

ElementsKit integrates with Polylang to let you create WordPress multilingual websites easily. Using the Polylang WordPress plugin, you have the capability to translate your website pages, posts, strings, and ElementsKit templates into any desired language. Read this documentation to learn how to use Polylang with the Elementor ElementsKit addon.
Required Plugins #
- Elementor: Download Plugin
- ElementsKit: Download Plugin
- ElementsKit Pro: Get Plugin
- Polylang: Get Plugin
How To Configure Polylang Plugin to create WordPress multilingual site #
Once you install the Polylang WordPress plugin, you need to set up this WordPress multilingual plugin in the following way:
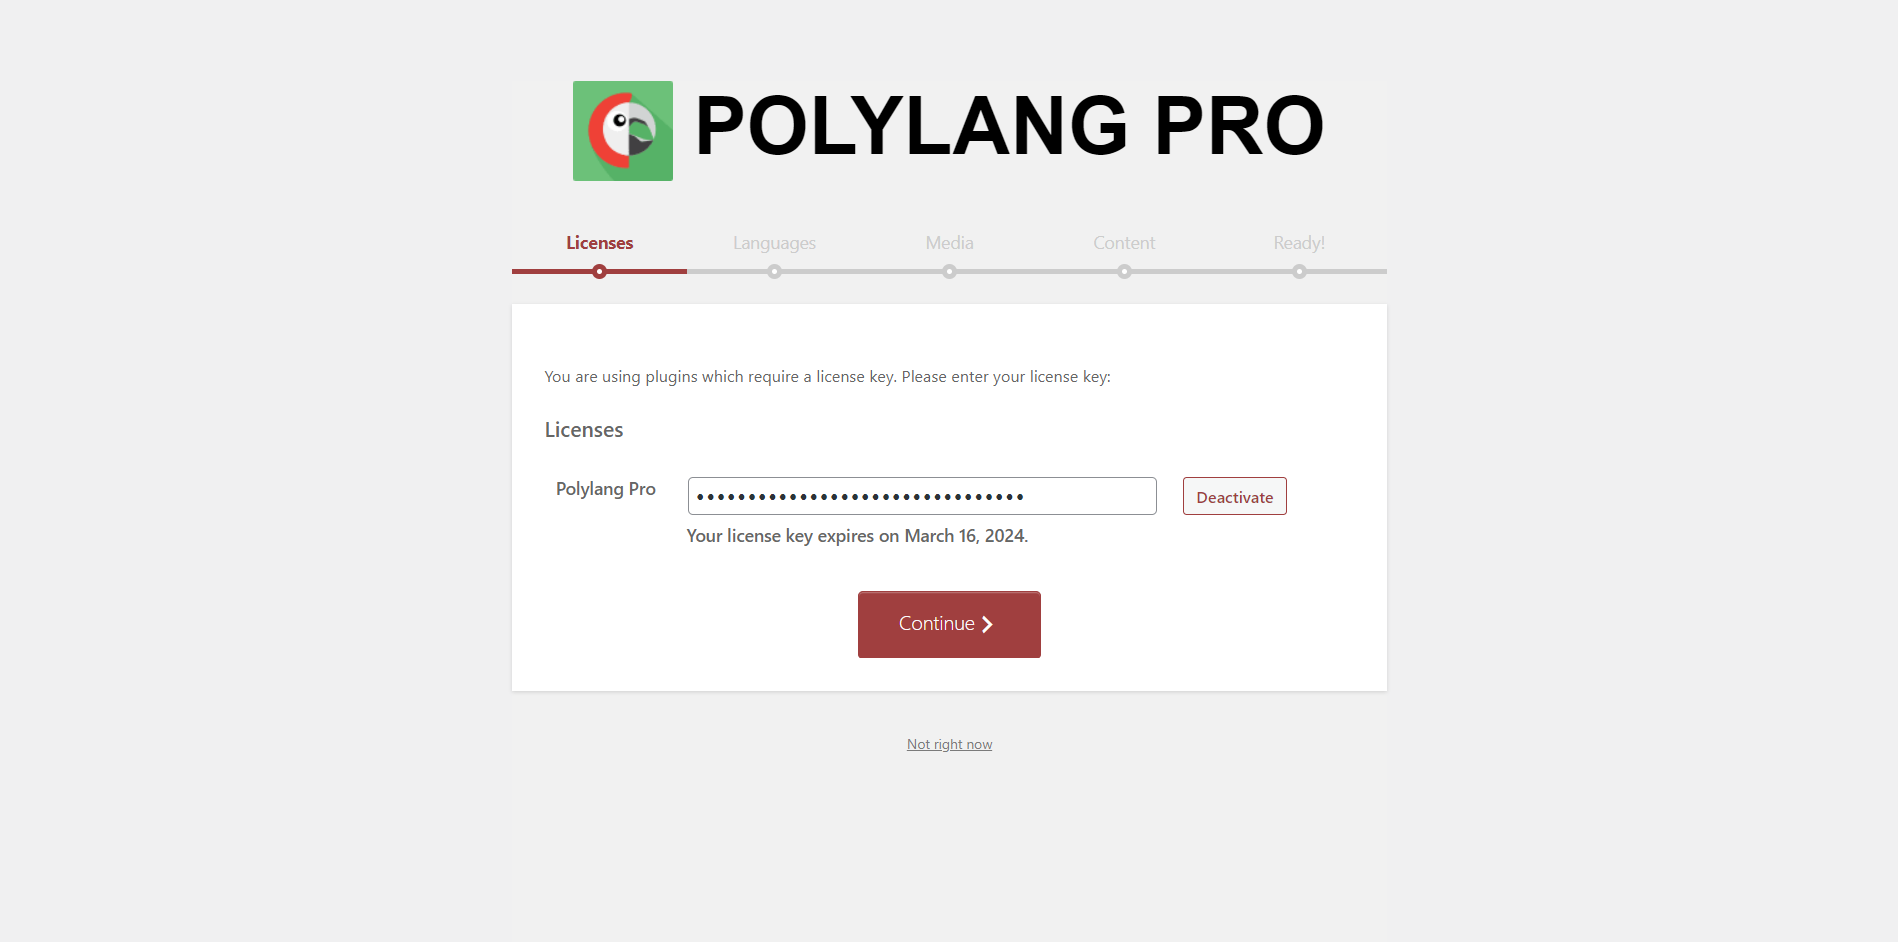
Step 1.1: Activate License #
Firstly, activate the Polylang Pro plugin with the license key. For that,
- Enter your Polylang Pro license key.
- Click on the Activate button.
- Once activated, click to continue.
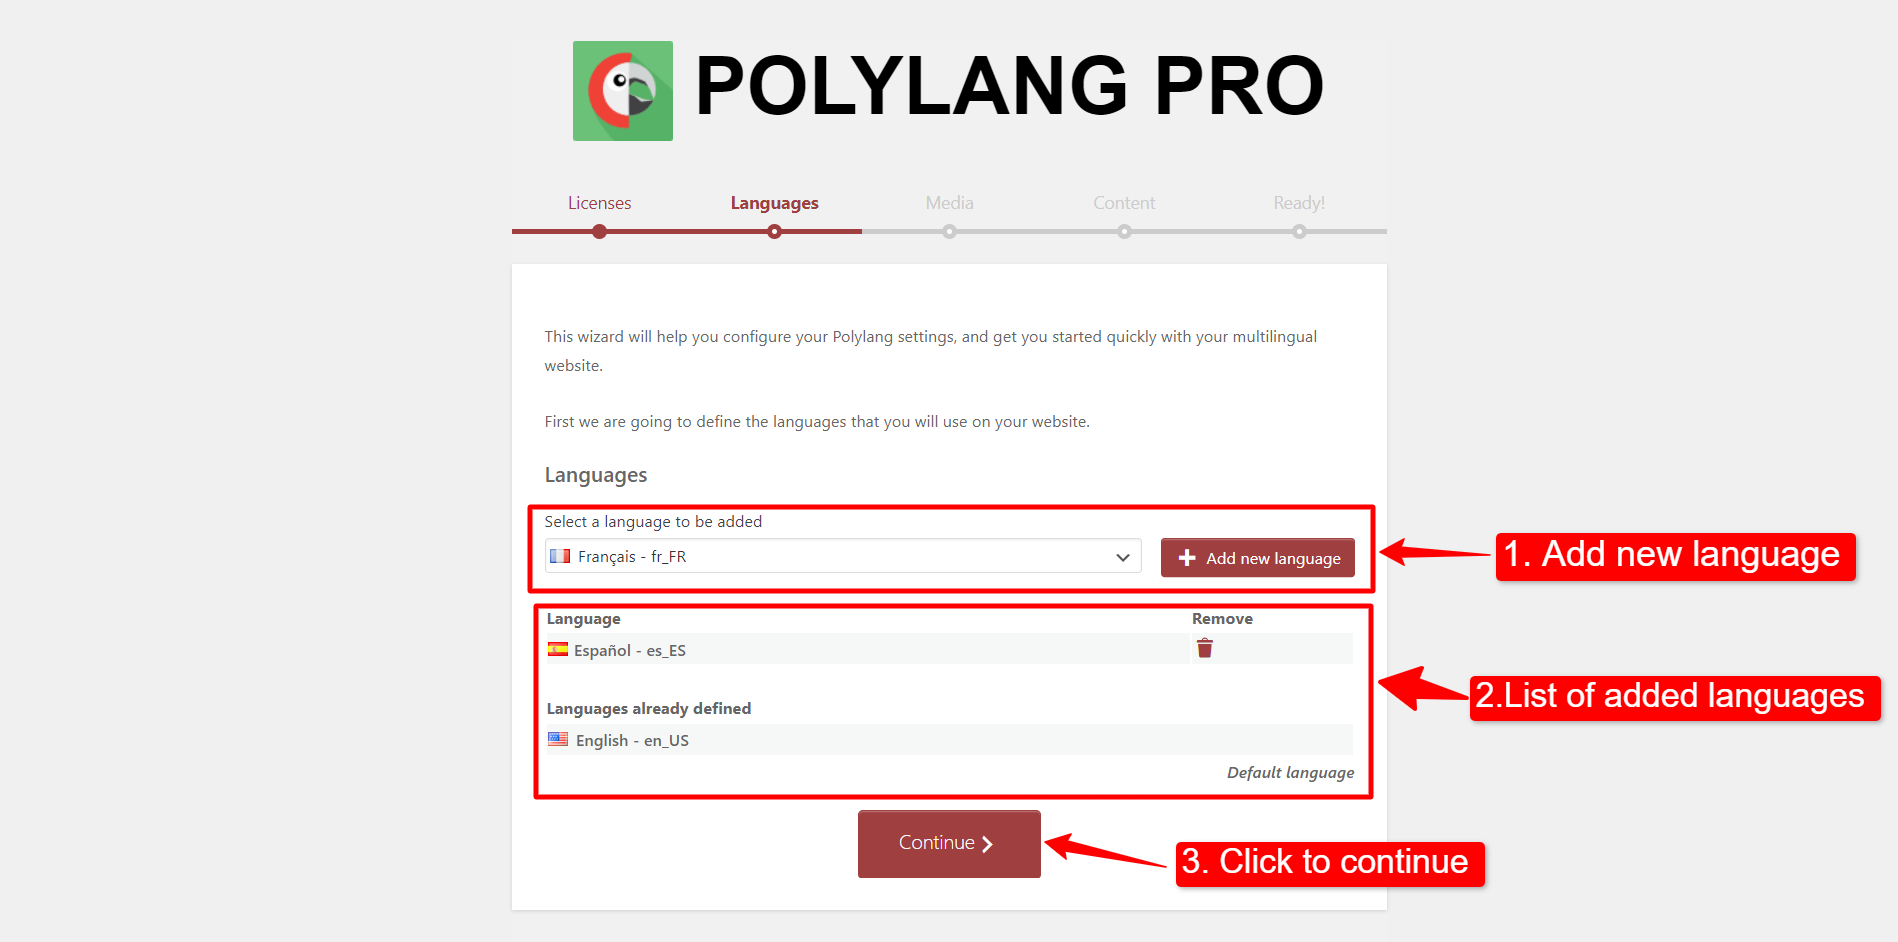
Step 1.2: Language Setup #
To setup languages for your WordPress multilingual website:
- Select a language to add and click the Add new language button.
- You will see the list of added languages. You can remove any language if you want.
- Click on the continue button.
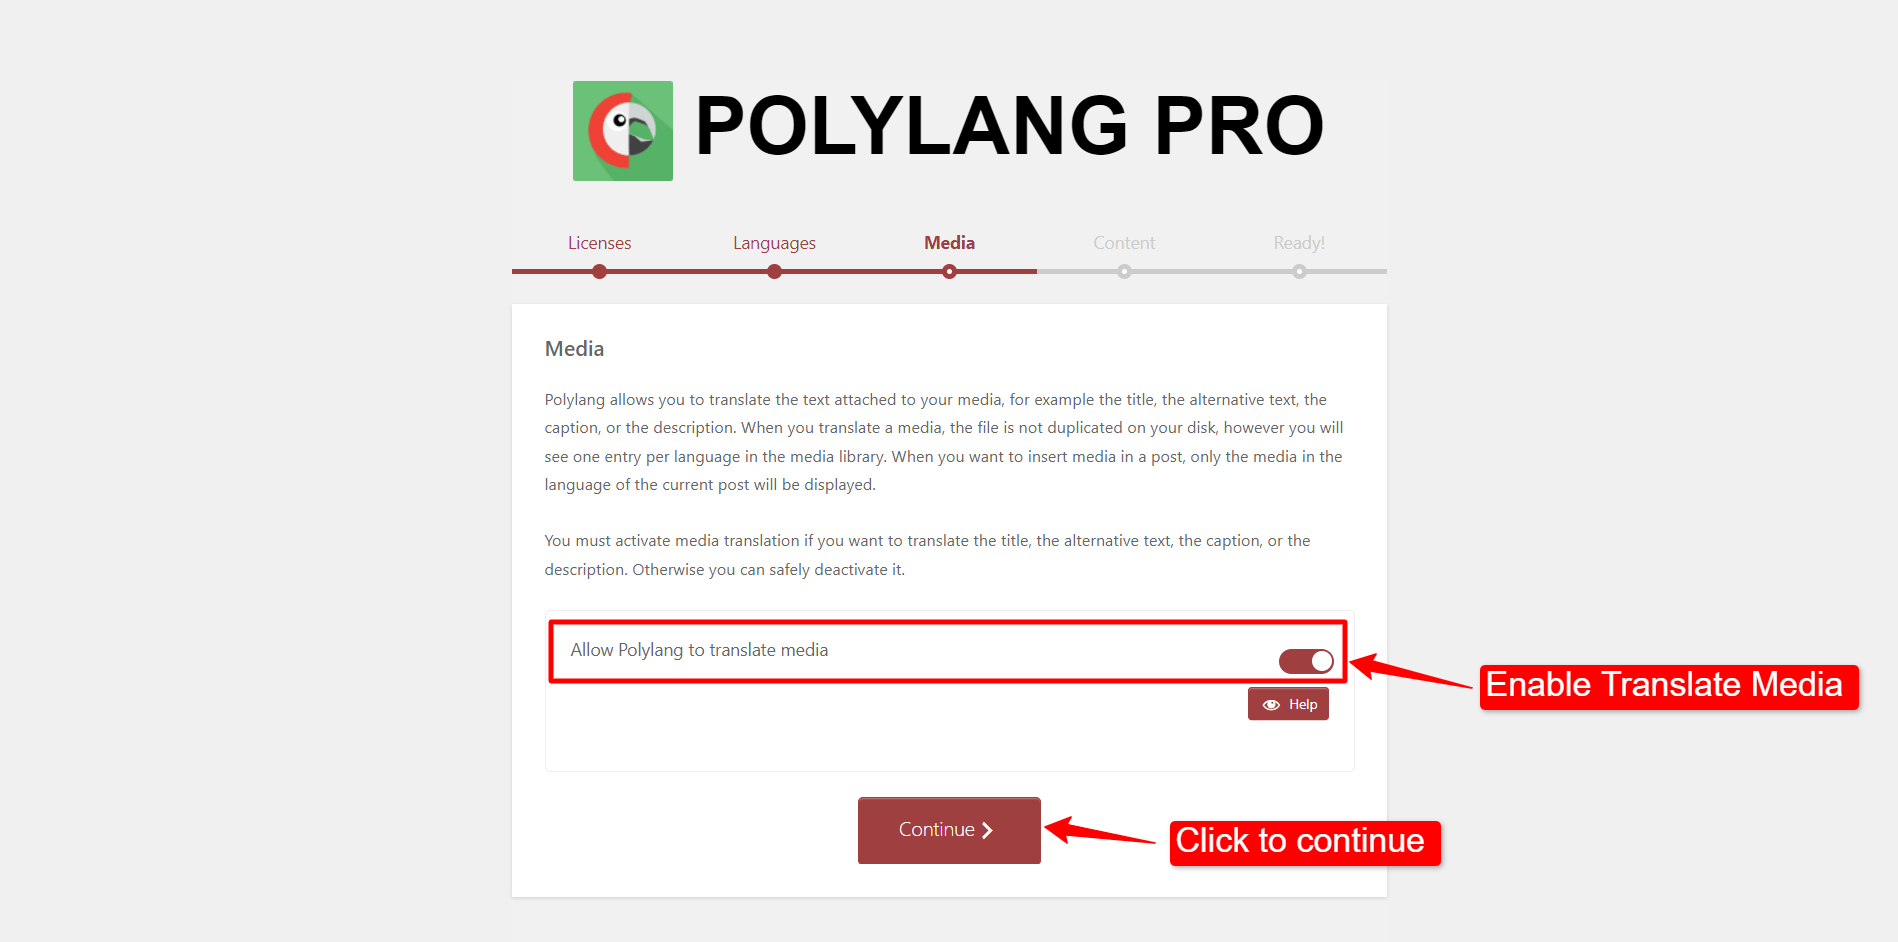
Step 1.3: Media Translation #
To translate the image title, alternative text, caption, and description, you have to enable the Allow Polylang to translate media option.
Step 1.4: Choose Default Language #
Choose a language that will be assigned by default to the post, pages, categories, and tags without any specific language.
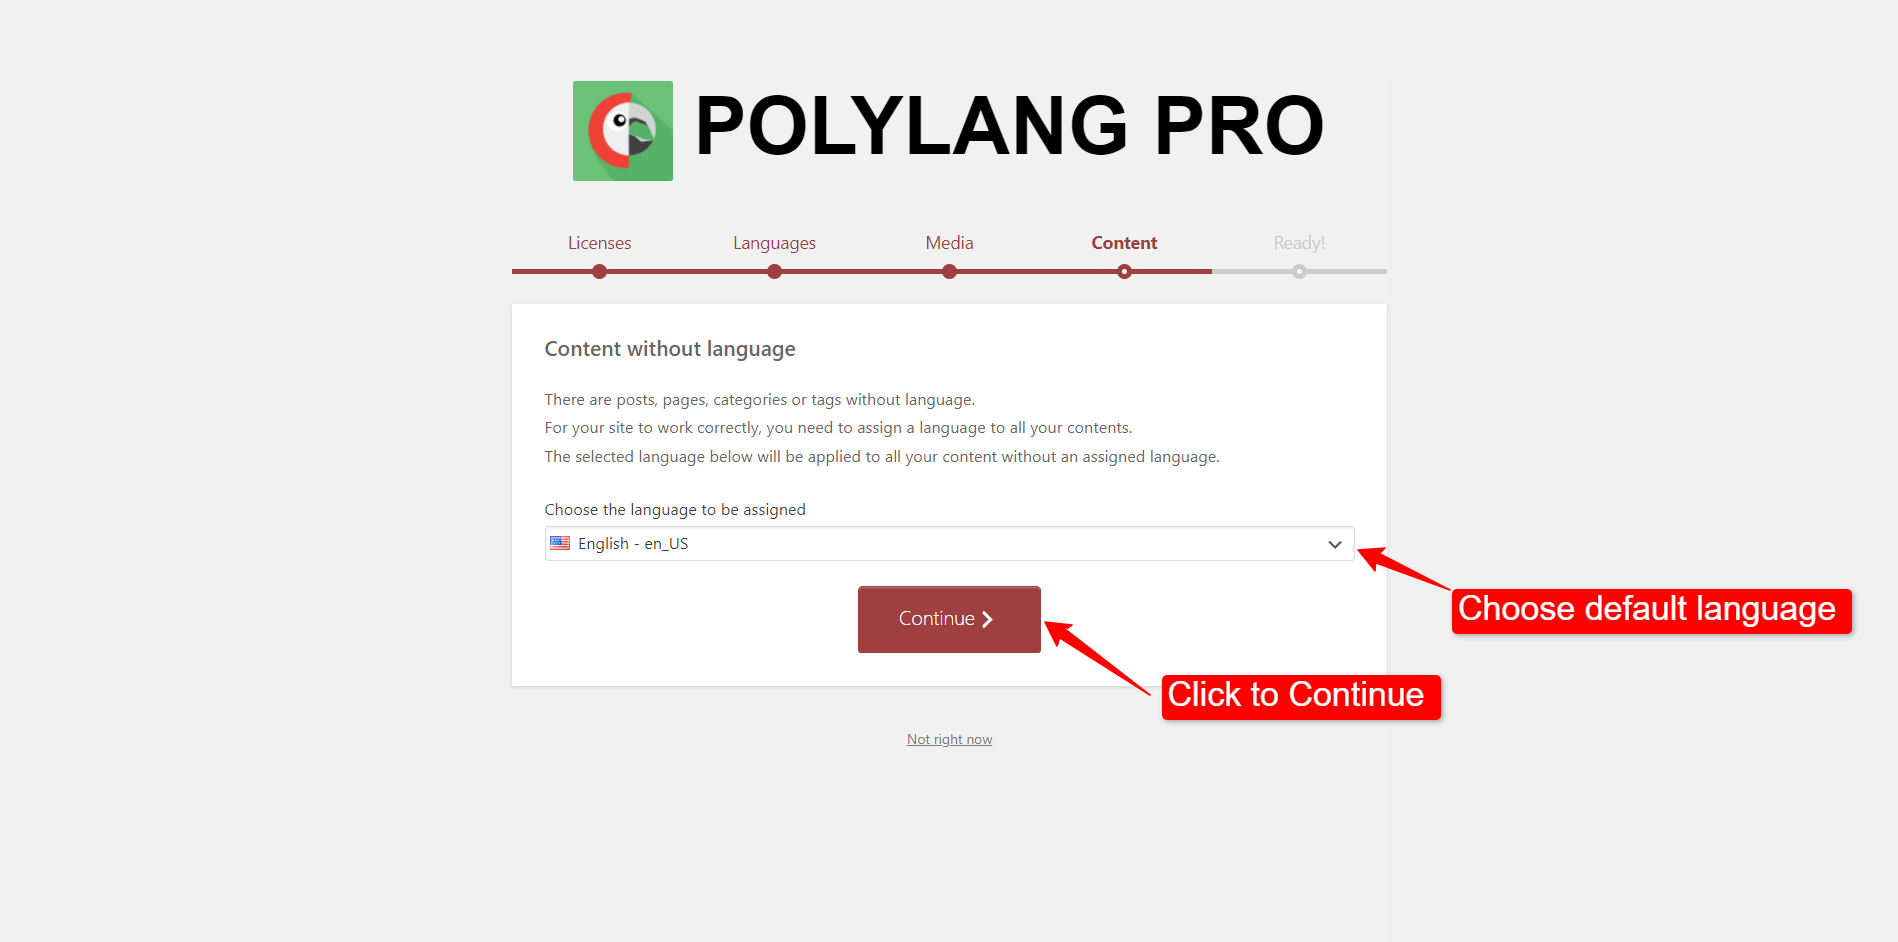
Now, Polylang is ready to translate your website. Return to your WordPress dashboard and proceed with the next steps.
[Note: You can also set up Polylang from the WordPress dashboard > Languages > Setup]
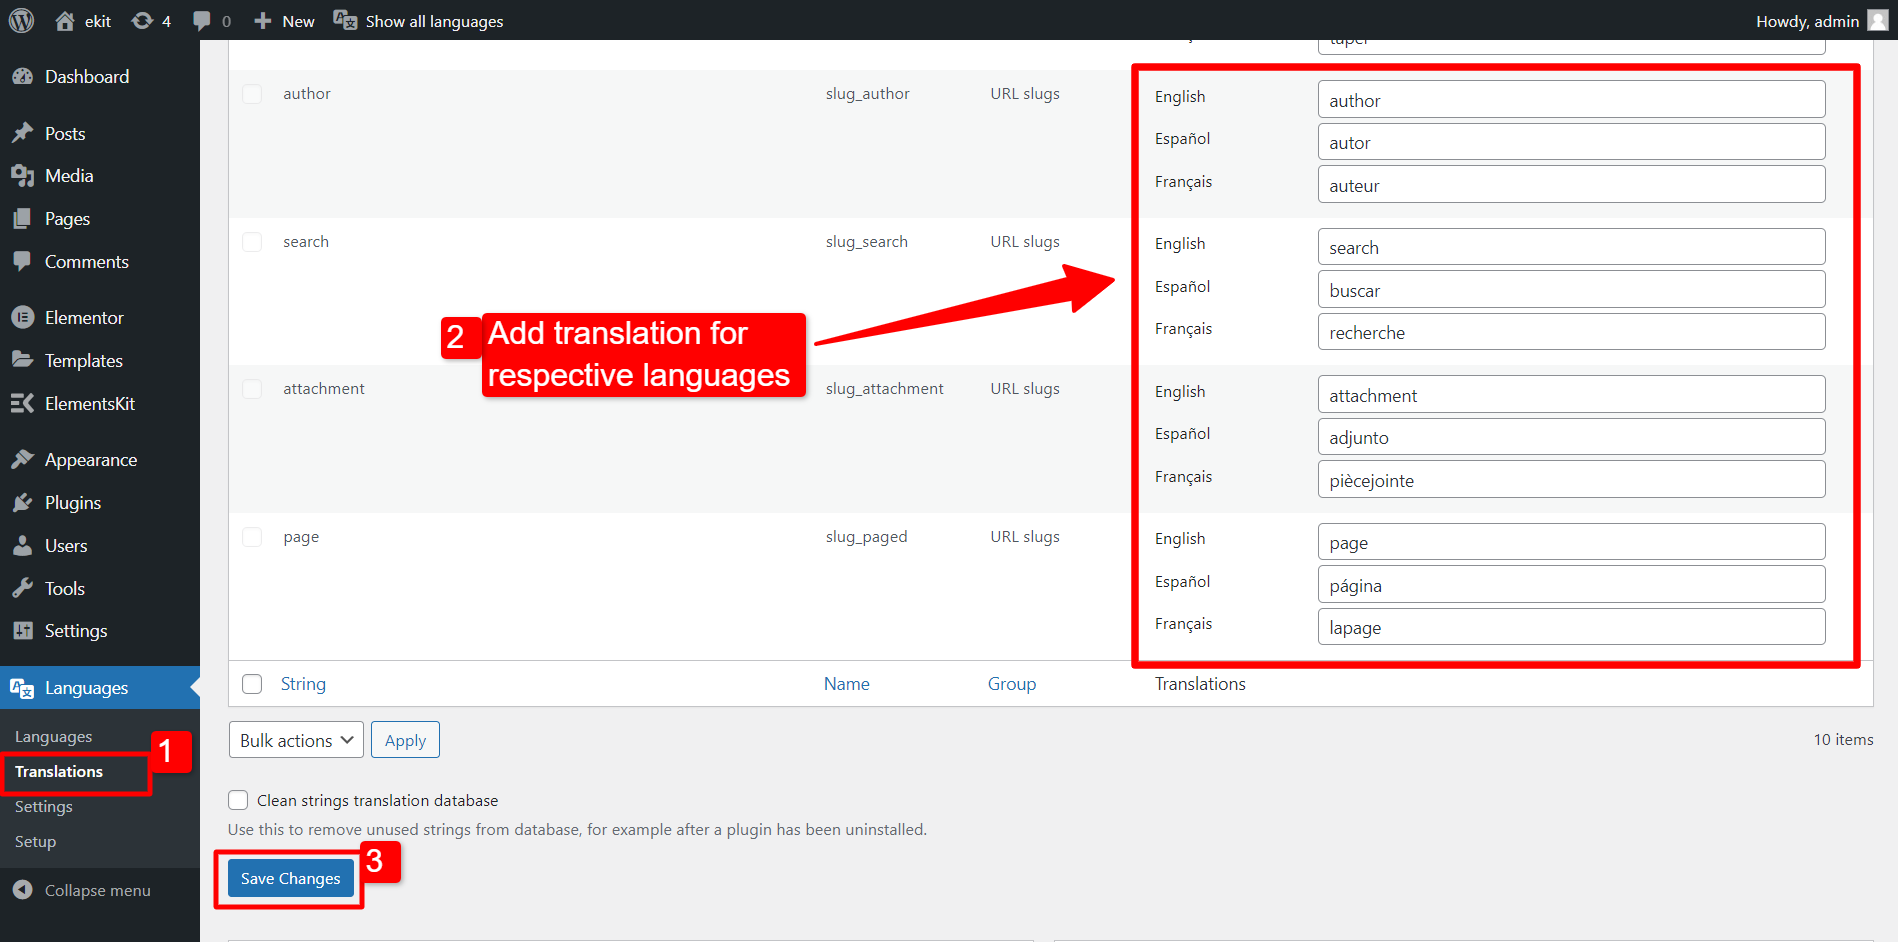
String Translation with Polylang #
To translate plugin strings:
- Go to Languages > Translations from your WordPress dashboard.
- Enter the translation for the string in the respective language field.
- Click on the Save Changes button.
How to Use Polylang in WordPress to translate a post and page #
You can translate posts and pages to create WordPress multilingual. In this documentation, we will show you how to translate posts in WordPress using Polylang. However, translating pages are quite similar.
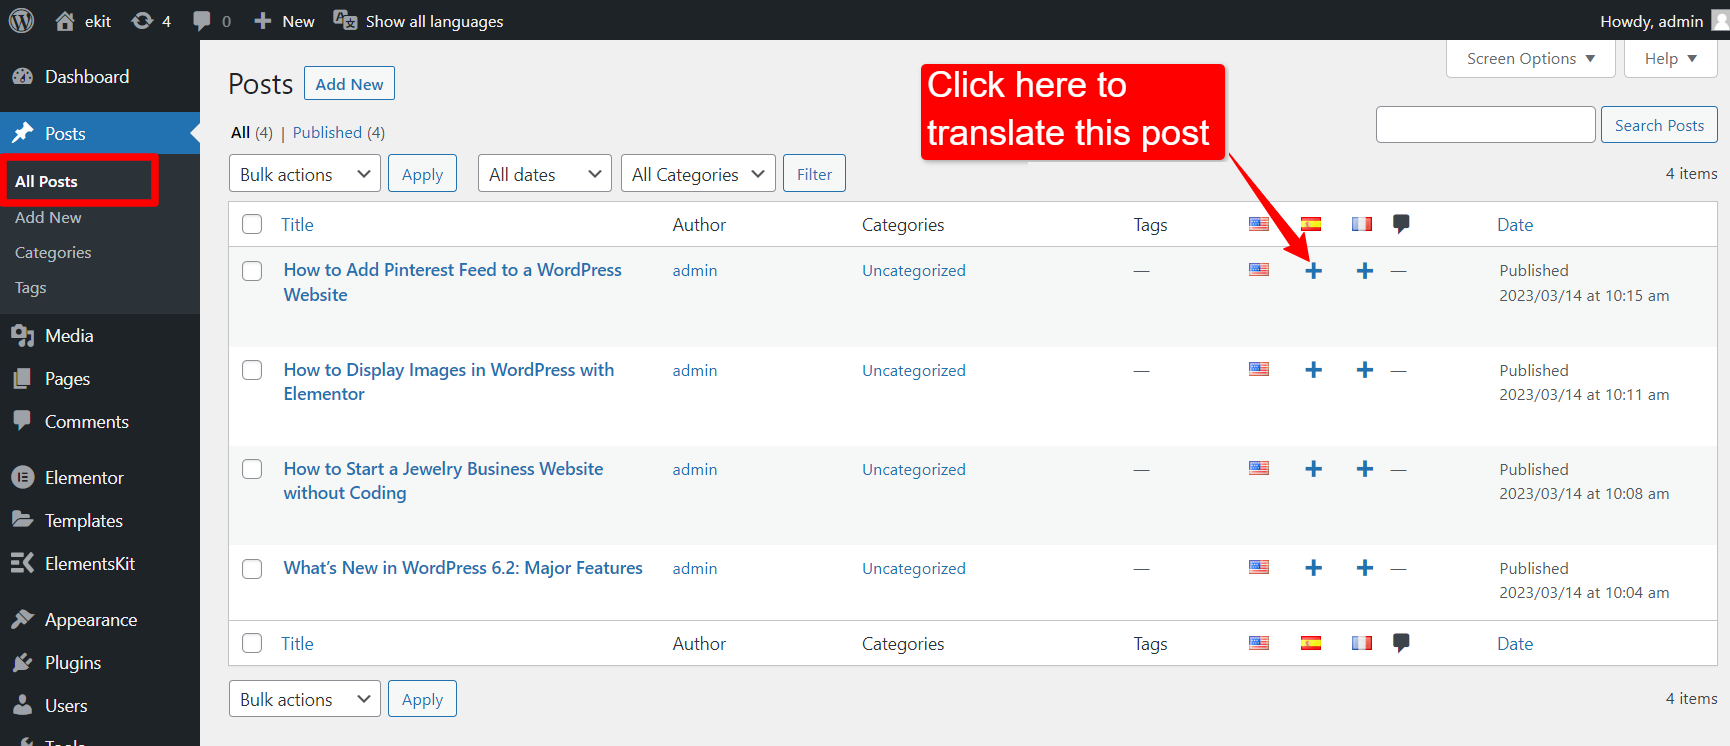
To translate your WordPress post with Polylang:
- Navigate to WordPress Dashboard > Posts.
- You will see flags for respective languages and ➕ icon with every post.
- Click on the ➕ icon under the desired language column.
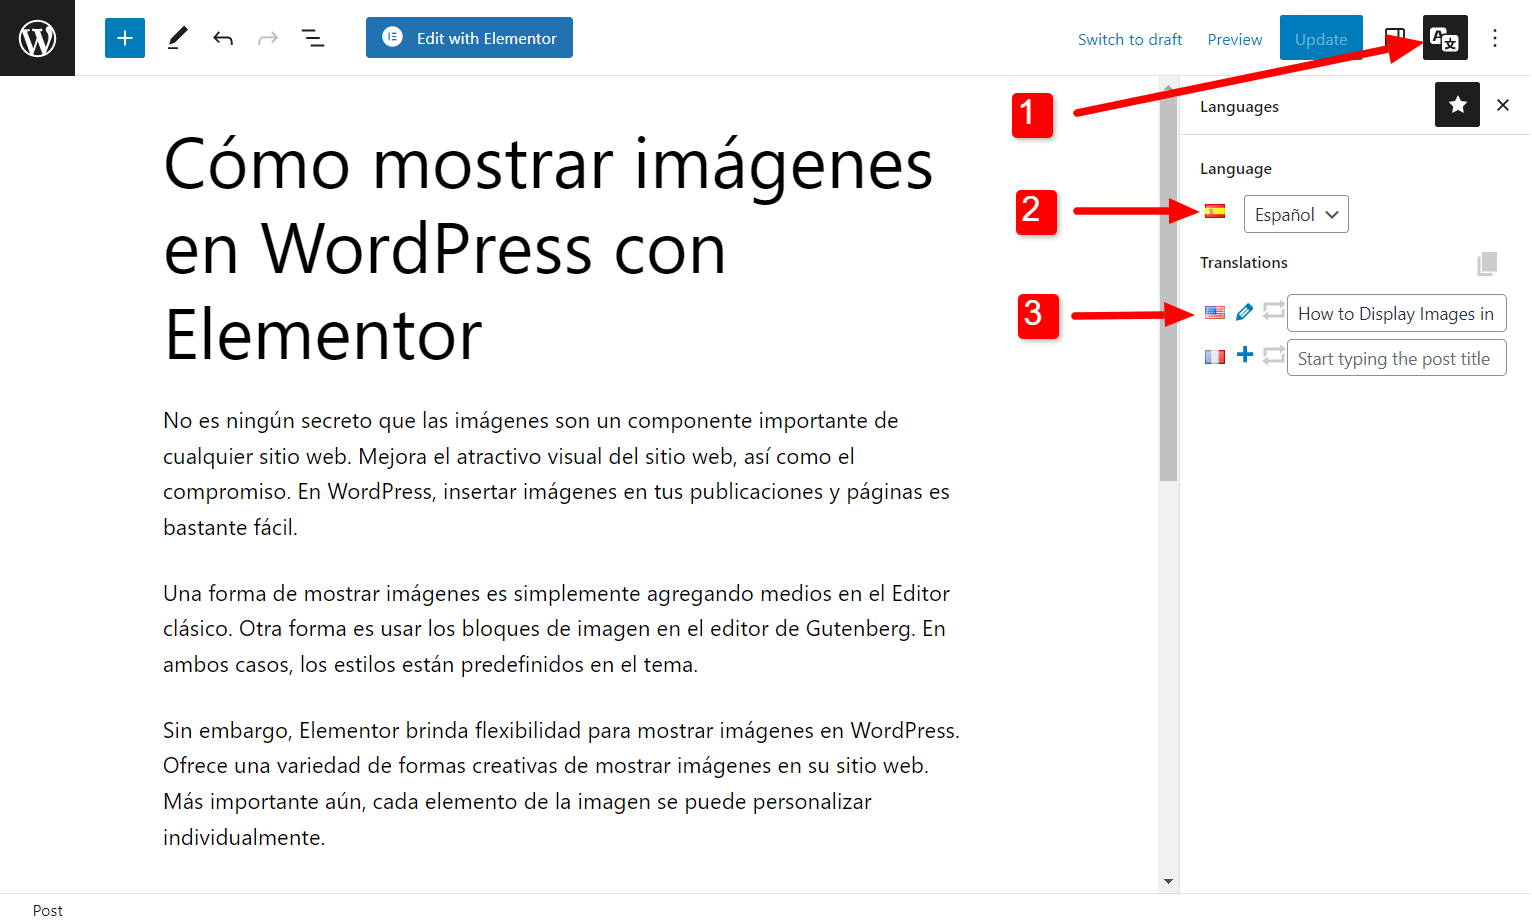
Now a new post editor will be opened. In the new post, add translated content of the original post.
- Then click on the Polylang icon at the top-right corner of the editor to open the language options.
- In the Language options, choose the language of the current post.
- Under the Translation, you can choose other posts as the translation of this post for respective language fields.
- Click on the ➕ icon beside the language icon to add a new translation.
- Click on the ✏️ to edit an existing translation.
Remember the translations will be created as a new post/page in the WordPress. So you need to link the posts/pages to use as a translated version.
How to Use Polylang with Elementor ElementsKit Templates #
ElementsKit seamlessly integrates with the Polylang WordPress plugin. Therefore, you can translate the ElementsKit templates using Polylang.
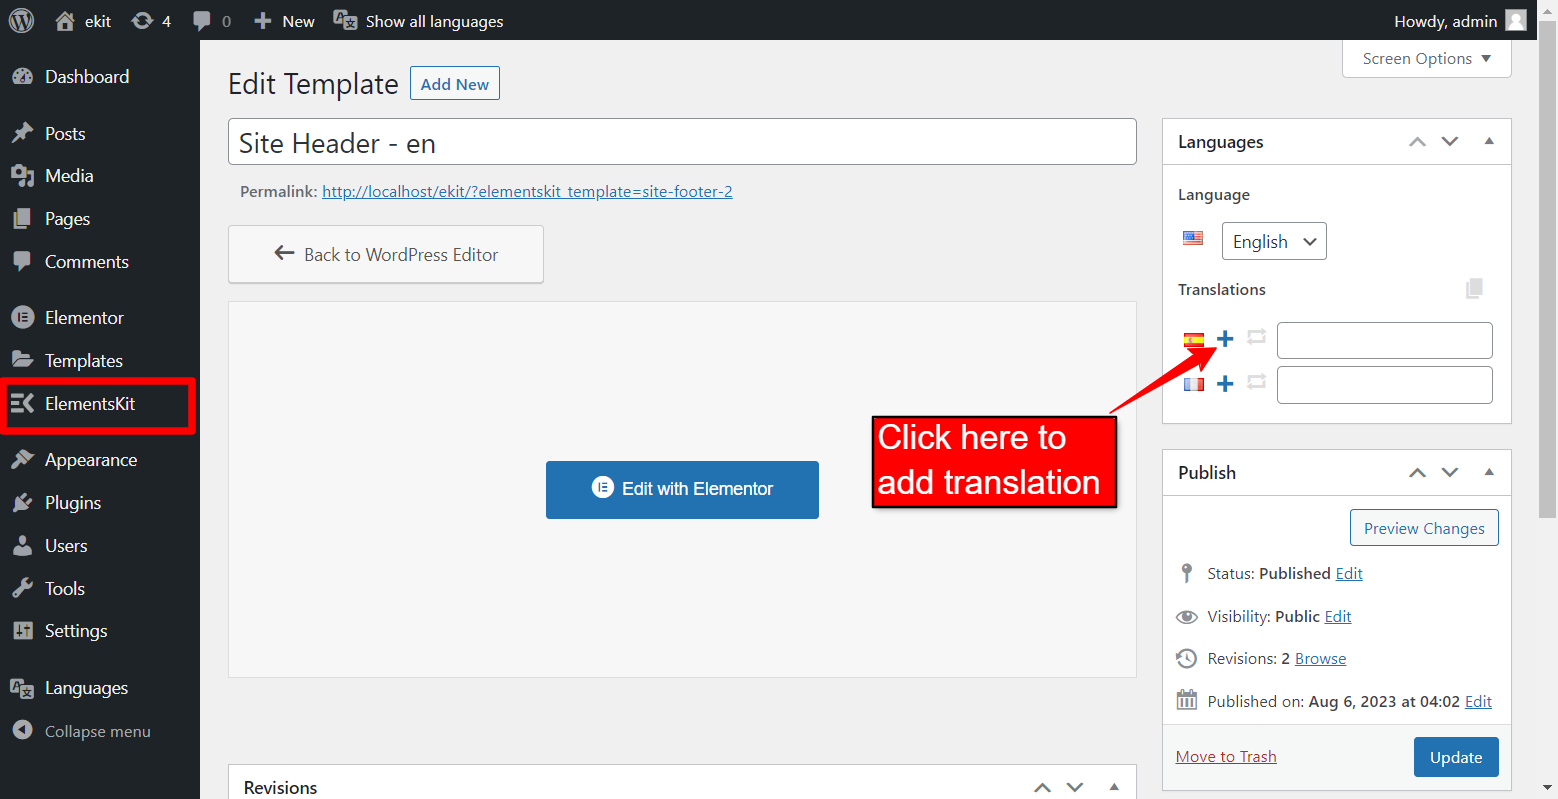
For example, you will translate the “Site Header – en” template (here, ‘en’ refers to English). To translate this ElementsKit template,
- Navigate to WordPress dashboard > ElementsKit > Header Footer.
- Open a template in the editor.
- Click on the ➕ icon for the language you want to translate the template.
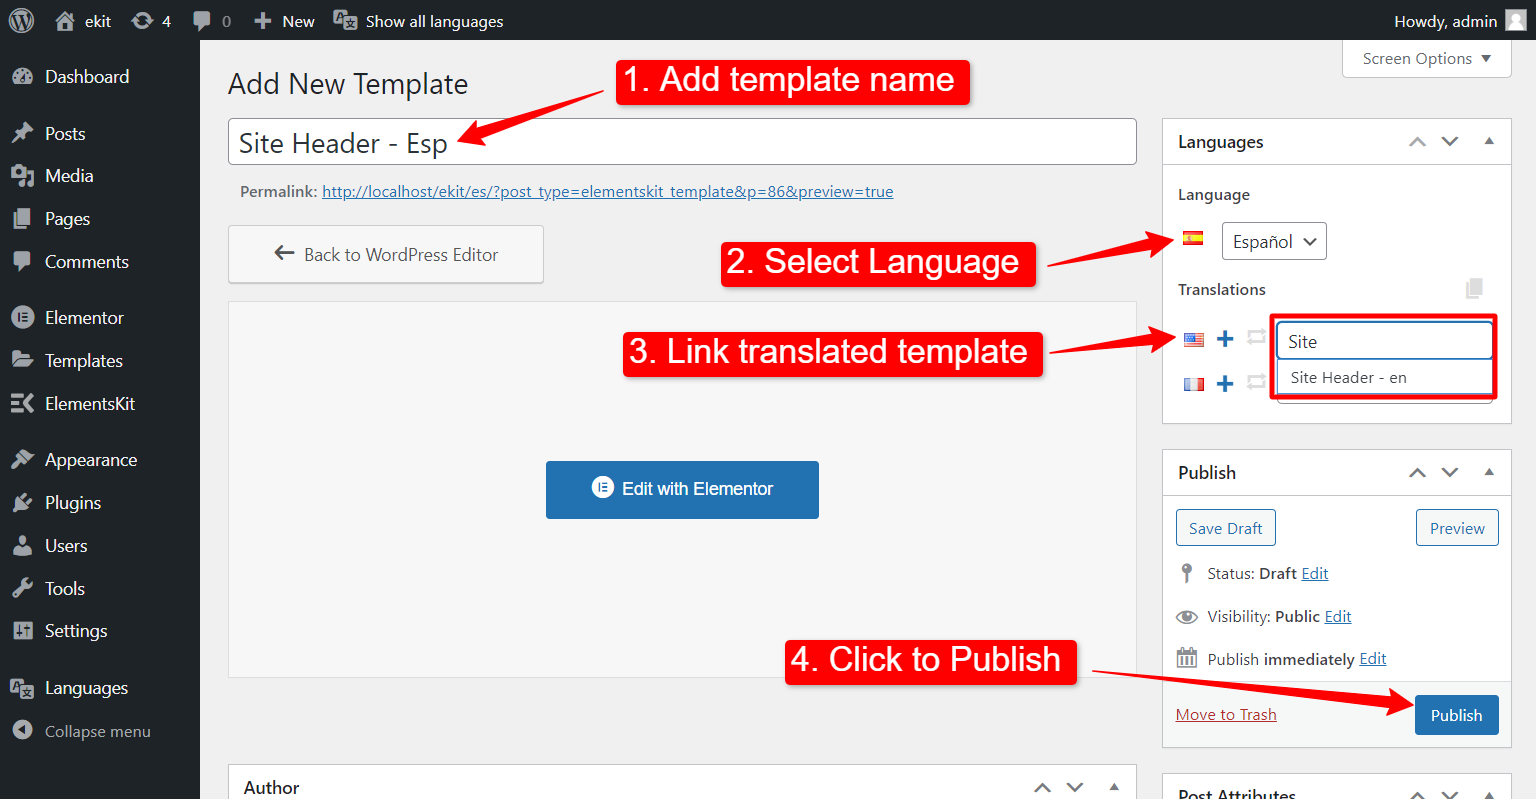
Now you will be redirected to create a new template. In the new template,
- Add a template name (Ex. Site Header – Esp).
- Select the language for this template.
- Under the Translate section, link to the original version of this template, i.e. Site Header – en.
- Click on the Publish button to finally publish the template.
Finally, you can now create WordPress multilingual website by translating posts, pages, strings, and ElementsKit templates.


