ElementsKit is compatible with WPML – WordPress Multilingual Translation Plugin. This plugin allows you to build multilingual sites. Using this plugin you can easily translate your complete sites which include header, footer, and advanced widgets.
In this documentation, you will learn how to Translate ElementsKit header footer and Advanced widgets with WPML.
How To Configure WPML Plugin Settings #
Before you can translate your website, you need to configure WPML Plugin Settings. Here is how you can do that:
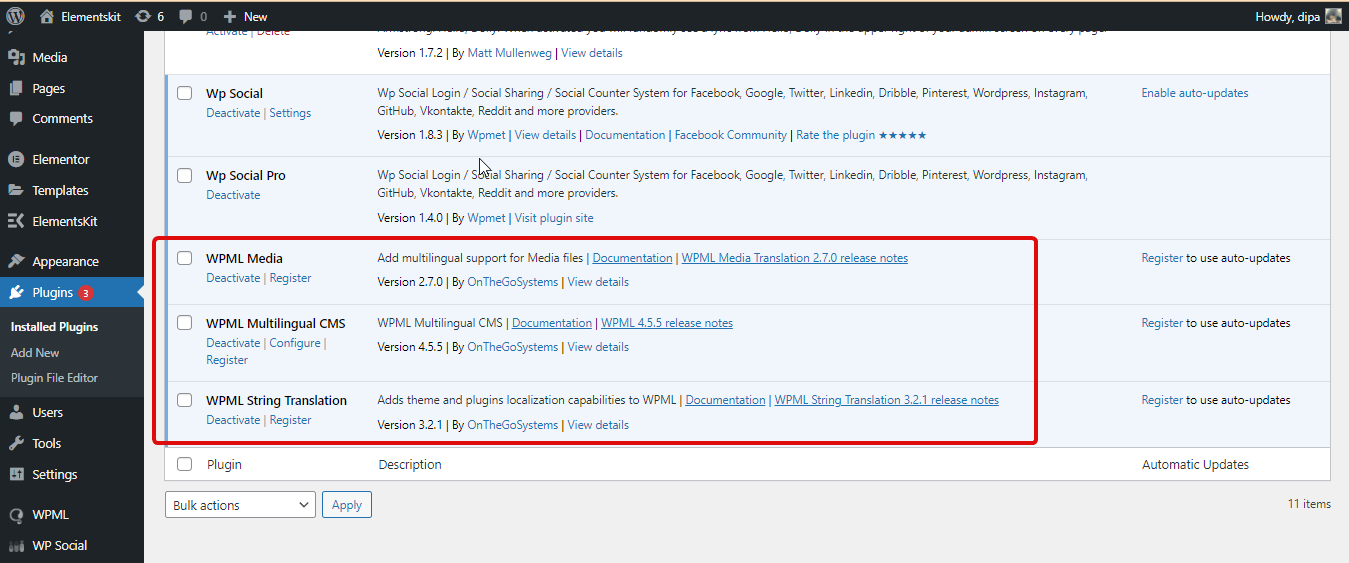
Step 1: Install and activate WPML plugins #
To translate ElementsKit Elementor pages with WPML, You will need two plugins: Those two plugins are:
For more details about the installation process check the documentation.
Step 2: Setup languages #
Now navigate to WPML ⇒ Languages. In this location, you can customize the following language-related settings.
- Site Languages: Here you can select the default language. You can also add languages you want to be enabled for this site. In addition, you also have the option to delete the language from the already enabled list.
- Language URL format: Here you can change the format of the URL that will determine the active language on the site.

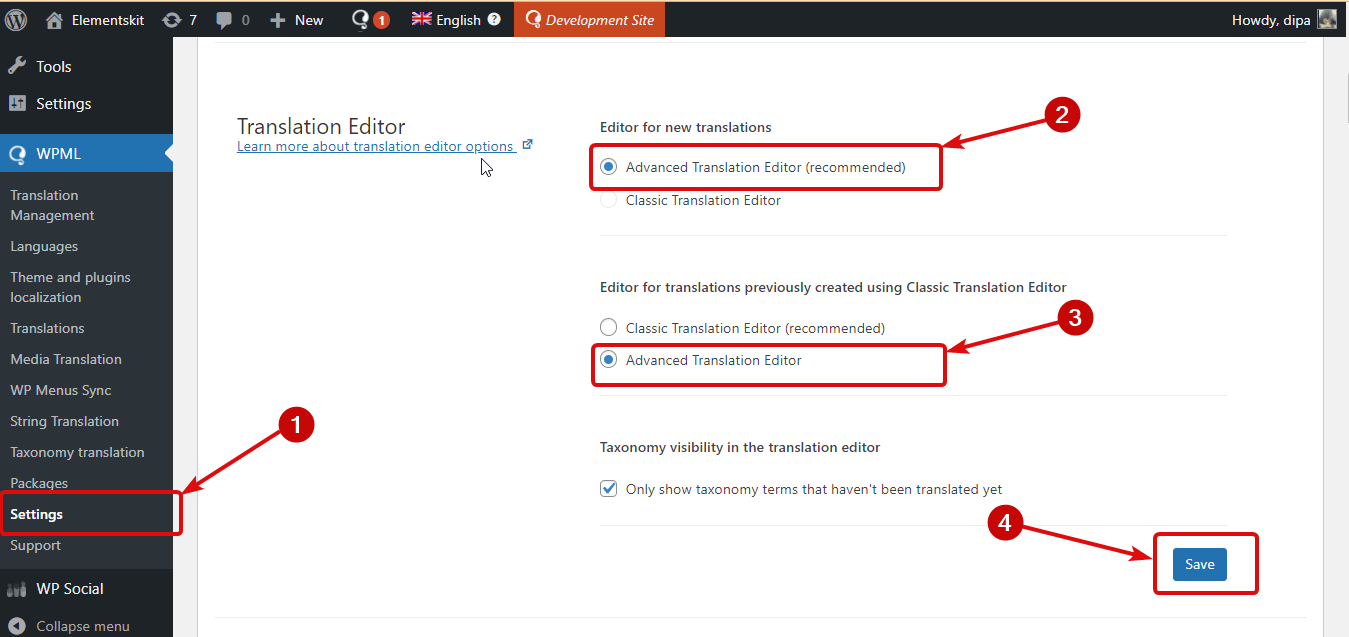
Step 3: Translation Editor Settings #
Navigate to WPML ⇒ Settings. Scroll down to the Translation Editor. Here choose the Advanced Translation Editor option for both Editor for new translations and Editor for translations previously created using Classic Translation Editor. Finally, click Save to update.
Now that all the important WPML settings are done, let’s move on to the next section.
⚠️⚠️ Note:
While translating ElementsKit Advanced Toggle Element and Off Canvas widgets, if you face the issue “not showing in Advanced Translation Editor” with the mentioned widgets, it’s because these Elements have sub-element within them.
To translate such items, you need to follow the documentation on how to translate ElementsKit elements with sub-element.
How To Translate ElementsKit Header Footer into multiple languages #
You need to make sure your header footer is created with Elementor and ElementsKit. To translate any page follow the steps below:
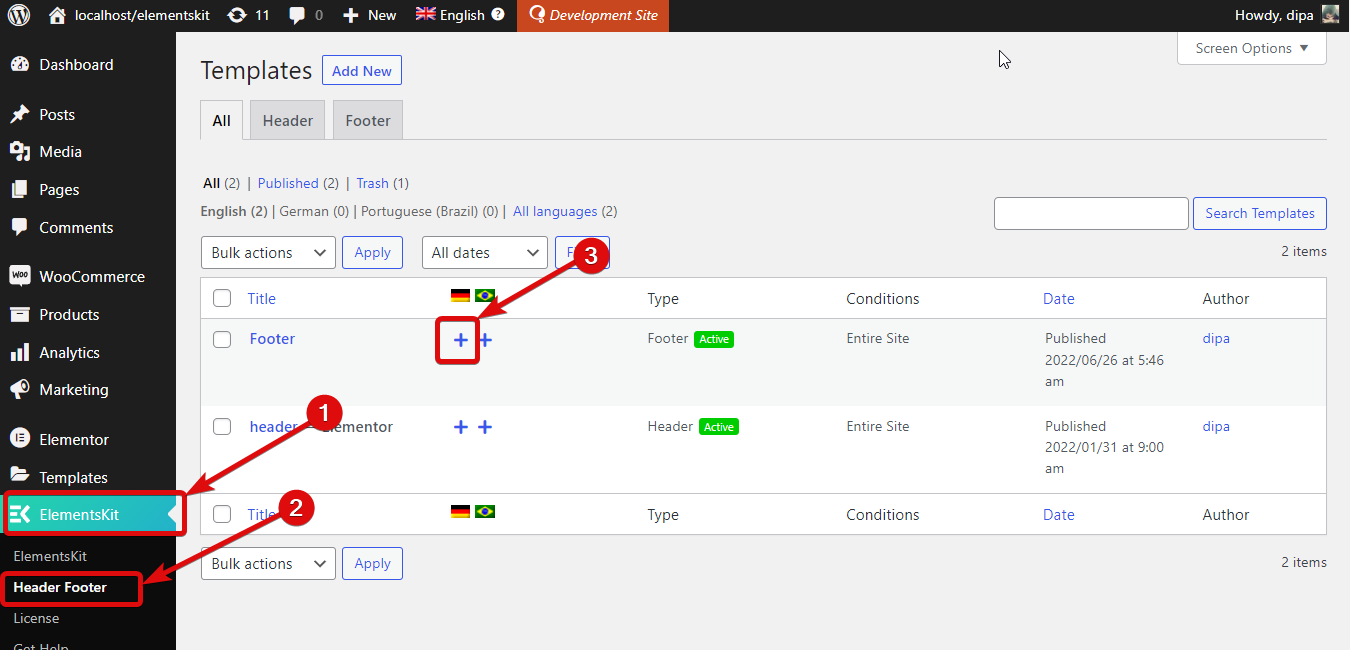
Step 1: Select the Header/Footer #
Navigate to ElementsKit ⇒ Header Footer. If you have successfully installed and activated the WPML plugins, you should see a new column with + icons. You will see +icons for all the enabled languages for this website. Now click on the + icon of the language you want to translate for either footer or the header.
Step 2: Add the translations #
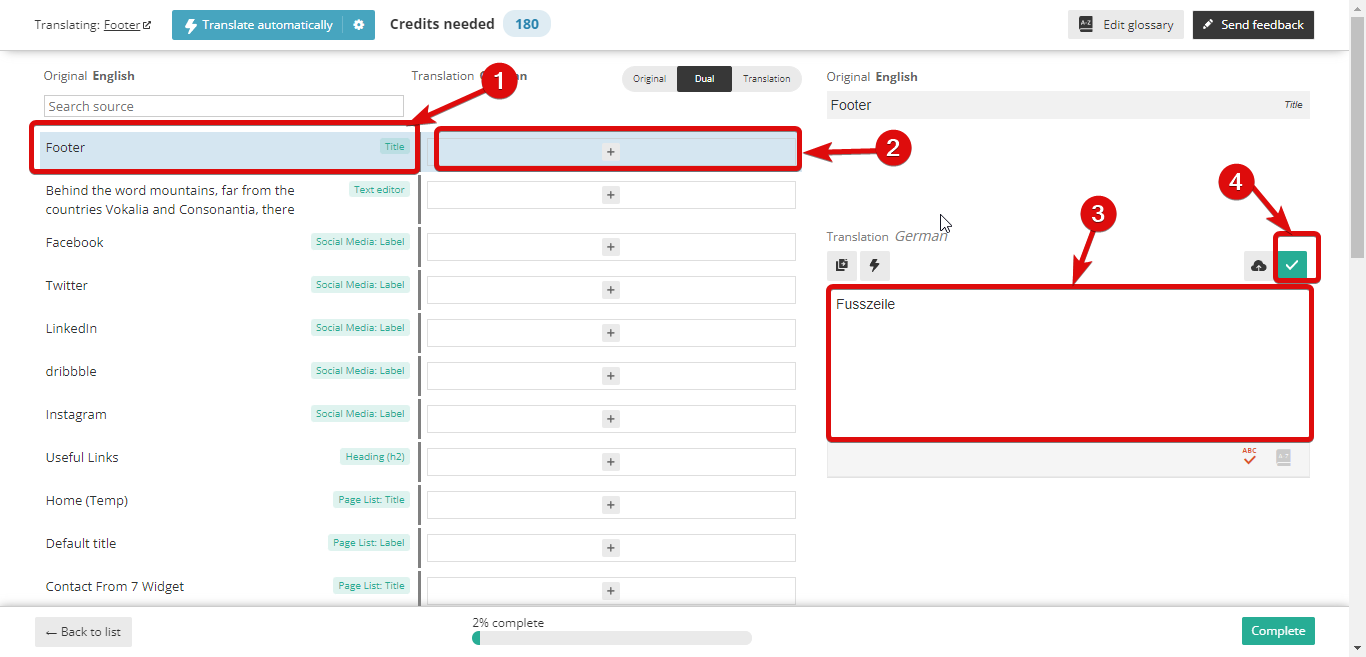
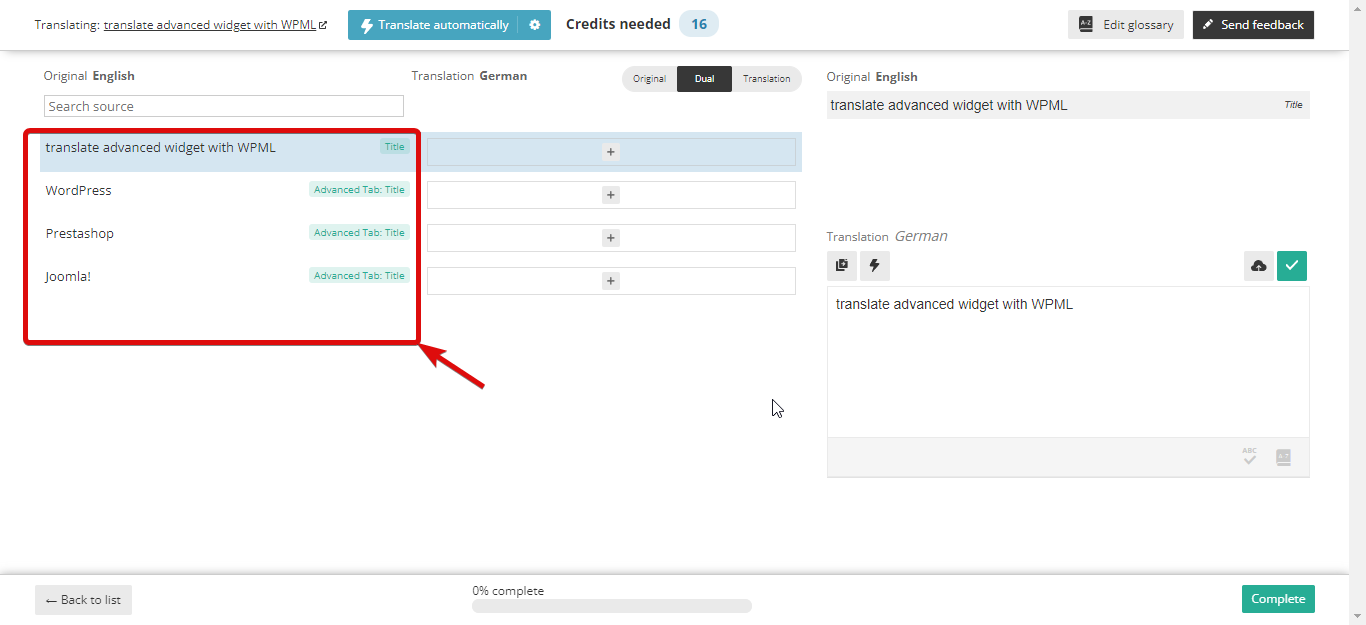
After clicking on the + icon, you should see a new window with the Advanced Translator Editor. Here you will see all the contents listed. You need to translate each content separately.
To add translation to the contents, click on the + icon, add the translation under the target language section (German in this case) and then click on the check sign or press Ctrl+Enter to save.
Step 3: Finally Complete and see the preview #
After you are done adding all the translations, click on Complete to update:
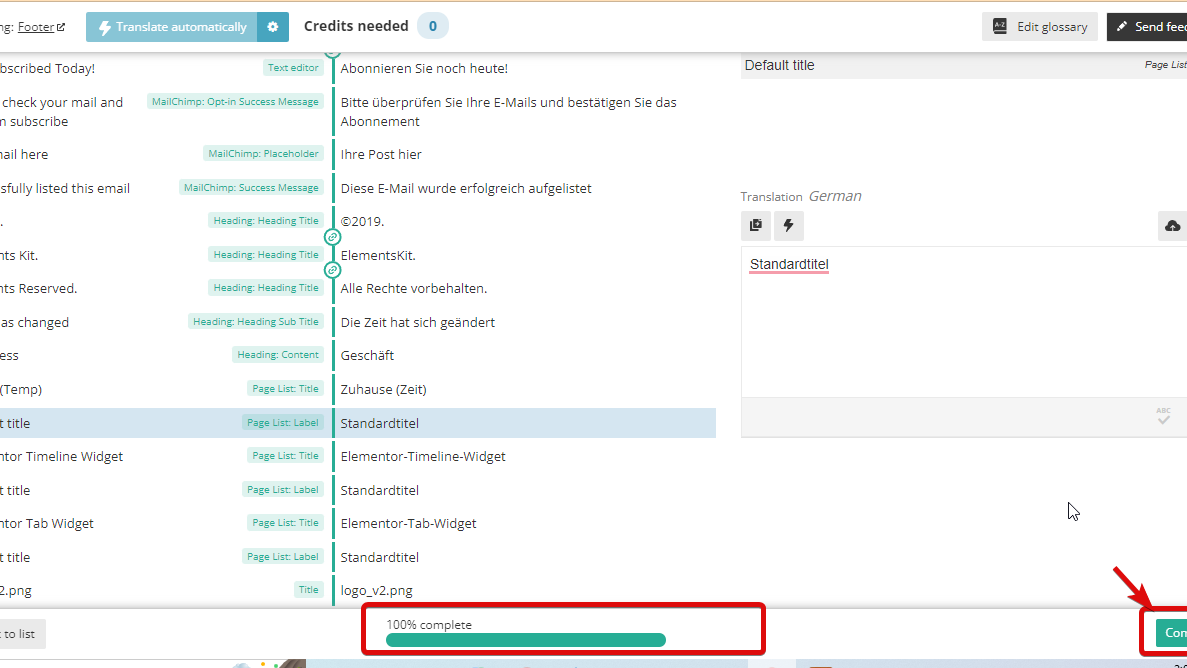
Here is a final preview of how the WPML translation works:
How To Translate ElementsKit Advanced widgets into multiple languages #
Translating ElementsKit advanced widgets such as Advanced Tab, Advanced Slider etc. is a little different however not complicated at all. In case you are using any of the advanced widgets of ElementsKit, follow these below-mentioned steps to translate that widget.
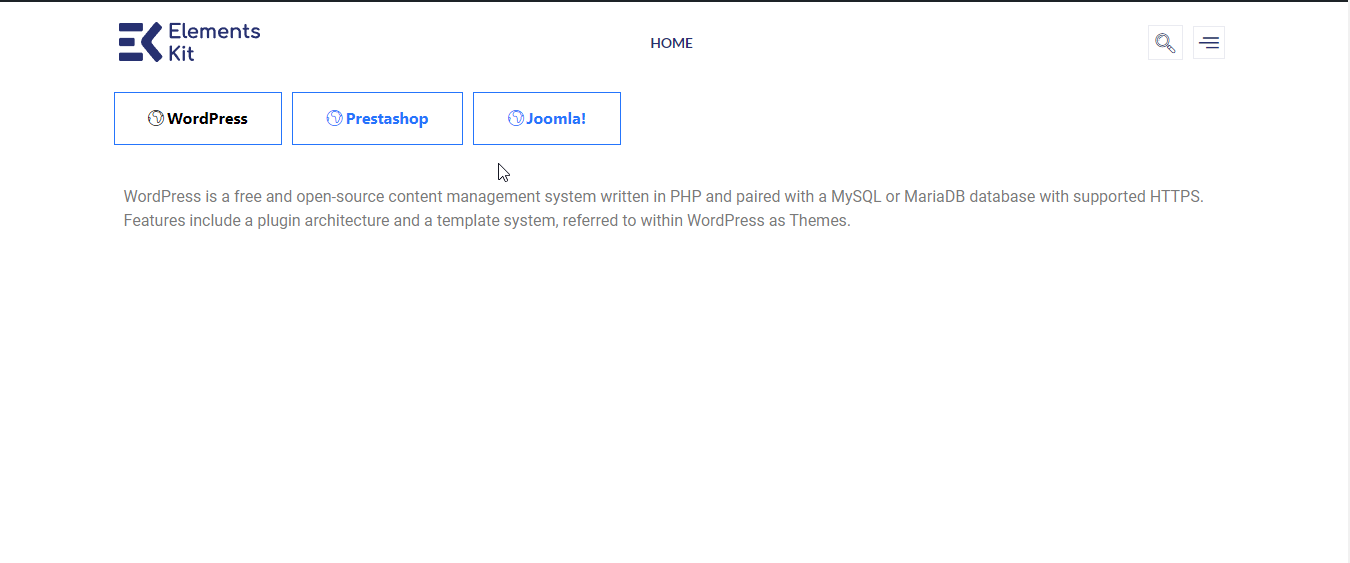
Note: For this doc, we are going to translate an advanced tab widget from English to German Language. Here is how the English version look like:
Step 1: Translate the page #
The first thing you need to do is to translate the page to which you have added an advanced widget. In this translation list, you can translate all the content of that page along with the visible content of the advanced widget.
For example the name of all the tabs of the Advanced tab and the content of the first tab will be on the list for translation but not the other tabs.
Note: If you need help translating ElementsKit pages with WPML, check this documentation.
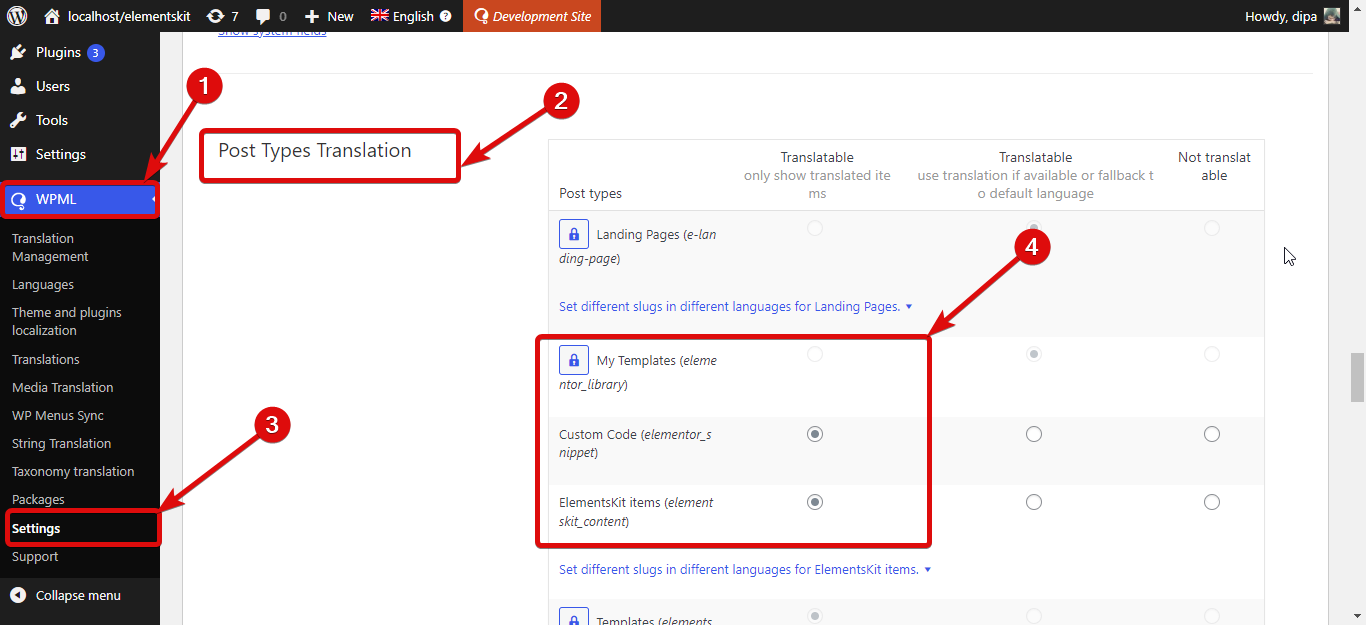
Step 2: Check Post Types Translation settings #
First thing you need to ensure is that Post Types Translation settings related to ElementsKit are checked. For this, navigate to WPML ⇒ Settings. Then scroll down to Post Types Translation options and ensure the two options (marked in the screenshot below) are checked.
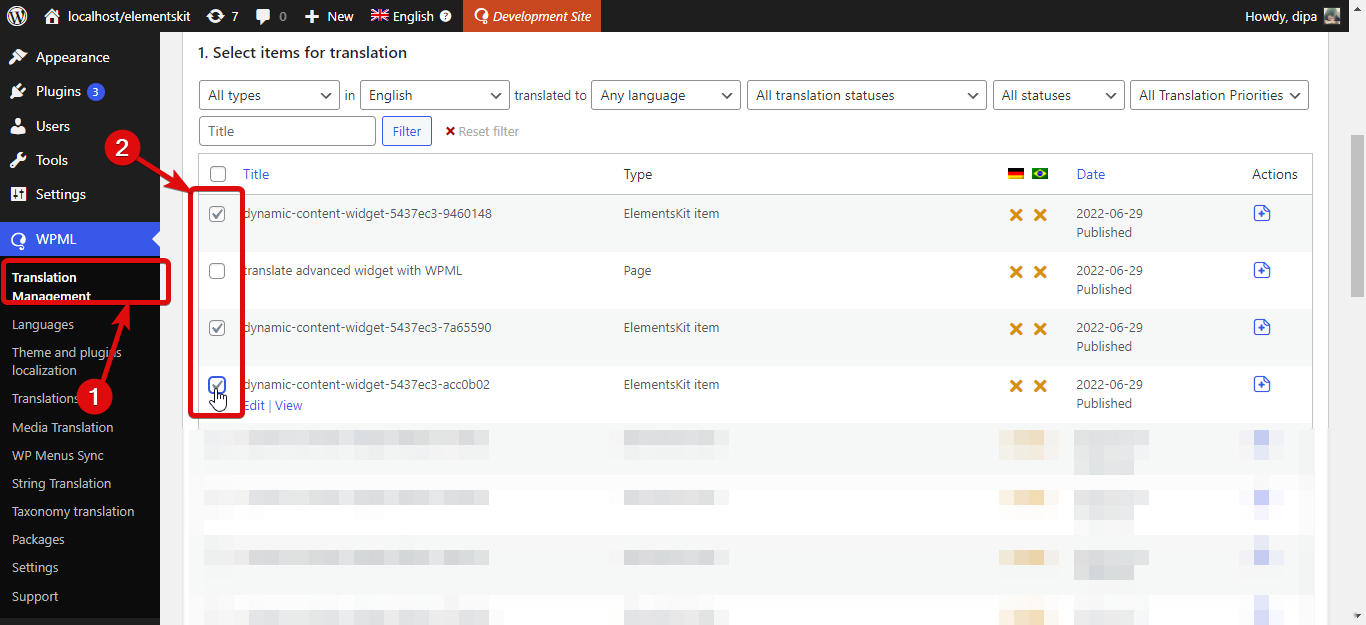
Step 3: Select the languages for translation #
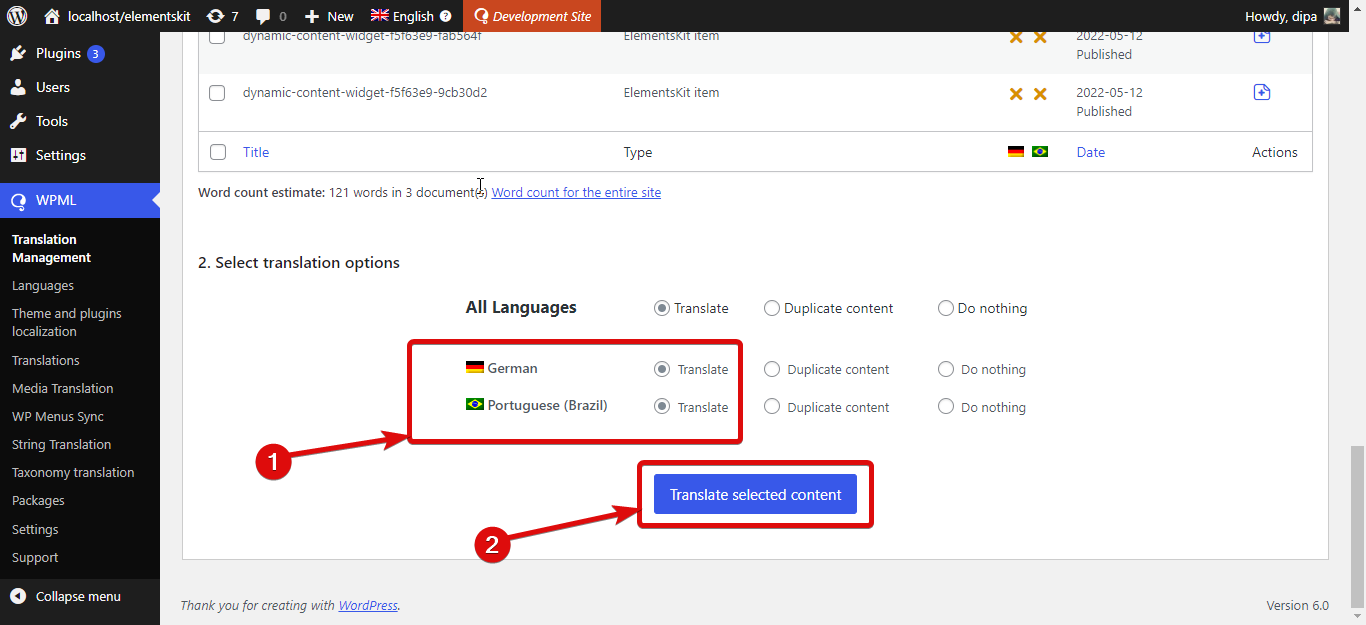
Now navigate to WPML ⇒ Translation Management and select the checkboxes of recently added dynamic content files. Since the advanced tab has 3 tabs by default it has created three dynamic files. However, if you add more tabs, you will find more dynamic contents here.
Then scroll down and select the languages you want to translate the advanced tab content for and click on Translate selected content.
Step 4: Translate Content #
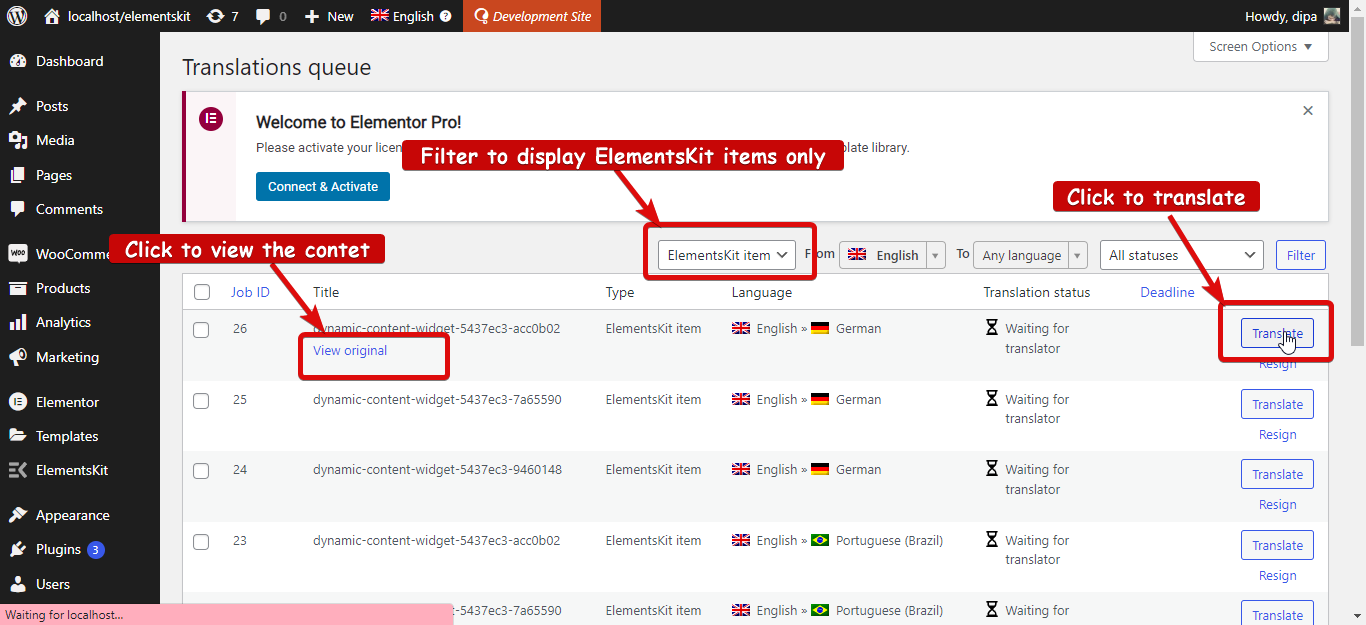
Navigate to WPML ⇒ Translations. Filter the results; from the dropdown choose ElementsKit Item. Now click on Translate to get the Advanced Translator Editor. .
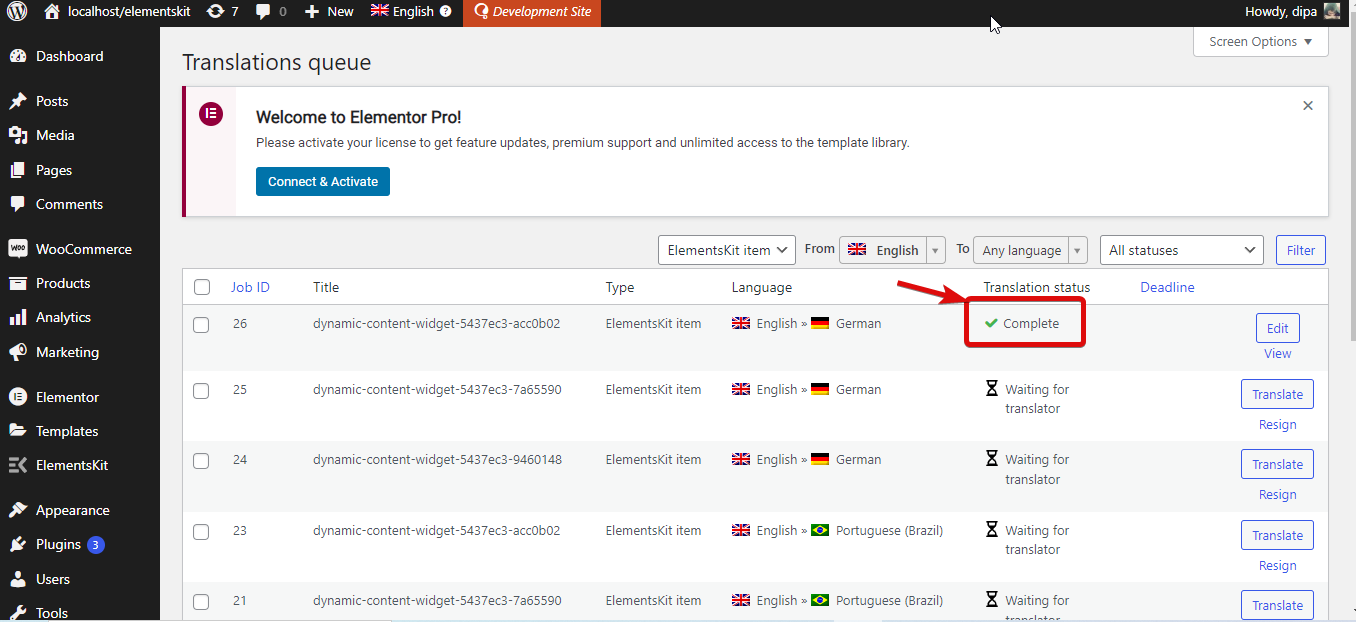
Here click on the + icon, add the translation then click on the check mark or press CTrl+Enter to save. Once you are done adding all the translations , click on complete to update the template. Now, you should see the translation status as complete.
Repeat the above described steps to translate all the tabs of your advanced widget content.
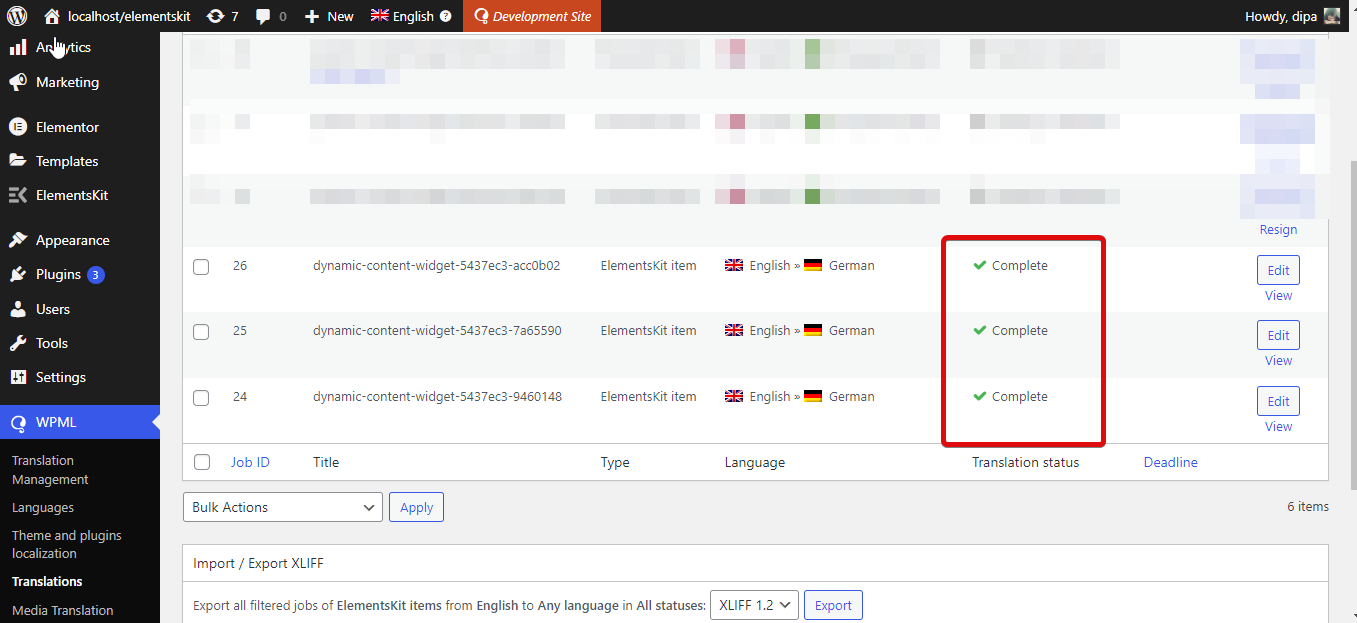
Now your advanced widget contents will also get translated along with the page content.
Here is a demo of how it will look: