
 English
  German
  Spanish
  Italian
  French
  Danish
  Portuguese
  Swedish
  Polish
  Korean
  Japanese
 Step 1: How to purchase ElementsKit Pro #
- Navigation to our Pricing page for ElementsKit
- Choose your desired pricing plan then click on PURCHASE NOW button.
- You’ll be redirected to our Checkout page. On this page, complete the required procedures and click on the PURCHASE button.
- Now select your preferred payment methods and proceed with the next steps.
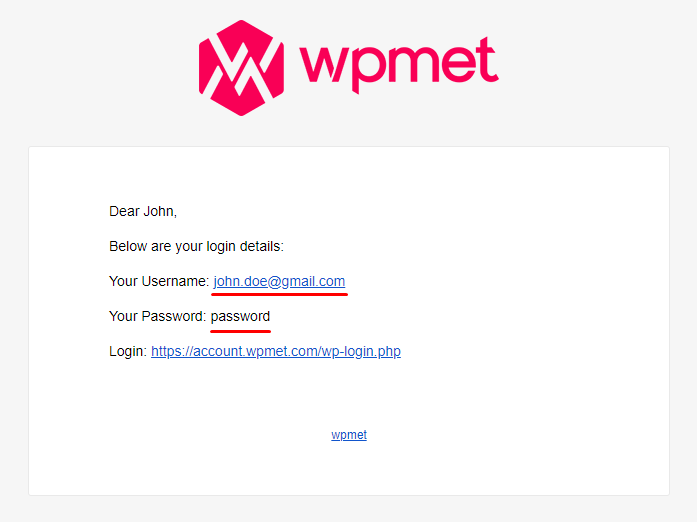
- Once payments are successfully done, you’ll get an email about your purchase and a link to download the plugin.
Step- 2: How to download the plugin #
Click on the login URL that you got in the email and log in to Wpmet account. You’ll be redirected to your Account dashboard.
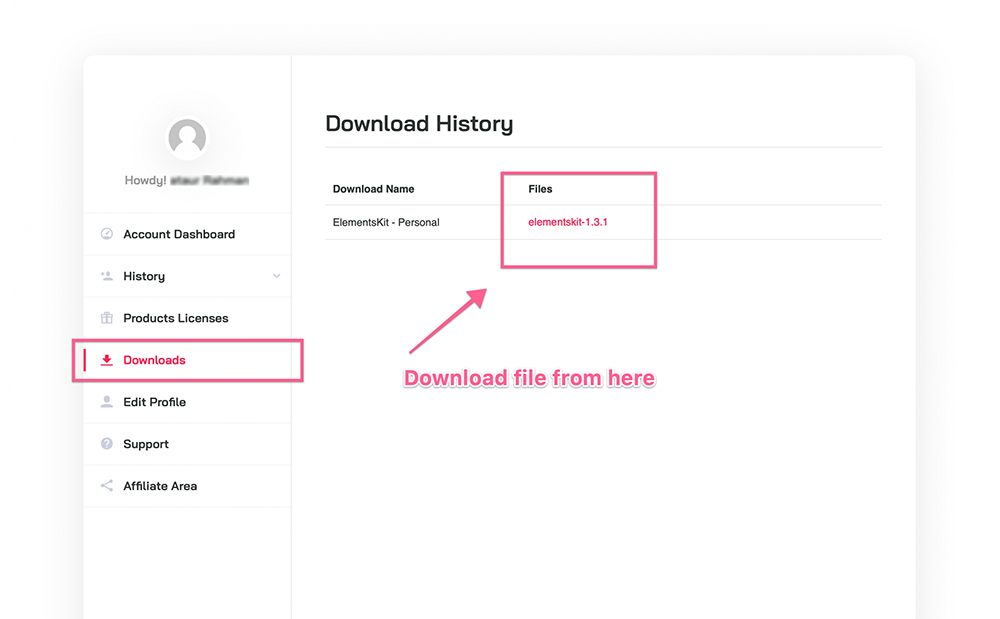
To download the plugin: Go to the Downloads and click on the file name to download the plugin.
Step- 3: How to install ElementsKit Pro #
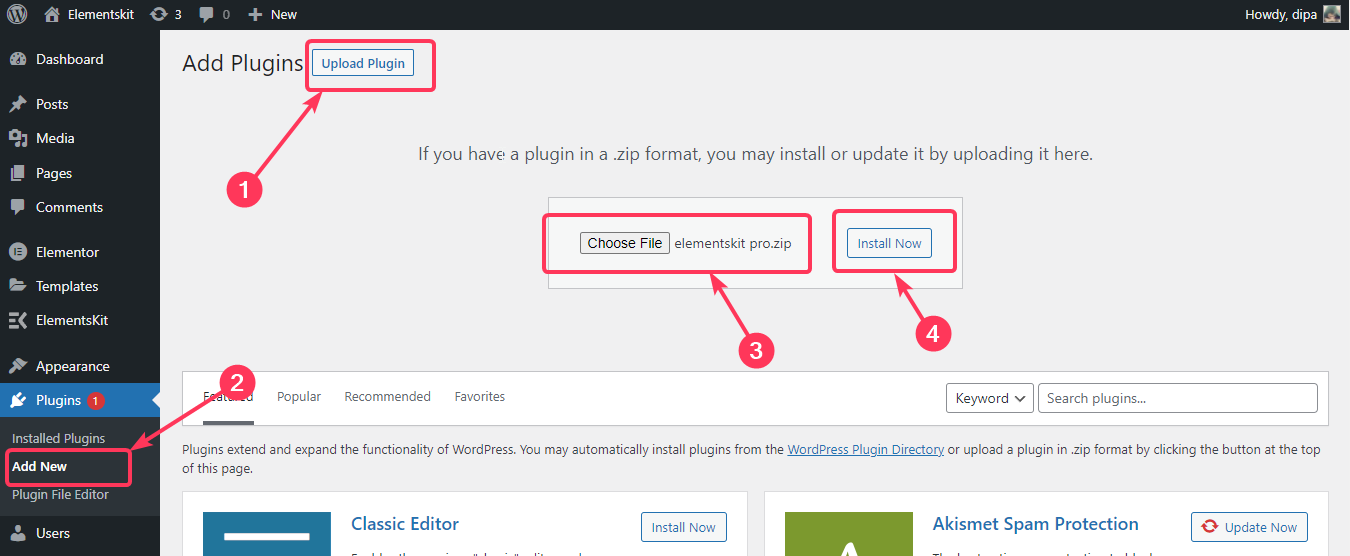
- Navigate to Dashboard > Plugins > Add new.
- Click on the Upload plugin and choose the ElementsKit Pro plugin file you downloaded.
- Click on Install the plugin.
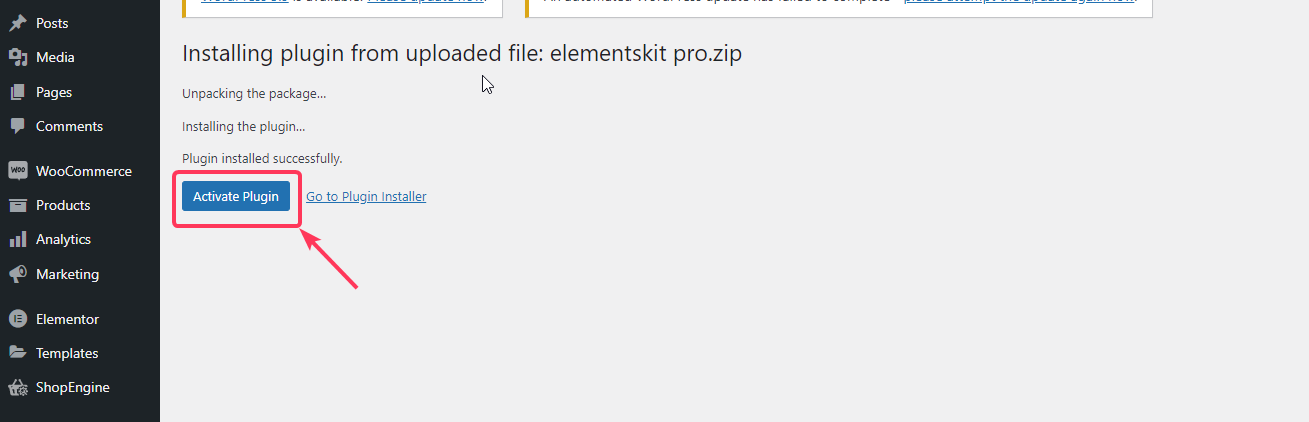
4. After the installation click on Activate Plugin to activate.
License Activation Process #
After that, log in to your Wpmet account again.
To get the License key for ElementsKit Pro:
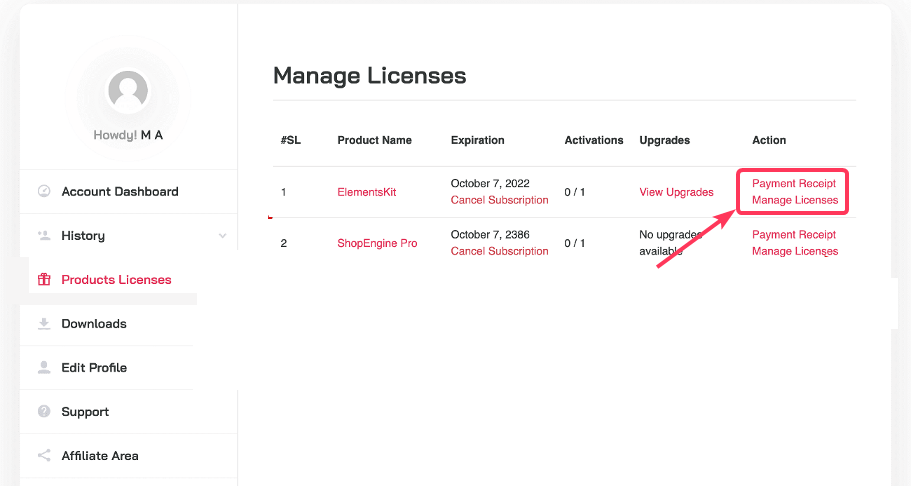
- Go to the Product License page.
- Click on the Manage License for ElementsKit. There you will find the license key for ElementsKit Pro.
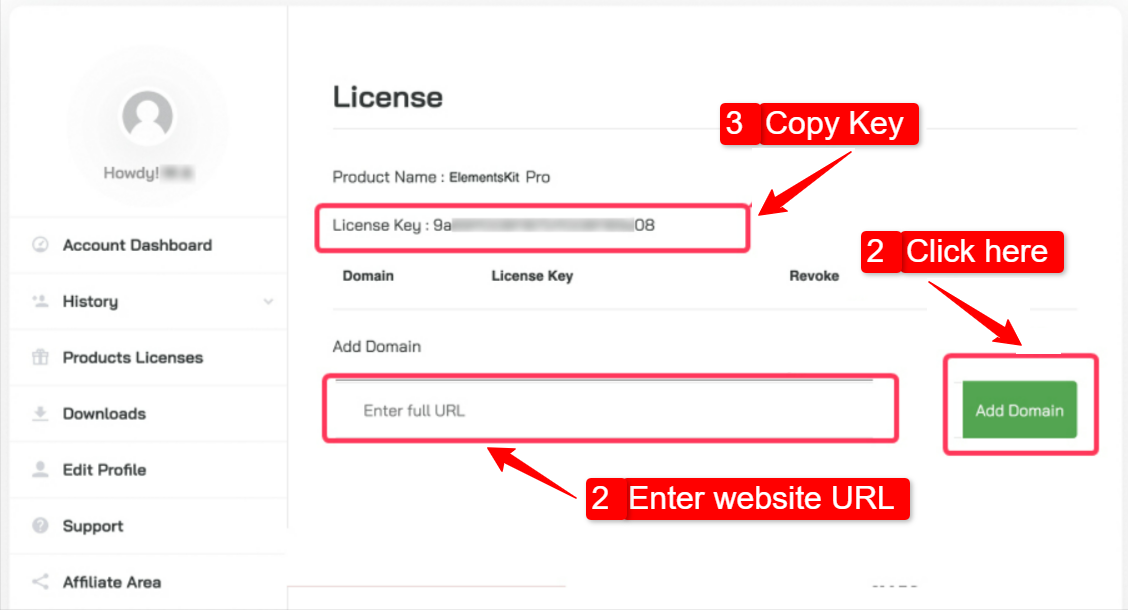
3. On the license management page add your website in the Add Domain field. Click on the Add Domain button to save. After that copy the license key and move on to the next step.
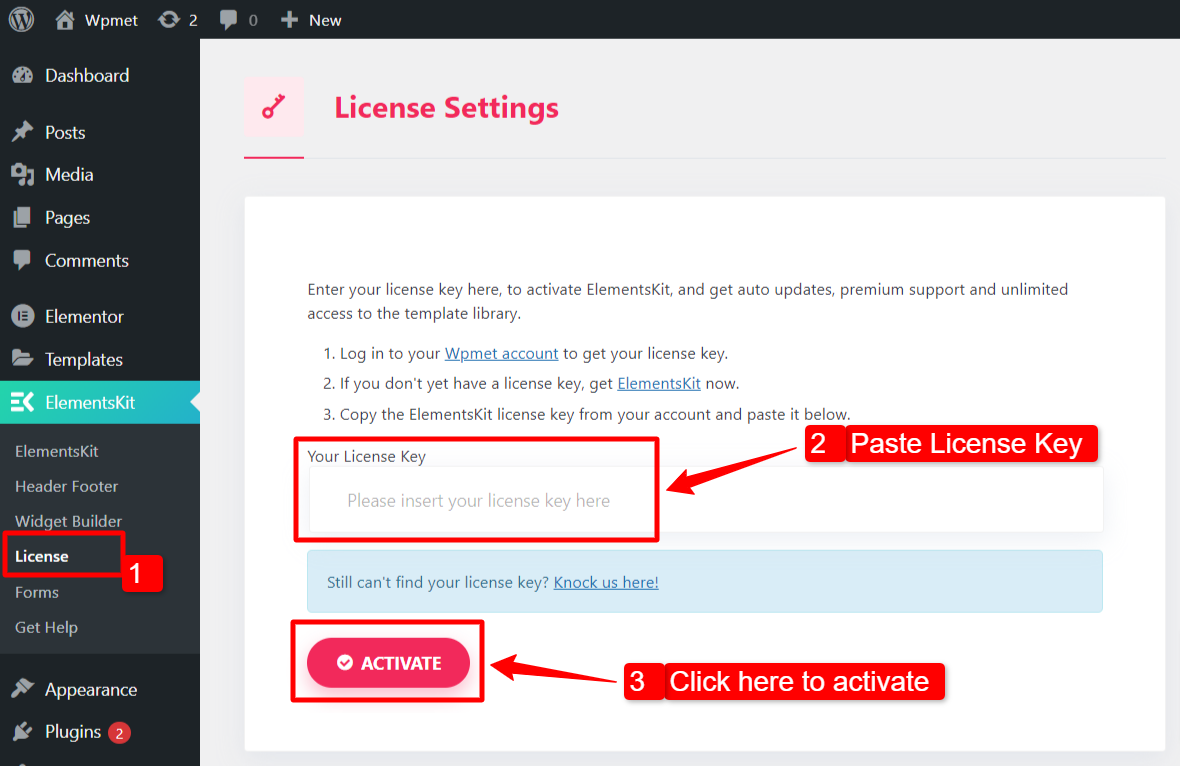
To activate the license key on your WordPress site:
- Go to your WordPress Admin Dashboard.
- Navigate to ElementsKit > License.
- Paste the license key on the required field.
- Click on the ACTIVATE button.
Finally, you have installed and activated the ElementsKit Pro for your WordPress website. Now you have access to hundreds of advanced elements for Elementor that comes with ElementsKit Pro.


