Countdown timers on websites act like ticking time bombs, creating a sense of urgency that drives users to act fast. Whether it’s grabbing a limited-time offer or joining before it’s too late, these timers boost conversions, engagement, and highlight key events, all in a blink of an eye. Think of them as persuasive little nudges that get users moving!
Uisng GutenKit Countdown Timer #
Install the GutenKit plugin and go to the WordPress dashboard. Then, take a new page or post and follow the below steps:
- Enable the block editor.
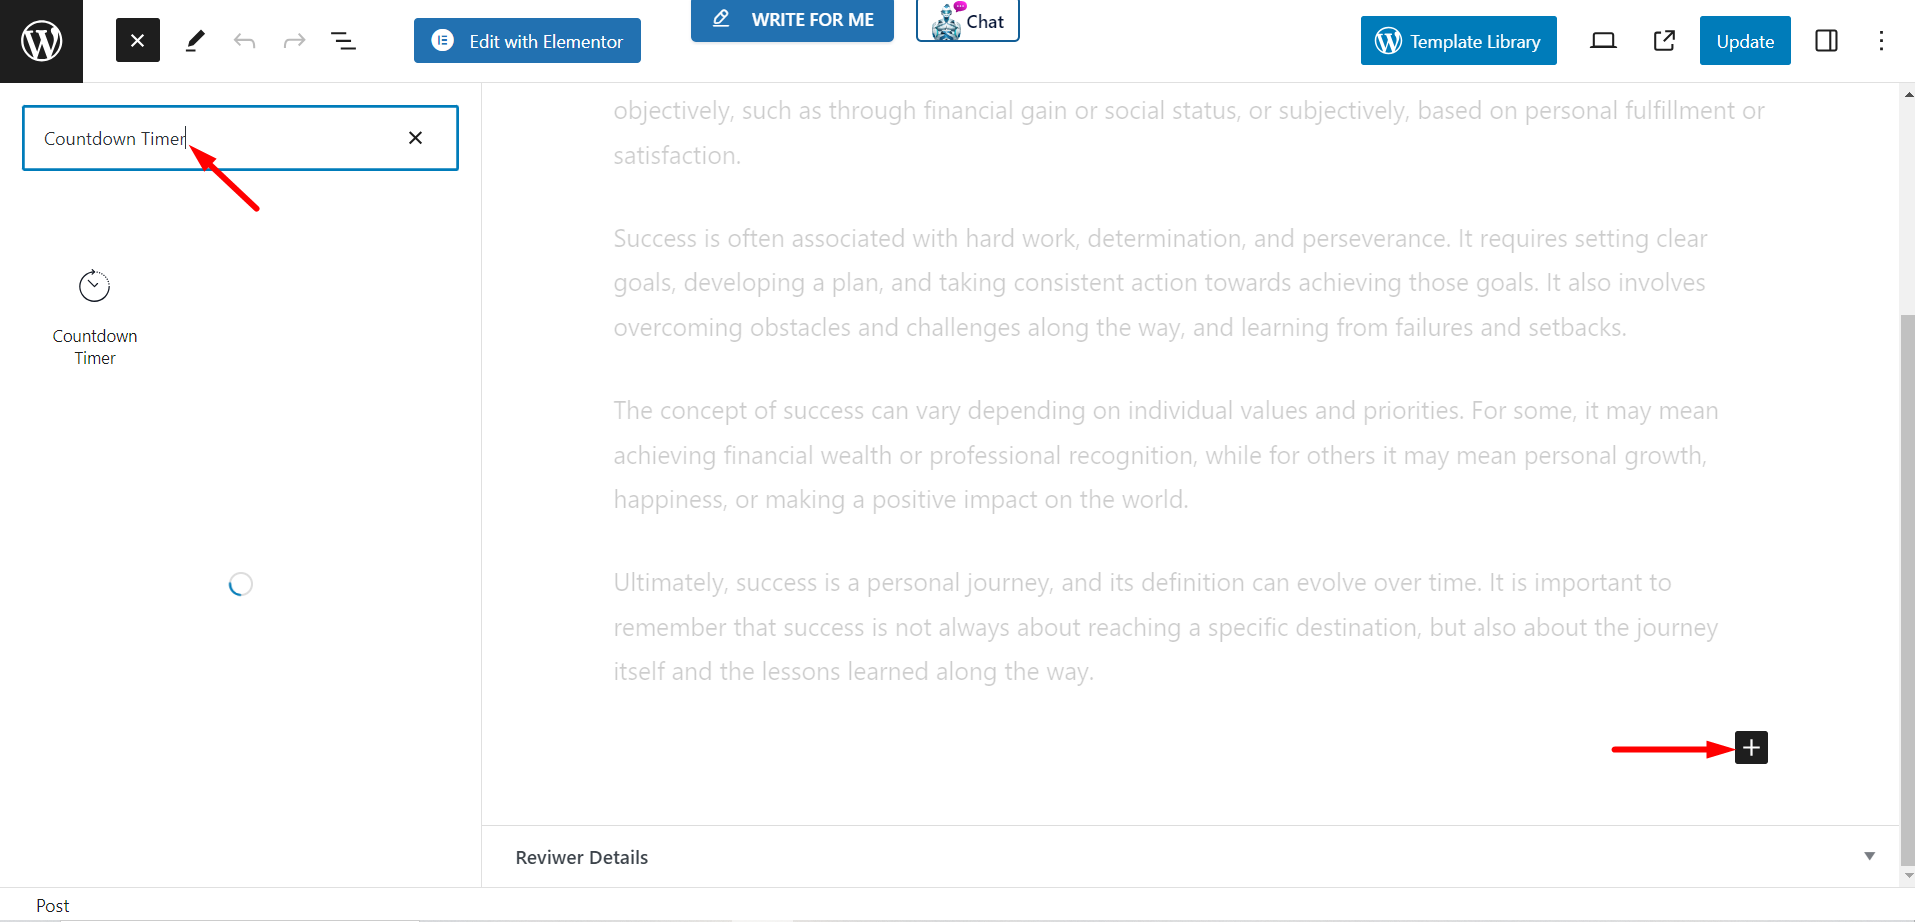
- Find the “+” icon at the top of the editor screen.
- Clicking it will display a block library.
- Search for the GutenKit Countdown Timer.
- Once you see it, click or drag & drop it to the editor screen.
Content #
In this part, you have four features to customize the block content.
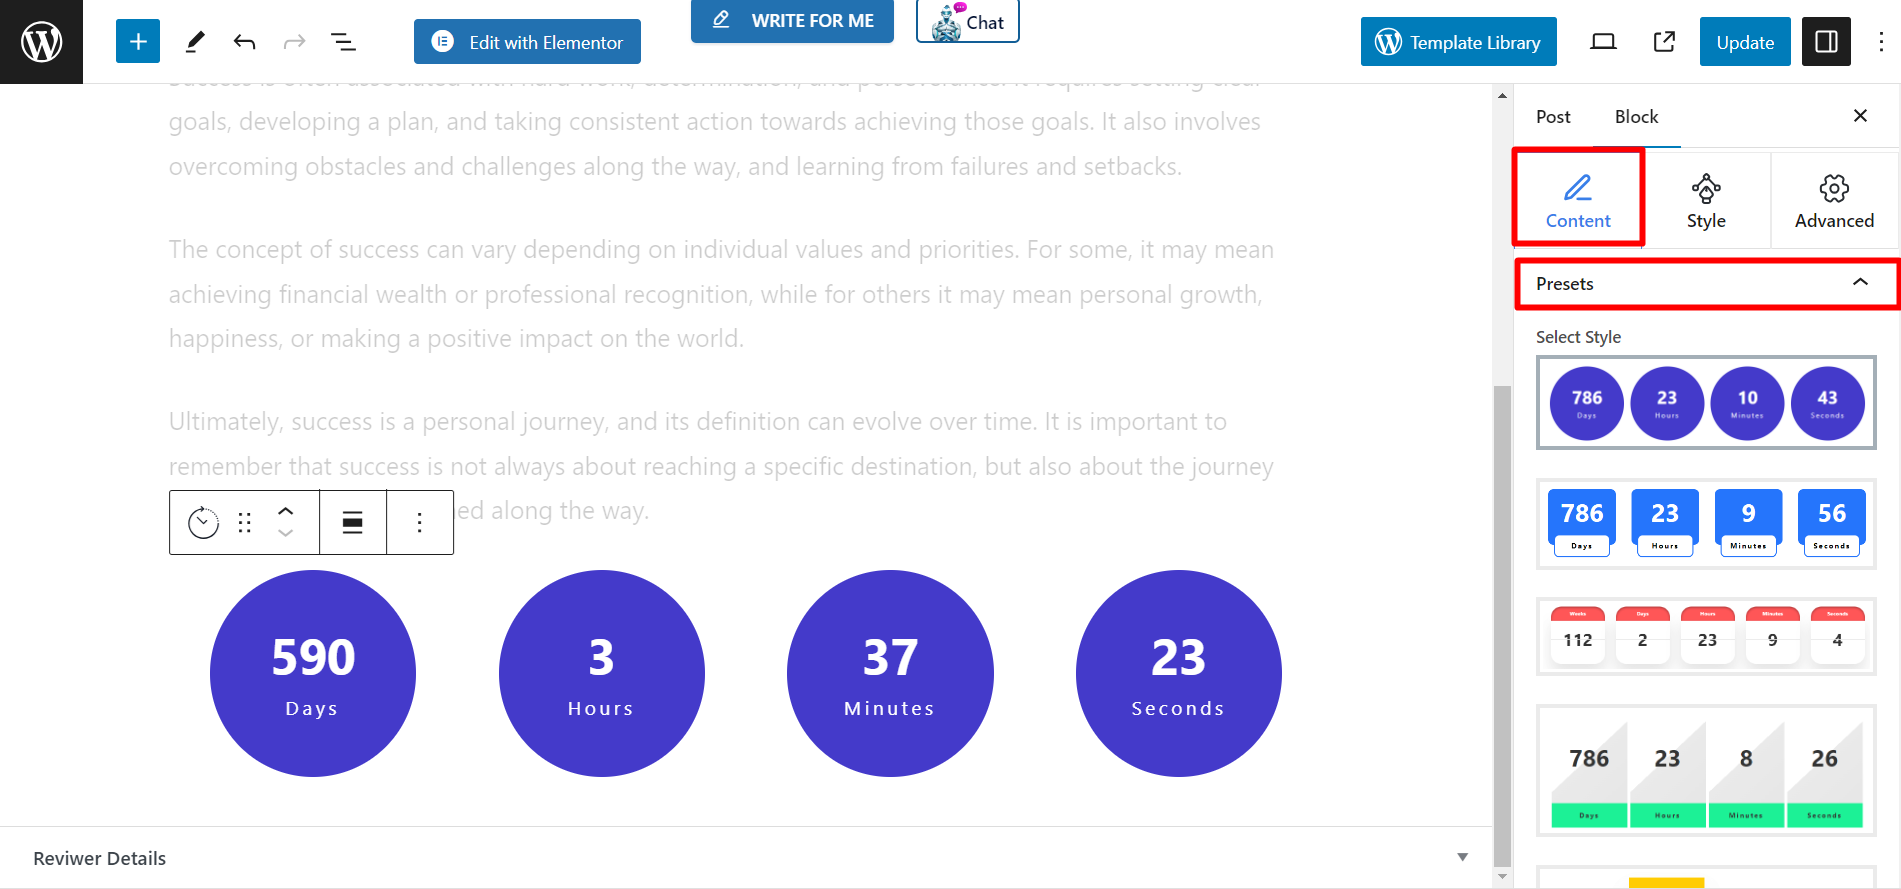
Presets #
There are several options to choose a style for your countdown timer.
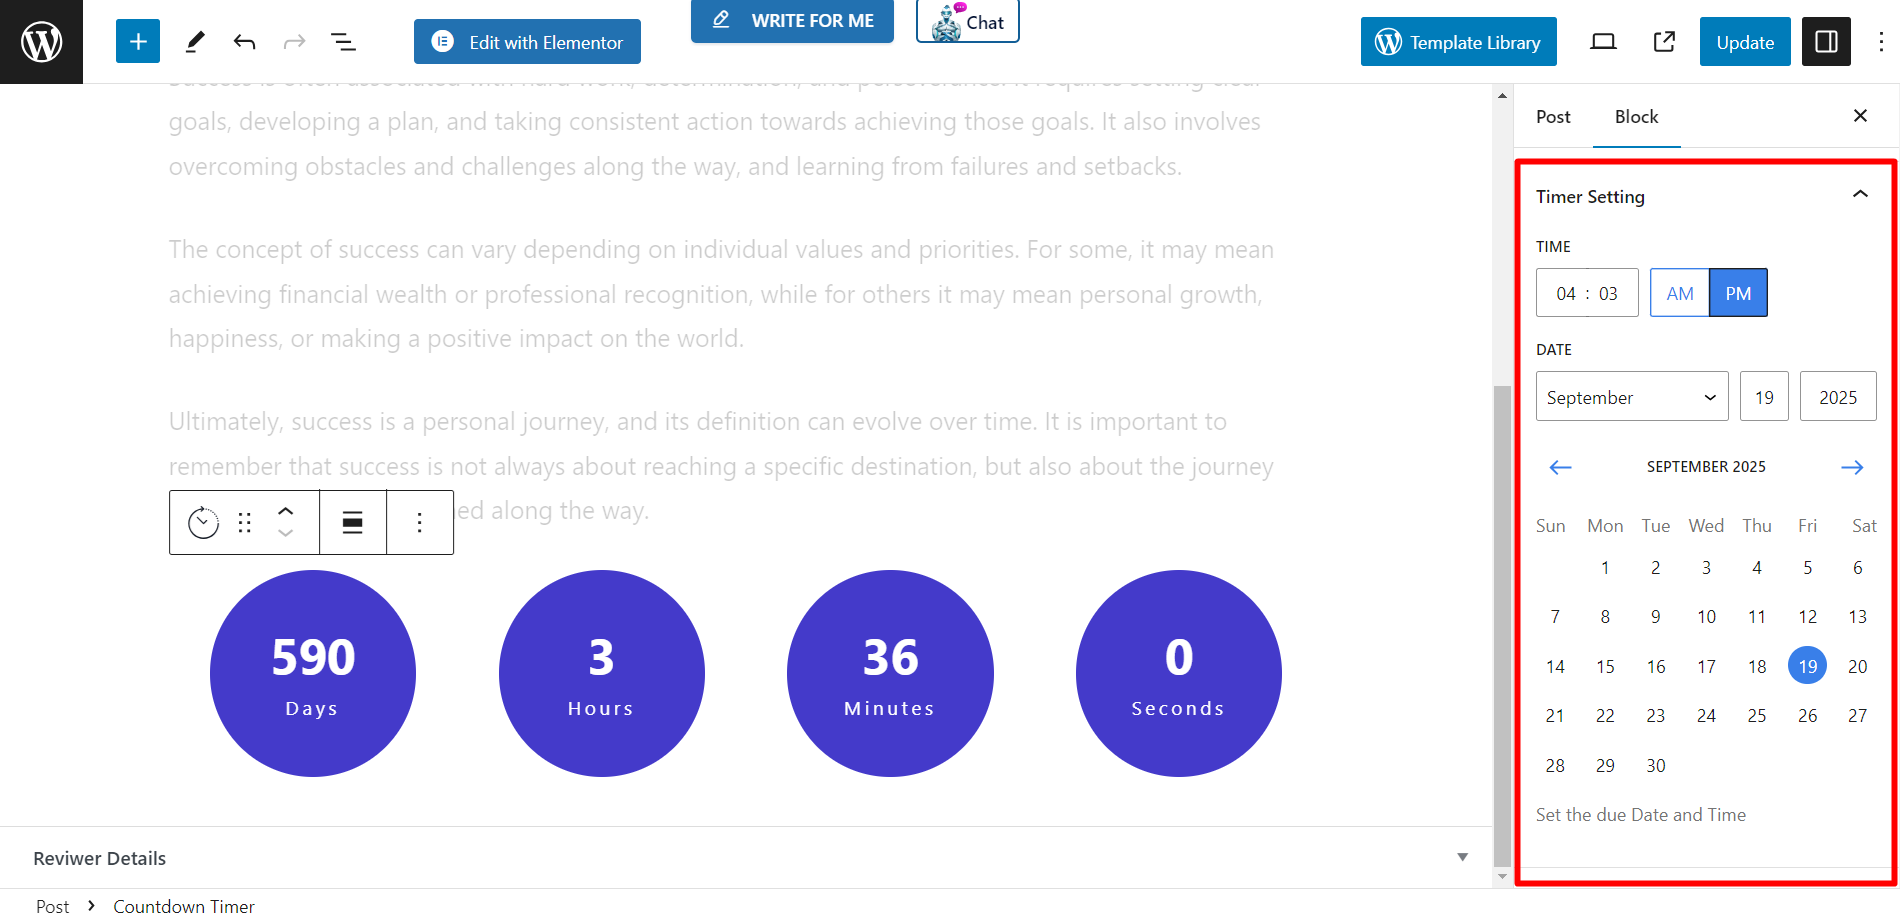
Timer Setting #
- Time – Set the time from here.
- Date – Adjust the date using the calendar based on your needs.
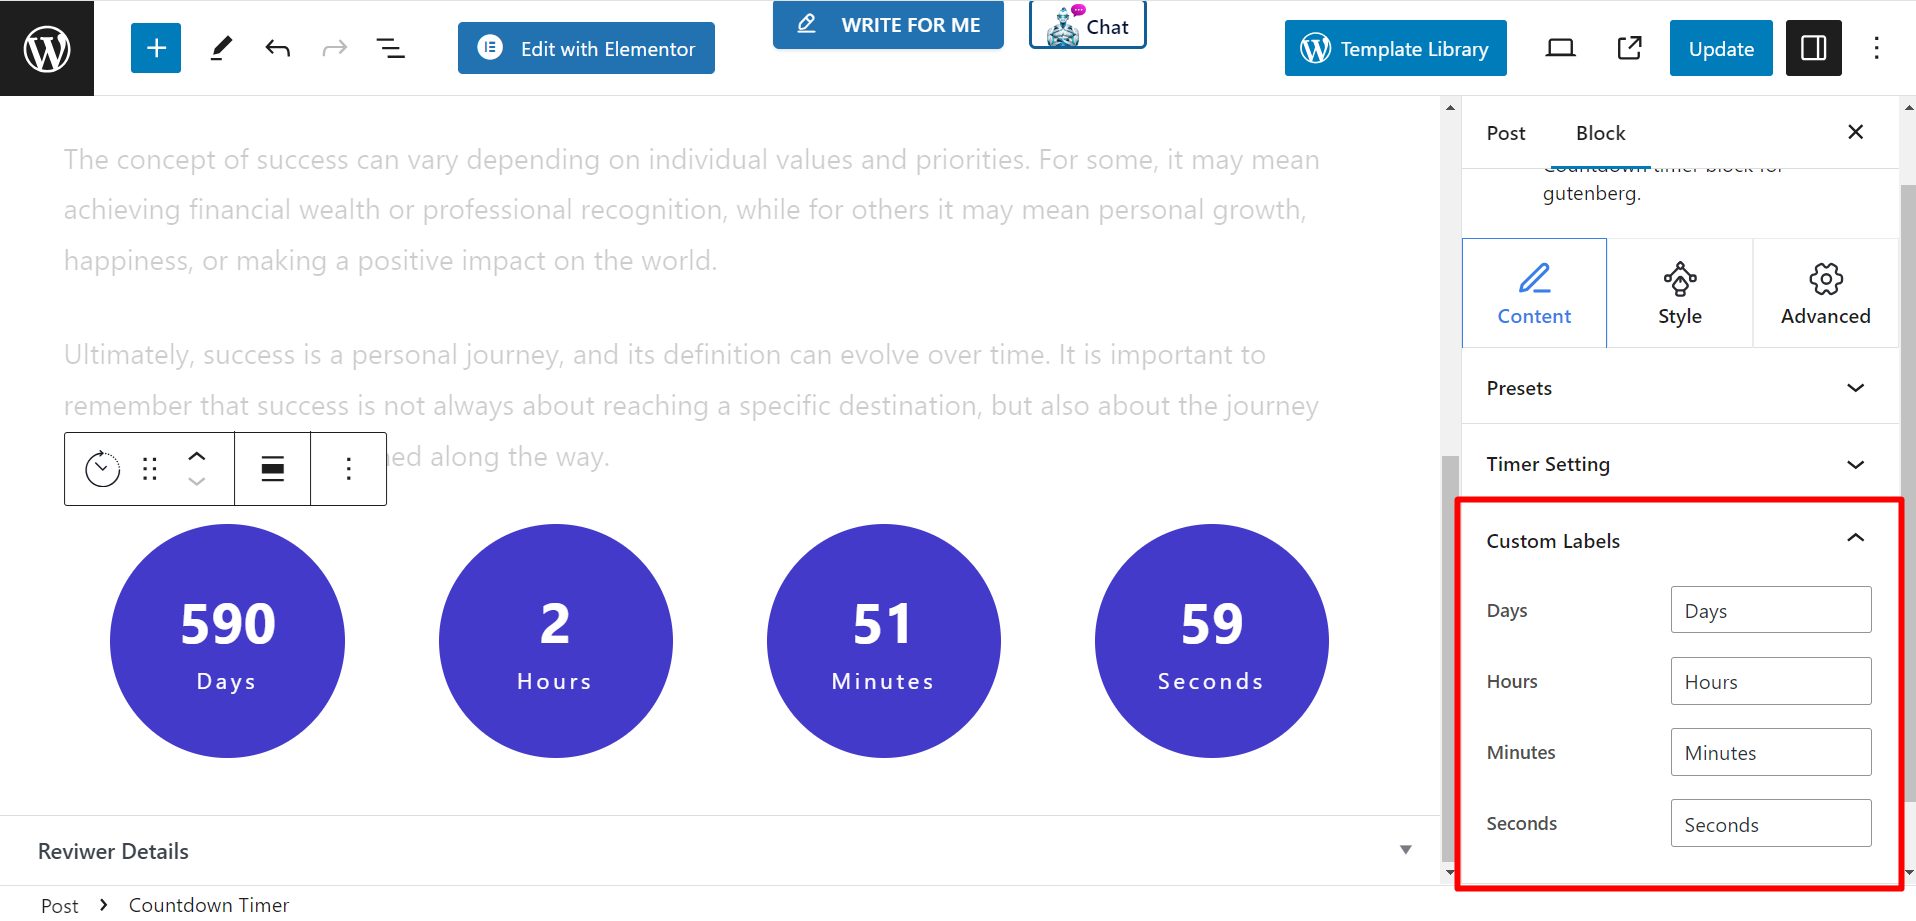
Custom Labels #
This feature shows you the setting options for days, hours, minutes, and seconds.
Expire Action #
When the countdown is finished, you can set an expiration action to notify website visitors.
- On Expiry Title – Write a title that you want to show to the visitors to notify them that the countdown is finished.
- On Expiry Content – Here, you can write detailed content if you wish to show it when the countdown expires.

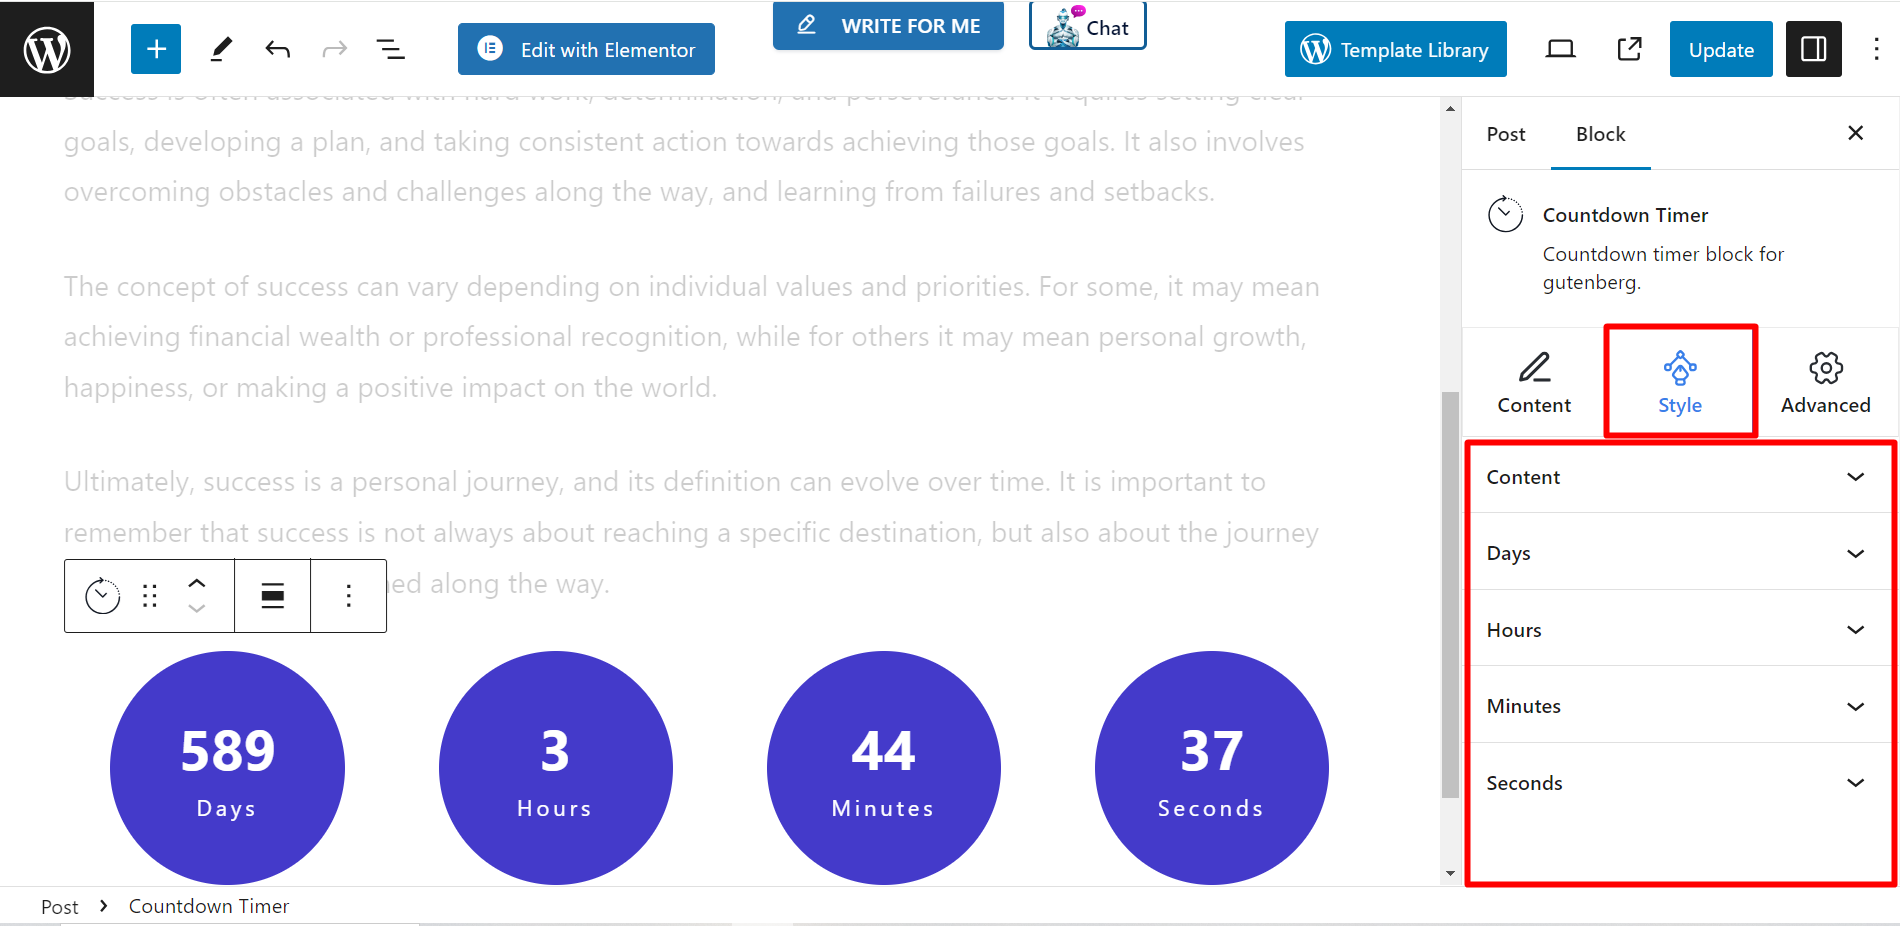
Style #
This is the styling section of the countdown timer block. You can width, height, column gap, row gap, typography, color, background type, border, border radius, and other related things in the timer.