

Currency Switcher Module by ShopEngine enables customers to switch to different Currencies while shopping on an eCommerce website. You can add as many currency options as you like with this module.
Let’s check out the steps of how you can use the Currency Switcher module:
Step 1. Enable Currency Switcher Module #
You need to enable the module before you can access the settings. To enable the module
- Go to: ShopEngine > Modules > Currency Switcher
- Click on the Settings Icon
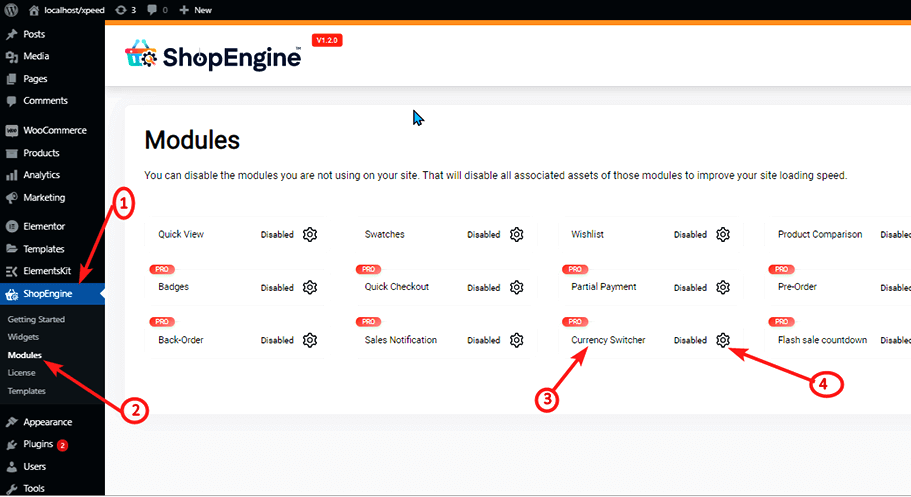
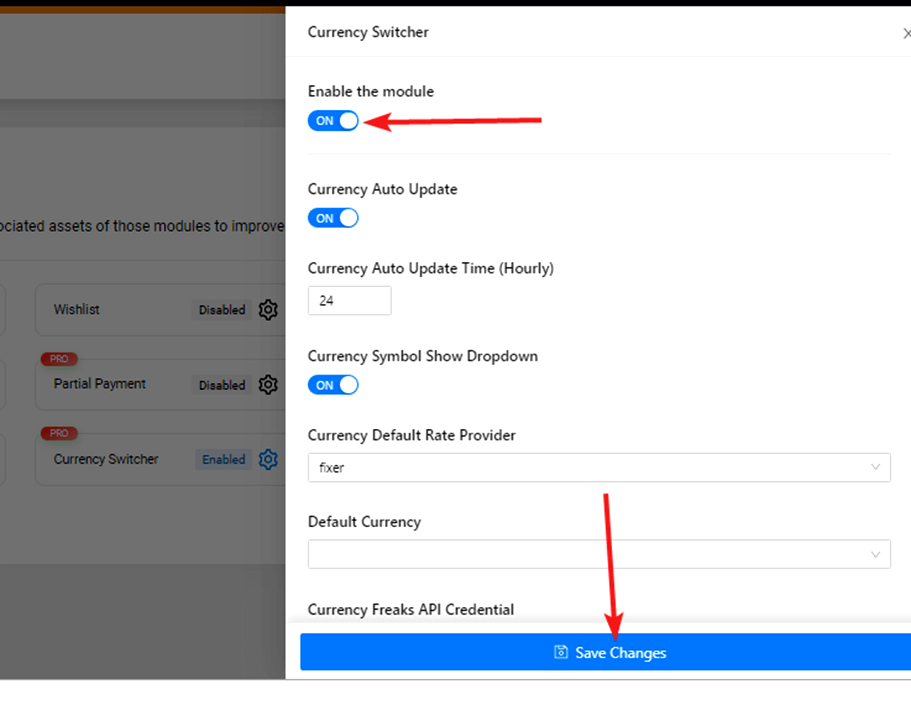
- Turn on the Enable the module option
- Save changes.
Note: You can also enable all the modules at the same time. Check out how you can turn on all the modules at once.
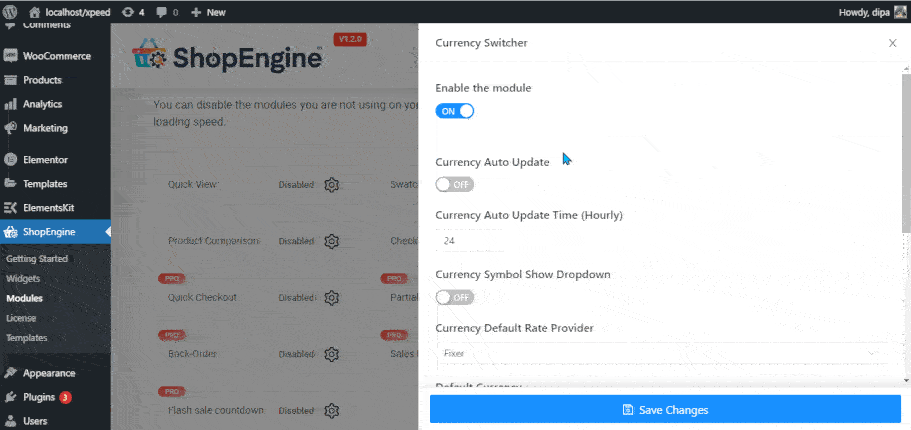
Step 2: Settings of Currency Switcher Module #
Currency Switcher has many settings lets go through one by one:
Currency Switcher has many settings lets go through one by one:
Currency Auto Update: #
Turn this option on to update different currency values automatically.
Currency Auto Update Time (Hourly): #
Set how frequently you want the currency to update. You must give the numbers in hours only.
Currency Symbol Show Dropdown: #
Turn this option to show the currency list (symbol) in the dropdown menu in the front end.
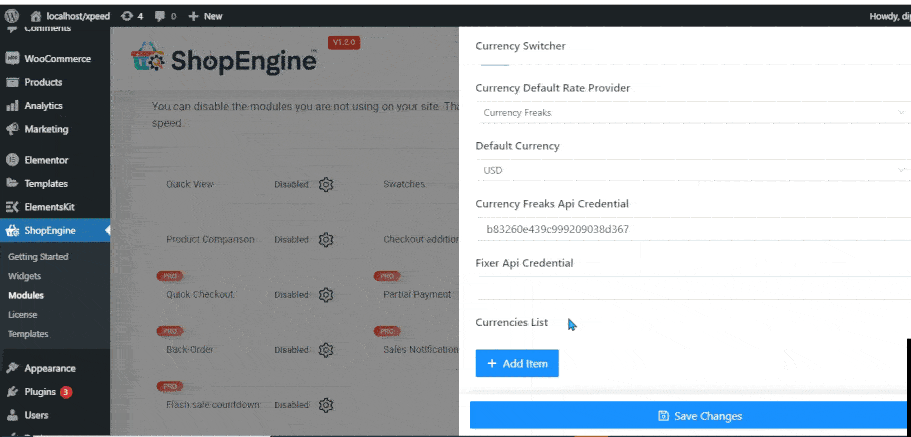
Currency Default Rate Provider: #
ShopEngine leverages 2 API providers to update the currency rate; Fixer API and Currency Freaks API. You can choose either of these two.
Default Currency: #
Select the default currency that will appear when someone first lands on your website.
Currency Freaks API Credential : #
Once you Sign up for any of the Currency Freaks packages, you will get an API credential, use that value here.
Fixer API Credential: #
Sign up for any of the Fixer packages, you will get an API credential, you will get an API credential.
Note: You do not need to sign up for both the API, just one is enough. And the API will update the currency rate automatically.
Currencies List: #
You will find all the saved currency lists. You can add new currency using step 3.
To edit any of the currency information,
- Click on the currency to open the currency data,
- Edit any of the values you want and
- Click save changes.
To delete any of the currencies click on the X button.
Step 3: Add New Currencies #
To add a new currency, click on the + Add New button and provide the following information.
- Currency Activate: Turn on/off Currency Activate to activate/deactivate the currency.
- Currency Name: Put the currency name in the Currency Name
- Currency Code: Make sure to use a standard code for the Currency Code. For example: Currency code for United States Dollar is USD
- Currency Rate: Put the currency rate in terms of exchange rate or USD.
- Currency Symbol: Use a standard currency symbol
- Currency Symbol Position: You can position the currency symbol on left, right, left space, or right space depending on the currency you are trying to add.
- Currency Decimal: Select the number of decimal places you want your currency to show.
- Disable Payment Gateways For This Currency: Choose the payments gateways you want to disable for the currency
After inserting all the data, click Save Changes.
Step 4: Add Currency Switcher Widget the website #
You need to add the Currency Switcher Widget in the front end of the website to leverage the functionality of this module. Check out the how-to add the currency switcher module.
Note: If any Payment Gateways is disabled for some Currency, then that gateway will not show up on the checkout page for that currency.


