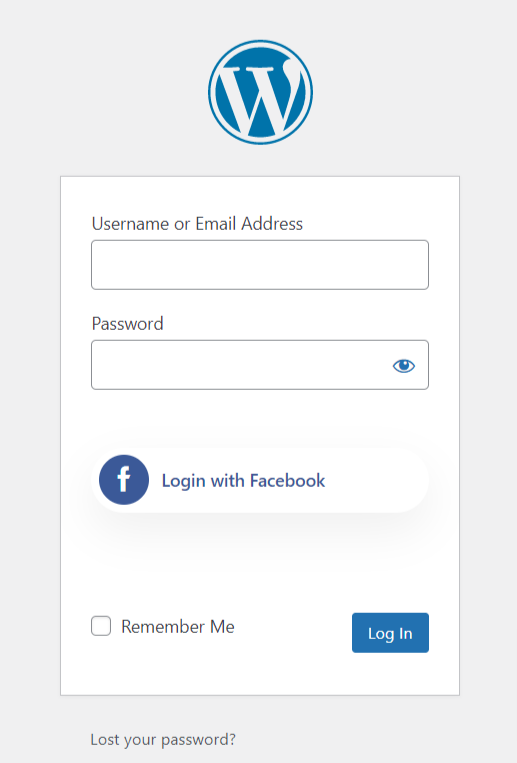
WP Social is the ultimate WordPress social media plugin. It integrates with all the social media platforms, including Facebook. You can add one-click login options on your website, letting users log in to your website using their Facebook accounts.
Read this documentation to learn how to add a WordPress Facebook login option on your site and let the users log in with their accounts.
Getting Started #
In order to allow your visitors to log in with their Facebook account, first you must create a Facebook App. The following guide will help you through the Facebook App creation process. After you have created your Facebook App, head over to “Settings” and configure the given “App ID” and “App secret” according to your Facebook App. Let’s Learn…
Create Facebook App #
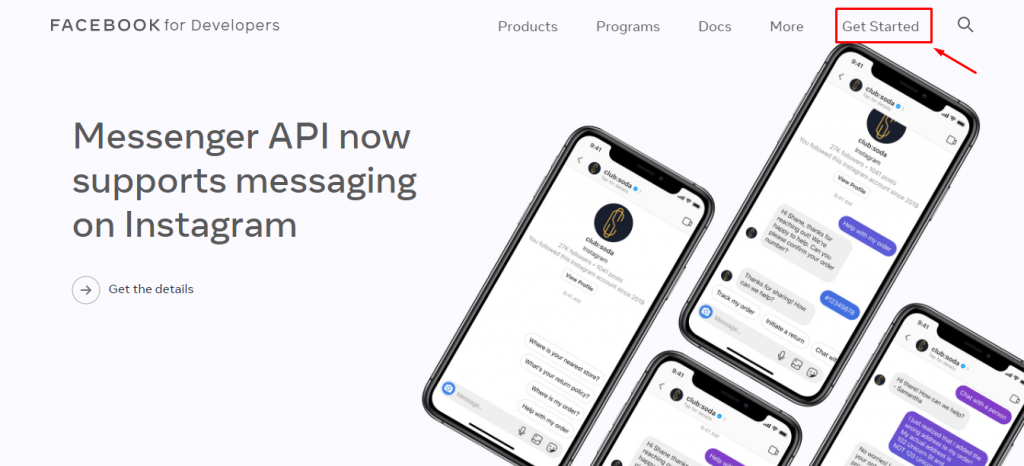
- Go to https://developers.facebook.com/apps/
- Log in with your Facebook ( if you are not logged in )
- Click on “Get Started” menu
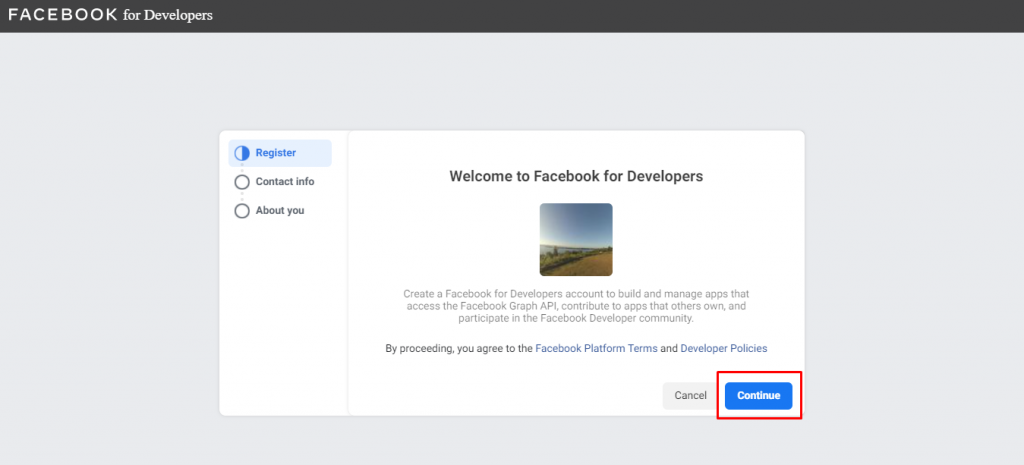
- Now you’ll be taken to a 3-phase registration phase. Click on “Continue” in the first phase.
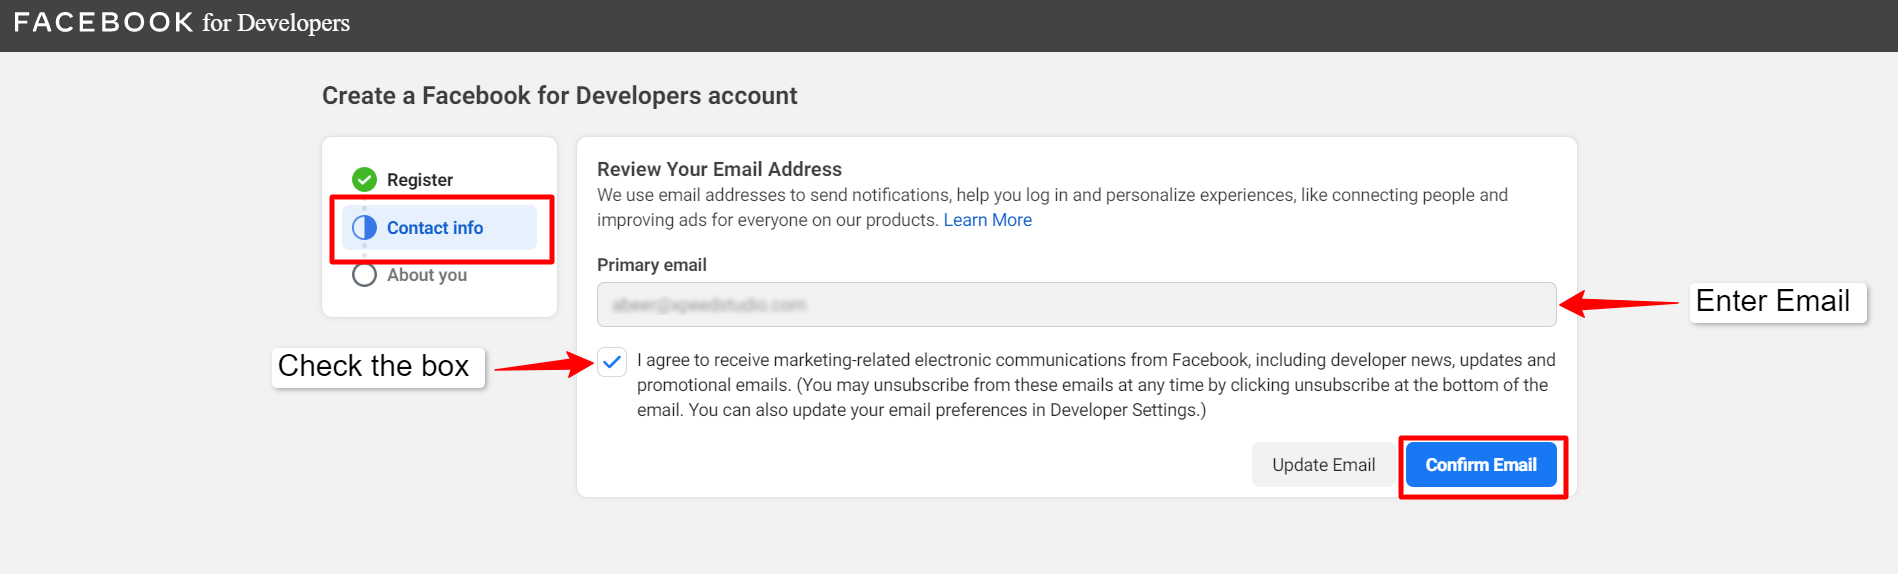
- In the second phase, you have to review your email address and agree to receive the updates and promotional emails from Facebook. Click on “Confirm Email” if you didn’t change the primary email address. If you did, click on “Update Email”.
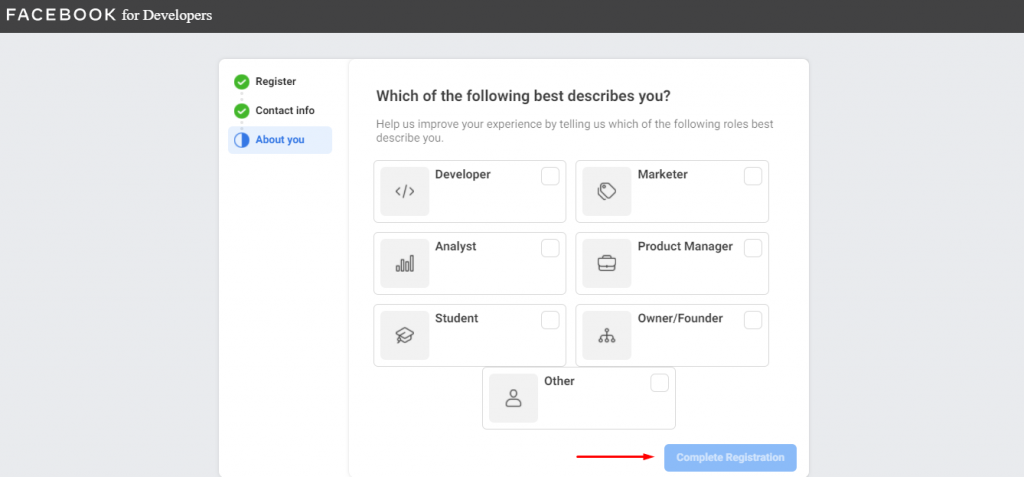
- The “About you” phase will ask you to choose what best describes you. Choose one and then click on “Confirm Registration”
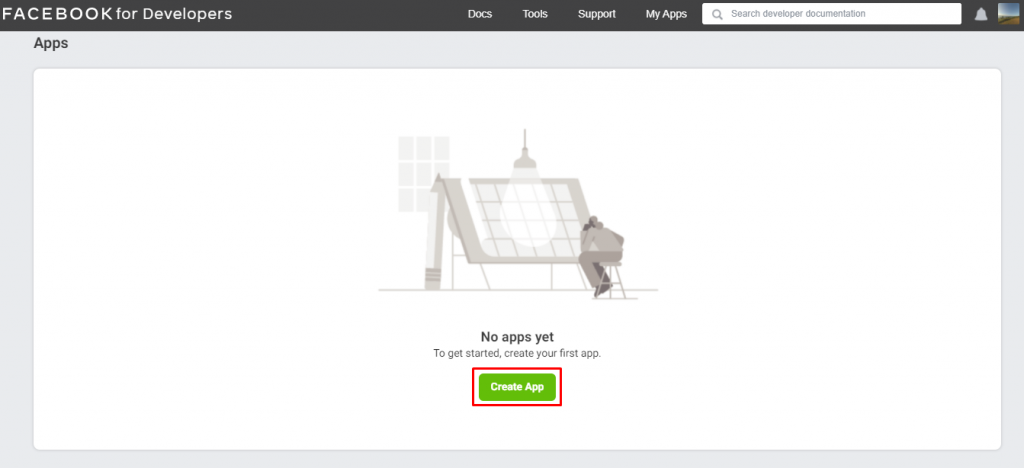
- Now you will be redirected to the main page to start creating an app. Click on “Create App” to proceed on
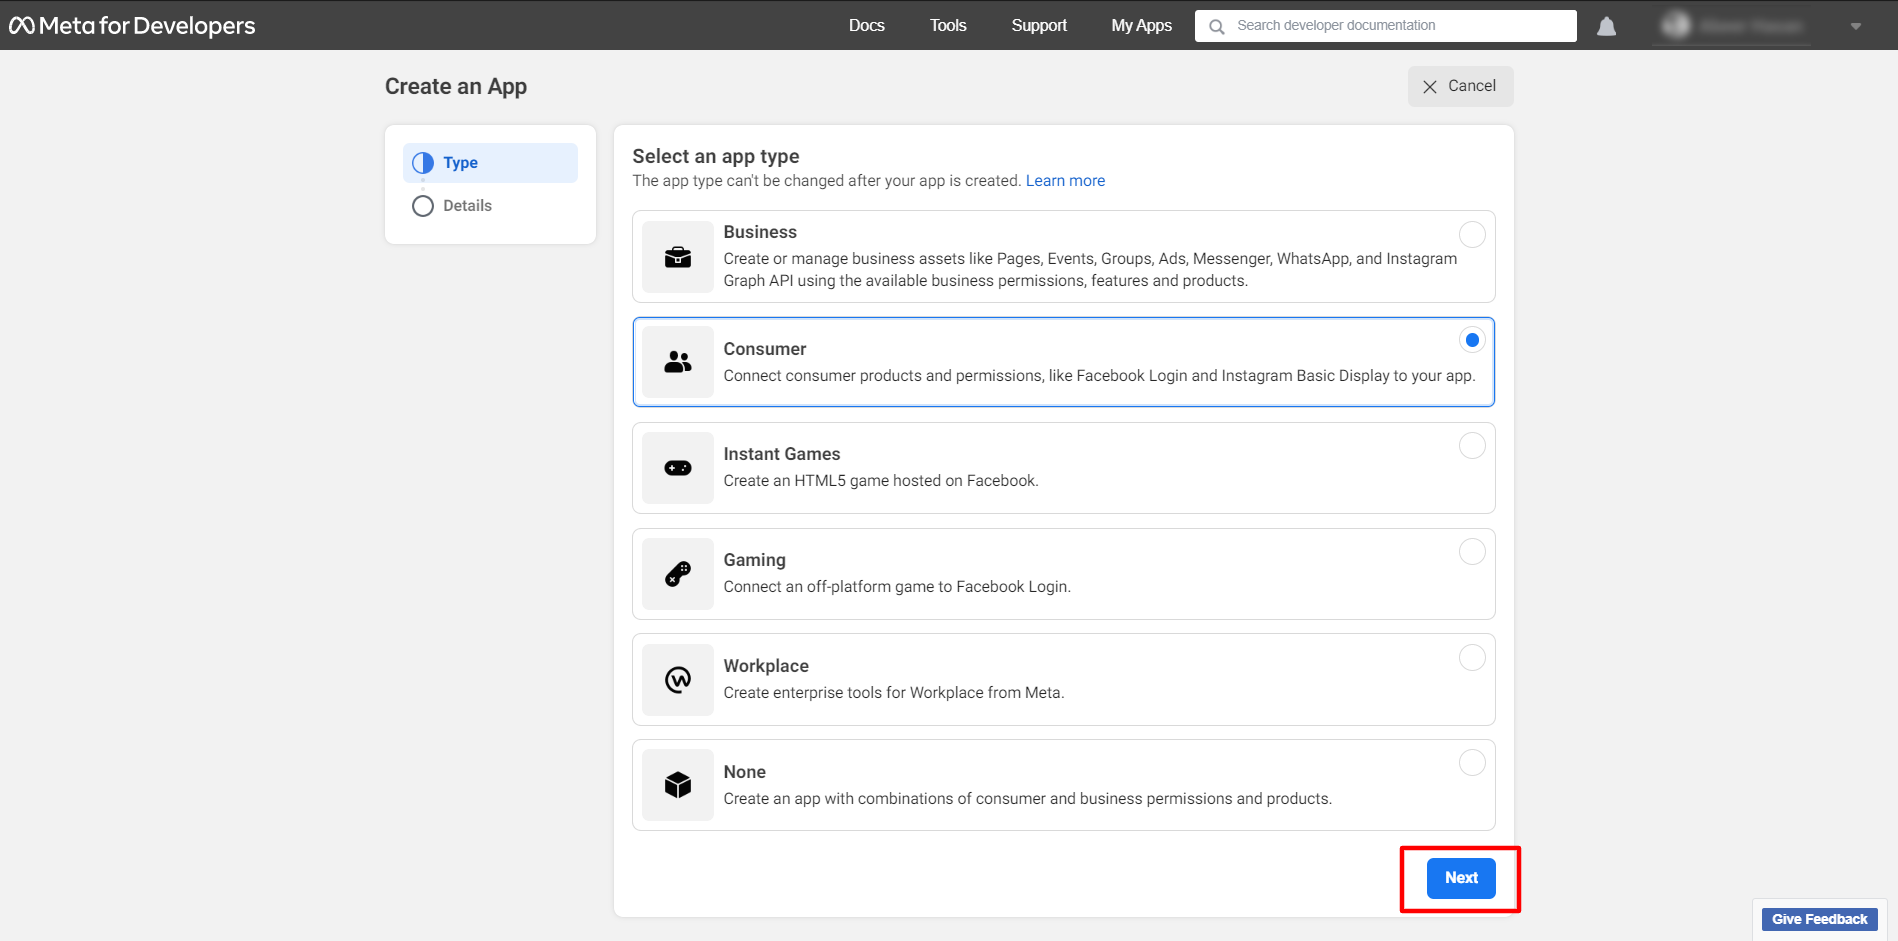
- It is time to define why you need to create an app. Choose one from the list and click on “Continue”
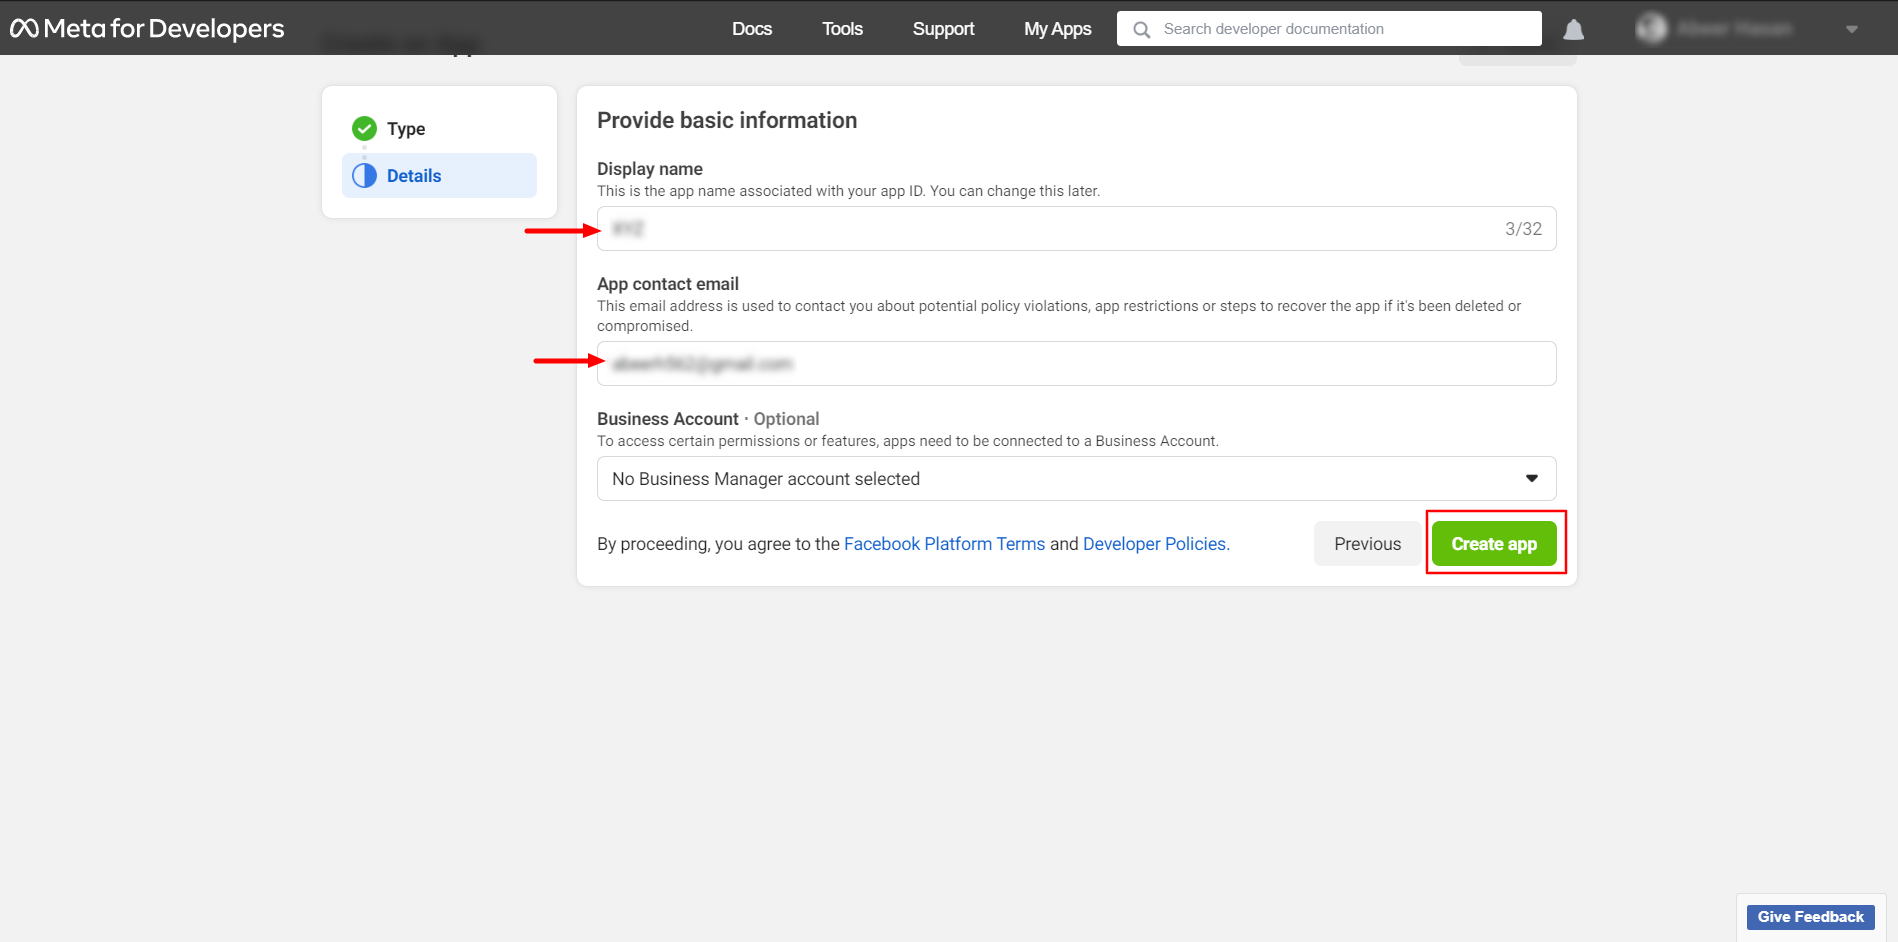
- Set the App Display Name and App Contact Email and then go ahead clicking on “Create App”. This app name will be displayed to the users when they try to “Login with Facebook”. So, make sure you provide a meaningful name in this field.
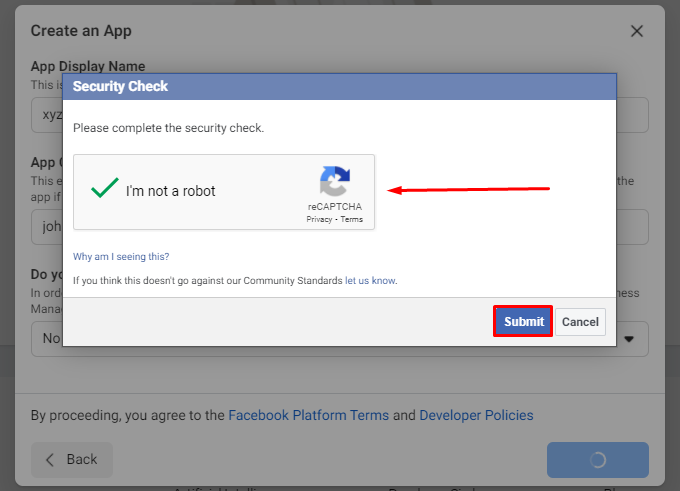
- To make sure that you are not a spamming bot, you have to proceed with a reCAPTCHA security check. Once done, click on “Submit”
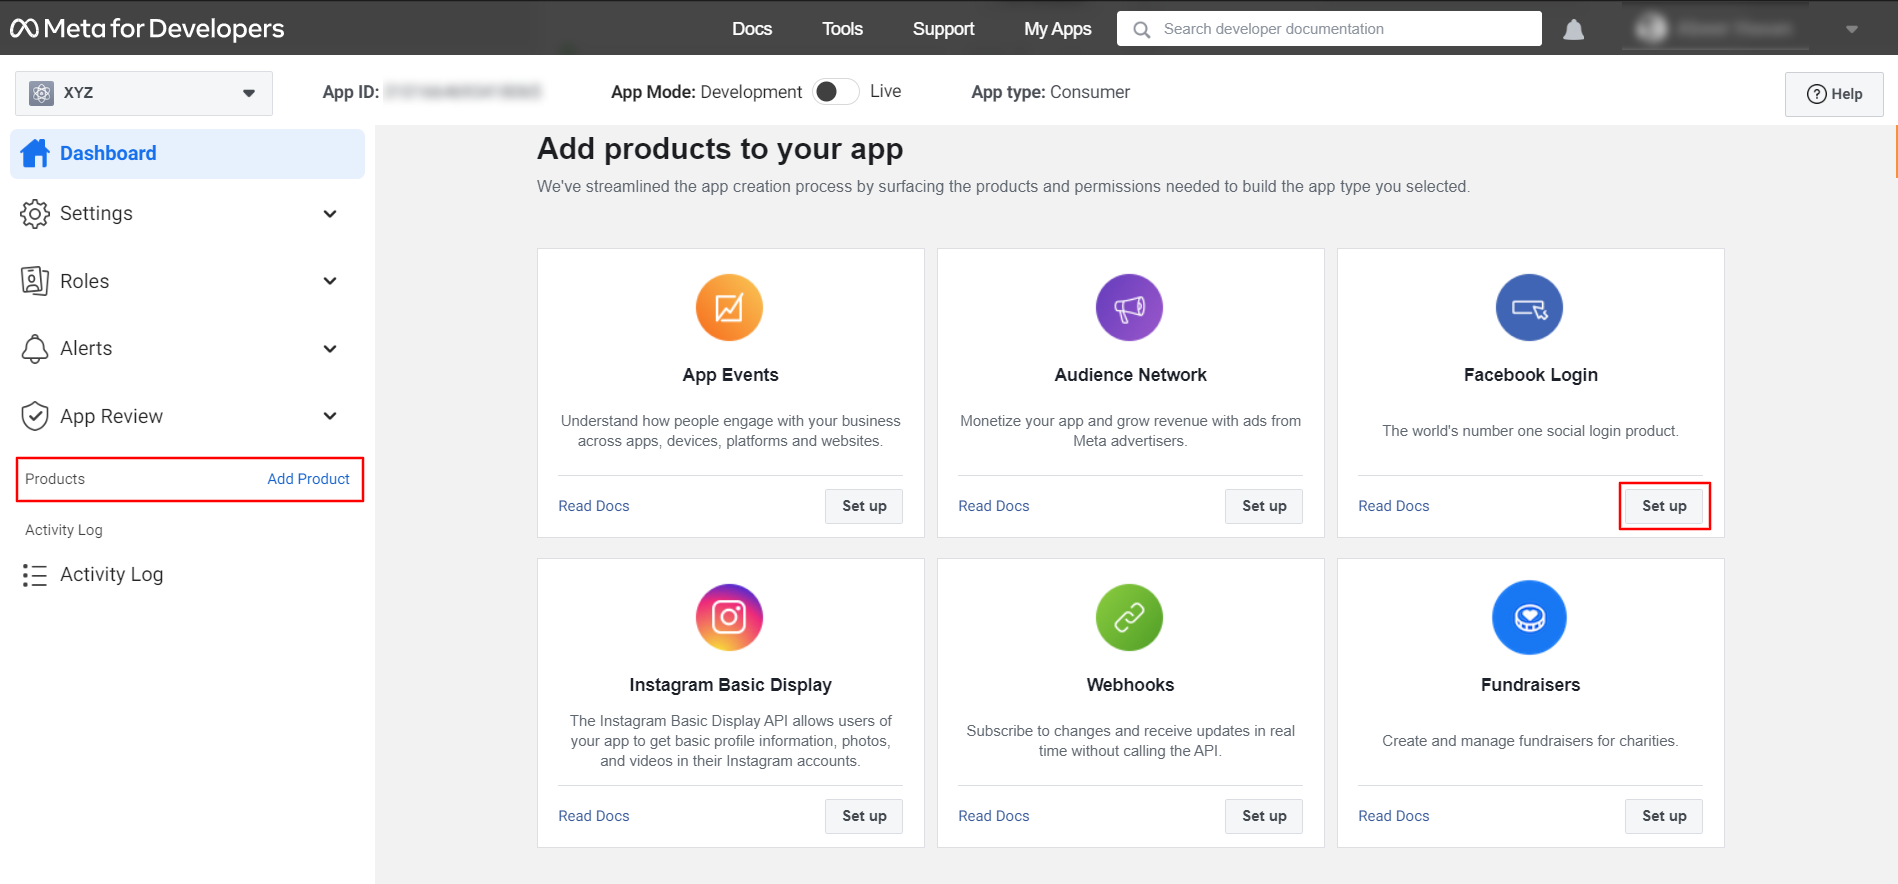
- On the next page, click on the “+” of the “Products” menu on the left of the page. You’ll be now presented with a wide range of products. Find “Facebook Login” from the list and click on “Set Up”.
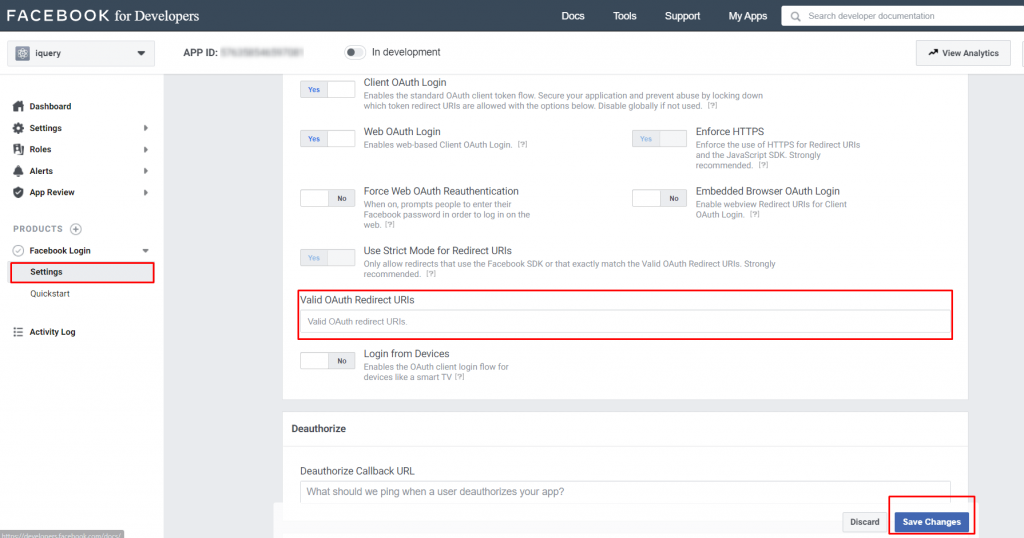
- On the left side of your screen, you’ll see the Settings under the Facebook Login App menu. Click there then go to Valid OAuth Redirect URIs.
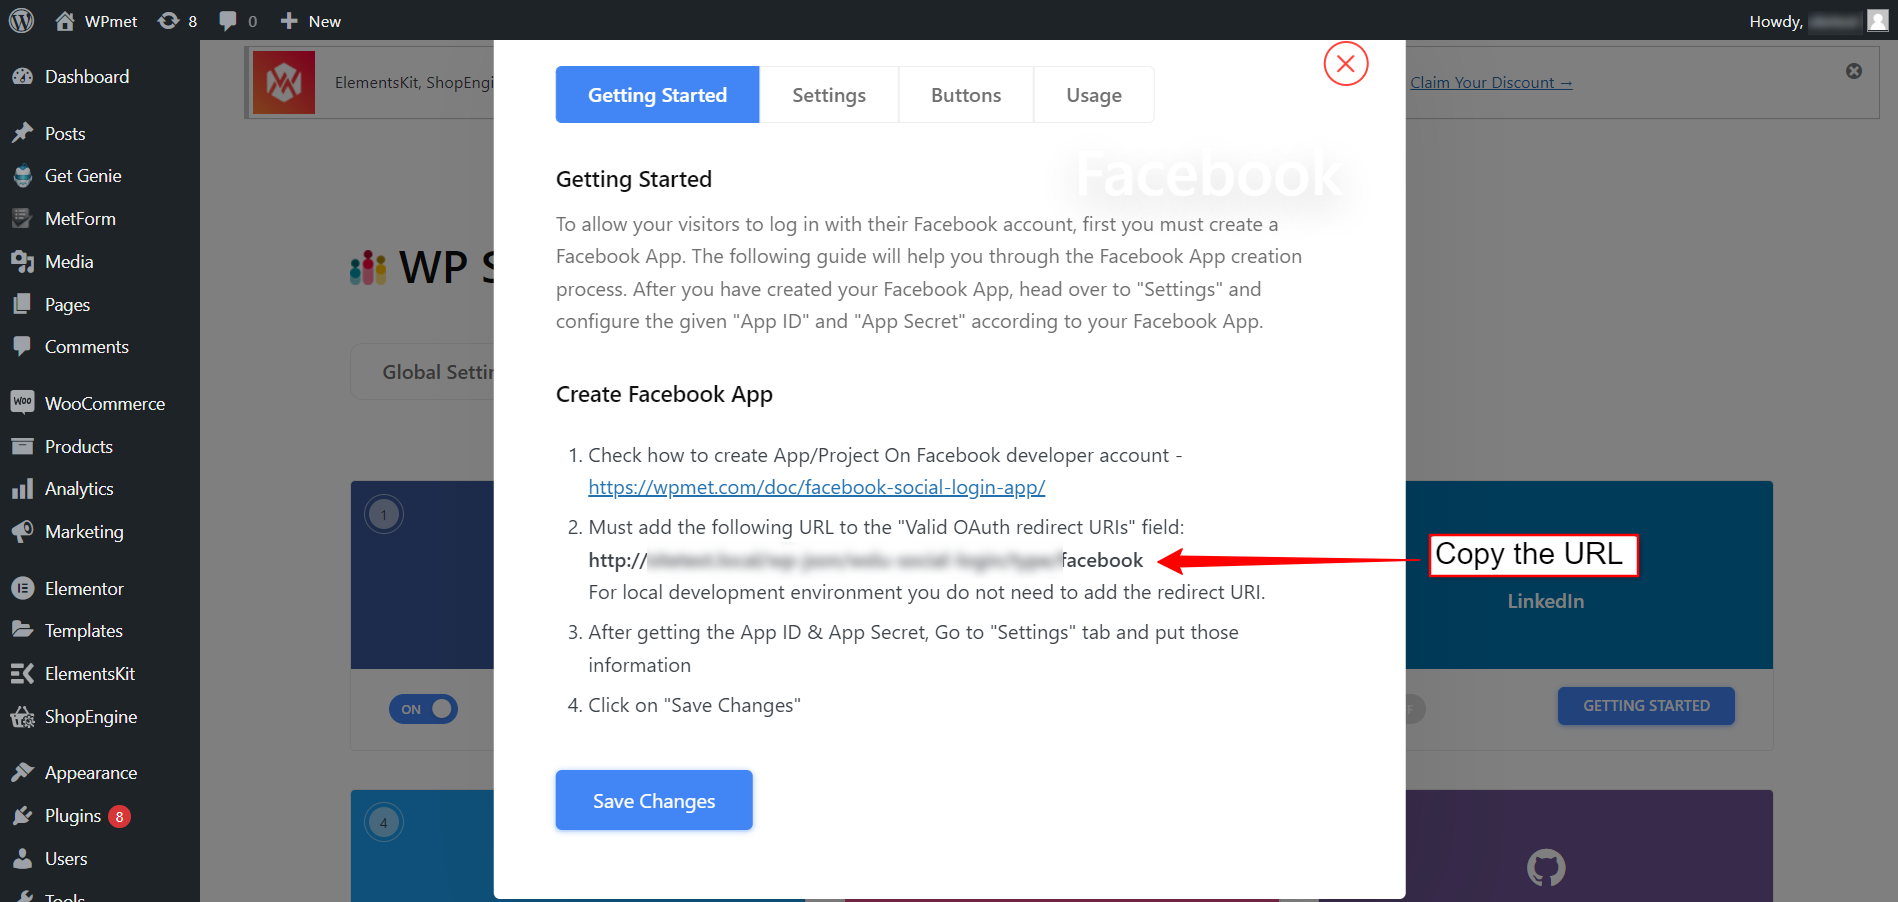
- You will find the redirect URIs from Wp Social Plugin.
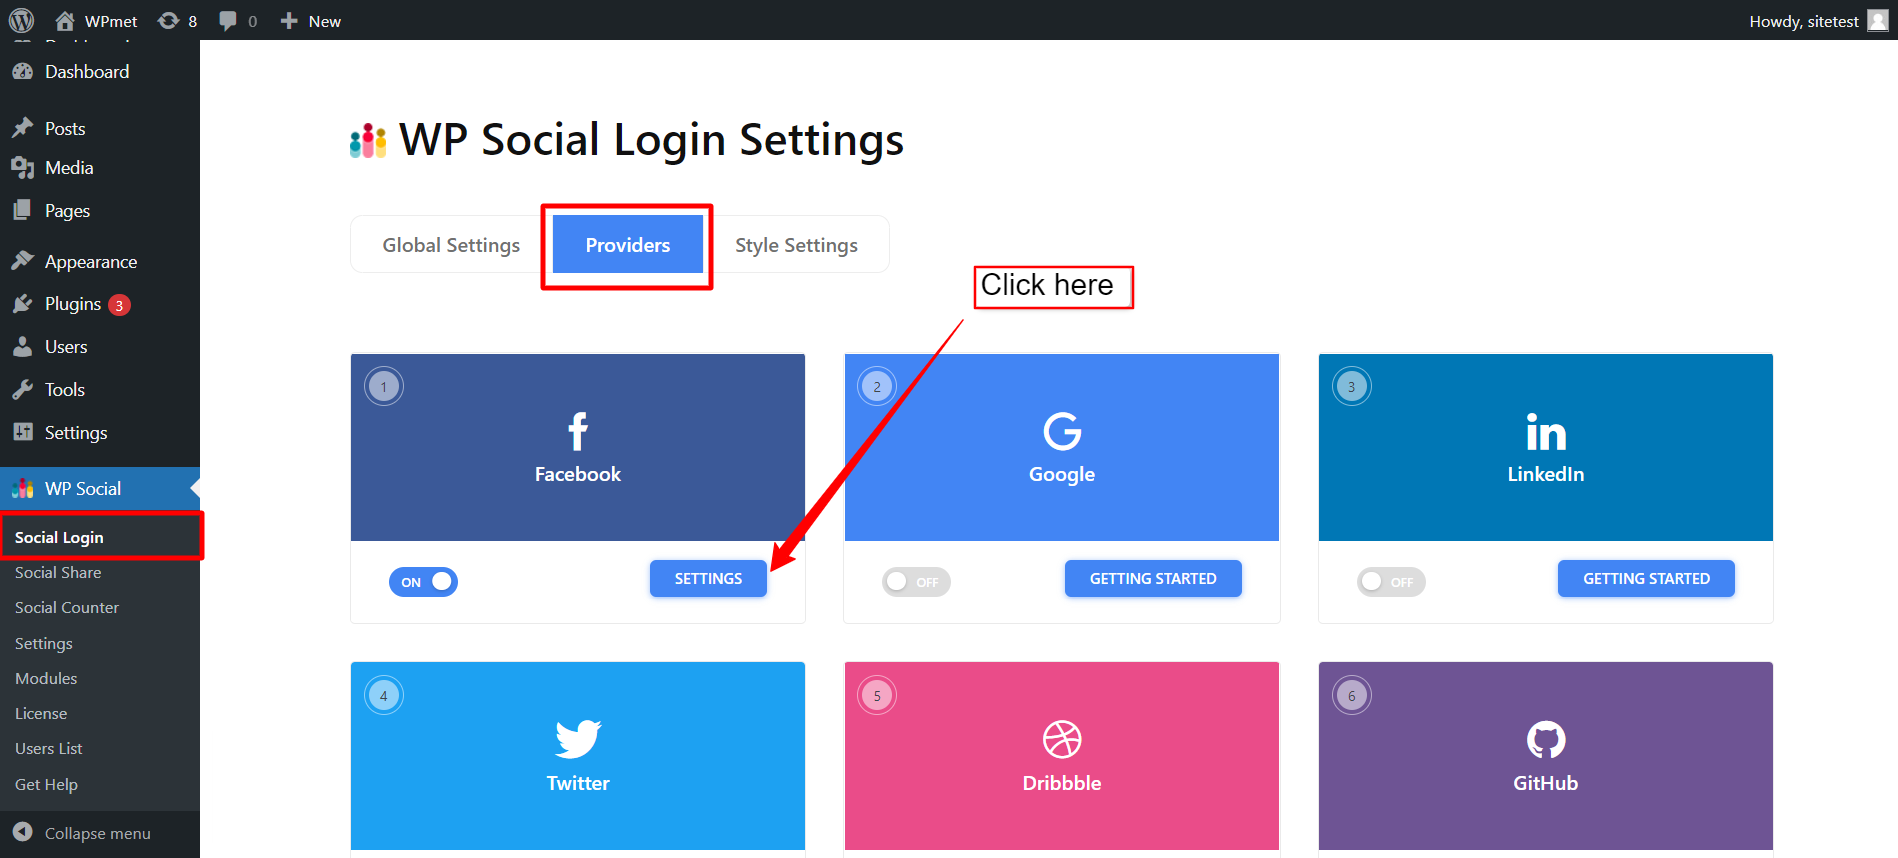
- Go to Social Login Settings of WP Social. Find the Provider list and switch the toggle button to Yes below Facebook.
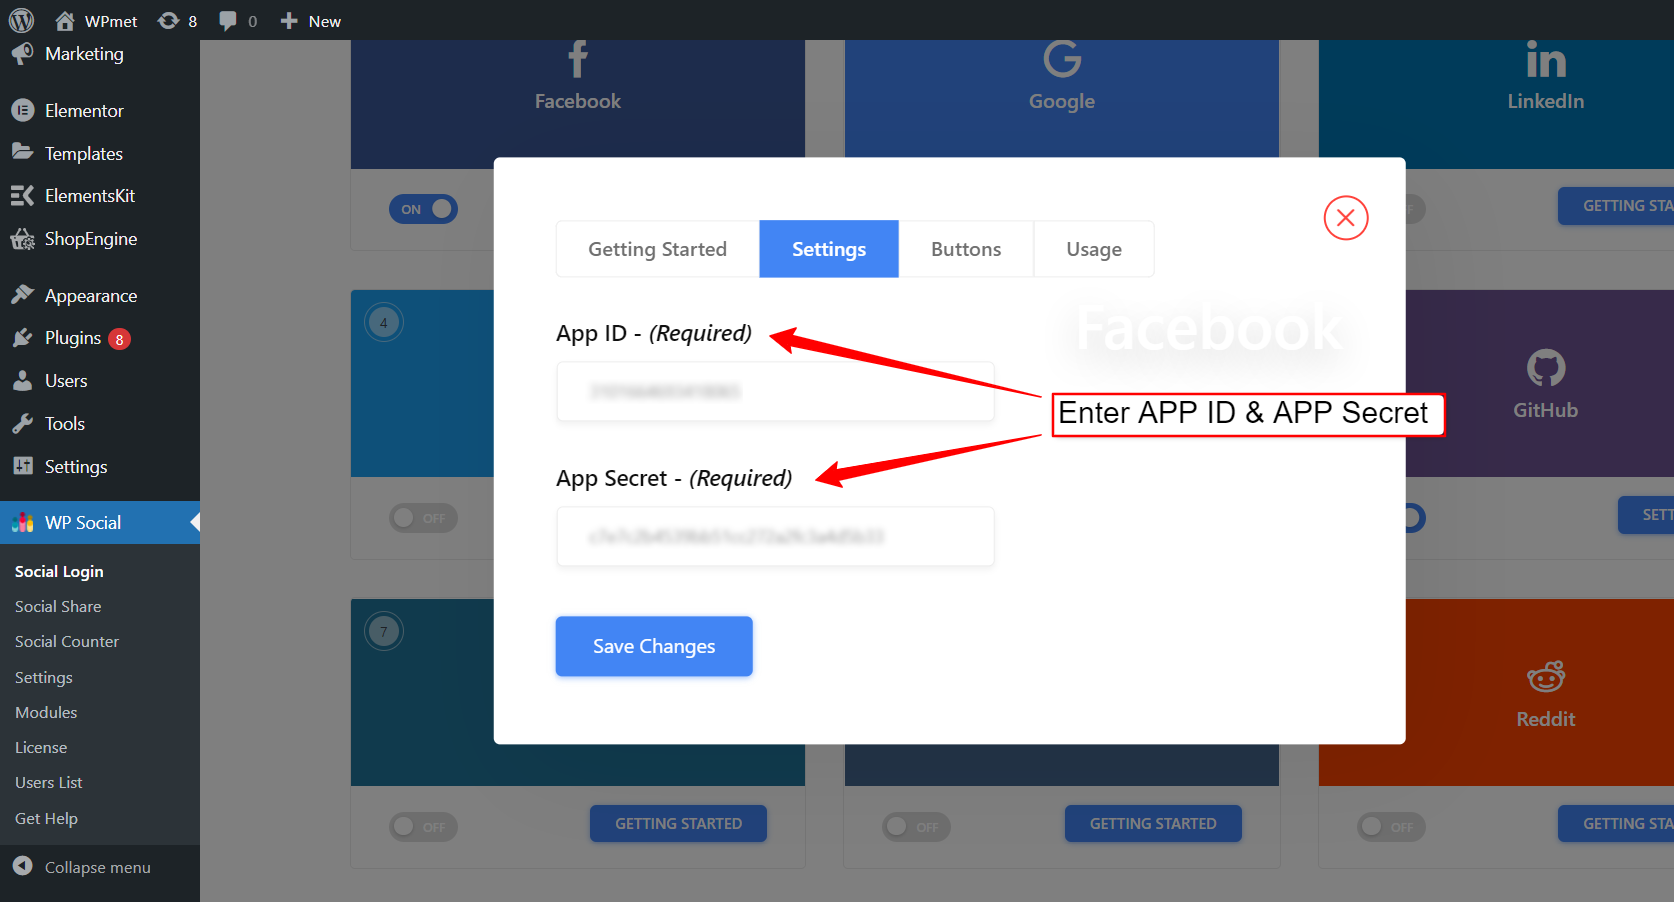
- And now, click on the Settings button of Facebook login. Here, you’ll find the redirect URI. Copy that and paste that into the Valid OAuth Redirect URIs field.
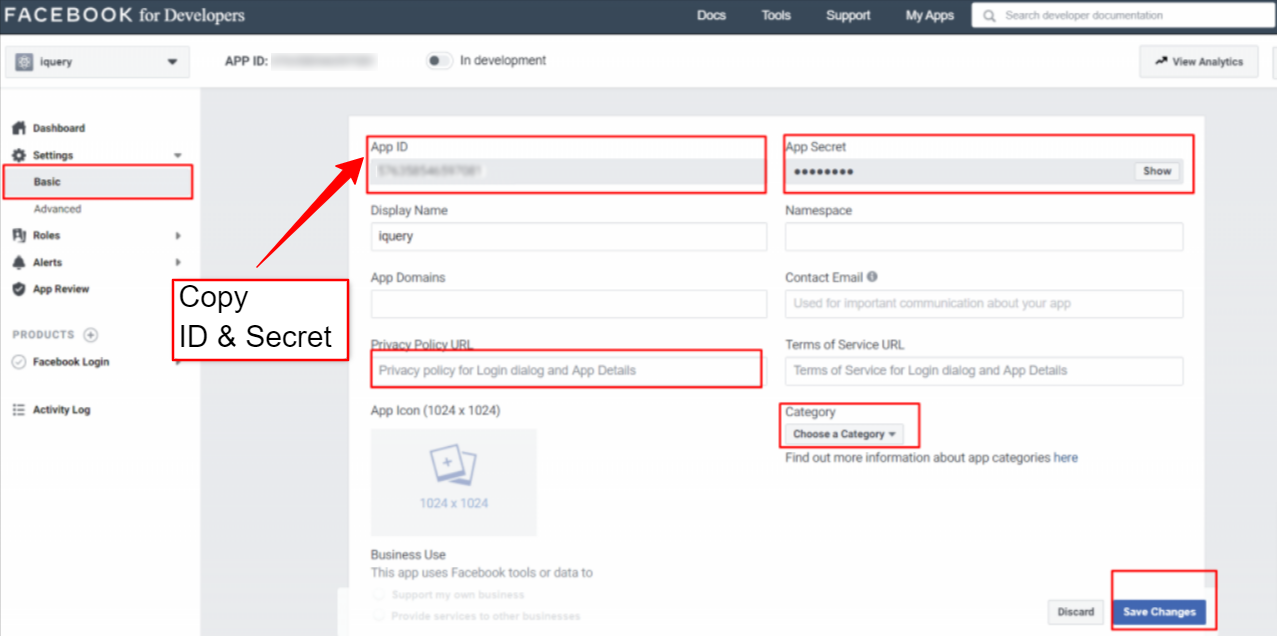
- From Settings Dropdown select Basic Submenu. Here you can find the App ID and App Secret. Then click on the “Show” button in the “App Secret” text box. You can copy the “App Id” and “App Secret” that you can use for Facebook API calls. But when you first create a Facebook app, it remains private and available only to you for testing purposes. Here users can only use this after you make the app live. For the live app, you must enter a Privacy Policy URL. Here you also need to fill in other information.
- App Domains,
- Contact Email
- Privacy Policy URL
- Terms of Policy URL
- Category, etc.
When you’re done click the Save Changes button.
Setup WordPress Facebook login on WP Social #
After the successful Facebook app creation, the next step of WordPress Facebook login integration is to add Facebook login credentials (APP ID and APP Secret key) to your site. For that, first log in to your WordPress site, then,
- Navigate to WP Social > Social Login from your dashboard.
- Switch to the Providers tab.
- Click to Settings under Facebook.
- In the popup, move to the Settings tab.
- Enter the App ID in the required field.
- Enter the App Secret in the required field.
- Then click Save Changes button.
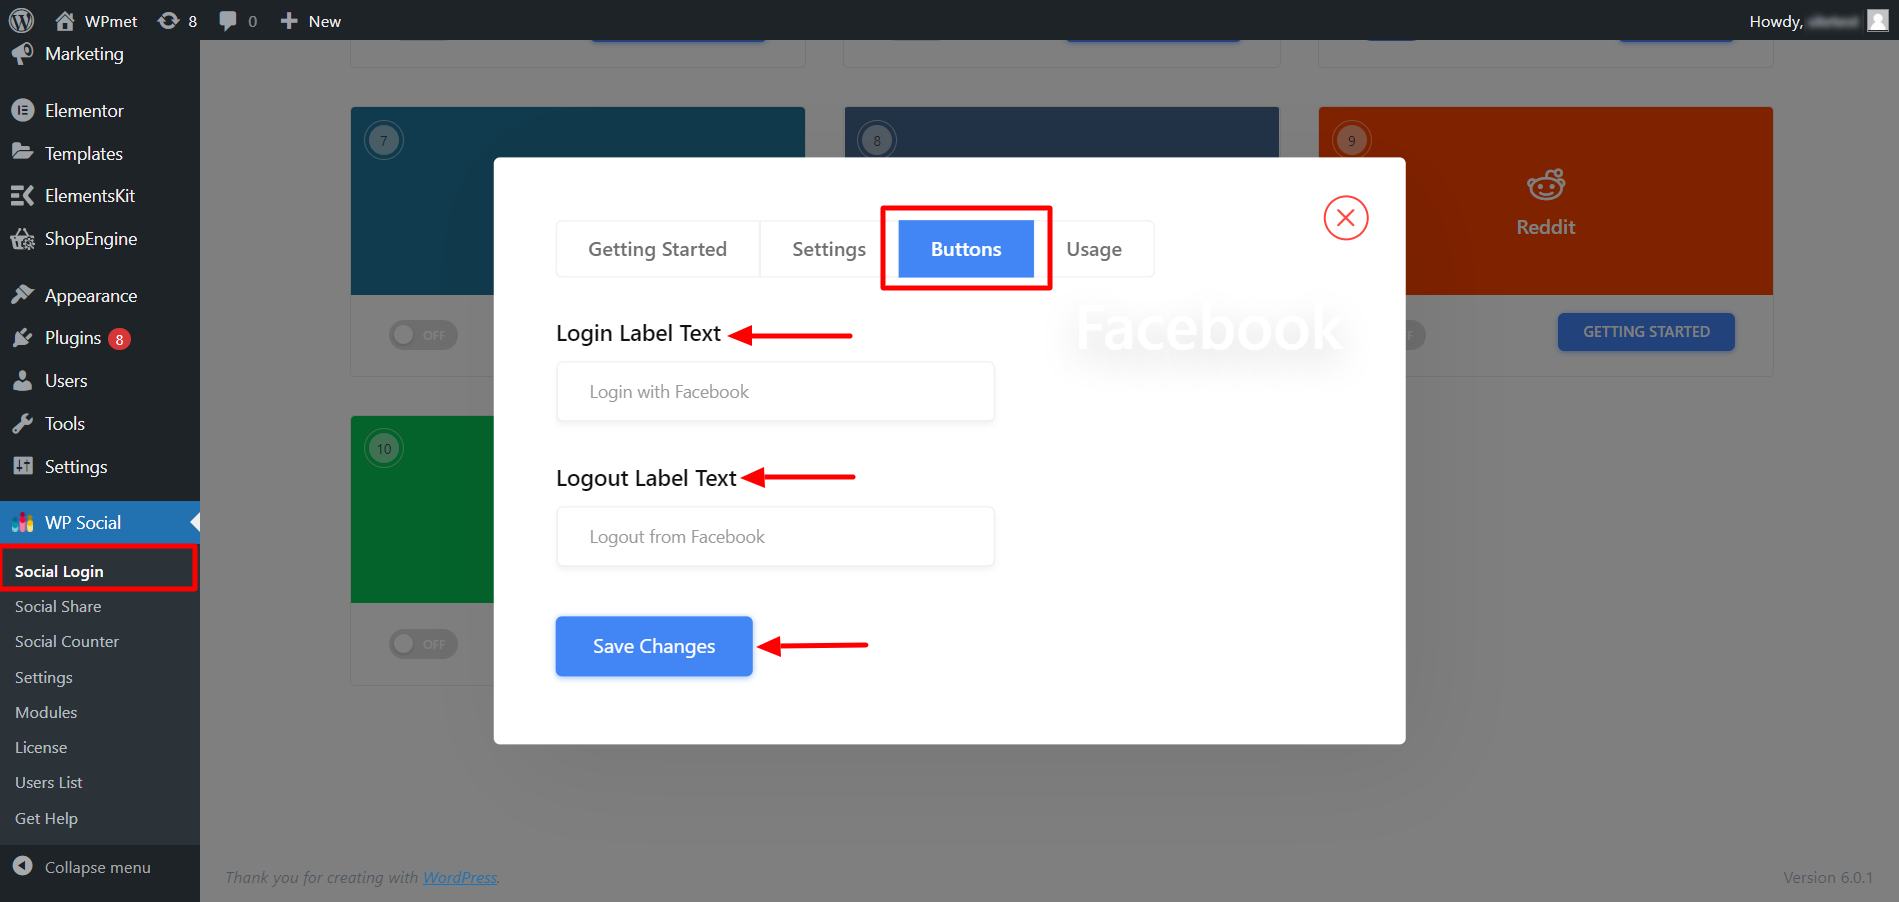
Add Login Button Label #
You can customize the button label for Facebook Login. To add/change the button label,
- Move to the Buttons tab.
- Enter Login Label Text.
- Enter Logout Label Text.
- Then Save Changes.
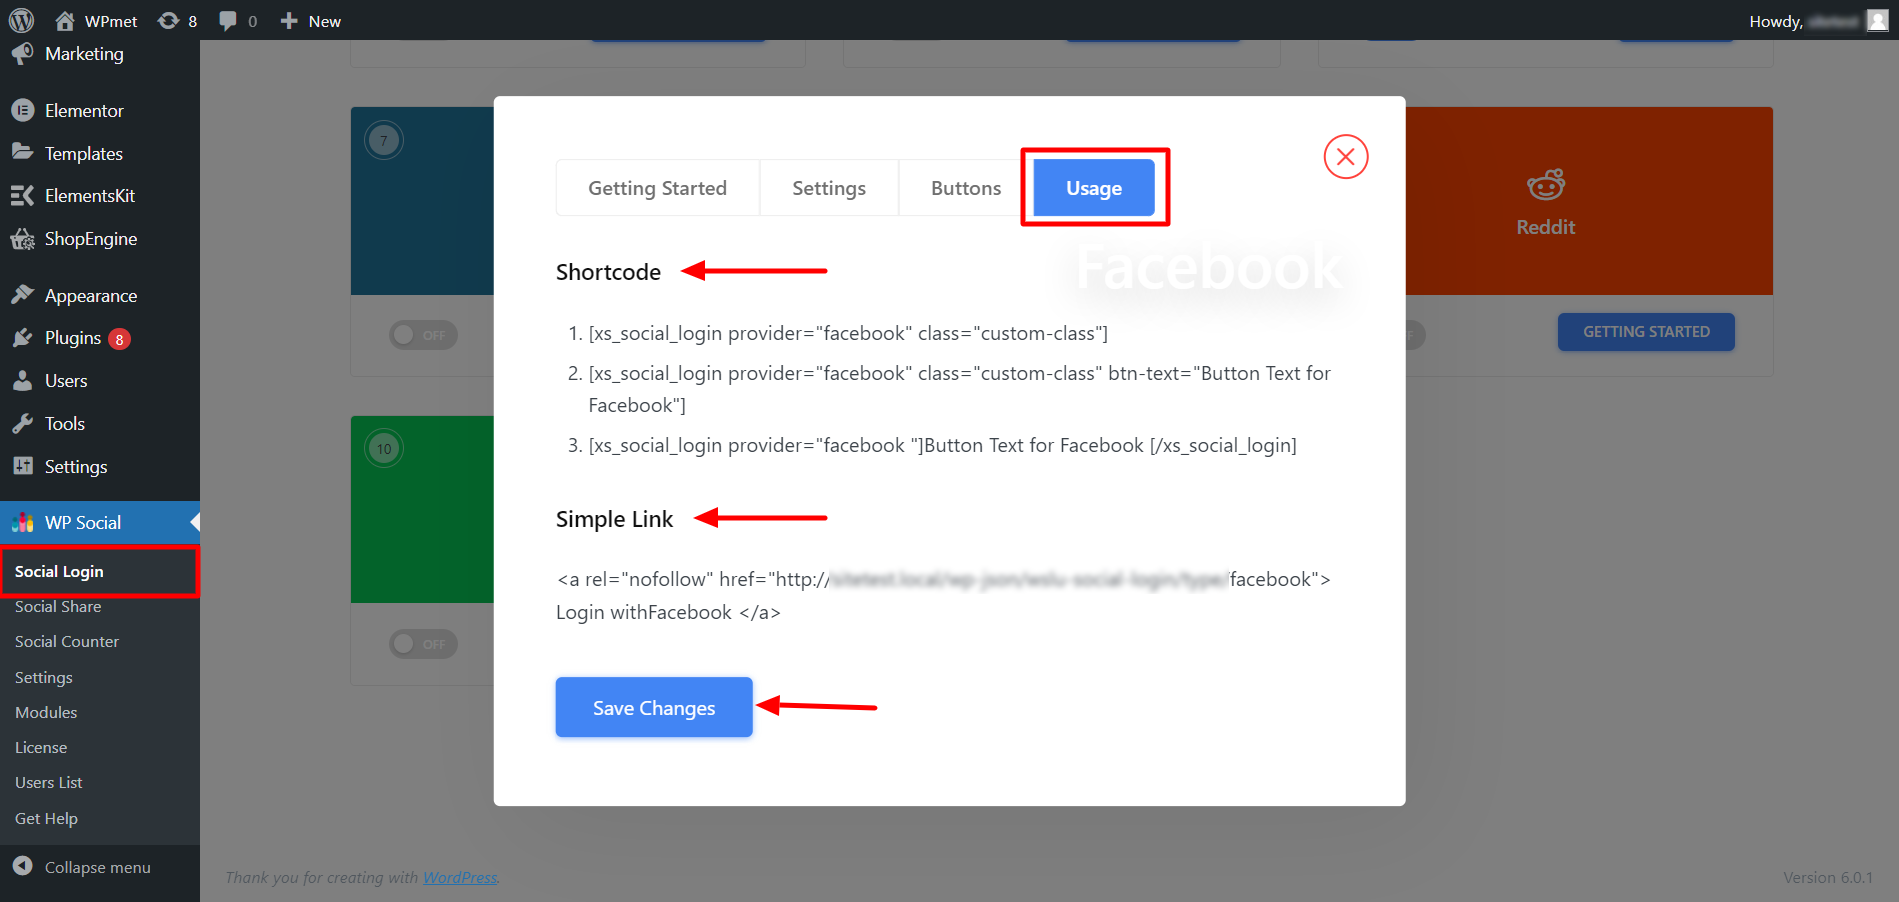
Find Shortcodes and Simple Link #
You can use Shortcodes to add WordPress Facebook Login on any page. You can find the shortcodes in the Usage tab. Read the documentation of WP Social Shortcodes Usage to learn how to use those shortcodes.
You also find a Simple Link for the Facebook Login button.
Congratulations! You’ve successfully integrated Facebook Login into your WordPress Website. However, if you have any issues that require our attention, feel free to contact our support center.