Auto-populate field is a premium feature of MetForm that will let you make default settings for your fields on a form. For example, if you want to add a switch to your form, then you can show it in an enabled condition to your visitors or customers. This newly added feature of MetForm allows you to add default values for the fields by changing the URL.
How to use auto populate field #
Adding default values to the fields is super easy with MetForm’s auto populate field feature. All you need to follow the following steps for making use of this advanced feature:
Use the auto populate field to switch #
To add an auto populate field to the switch field of your form, you need to click the switch field. After that, go to the settings and turn on the “Get value from URL” option.
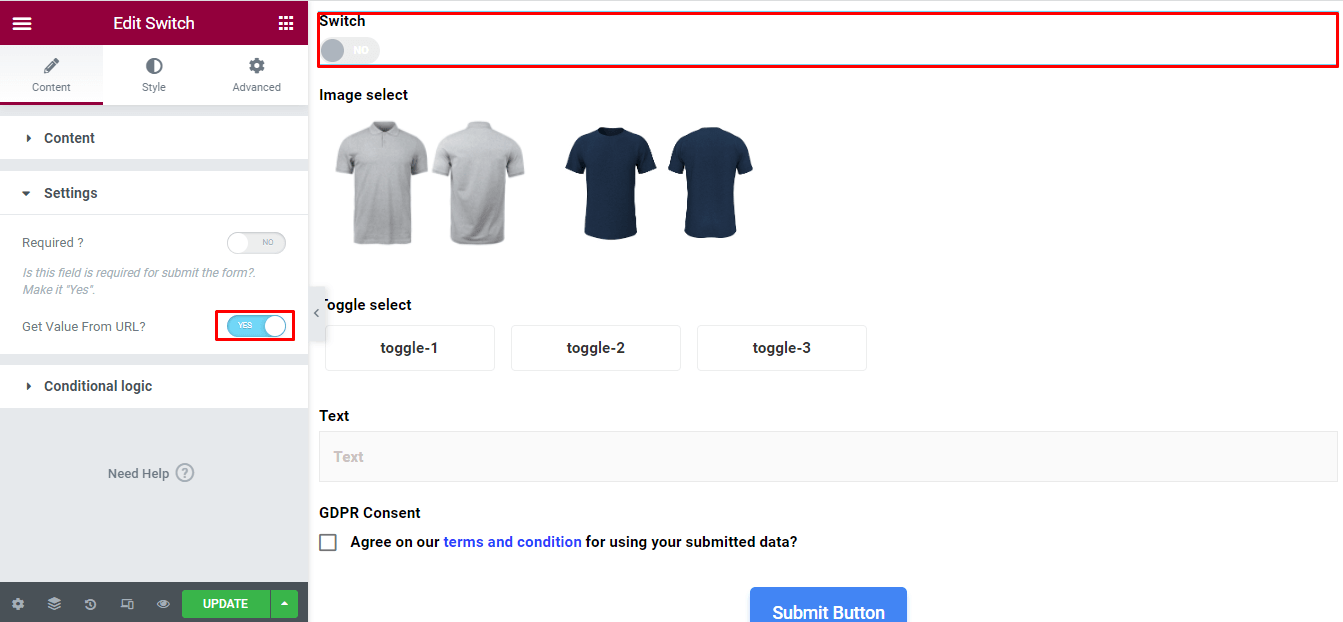
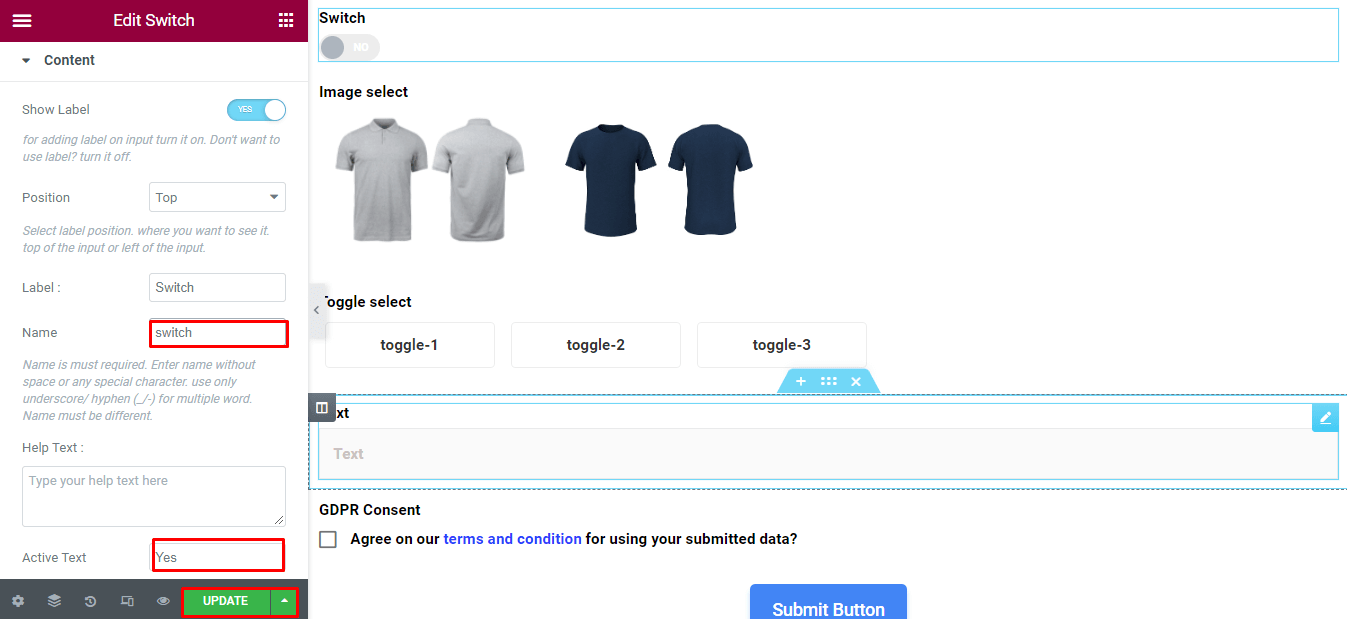
Then enter the name and active text for the switch field. After that, click on the update button.
Now you need to make some edits to your URL that should be done very carefully. Add the “?switch name=active text” section to the end of the URL. Here added section will be “?switch=yes” for the above switch field.
If you have entered a different name and active text, then you need to adjust accordingly. After adding that section to the end of the URL, press the enter button.
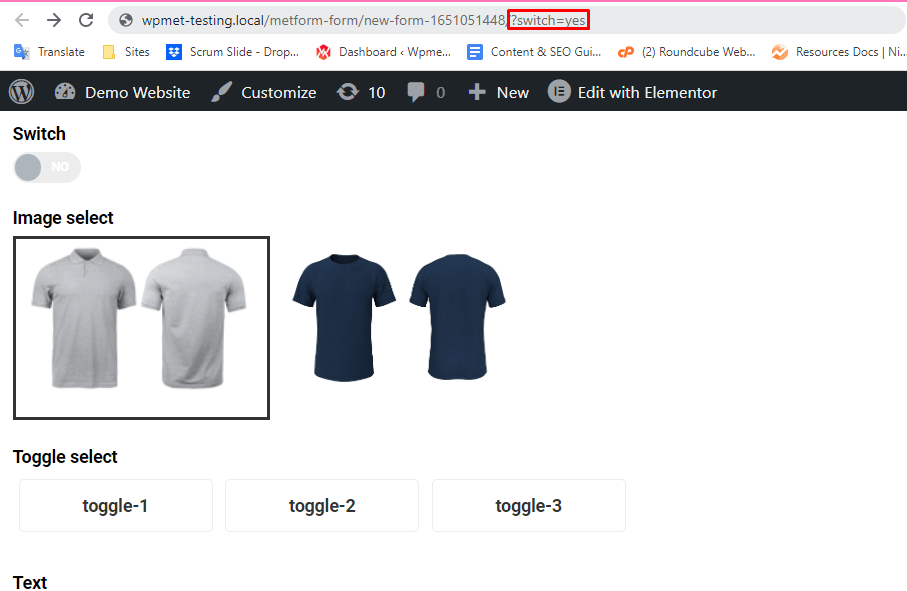
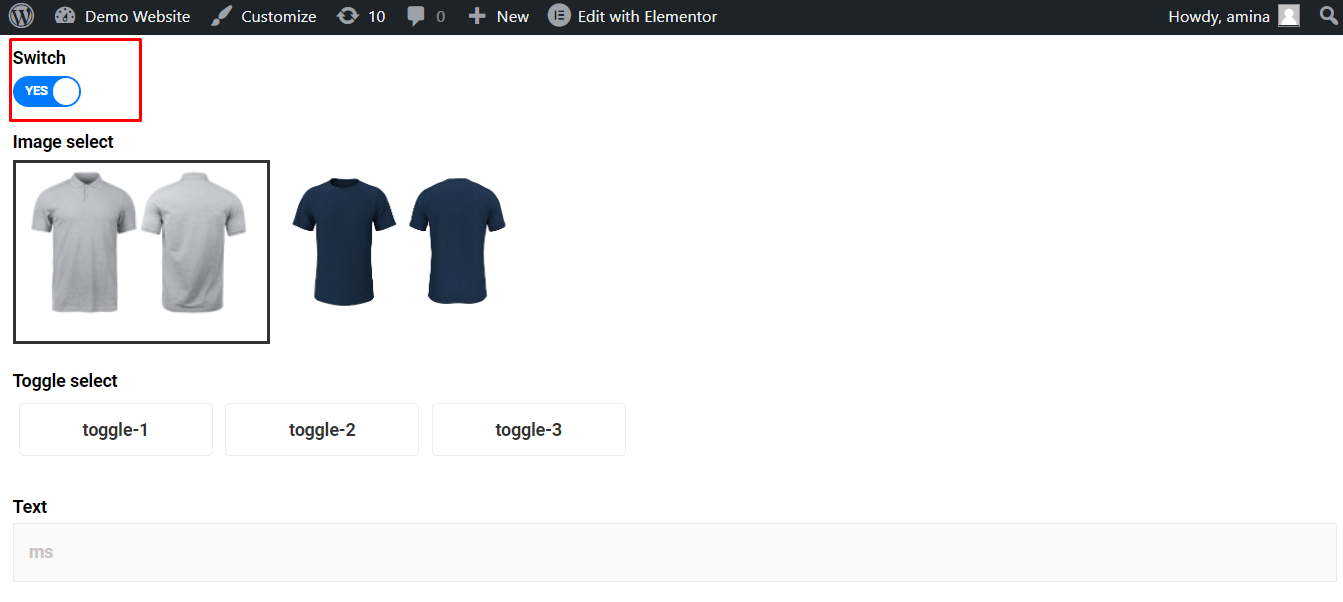
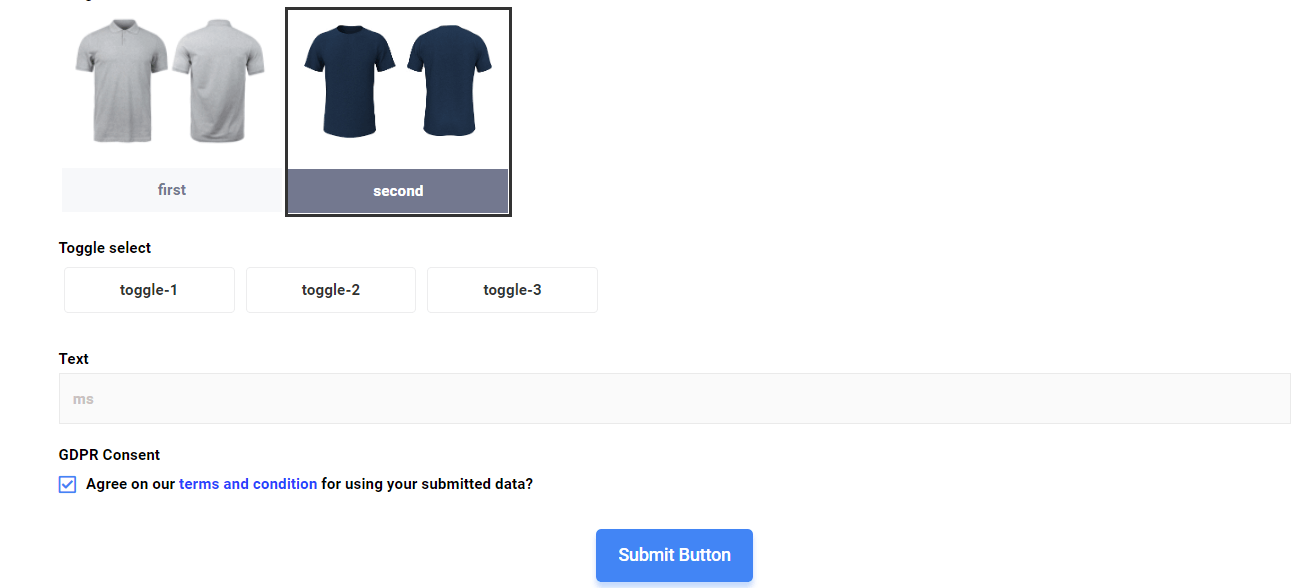
The person who will fill the form will find the switch field in an enabled condition like below:
Important note:
If you want to add auto populate feature to more than one field then you need to use “&” in the URL. For example, if you want to add auto populate feature to switch and image select, then your added section at the end of the URL will be like this “switch=yes&image=2”.
Don’t worry. It will be more clear in the next section if you don’t get it.
Auto populate field to image select #
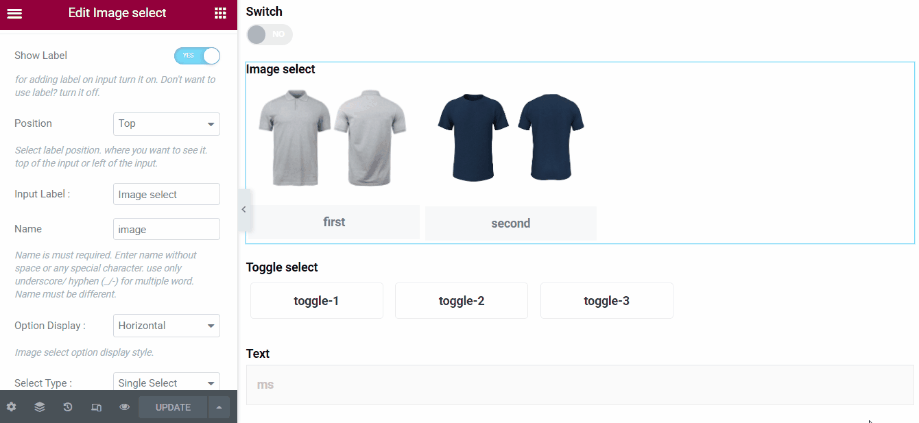
Like the switch filed, you need to click on the image select field and turn on the “Get value from URL“.

After that, you need to enter the name and option value for each image. Then press the update button.
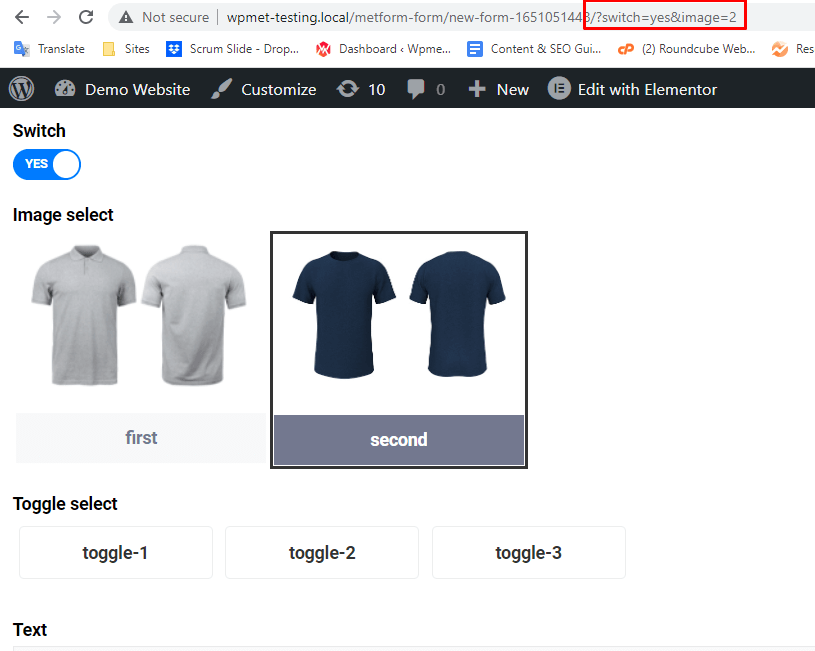
Same as the switch field, you have to add the “&image field name=option value” at the end of the URL. One difference you might notice is that this time you need to add “&” at the starting of the added section. The reason is if you want to add more than one default value with the auto populate feature, then you need to add “&” at the starting of the section.
After adding this section “&image=2“, only for the above case. It will vary according to the inserted name and option value. Finally, press the enter button.
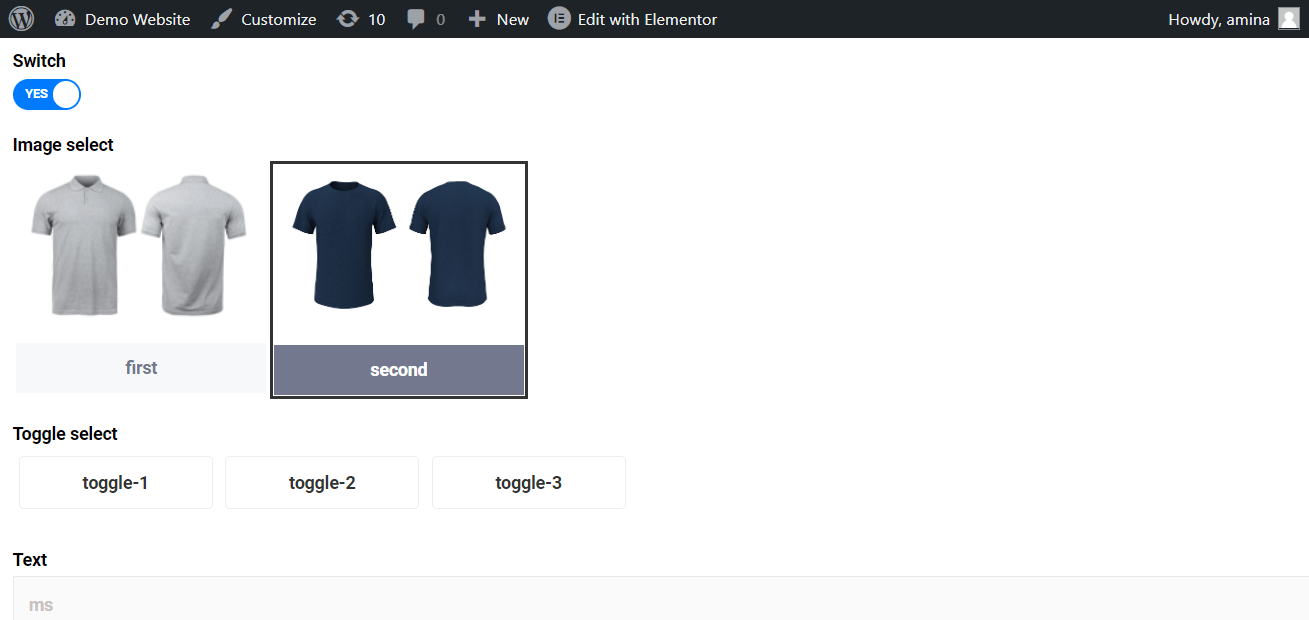
Your settings will show like the below image:
Use auto populate feature to GDRP consent #
You can add an auto populate field feature to GDRP consent and option in listing fields. The process is the same as before. But this time you need to only add a name and enable the “Get value from URL” option for this field. You don’t need to add option values for these fields.
Here your added section at the end of the URL will be like this “&name=on”. For the below case, it will be “agree=on” for right-clicking it.

Here is how it will look after entering the URL:
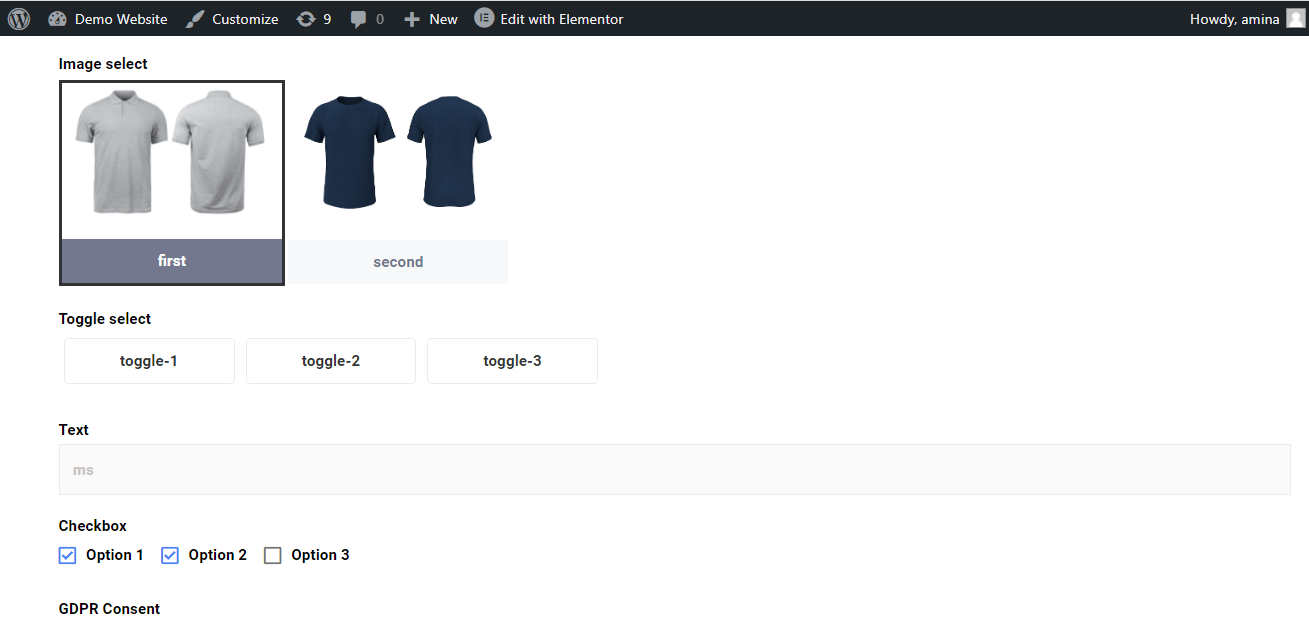
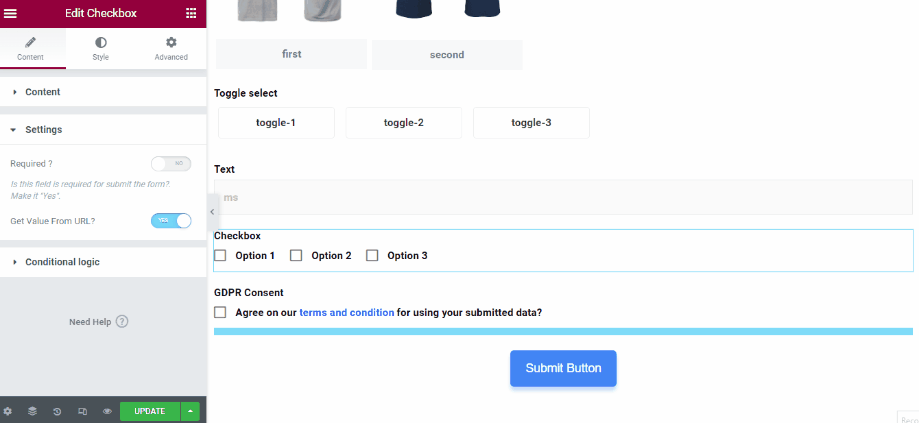
Add auto populate field to a checkbox #
MetForm also allows you to use the auto populate field for the checkbox. For example, you can make multiple options of a checkbox by default. To do that, you need to click the checkbox and enable the “get value from URL” option.
After that, visit the content tab and add a name for the checkbox. Then add the option value for each checkbox option. Finally, press the update button.
Now to activate the options one and two of the checkbox by default, add this additional section (checkbox=value-1,value-2) at the end of your URL.
Note:
To add multiple default values to a field, you have to use “,” between two default values. For example, to add default values to a checkbox field you need to use “,” and your added section at the end of the URL will be like this “checkbox=value-1,value-2”.
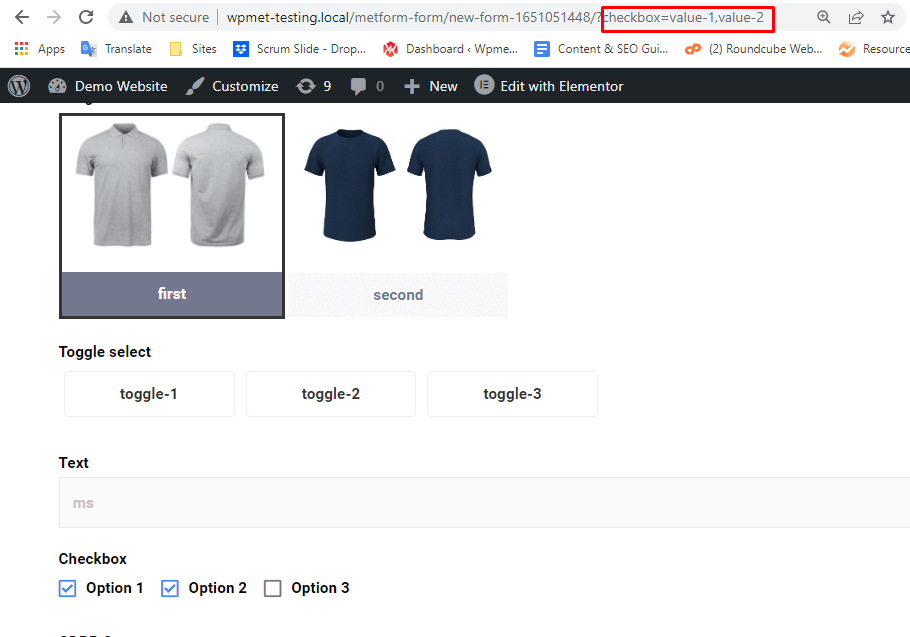
Finally, press the enter button, and your added checkbox will look like this by default.