ShopEngine is a comprehensive Woocommerce solution for Elementor. No matter whether it’s a single product page, shop page, checkout page, or any other page, ShopEngine lets you do bottomless customization opportunities for all of them.
The plugin consists of 10+ useful modules and 50+ robust widgets to make your Woocommerce shop building easier than ever. If you are looking for an all-in-one plugin with smooth extended functionalities, ShopEngine is a perfect choice for you.
Quick View Module: #
It’s the nature of shoppers to view products including all the details altogether without any distraction. With the Quick View module of ShopEngine, you can easily execute that. ShopEngine’s Quick View module will let you show your products to your clients altogether in a pop-up window with necessary details like product image, name, description, Add to Cart button, etc.
How to Activate and Deploy the Module? #
Step-1: Select Modules from the Dashboard: #
First, go to the dashboard of your admin panel and find ShopEngine in the sidebar. Click ShopEngine and select Modules from the list of items.
Dashboard => ShopEngine => Modules

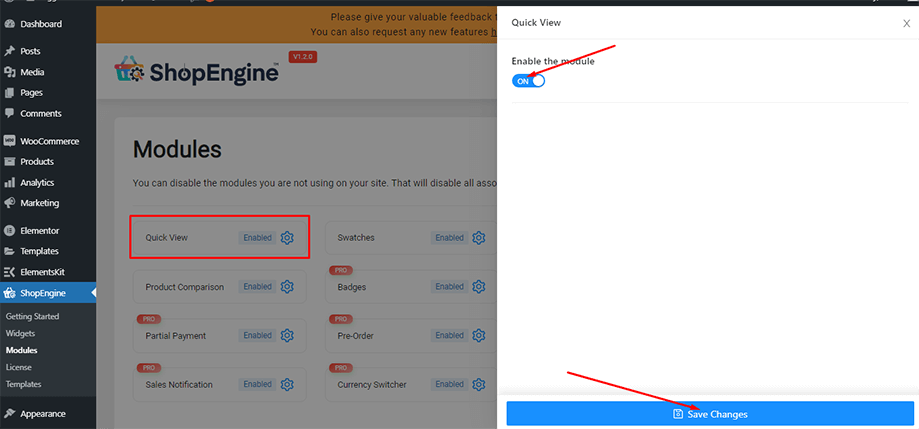
Step-2: Enable the Quick View Module: #
Now, find the Quick View module from the collection of all the available modules of ShopEngine and click the setting icon visible on the module button. After that, enable the Quick View module from the popup window and press the “Save Changes” button.
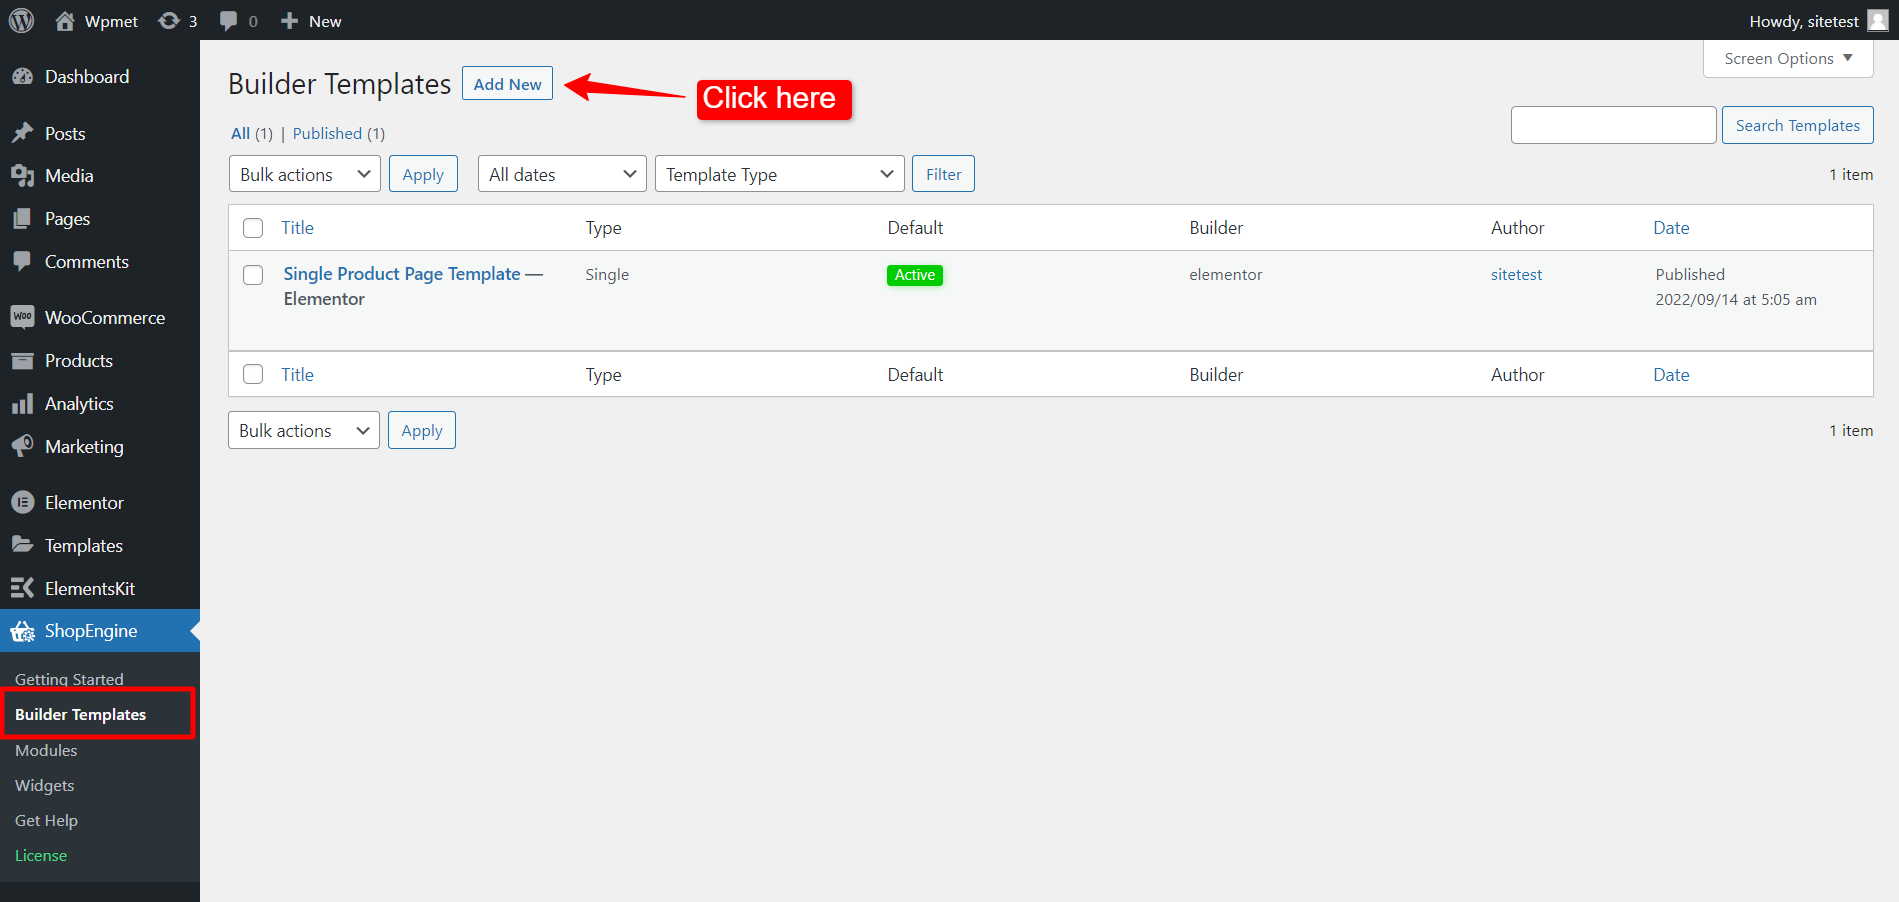
Step-3: Create a Quick View Template: #
Now, go to the dashboard of your admin panel and find ShopEngine from the list of items. After that,
- Navigate to ShopEngine > Builder Templates.
- Click the “Add New” button on the top of the page.
Immediately after that, an off-canvas window will show up for template settings. In the Template Settings,
- Enter a Name for the template.
- Choose the page Type as “Quick View”.
- Enable Set Default to set the template as Default.
- Select a design from the available template or create your own design. We will show the template created from the scratch.
- Choose which editor you want to use for editing the template from the given options: Elementor and Gutenberg.
- Now Click on Save Changes.
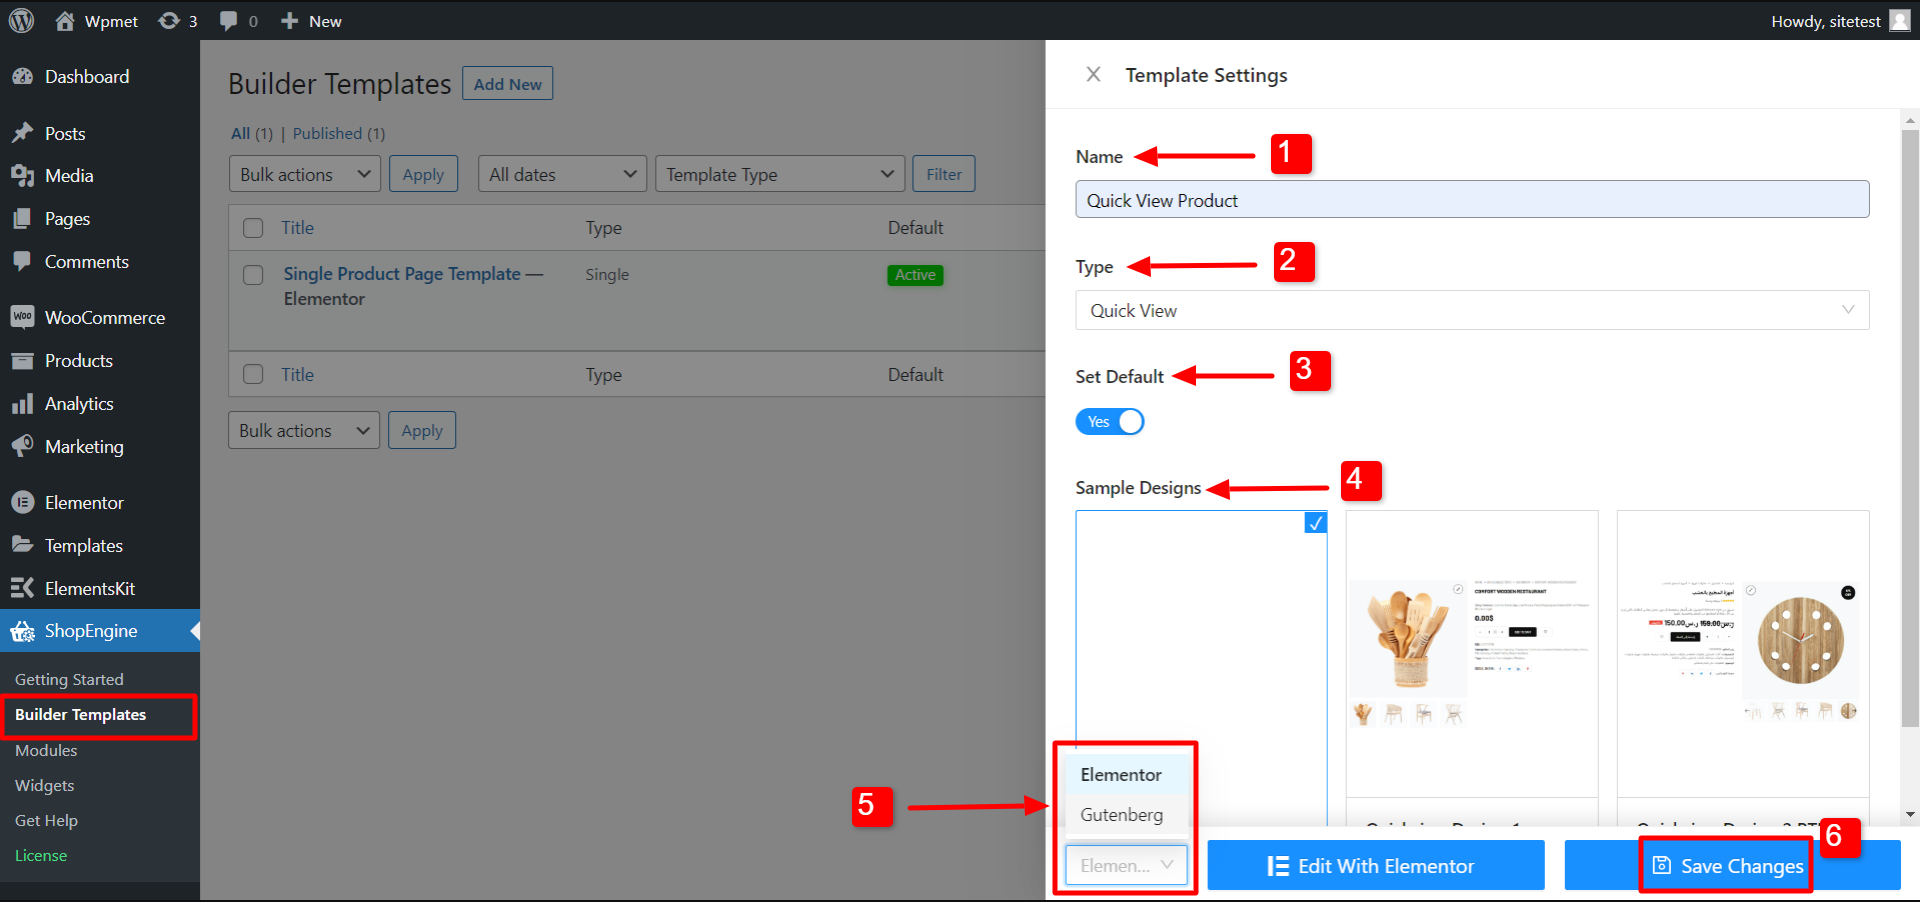
Your template is created and you can see it on top of the list. To edit the template, you will see the edit option with the editor you choose. For say, if you choose Elementor, you will see an option to Edit with Elementor. If you choose Gutenberg, you will see an option to Edit with Gutenberg. Here we have chosen Elementor editor.

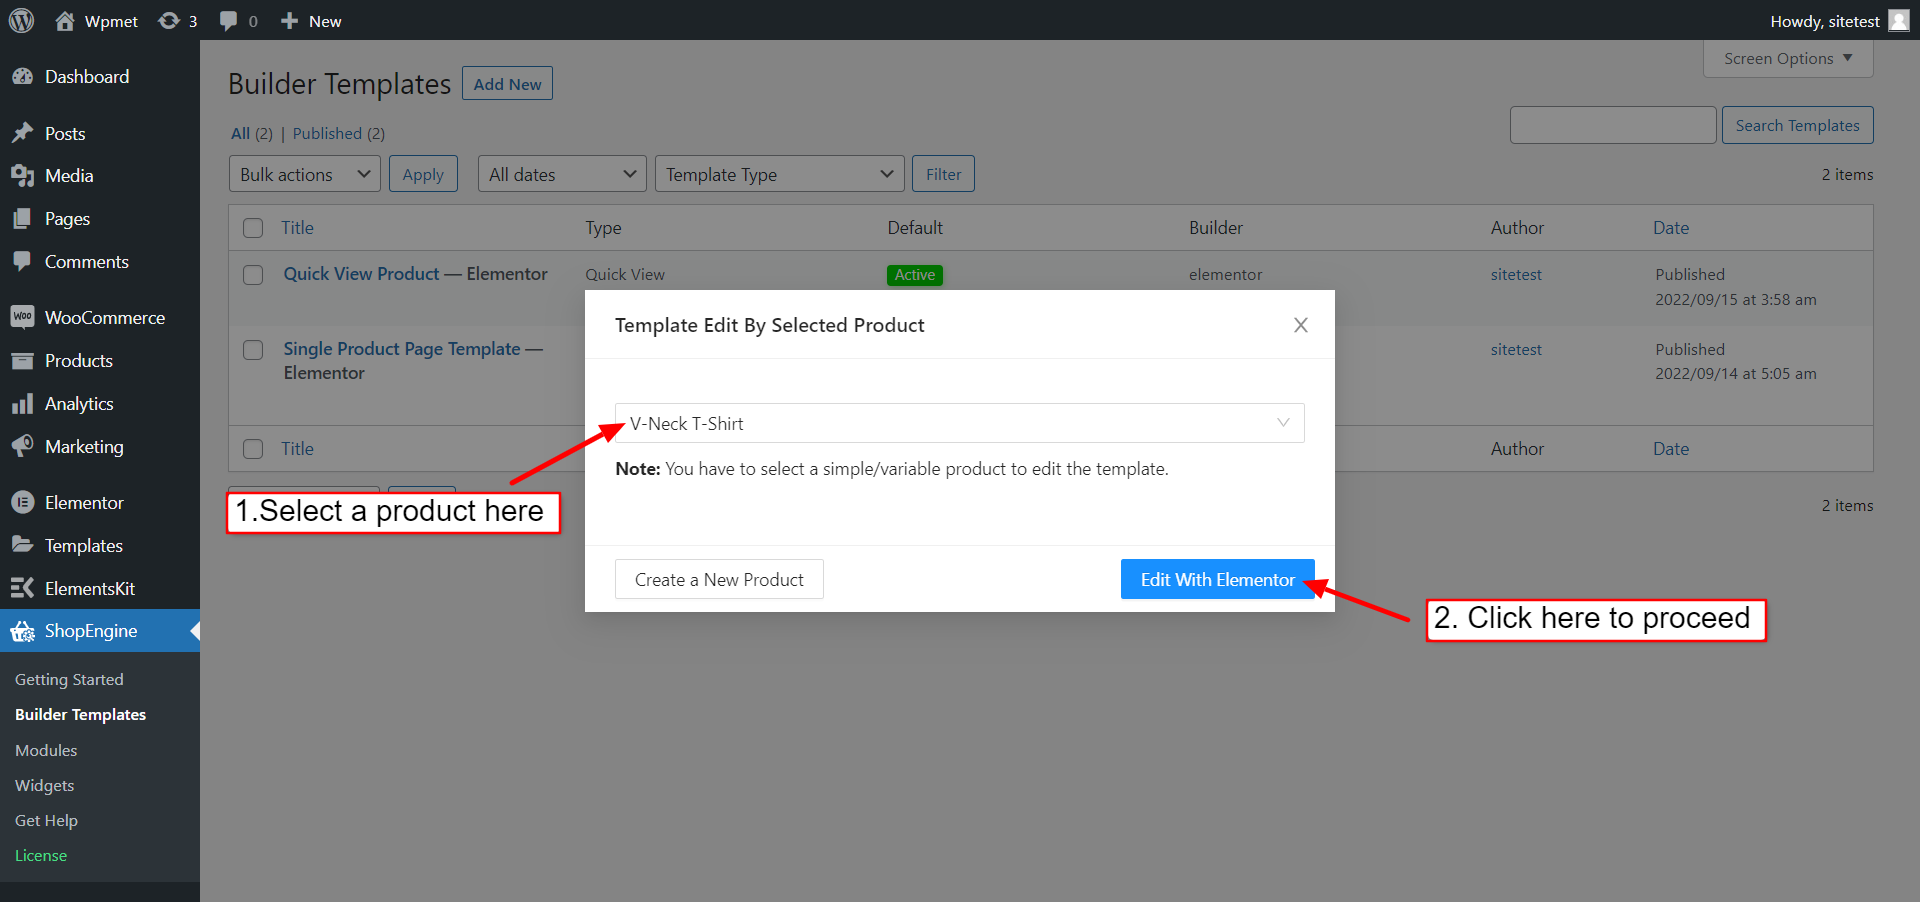
Step-4: Edit Template By Selected Product #
This is ShopEngine’s special feature for WooCommerce. Now you can choose a specific product to customize the Quick View page template. When you click on “Edit with Elementor” (or Edit with Gutenberg), a popup will appear where you can Template Edit By Selected Product. On the popup,
- Select a Product from the drop-down list.
- Click on Edit With Elementor to start editing the template.
- Also, you can Create a New Product to edit the template.
Step-5: Choose a Structure and Add a Section: #
Now, depending on your needs, add a section with your necessary structure on the window.
Step-6: Drag and Drop the Necessary Widgets: #
In this step, you will notice a sidebar on the left with a list of ShopEngine widgets.
Find the product images widget from the ShopEngine Single Product page section and then drag and drop it to the designated area.

Now, find the product title widget from the same section and then drag and drop it to the designated area.
Similarly, drag and drop the product description widget on the specified area as well.
Next, look for the product price widget and drag and drop it to the designated area.
After that, search for the add to cart button and then drag and drop it to the same area.
Step-7: Preview Quick View Icon on Website Shop Page: #
Now, go to the shop page of your website and take a look at the quick view icon (Similar to Eye) just under each product. You can have a look at all the details of your preferred product by clicking the icon.
That’s it with the creation of a Quick View page template. It’s pretty simple and straightforward. ShopEngine offers everything that you need to build a Quick View page template for your WooCommerce site.


