Getting Started #
Embed Google map anywhere on your webpage. Most importantly, on the contact page, so your visitors can know where you are located. Display pre-defined locations (latitude and longitude) on an on-screen map. Just follow the step-by-step process to connect the Google Map.
Step=>1: Generate Google Map API Key #
- Go to Google Cloud Platform Console. If you don’t have an account yet, create one, it’s free.
- Click Go to the Credentials page
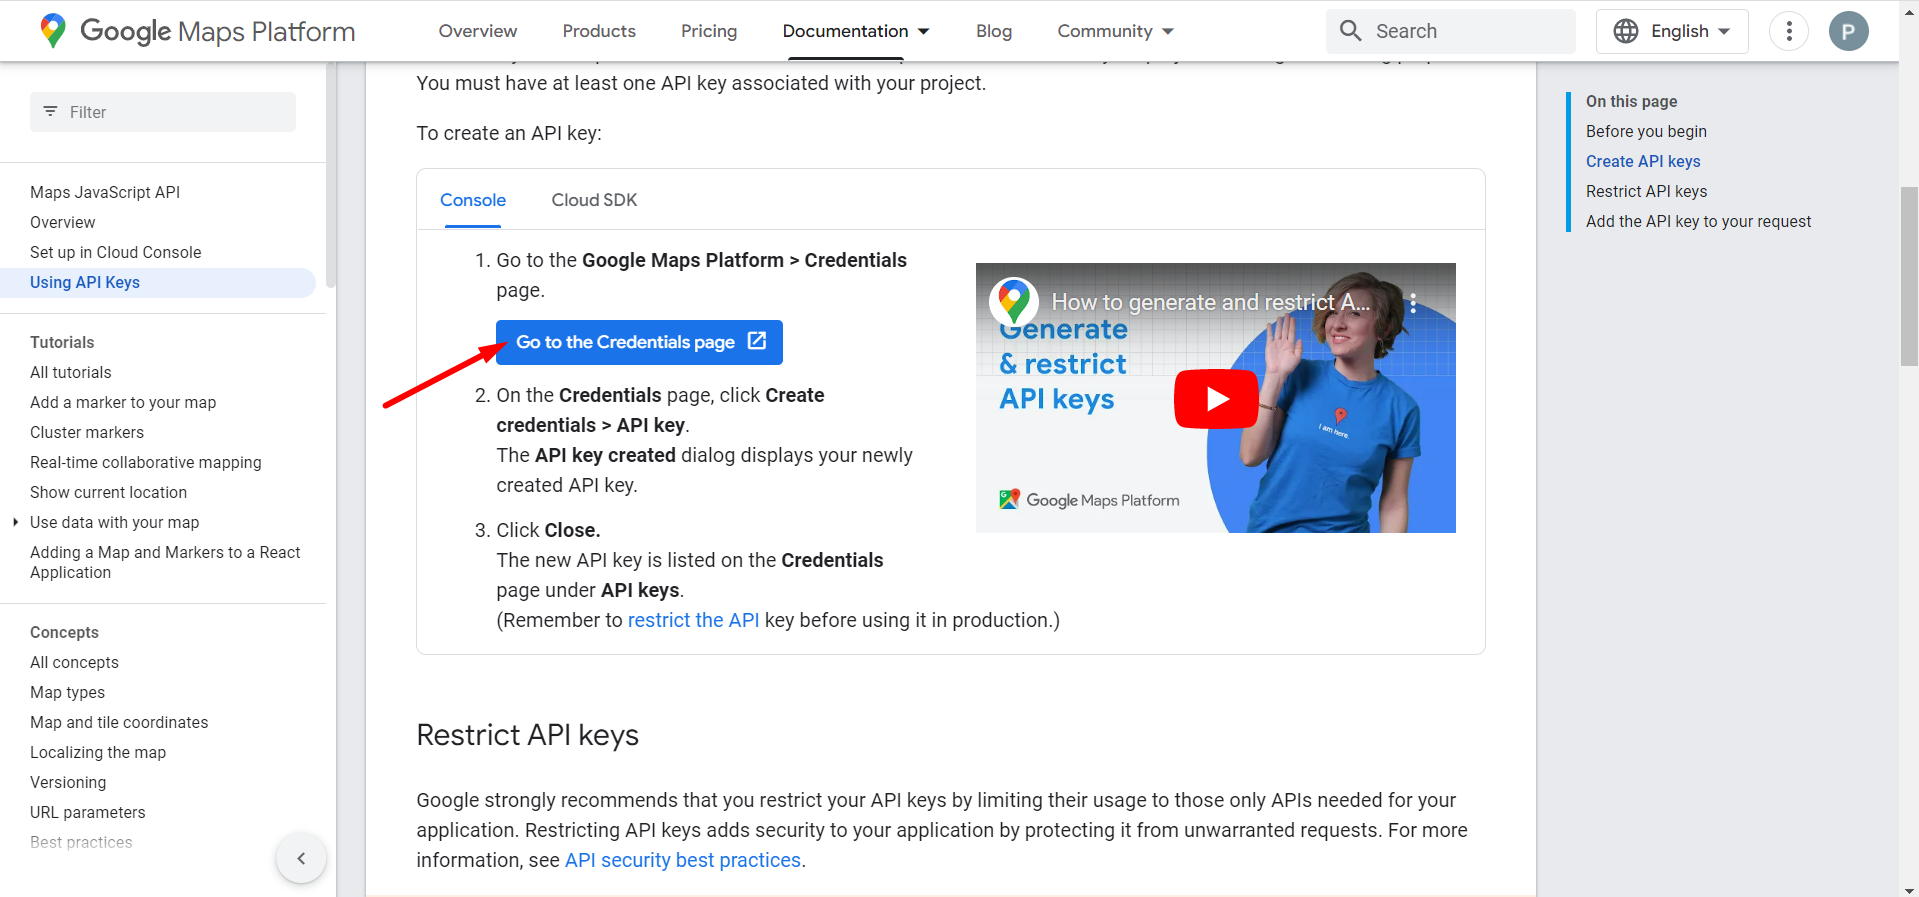
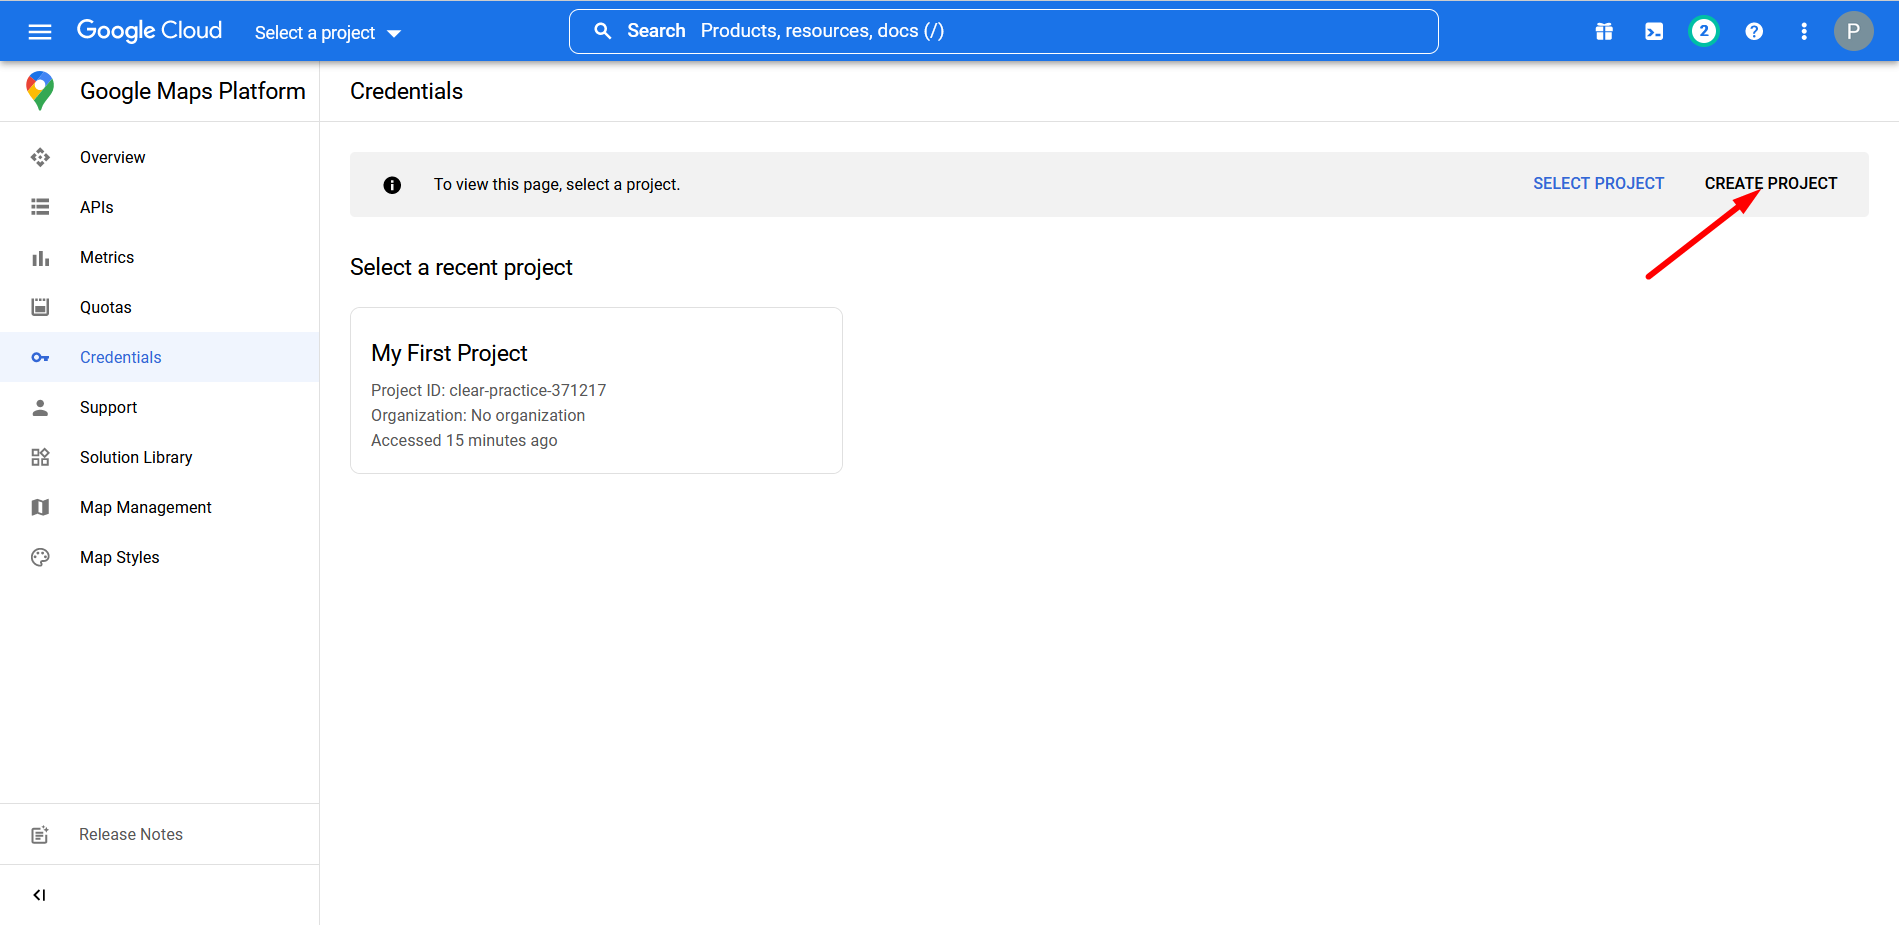
- Select or create a project.
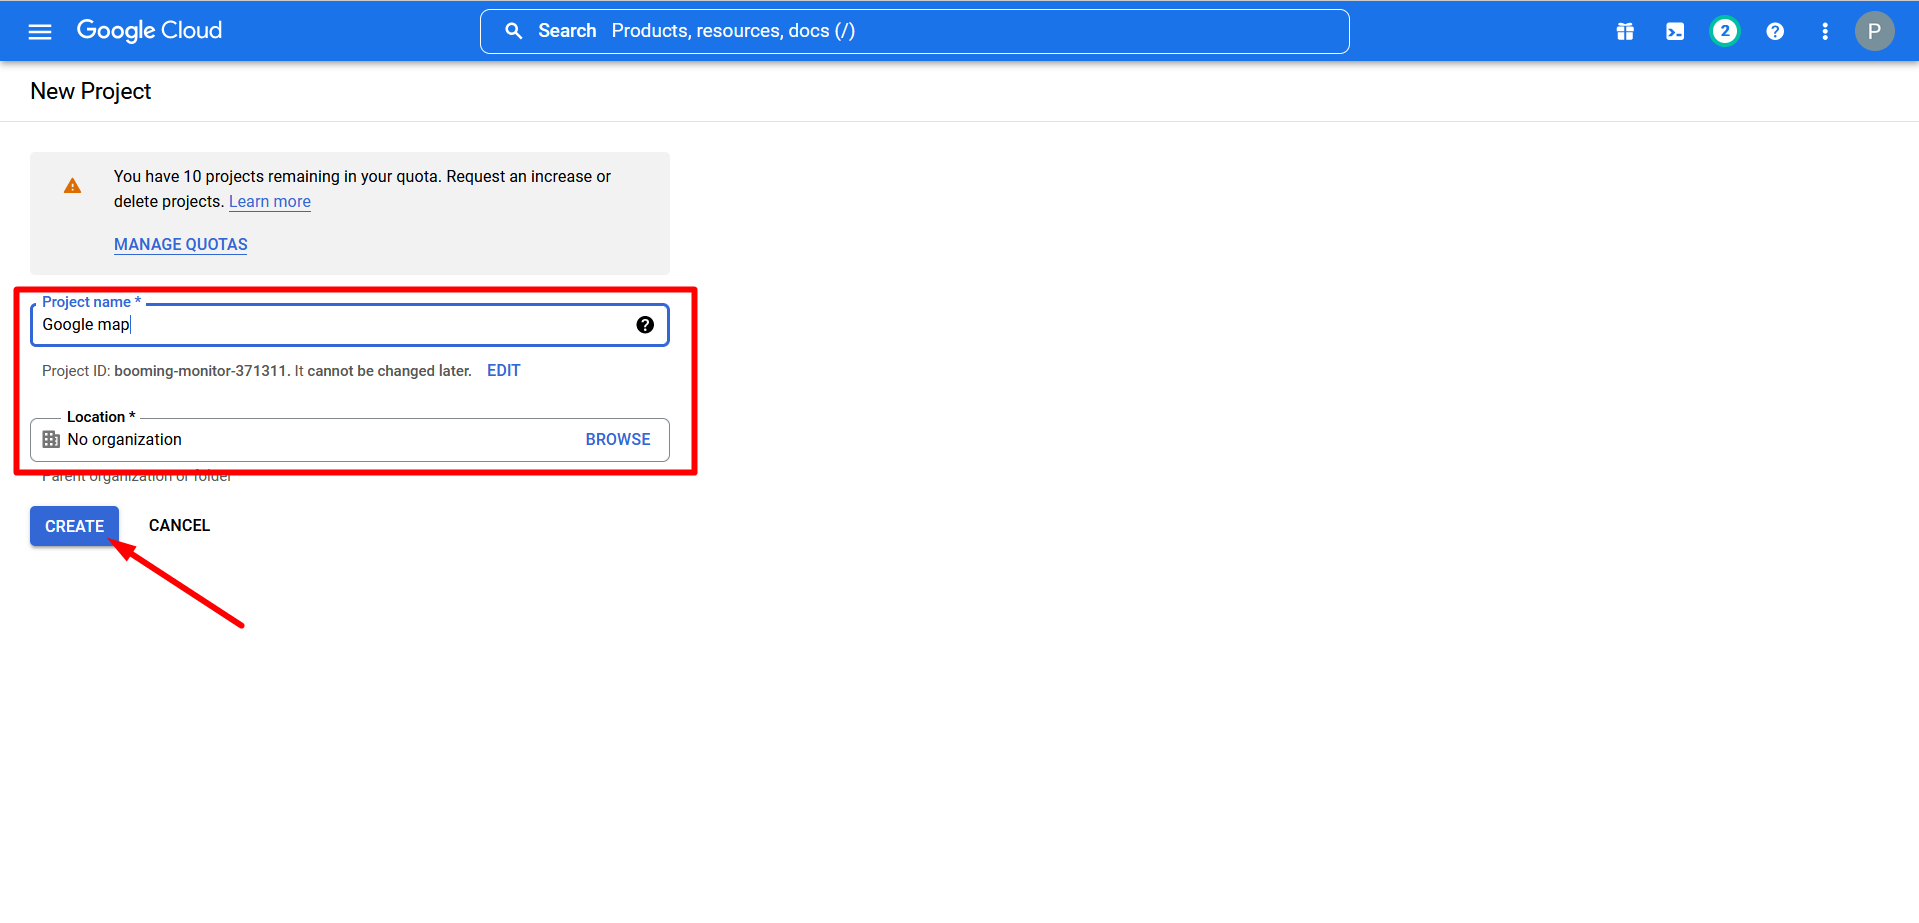
- Put a Project name and Location
- Click CREATE
- Your project has been created
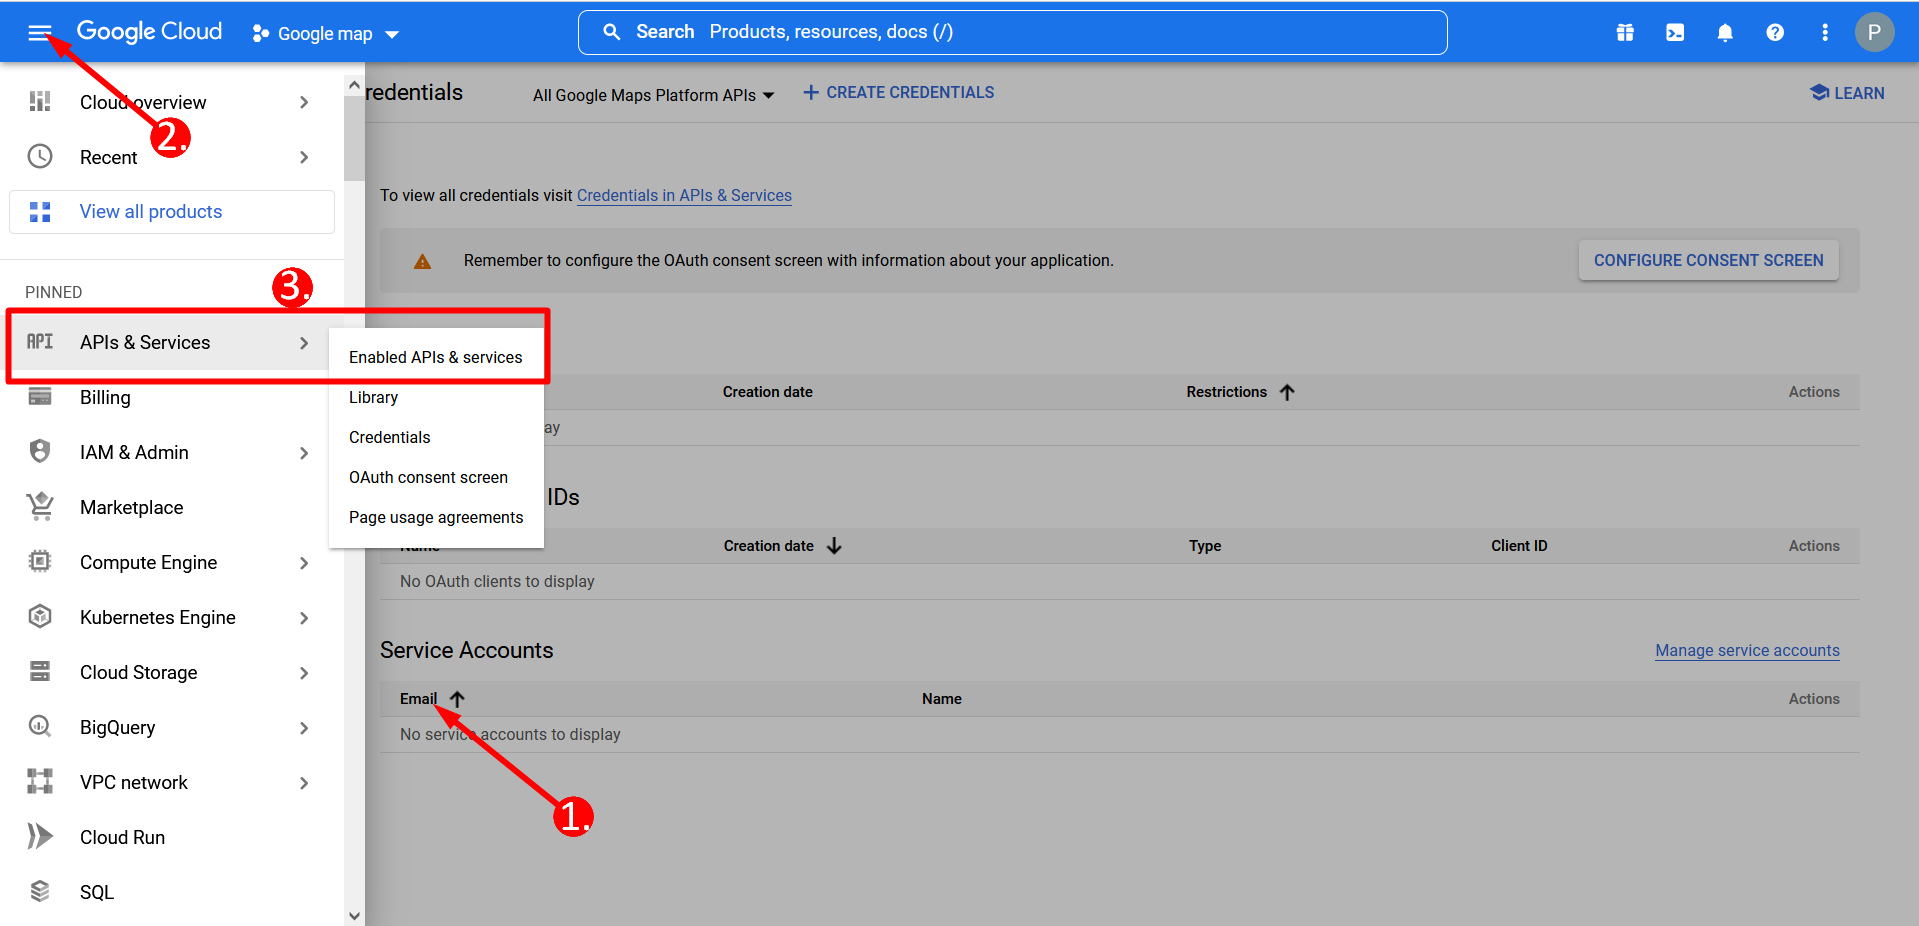
- Go to the hamburger menu
- Find APIs & Services
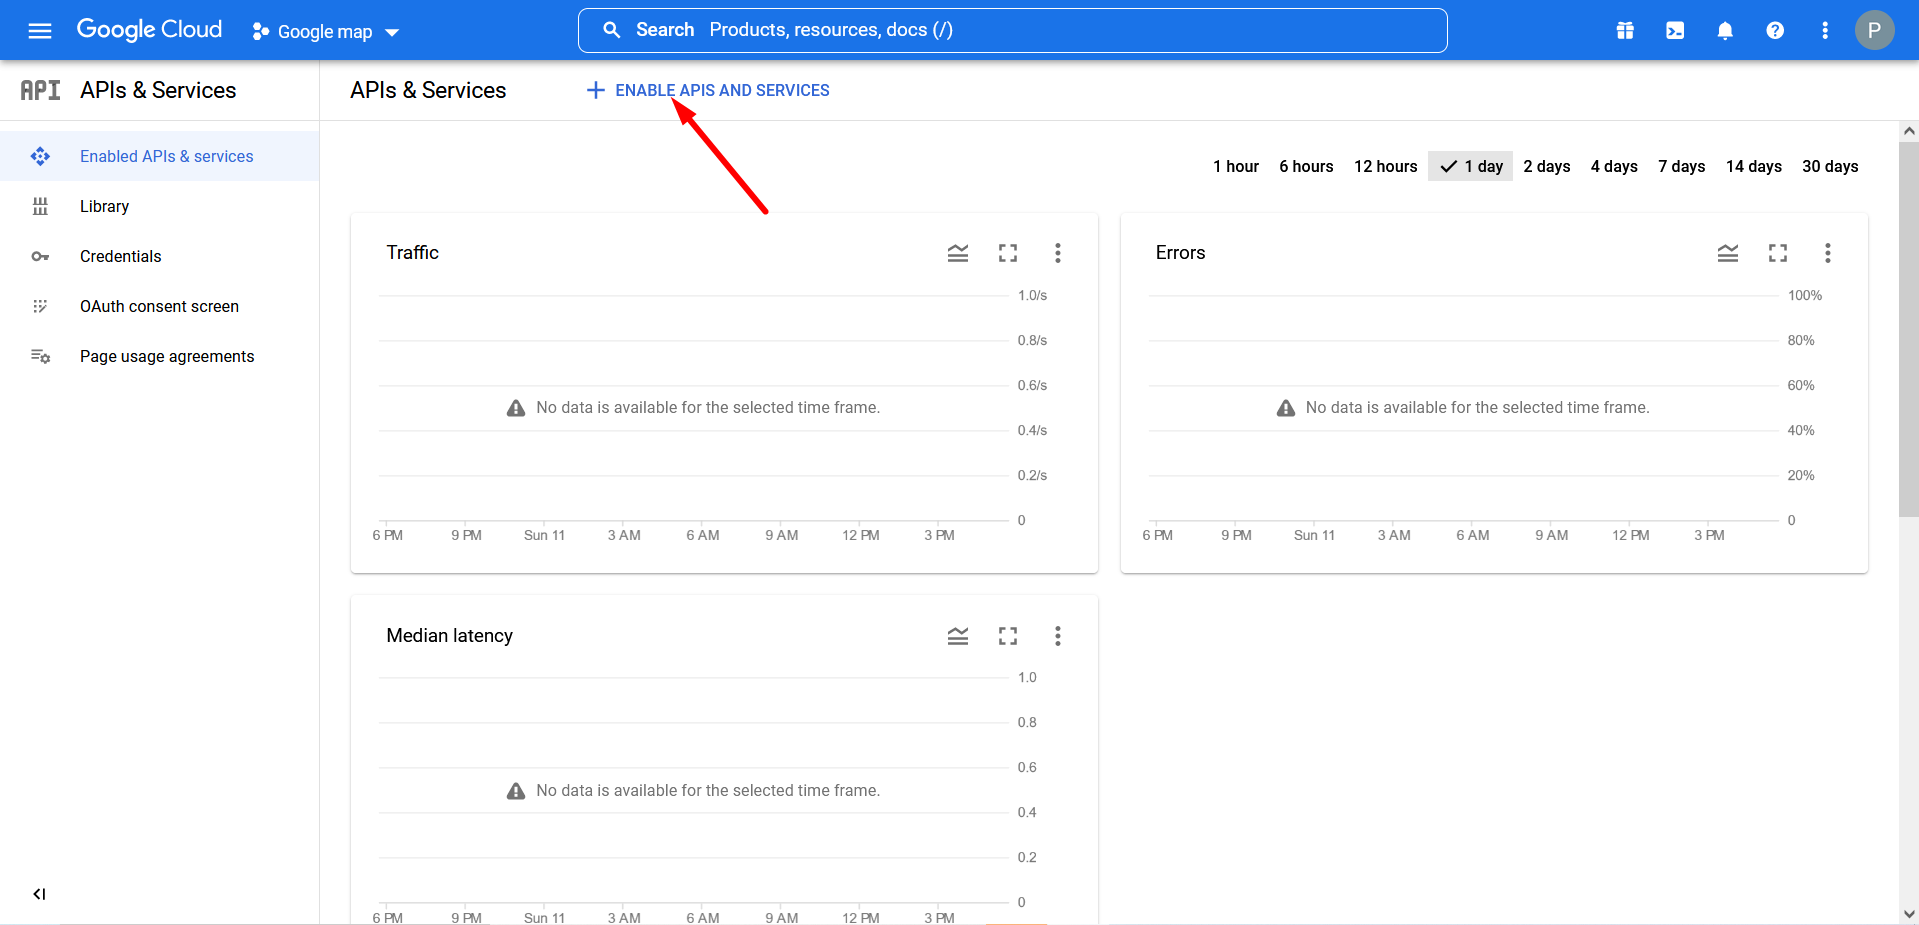
- Click ENABLE APIS AND SERVICES
- Search map in the search box-
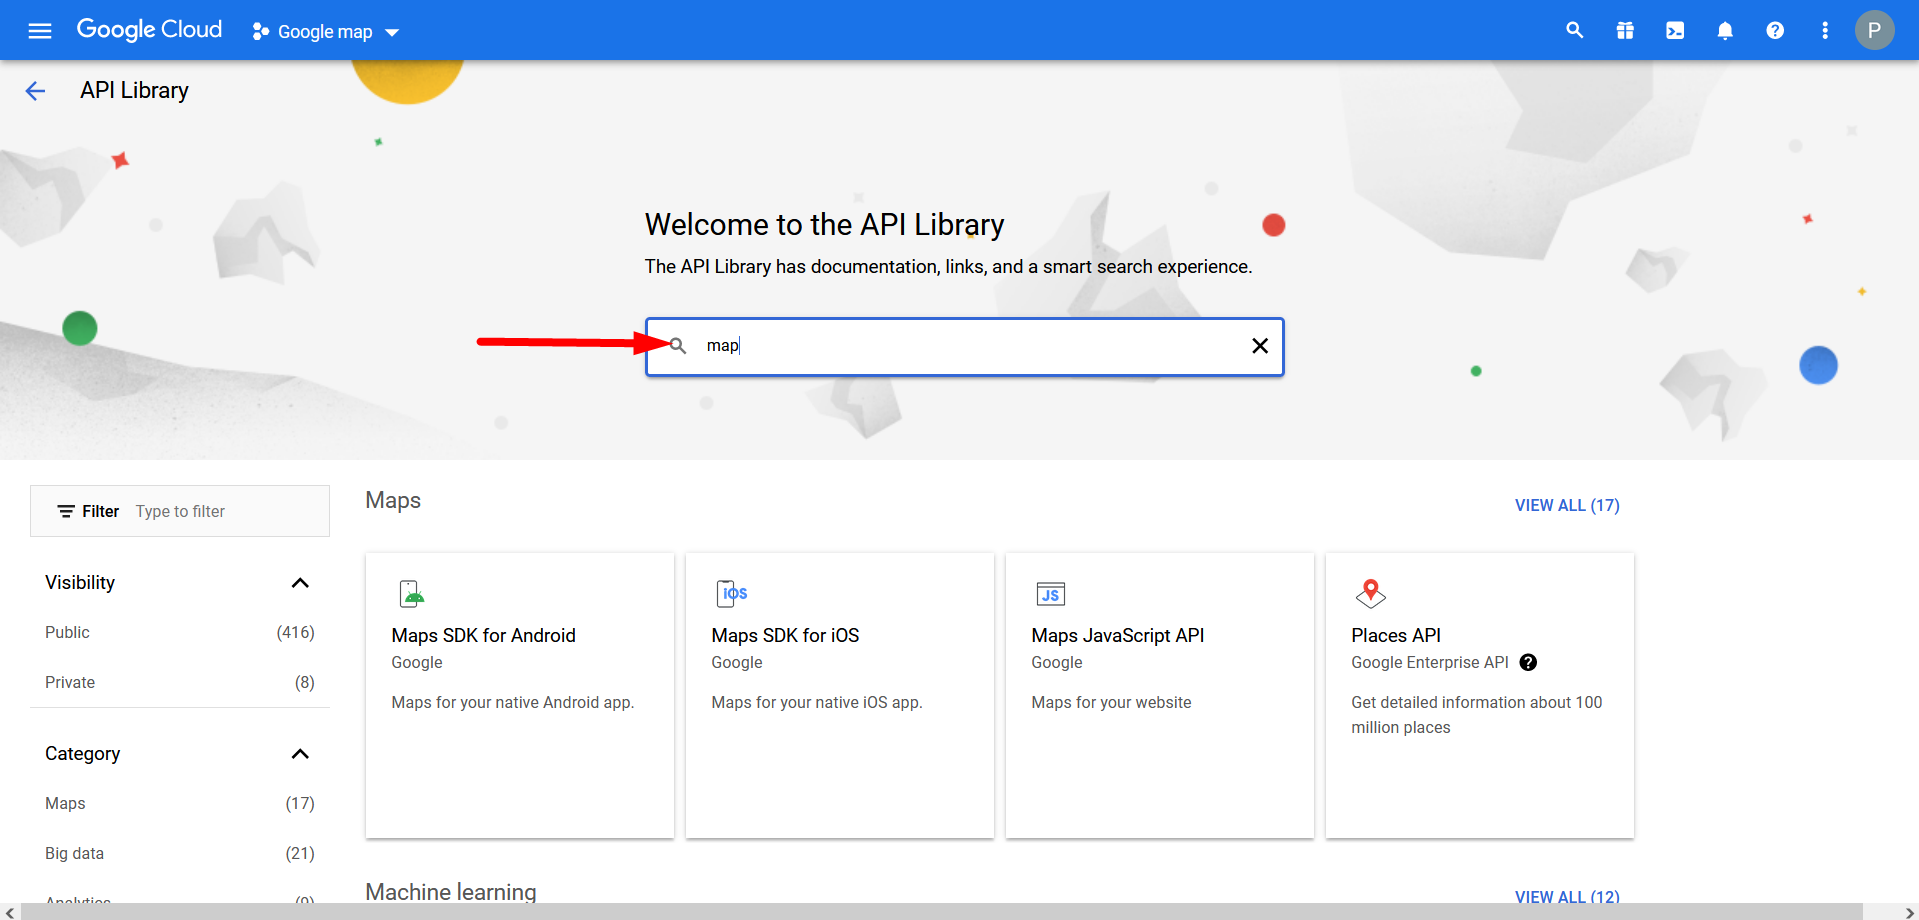
- Click Maps JavaScript API and enable it
- Go to Credentials
- Now click on “Create Credentials”, you will see your API key. Copy the API Key from here.
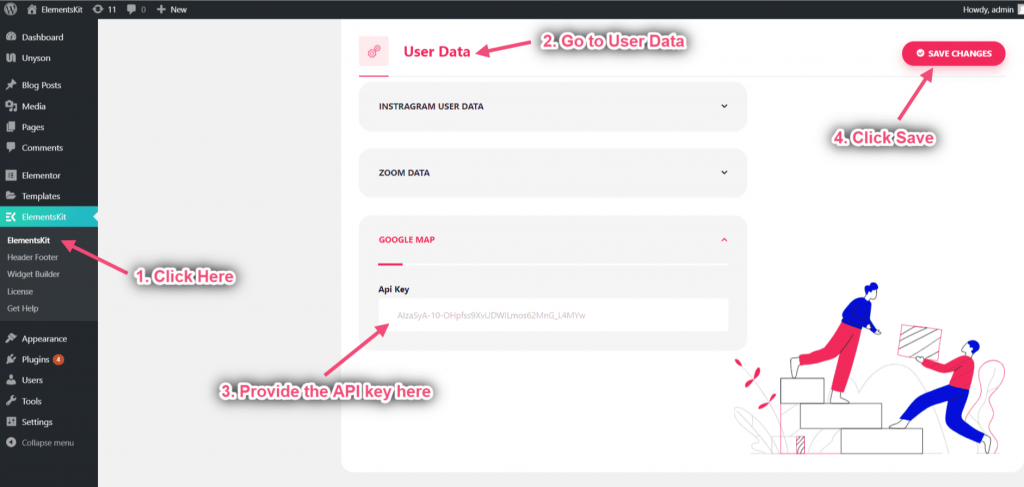
- Now go to Elementskit=> User data=> Click on the Google Map to Expand. Provide your API key to Connect Google Map.
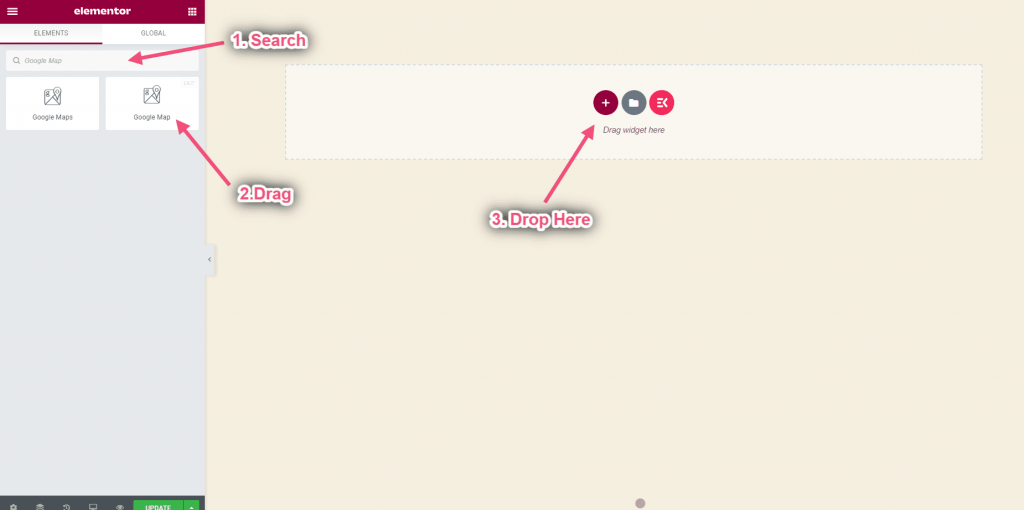
- Now Search for Google Map=> Drag=> Drop on the selected area
Step=>2: Select Map Type #
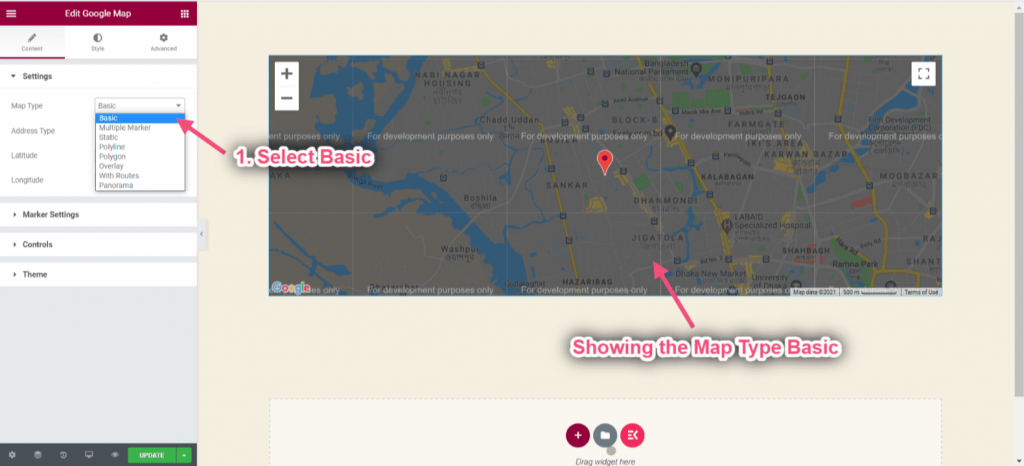
Set Up Basic Map #
Add a simple Google map with a marker to your web page. It suits people with beginner or intermediate knowledge.
- Click on Settings=> Select map type Basic from the drop-down. You can see the basic map type appeared
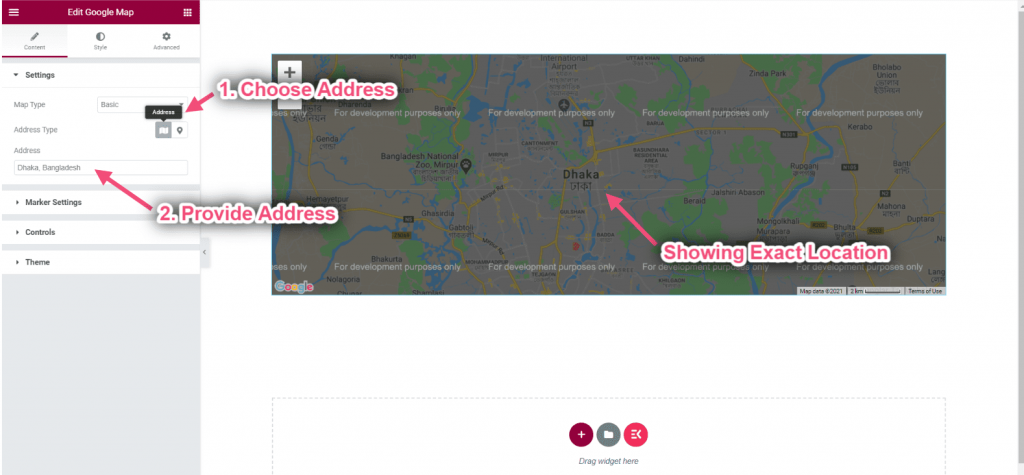
- Choose Address from the selected area=> Provide your Address
- You can see the selected location
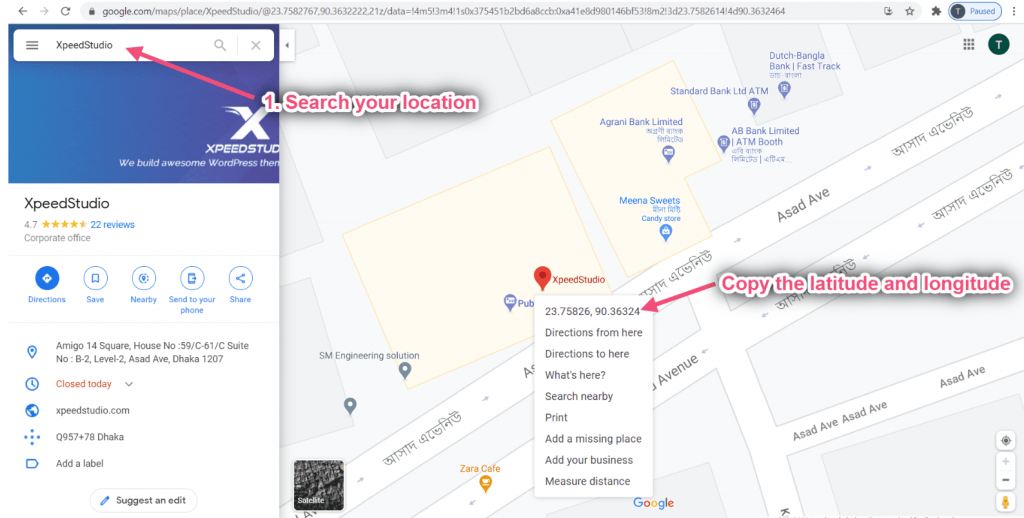
Get Latitude and Longitude: Latitude is used together with longitude to specify the precise location of features on the surface of the Earth
- Go to https://www.google.com/maps/=> Search for your location=> Right-click on the Map’s pin point=> Now copy the Latitude & Longitude
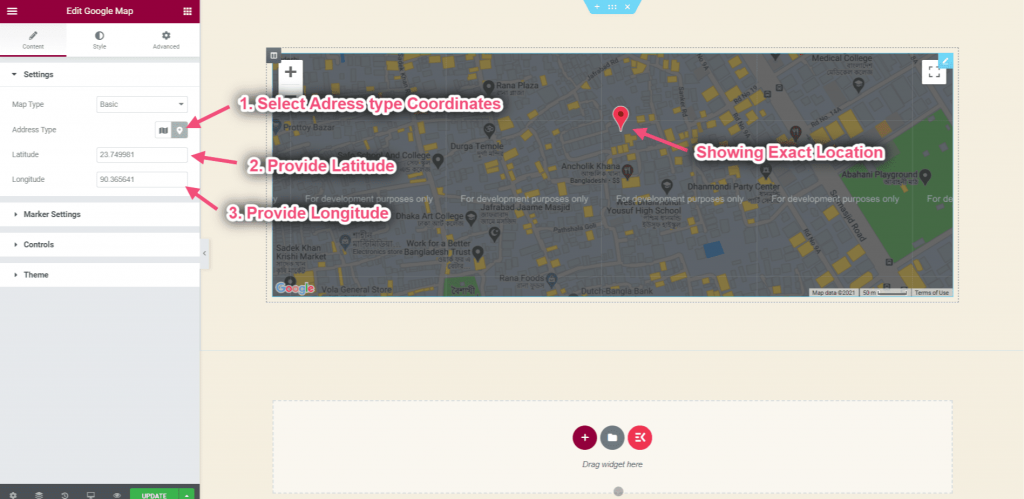
- Now choose Address type: Coordinates
- Provide Latitude: Latitude is the measurement of distance north or south of the Equator.
- Provide Longitude: Longitude is the measurement east or west of the Equator.
- You can see the exact location showing
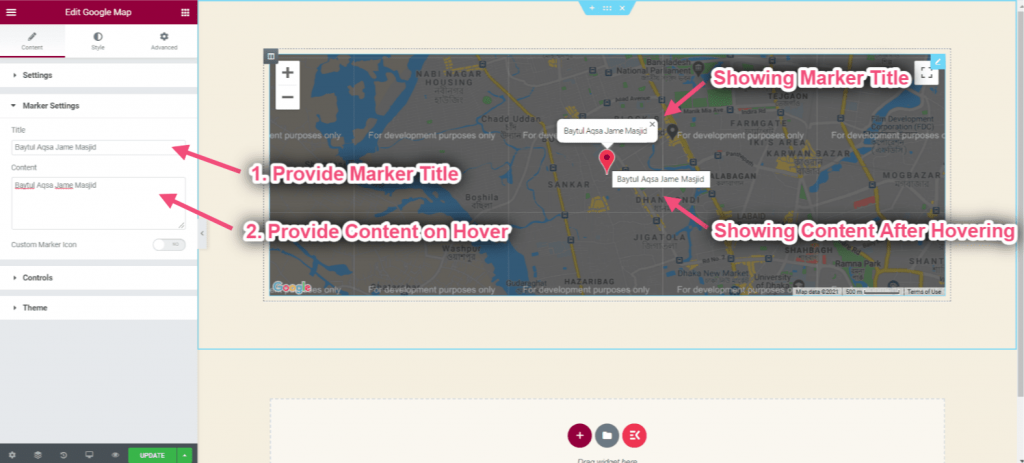
- Click on Marker Settings=> Provide Marker Title=> Add Content that will show on hovering
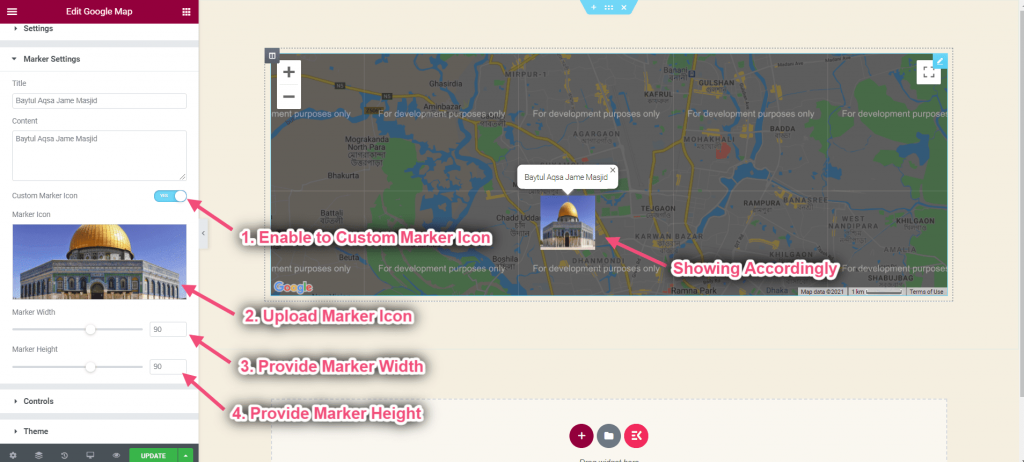
- Enable the toggle to Custom Marker Icon
- Upload your marker icon
- Control marker width
- Control marker height
- You can see the custom Image/ icon showing
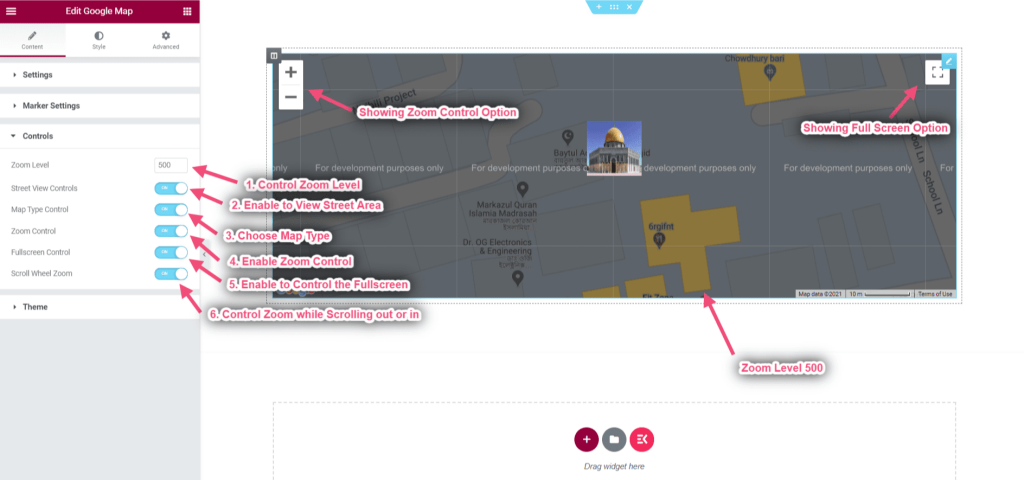
Click on Control
- Control Zoom Level: You can provide any number
- Enable Street View Control: It contains a Pegman icon that can be dragged onto the map to enable Street View.
- Turn on Map Type Control: The Map Type control allowing the user to choose a map type (ROADMAP, SATELLITE).
- Enable Zoom Control: The Zoom control displays “+” and “-” buttons to change the zoom level of the map.
- Enable Fullscreen Control: The Fullscreen control offers the option to open the map in fullscreen mode.
- Enable Scroll Wheel Zoom: Each click, up or down, increases or decreases the zoom factor by 10%
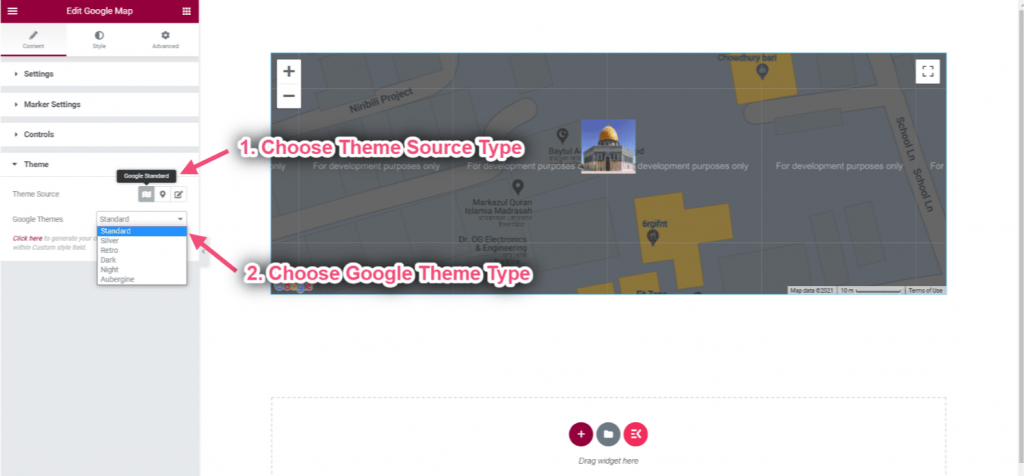
- Click on Theme=> Choose Theme Source Type: Google Standard
- Choose Google Theme Type from the drop-down
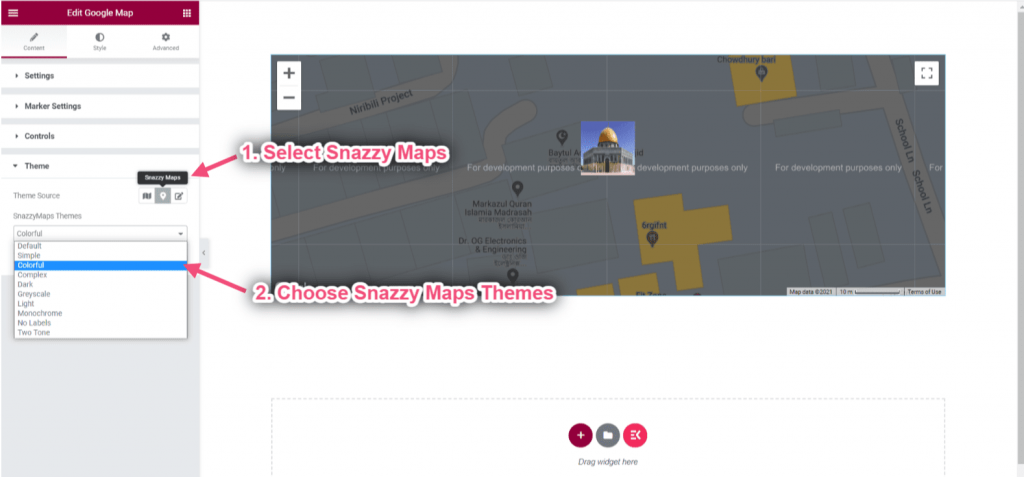
- Select Theme Source: Snazzy Maps
- Choose your snazzy maps theme from the drop-down
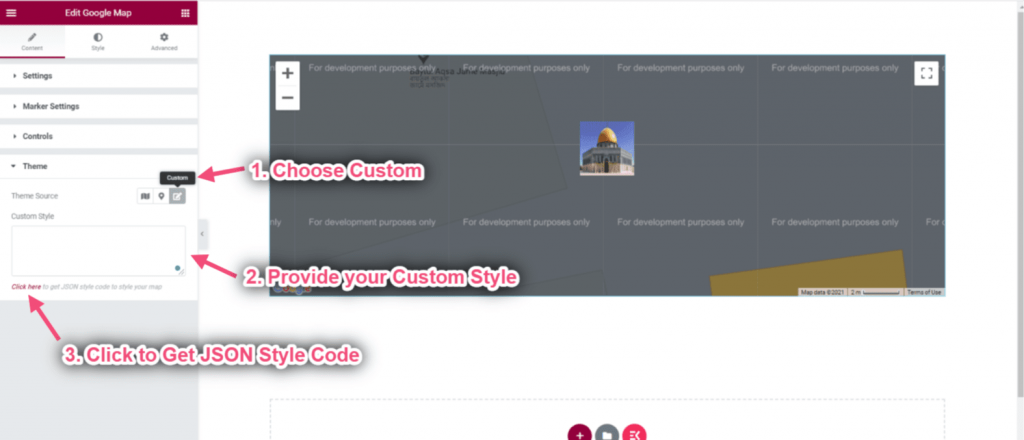
- Select Theme Source: Custom
- Provide your custom style on the box
- Click on the selected area to get JSON style code to style your map
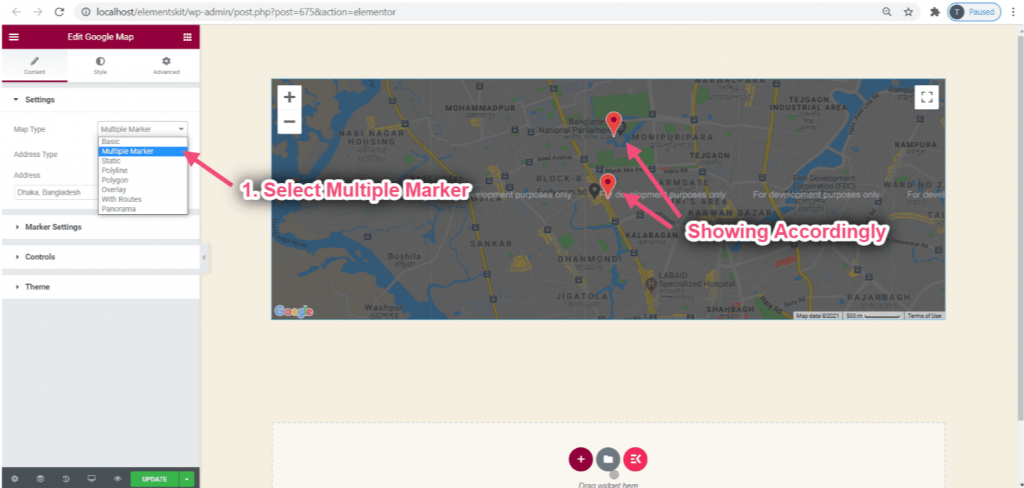
Set up Multiple Marker Map #
Add up multiple marker on the map. Each marker being clickable to display information.
- Click on Settings=> Select map type Multiple Marker from the drop-down.
- You can see the basic map type appeared
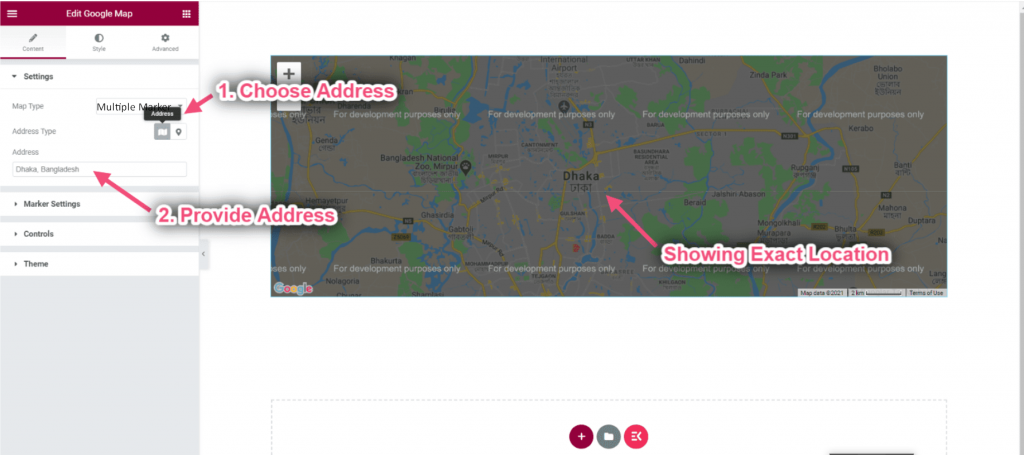
- Choose Address from the selected area=> Provide your Address
- You can see the selected location
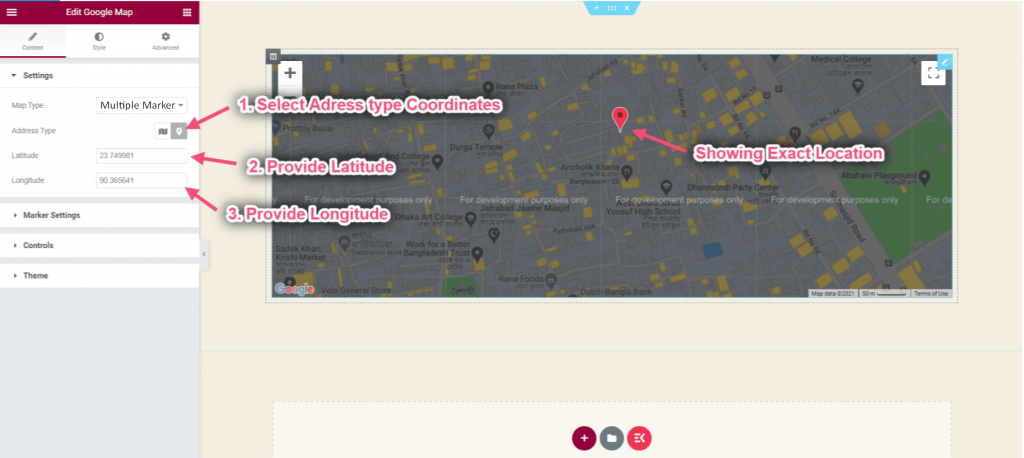
- Choose Address type: Coordinates
- Provide Latitude
- Provide Longitude
- You can see the exact Address showing as a Marker
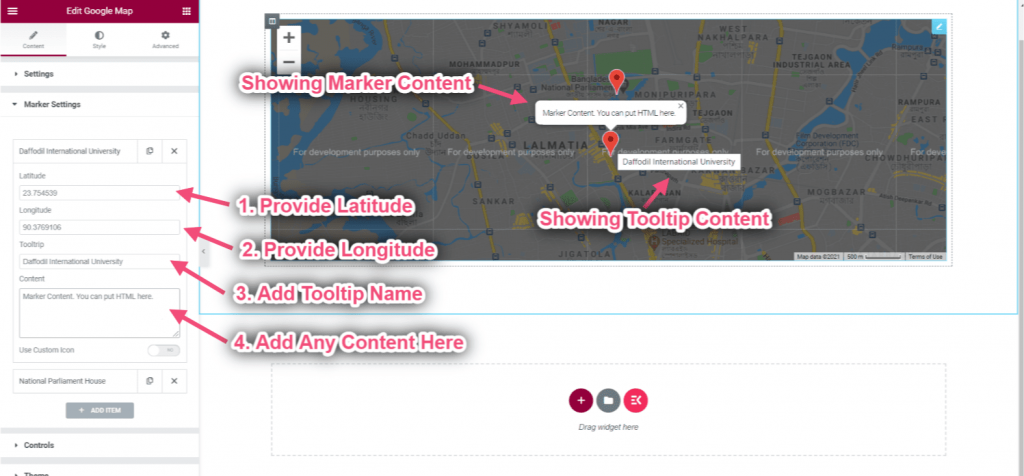
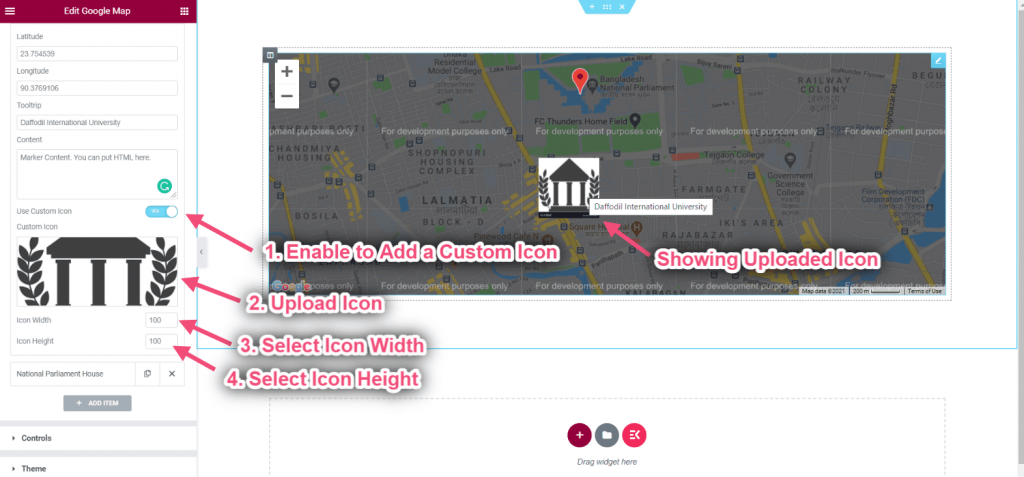
- Click on Marker Settings
- Click over the content to expand
- Provide Latitude
- Provide Longitude
- Add Tooltip Name
- Add any content on the box
- You can see the output showing exactly
- Turn on Custom Icon Toggle
- Upload your Icon
- Select Icon Width
- Select Icon Height
Click on Control
- Control Zoom Level: You can provide any number
- Enable Street View Control: It contains a Pegman icon that can be dragged onto the map to enable Street View.
- Turn on Map Type Control: The Map Type control allowing the user to choose a map type (ROADMAP, SATELLITE).
- Enable Zoom Control: The Zoom control displays “+” and “-” buttons to change the zoom level of the map.
- Enable Fullscreen Control: The Fullscreen control offers the option to open the map in fullscreen mode.
- Enable Scroll Wheel Zoom: Each click, up or down, increases or decreases the zoom factor by 10%
- Click on Theme=> Choose Theme Source Type: Google Standard
- Choose Google Theme Type from the drop-down
- Select Theme Source: Snazzy Maps
- Choose the theme of your snazzy map from the drop-down
- Select Theme Source: Custom
- Provide your custom style on the box
- Click on the selected area to get JSON style code to style your map
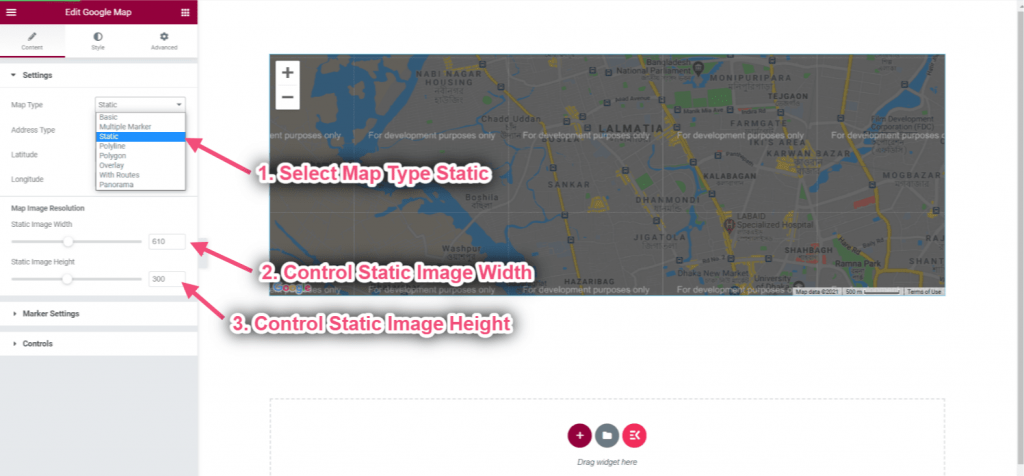
Set up Static Map #
Static maps are standalone images in PNG format that can be displayed on web and mobile devices without the aid of a mapping library or API.
- Select Map Type: Static
- Control Static Image Width
- Control Static Image Height
Set up Polyline Map #
You can use a polyline to draw lines on a map in Google Maps.
- Select Map Type: Polyline
- You can see the Polyline Map appeared
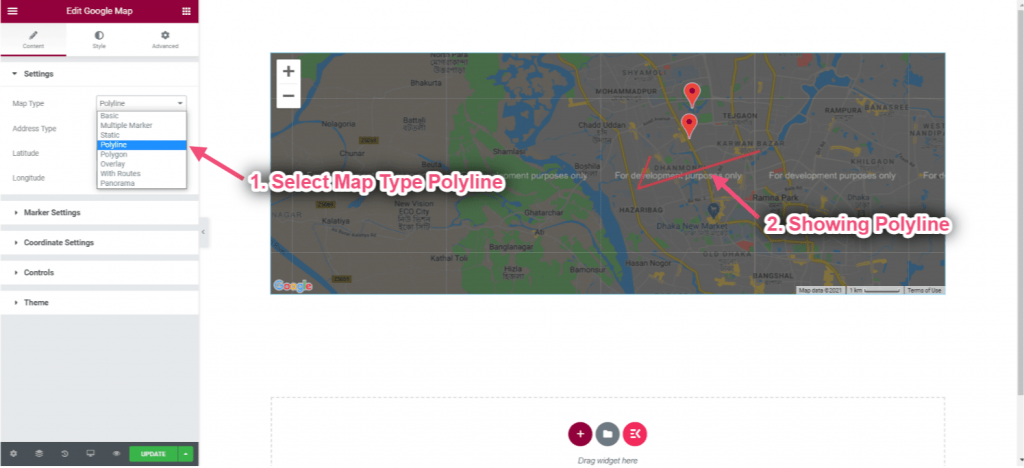
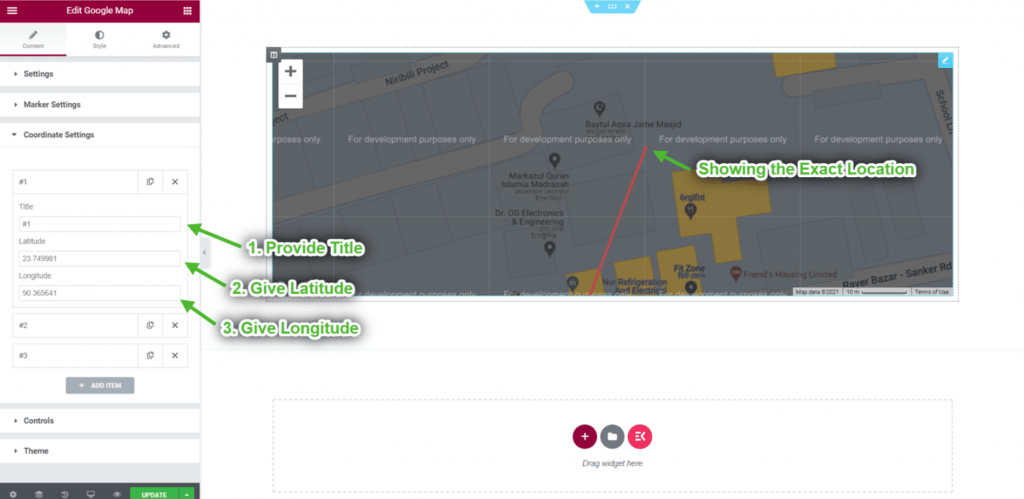
- Provide your coordinate title
- Provide Latitude
- Provide Longitude
Set up Polygon Map #
A polygon (like a polyline) defines a series of connected coordinates in an ordered sequence.
- Select Map Type: Polygon
- You can see the Polygon Map appeared
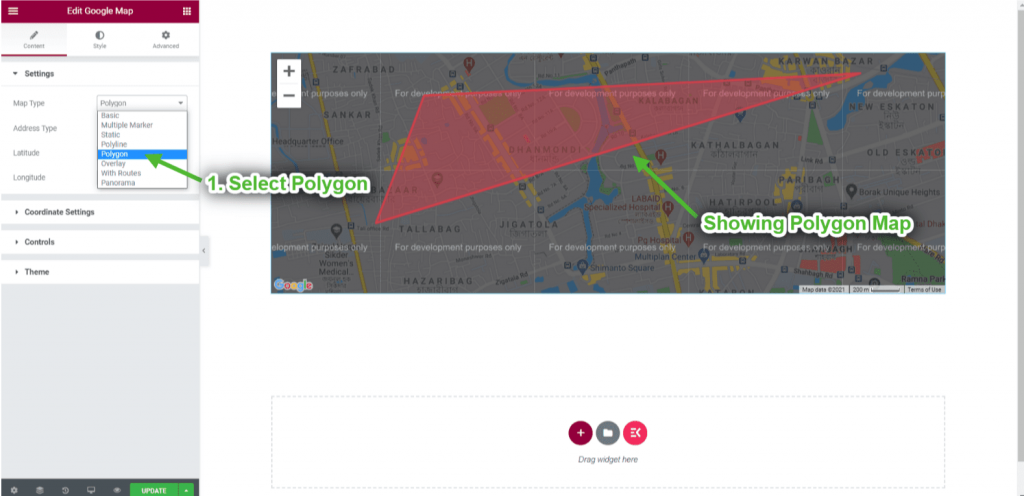
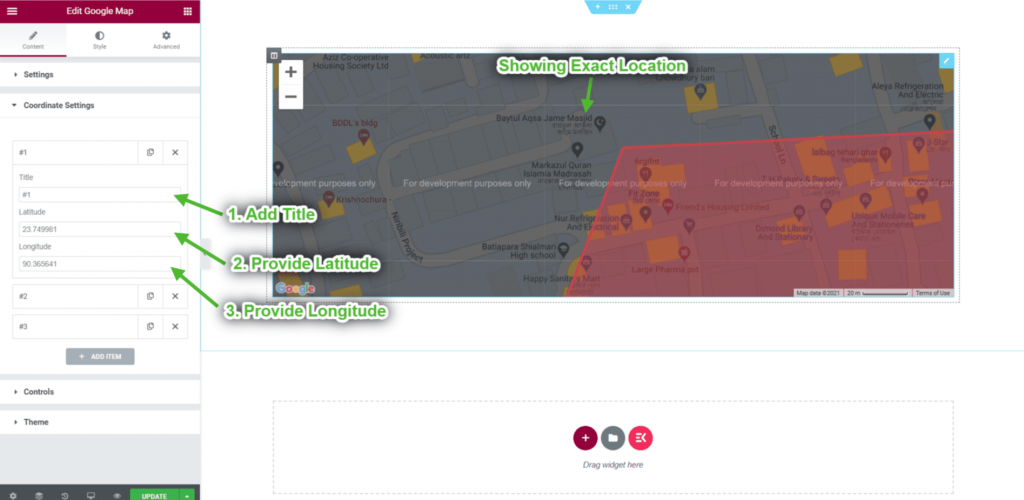
- Provide your coordinate title
- Provide Latitude
- Provide Longitude
- Provide Latitude
- Provide Longitude
- Add any content on the box

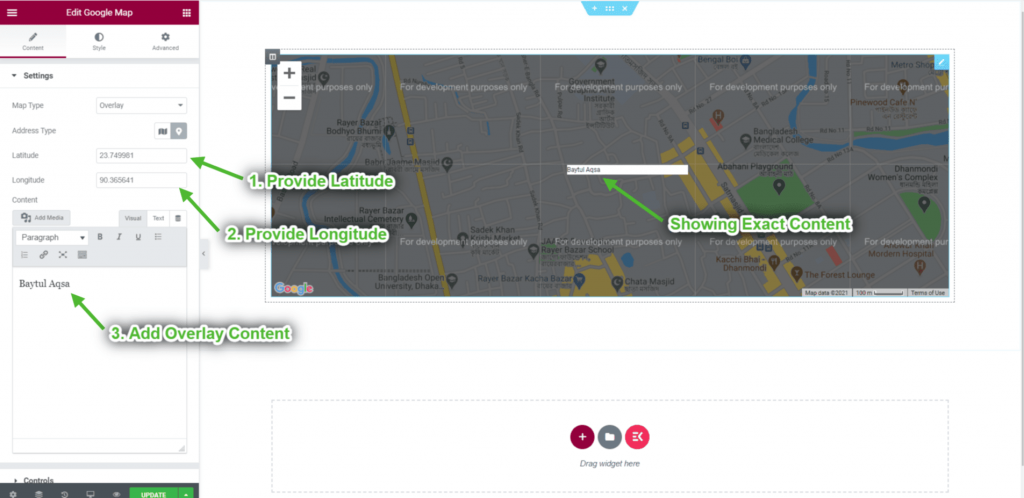
Set up Overlay Map #
Overlays are objects on the map that are tied to latitude/longitude coordinates, so they move when you drag or zoom the map.
- Select Map Type: Overlay
- You can see the Overlay Map appeared
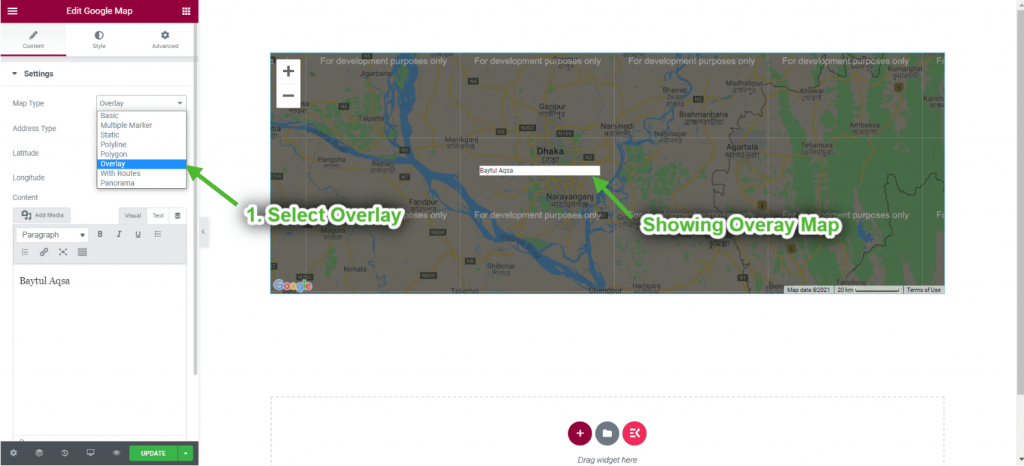
- Provide Latitude
- Provide Longitude
- Select Overlay content on the box
- You can see the exact content appeared accordingly