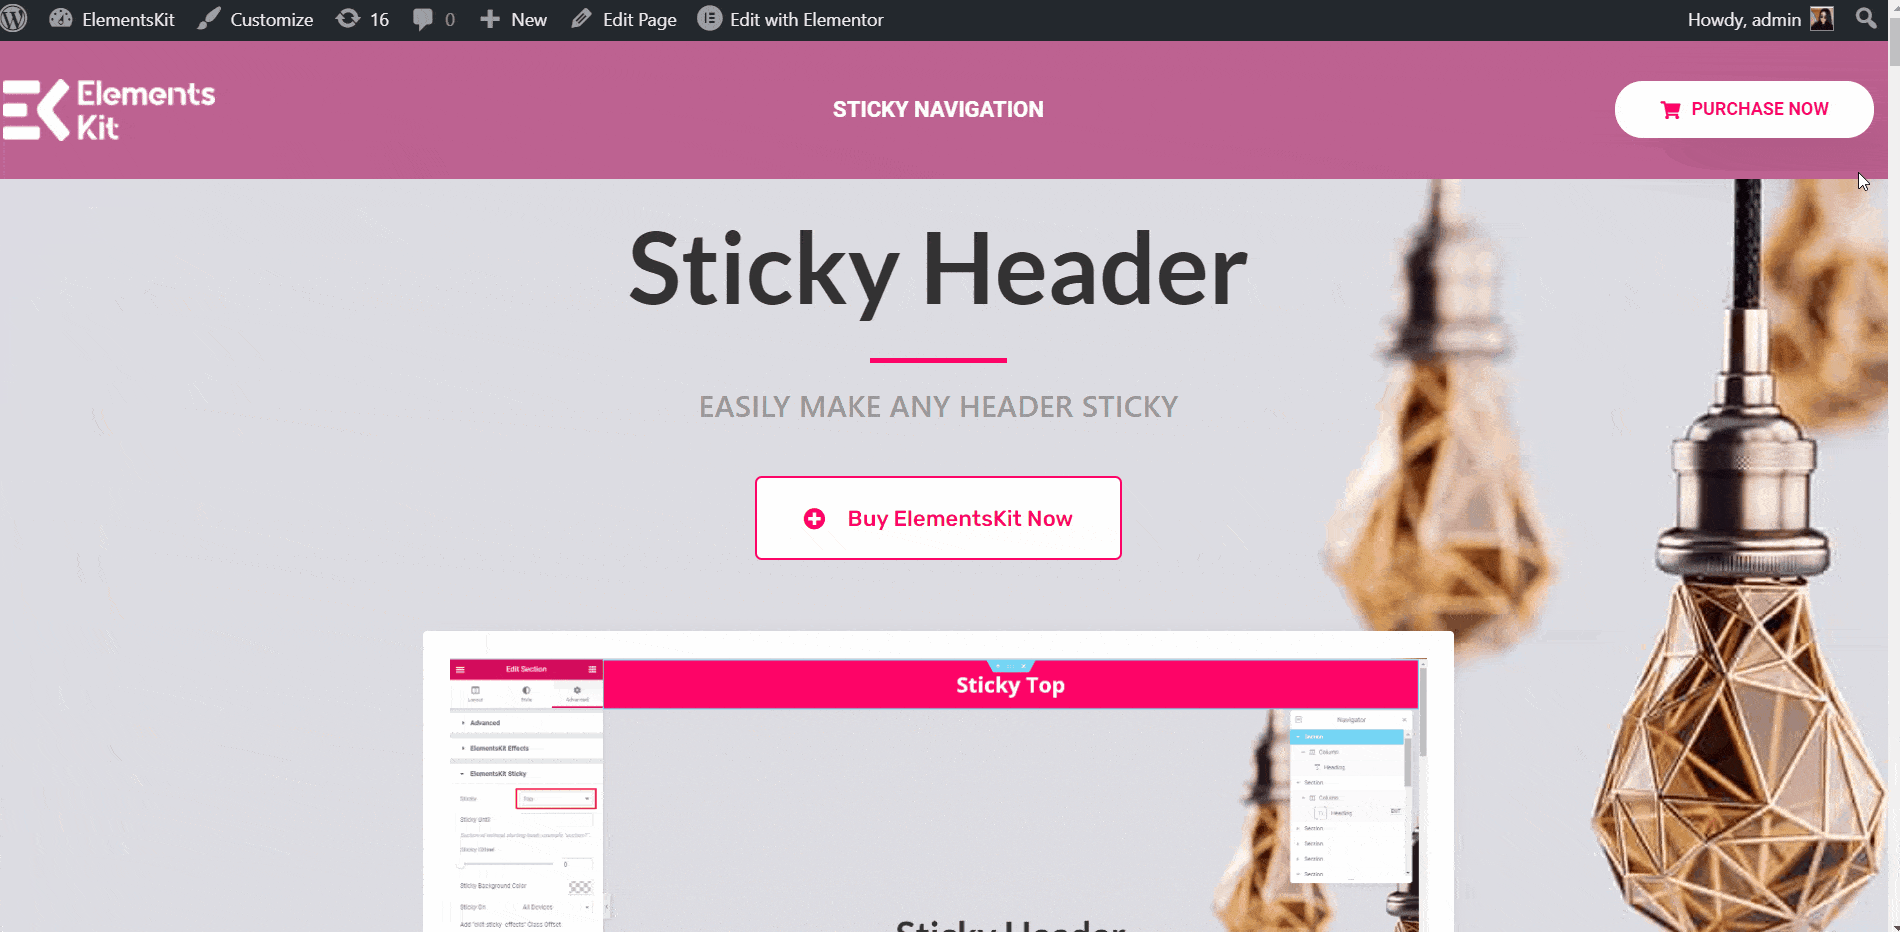
The Sticky Content module of ElementsKit lets you make any section of the page or post sticky to a selected position. In this tutorial, we are going to explain different features of the Sticky Content module and how to leverage them to make your content stand out.
Watch our video guide:
Or, follow the step by step instructions:
Enable Sticky Content Module #
To start using the Sticky Content module, the first thing you should do is to enable this from the list of ElementsKit modules. Without enabling this module, you cannot use it with Elementor. Here’s how to enable the Sticky Content module:
- Go to ElementsKit ➔ Modules. Now, switch the Sticky Content module ON and click on Save Changes.

Sticky on Top #
This feature will help you stick any section on the top of the page.
Watch our video guide:
Or, follow the step by step instructions:
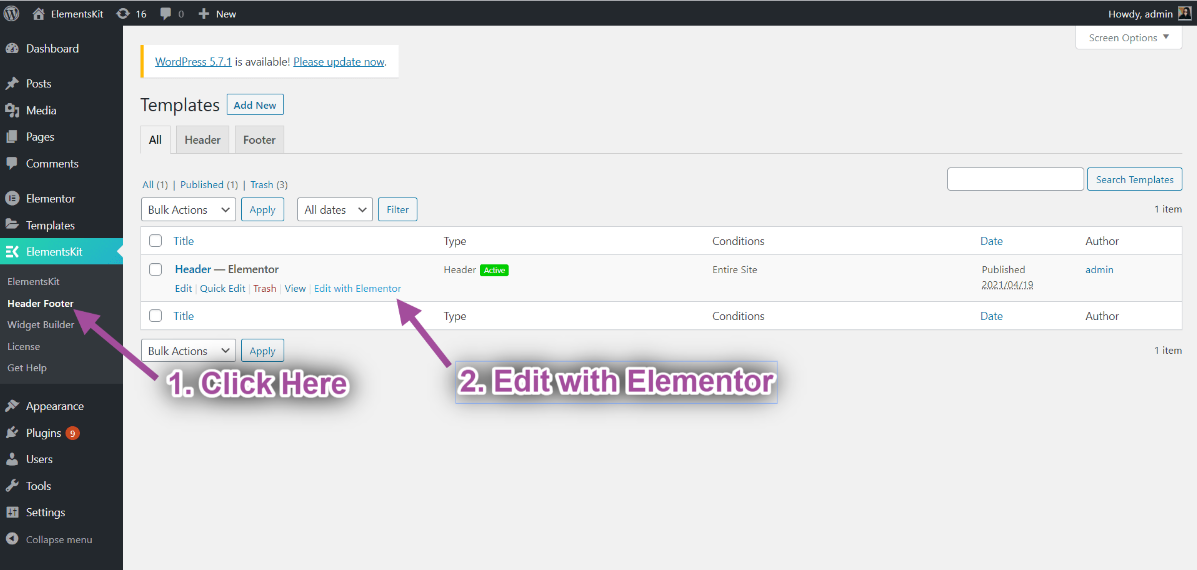
- Navigate to ElementsKit→ Header Footer→ click Edit with Elementor.
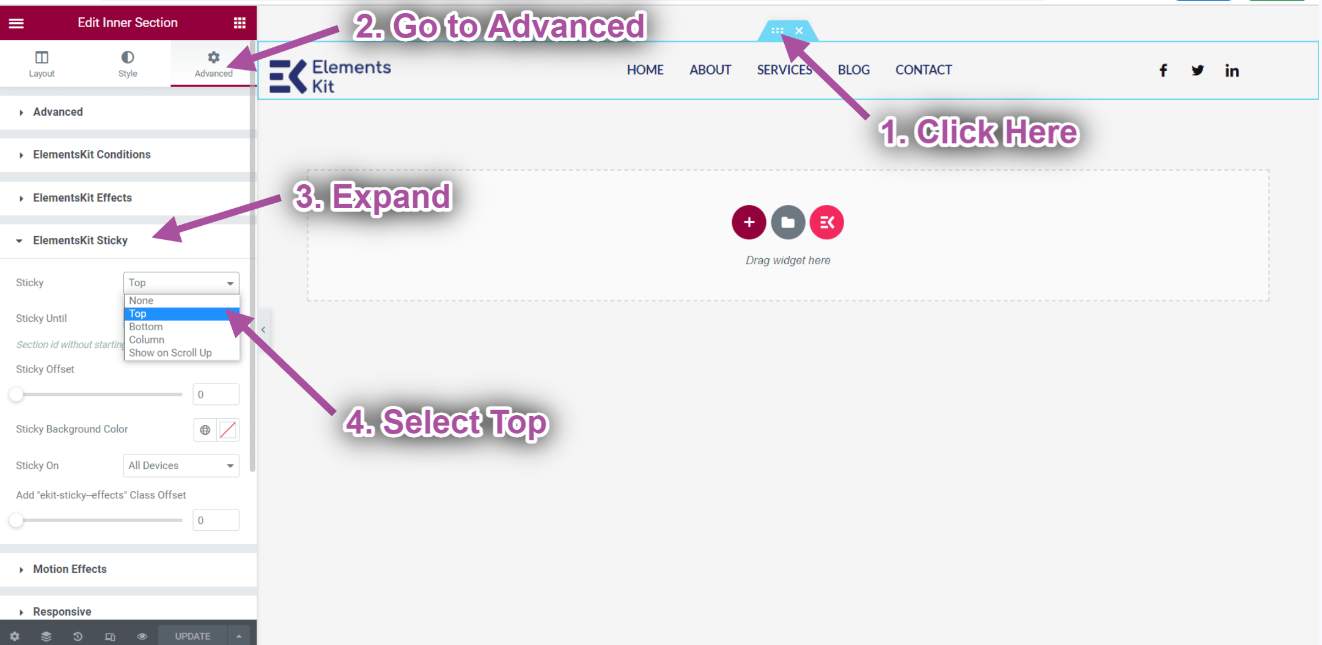
- Click on the Inner Section Icon.
- Go to Advanced-> Expand ElementsKit Sticky.
- Select Sticky option➔ Top from the drop-down.
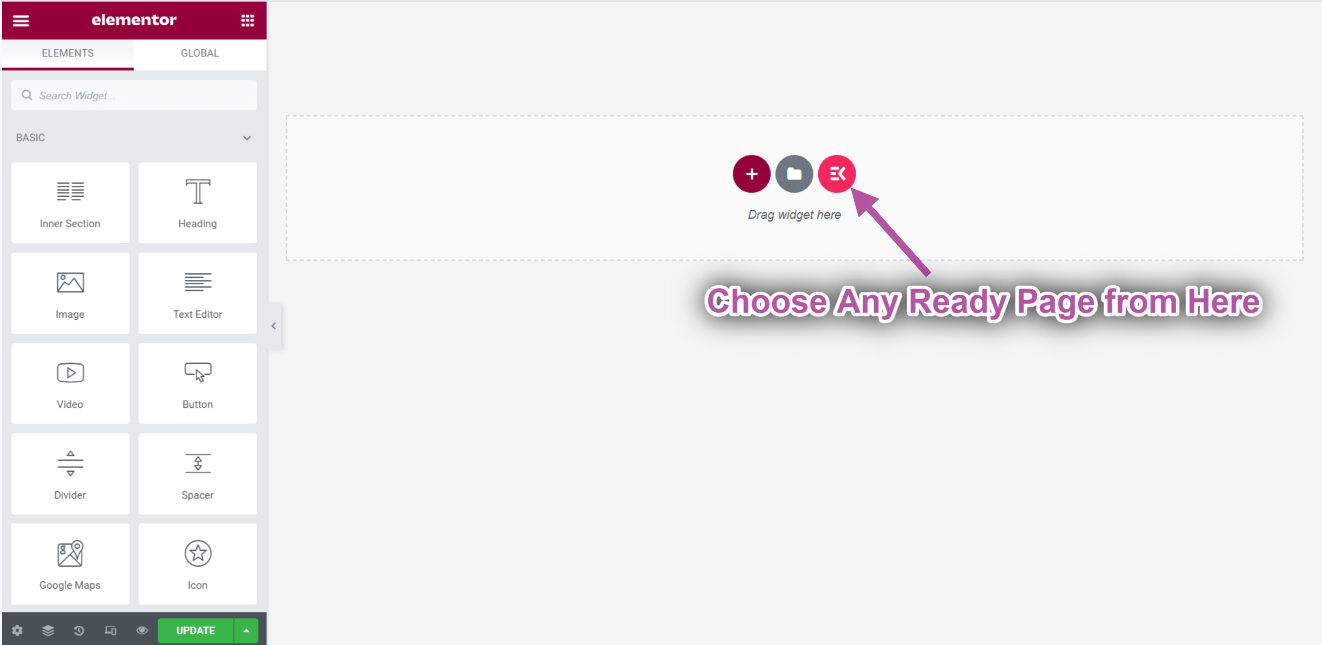
- Create a new page-> Click on the ElementsKit Icon to insert any ready page from our premade templates.
- Now go to your page-> You can see your header is sticky on the top.

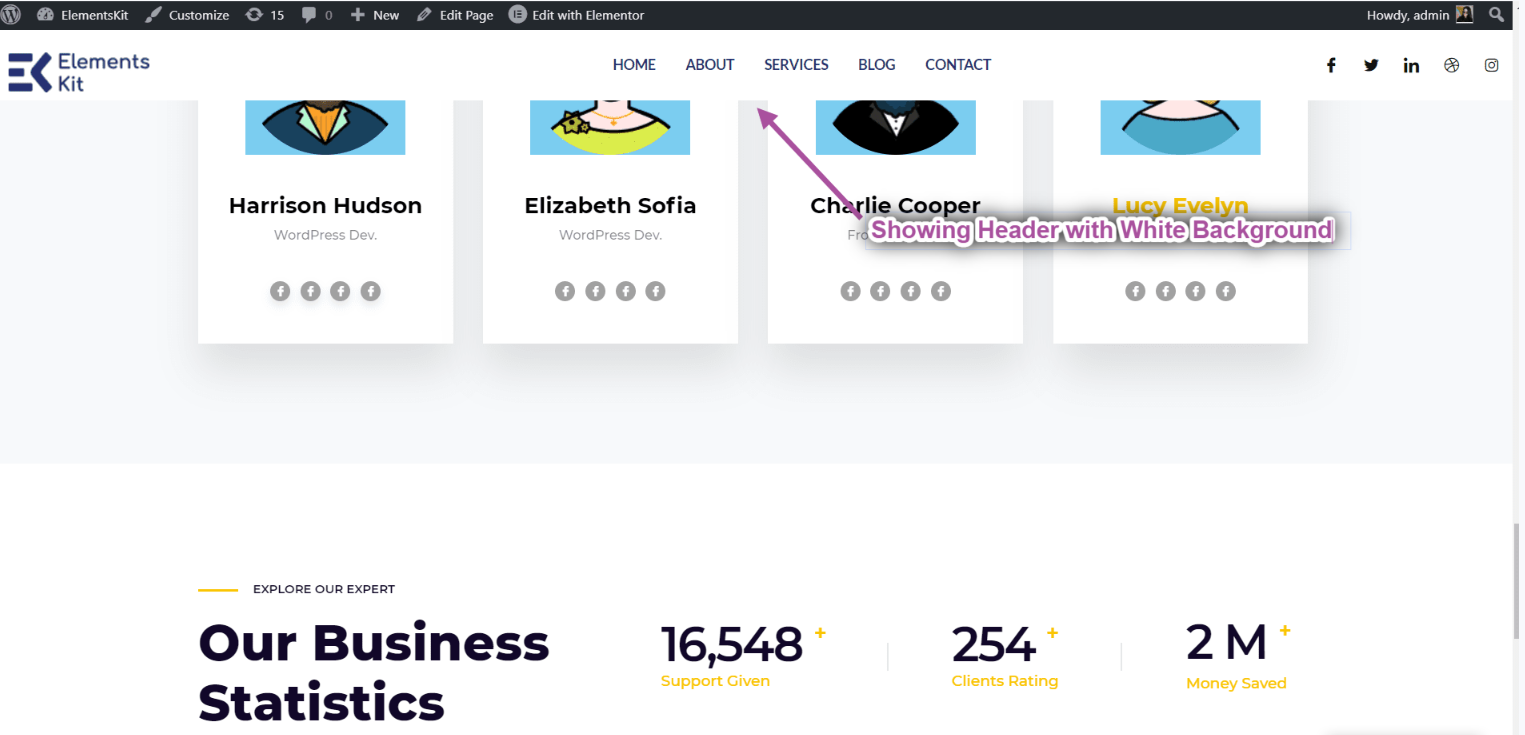
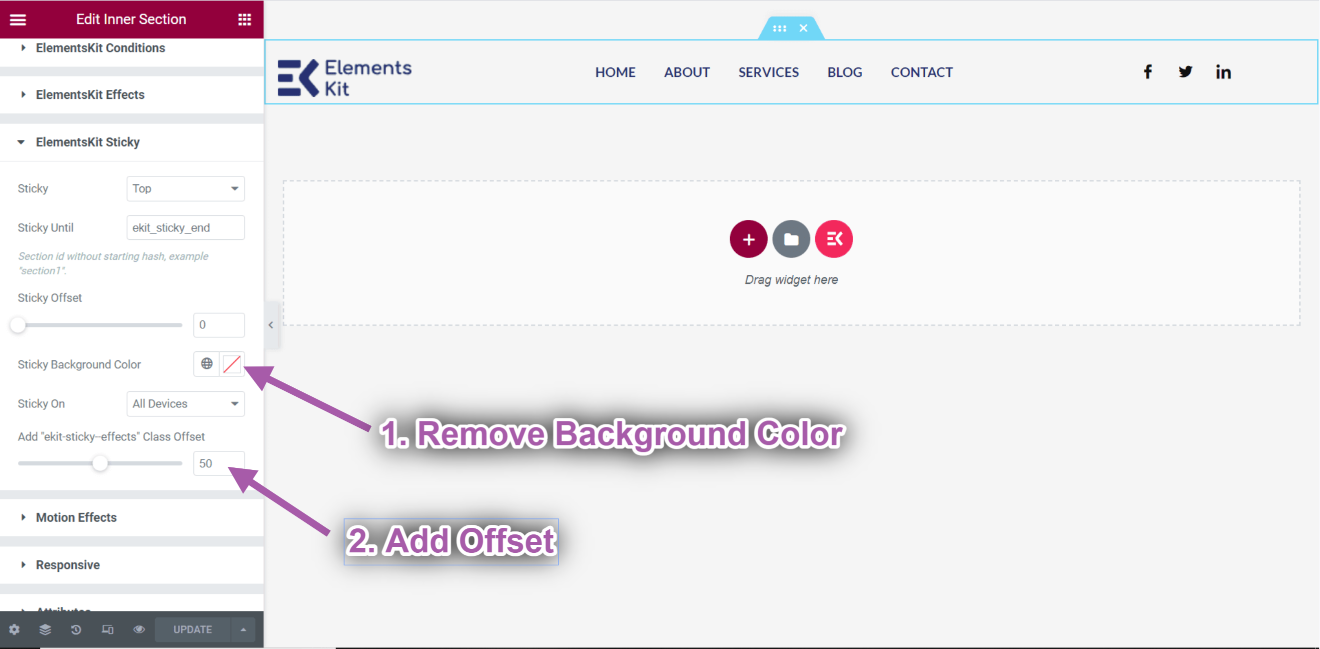
Background Color Change of the Sticky on Top #
You can see the problem that the header part is sticky but it’s transparent. So we need to change the background color. Under the Sticky Until feature, you can find the option to change the background color of the sticky section.
- Choose a sticky background color: White.
- Click Update

- Go to the Homepage-> Refresh-> Scroll Down.
- You can see the header background color is showing white.
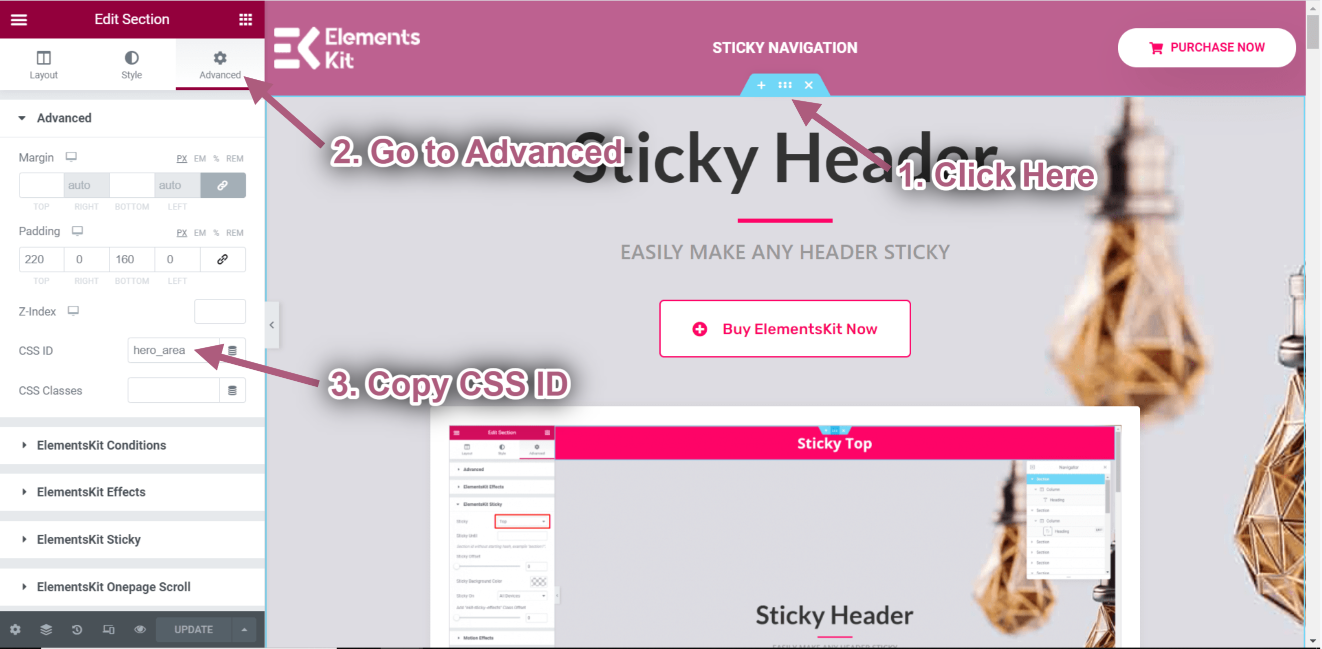
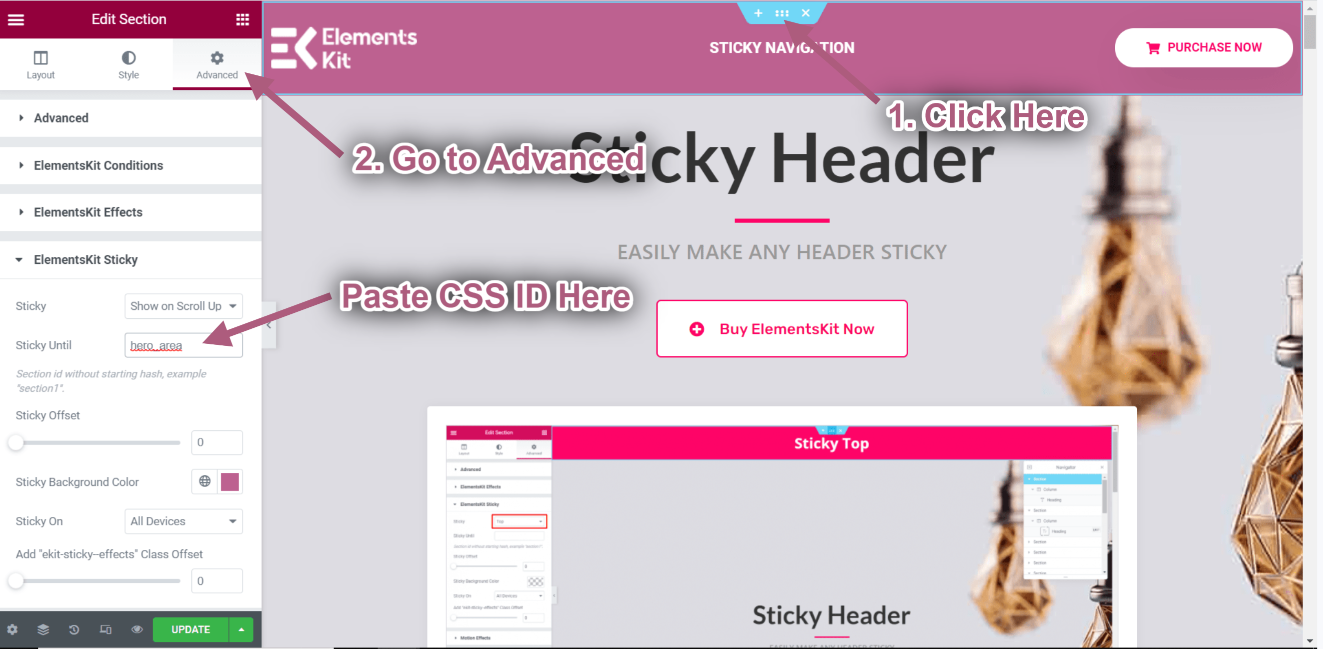
Sticky Until on Top #
If you want to make your sections sticky up to multiple sections and stop sticky after a specific section, you can set that section ID here. Let’s make it sticky until the About Us Section.
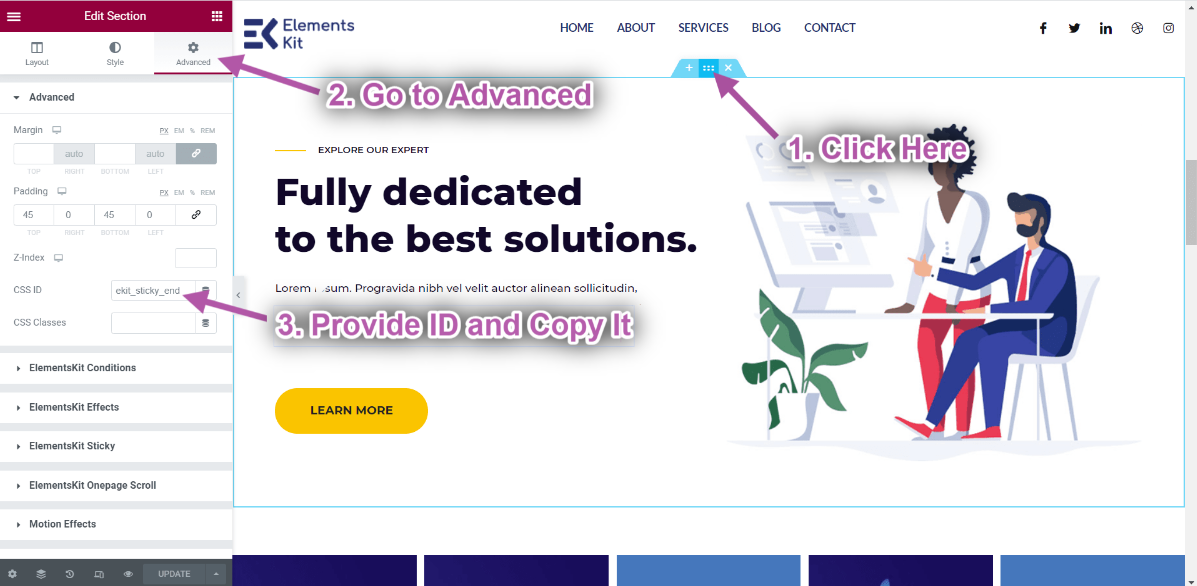
- Click on Edit with Elementor.

- Click on the about us Inner Section Icon.
- Now, going to the Advanced settings, set the CSS ID, and Copy it.
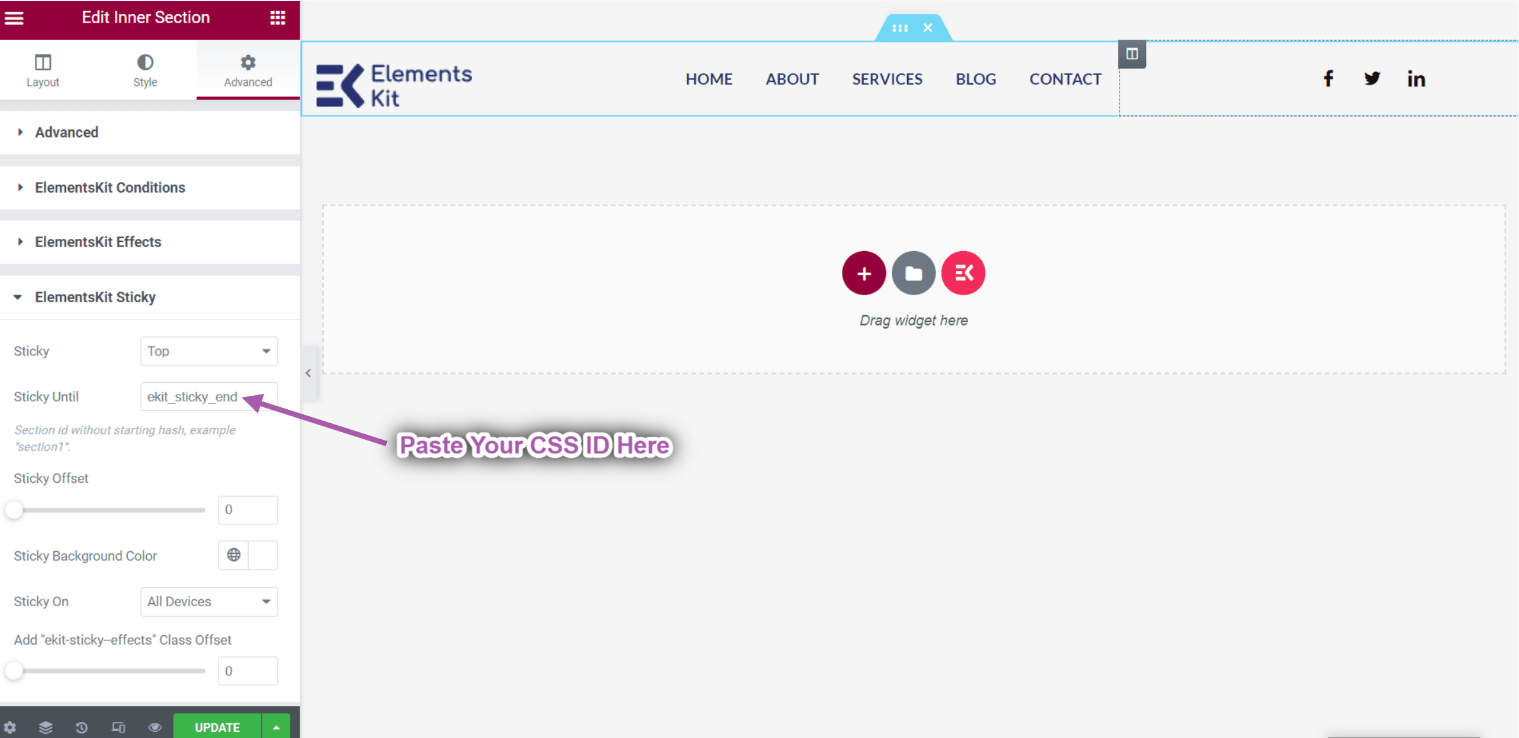
- Go to Header➔ Advanced➔ Elementskit Sticky➔ Sticky Until.
- Now paste that about us section’s CSS ID into the Sticky Until field.
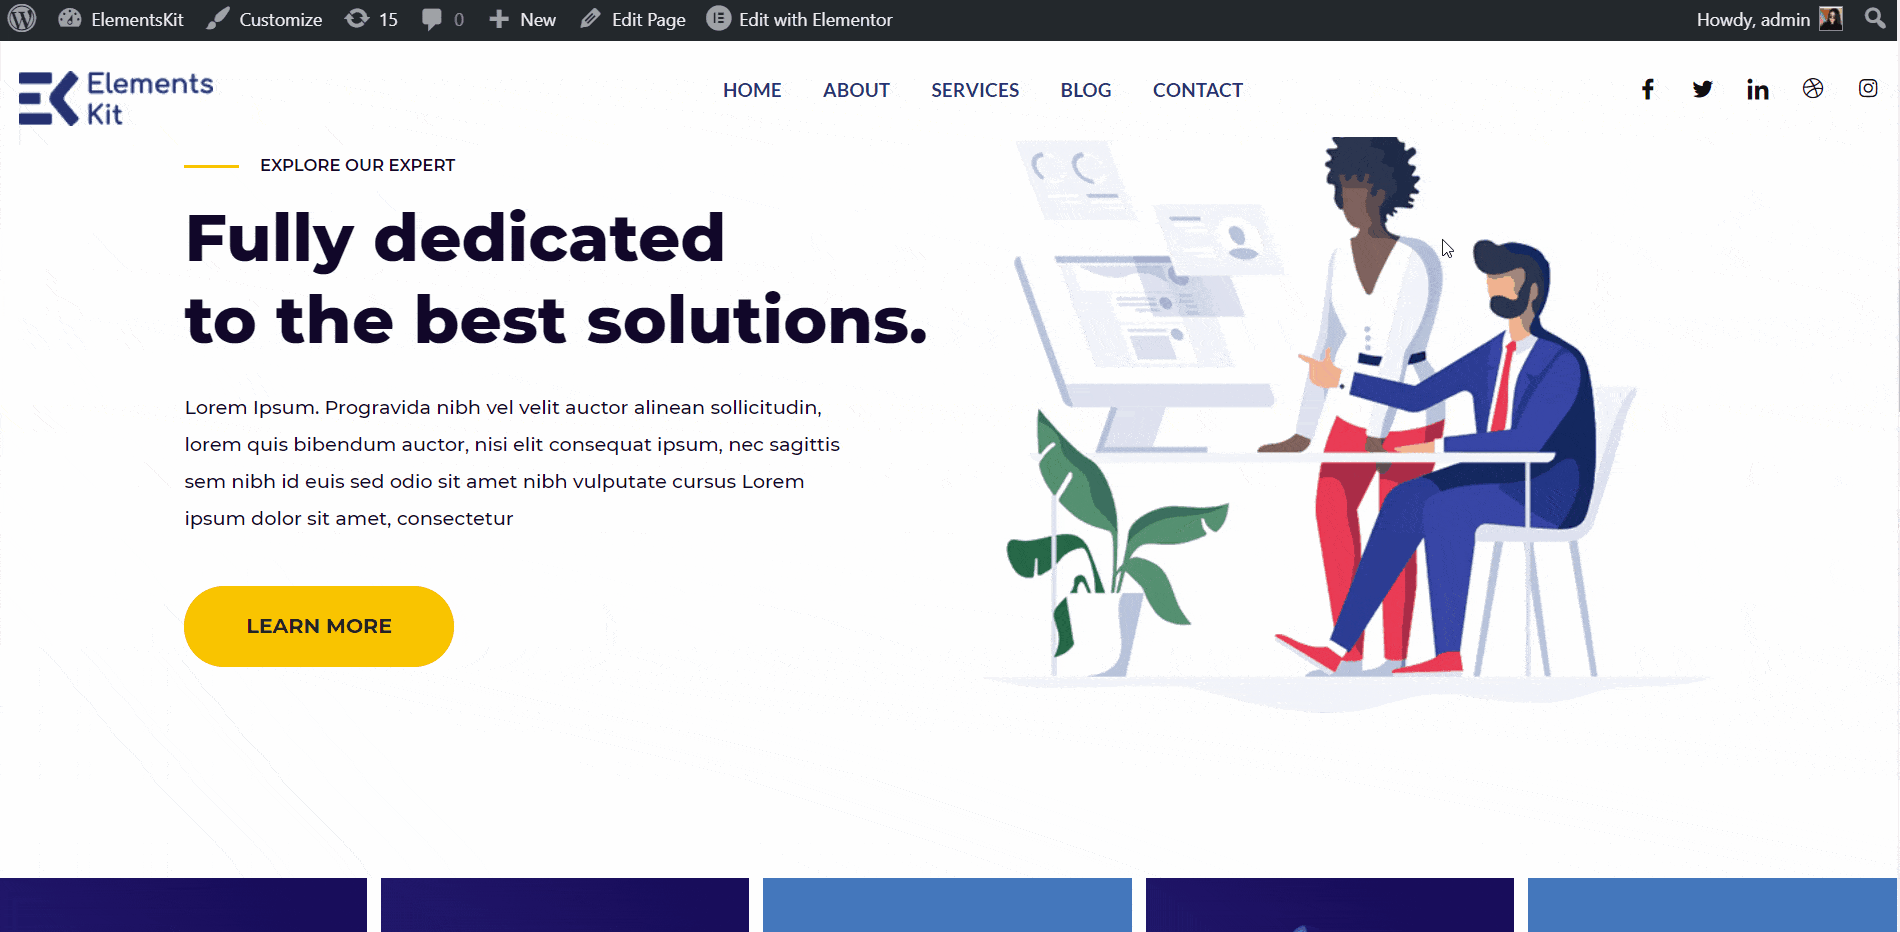
- Now you can see the header is Sticky Until the About Us Section.
Class Add Feature #
When you are using a transparent header you might face an issue with the background color. If you scroll down you might need a background color. So in here, ElementsKit provides you another option and that is a class adding feature. If you scroll down for example 50px, a new class will be added and that is”ekit-sticky-effects”. Using this class you can make any CSS you want. Let’s see how you can do it.
- Go to customizer-> Additional CSS.
- Use the class: “ekit-sticky-effects” and make the background color Gray.
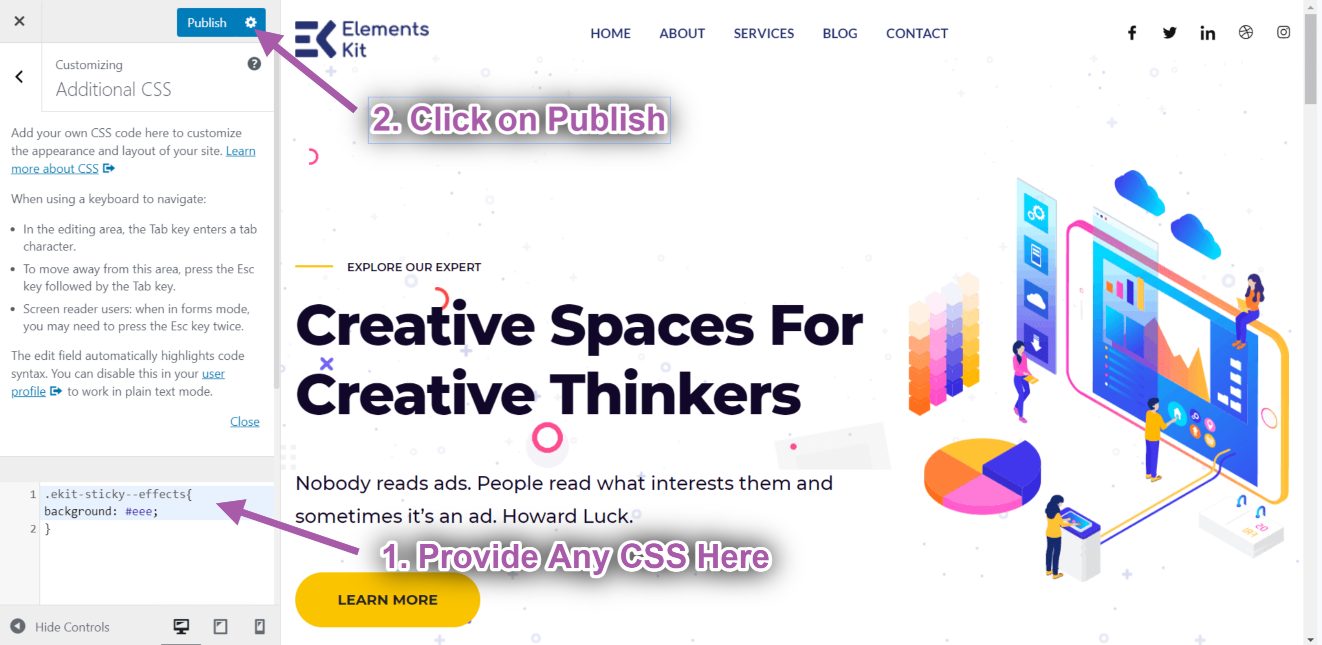
- Go to header-> Remove the Background Color.
- Add offset. For Example: 50px.
- You can see the background color is Transparent. But after scrolling up to 50px, a background color is added.

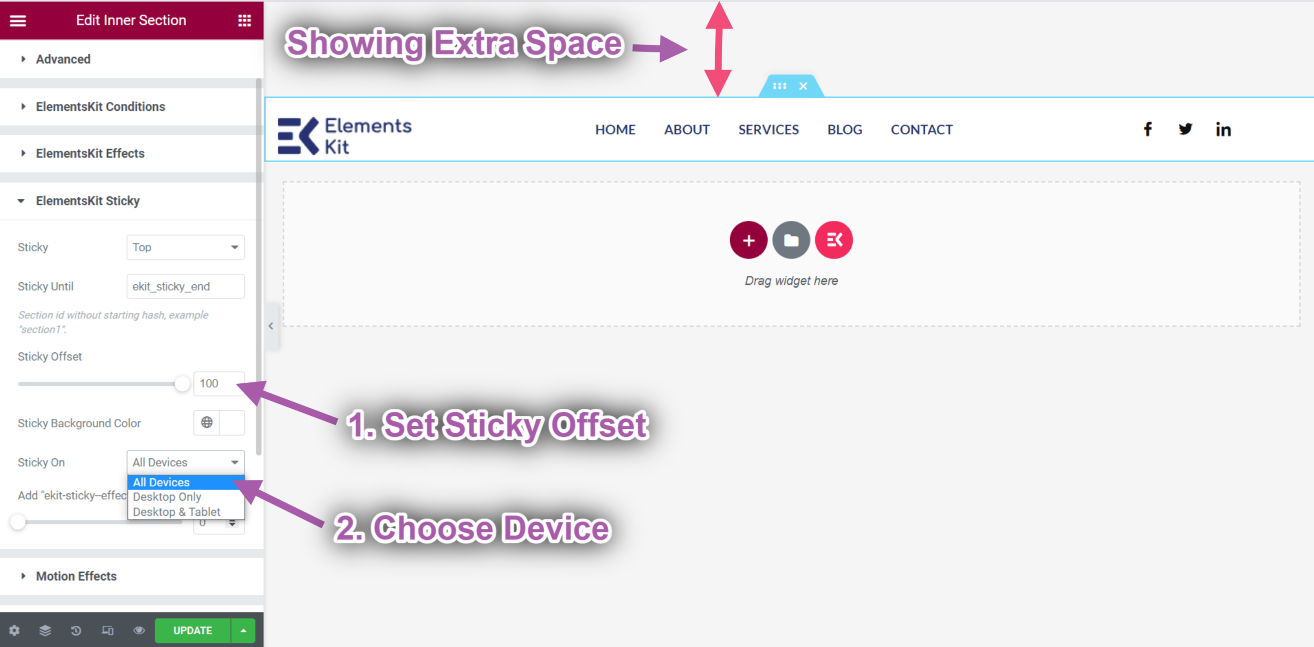
Sticky Offset On Top #
- You can decide the amount of space to be left while your content or picture will be sticky on the Top. You can do the same for other sticky positions. Provide the sticky offset: 100px. You can see the header is showing after 100px.
- There are three device choice options for you to display the sticky: All Devices, Desktop Only, Desktop & Tablet. Choose an option to decide exactly in which device (s) you want to show the content as sticky.
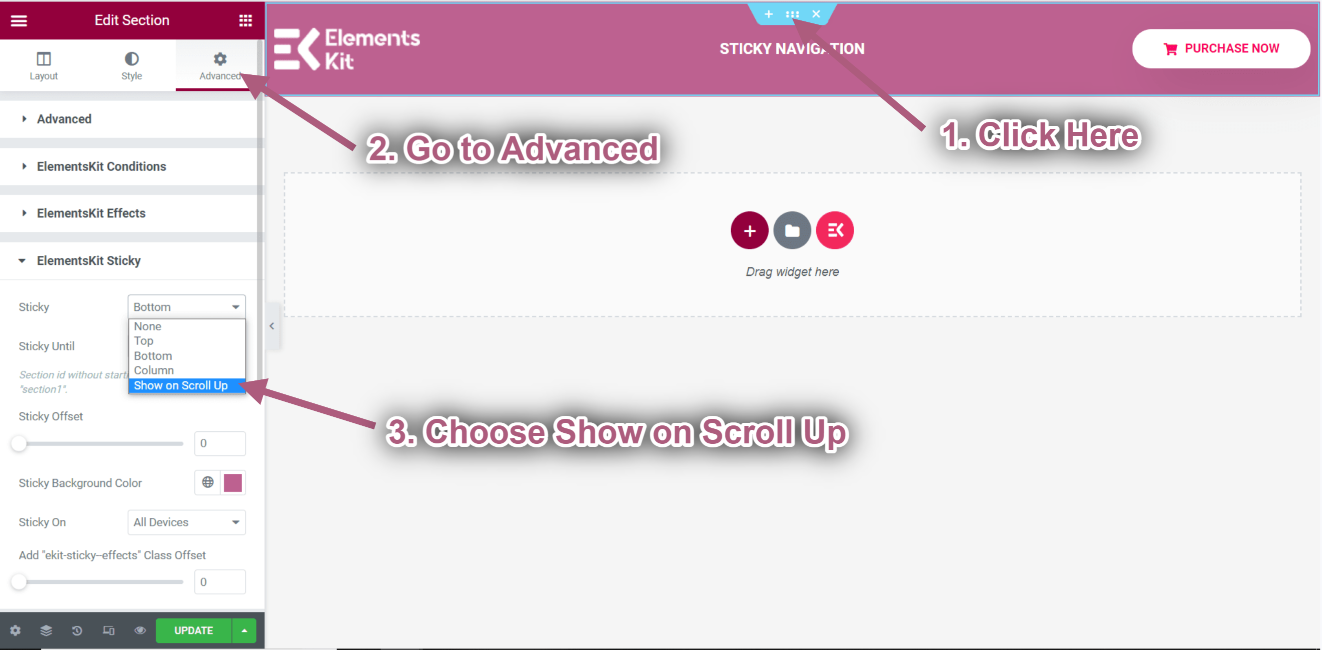
Show Sticky on Scroll Up #
This feature will help you stick any section of the page when you scroll up.
Watch our video guide:
Or, follow the step by step instructions:
- Click on the ElementsKit Icon to insert any header from our premade templates.
- Click on the Inner Section Icon.
- Go to Advanced-> Expand ElementsKit Sticky.
- Select sticky option➔ Show on Scroll Up from the drop-down.
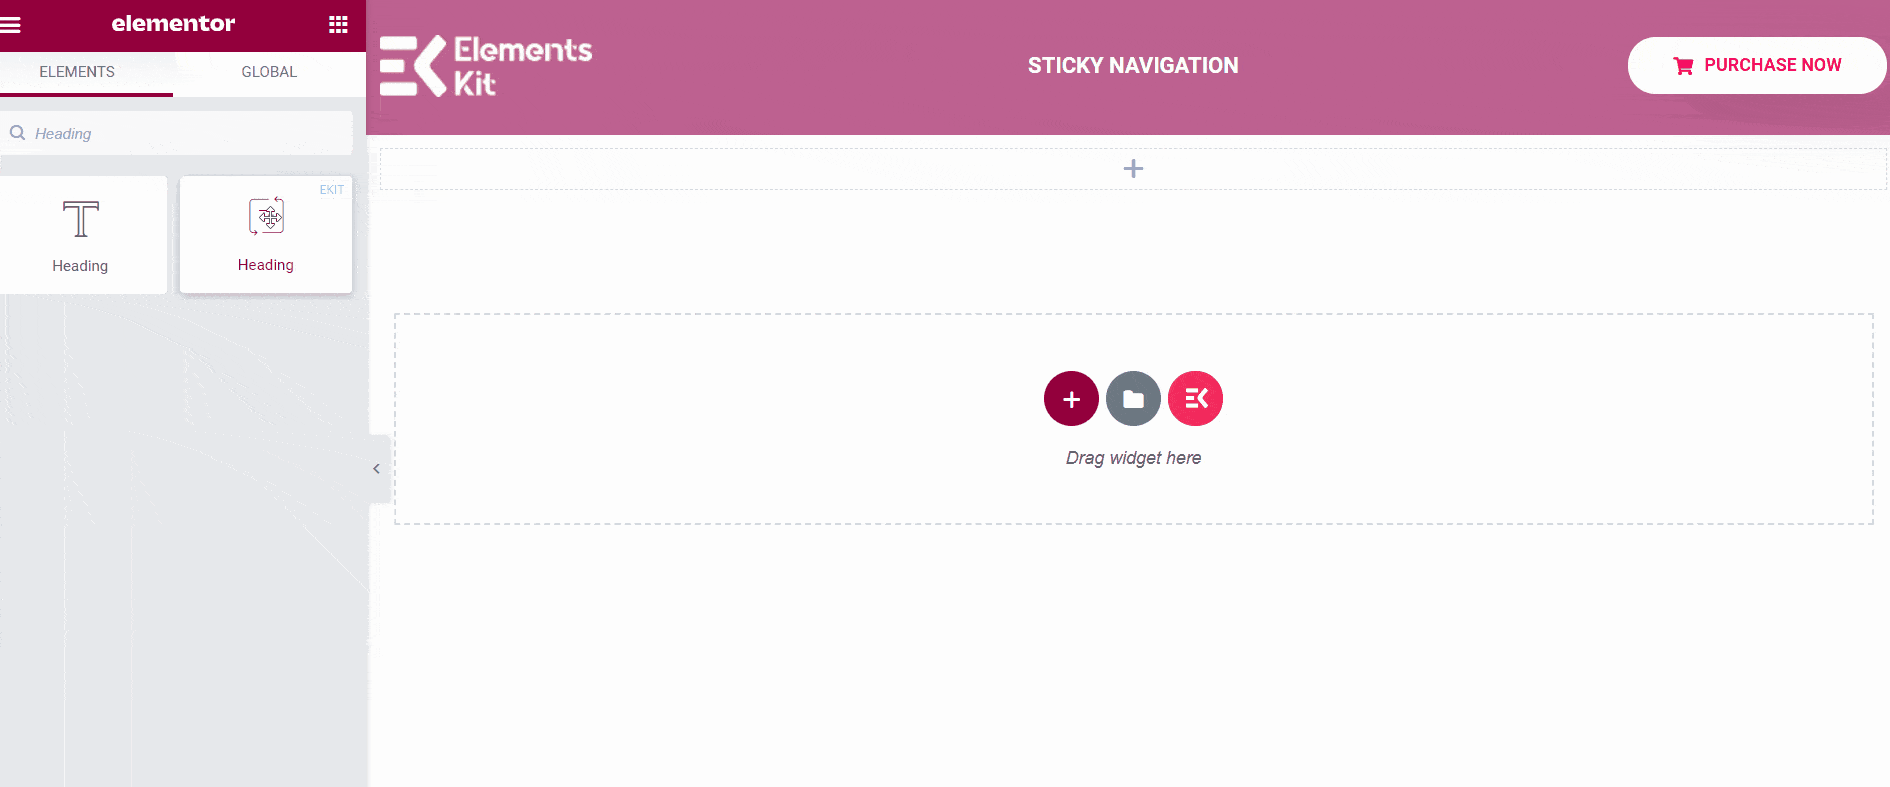
Go to Elements ➔ Drag the following widgets and drop on the selected area.
- Heading.
- Creative Button.
- Image.
- Heading.
- Video.
- Click on Update-> Go to your page->Refresh-> Scroll Up.
- You can see the header is sticky when you scroll up.
Sticky Until on Scroll Up #
Let’s make it sticky until the Sticky Header Section.
- Click on the sticky header Inner Section Icon.
- Now, going to the Advanced settings, set the CSS ID, and Copy it.
- Click on the sticky navigation header Inner Section Icon.
- Go to Advanced➔ Elementskit Sticky➔ Sticky Until.
- Now paste that sticky header section’s CSS ID into the Sticky Until field.
- Click Update-> Go to the Homepage-> Refresh-> Scroll Up.
- Now you can see the header is Sticky Until the sticky header section and when the video section comes in the header is no more sticky.
Sticky on Bottom #
This feature will help you stick any section on the bottom of the page.
Watch our video guide:
Or, follow the step by step instructions:
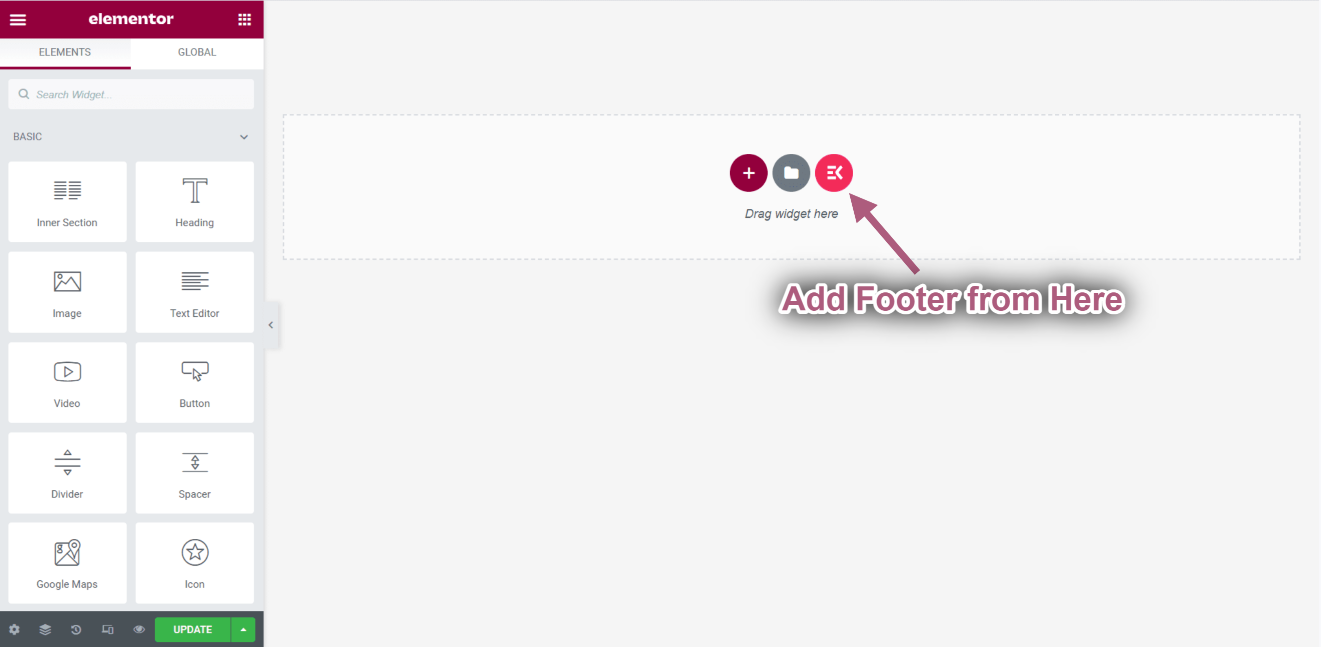
- Click on the ElementsKit Icon to insert any footer from our premade templates.
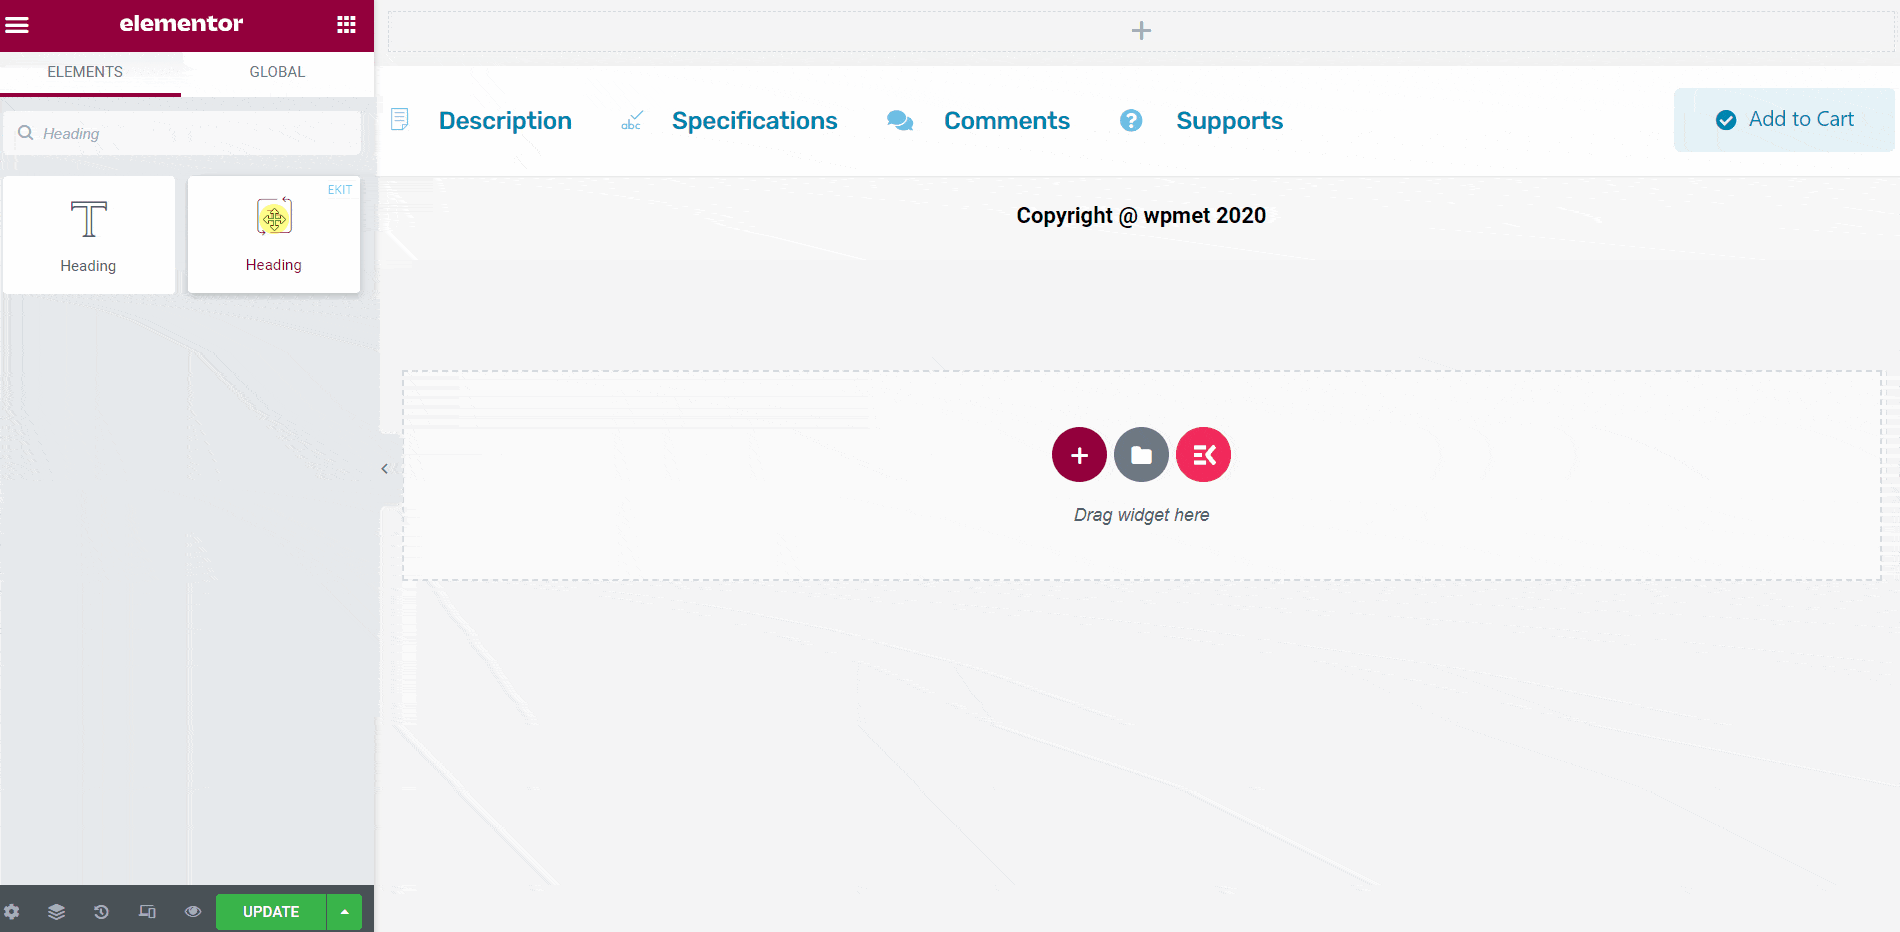
Go to Elements ➔ Drag the following widgets and drop on the selected area.
- Heading.
- Client Logo.
- Video.
- Heading.
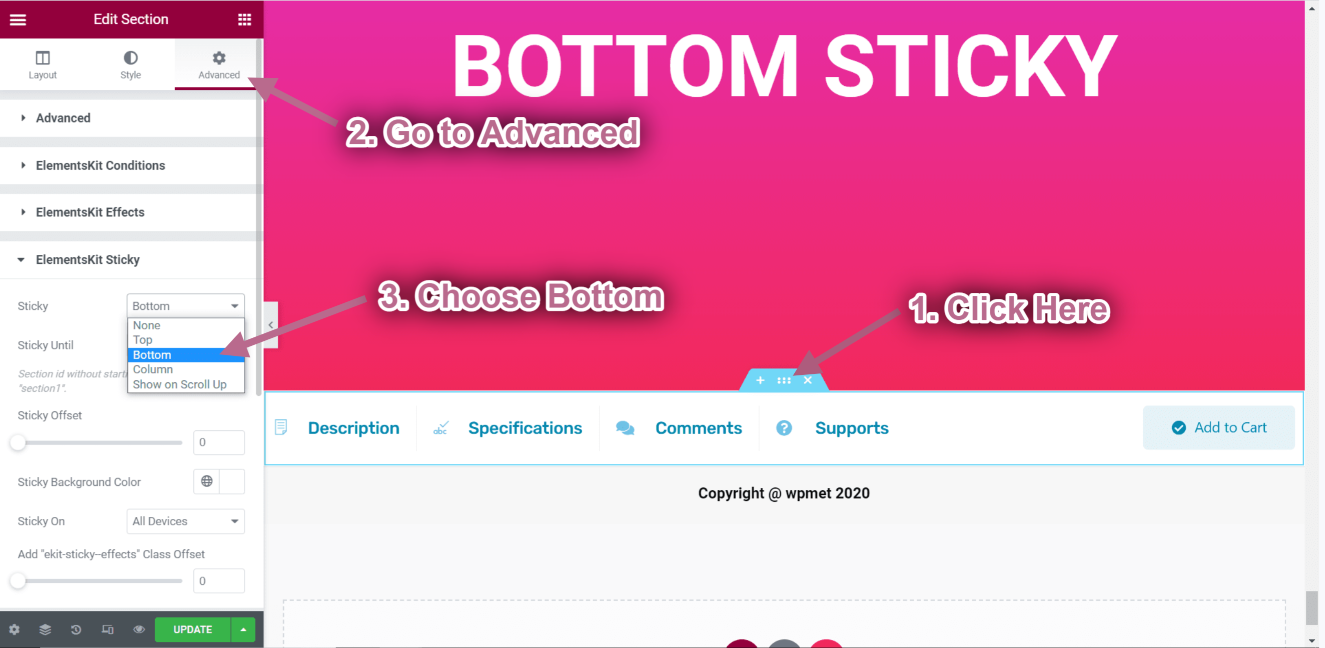
- Click on the Footer Inner Section Icon.
- Go to Advanced-> Expand ElementsKit Sticky.
- Select sticky option➔ Bottom from the drop-down.
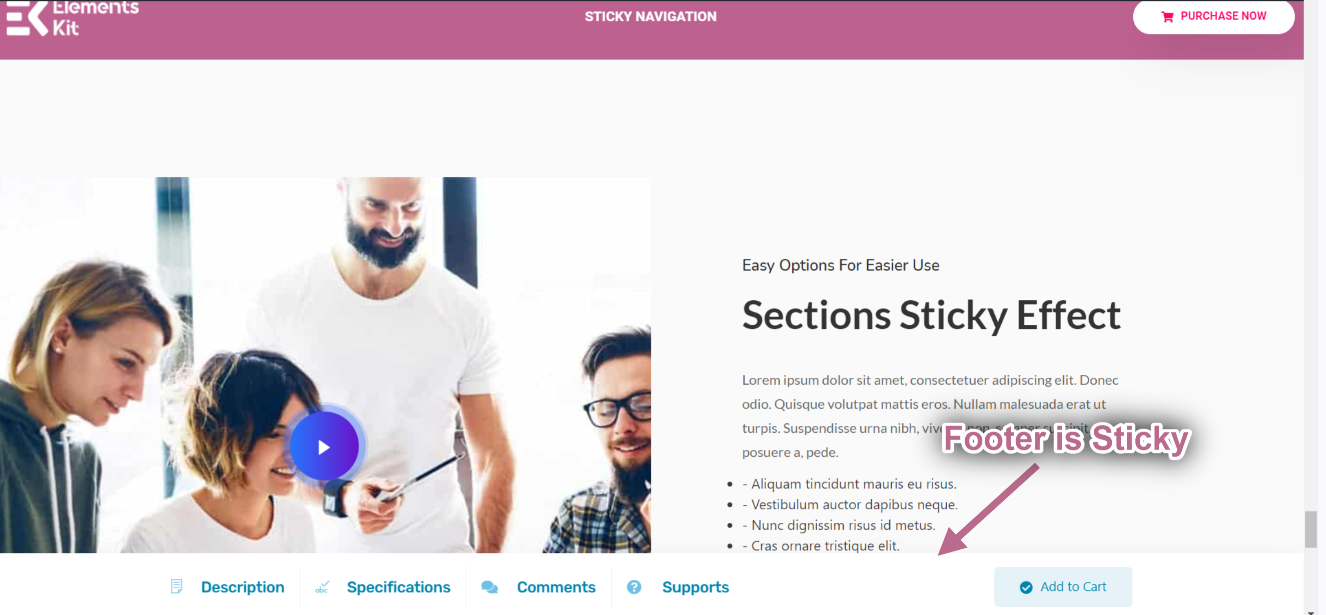
- Click on Update-> Go to your page->Refresh-> Scroll Up.
- You can see the footer is sticky when you scroll up.
Sticky Until on Bottom #
Let’s make it sticky until the Bottom Sticky Section.
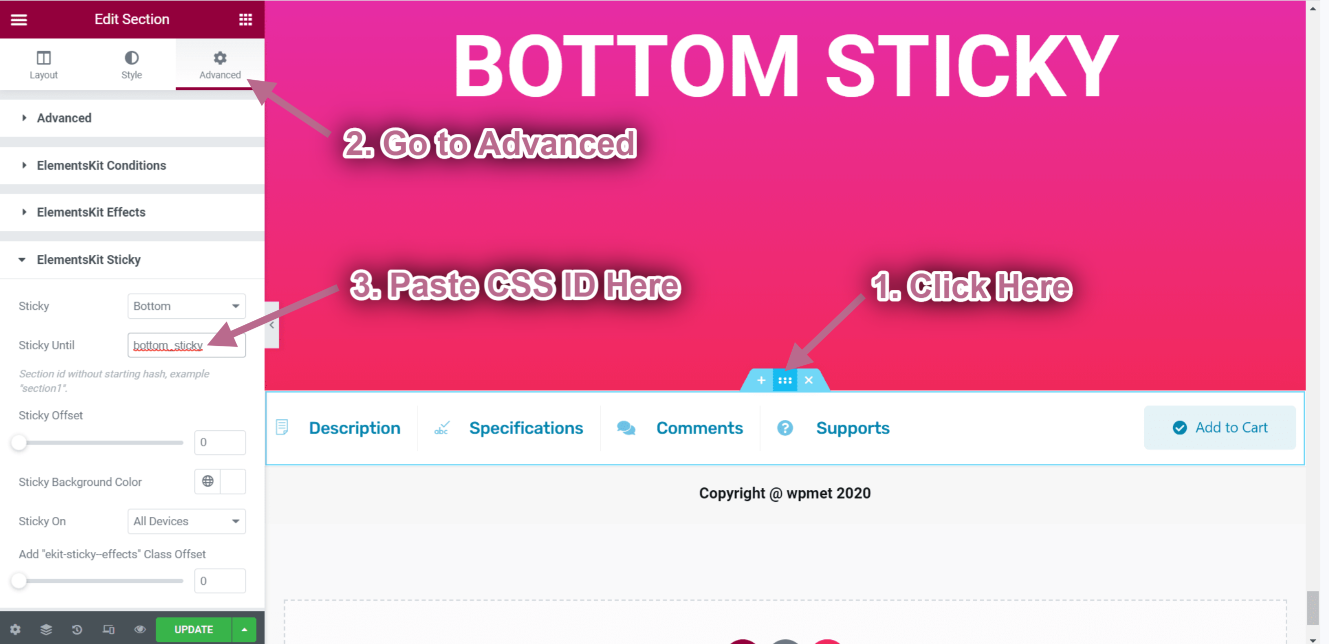
- Click on the Bottom Sticky Inner Section Icon.
- Now, going to the Advanced settings, set the CSS ID, and Copy it.

- Click on the footer Inner Section Icon.
- Go to Advanced➔ Elementskit Sticky➔ Sticky Until.
- Now paste that bottom sticky section’s CSS ID into the Sticky Until field.
- Click Update-> Go to the Homepage-> Refresh-> Scroll Up.
- Now you can see the header is Sticky Until the bottom sticky section and when the client logo section comes in the footer is no more sticky.

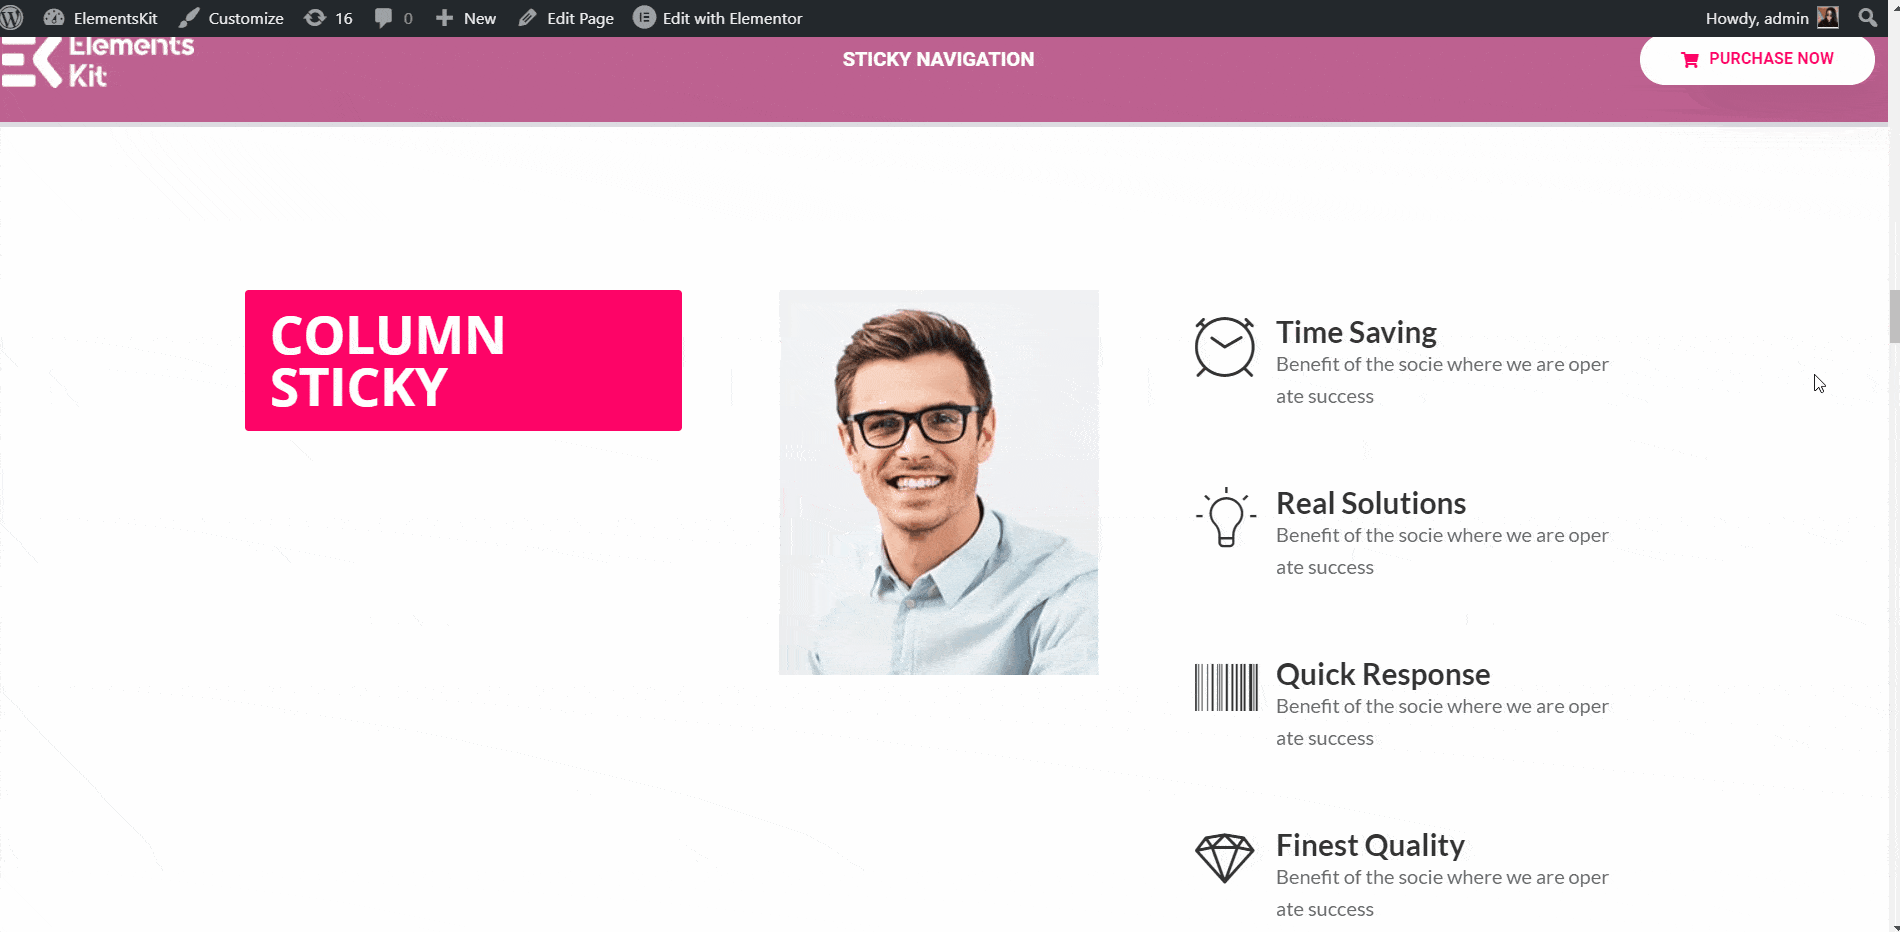
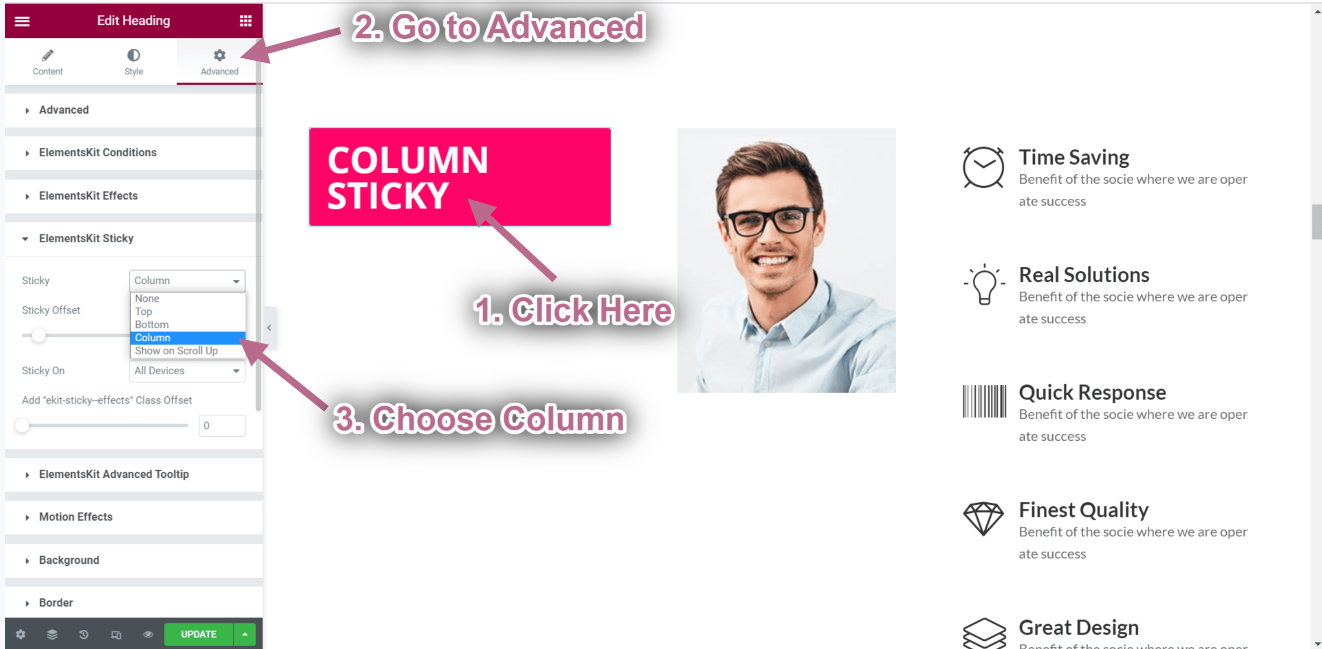
Sticky on Column #
This feature will help you stick any section on the column.
Watch our video guide:
Or, follow the step by step instructions:
- Select your structure from the selected area. Here I am taking 3 column.
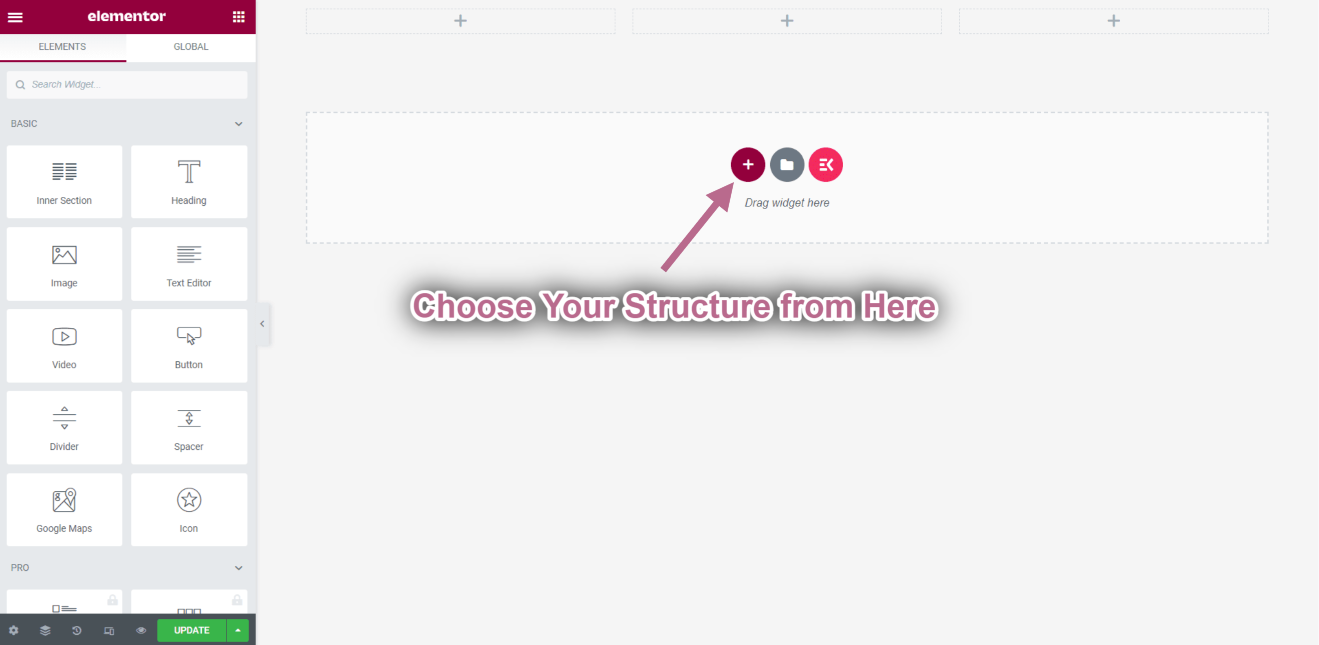
Go to Elements ➔ Drag the following widgets and drop on the selected area.
- Heading.
- Image.
- Icon Box.
Let’s make the heading and image section sticky.
- Click on the Heading Inner Section Icon.
- Go to Advanced-> Expand ElementsKit Sticky.
- Select the sticky option➔ Column from the drop-down.
- Click on the Image Inner Section Icon.
- Go to Advanced-> Expand ElementsKit Sticky.
- Select the sticky option➔ Column from the drop-down.
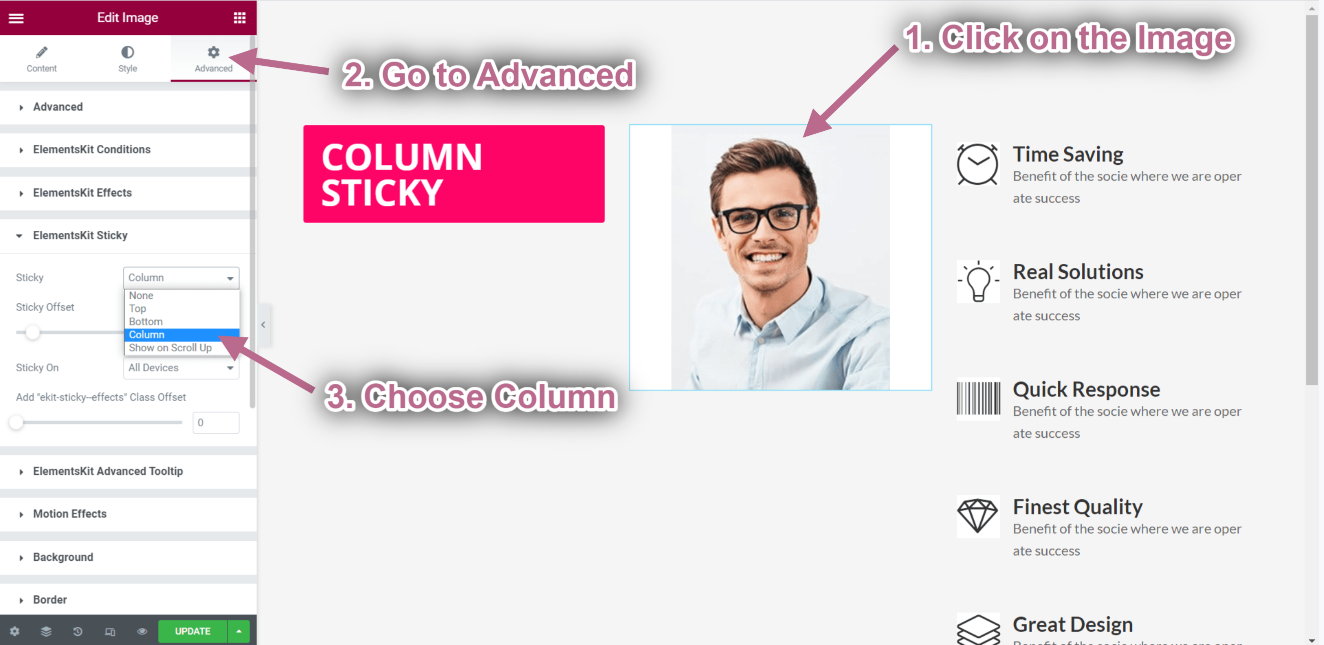
- Click on Update-> Go to your page->Refresh-> Scroll Down.
- You can see the heading and image are sticky and the right side of the icon box content is still moving.