ElementsKit is the all-in-one solution that comes with all the useful features to build websites with Elementor. This includes a set of Social Media Feed widgets, that you can use to embed your social media feed on your website. ElementsKit currently supports Twitter feed, Facebook feed, Instagram feed, Dribble feed, Behance feed, and Pinterest feed integration.
How to add Pinterest Feed to WordPress using Elementor #
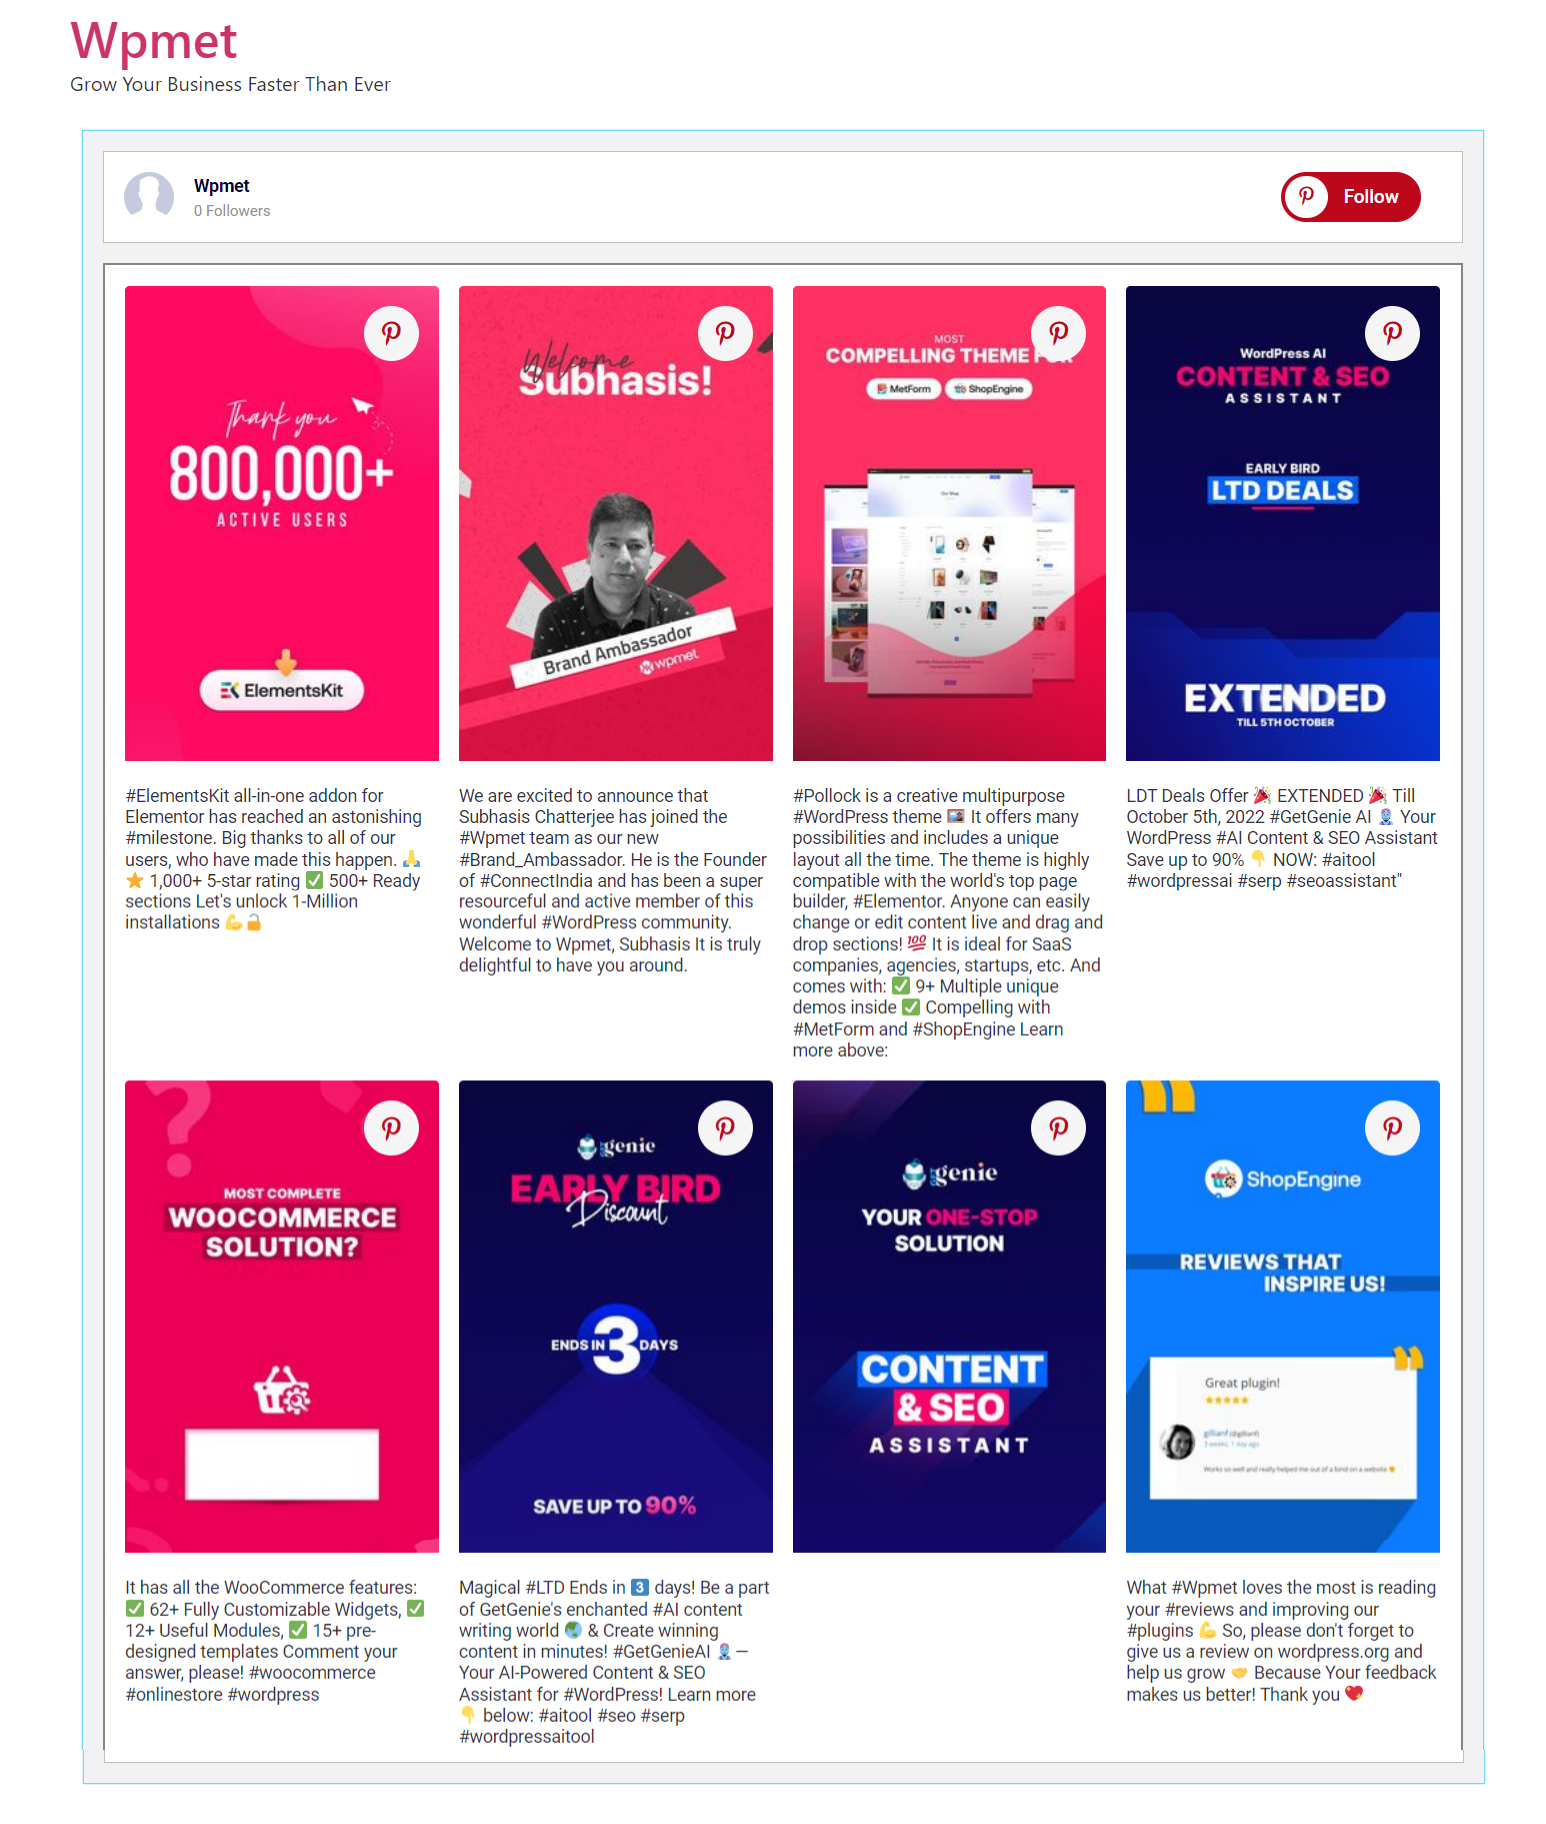
Embedding Pinterest images to WordPress is easy with ElementsKit. Using the Pinterest feed widget, you can easily add Pinterest feed to WordPress and display Pinterest pins and boards on your website with the highest number of customization options.
Read this documentation to learn how to add Pinterest images to WordPress using the ElementsKit Pinterest Feed widget for Elementor.
Step-1: Enable the Pinterest Feed widget #
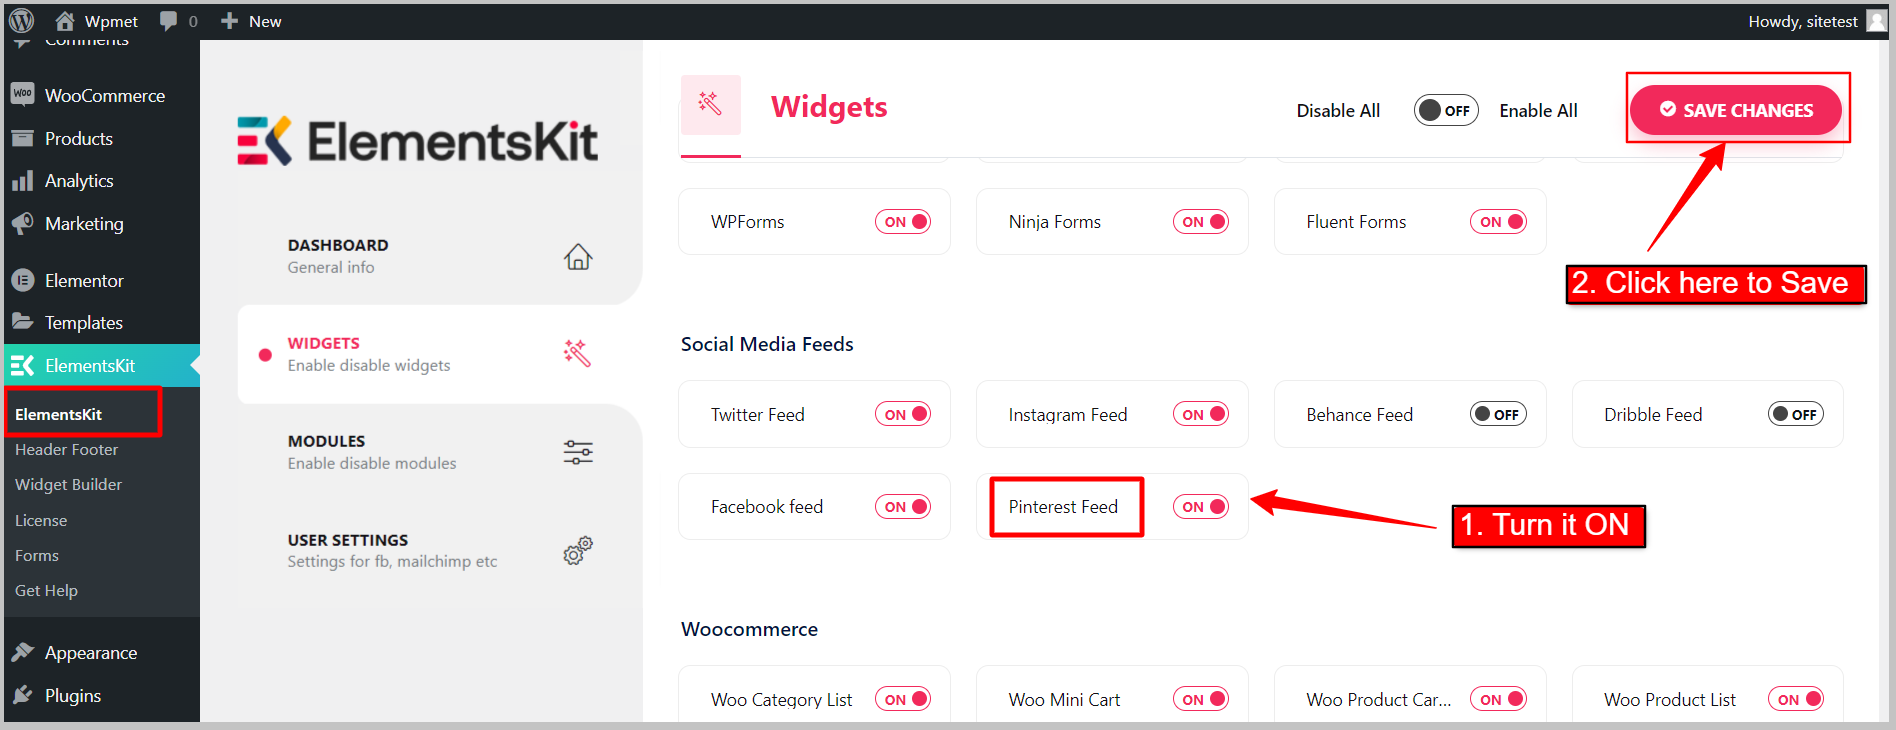
To use the Pinterest Feed widget of ElementsKit,
- Login to your WordPress site.
- Navigate to ElementsKit > WIDGETS from your WordPress dashboard.
- Scroll down to the Social Media Feeds section and find the Pinterest Feed widget from the list.
- Enable the widget by switching the toggle button to ON.
- Click on the SAVE CHANGES button.
Step-2: How to use Pinterest Feed widget #
Now you can use the Pinterest Feed widget. To use the widget, follow the following steps.
2.1 Add the widget into your design: #
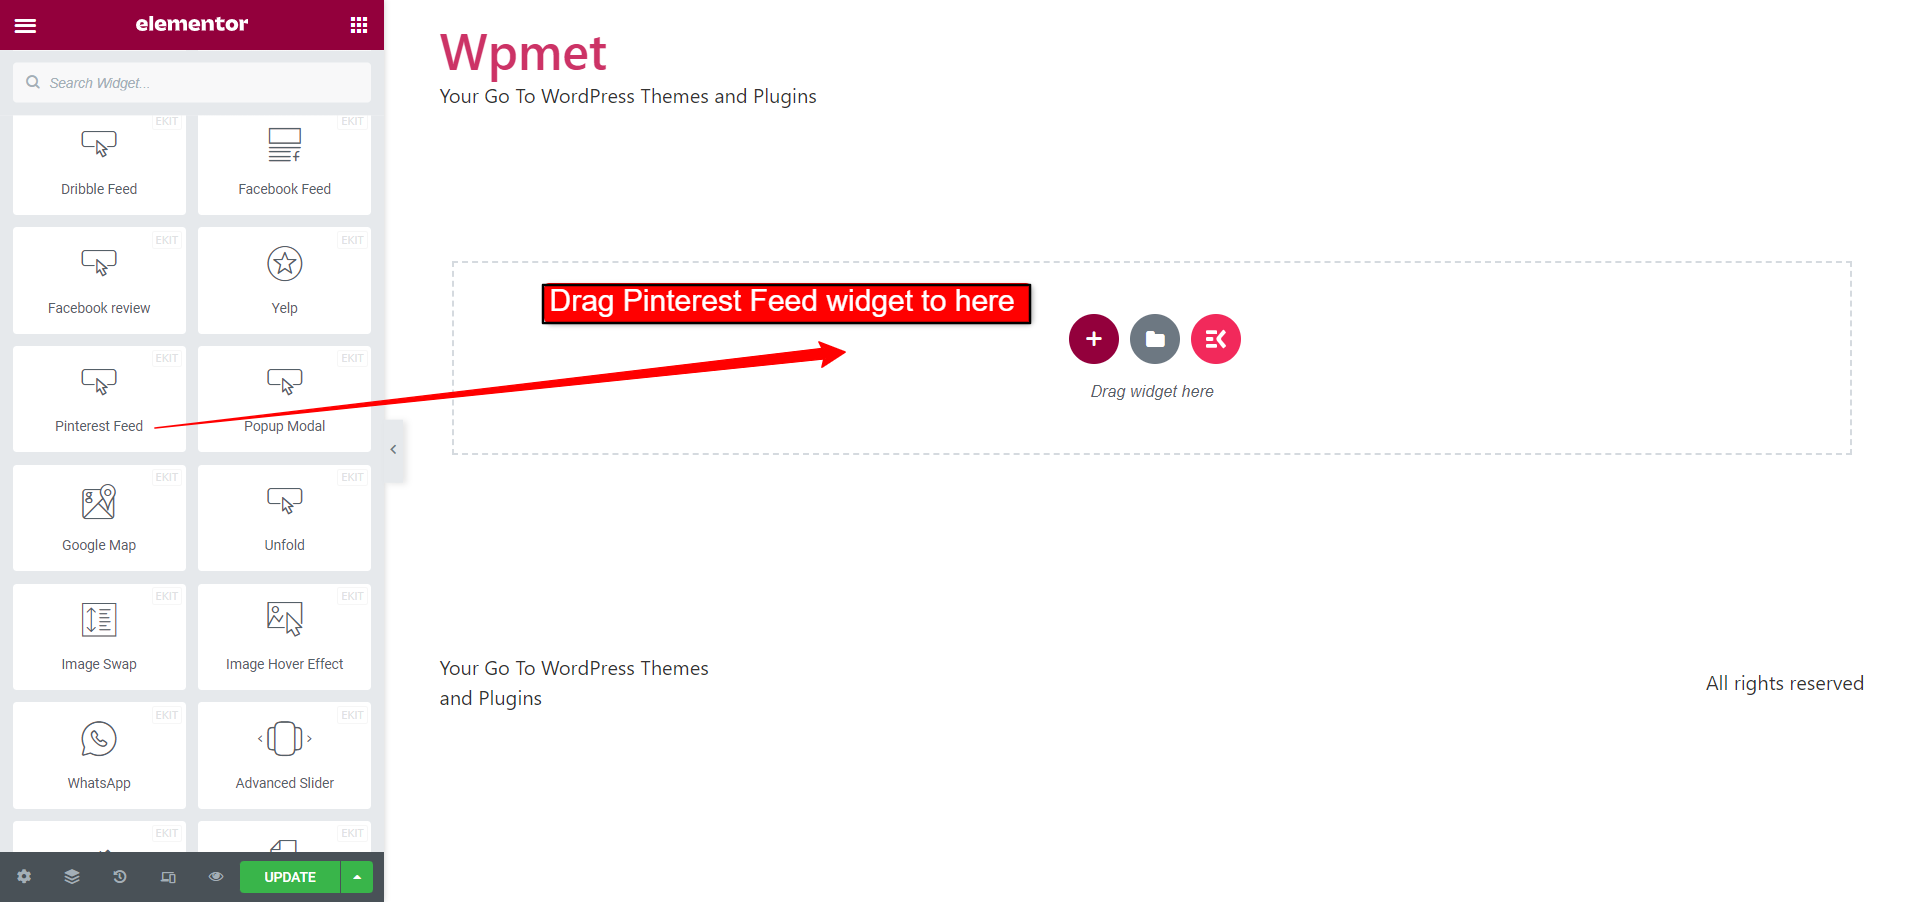
- Open a page with Elementor editor.
- Find the Pinterest widget from the left panel.
- Drag and drop the widget into your design.
2.2 Configure the Pinterest feed setting: #
To configure the Pinterest feed setting,
- Go to the Setting section under the content tab.
- Enter your Pinterest Username.
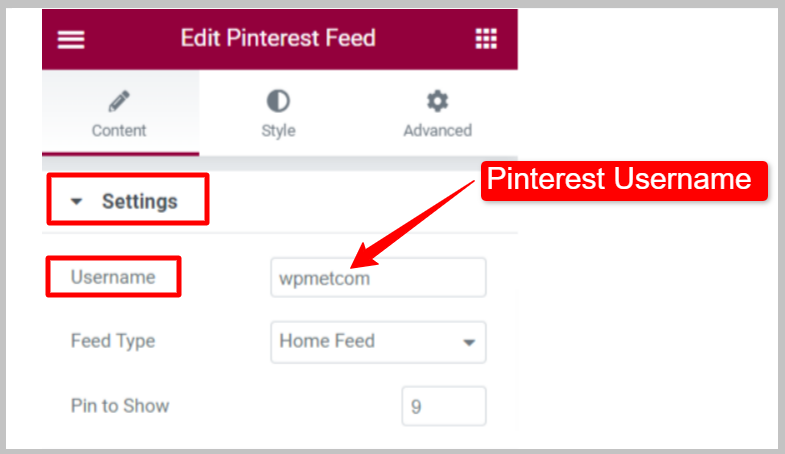
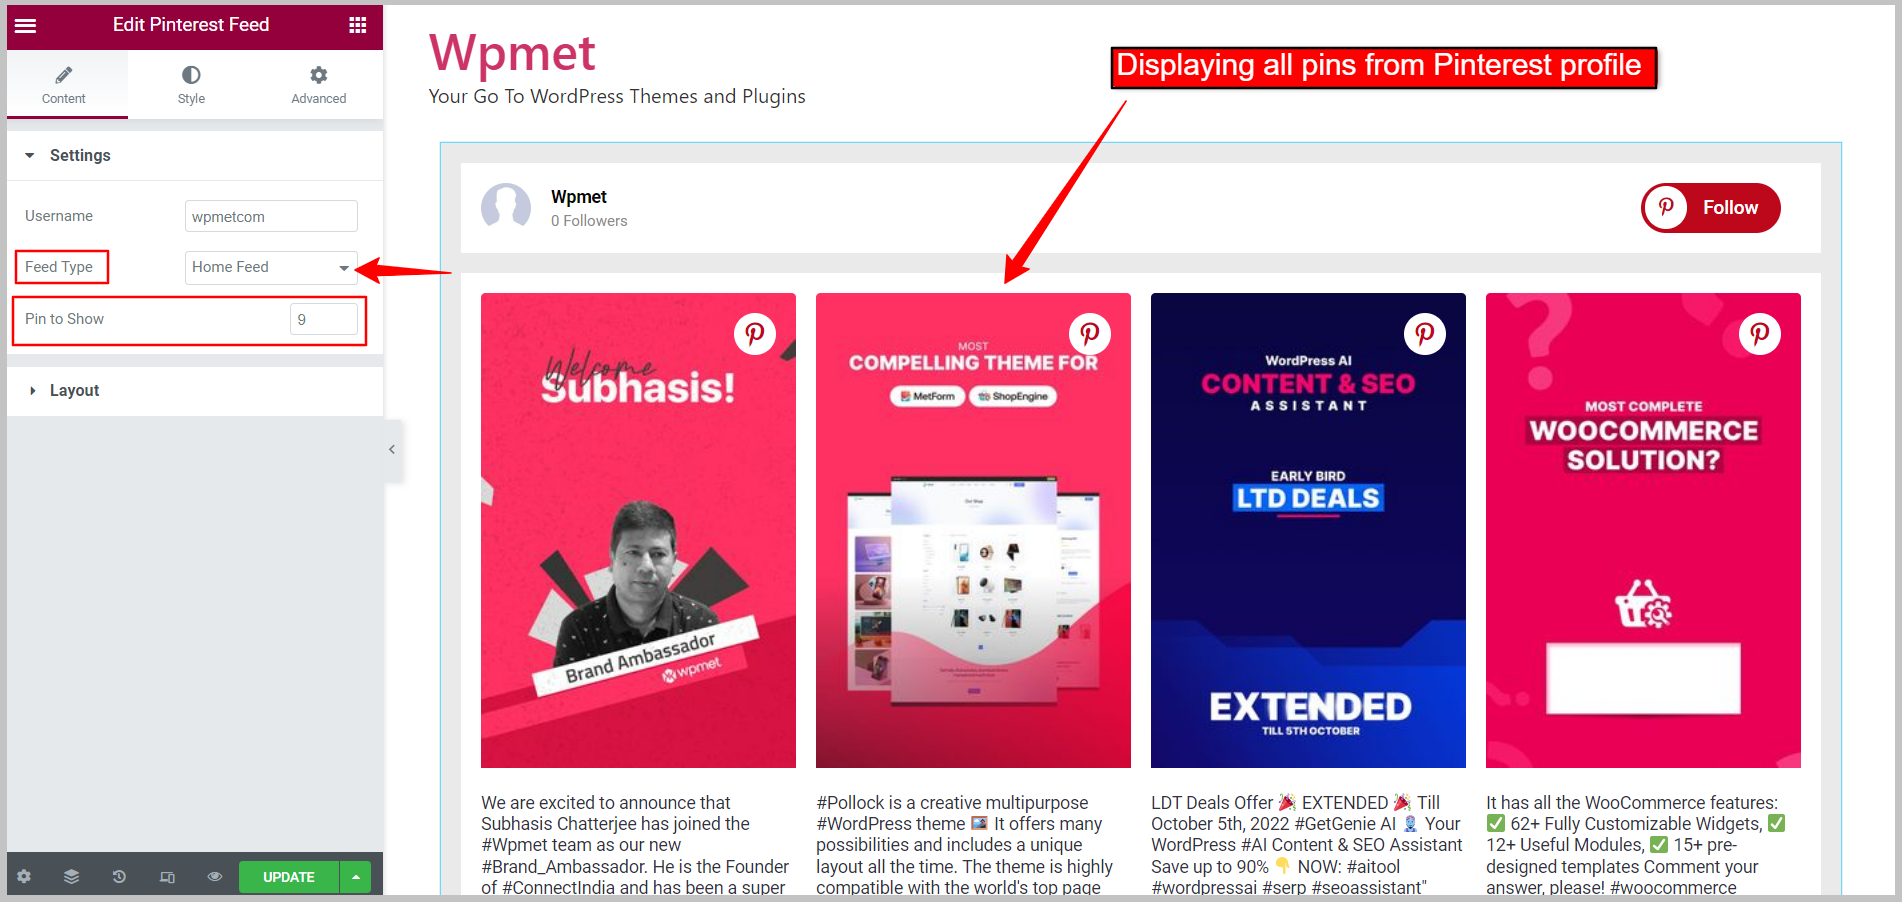
Select Feed Type to choose whether to show the pins or the boards on the website.
Feed Type: Home Feed #
Shows Pins from the profile’s home feed.
- Feed type: Set to Home Feed.
- Pins to Show: Set the number of Pinterest Pins to show on the web page.
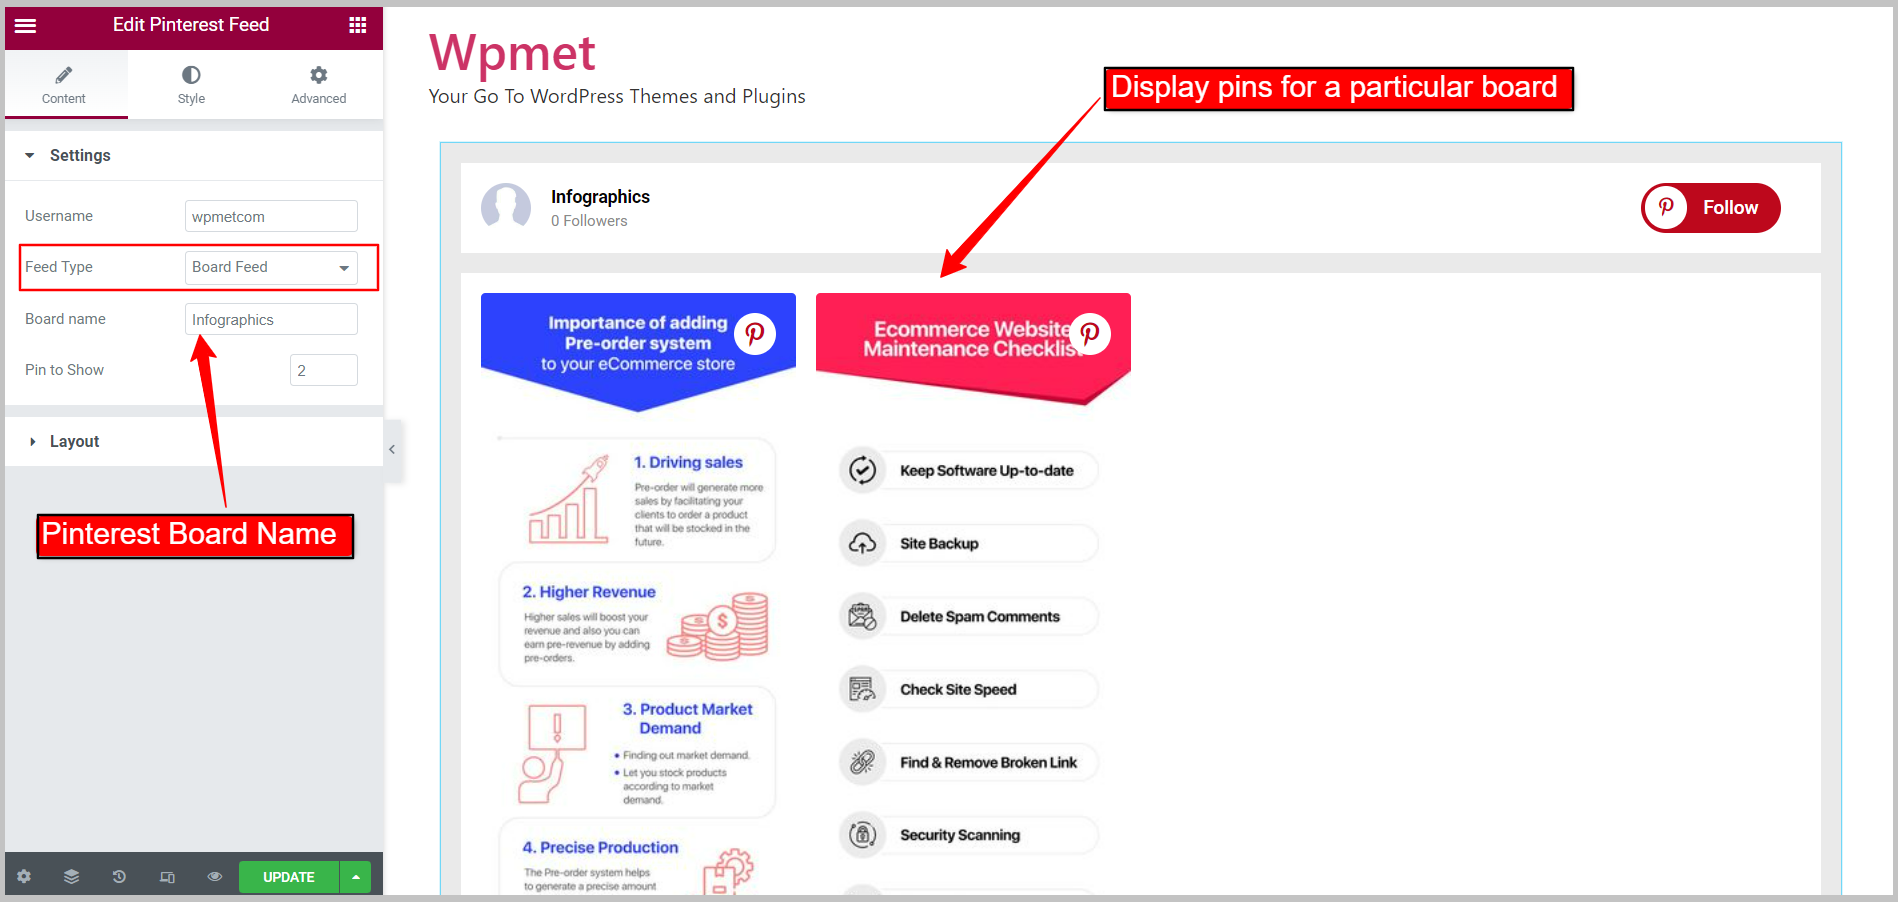
Feed Type: Board Feed #
Shows a particular board from your Pinterest profile.
- Feed type: Set to Board Feed.
- Board name: Enter the name of the Pinterest board you want to display.
- Pins to Show: Set the number of Pinterest Pins to show on the web page.
2.3 Configure the Pinterest feed layout: #
Go to the Layout section under content tab. The widget has two layout styles available.
Cards Style: Gird #
- Cards Style: Set to Grid.
- Column Count: Number of items to show in a single row.
- Column Gap: Adjust gap between columns.
- Column Height: Adjust column height of items in each row.
Cards Style: Masonry #
- Cards Style: Set to Masonry
- Column Count: Number of items to show in a single row.
- Column Gap: Adjust gap between columns.
[img 2.3b/gif]
Step-3: Customize styles of Pinterest Feed #
You can customize the appearance of the Pinterest Feed on your website with the highest number of options available. Here are the steps to follow:
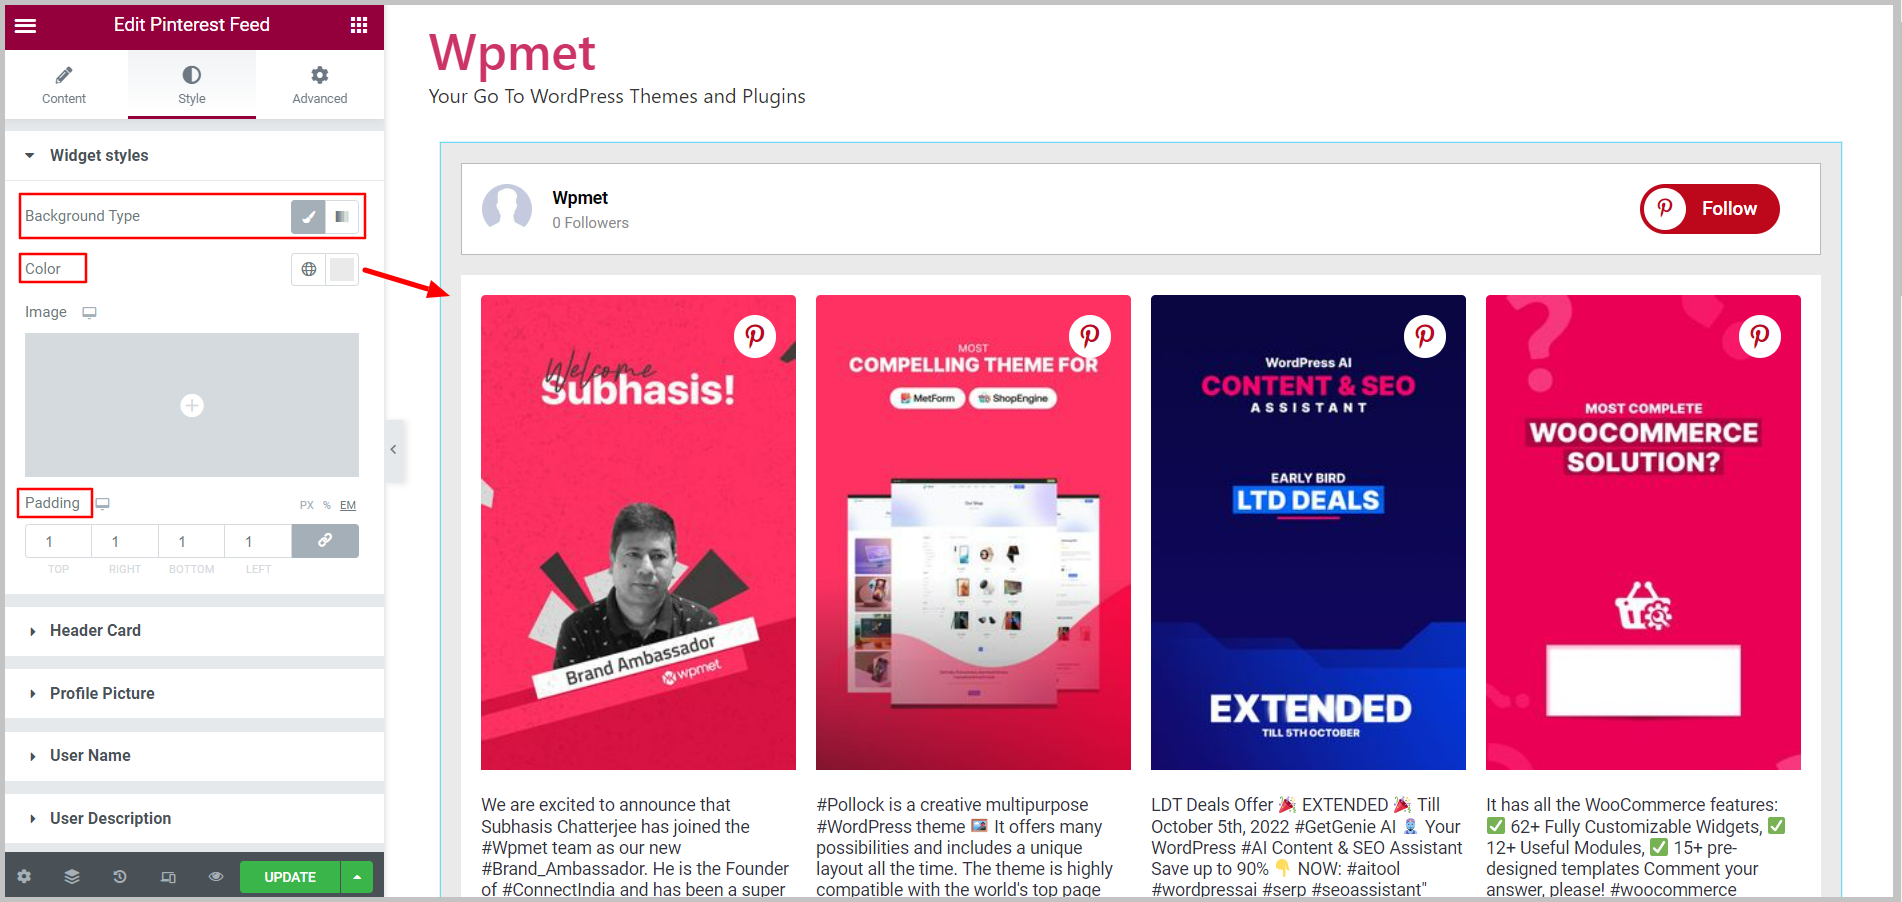
3.1 Widget Style #
Style option for the entire feed. To customize the styles,
- Background Type: Choose the Background color type; Classic or Gradient.
- Color: Choose background Color.
- Image: Can use an image as background.
- Padding: Set padding for the entire Pinterest feed.
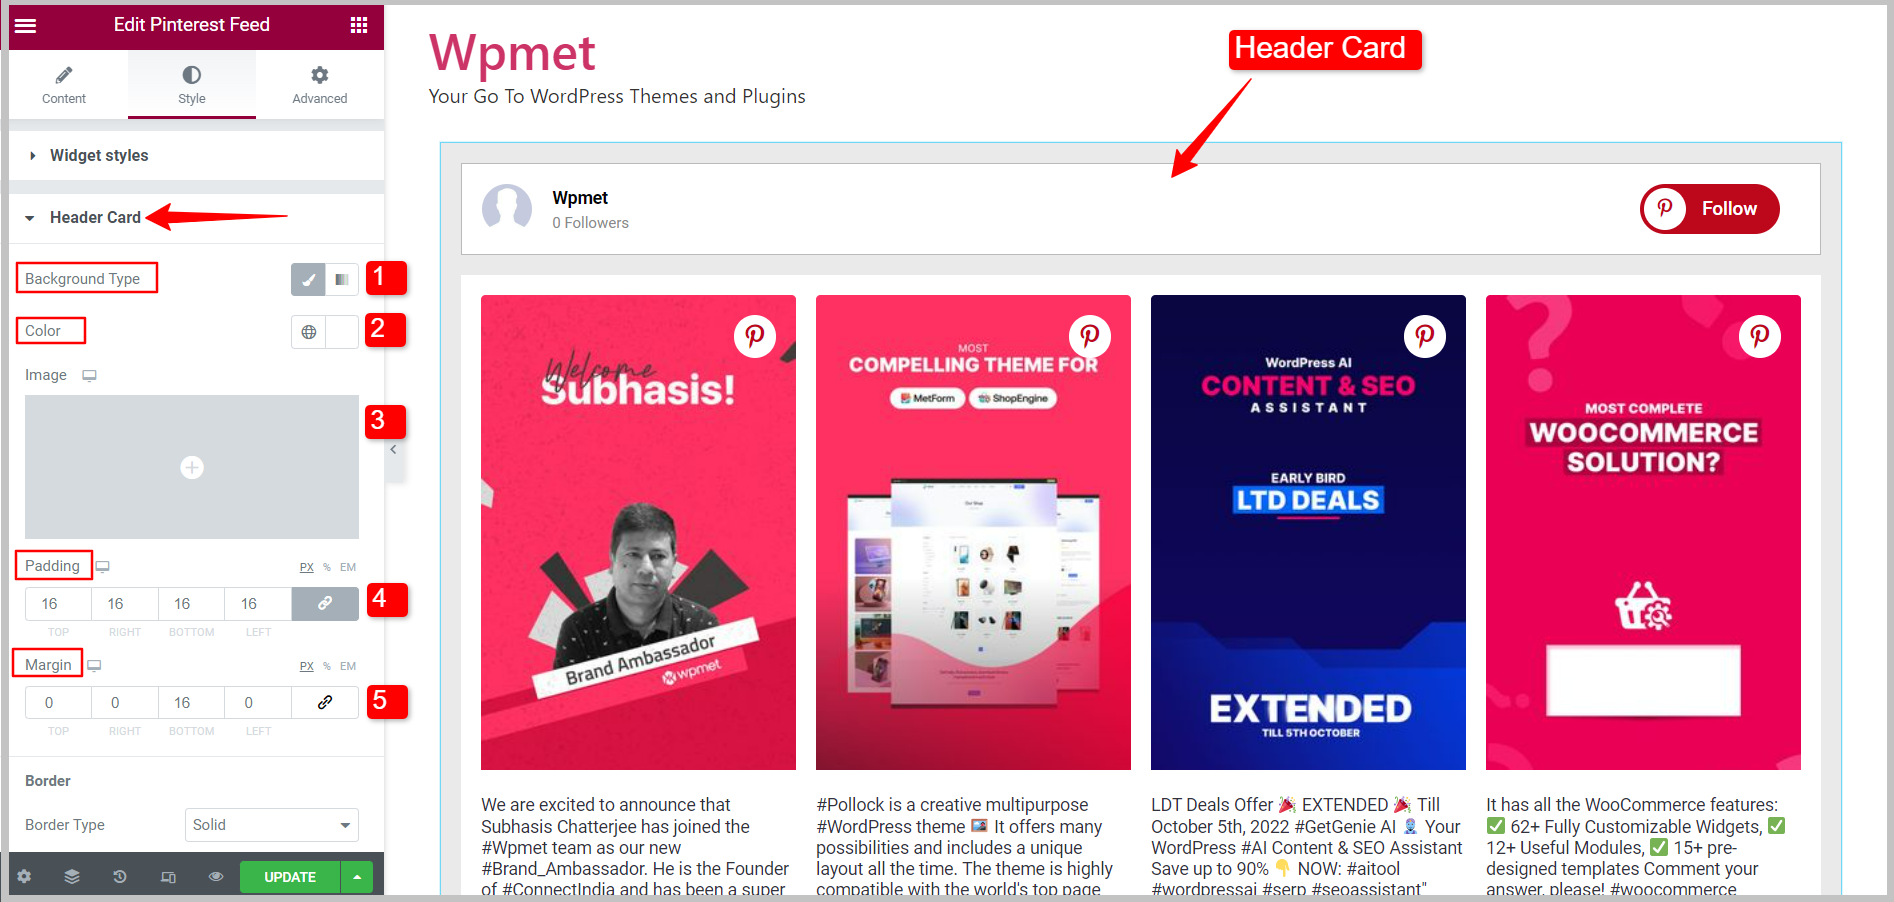
3.2 Header Card #
Style options for the header of the feed. To customize the styles,
- Background Type: Choose the Background color type; Classic or Gradient.
- Color: Choose the background color for Header Card.
- Image: Can use an image as background.
- Padding: Set padding for the header items.
- Margin: Adjust the margin for items in the header card.
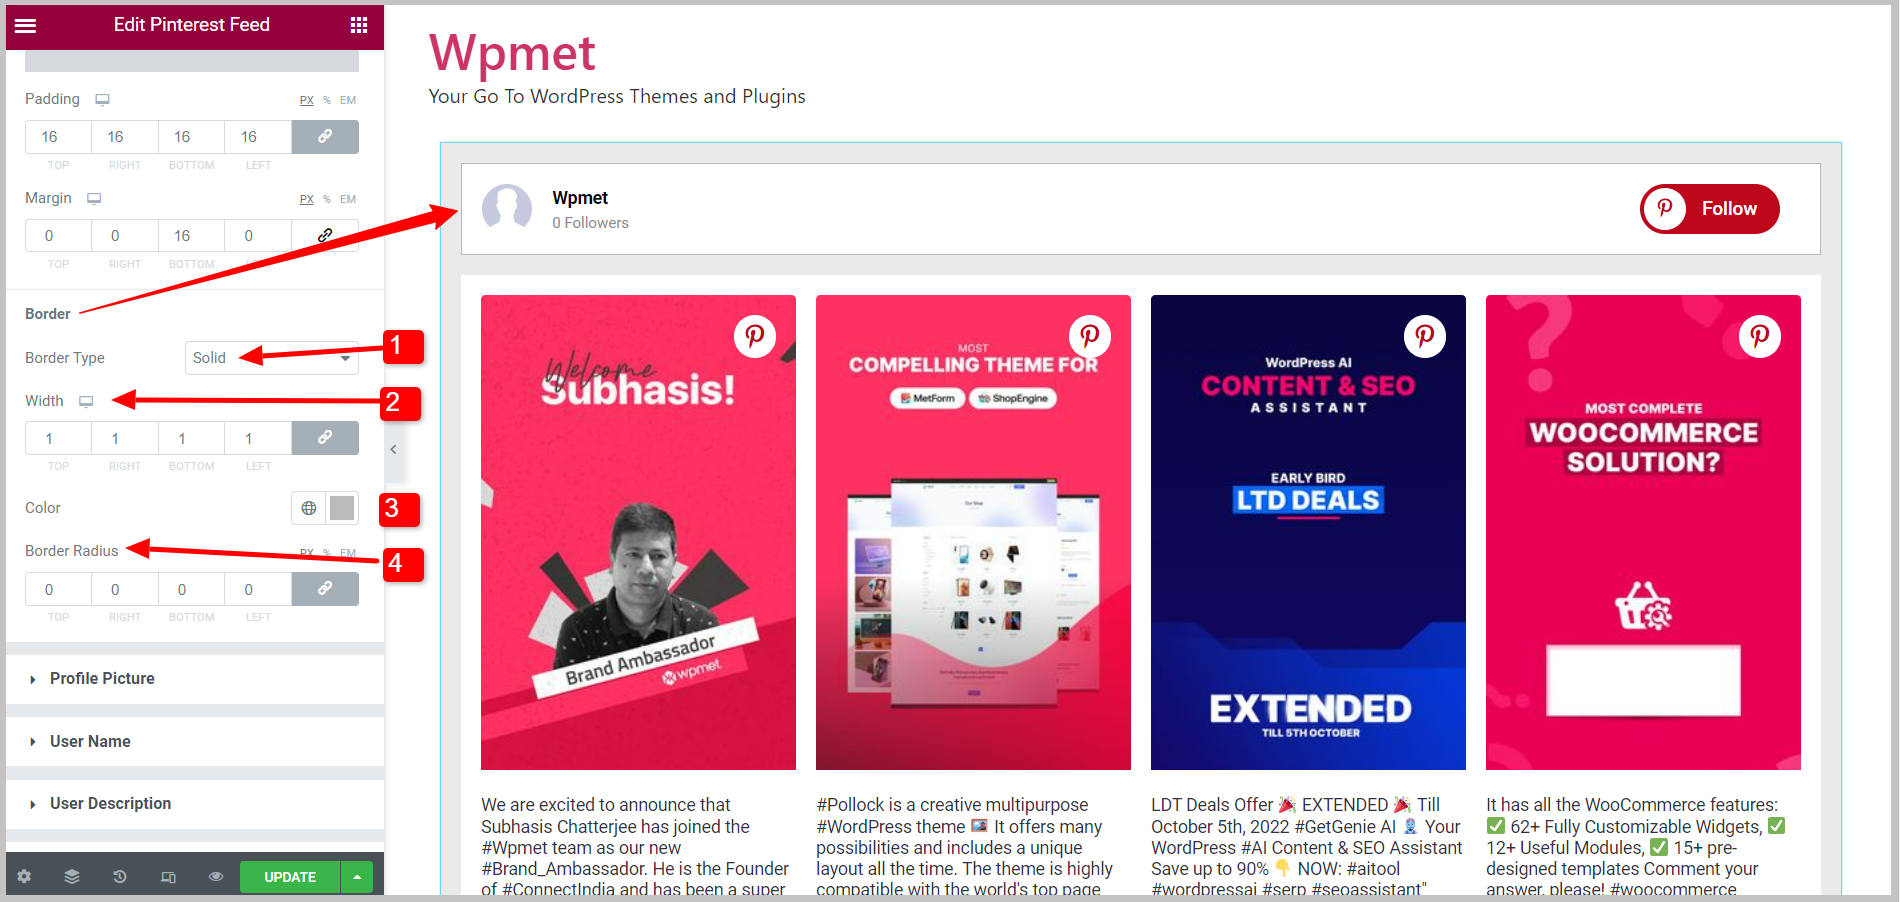
Border of Header Card
- Border Type: Select border type for header card from the given options; Solid, Double, Dotted, Dashed, Groove, or None(no border).
- Width: Set the border width for the header card.
- Color: Set the border color for the header card.
- Border Radius: Set the border radius for the header card.
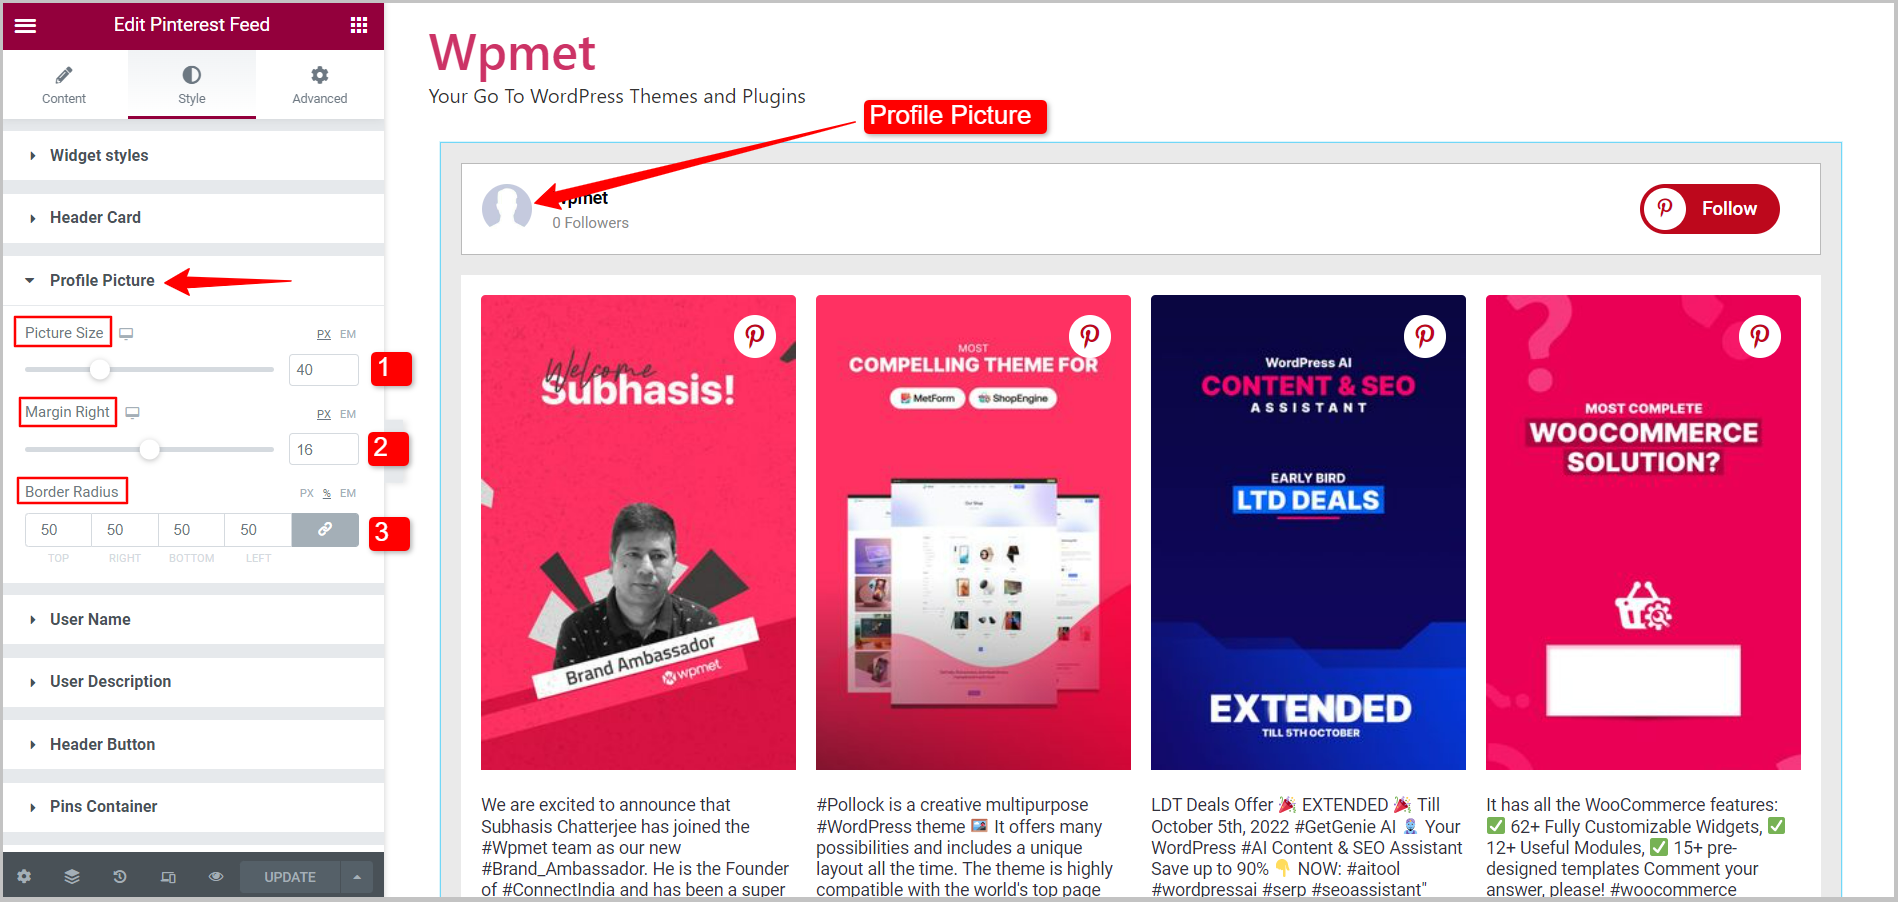
3.3 Profile Picture #
Style options for the Profile Picture in the display. To customize the styles,
- Picture Size: Adjust the size of the profile picture.
- Margin Right: Adjust the margin to the right.
- Border Radius: Set the Border radius of the profile picture.
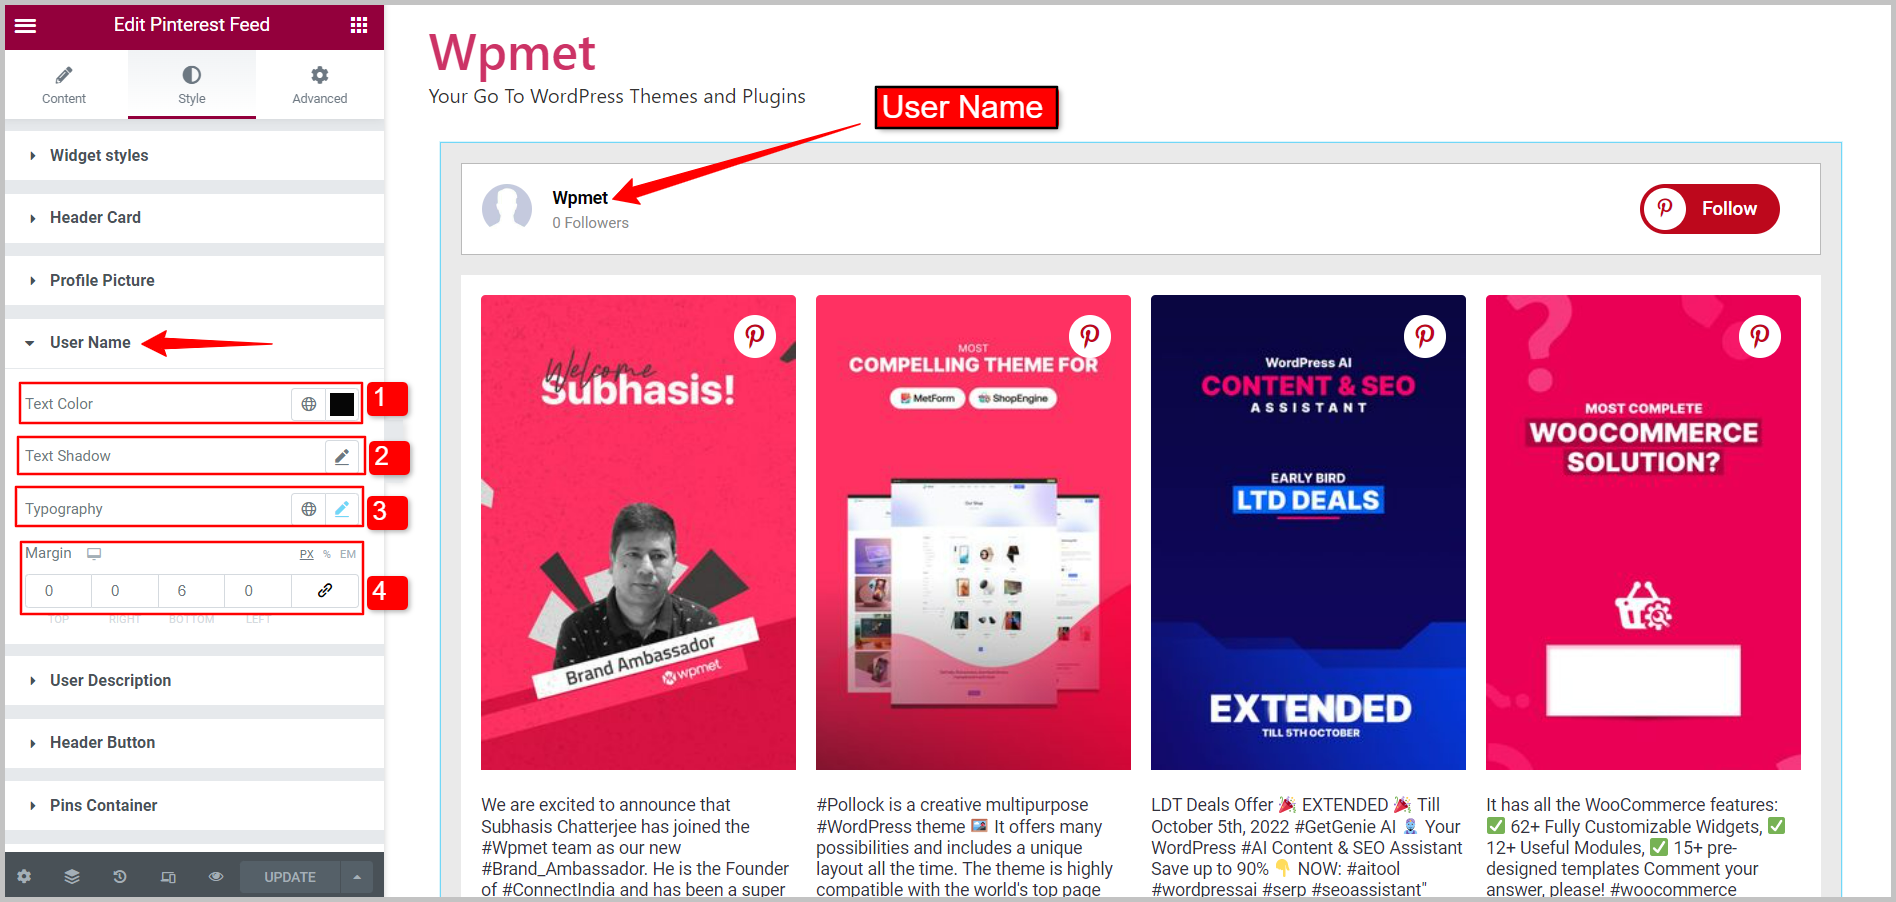
3.4 User Name #
Style options for the User Name to display. To customize the styles,
- Text Color: Choose a color for the user name text.
- Text Shadow: Tailor the design by adding text shadow to the user name.
- Typography: Set typography for the user name.
- Margin: Adjust the margin around the user name.
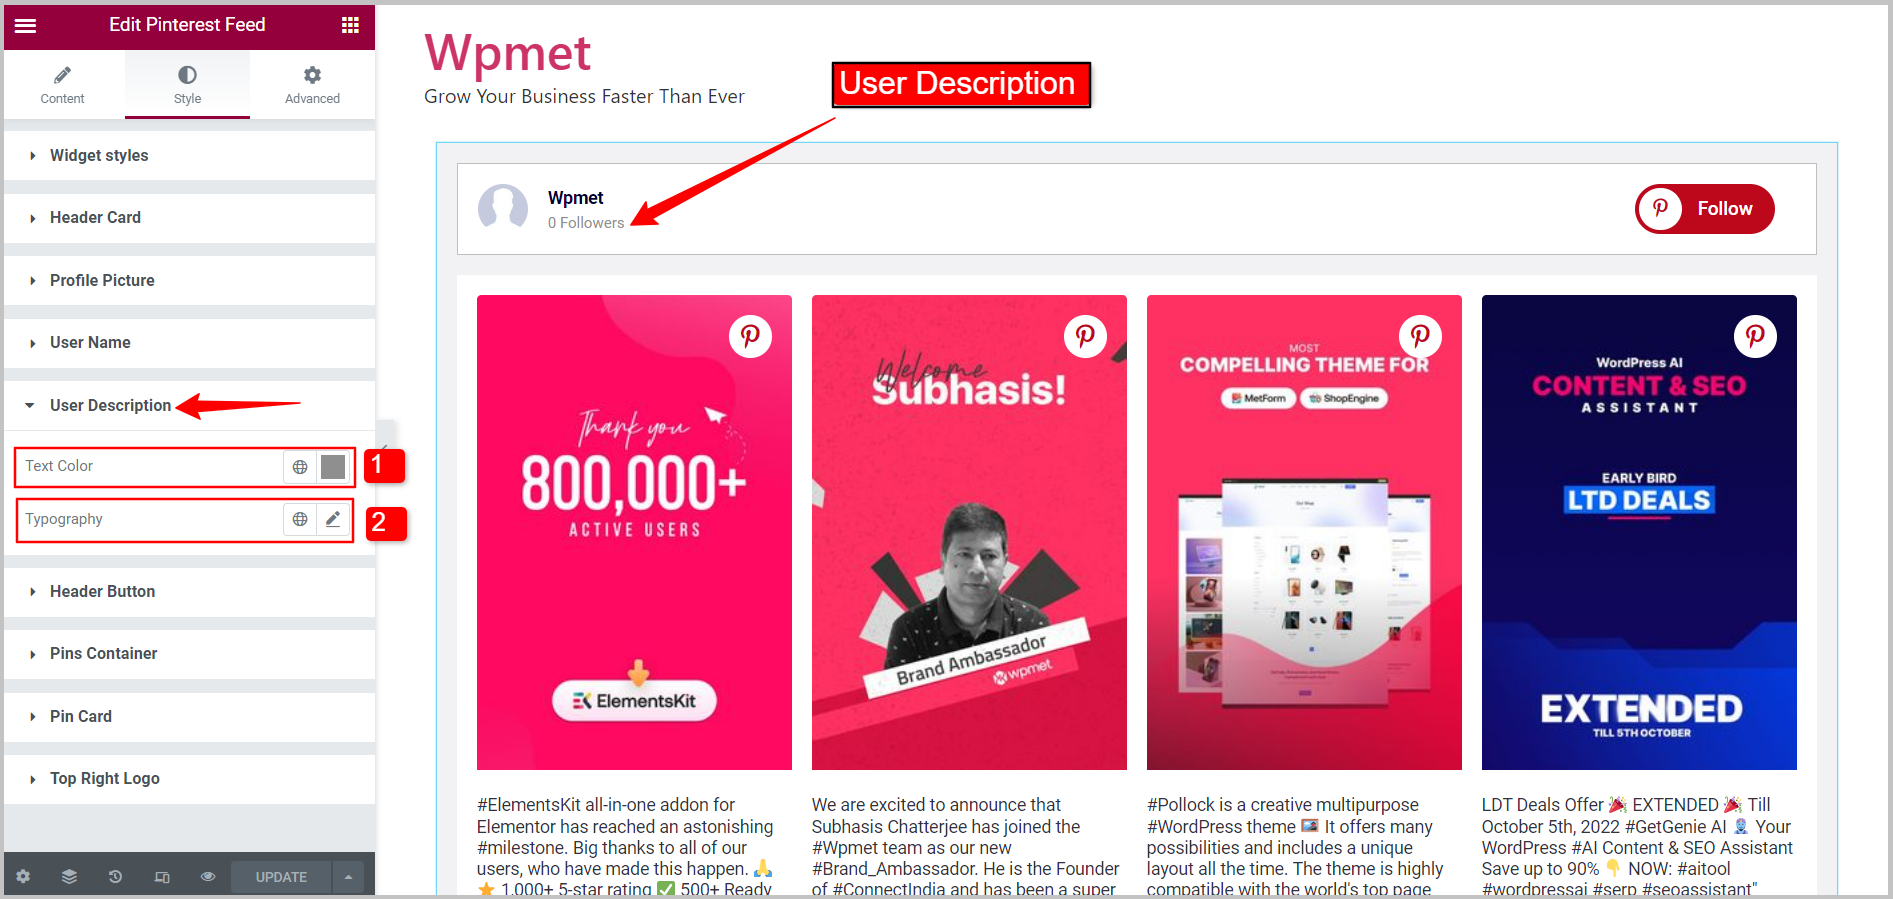
3.5 User Description #
Style options for the User Description to display. To customize the styles,
- Text Color: Choose a color for the user description text.
- Typography: Set the typography for the user description.
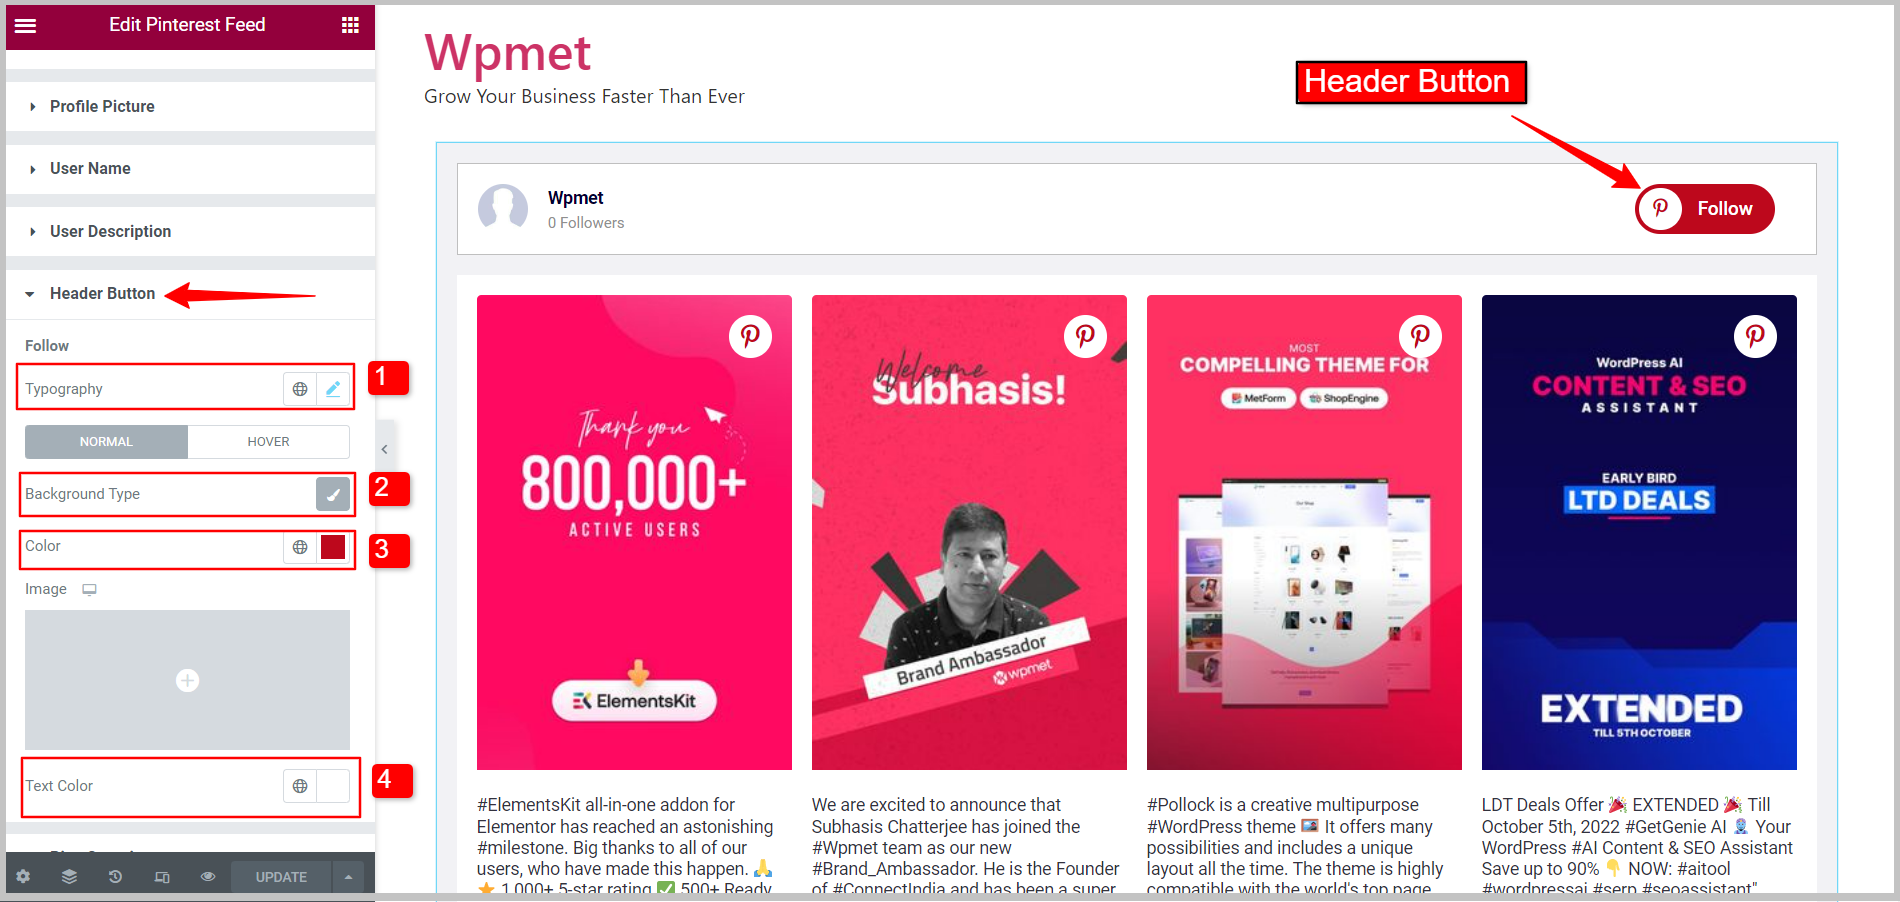
3.6 Header Button #
Style options for the follow button on the header. To customize the styles,
- Typography: Set text typography for the header button.
- Background Type: Choose the Background color type; Classic or Gradient.
- Color: Choose the background color for the header button.
- Image: Can use an image as background.
- Text Color: Select a color for the text in the follow button on the header.
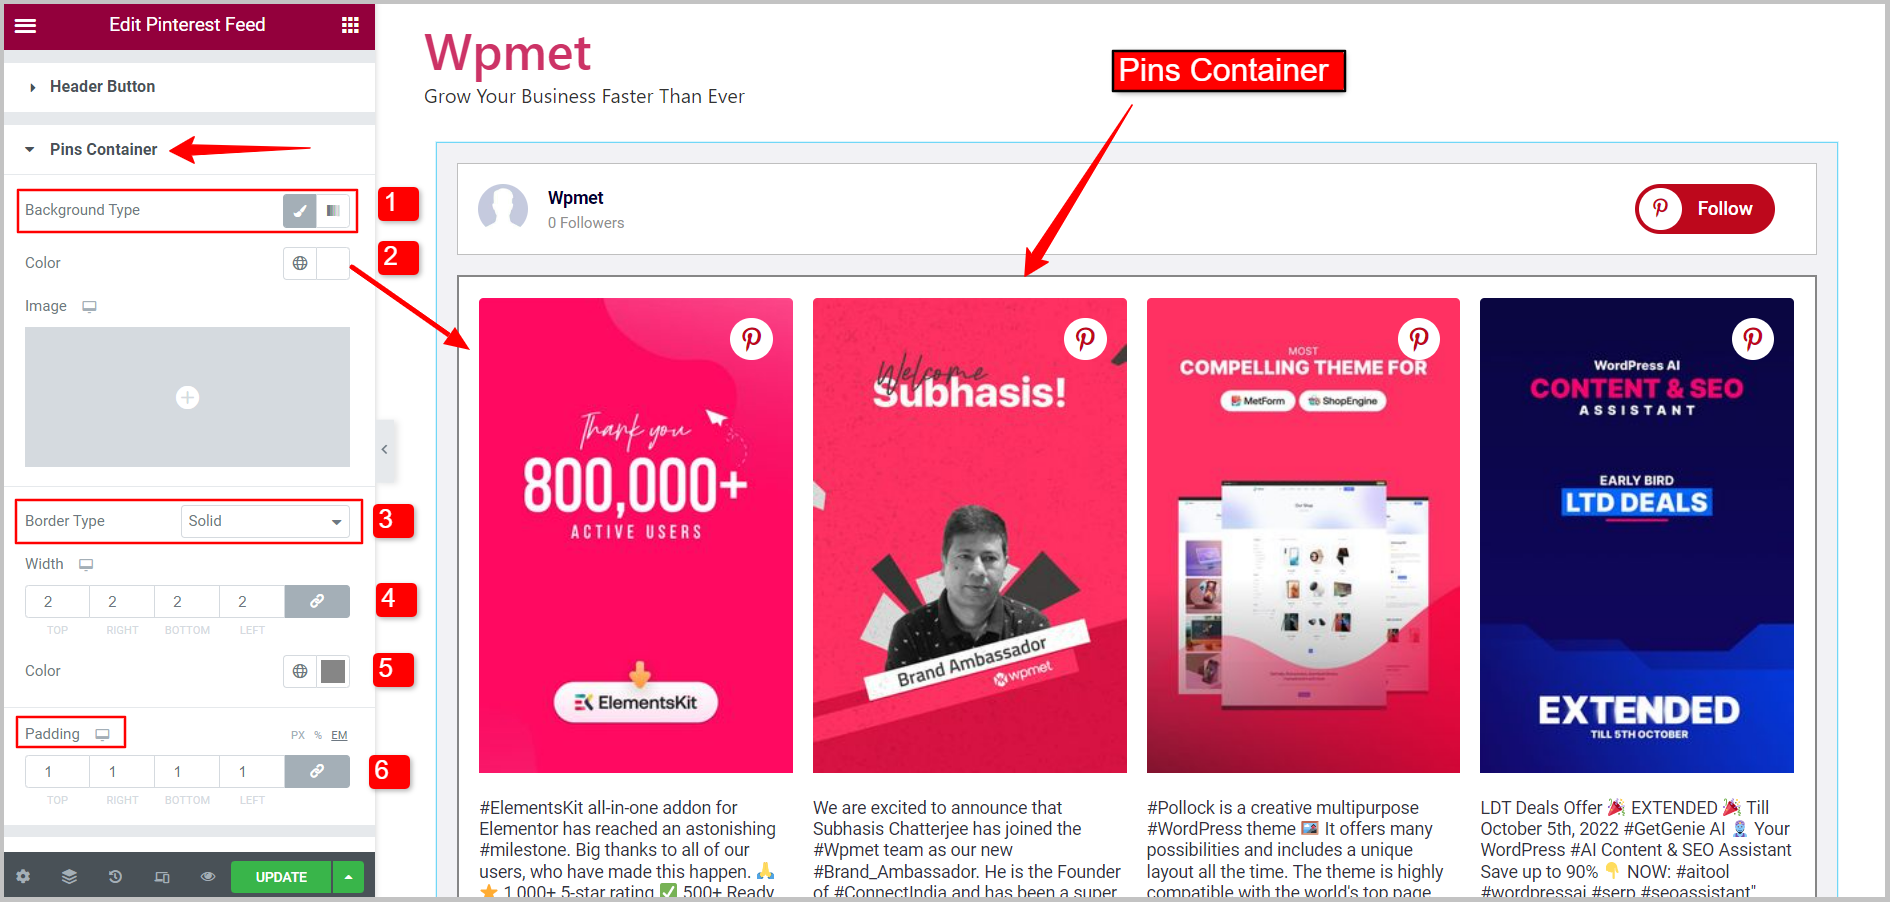
3.7 Pins Container #
Style options for the container where pins are displayed. To customize the styles,
- Background Type: Choose the Background color type; Classic or Gradient.
- Color: Choose the background color for the Pins Container.
- Image: Can use an image as background.
- Border Type: Select border type for Pins Container from the given options; Solid, Double, Dotted, Dashed, Groove, or None(no border).
- Width: Set the border width for the Pins Container.
- Color: Set the border color for the Pins Container.
- Border Radius: Set the border radius for the Pins Container.
3.8 Pin Card #
Style options for the Pin Card where you can change the border radius. To customize the style, change the Border Radius for the pin cards.

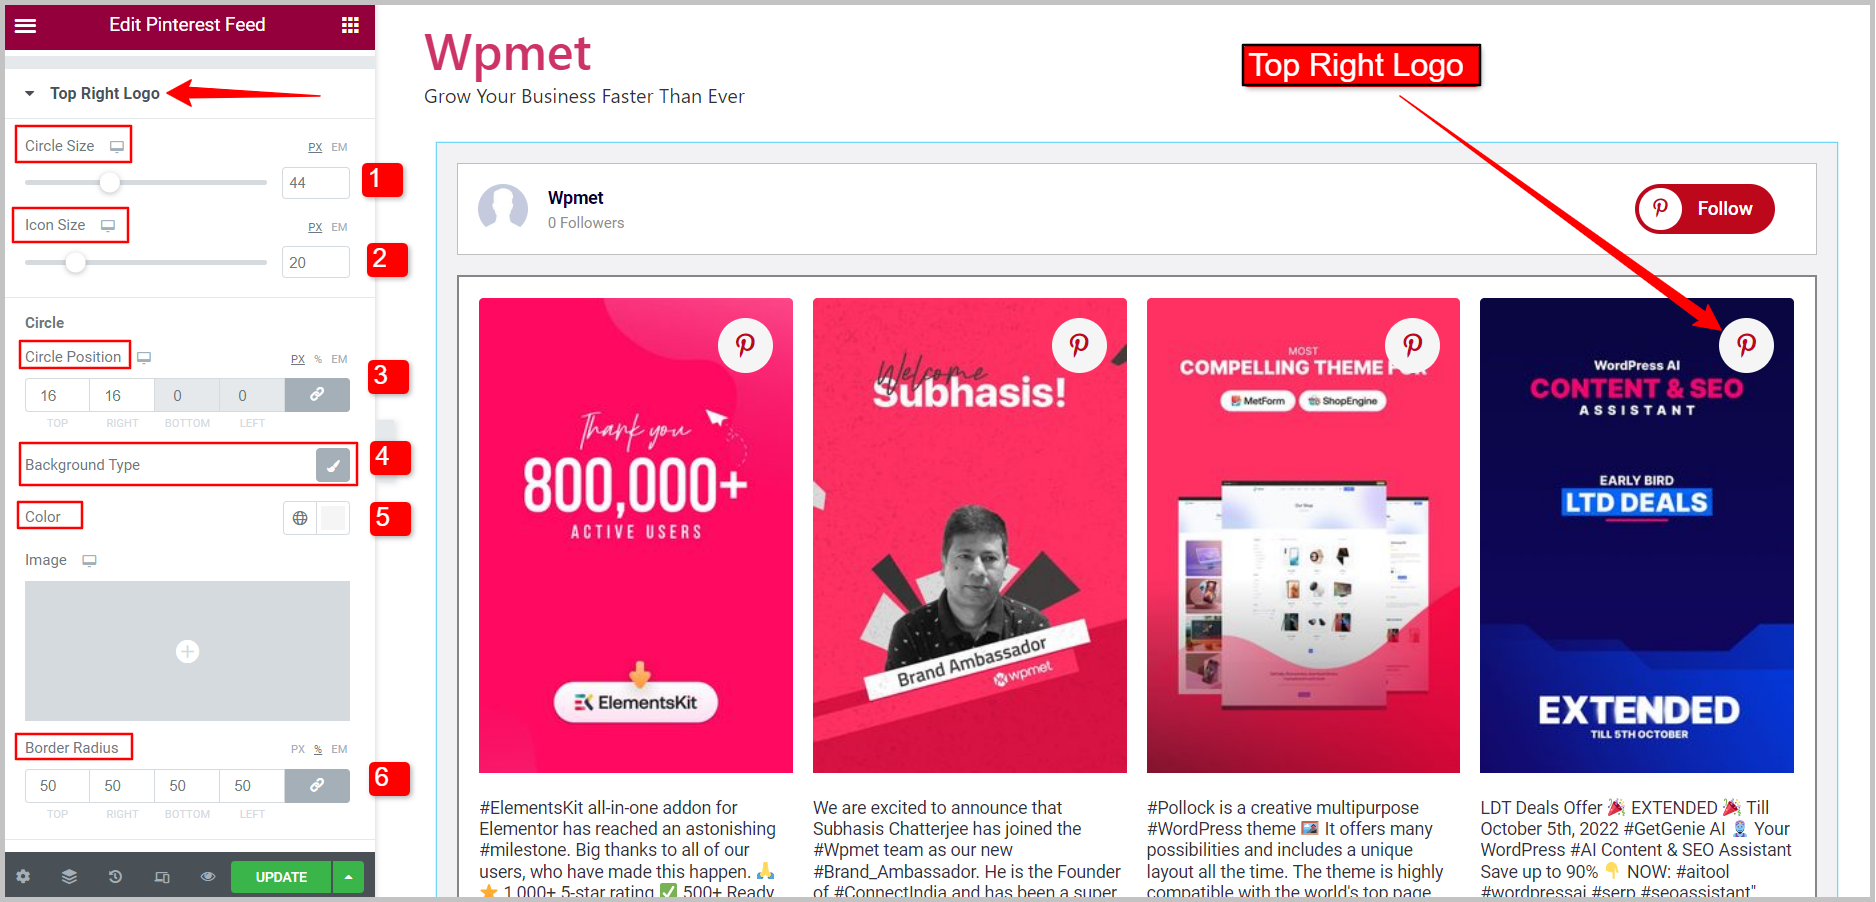
3.9 Top Right Logo #
Style option to customize the Pinterest logo on the cards at the top right corner. To customize the style,
- Circle Size: Adjust the size of the circle around the logo.
- Icon Size: Adjust the size of the icon.
Circle of the logo
- Circle position: Set where you want to place the logo on the cards.
- Background Type: Choose the Background color type; Classic or Gradient.
- Color: Choose the background color for the circle.
- Image: Can use an image as background.
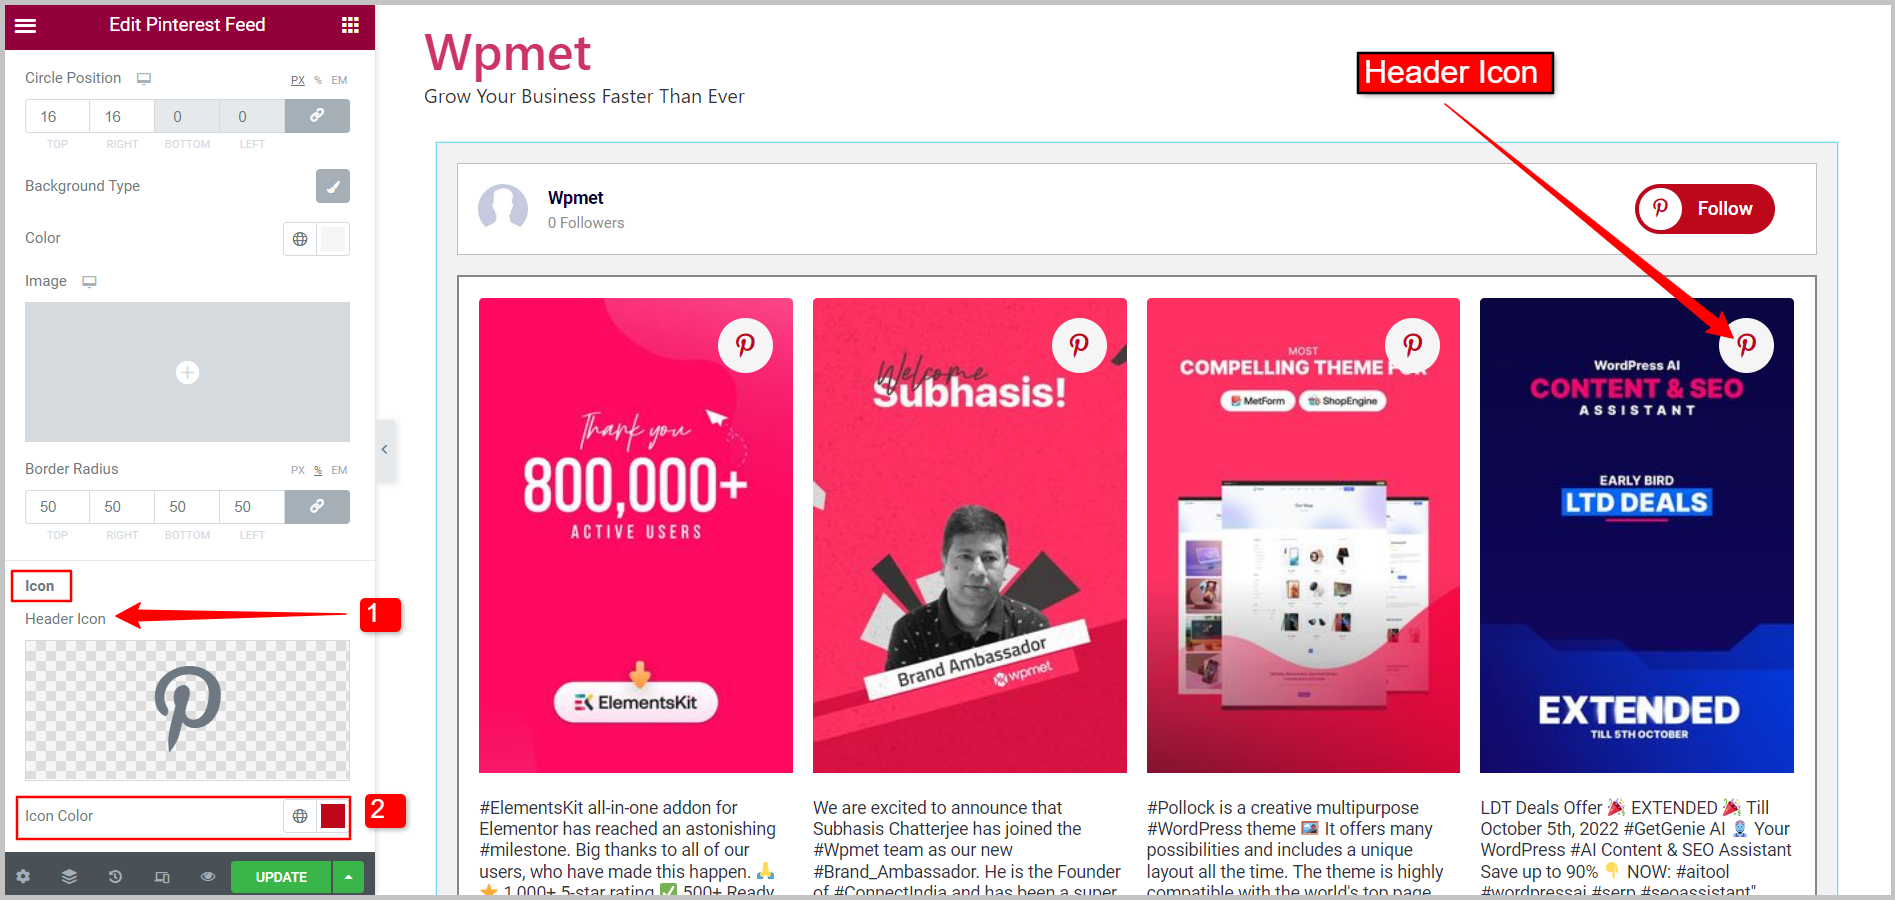
Icon in the Top Right Logo
- Header Icon: Choose an icon for the Top Right Logo.
- Icon Color: Select a color for the icon in the Top Right Logo.
Finally, you will have your Pinterest feed added to your WordPress website. ElementsKit makes it easy for you to embed your Pinterest pins and boards on your website with Elementor.