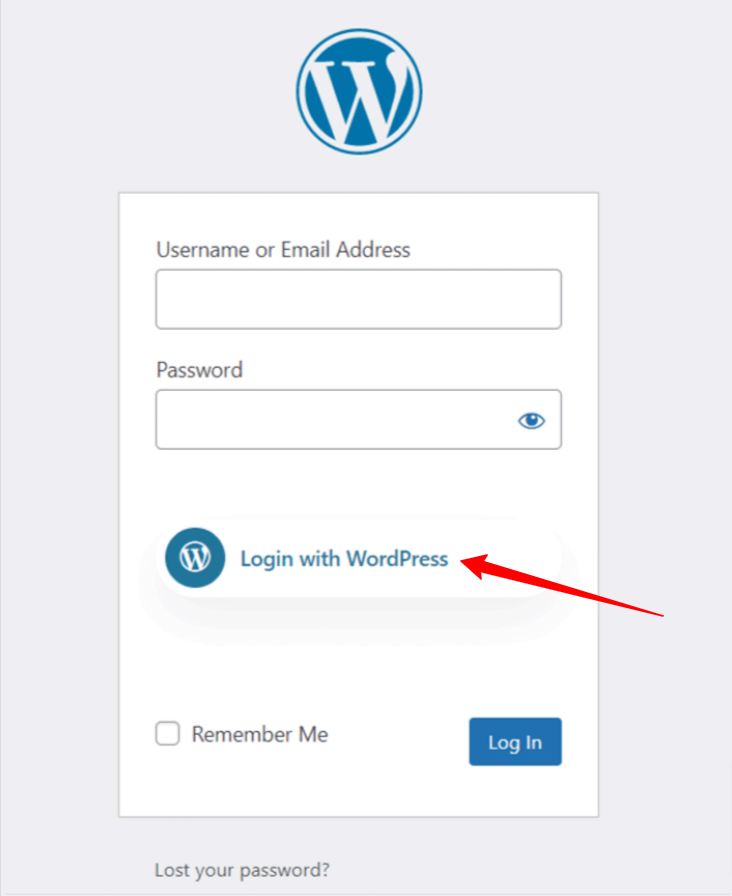
WP Social plugin perfectly integrates with all the popular social media platforms. It comes with features like social share, social count, and social login. Along site other platforms, it supports WordPress app integration for WordPress login. You can add a one-click login option for WordPress.com accounts using the WP Social plugin.
Read this documentation to learn how to add a one-click WordPress login option on your site and let the users log in with their accounts.
Getting Started #
In order to allow your visitors to log in with their WordPress.com account, you must create a WordPress App. The following guide will help you through the WordPress App creation process. After you have created your WordPress App, head over to “Settings” and configure the given “App ID” and “App secret” according to your LinkedIn App. Let’s Learn…
Create WordPress App #
To create the WordPress app:
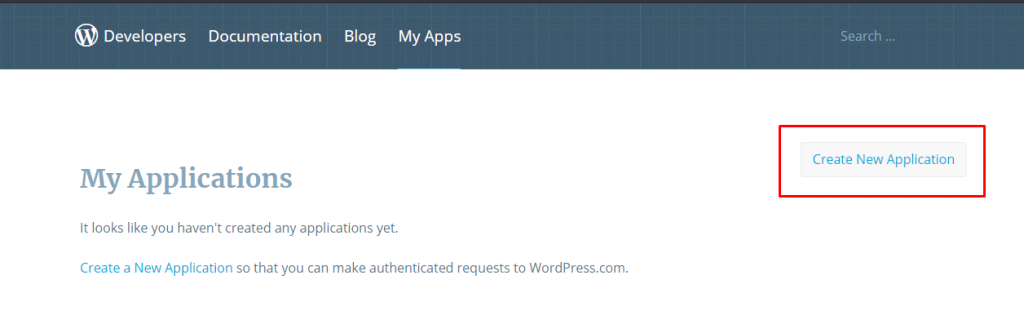
- Go to https://developer.wordpress.com/apps/
- Log in with your WordPress.com Account ( if you are not logged in )
- Click Create New Application button. It will take you to the app creation page.
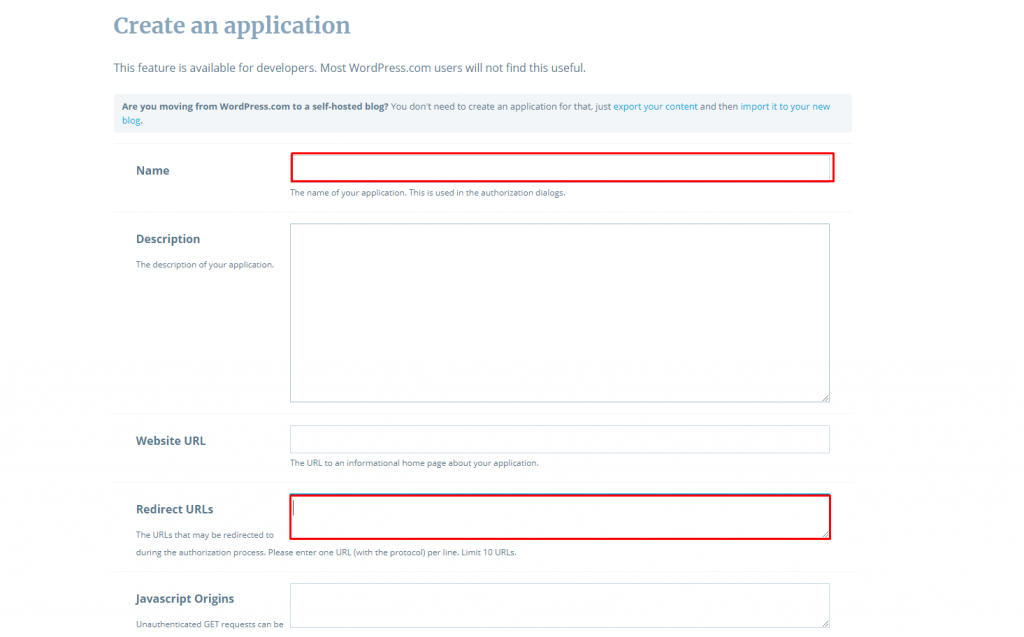
After that on the app creation page,
- Insert the Name and Description for your App.
- Fill up the Website URL with your website’s Homepage.
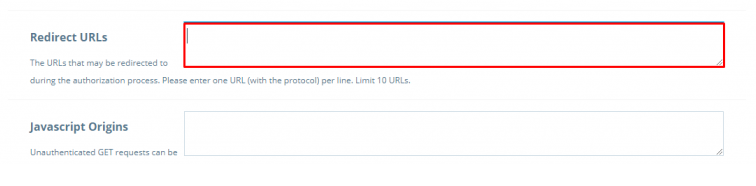
- Enter Redirect URLs (you will get it from WP Social Plugin).
- You can leave the Javascript Origins field empty.
- Complete the human verification test.
- At the Type checkbox, make sure Web is selected.
- Click the Create button.
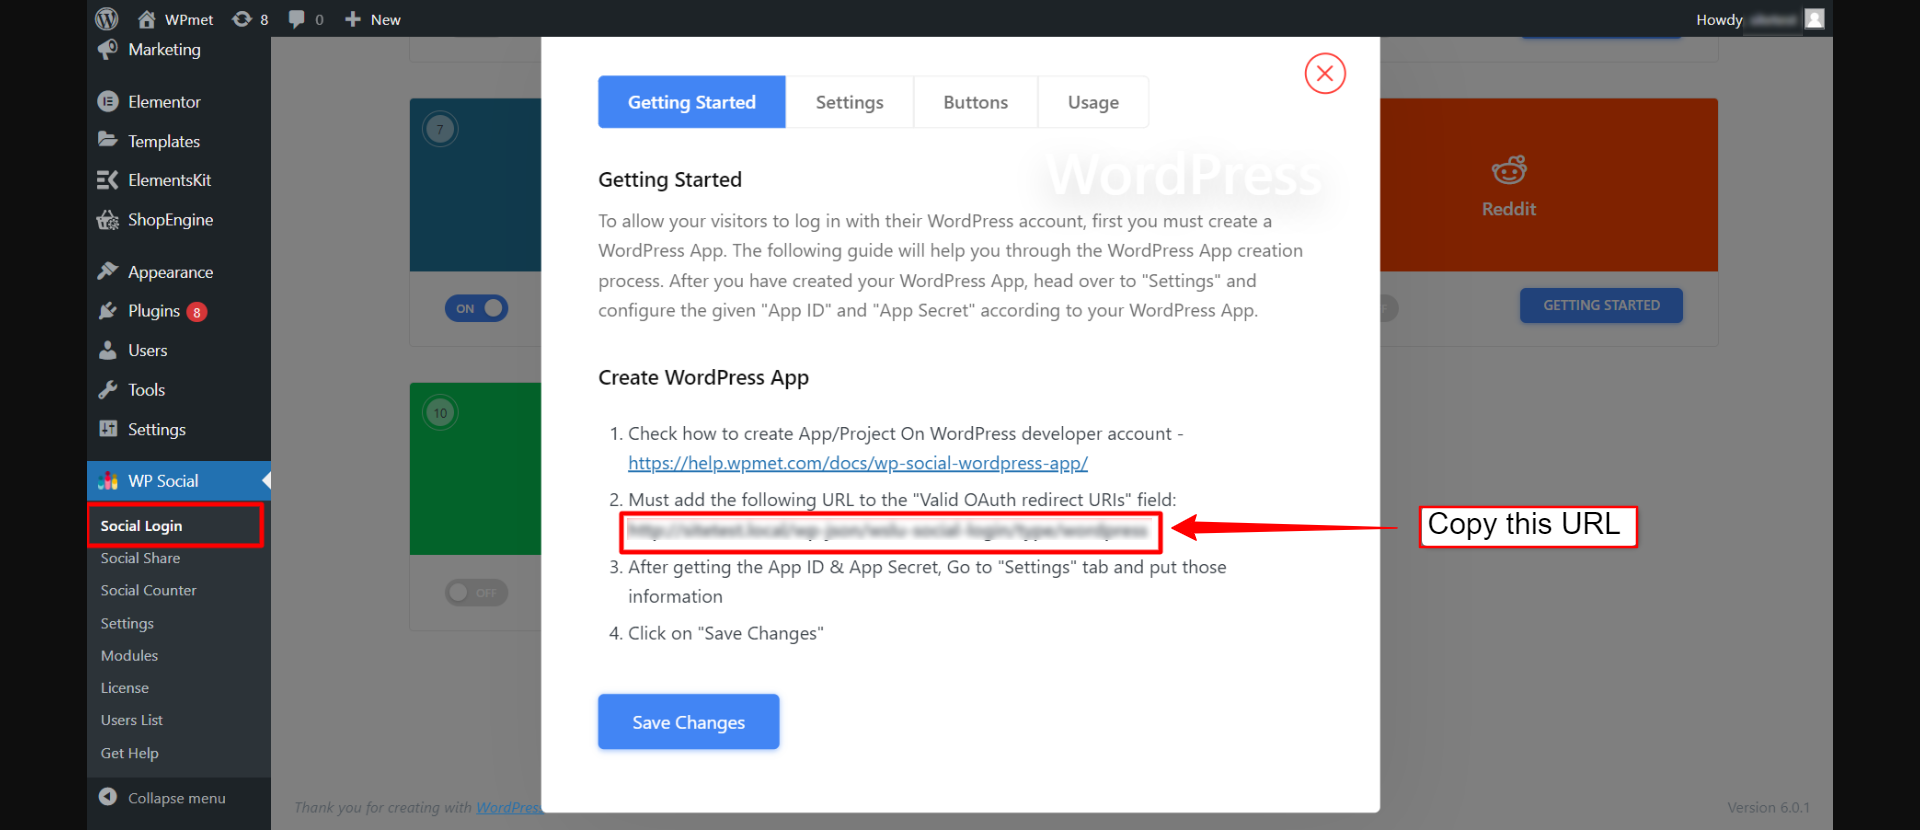
You will find the Authorized redirect URLs from WP Social Plugin.
- Navigate to WP Social > Social Login > Providers from your WordPress dashboard.
- Open the WordPress App settings.
- Click the Getting Started button on LinkedIn login.
- Copy the “Valid OAuth redirect URL“.
- Now go back to your App creation page on the WordPress Developer site.
- Paste the redirect URL on the required field.
- Finally, scroll down and click the Create button to save your changes.
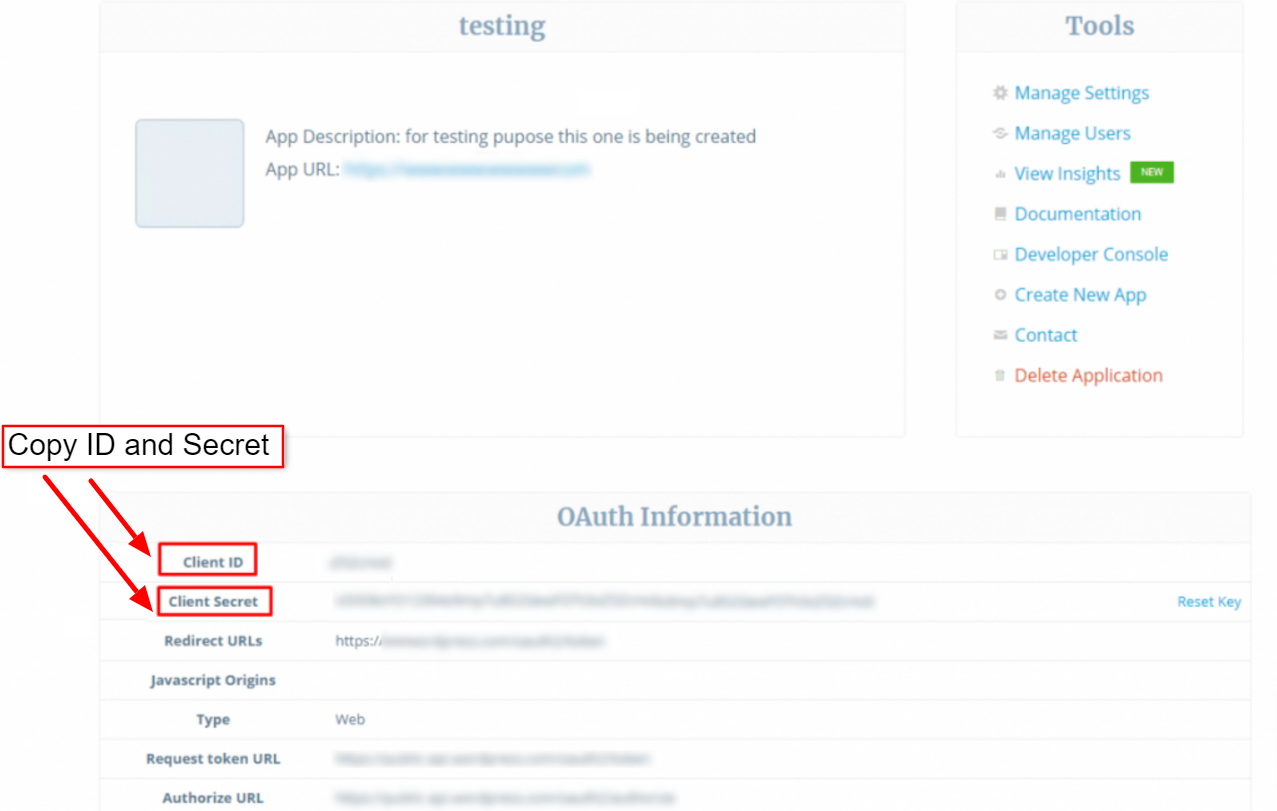
- When you’re app is created, click the name of your app. You will end up on the oAuth Information page.

- Here you can see your Client ID and Client Secret.
Setup WP Social for WordPress app integration for WordPress login #
After the successful WordPress app creation, the next step of WordPress app integration for WordPress login is to add the app with credentials (Client ID and Client Secret key) to your site. For that, first log in to your WordPress site, then,
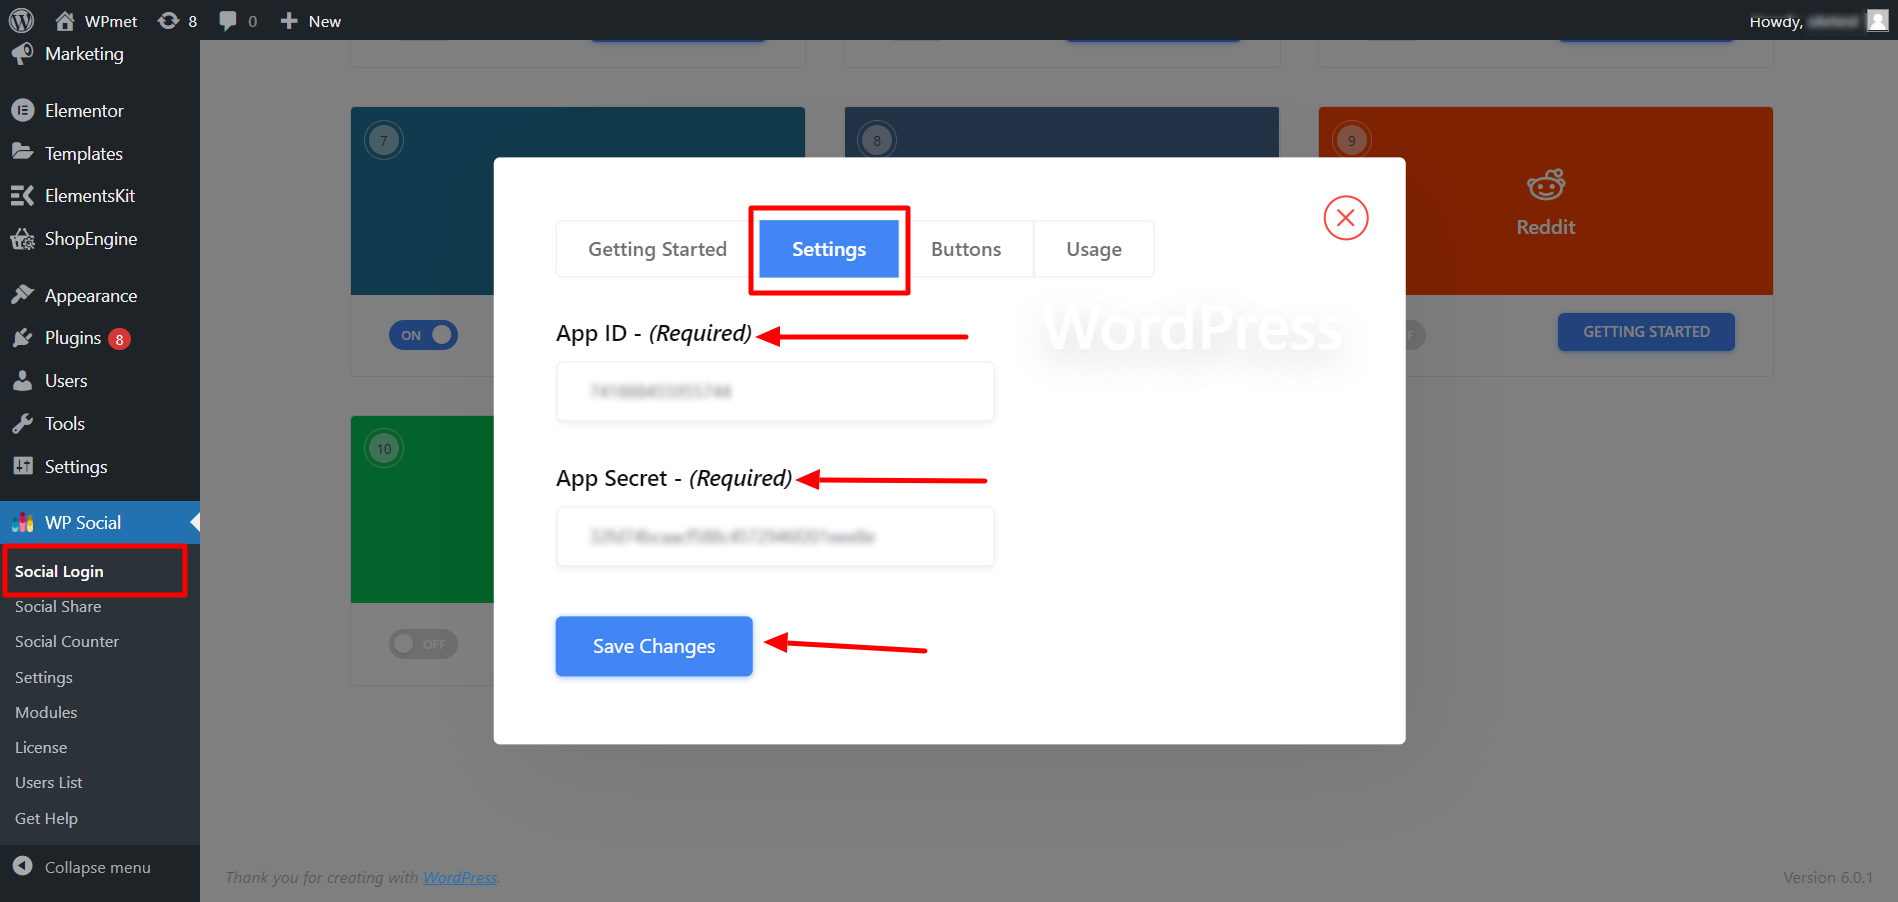
- Navigate to WP Social > Social Login from your dashboard.
- Switch to the Providers tab.
- Click to Settings under WordPress.
- Paste the Client ID and Client Secret on the respective field.
Add Login Button Label #
You can customize the button label for WordPress login. To add/change the button label,
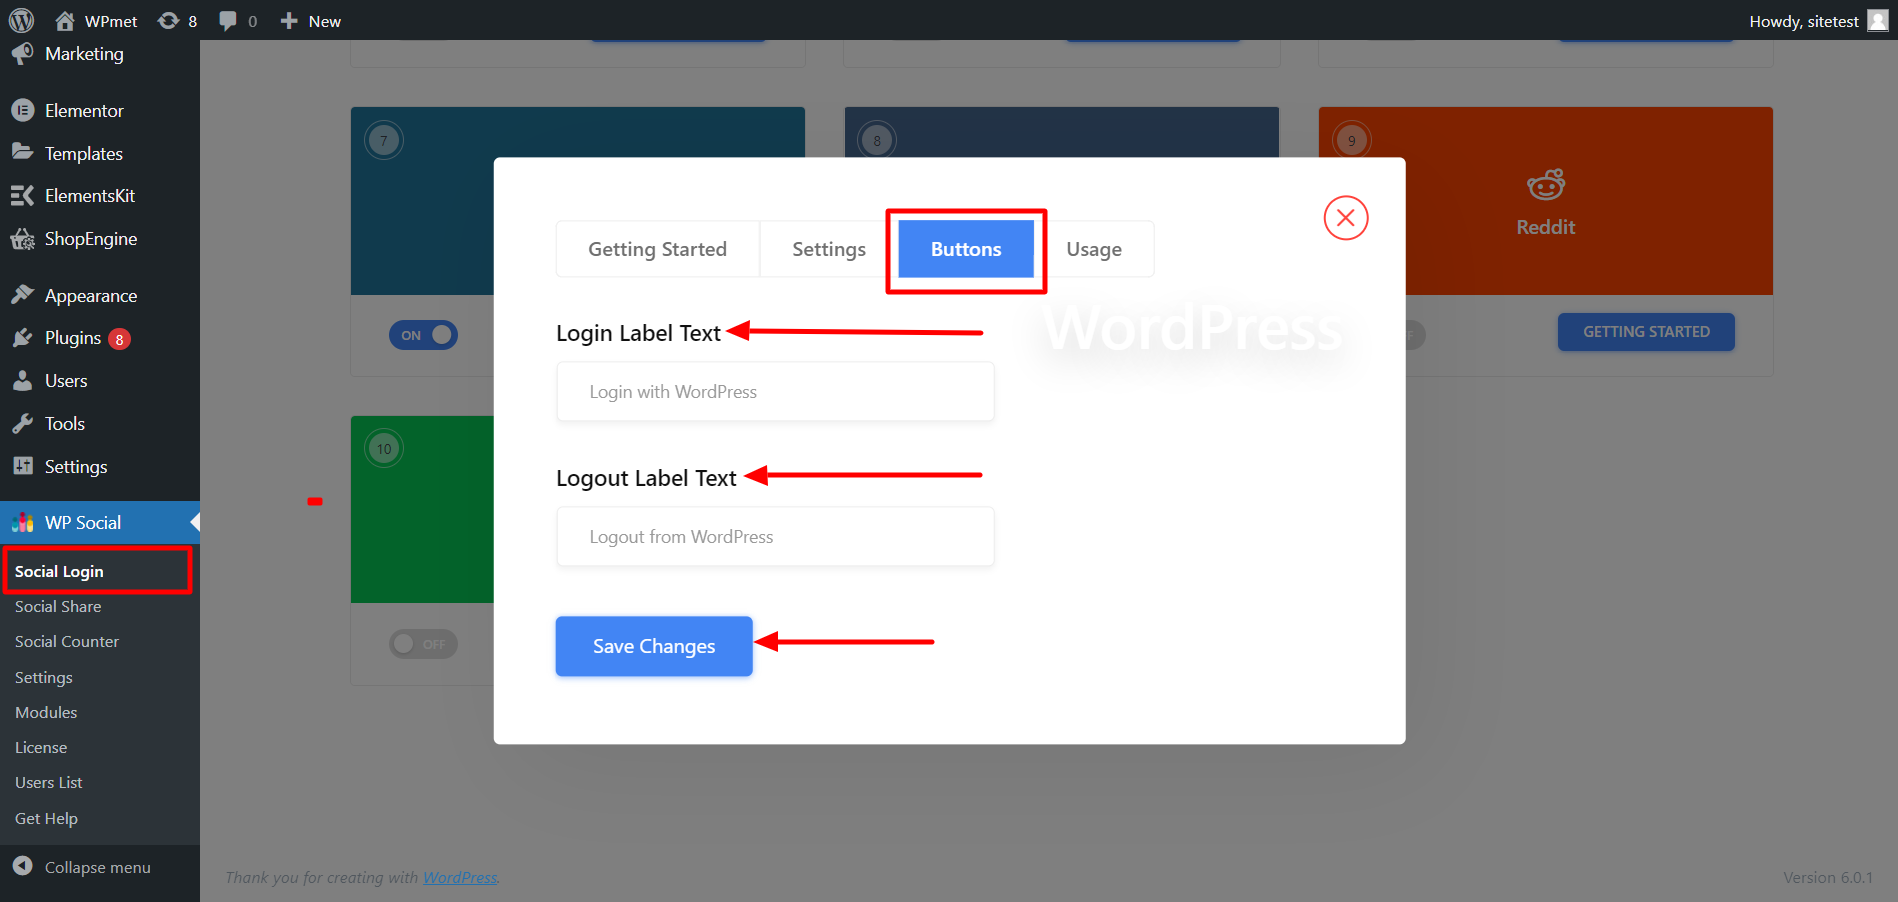
- Move to the Buttons tab.
- Enter Login Label Text.
- Enter Logout Label Text.
- Then Save Changes.
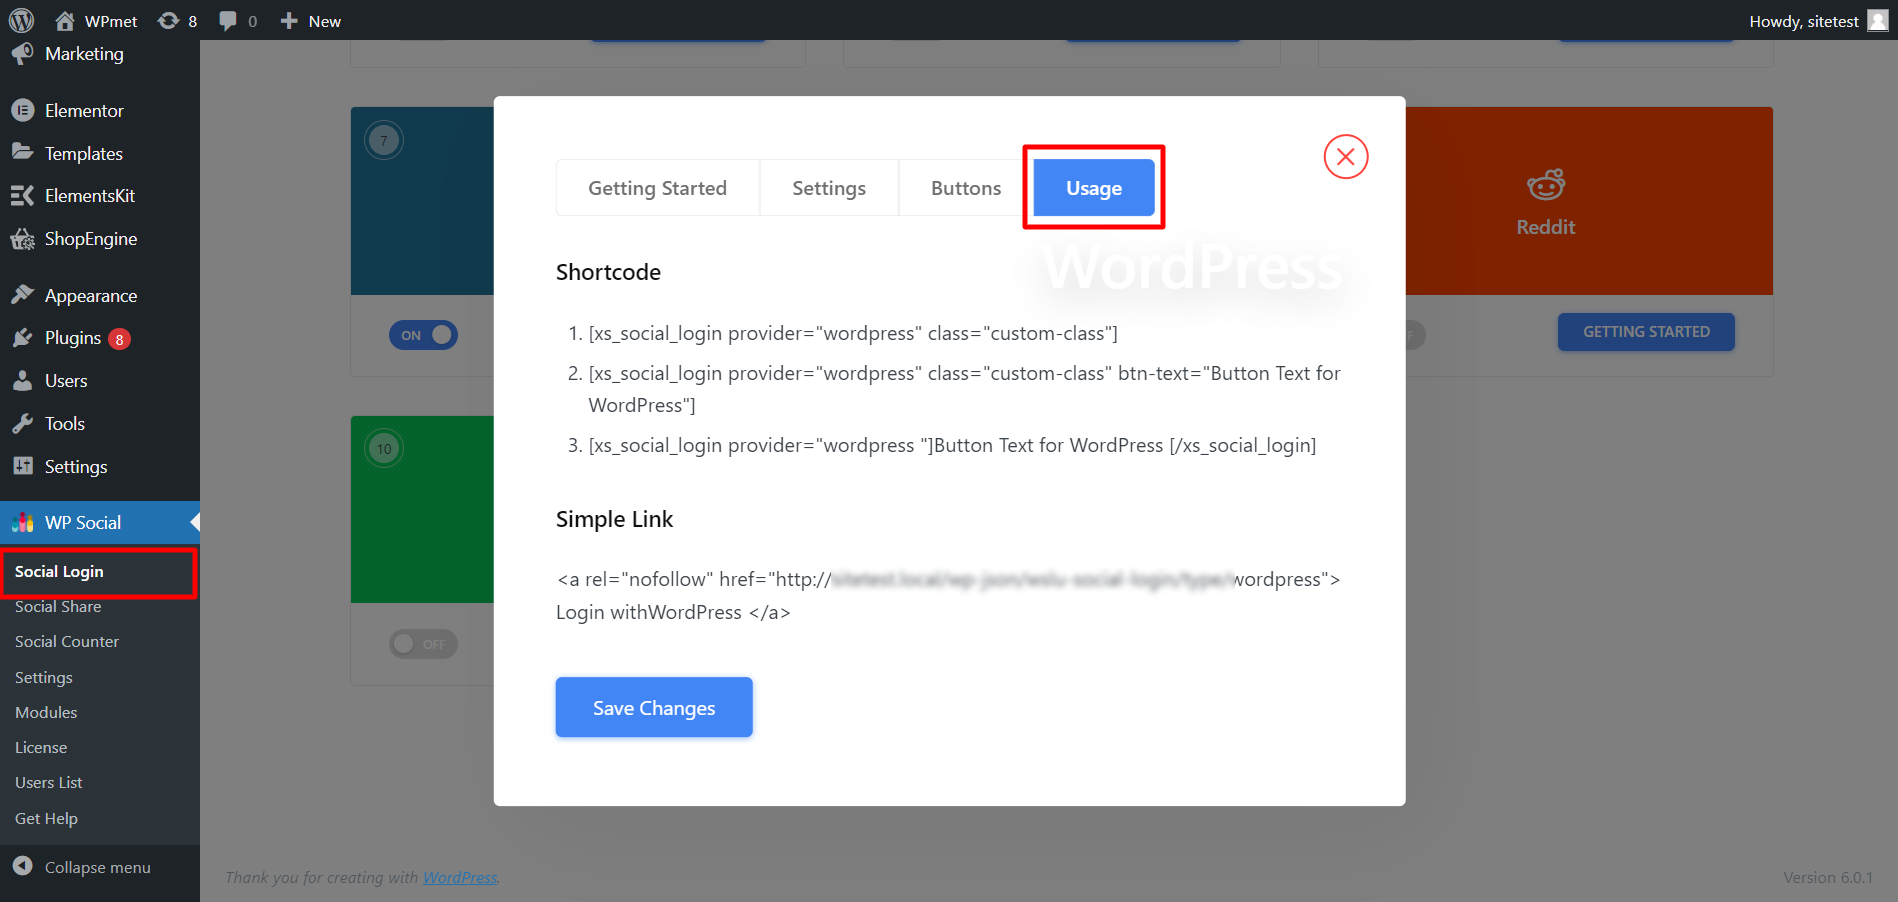
Find Shortcodes and Simple Link #
You can use Shortcodes to add WordPress login on any page. You can find the shortcodes in the Usage tab. Read the WP Social Shortcodes Usage documentation to learn how to use those shortcodes.
You also find a Simple Link for the WordPress login button.
Finally, the process of WordPress app integration for WordPress login is complete. Now you are able to add a WordPress login button to your website and let the user log in to the website using their LinkedIn account.