

ElementsKit is a complete Elementor addon that comes with hundreds of elements and features that help to build a fully functional website. That includes the Video Gallery widget.
With ElementsKit you can create a sophisticated video gallery without affecting your page speed. Using the ElementsKit Elementor Video Gallery widget, you can display videos with videos without even uploading or embedding videos on the website. Just enter the YouTube or Vimeo URL and display videos with player controls. Read this documentation to use the Video Gallery widget of ElementsKit.
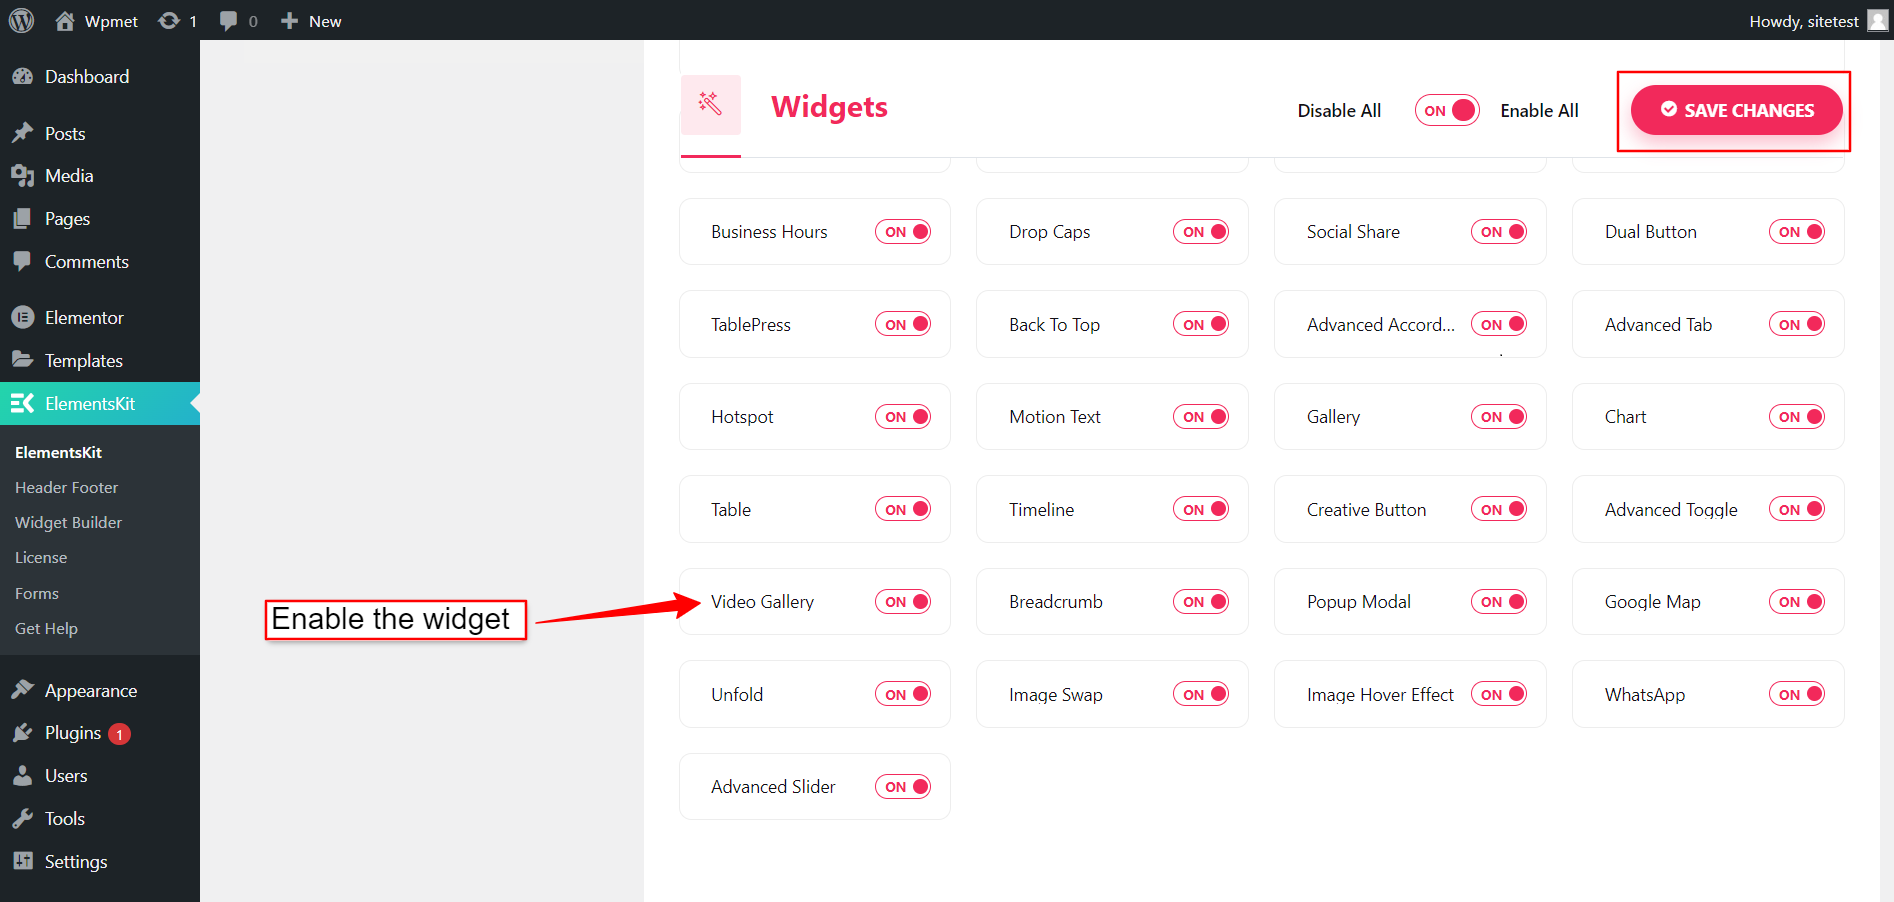
Step 1: Enable the widget #
To use the ElementsKit Elementor Video Gallery widget, you have to enable the widget from the WordPress dashboard. To enable the widget,
- Go to ElementsKit > Widgets from your WordPress dashboard.
- Find the Vidoe Gallery from the list and enable the widget.
- Click on the SAVE CHANGES.
Step 2: Configure the ElementsKit Video Gallery widget #
Under the Content tab, you can configure ElementsKit Elementor Video Gallery. Follow the instruction below to configure the widget.
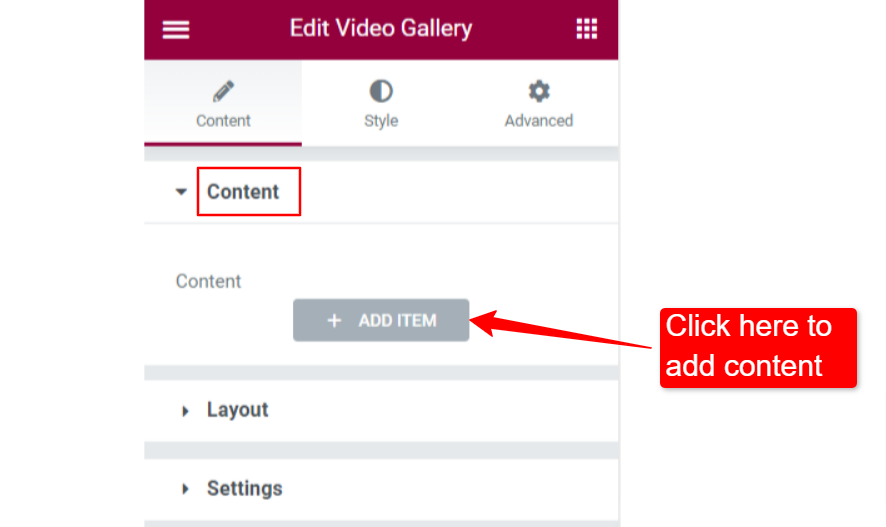
2.1 Add content to the video gallery #
In the Content section, you can add video content. To add videos to the gallery:
- Click on “+ ADD ITEM” under the content section.
- Choose the Video Type between “YouTube” and “Vimeo”.
- Enter a video URL link in the URL field.
- Add a Category for videos. Adding categories will help you to filter the videos.
- Add a Custom Image (thumbnail) if you want.
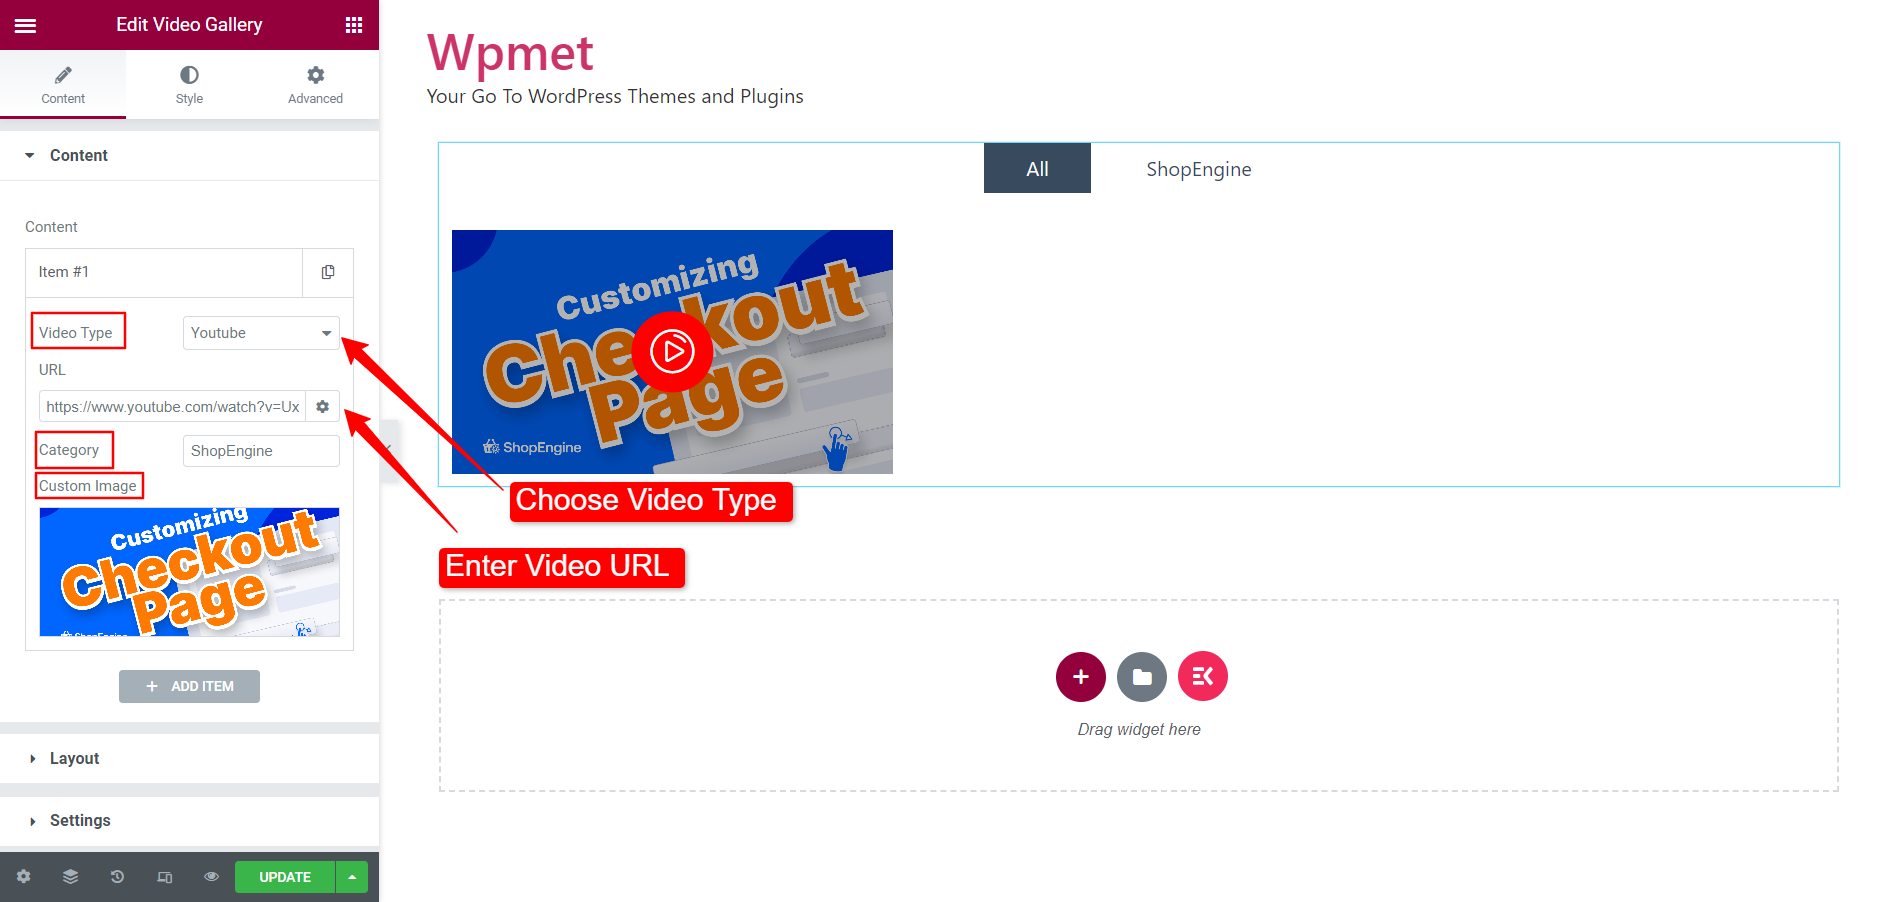
You can keep adding items to the videos gallery in this way.
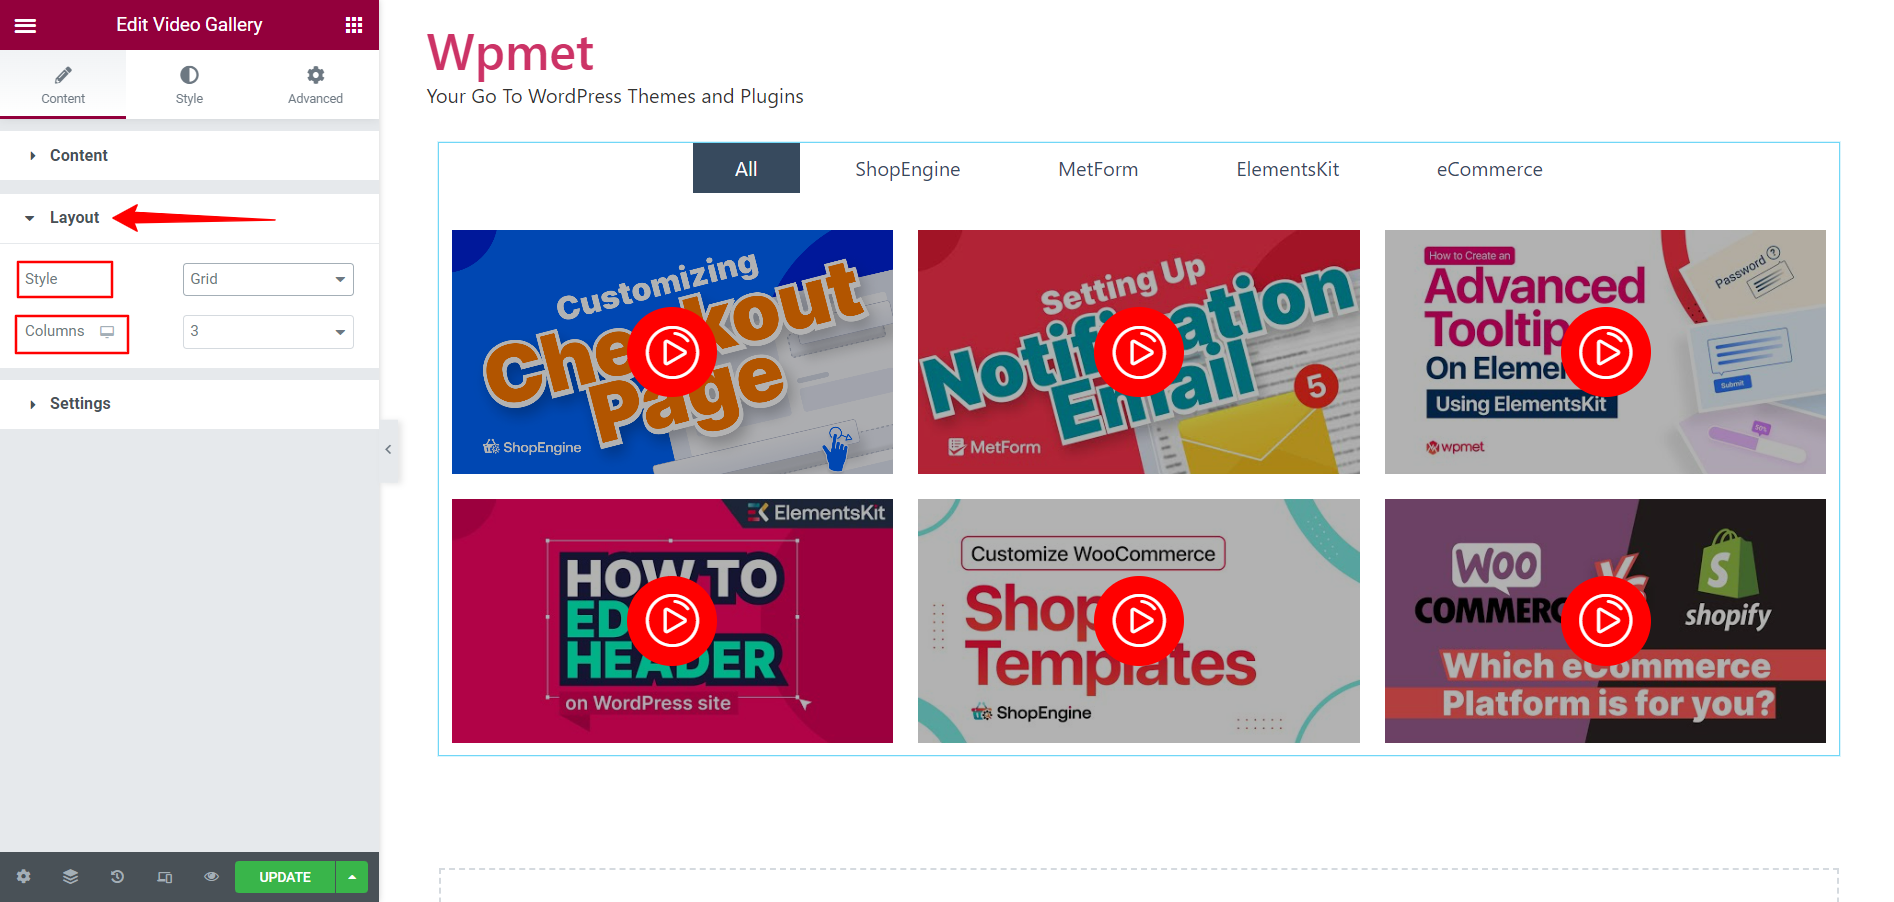
2.2 Layout configuration #
You choose how the Elementor video gallery layout would look. To configure the layout:
- Choose Layout Style. You can choose Grid, Masonry, or Carousel style for layout.
- For Gird and Masonry, you can select the Columns number.
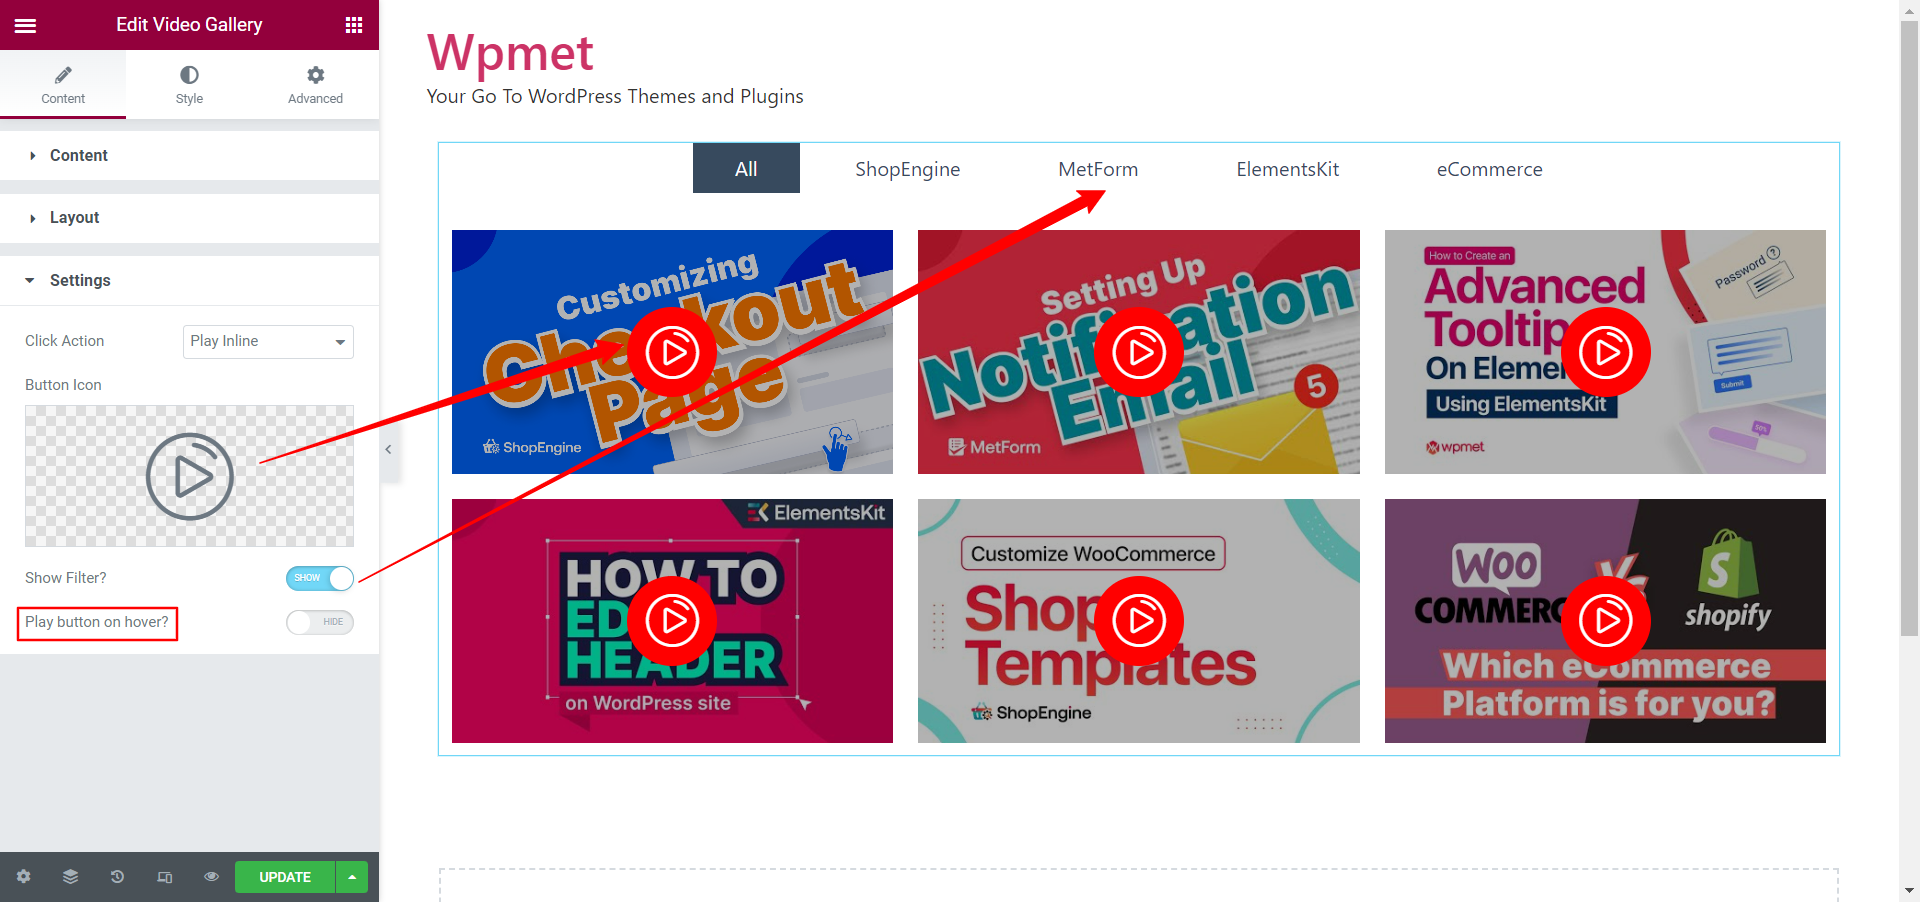
2.3 Settings #
The settings options change based on the layout you choose. Settings for the Grid and Masonry layout are the same. However, there are different sets of settings options for the Carousel layout.
Setting for Grid and Masonry layout:
- Choose how the video will play with the Click Action. If you choose “Play In Popup”, the video will play in a popup. Whereas with “Play Inline”, the video will play inside the video viewport.
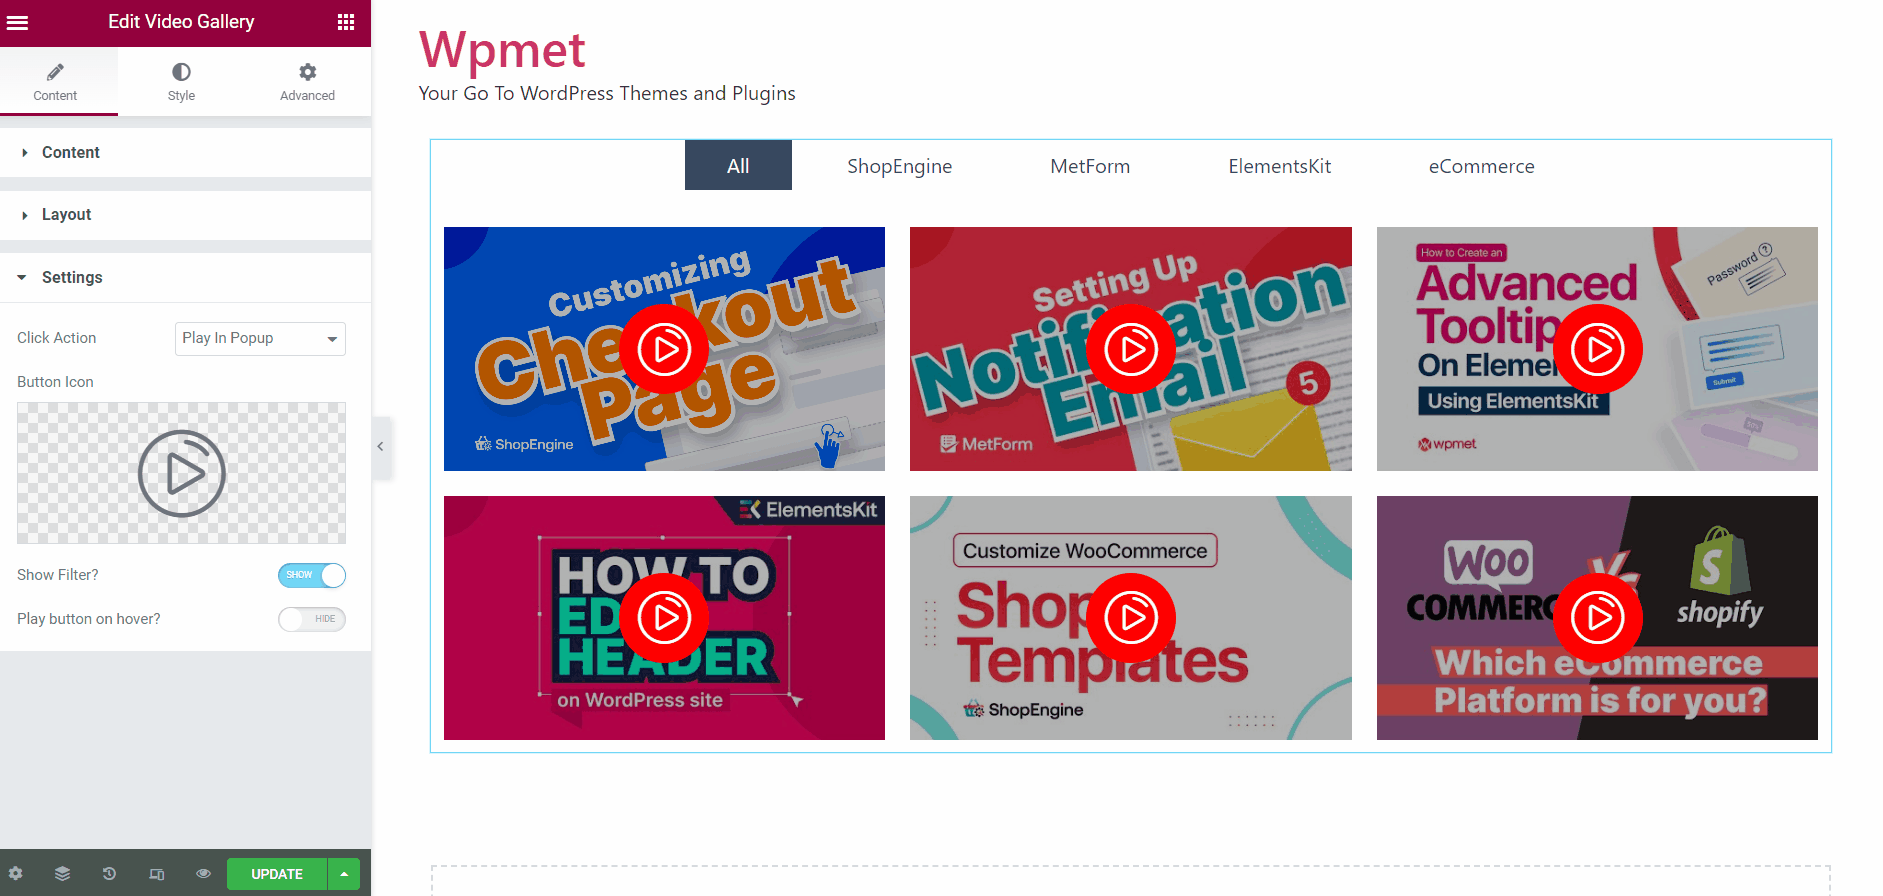
- After that, you can choose the Play Button Icon.
- Decide whether to Show Filter or not.
- And decide whether to show the Play button on hover or make it always visible.
Setting for Carousel Layout:
When you choose the Carousel layout, Carousel Settings will be available under the settings section.
- Adjust the space between items with the Spacing Left Right option.
- Set the number of Slides To Show on screen at a time.
- Decide how many Slides To Scroll at a time.
- Enable the Autoplay and set the autoplay Speed in (milliseconds).
- Enable Pause on Hover, so that slide autoplay will be paused when hovered.
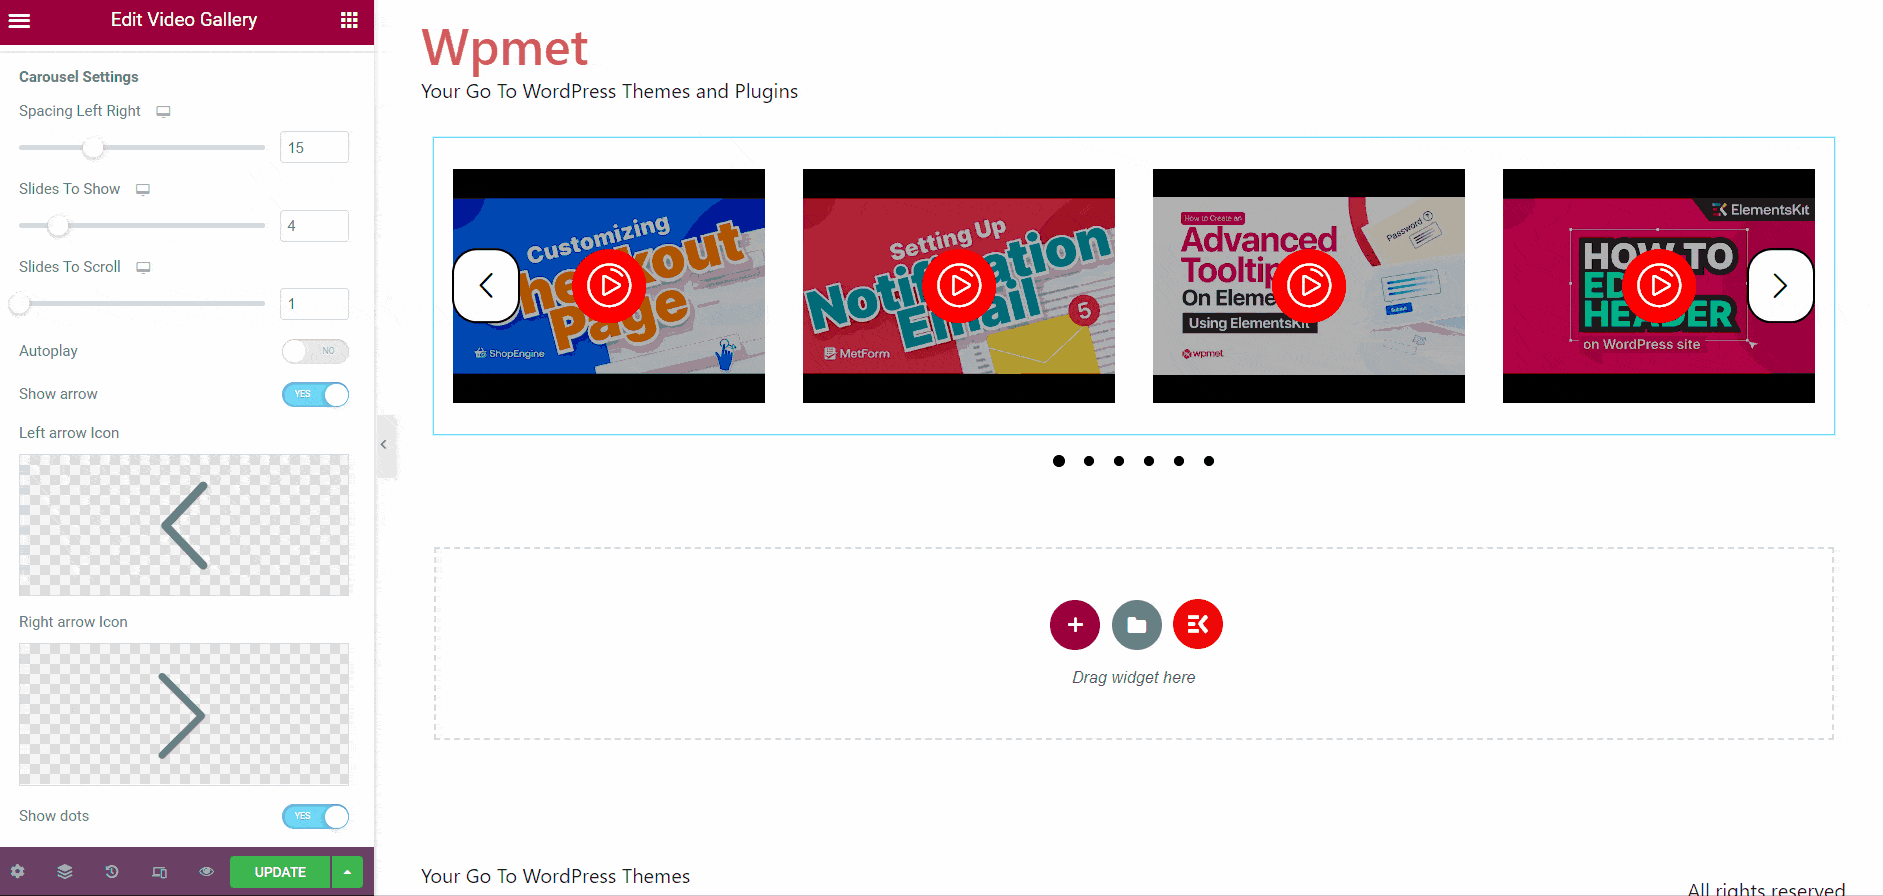
- Decide whether to the Show Arrow.
- If you decide to show arrows, choose the Left arrow icon and the Right arrow icon individually.
- Decide whether to Show dots.
- Enable Loop for slides to scroll in the loop.

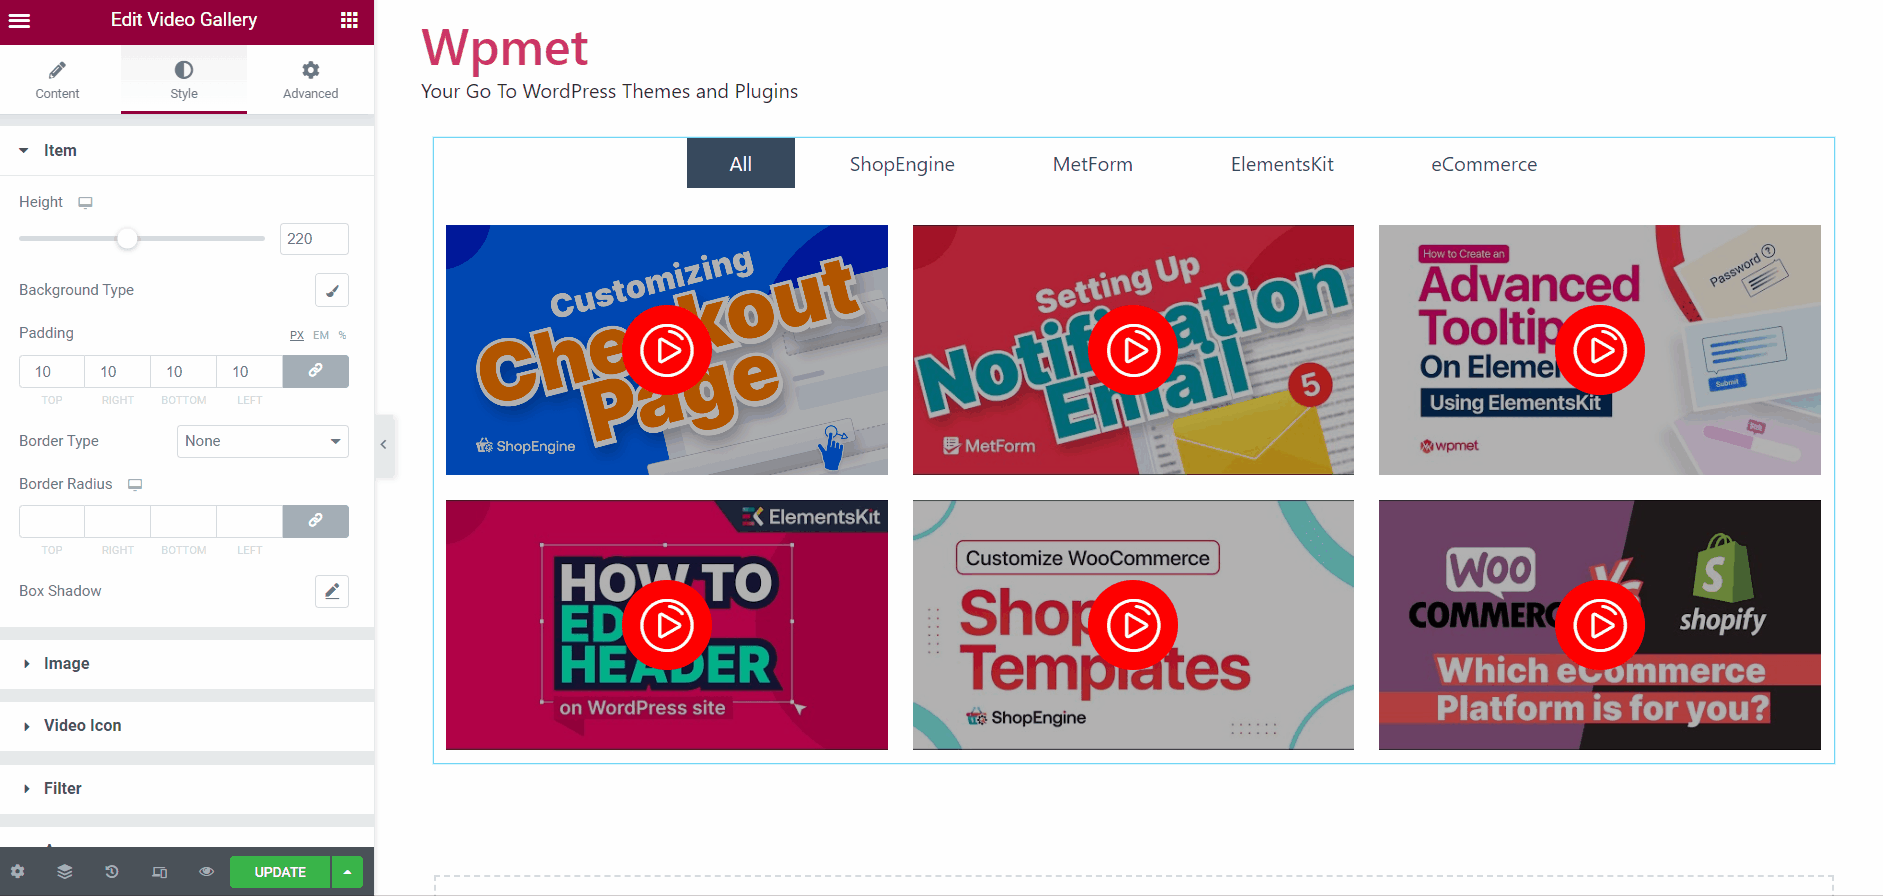
Step 3: Customize the ElementsKit Elementor Video Gallery style #
Under the Style tab, you can customize the video gallery style, including the item, image, video icon, filter, and arrow style.
3.1 Item #
In the Item section,
- Adjust the Height of the gallery items.
- Choose the Background Type for the videos. [Note: it’ll change the video background, not the entire gallery background.]
- Set the Padding.
- Choose Border Type.
- Set Border Radius.
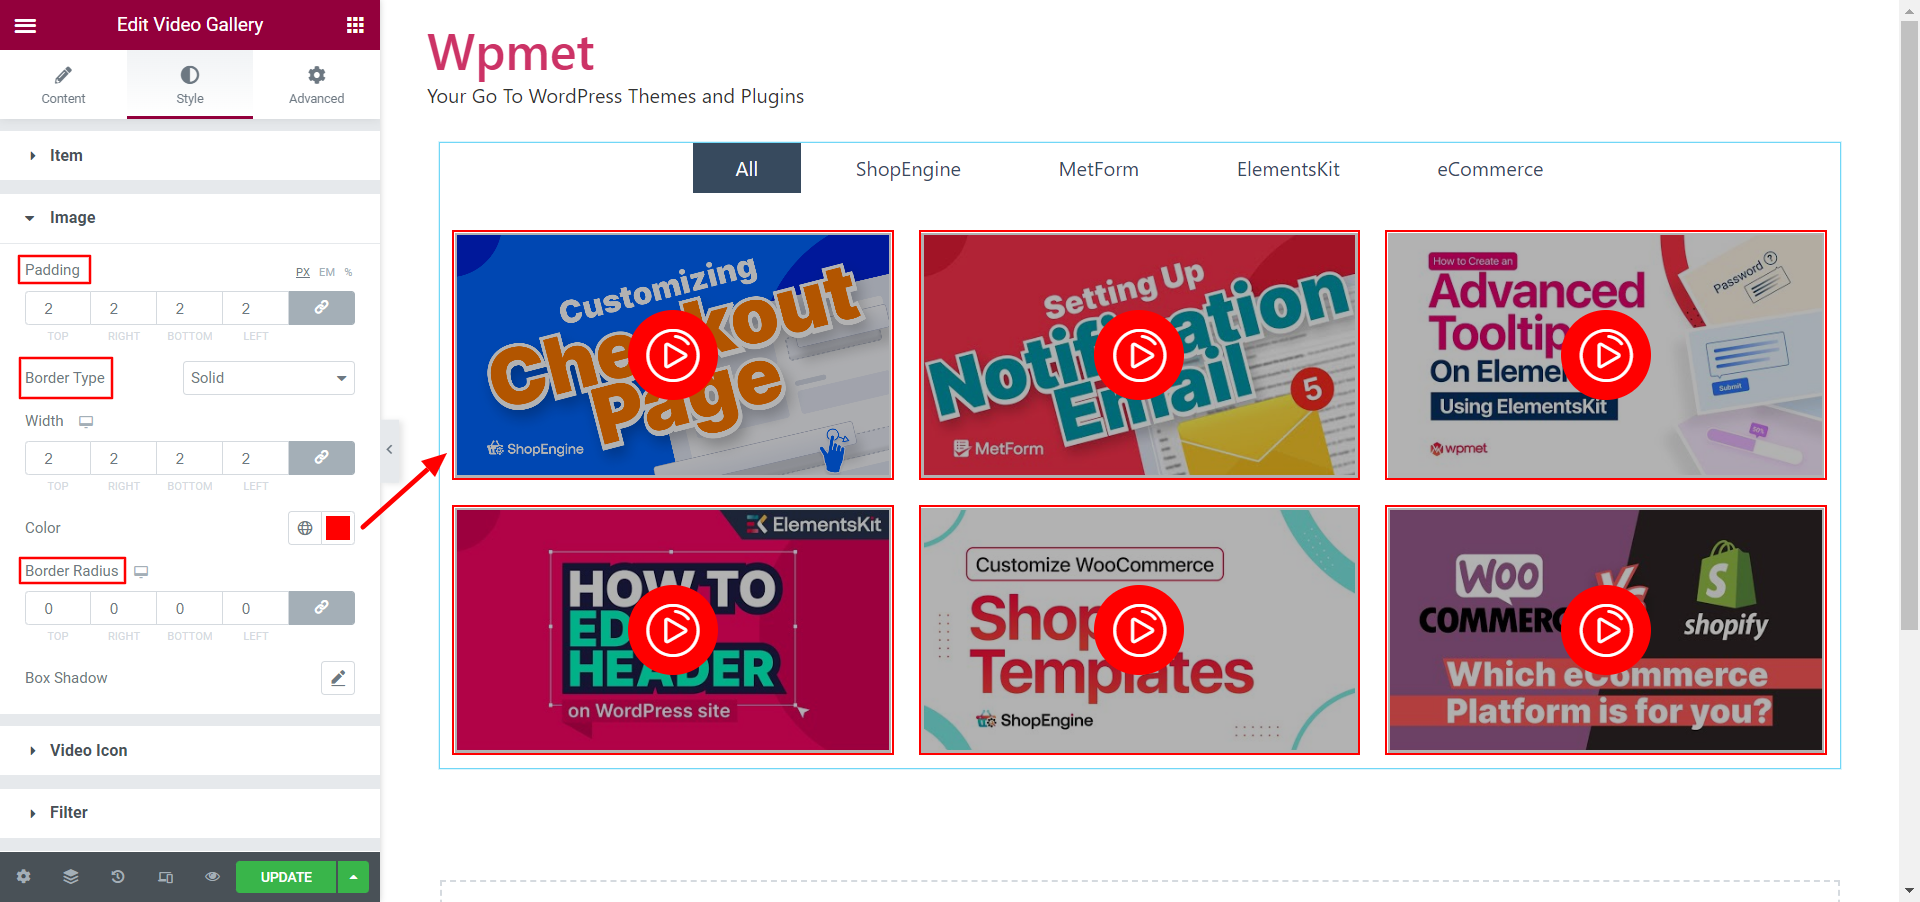
3.2 Image #
To customize the thumbnail image,
- Set the Padding for images.
- Choose Border Type. Then set Border Width and Border Color.
- Also, set the Border Radius for images.
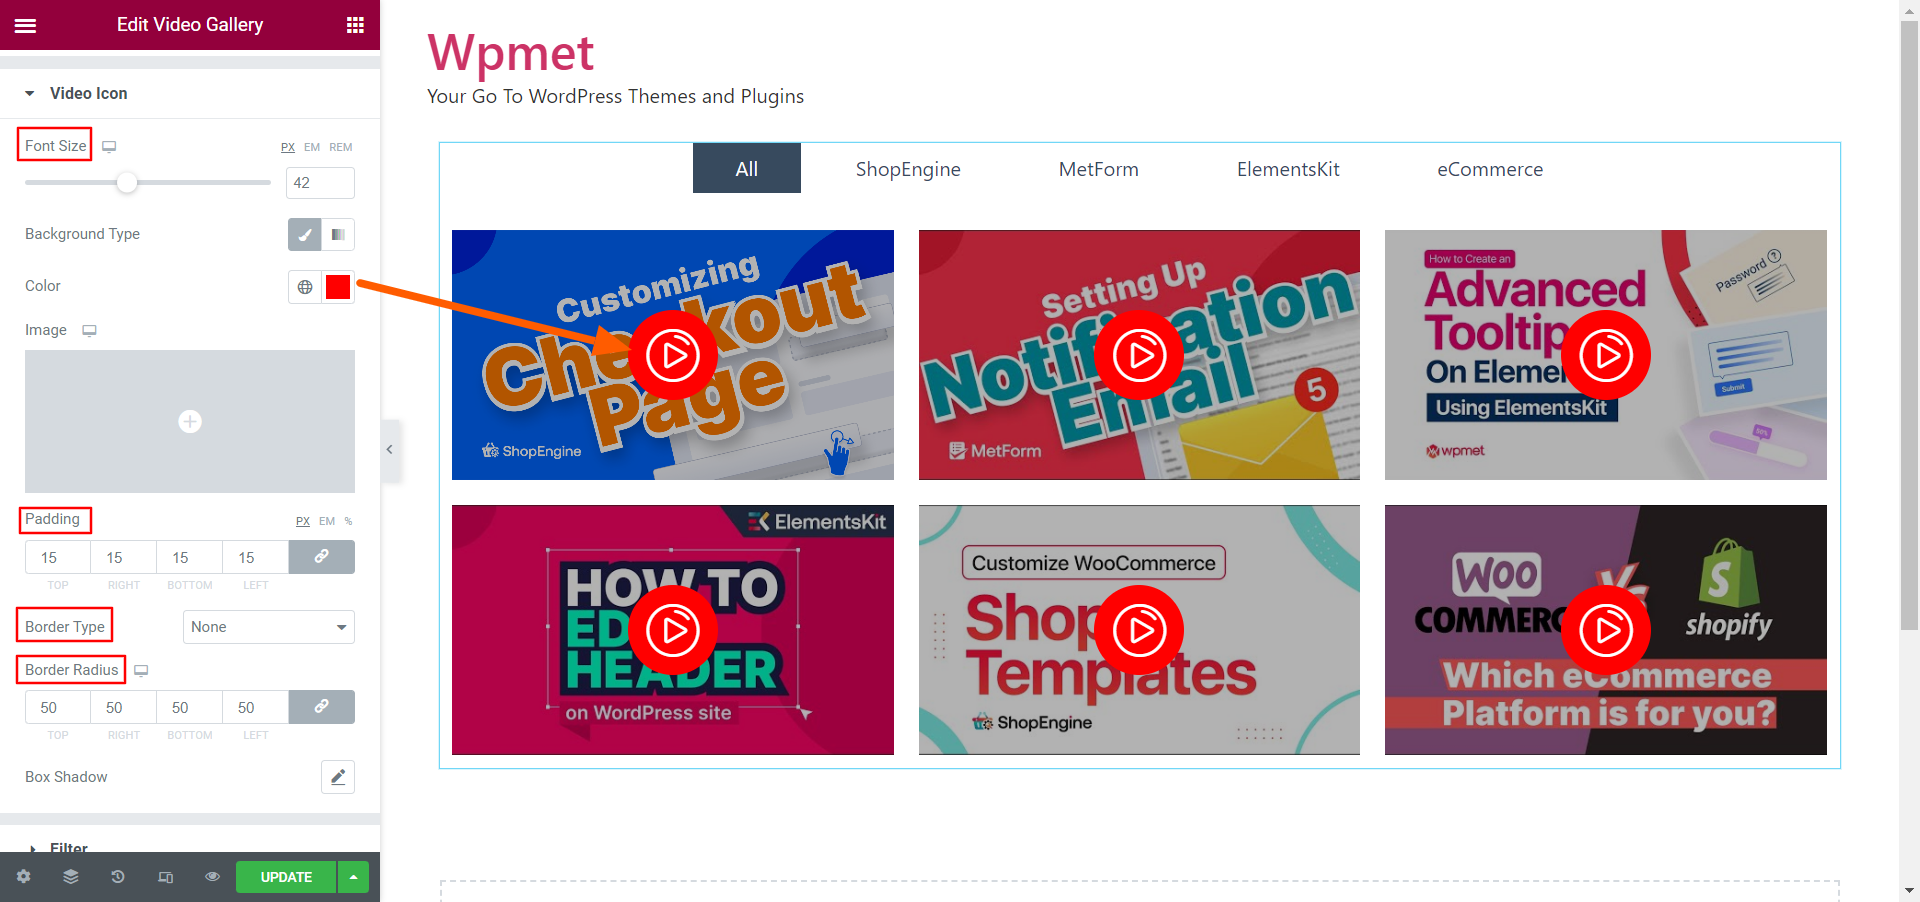
3.3 Video Icon #
To customize the Video Play Icon,
- Adjust the Font Size of the video play button icon.
- Choose the background type and select a background color for the icon. You can also add an image as the icon background.
- Also set Padding, Border Type, and Border Radius for the video play button icon.
3.5 Arrows #
Arrows only appear when you choose Carousel Layout for the gallery and enable the “Show Arrow” option in Settings.
To customize the arrows,
- Adjust the Arrow size.
- Set the Padding for arrows.
- Choose Border Type. Then set Border Width, Border Color, and Border Radius.
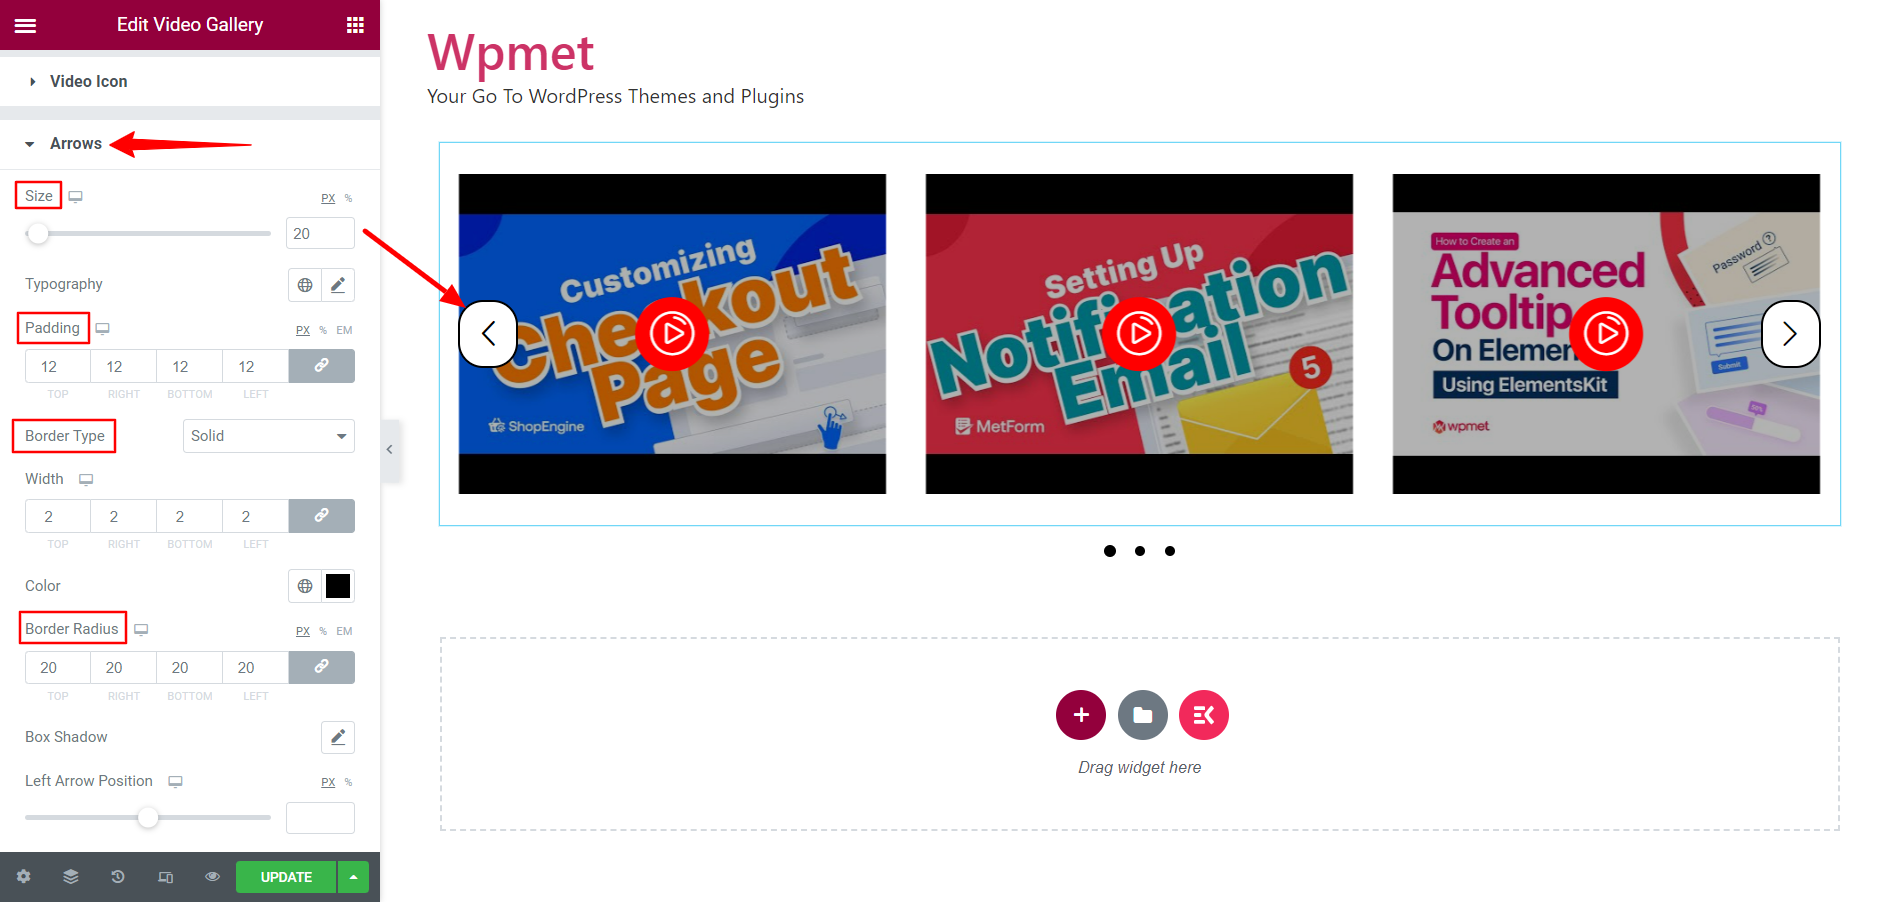
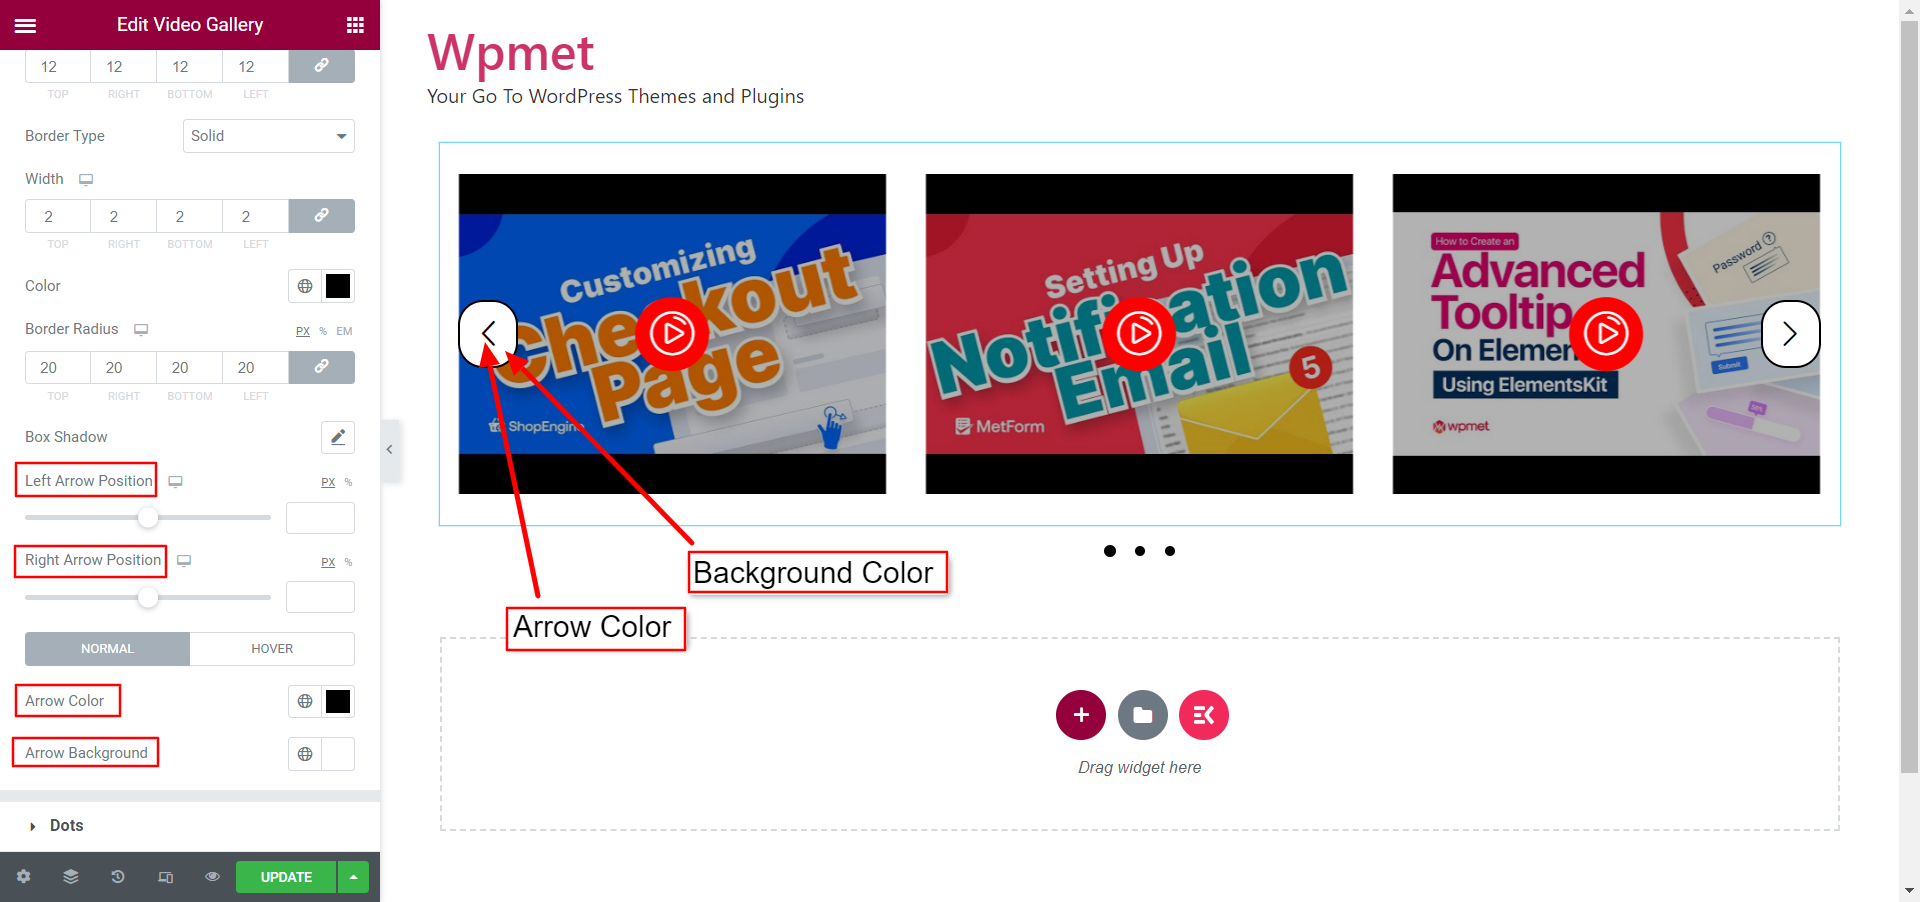
- Adjust Left Arrow Position and Right Arrow Position.
- Set Arrow Color and Arrow Background Color.
- Set separate hover colors for Arrow color and arrow background color.
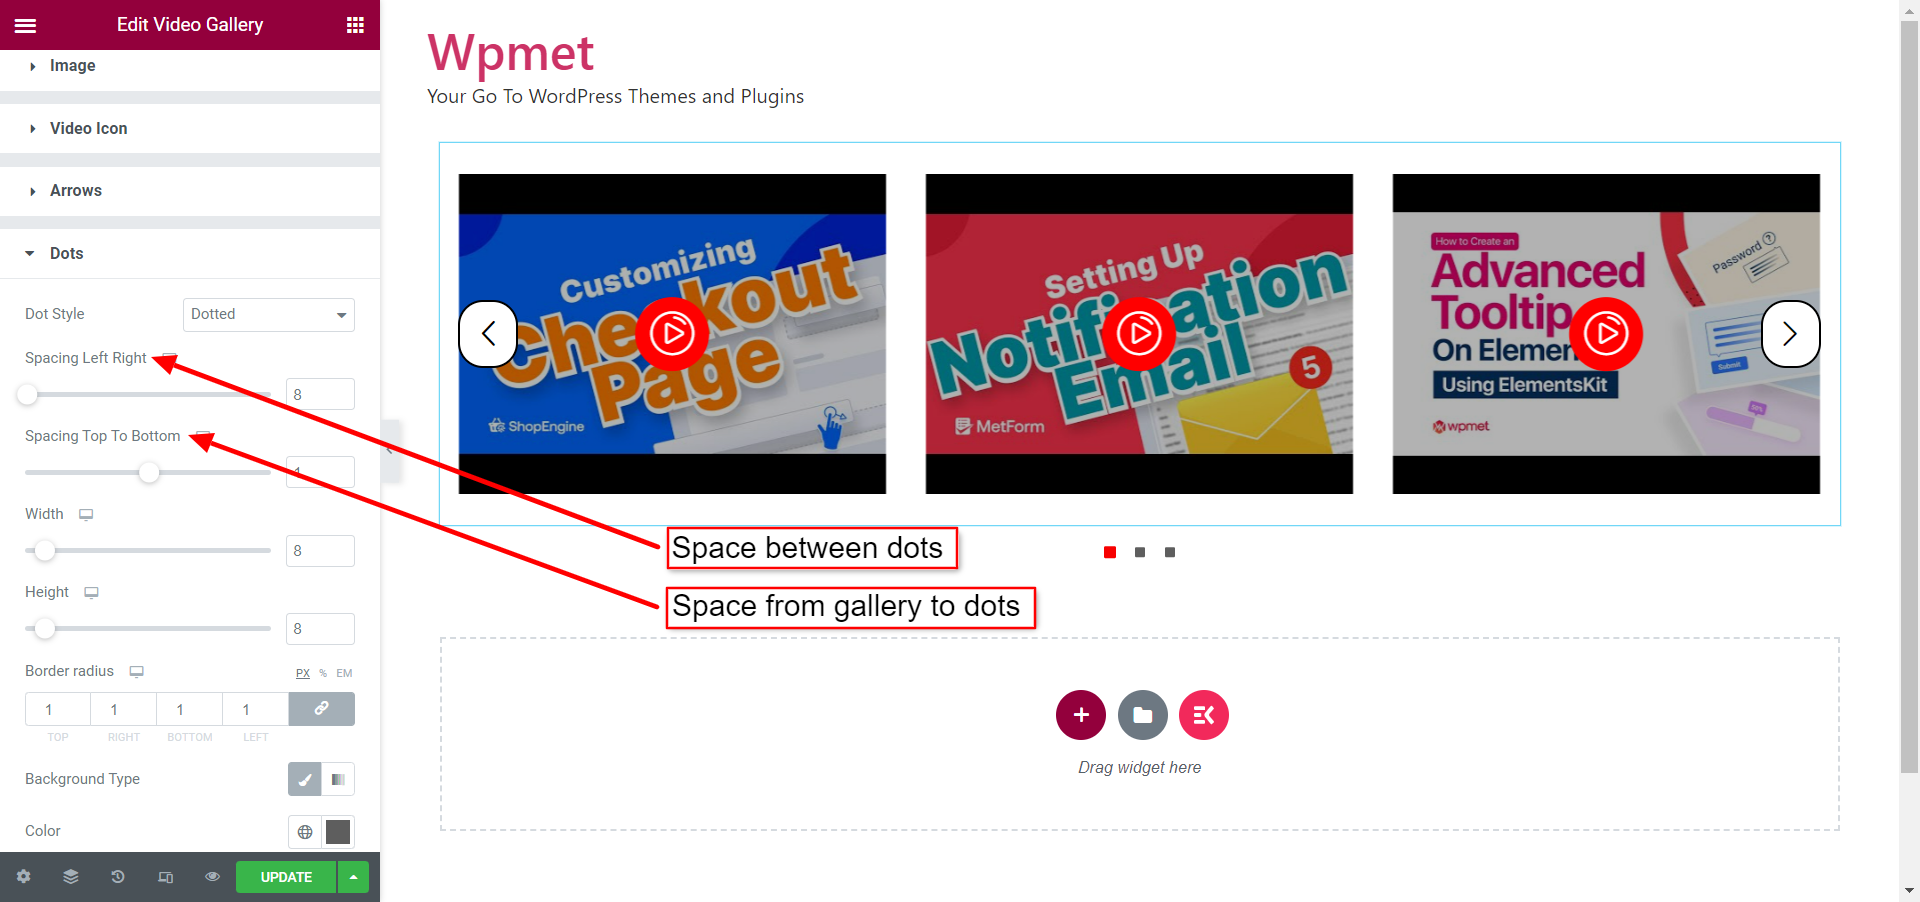
3.6 Dots #
Dots only appear when you choose Carousel Layout for the gallery and enable the “Show Dot” option in Settings.
To customize the Dots style,
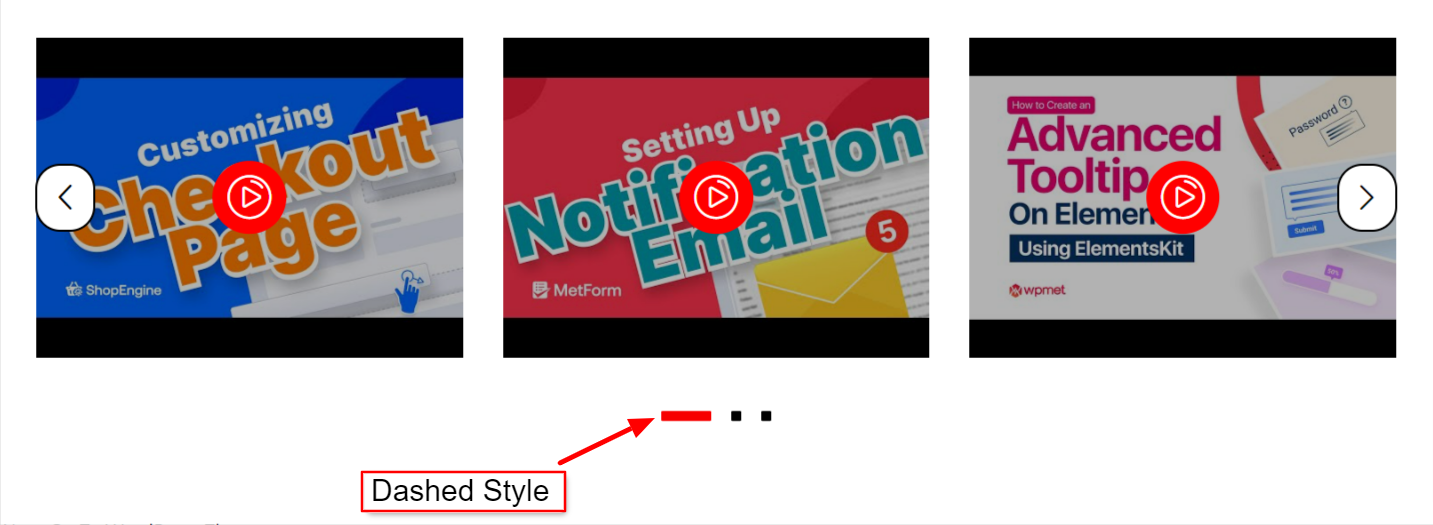
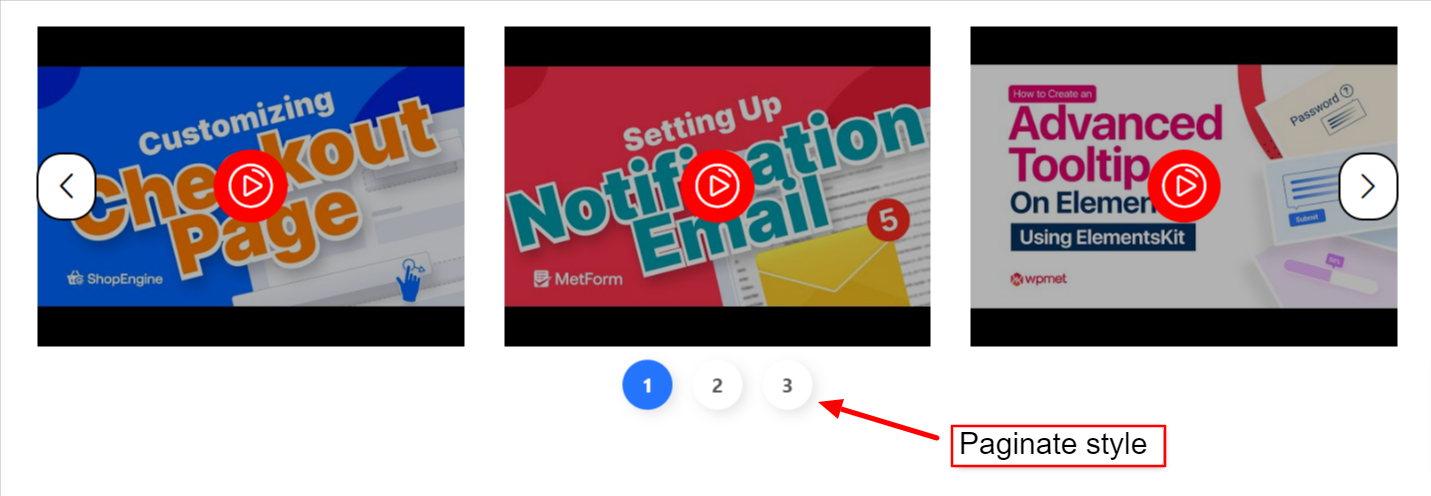
- Choose Dot Style from the given options: Default, Dotted, Dashed, Paginate.

- Adjust the space between the dots using the Spacing Left Right.
- Adjust the space between the video gallery and dots using the Spacing Top To Bottom.
- Adjust Dots Width and Height.
- Set Border Radius.
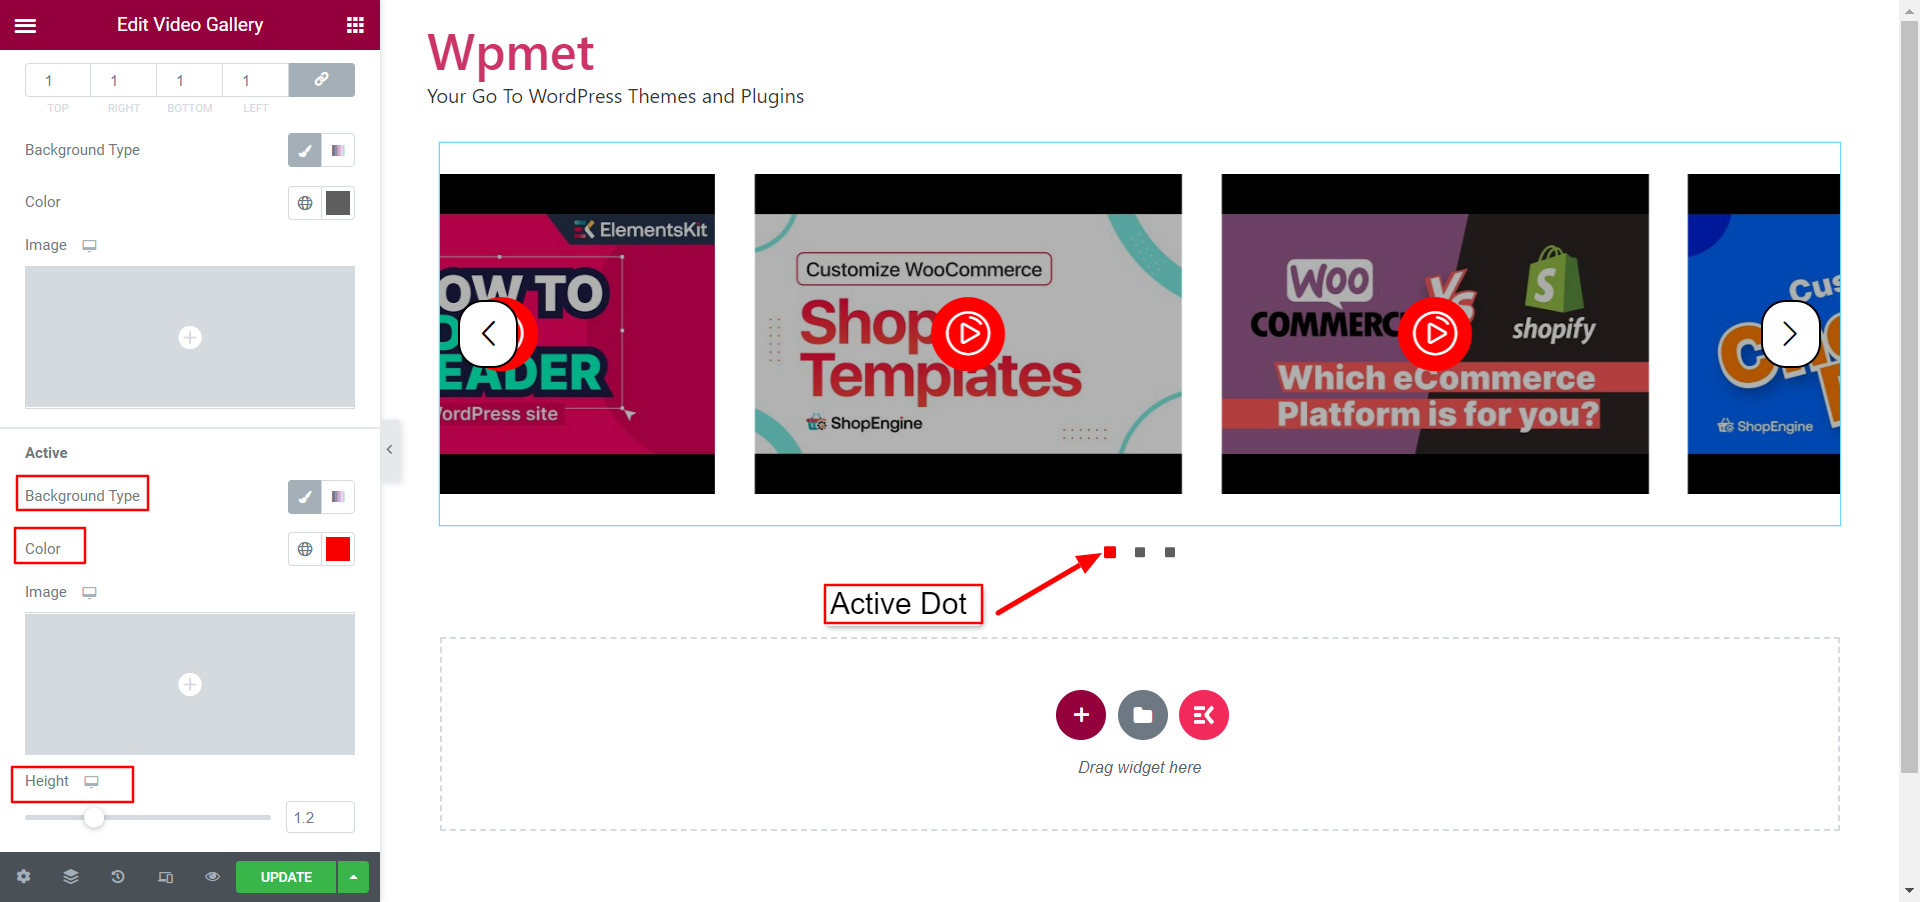
- Customize Active dots by choosing Background Type and Background Color.
- Adjust the Height of the dots.
Finally, the process is complete. you can add a sophisticated video gallery using ElementsKit’s Elementor Video Gallery widget.


