

With Recently Viewed Products you can show customers the products they have browsed so they can easily add them to the cart. You can add this extra feature on the product detail page and make the ordering process more flexible for your customers.
This is a General widget of ShopEngine. So, you can use this in any of the ShopEngine templates.
But how to add Recently Viewed Product? Let’s learn how you can use Recently Viewed Products Widgets on your WooCommerce site:
Recently Viewed Products- ShopEngine Widget #
Step 1: Enable the Recently Viewed Products Widget #
To enable the widget,
- Go to ShopEngine > Widgets > Recently Viewed Products
- Turn on Recently Viewed Products under General section
- Save changes
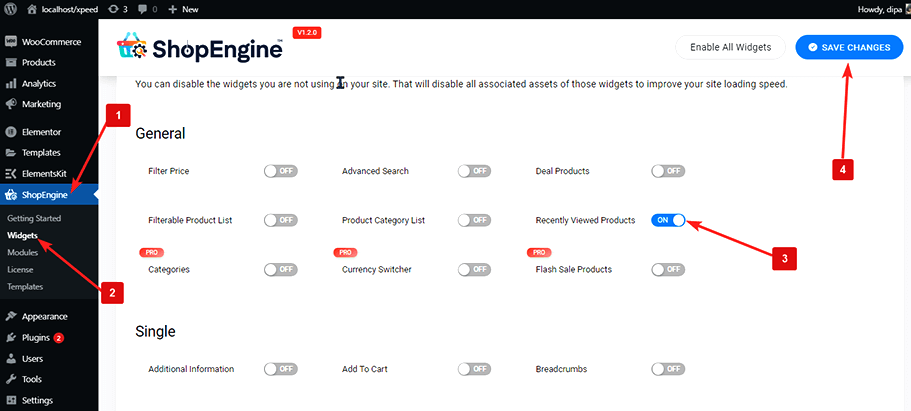
Note: You can also turn on Recently Viewed Products with a global setting that turns on all the widgets of ShopEngine at the same time.
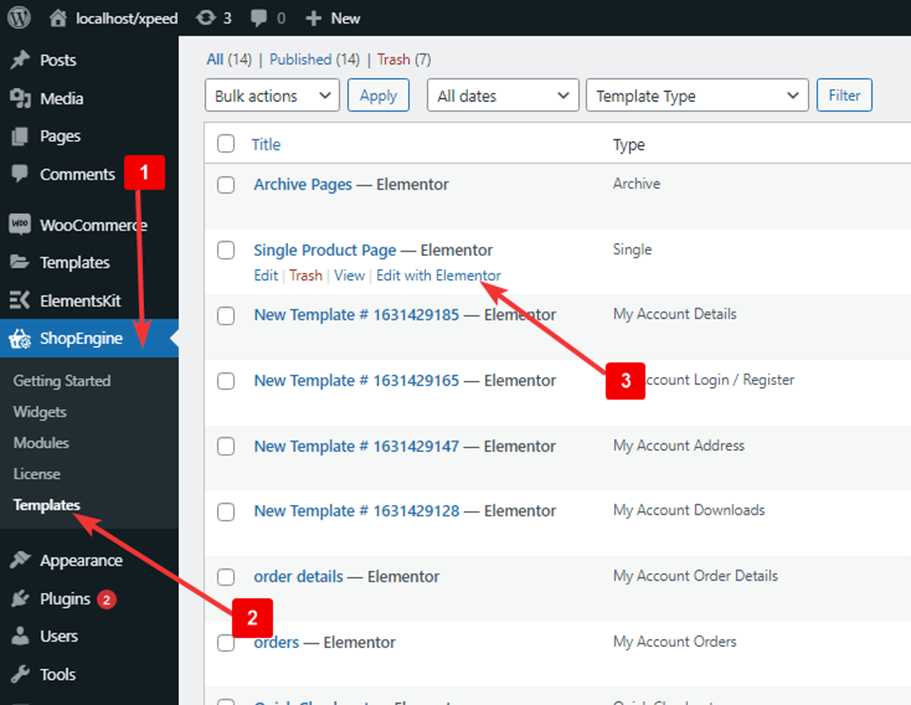
Step 2: Add Recently Viewed Products #
Before you can add the widget you need to any ShopEngine WooCommerce Template first. Check out the documentation on how to create a template.
To add Recently Viewed Products:
- Go to ShopEngine > Templates > Any ShopEngine Template
- Click on Edit with Elementor
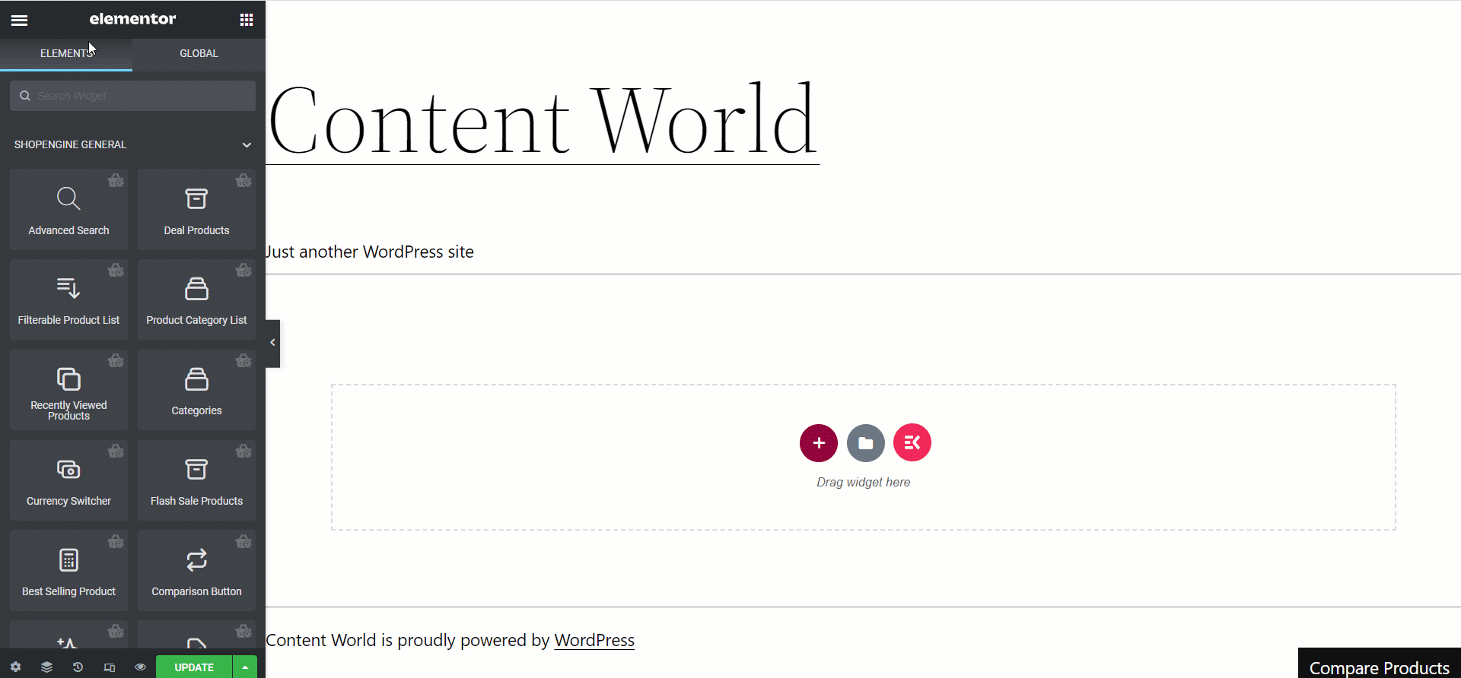
- Search for Recently Viewed Products on the Elements Search option.
- Drag and drop the widget
- Click on Update to save changes.
Step 3: Settings of Recently Viewed Products #
In the Content section, you can customize General and Settings.
Click General to expand

- Products Per Page: Set the number of recently viewed products you want to show per page.
- Order: You can show the product in ascending or descending order. Choose ASC for ascending and DESC for descending.
- Column: Choose how many columns you want to display per row.
Click Settings and expand to get access to the following badge settings:
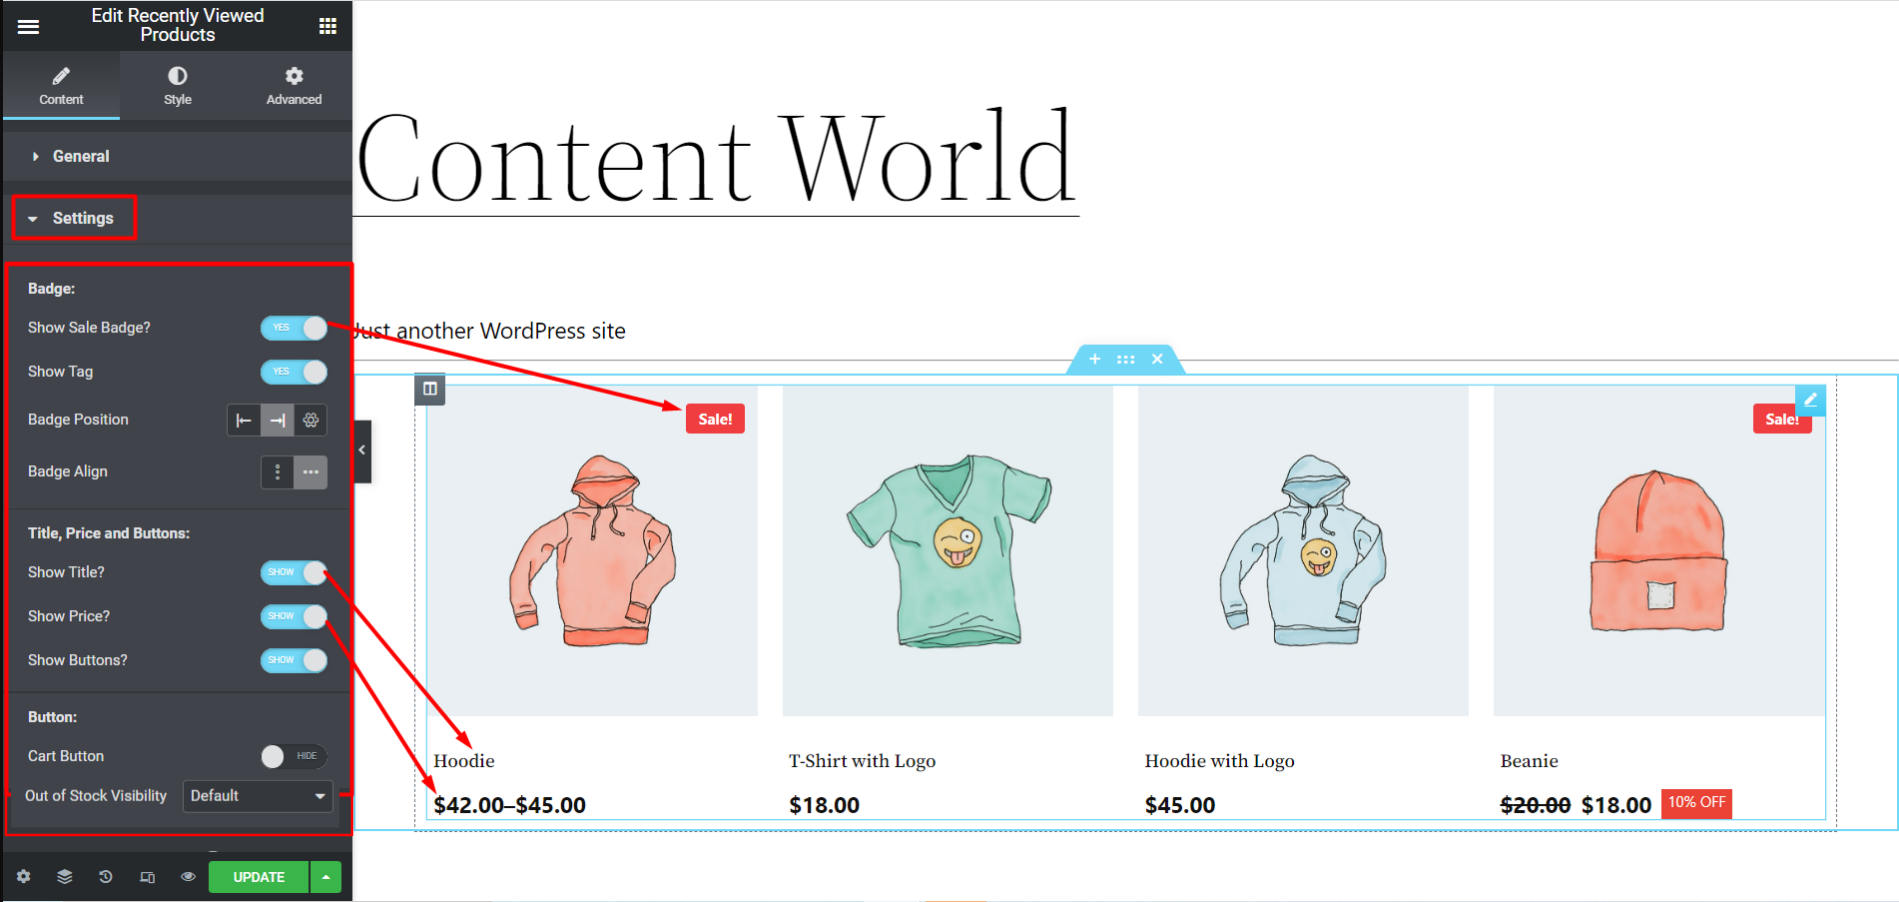
- Show Sale Badge: Turn this option on to show the sale badge. If you don’t want to display the sale badge, turn it off.
- Show Discount Percentage: You can turn this option on to show the discounted percentage.
- Show Tag: To show tag, turn this option on.
- Badge Position: You can set the badge position to the top left and top right. You can also choose a custom position using the values of the X-axis and Y-axis.
- Badge Align: Set the badge to align to vertical or horizontal according to your wish.
- Show Title?: Enable this option if you want to display the image name.
- Show Price?: To display the price select SHOW otherwise HIDE.
- Show Button?: If you enable this option you will see the Cart Button below. There is also the choice to display the Cart option by selecting SHOW and otherwise HIDE.
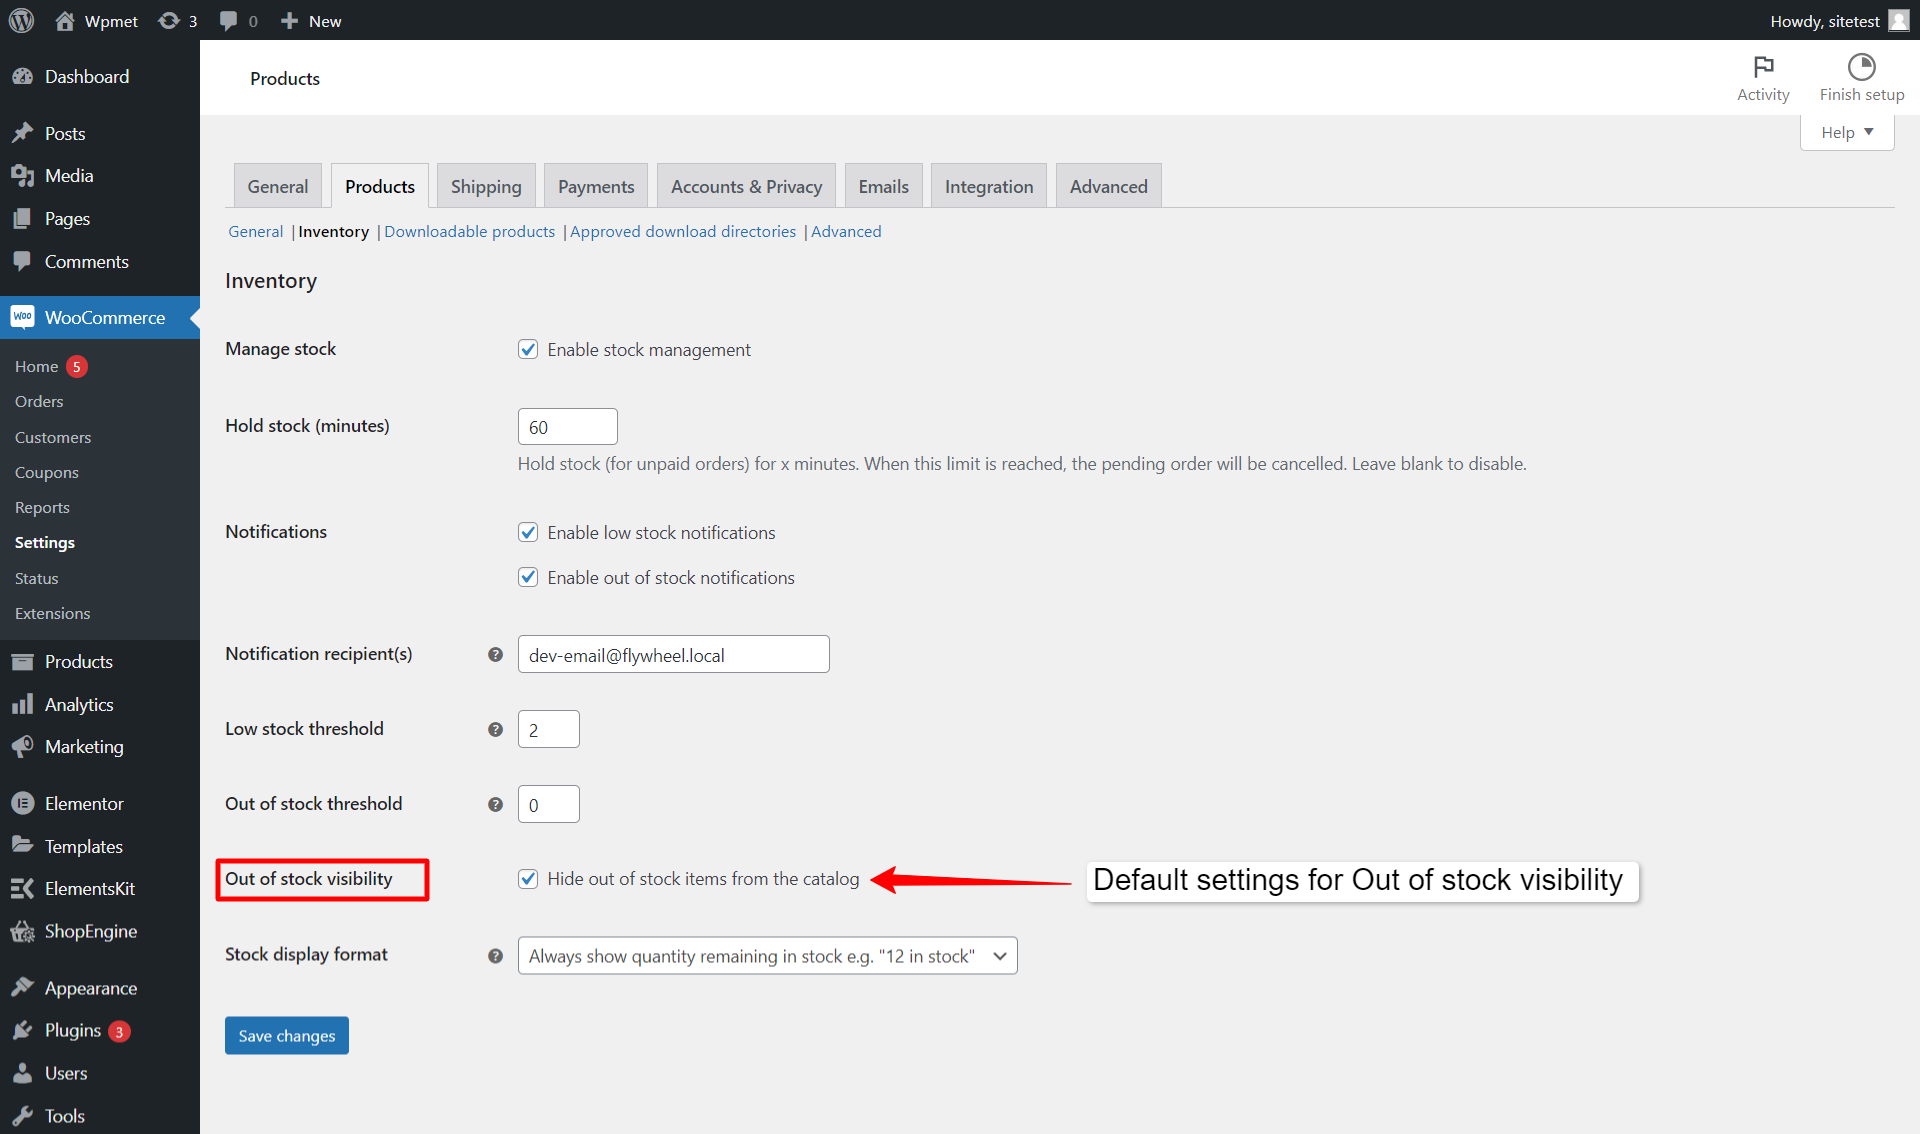
Custom Out of stock visibility:
With ShopEngine Pro, you can customize the visibility of products that are out of stock, on the list of recently viewed products. On the Setting section, find the Out of Stock Visibility feature, and set it to Show or Hide or Default.
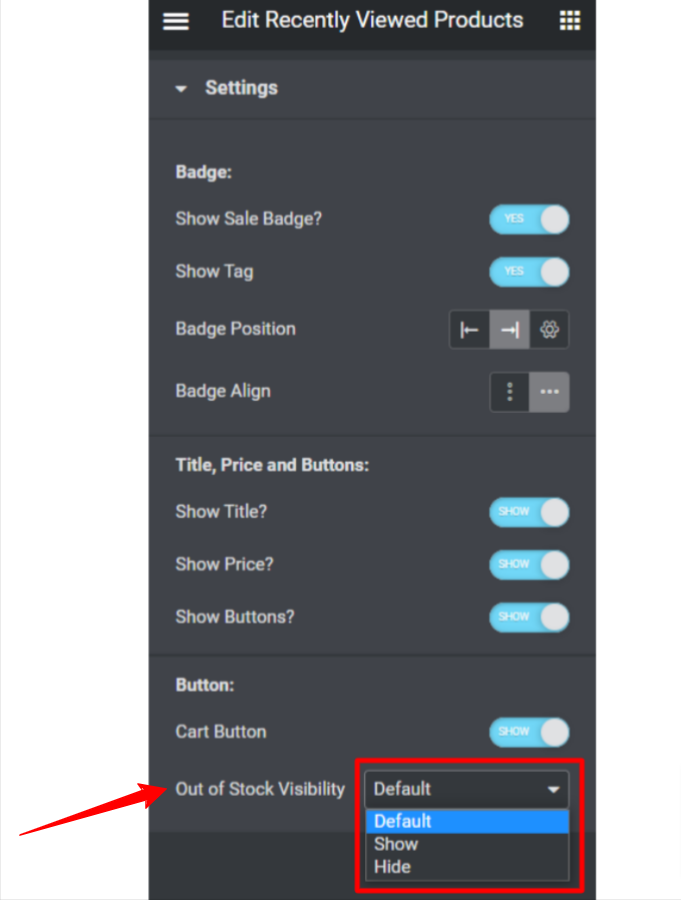
When you choose Default, the visibility will be set according to the WooCommerce product settings Out of Stock Visibility from the WooCommerce > Products > Inventory. Otherwise, selecting Show or Hide will override the default settings.
After making all the settings changes, click update to save.
Step 4: Style Settings of Recently Viewed Products #
After you are done with the settings, you can change the style from content > style
Expand the Product Wrap option to change the following style:
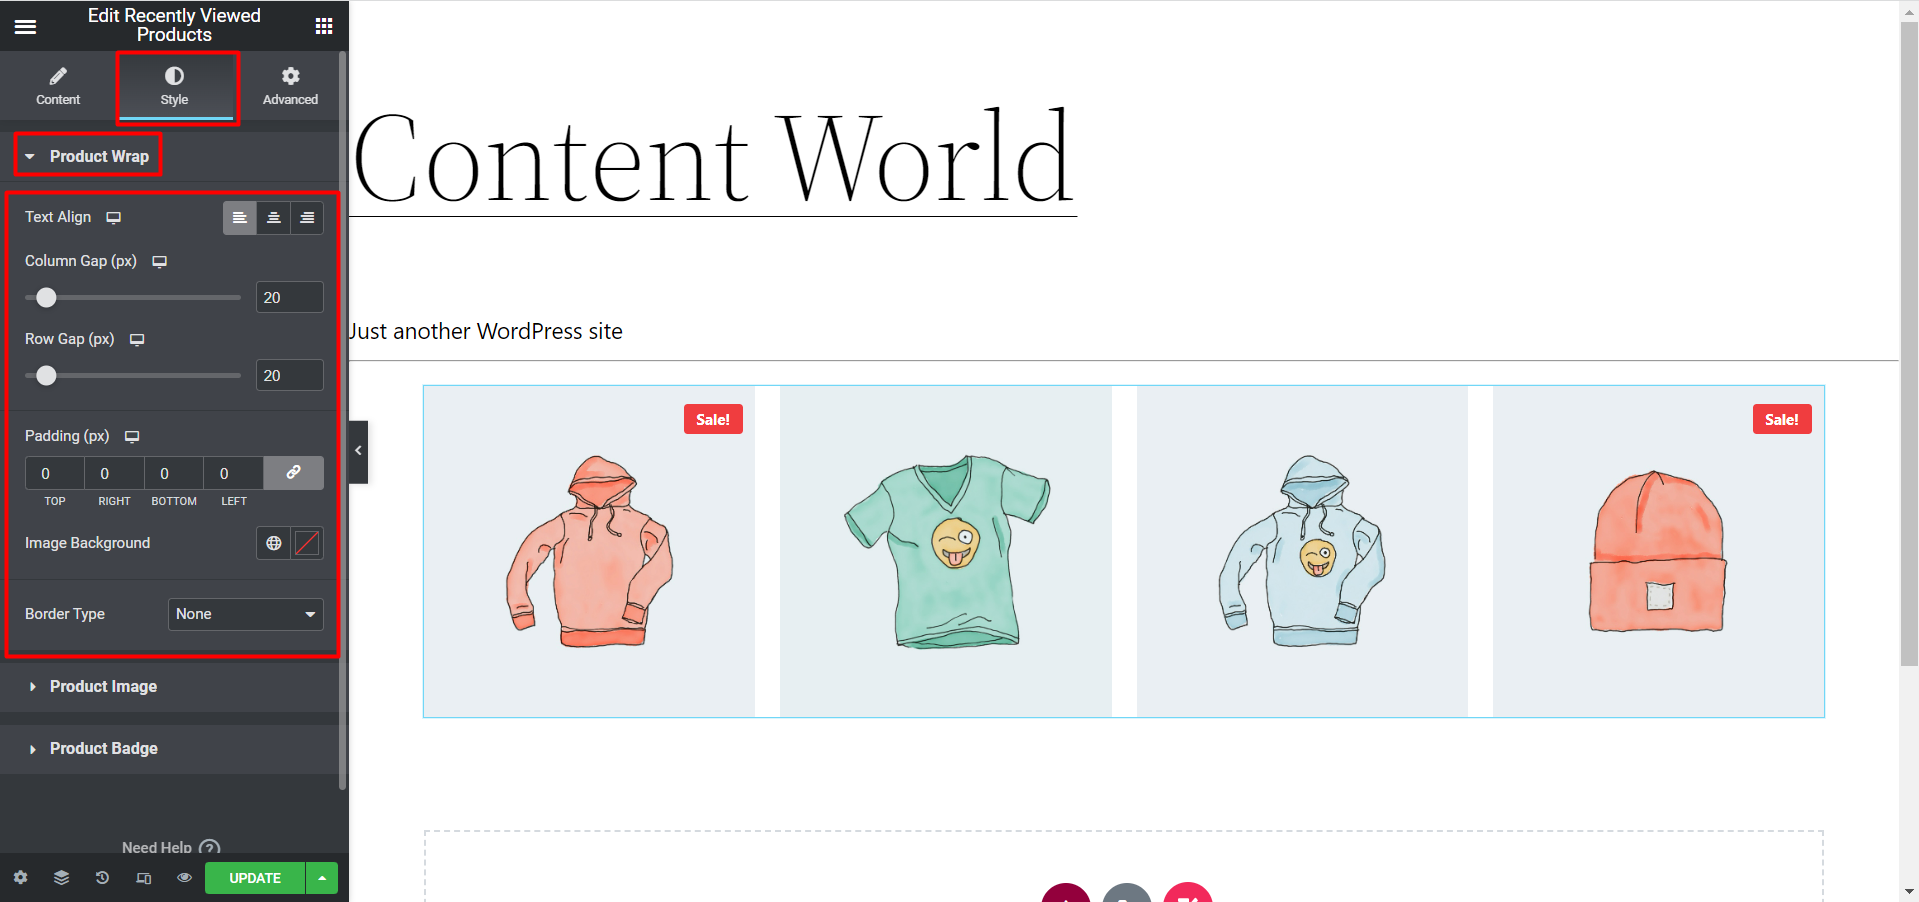
- Text Align: You can align your text Left, center, and Right.
- Column Gap: Choose the gap between each column in pixels.
- Row Gap: Enter the gap you want between each row here.
- Padding: Set the top, left, right, and bottom padding.
- Image Background: Choose the background color
- Border Type: Select the border type you want around each product section.
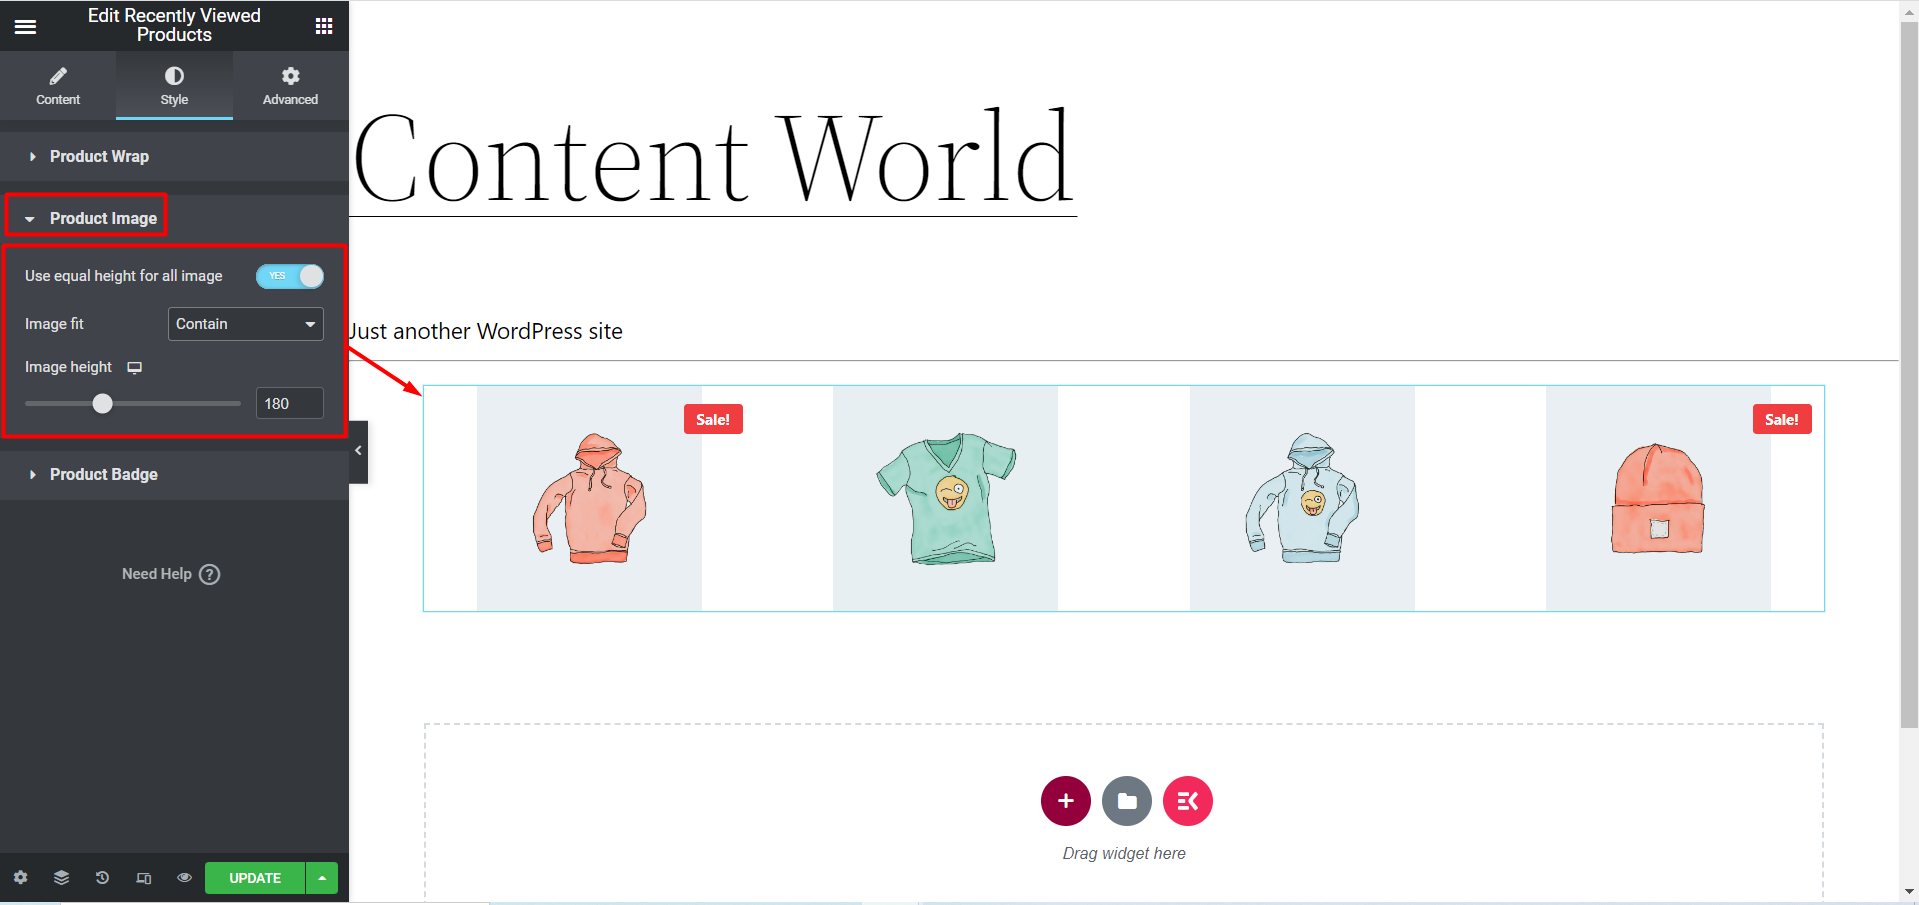
Expand the Product Image option now:
Here, if you click YES for Use equal height for all image option it will show Image fit and Image height options. So, you can set them according to your need.
Expand the Product Badge option to change the following style:
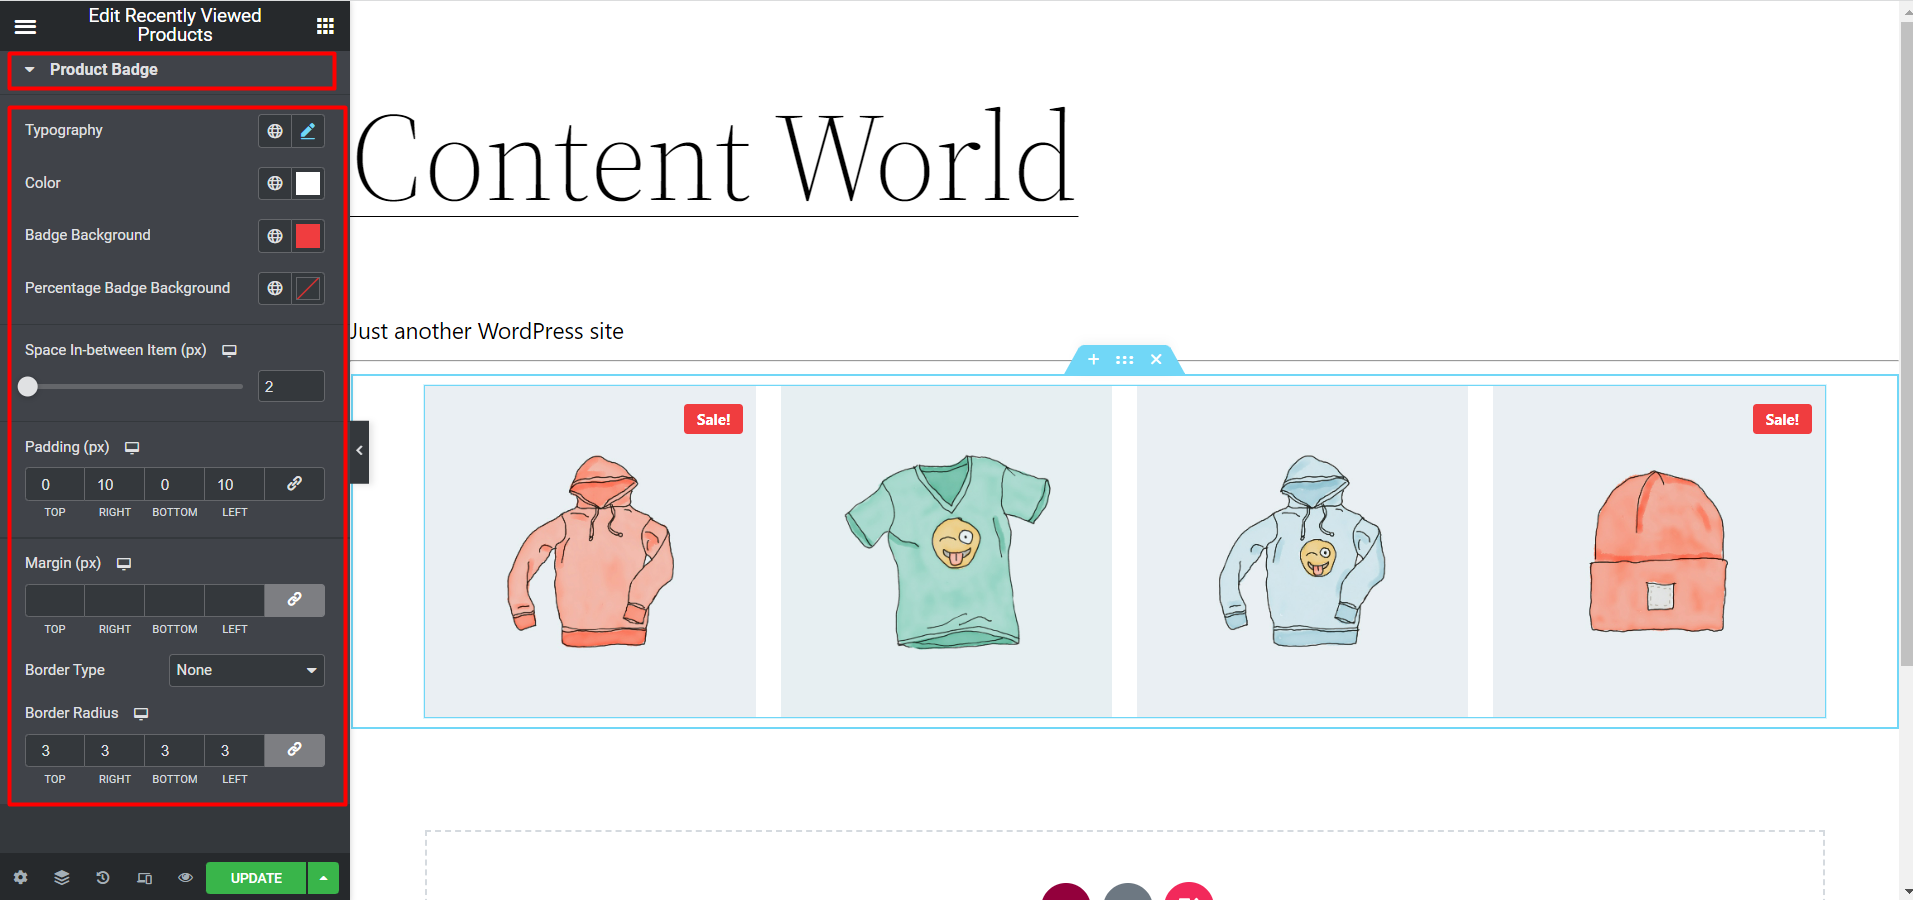
- Typography: Choose the font family, font size, weight, transform, line height, and letter spacing for the sale badge.
- Color: Change the color of the badge text.
- Badge Background: Choose the badge background from this option.
- Percentage Badge Background: Select the background color for the percentage badge.
- Space In-between Item (px): Choose the space you want between items.
- Padding: Choose the top, right, bottom, and left padding around the badge.
- Margin: Select the top, right, bottom, and left margin around the badge.
- Border Type: You can change the border type here.
- Border Radius: Here you can set the top, right, bottom, and left value of border-radius.
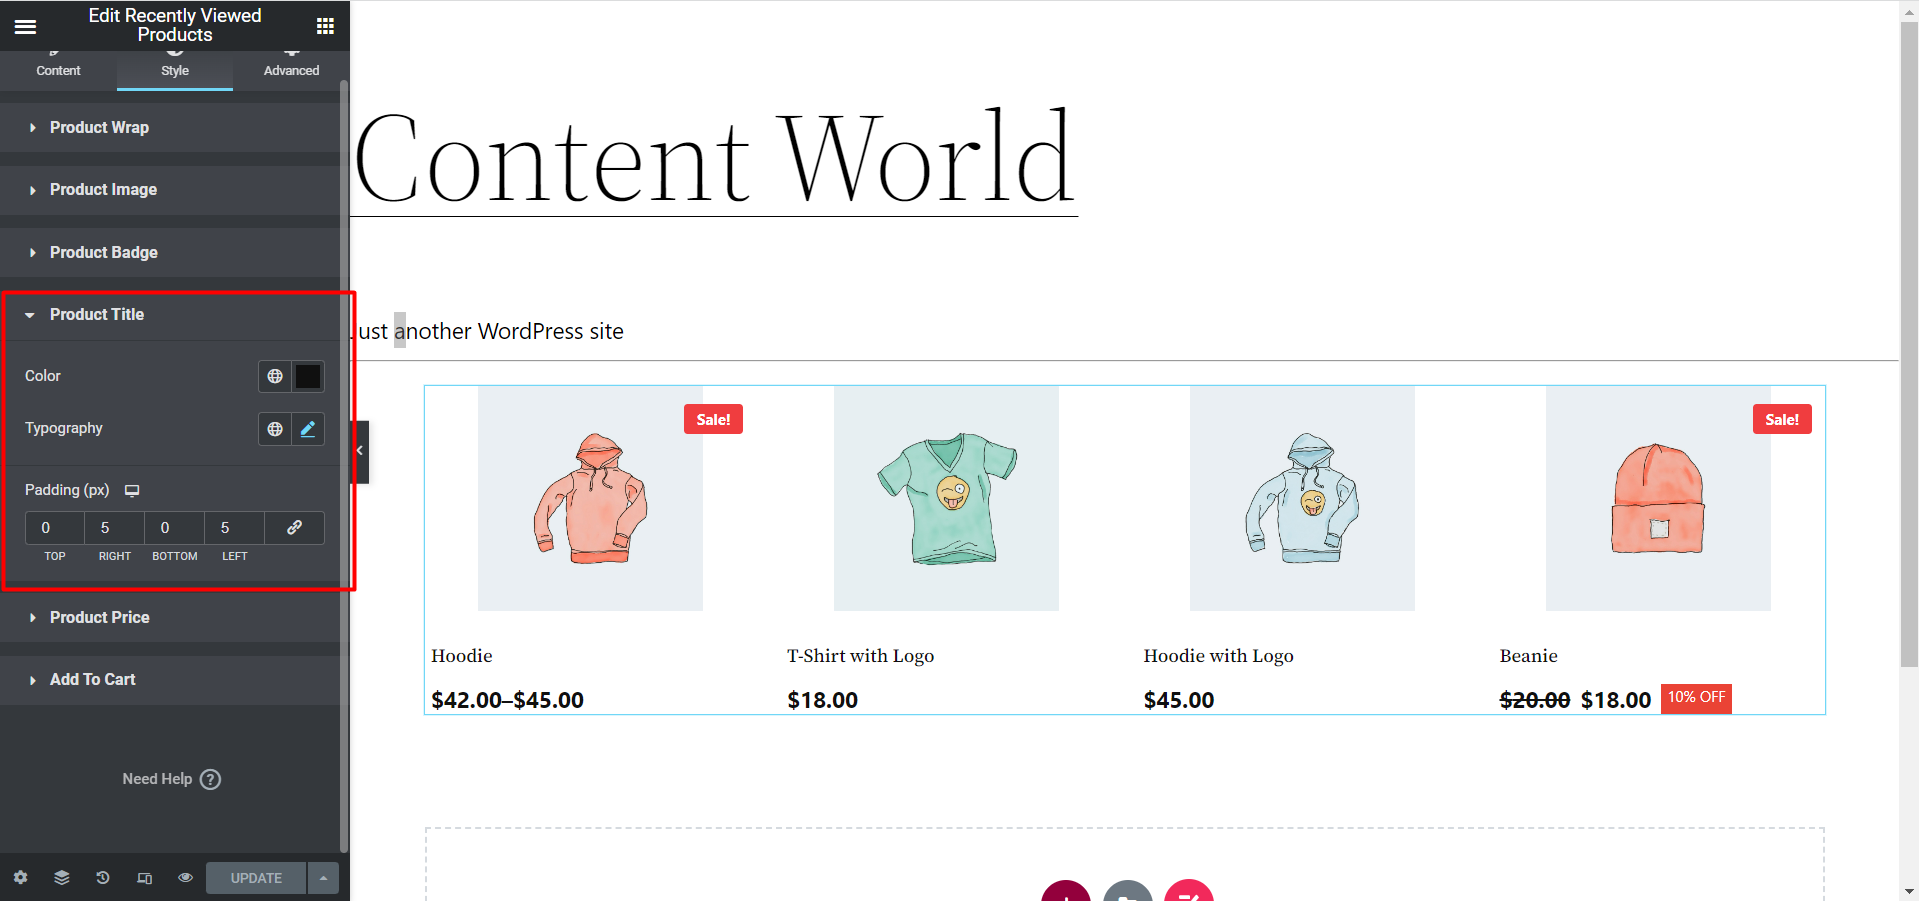
Now click Product Title and change the options:
There are Color, Typography, and Padding settings for the Title, so, set them accordingly.
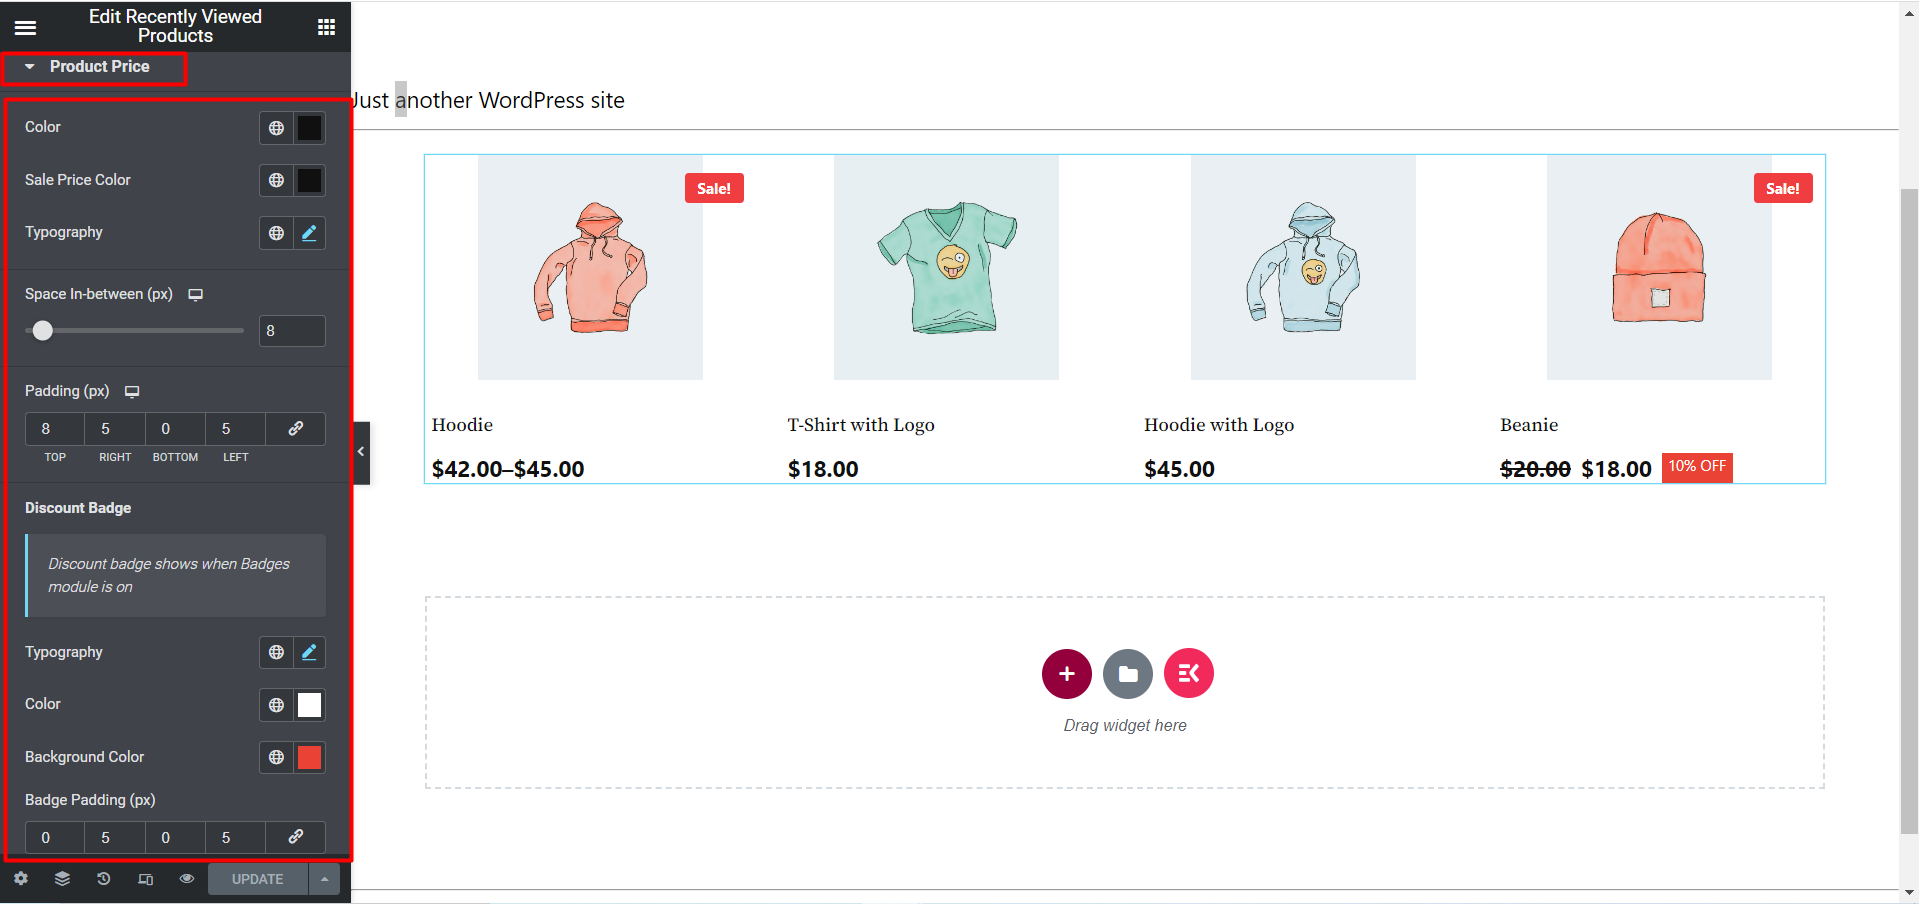
Now click Product Price and change the options:
Here, along with Color, Typography, and Padding options there is also a Discount Badge setting option. If you turn ON the Discount Badge module then you can edit here the options accordingly.
The last one is Add to Cart option:
See the image below, there are multiple options to add products and place them. You can set space in-between, typography, padding, margin, and so on.

After making all the changes click update to save. Now, recently viewed products should be visible on the storefront with all the customization and styling.
Here is a final preview of the Recently Viewed Products widget:
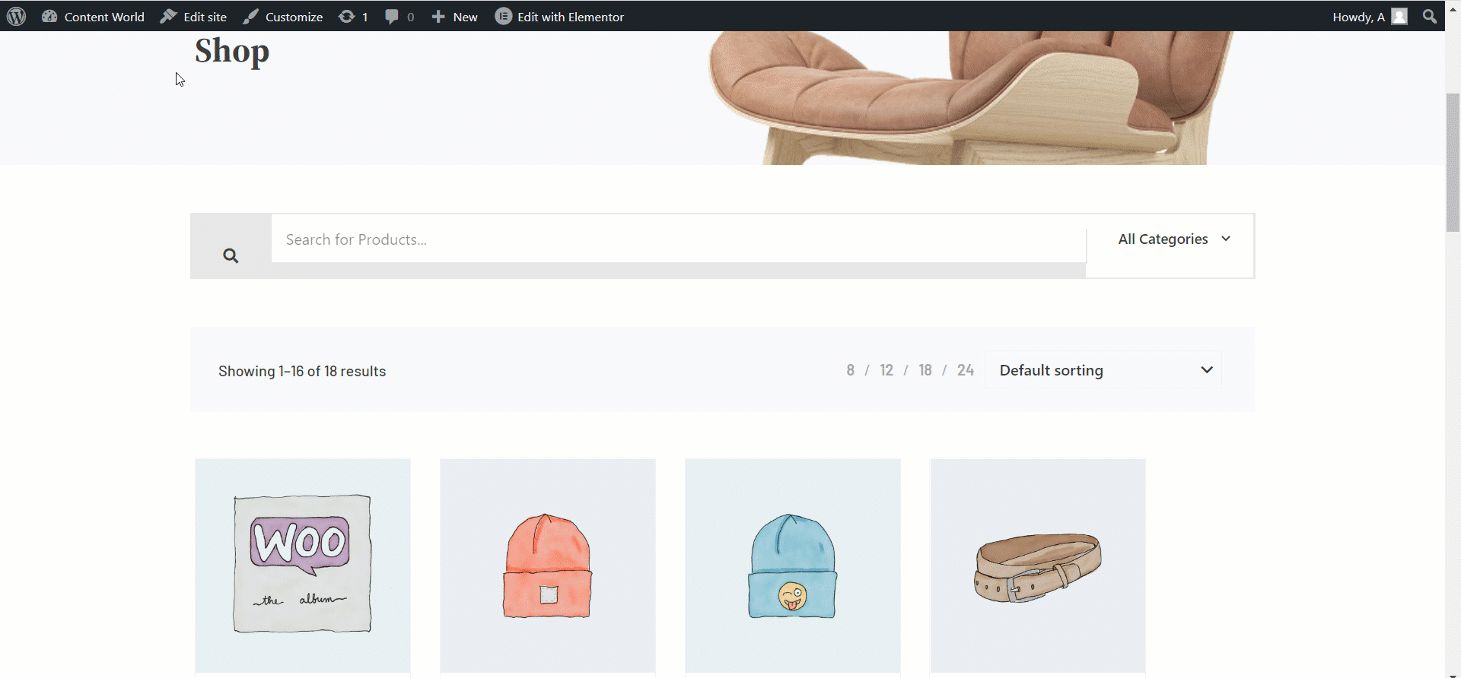
Customers sometimes forget where they left their last product. Recently Viewed Products is the feature presents the last or recently viewed products to the customers easily. You can try this widget and increase more sales this way.


