

A Crowdfunding Campaign is a method of raising funds for a project or venture. The process begins by soliciting small contributions from a large number of people, typically via the internet.
Let’s see how the popular WordPress plugin WP FundEngine can help you.
Add Crowdfunding Campaign #
Crowdfunding is to collect money from investor or any large number of people for any project or other purposes through Internet.
So for this we need to create a campaign for crowdfunding
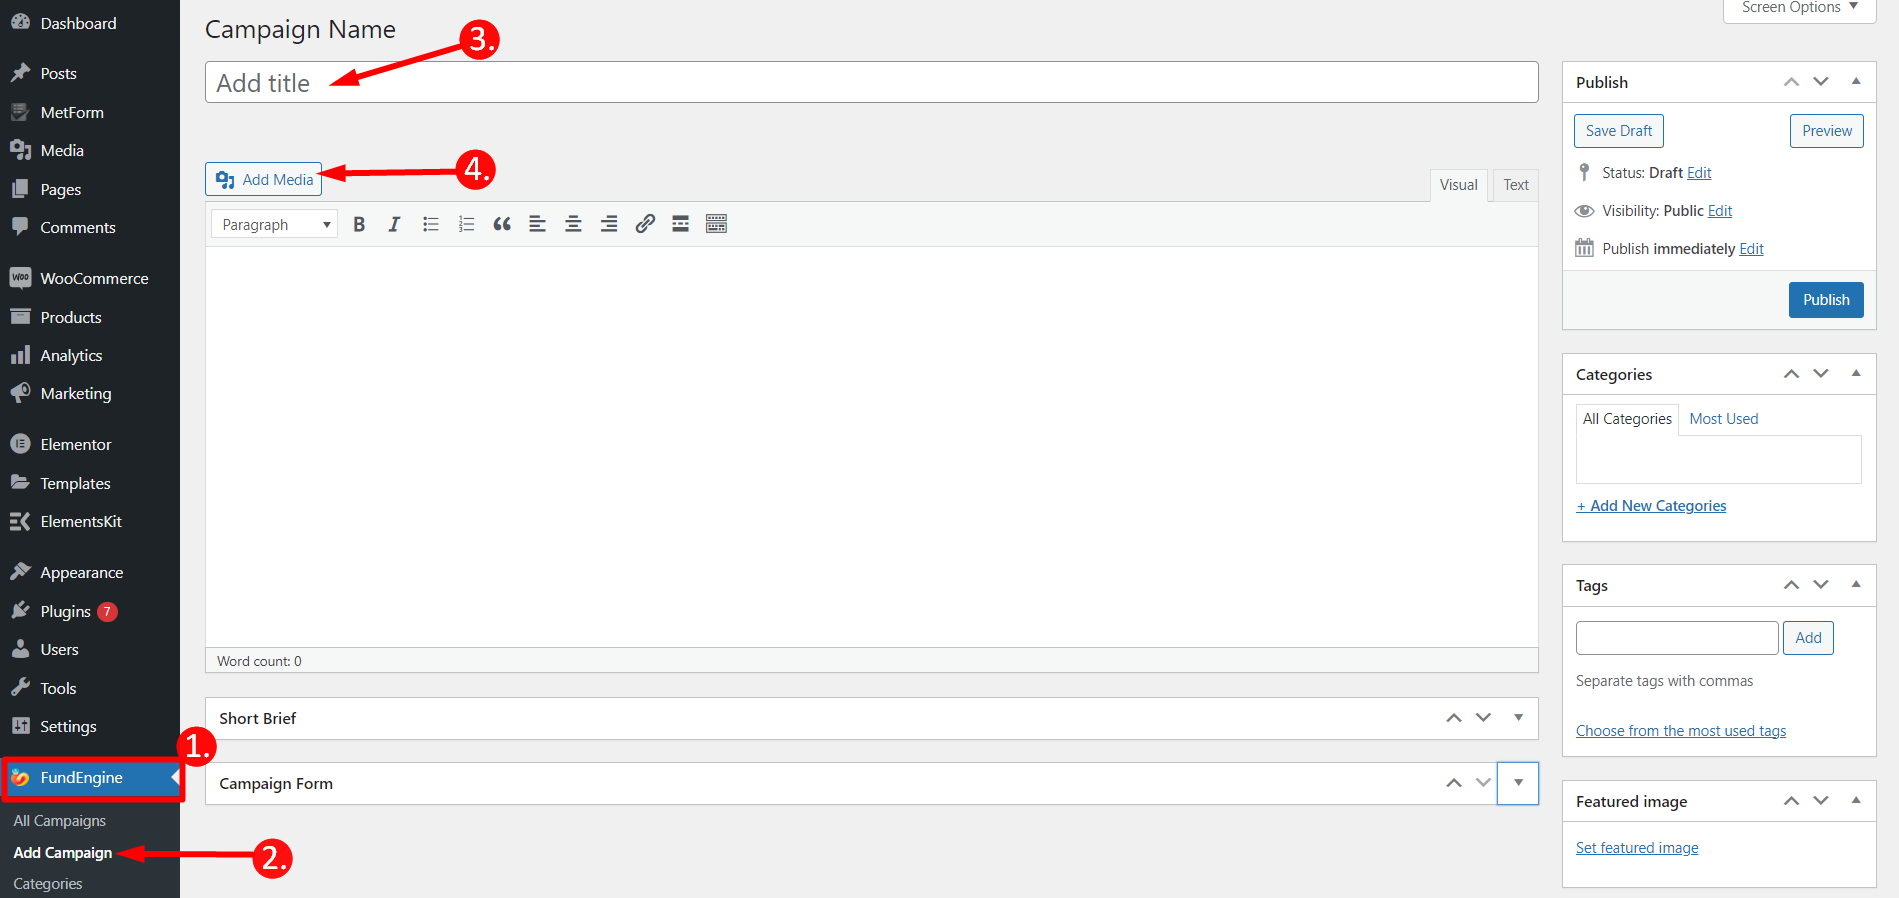
- Click on WP FundEngine
- Add campaign
- Add Crowdfunding Campaign Name
- Click Add media to show pictures
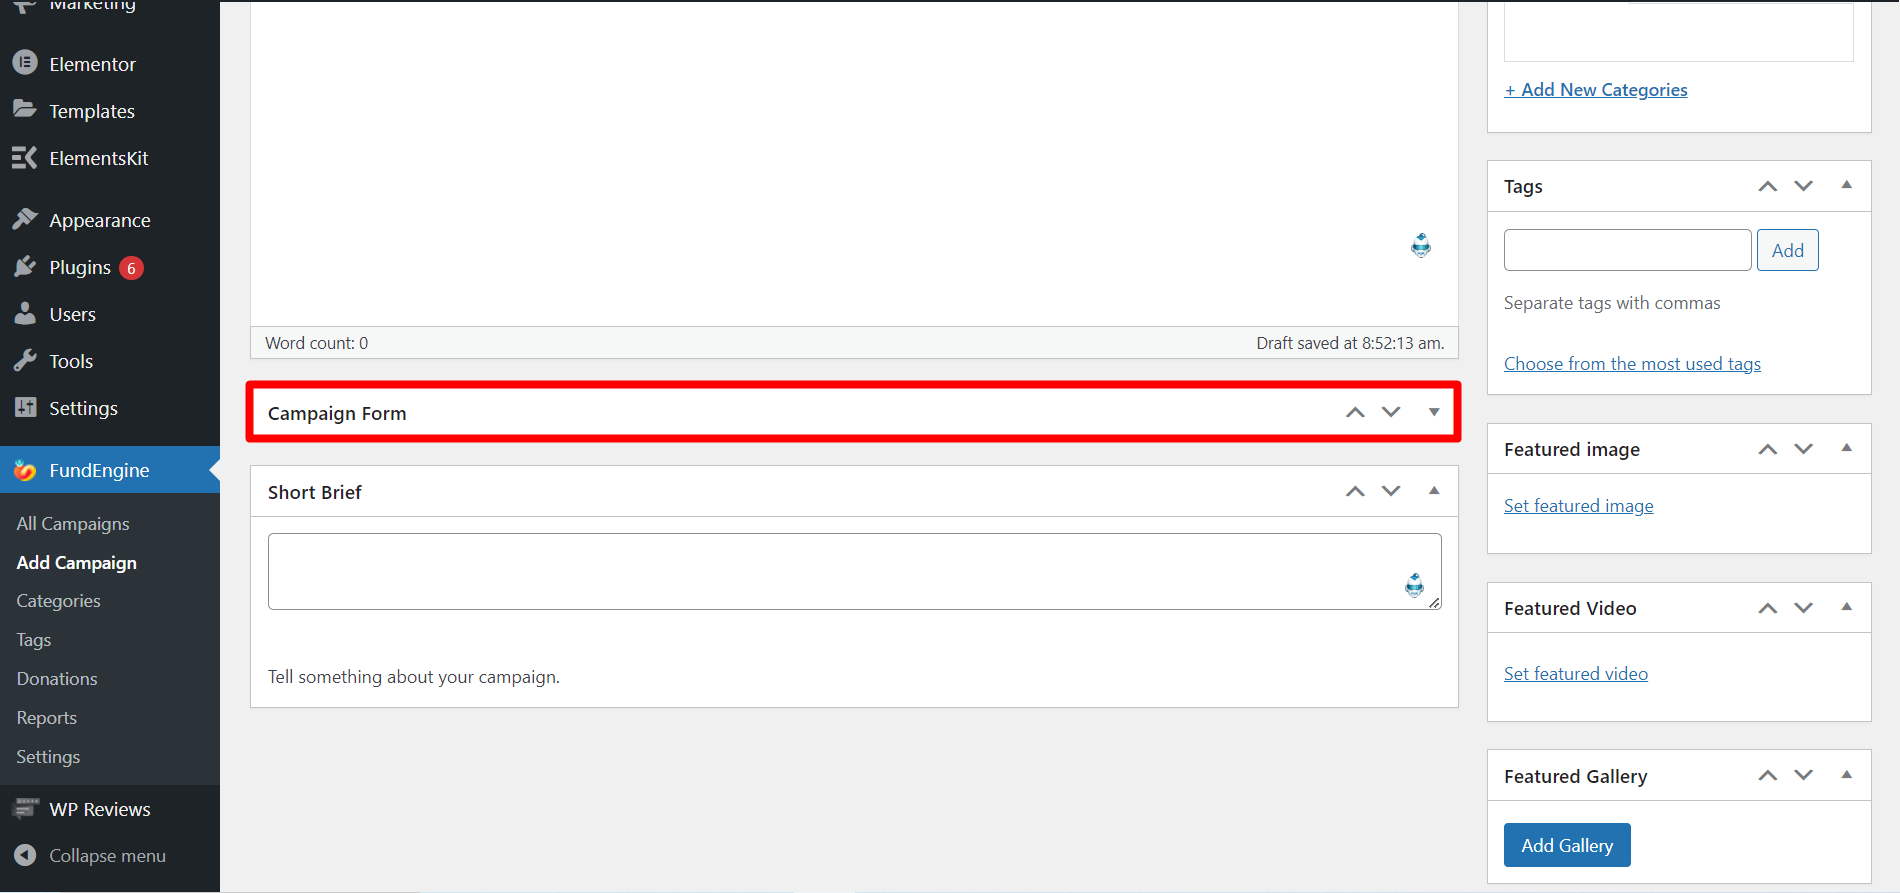
Click on the Campaign Form and it will expand
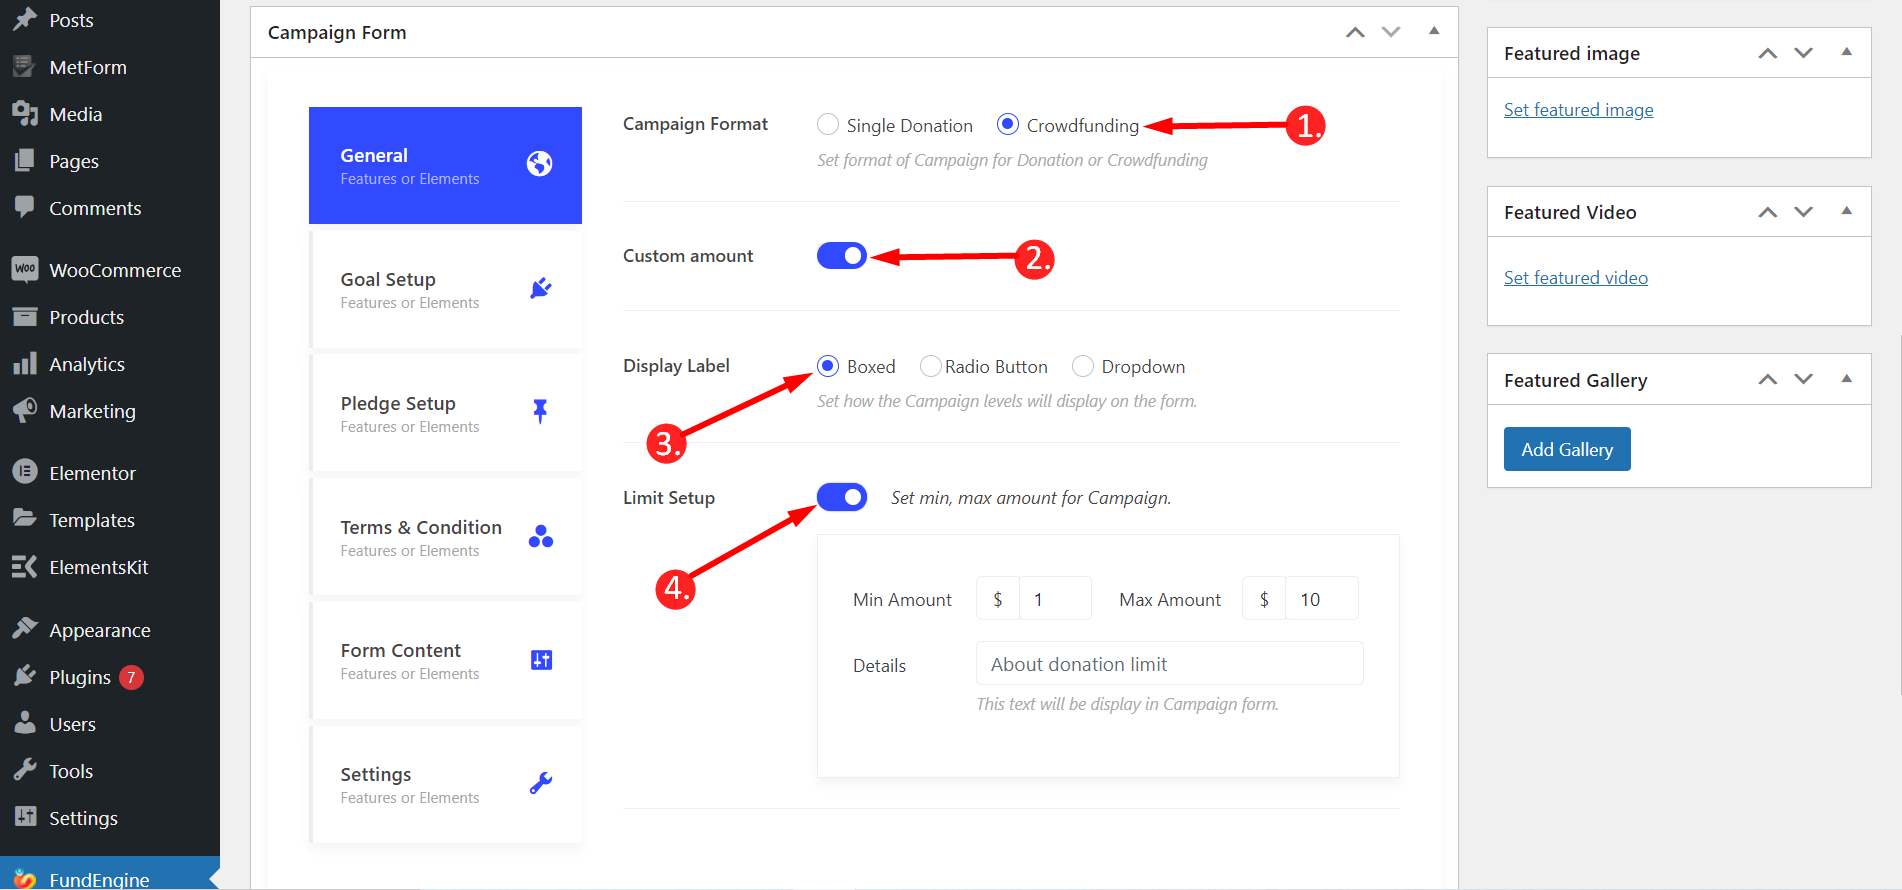
General #
Set up your Campaign Format for Donation or crowdfunding. You can also display label at your own choice like how you want to show your campaign label on the form. Moreover, You can set the minimum or maximum amount that user want to give.
From General –
1. Campaign Format: Choose “Crowdfunding” from the radio button.
2. Custom amount: You can enable this button to set custom amount.
3. Select Display Label: Boxed or Radio-Button or you can select Drop-Down.
4. Turn on the Limit Setup toggle: Set the maximum or minimum value that user can give. Show short message about donation limit. For example “you can give min amount 1$ and maximum amount 10$”.
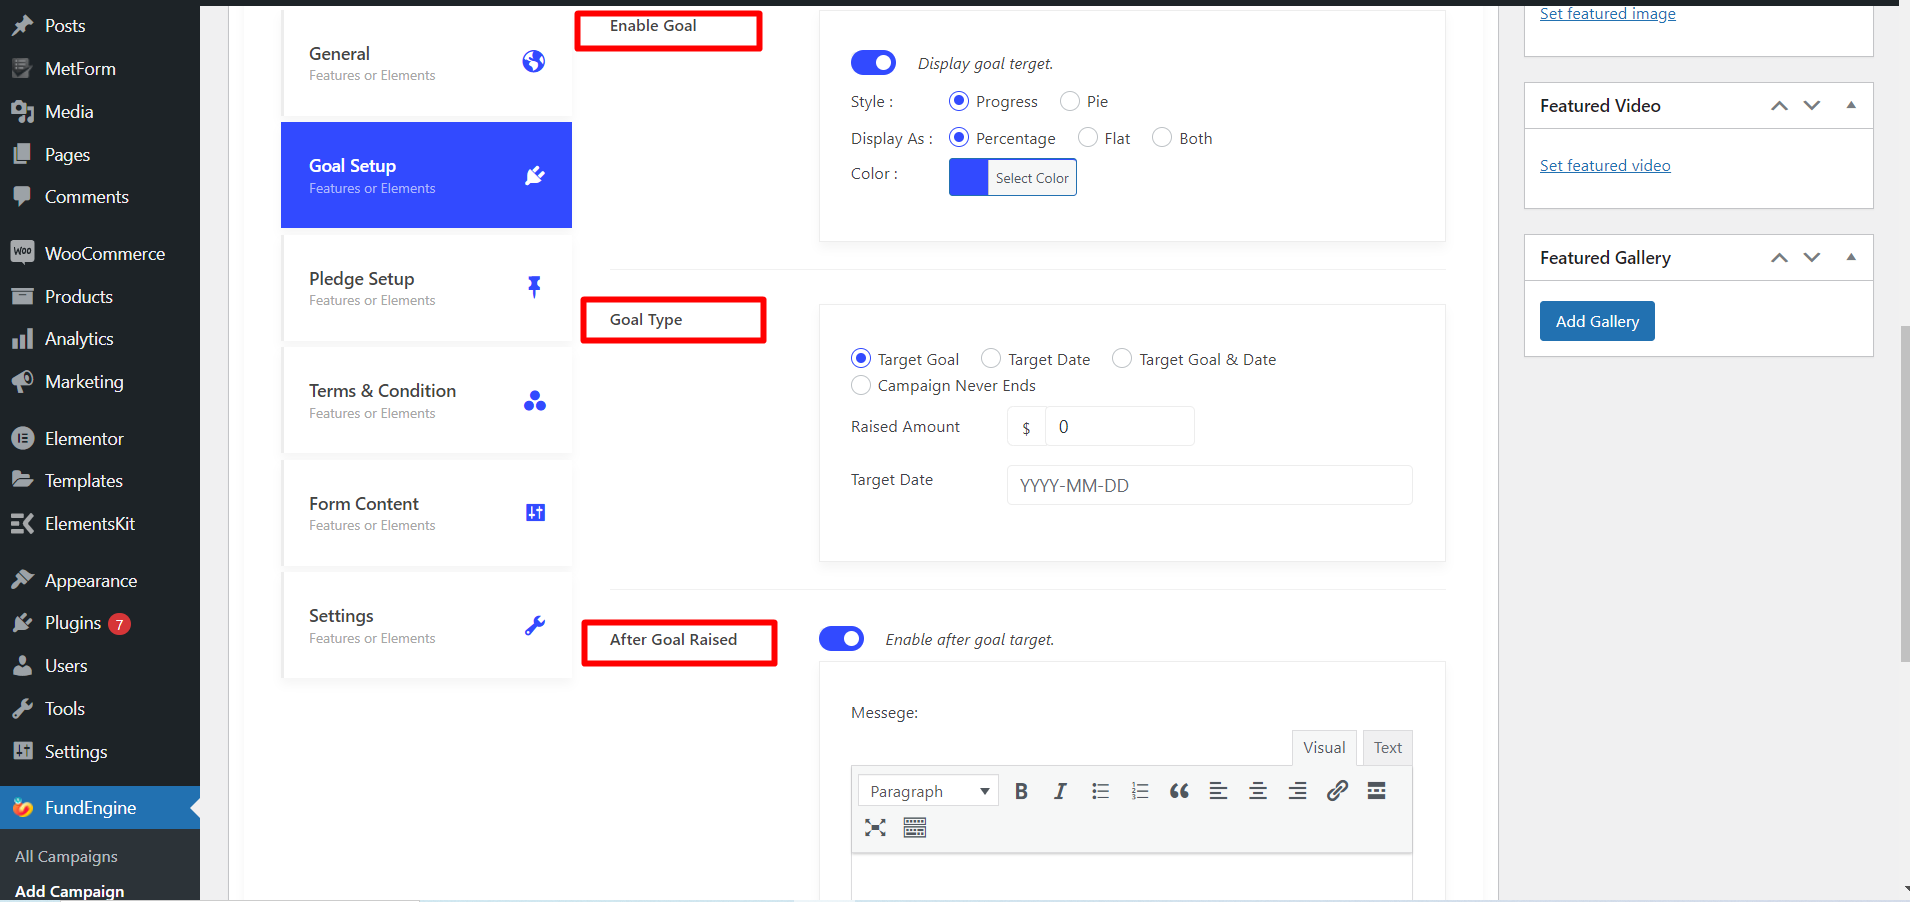
Goal Setup #
This feature is to set up your target goal or raised amount that means you can showcase what amount of money you want to get from donor. You can also set up the finished date of your campaign with different styles and color.
Click on the Goal Setup-> Turn on the “Display Goal Target” toggle
- Styles: Progress bar and Pie chart.
- Display as : Percentage or Flat or Both.
- Color: Select color at your choice
Click on the Goal Type –
- Give your Targeted Amount or Raised Amount that means what amount of money you want for.
- Target Goal, Target Date, Target Goal & Date both or you can also select campaign never ends.
- Give your Target Date at when the campaign will be stopped.
Next enable After Goal Raised –
It displays a Short Message to provide update. For example: “Target Amount Raised”
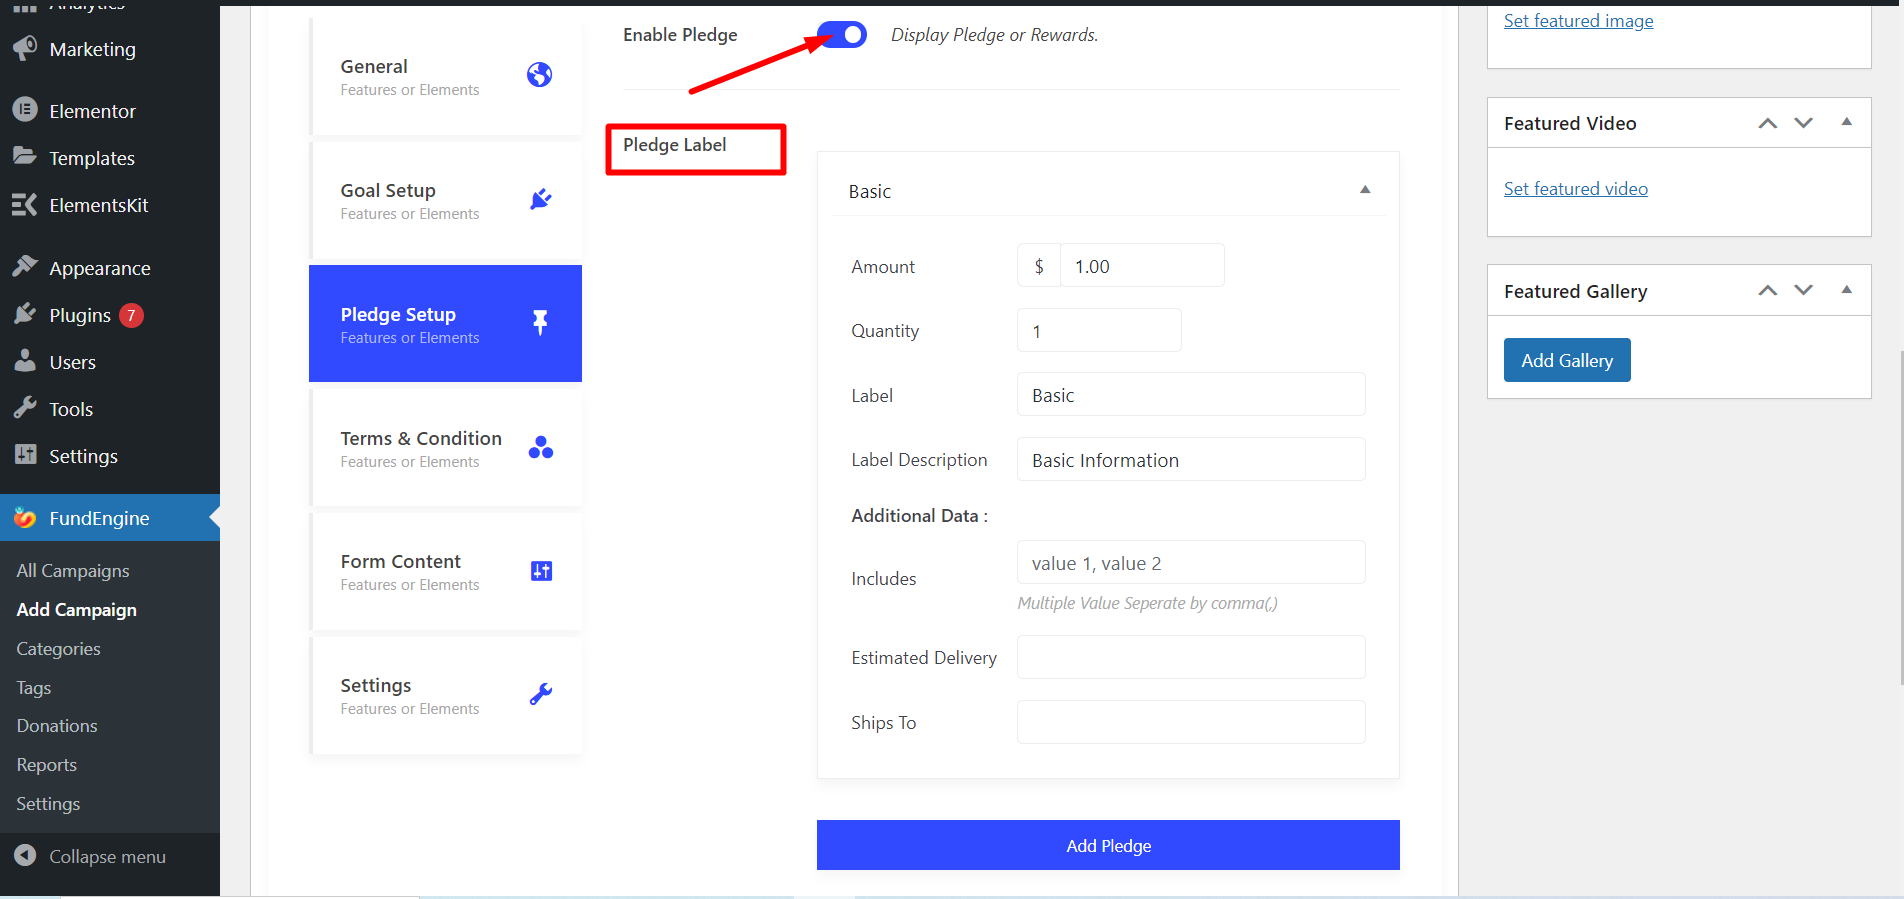
Pledge Setup #
Basically Pledge is providing the certain amount of money for a period of time with a condition that user will pay it back to the donor after reaching the targeted amount. With the pledge setup user can display amount, quantity, label and label description. Additionally, User can provide reward product or data, estimated delivery date and shipping location to the site.
Click on the Pledge Setup and enable pledge.
From the Pledge label –
Basic:
- Amount: Ex: 9$
- Quantity: Ex: 5
- Label: Ex: Basic
- Label Description: Ex: Basic Information
Additional data:
- Includes: Add values if you need.
- Estimated Delivery: Ex: 2020-03-04
- Shipping Location. Ex: Dhaka
- Add pledge as many as you want
Terms & Conditions #
This field contains some set of rules and regulations between the site owner and donor. You have to make an agreement with the donor and these contracts must be followed accordingly.
Move to Terms & Conditions and Enable Terms
- Position Checkbox: Choose any option based on your choice.
- Agreement Label: Agree to Terms
- Agreement Details: Write the details

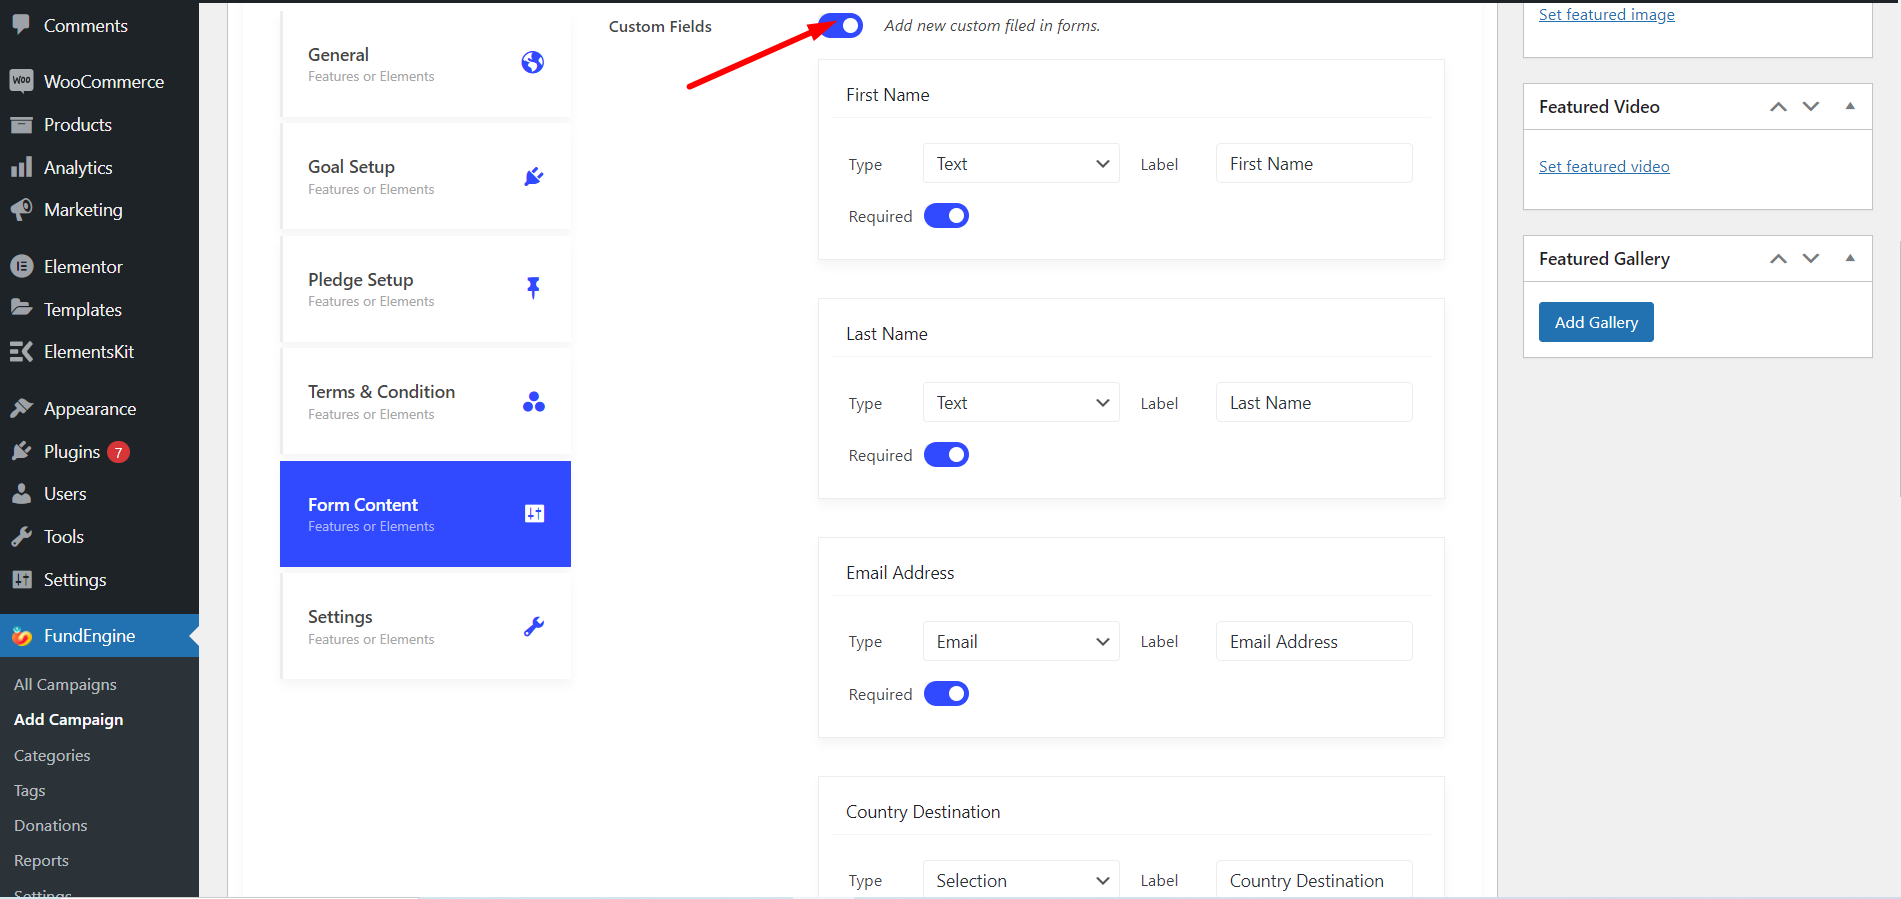
Form Content #
Add custom field in Form Content as many you want. You can add First name, Last name, Email Address, Country Destination, etc.
The fields you’ll get are –
First name
- Type: Text, Text-area or Number
- Label
- Required or not
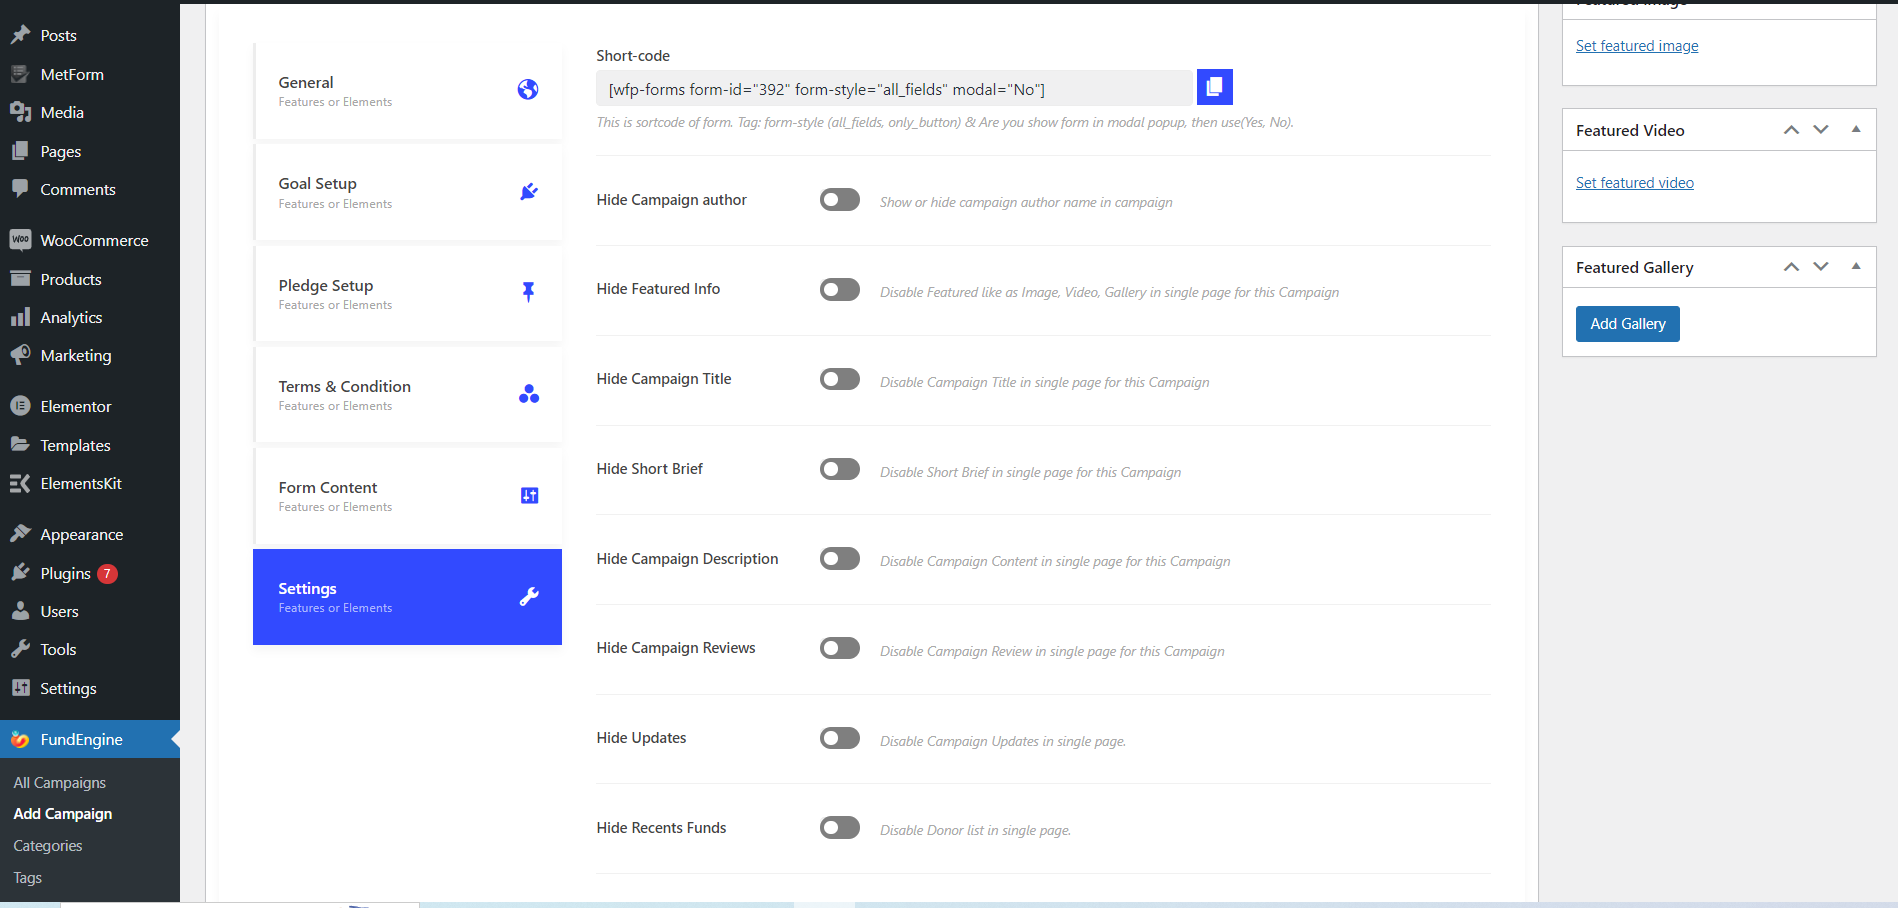
Settings #
Through settings you can customize different section. You can Enable or Disable section at your own choice. The options are –
- Hide Campaign author.
- Hide Featured Info.
- Hide Campaign Title
- Hide Short Brief
- Hide Campaign Description
- Hide Campaign Reviews
- Hide Updates
- Hide Recent Funds
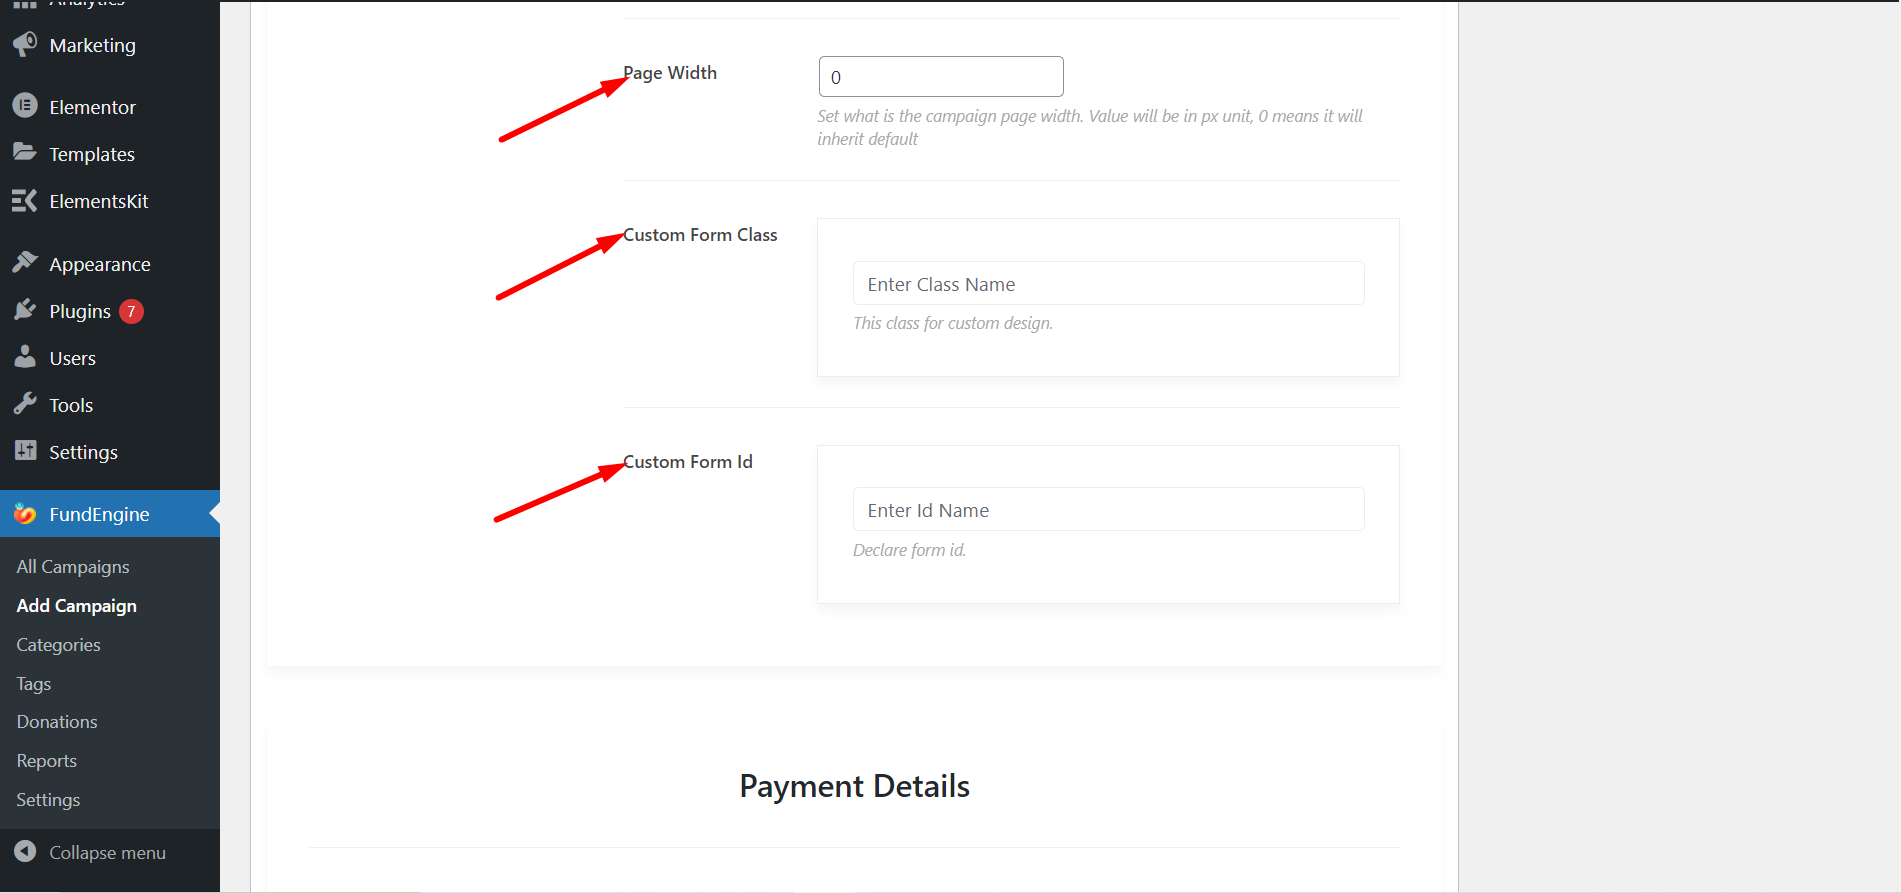
You can also add custom Page Width, Custom Form Class, and Custom Form Id.
This is how following the steps can help you to a Crowdfunding campaign.


