ShopEngine is a complete WooCommerce solution for Elementor. The features of ShopEngine include the WooCommerce Checkout Form Login widget that allows you to design a customized login form when users log into an existing account during checkout.
Read this documentation to learn how to create and customize the checkout login form with ShopEngine.
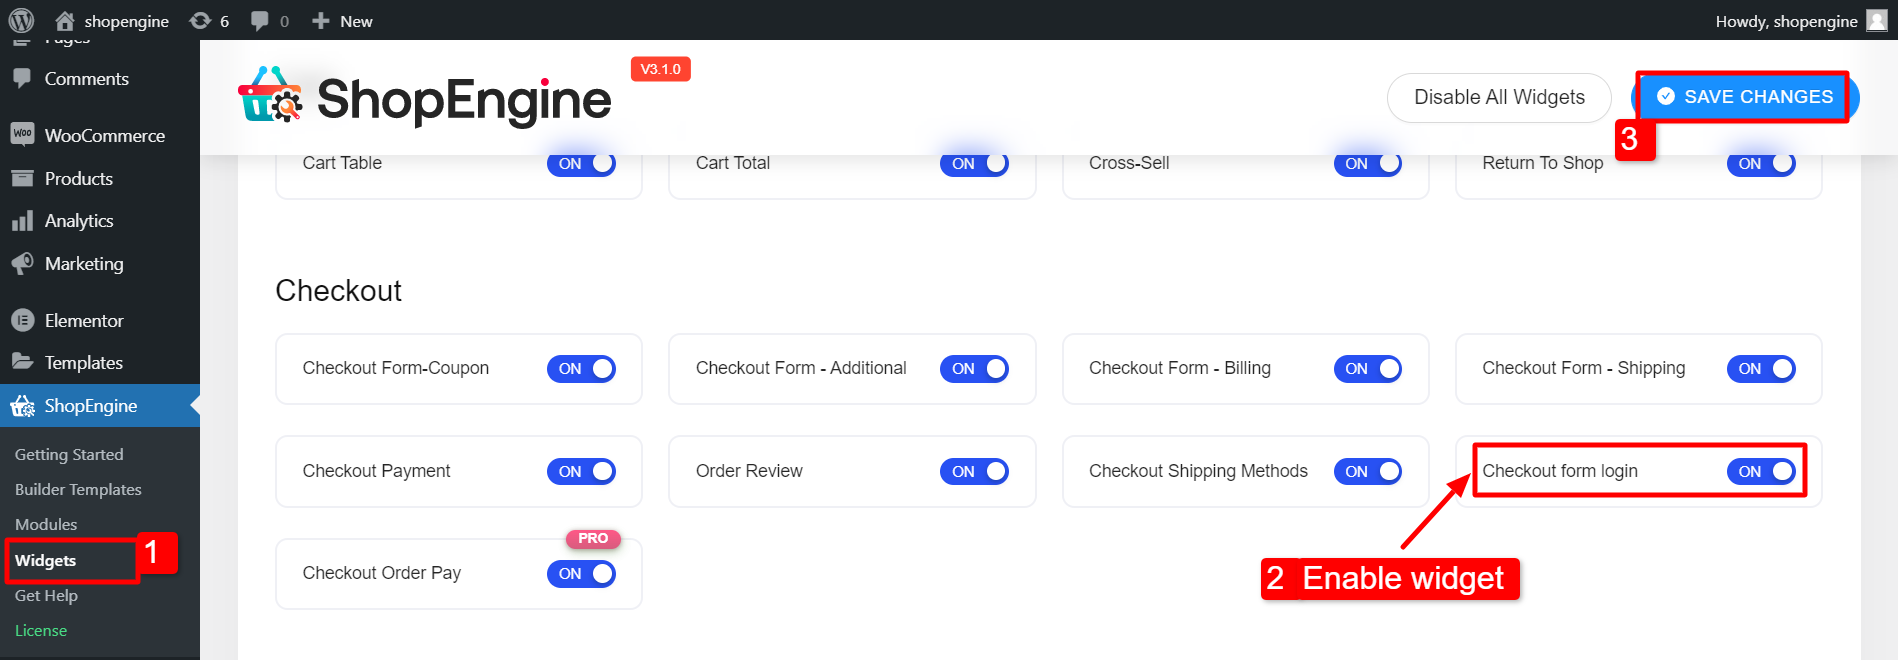
Step 1: Enable the widget #
Firstly, to enable the “Checkout Form Login” widget:
- Navigate to ShopEngine > Widgets from your WordPress dashboard.
- Find the Checkout form login widget.
- Enable the widget by turning the toggle to ON.
- Click on the SAVE CHANGES button.
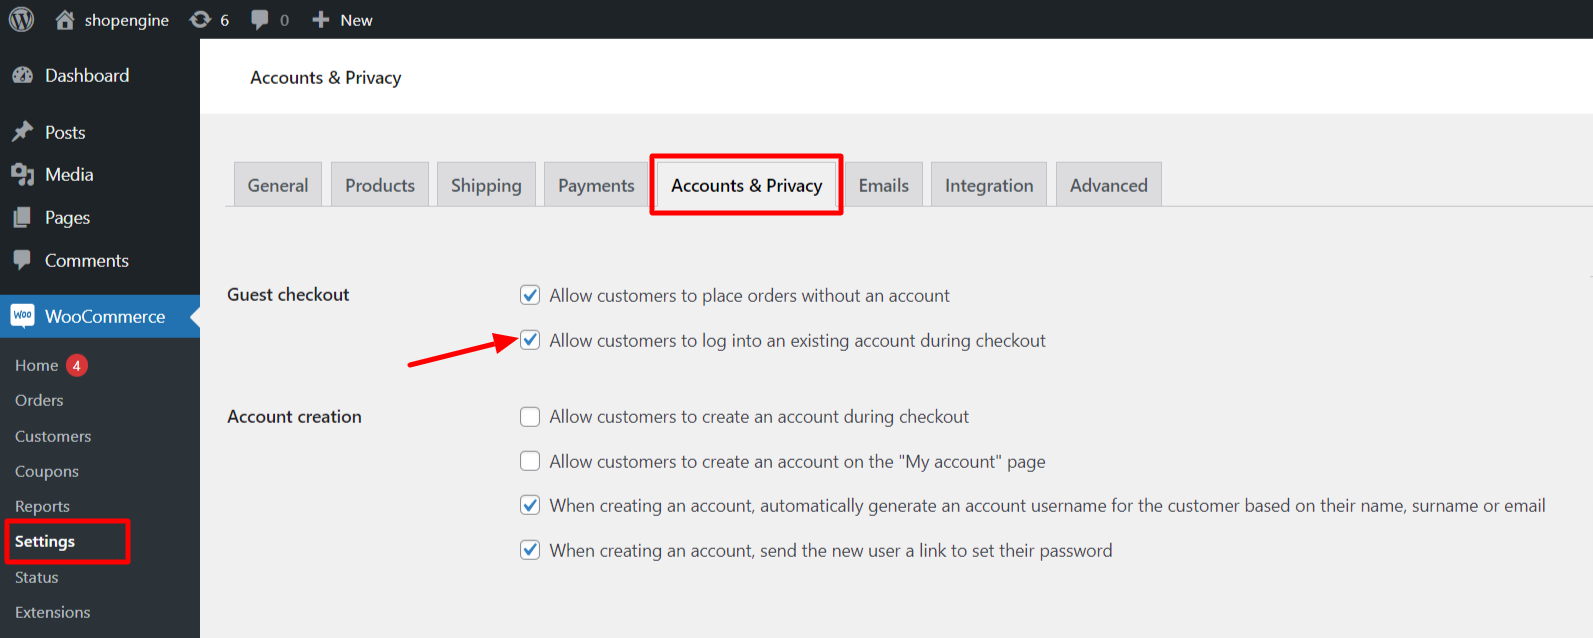
Step 2: Configure settings #
To enable the customer login during checkout:
- Navigate to WooCommerce > Settings from WordPress dashboard.
- Switch to Account & Privacy.
- Under Guest checkout, select the “Allow customers to log into an existing account during checkout” option.
- Scroll down on the page and click on Save changes.
Step 3: Customize Checkout Form Login #
Now open the Checkout template with Elementor.
Go to the ShopEngine > Builder Template. Find the Checkout template and click on “Edit with Elementor” along with the template.
After that, expand the form by clicking on the toggle heading.
If you haven’t created a checkout template yet, follow our documentation on
how to create a WooCommece Checkout page with ShopEngine.
After that, you can customize the WooCommerce checkout login form appearance.
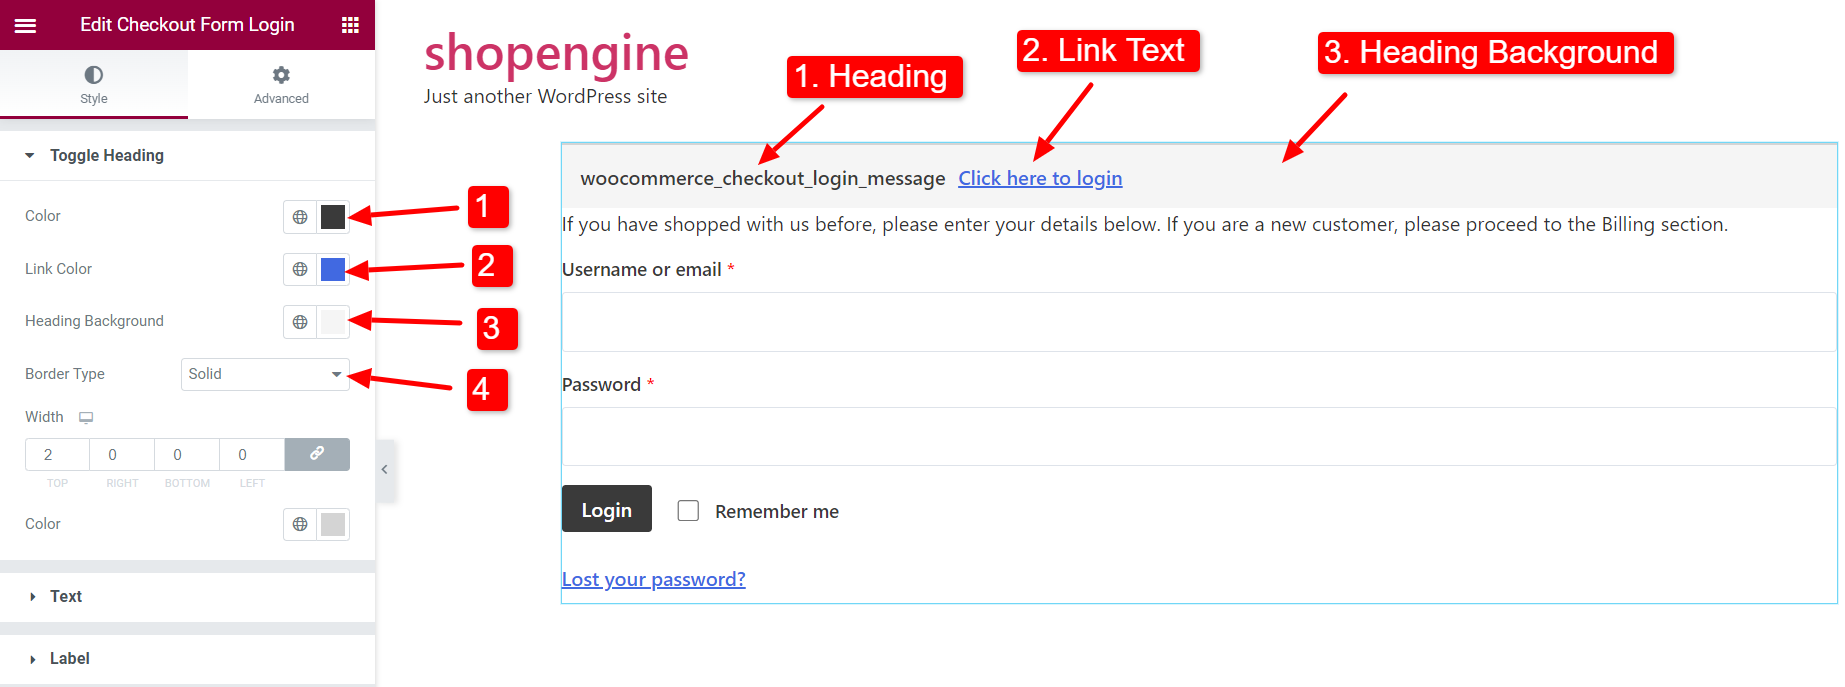
3.1 Toggle Heading #
In the Toggle Heading section,
- Choose a Color for the heading.
- Choose a Link Color for texts with hyperlinks.
- Select a Heading Background color.
- You can also select a Border Type, width, and color for toggle heading.
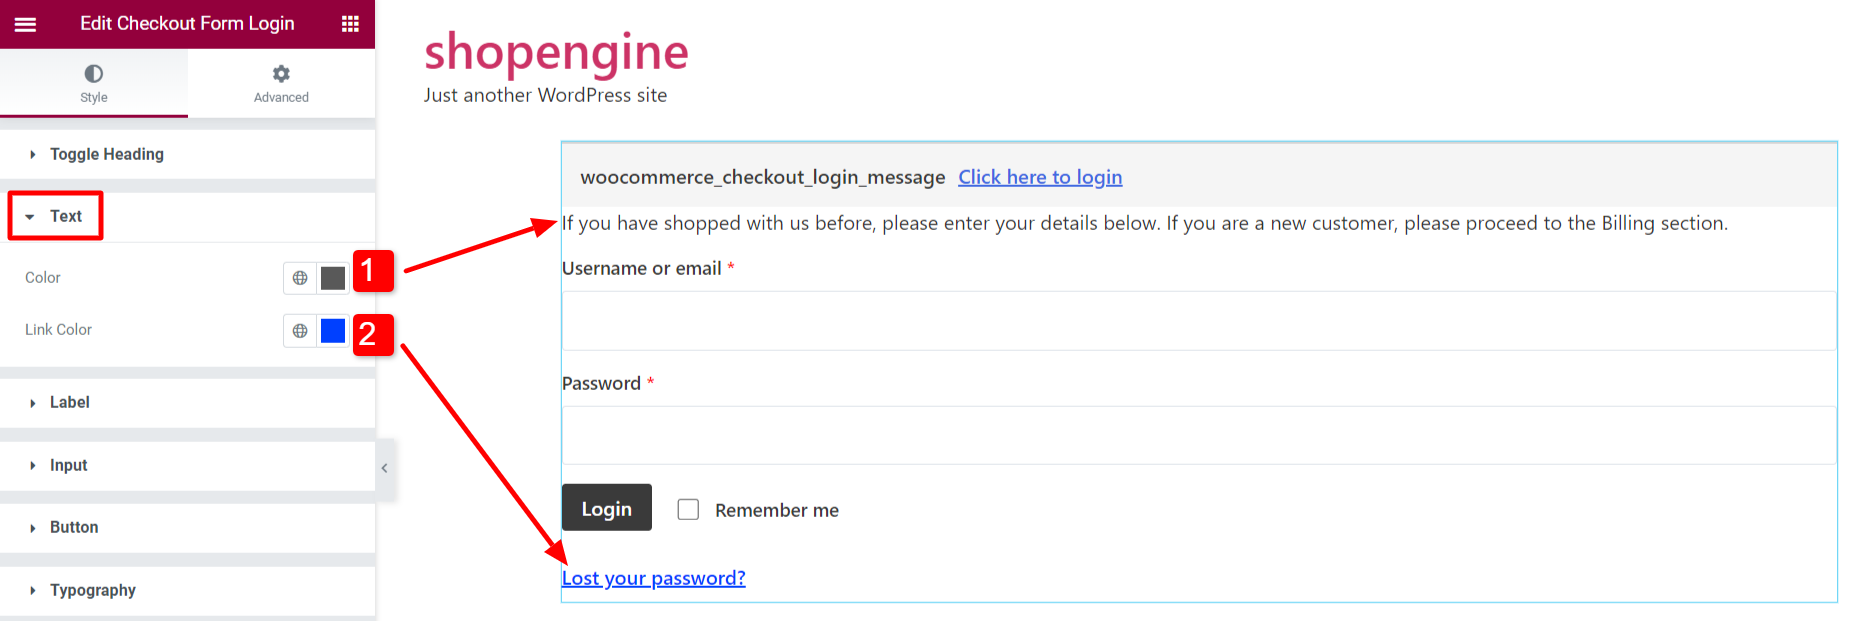
3.2 Text #
For the Text in the WooCommerce checkout login form,
- Choose a text Color.
- Select a Link Color for the text with hyperlink.
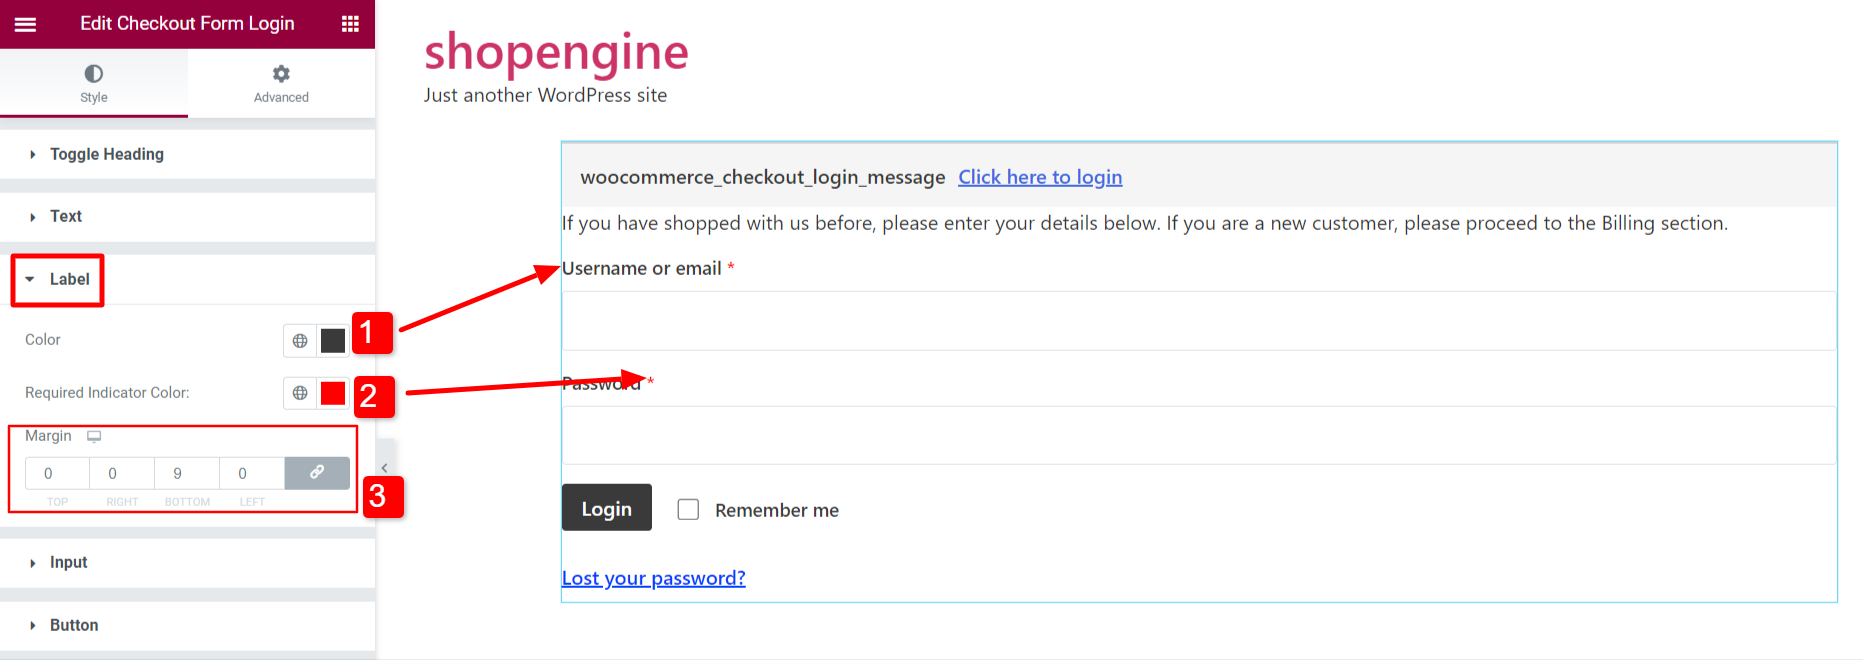
3.3 Label #
For the Labels in the WooCommerce checkout login form,
- Choose a text Color for the label.
- Select a Required Indicator Color for the required form field.
- Adjust the Margin for labels.
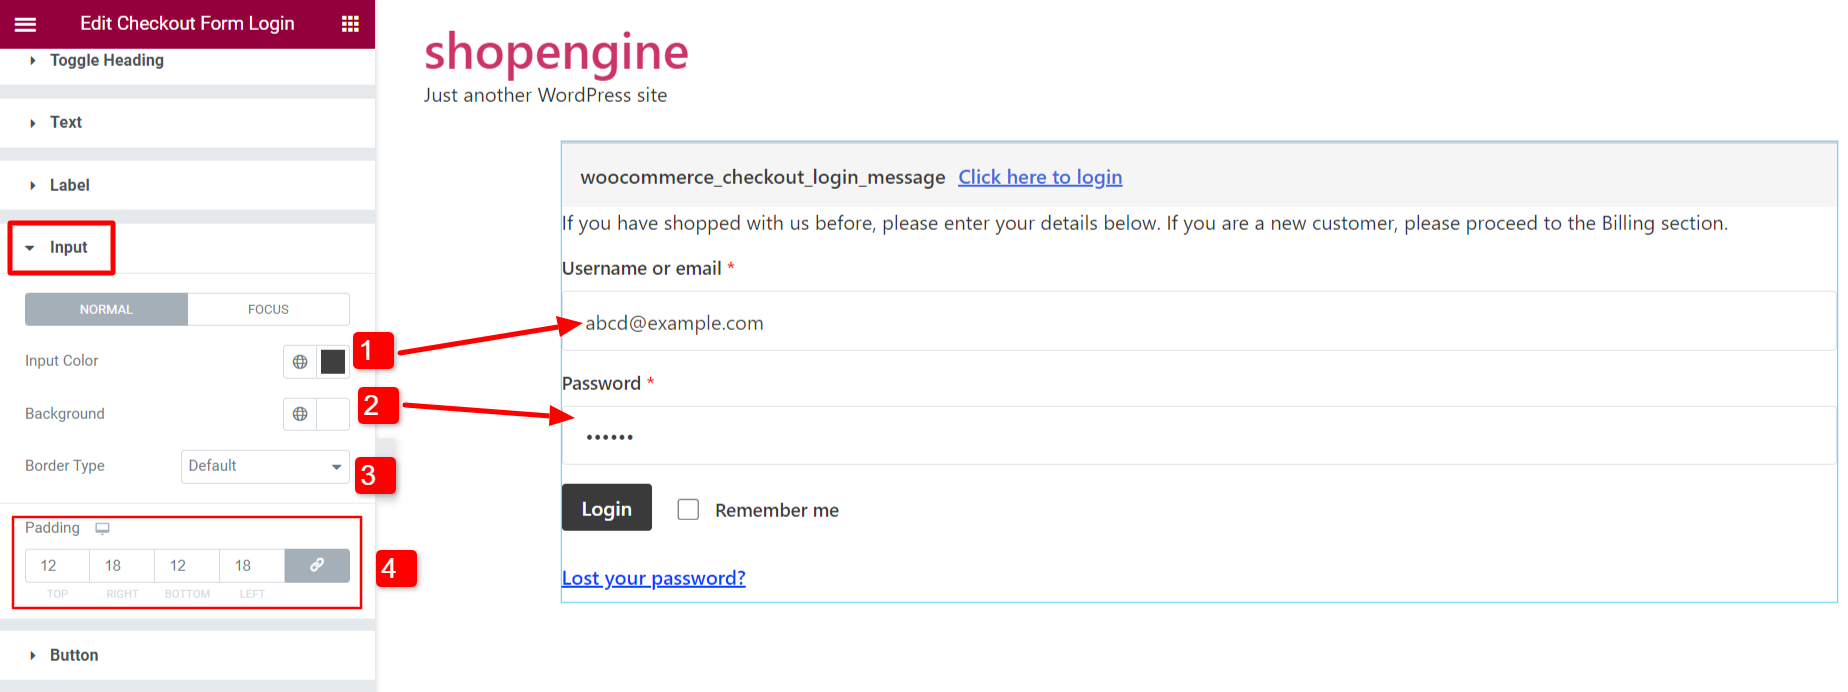
3.4 Input #
To customize the input field of the login form,
- Choose an Input Color for the text.
- Select the Background color for the input field.
- Set the Border Type.
- Adjust Padding of the input field.
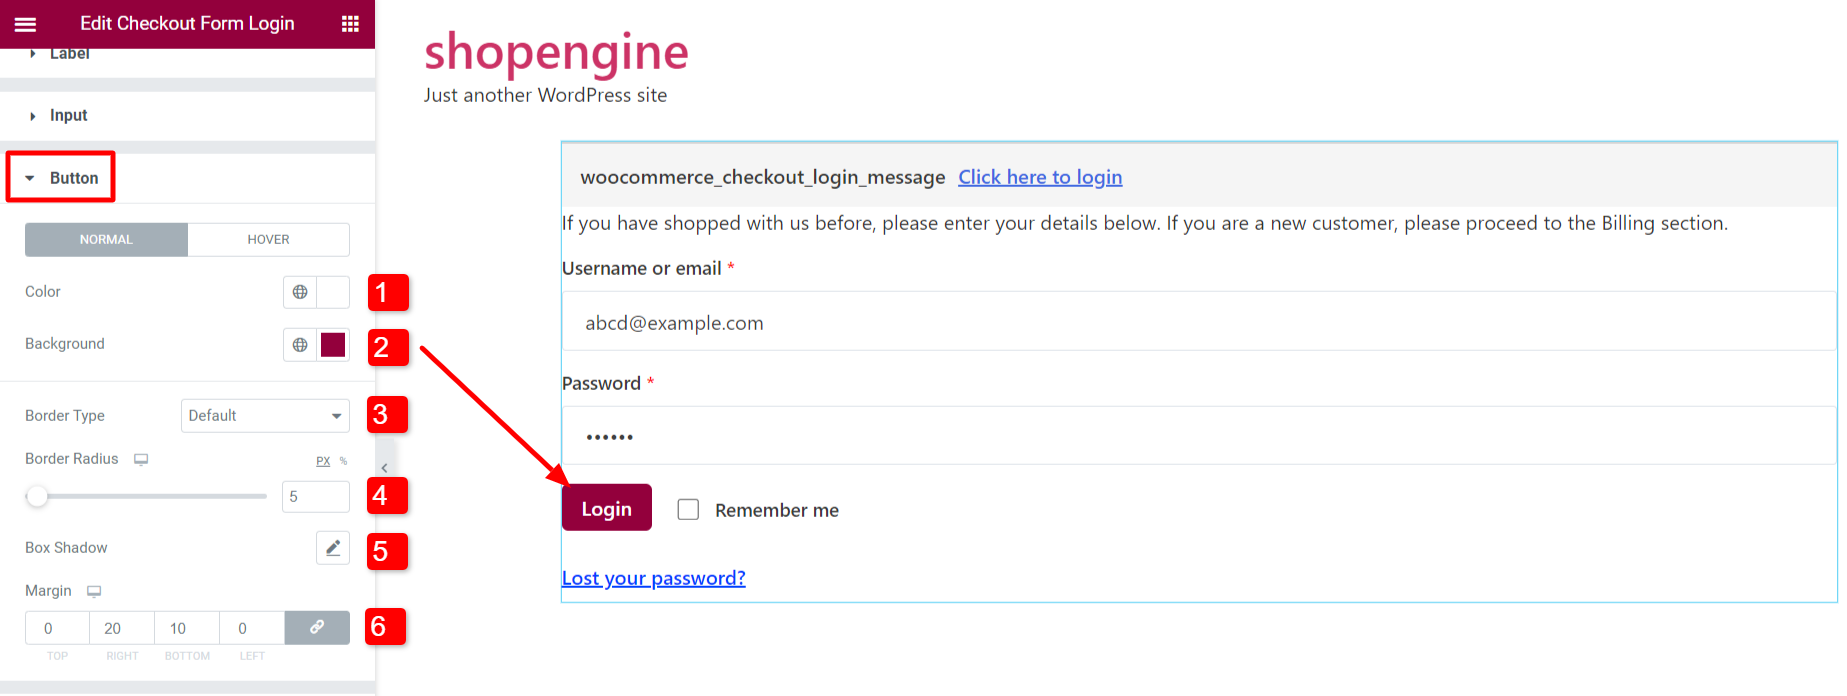
3.5 Button #
You can customize the styles of the form submit button.
- Select the Color of the button text.
- Choose the button Background Color.
- Set the Border Type.
- Adjust the Border Radius.
- Adjust the Box Shadow.
- Set the Margin of the button.
You can choose different text Colors and Background Colors for “Normal” and “Hover” state.
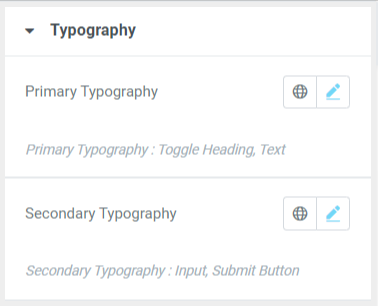
3.6 Typography #
Set the Primary and Secondary Typography for the texts in the login form.
- Primary Typography works for the Toggle Heading and Text.
- Secondary Typography works for the Input field and Submit Button.
Finally, you have a customized WooCommerce checkout login form ready for your website.


