Protected content on websites serves various purposes. For any content, you can use this technique to provide exclusive access, boost sales, safeguard intellectual property, and ensure privacy. You can set these access rules without much effort by using the ElementsKit Protected Content widget. It is a handy tool to protect your content within a short time.
So, check the documentation and learn how you can use the ElementsKit Protected Content widget.
How to use Protected Content widget? #
First thing first 👉 don’t forget to install ElementsKit Pro.
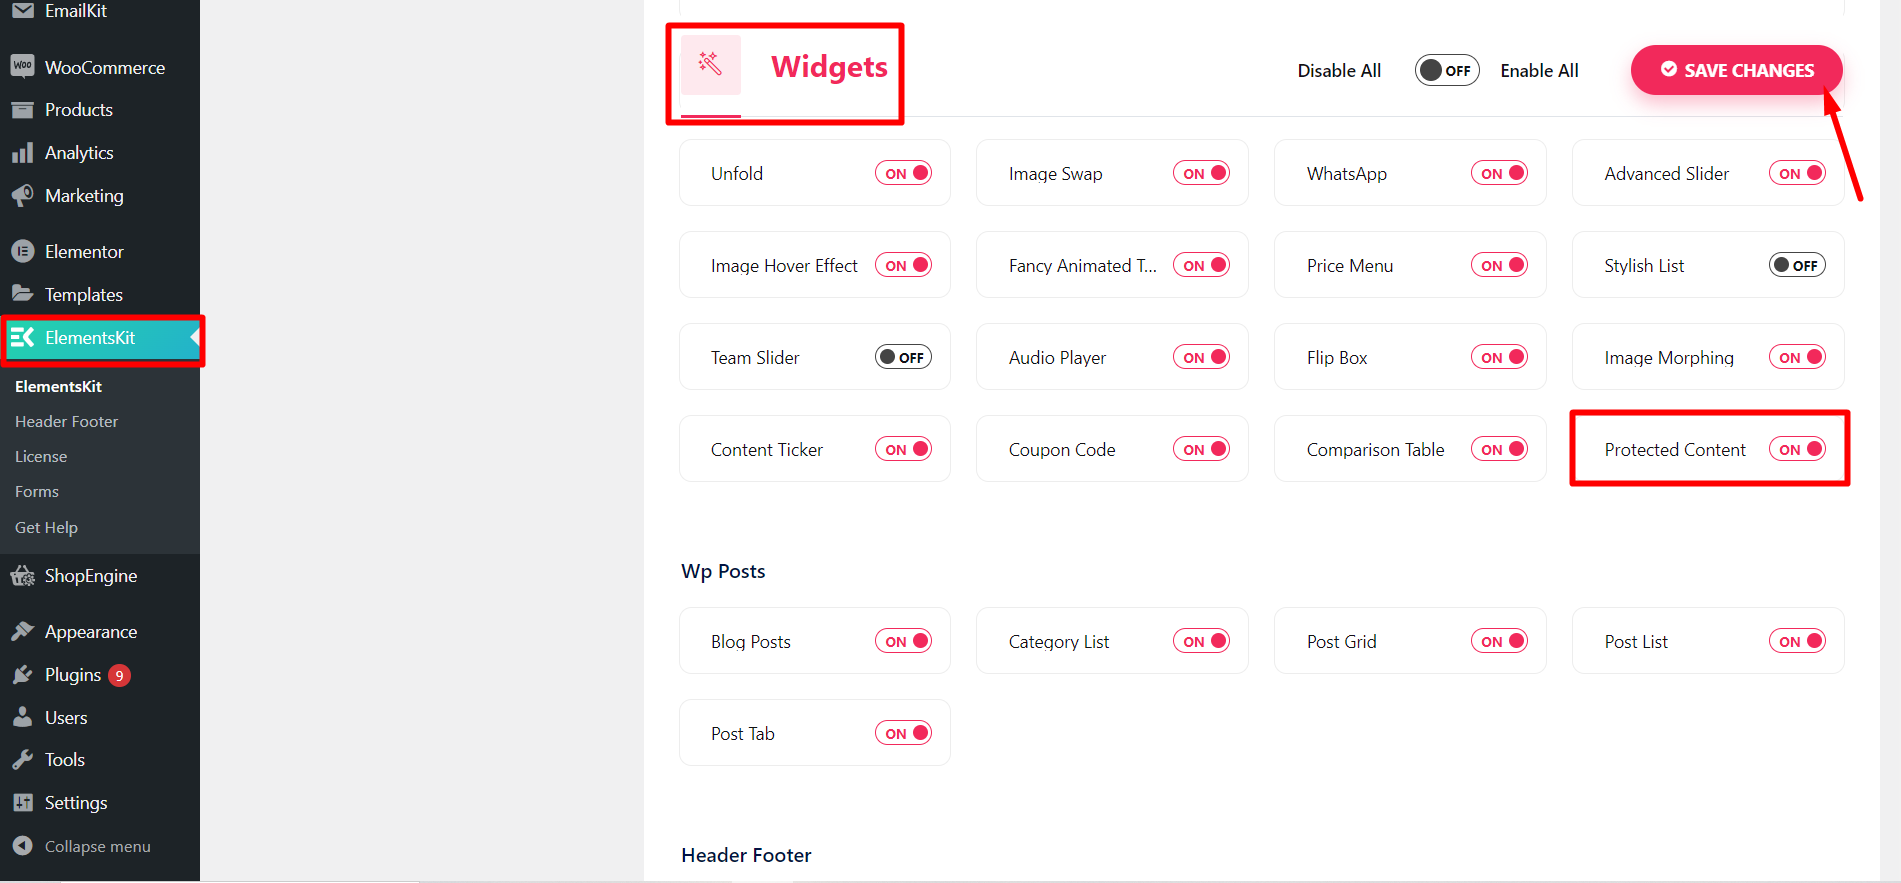
Step 1: Turn ON the widget #
Access your WordPress dashboard > Go to ElementsKit > Click Widgets > Find Protected Content > Turn it ON > Save the changes.
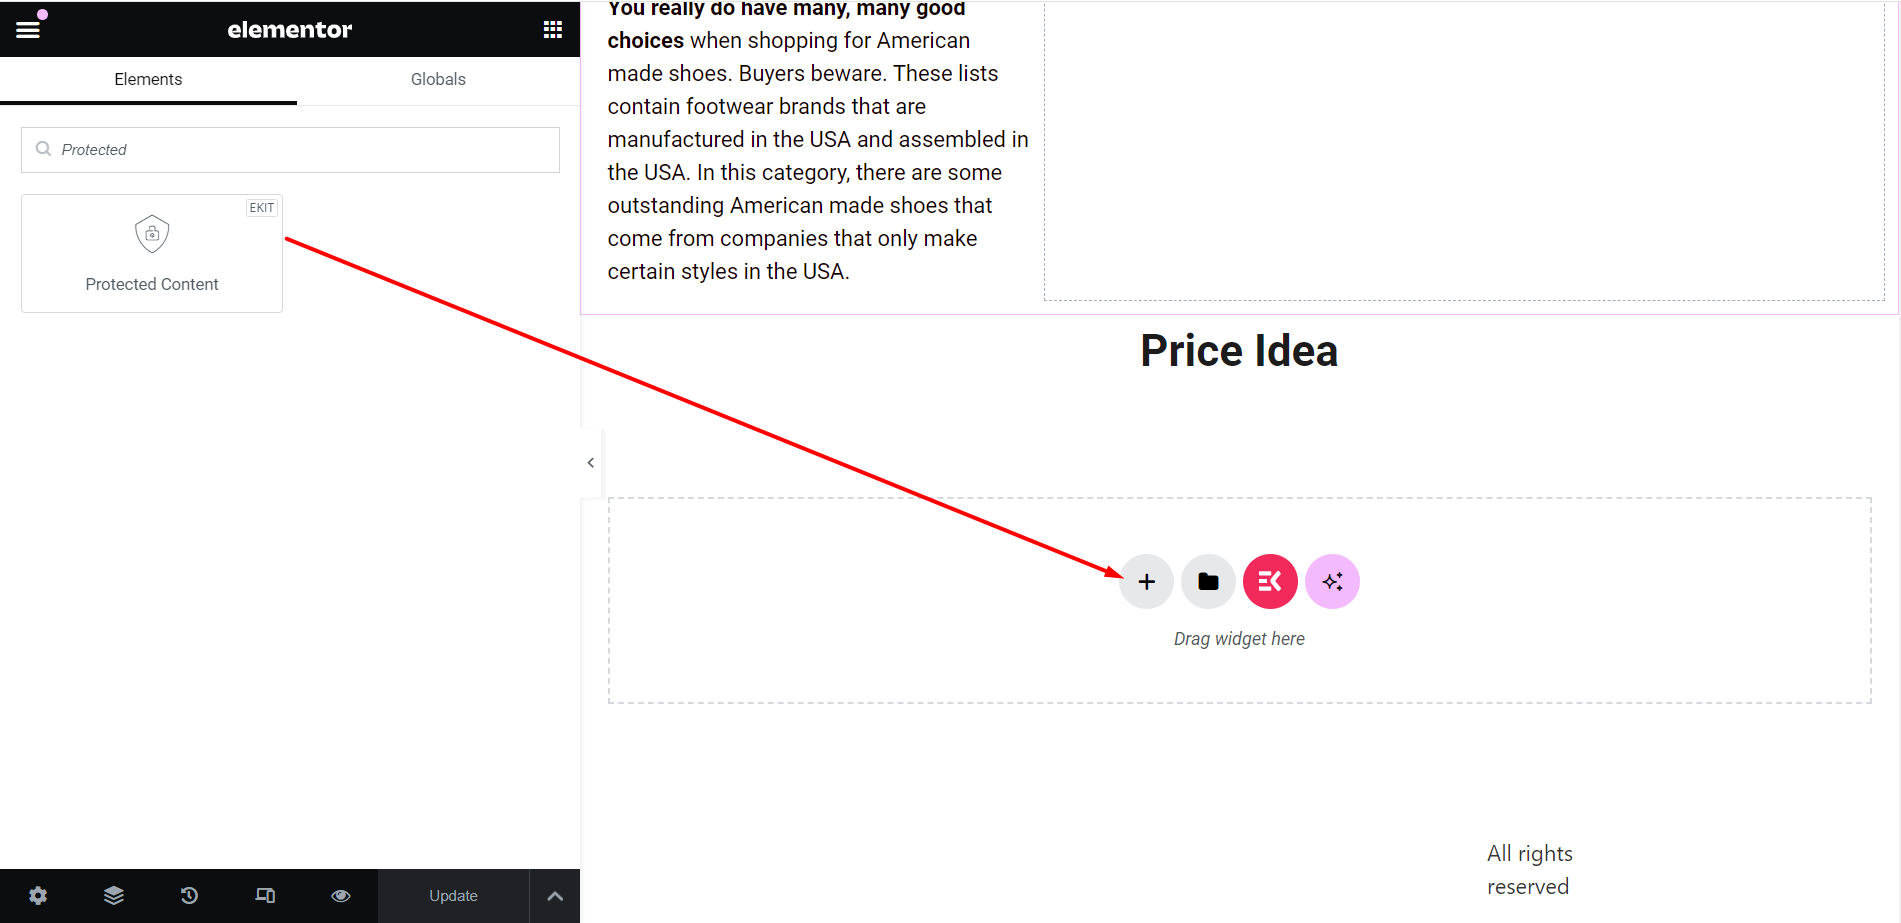
Step 2: Drag and drop the widget #
- Open the content/page/post where you want to restrict any information.
- Edit with Elementor and search the widget.
- Drag and drop the widget.
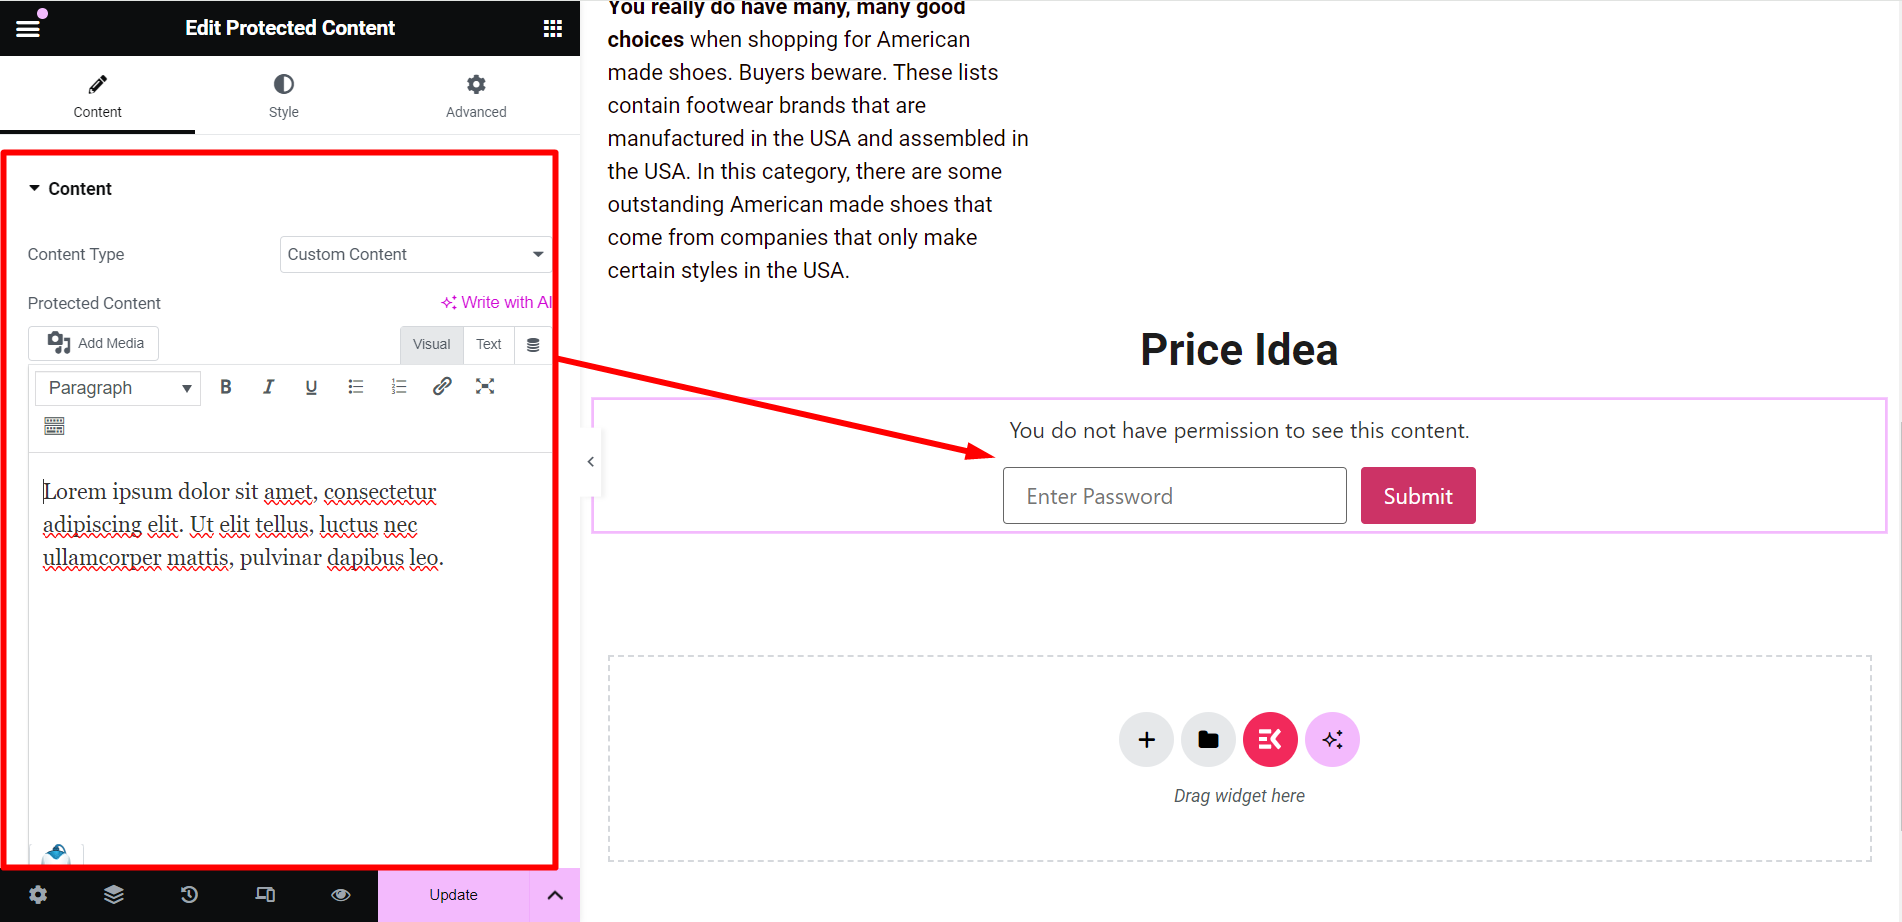
Step 3: Start editing #
In the content part, you will see a few customization options to adjust the widget based on your preferences. Those are –
Content #
Here, the content type is set as ‘Custom Content’ by default. You can customize the Protected Content by adding media, shortcode, or writing the text content.
If you choose the content type as ‘Elementor Template’, you can see options to select a template of your choice.
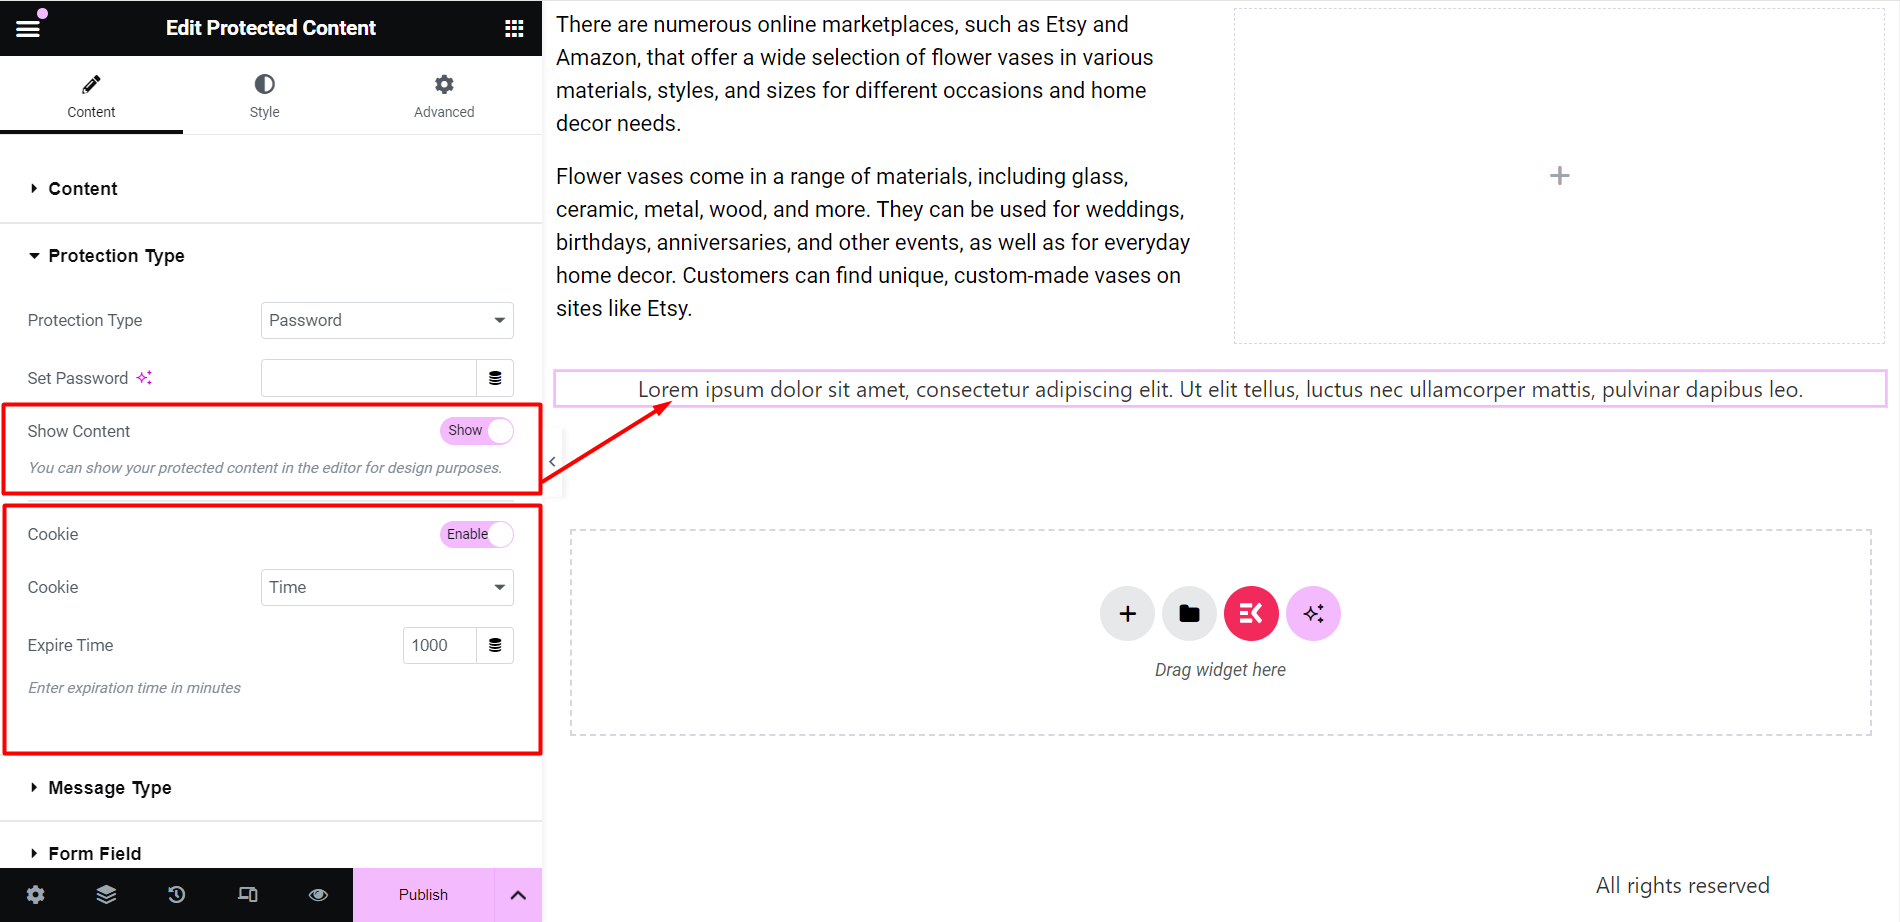
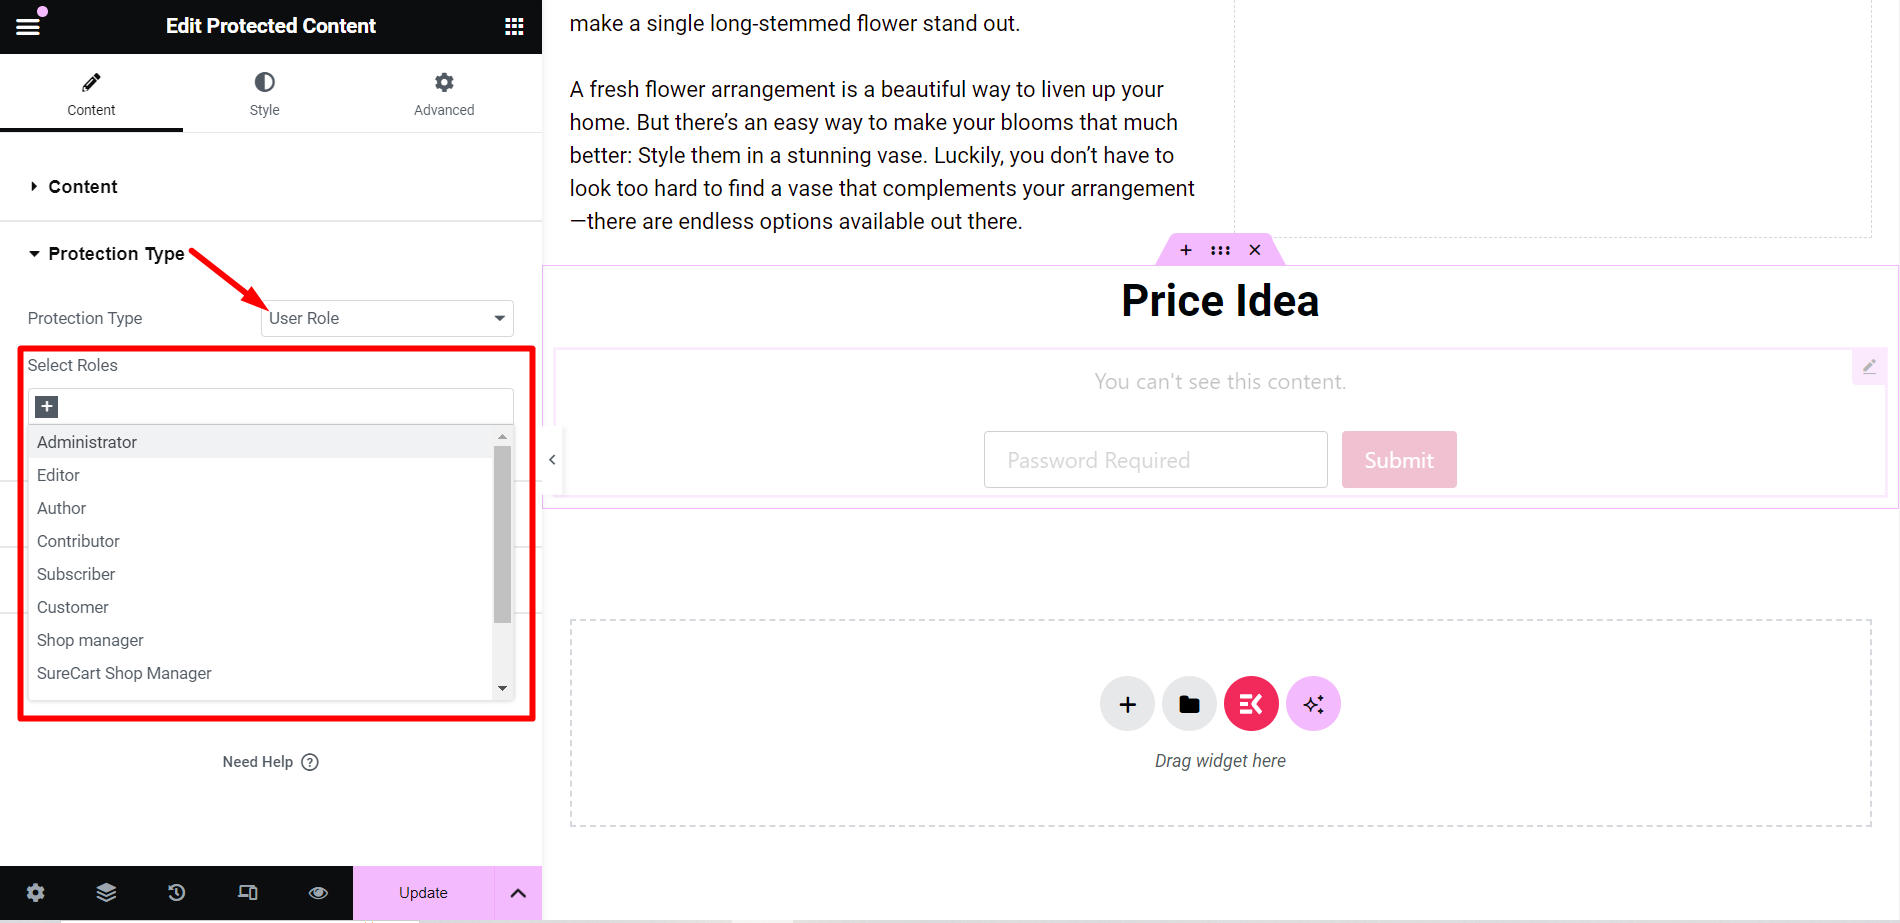
Protection Type #
Here, the options are Password and User Role.
If you choose the ‘Password’ type, you will see –
- Set Password: You need to set a password, using which people can view the content.
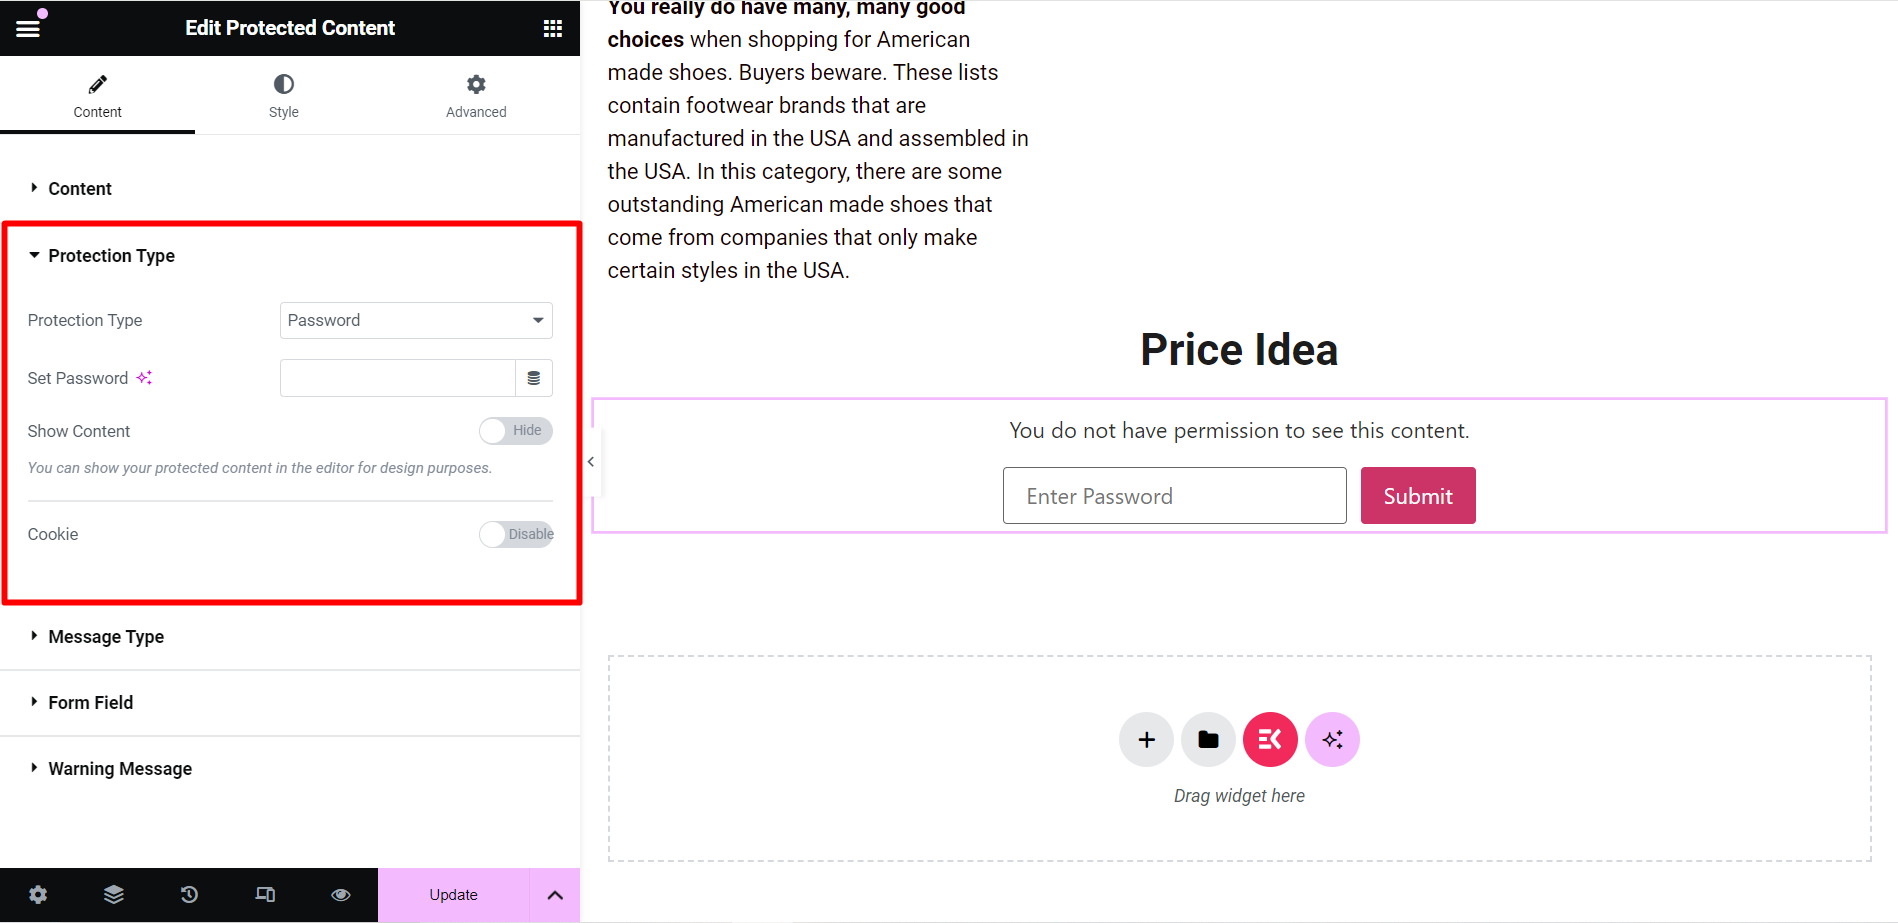
- Show Content: For the design purpose you can just show a dummy text for your protected content by enabling this button.
- Cookie: If you want to use cookie, you have to enable this button and you’ll see the other related options here.
With ‘User Role’, you will get a drop-down menu to select roles. Thus, only your selected users will view the content.
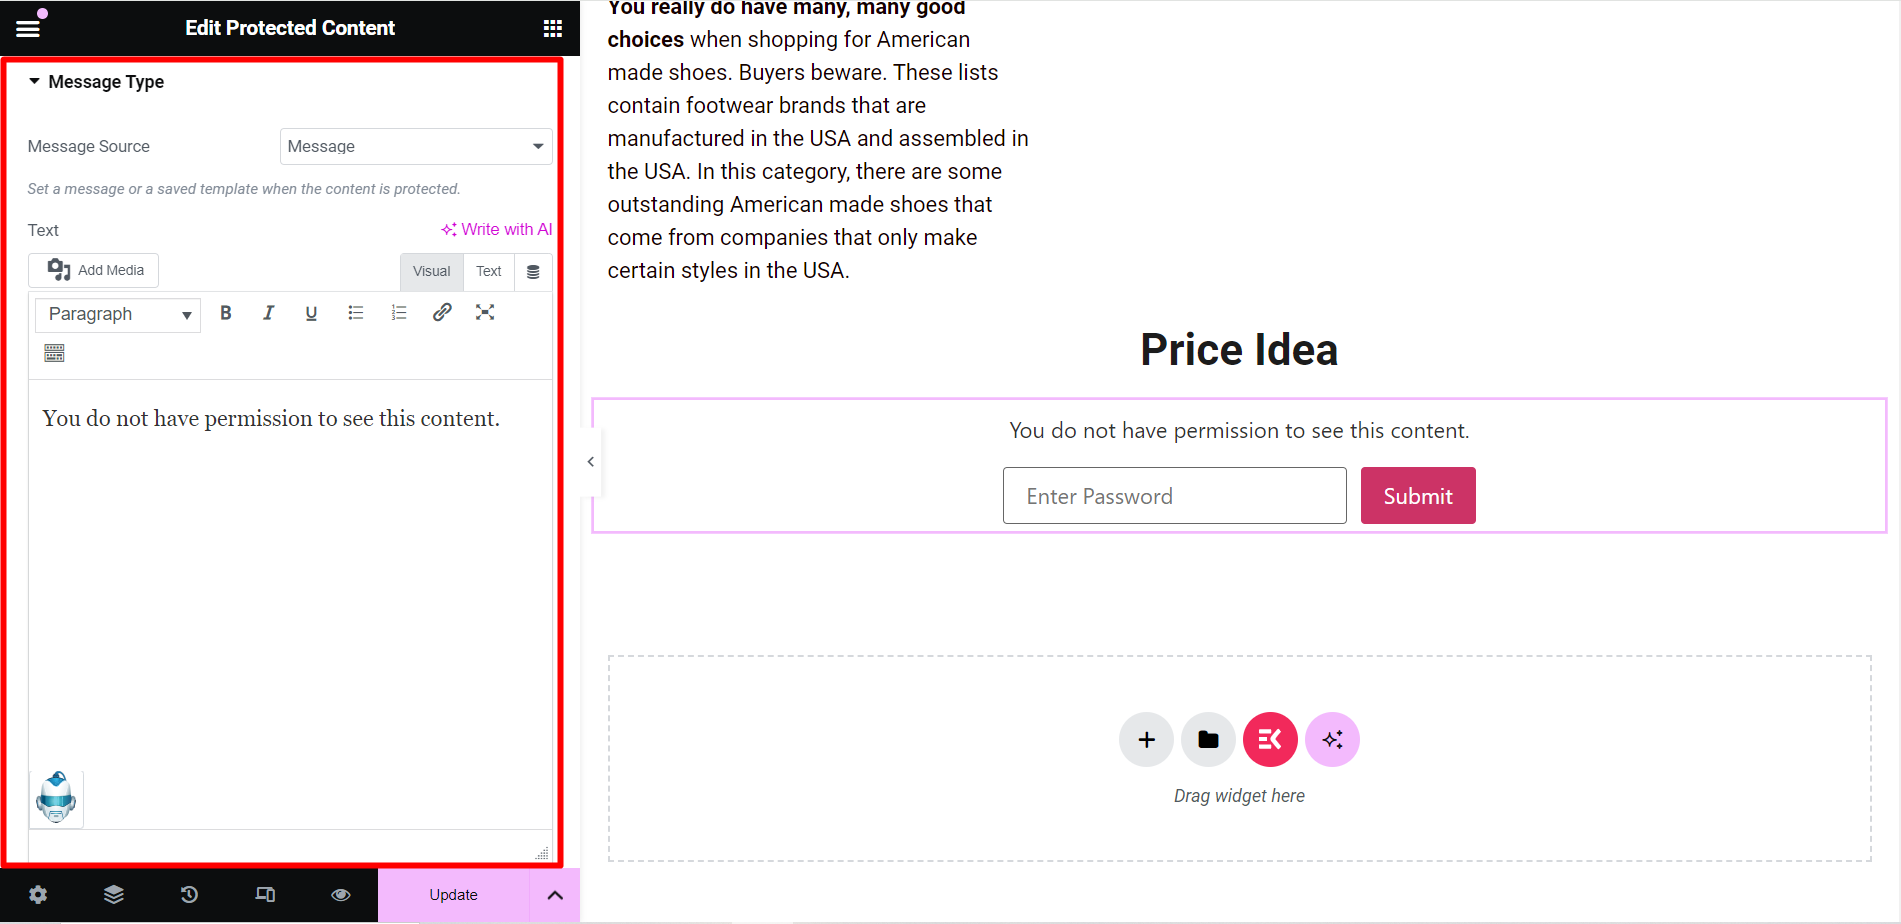
Message Type #
For your protected content, you can show a notify message if you want.
Message Source: From this option, you will choose to set a message or choose saved templates when the content is protected. Or, you can also choose to show nothing.
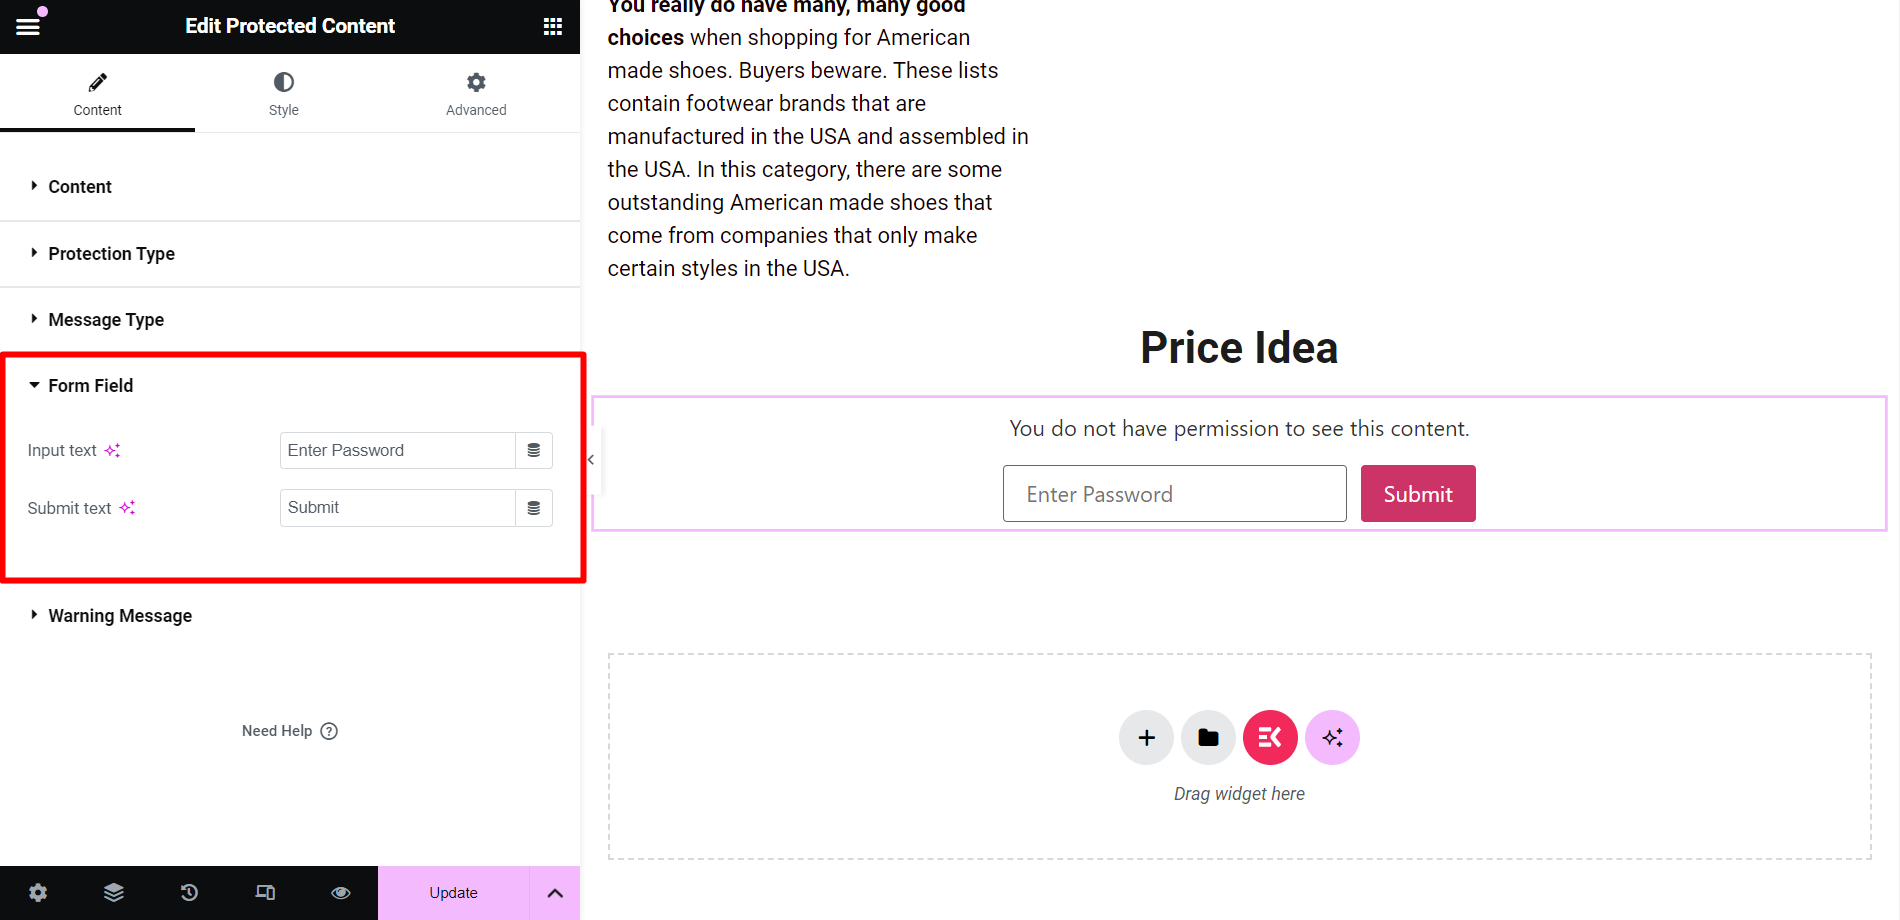
Form Field #
- Input Text: This is a placeholder to input a password, you can write the text accordingly.
- Submit Text: It is the placeholder of submit button .
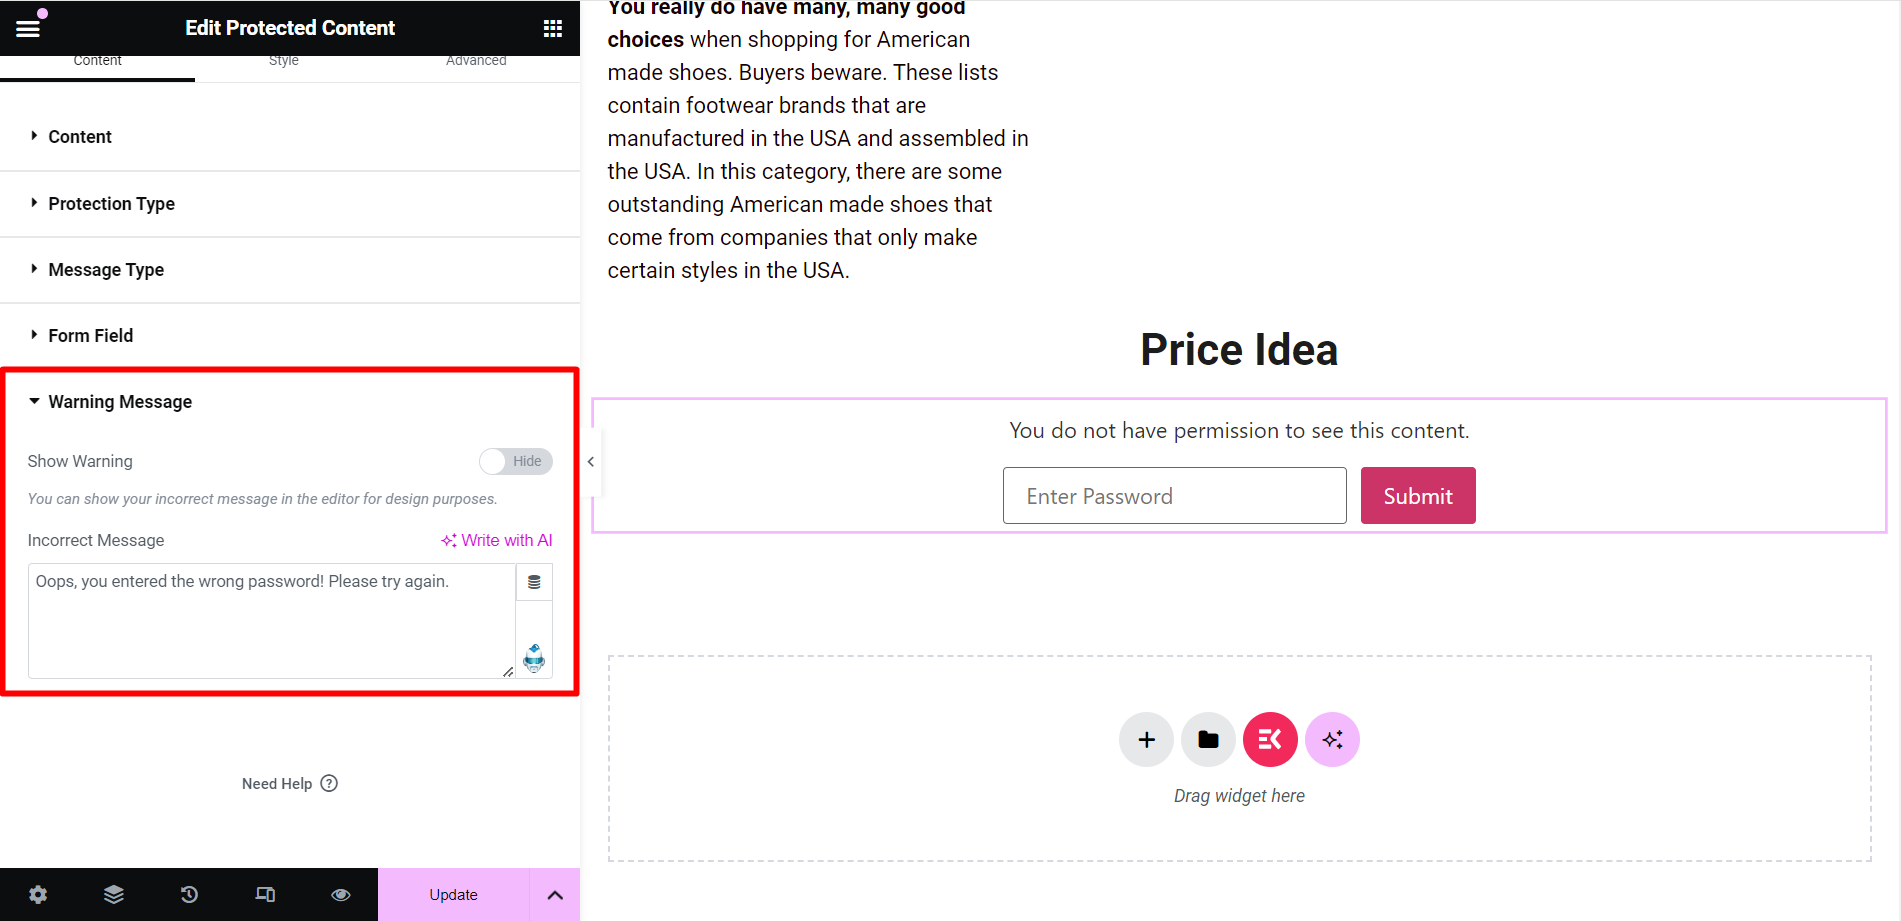
Warning Message #
- Show Warning: You can turn ON the button to show an incorrect message in the editor if anyone enters a wrong password.
- Incorrect Message: It is the message writing field.
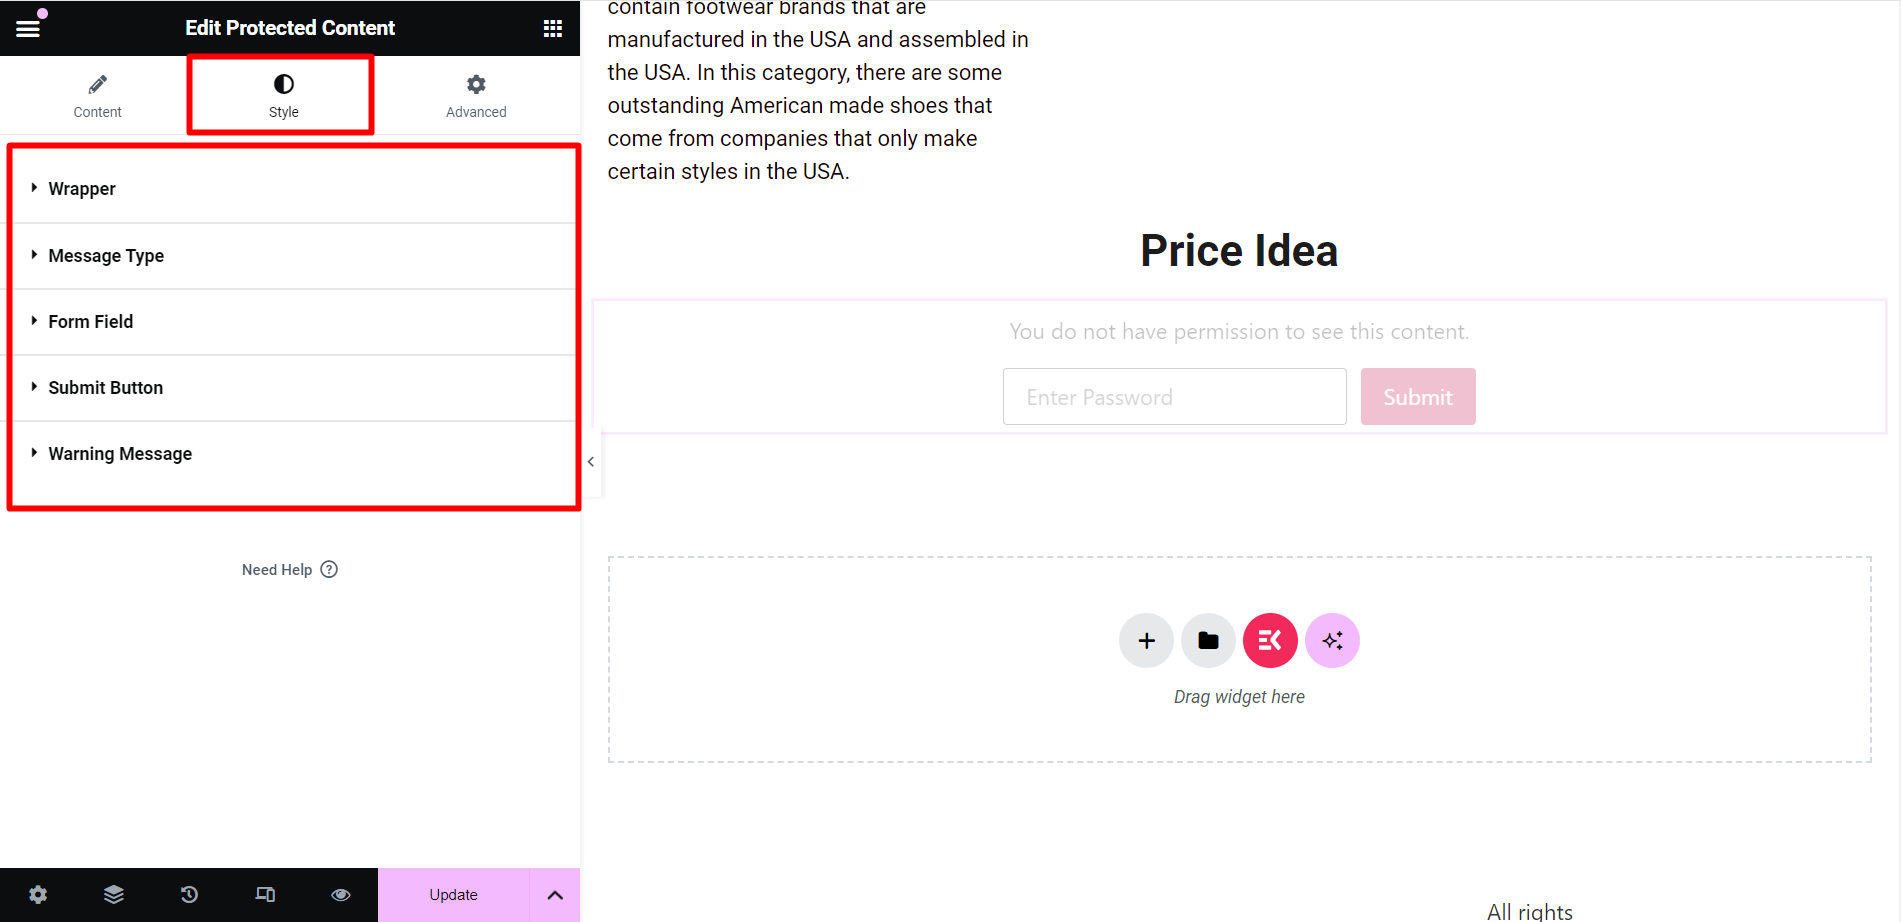
Style #
- Wrapper: The adjusting options are alignment and direction.
- Message Type: You can style the message by changing the text color, typography, and margin.
- Form Field: To arrange the form fields, you can control the width, box shadow, color, etc.
- Submit Button: The styling options are box shadow, typography, background, and more.
- Warning Message: You can change the text color, typography, and margin.
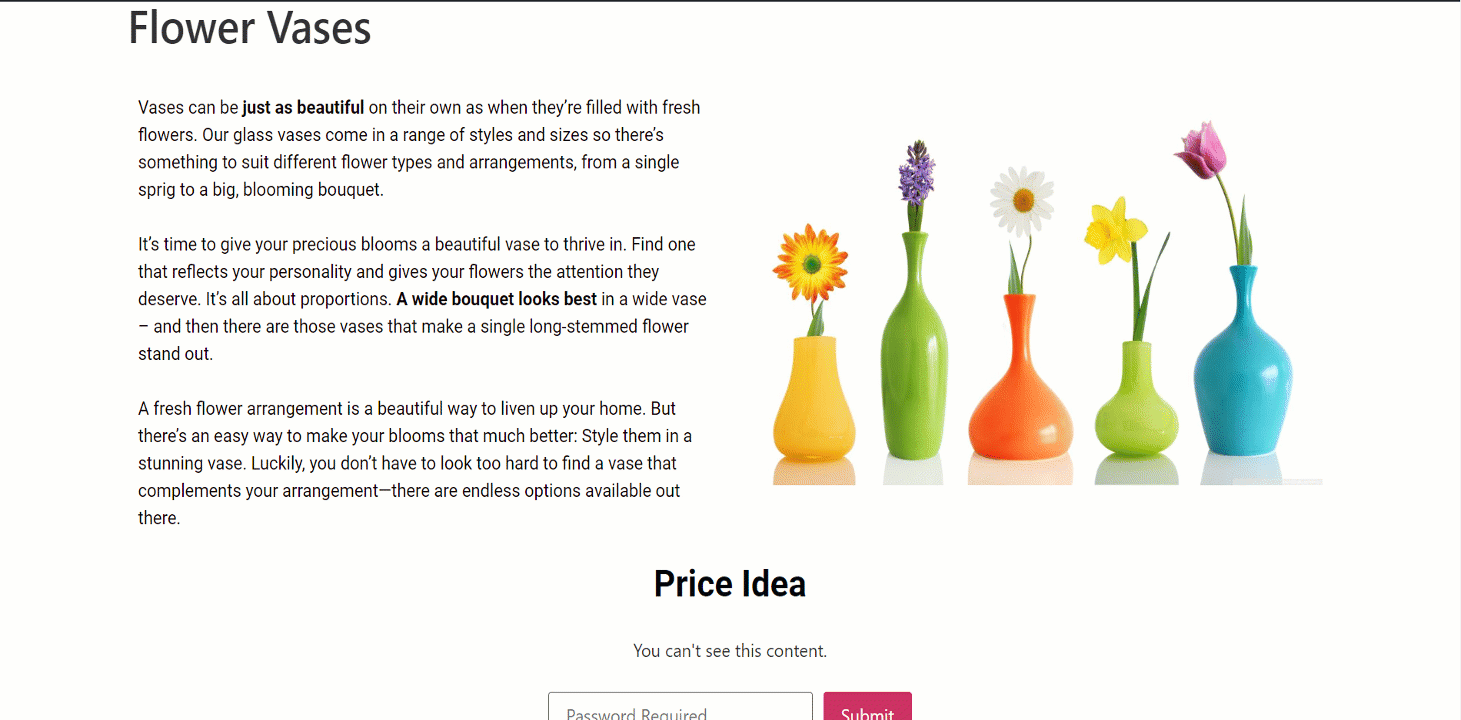
Final output #
We have customized an output for you –
To control access to sensitive information you should protect your data. Use the ElementsKit Protected Content widget and make your task easy.


