ShopEngine is an advanced WooCommerce plugin with the most options to build a WooCommerce site with the highest flexibility including multilingual support.
ShopEngine integrates with Polylang to let you create multilingual WooCommerce stores. Amazingly, you can create different templates for different languages, each with unique styles.
Read this documentation to learn how ShopEngine works with Polylang for WooCommerce multilingual stores.
Required Plugins: #
You need to have the following plugin installed on your WordPress site.
- Polylang: Get the plugin
Besides, you will obviously need ShopEngine lite and ShopEngine Pro plugins installed.
Once installed, you need to set up polylang on your website. On the setup wizard, you can add languages. Polylang comes supports over languages by default.
Translate ShopEngine strings with Polylang #
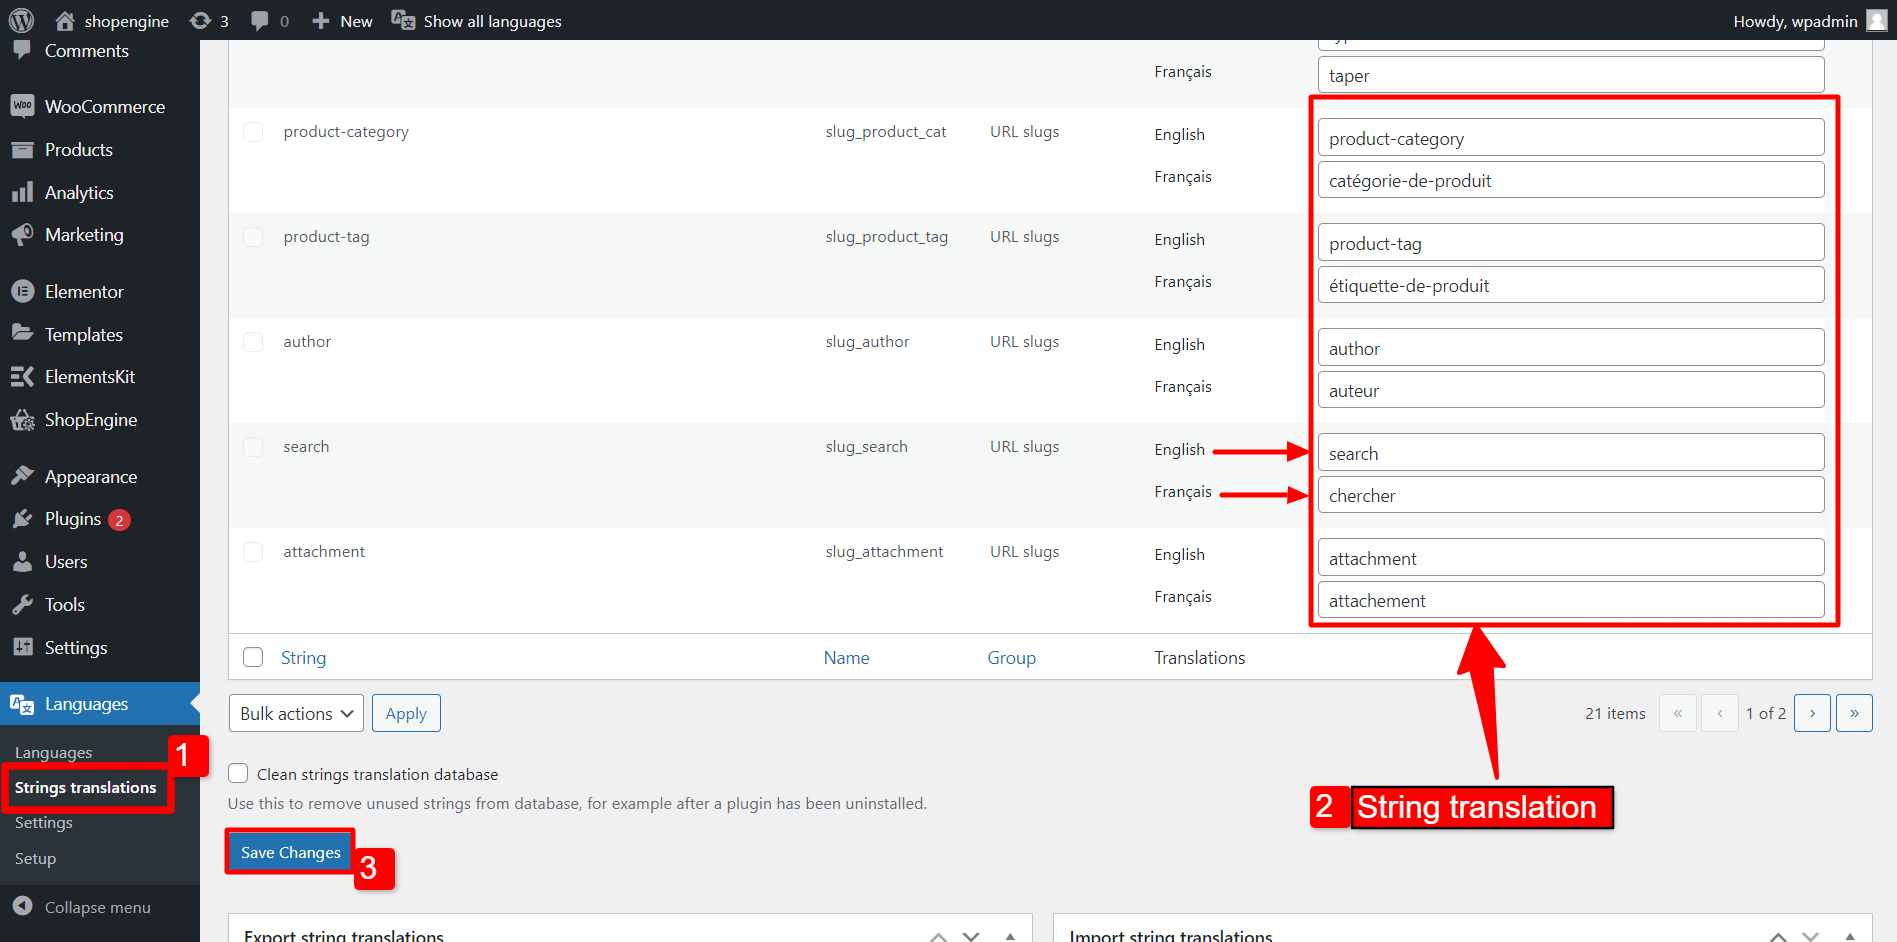
After setting up Polylang, you can translate text strings of ShopEngine plugins. To translate ShopEngine Plugin strings,
- Navigate to Languages > String Translations from your WordPress dashboard.
- There you can see a list of strings. You can translate each strings individually.
- Click on the Save Changes button to finalize the string translation.
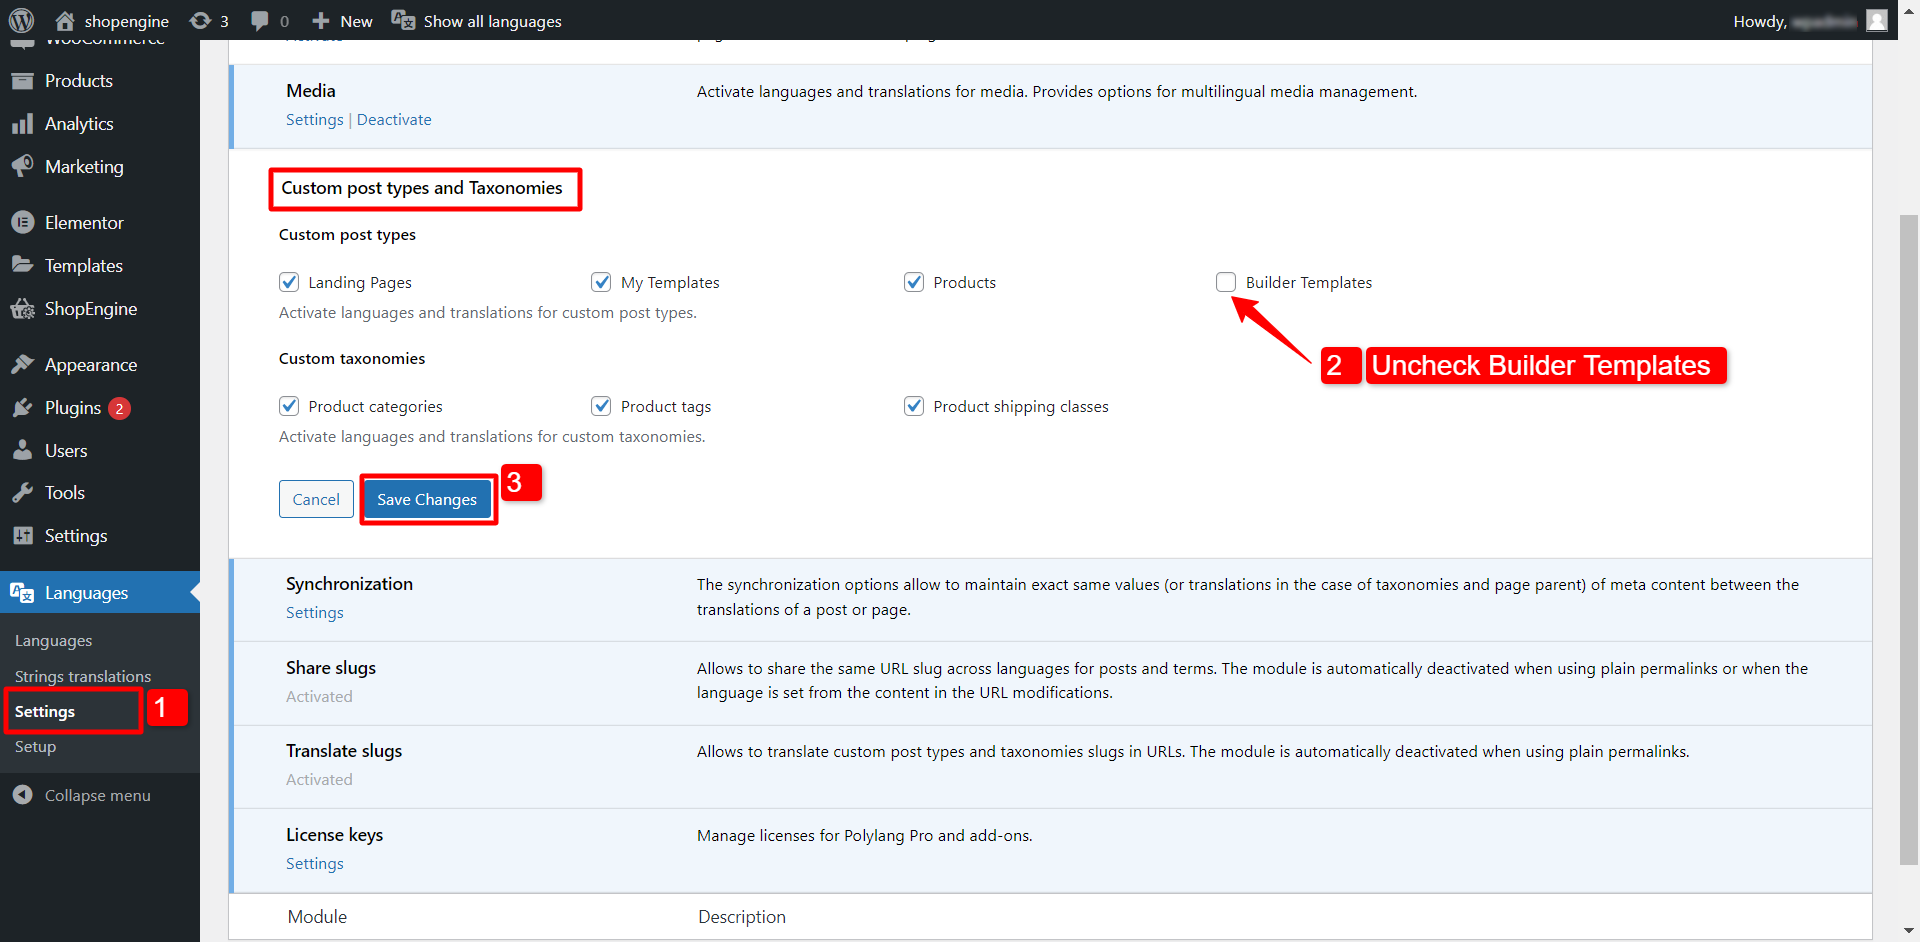
In order to let the ShopEngine work properly with Polylang, go to Languages > Settings > Custom post types and Taxonomies.
Under Custom post types, uncheck Builder Templates and click on the Save Changes button.
Create a multi-language template for WooCommerce pages #
Before creating a multi-language template, you need to translate some pages of your website to the same language that you will be creating the template.
With ShopEngine, you can create multilingual templates for WooCommerce pages.
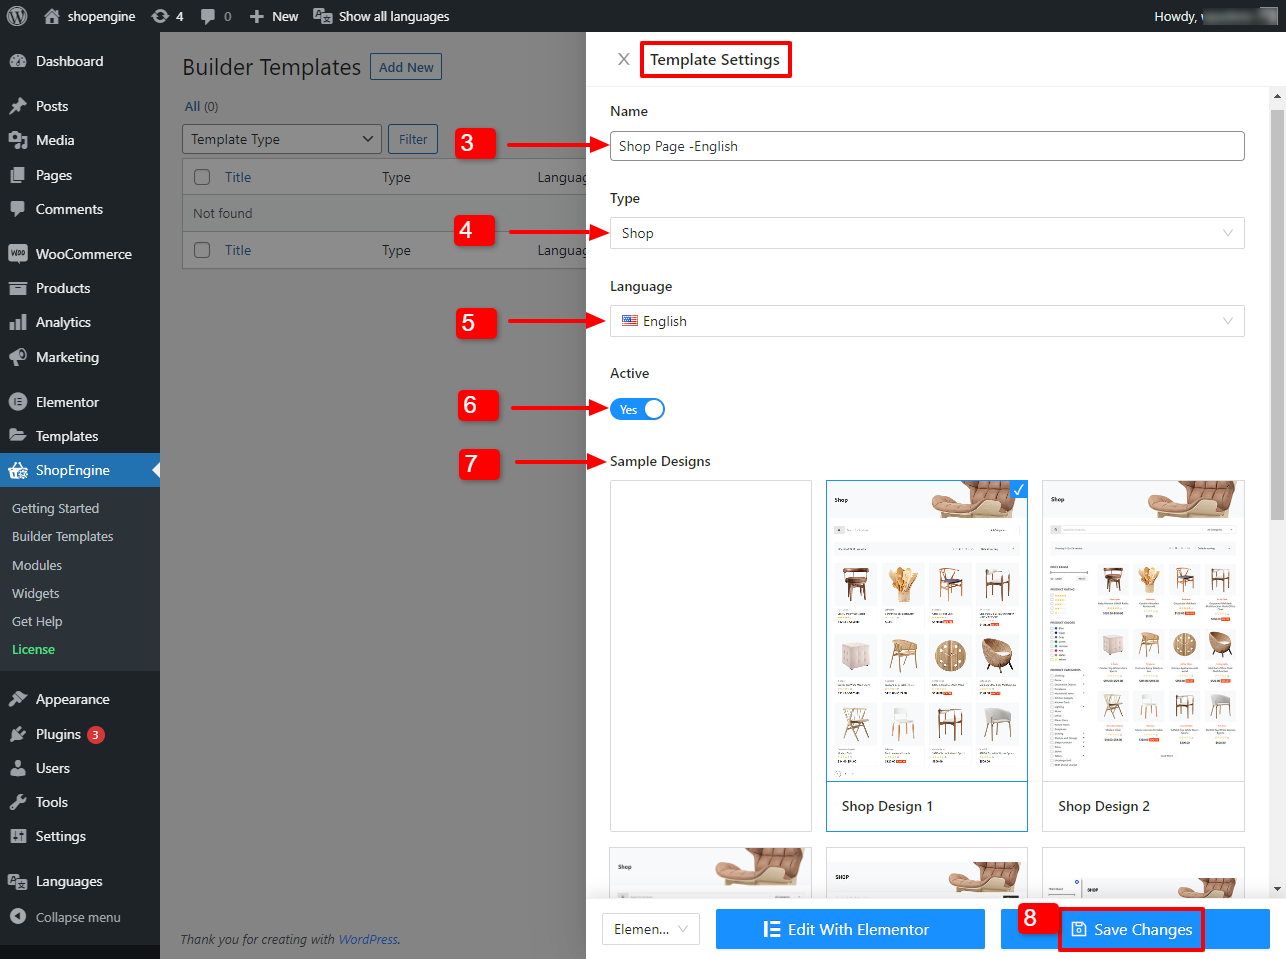
You have to create templates for each language. To create a template for the primary language (English in this case):
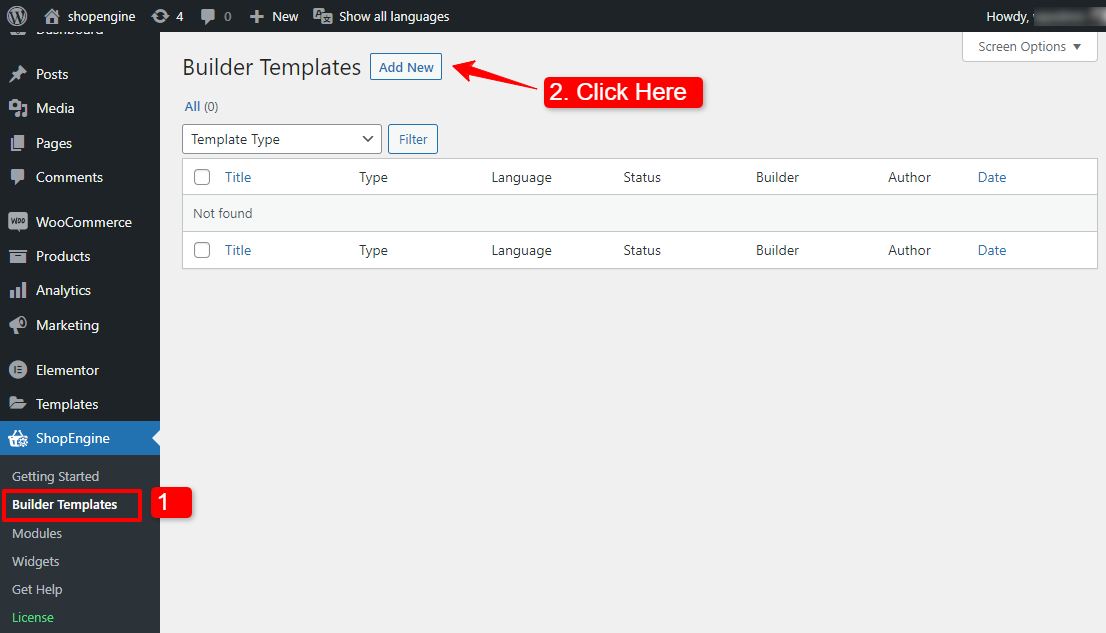
- Navigate to ShopEngine > Builder Templates from WordPress dashboard.
- Click on the Add New button on the top left corner of the screen.
On the Template Settings popup,
- Enter a Name for the template.
- Select the page Type for the template.
- Set the Language to your website’s primary language (English).
- Turn on the Active mode.
- Choose a Sample Design or you can create a design with Elementor.
- Click on Save Changes.
Similarly, create another template for another language (French). Keep the page type same as the previous template.

Create a Menu with language switcher #
To switch the language from the front end, you need to create a menu with language switcher option. To create a menu for multi-language templates:
- Navigate to Appearance > Menus from your WordPress dashboard.
- Expand the Screen Options from the top of the screen.
- Select the Language switcher under Screen elements.
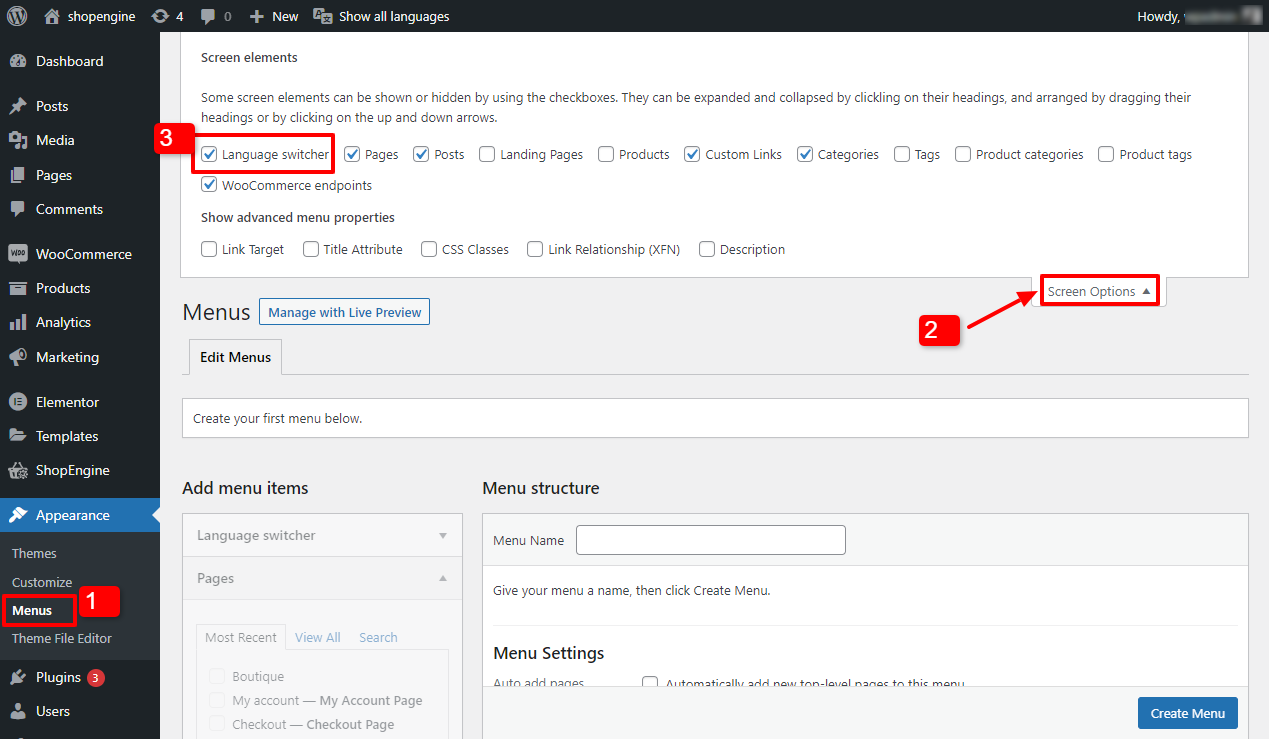
After that, close the Screen Options, and move to the “Edit Menu” section to create a menu.
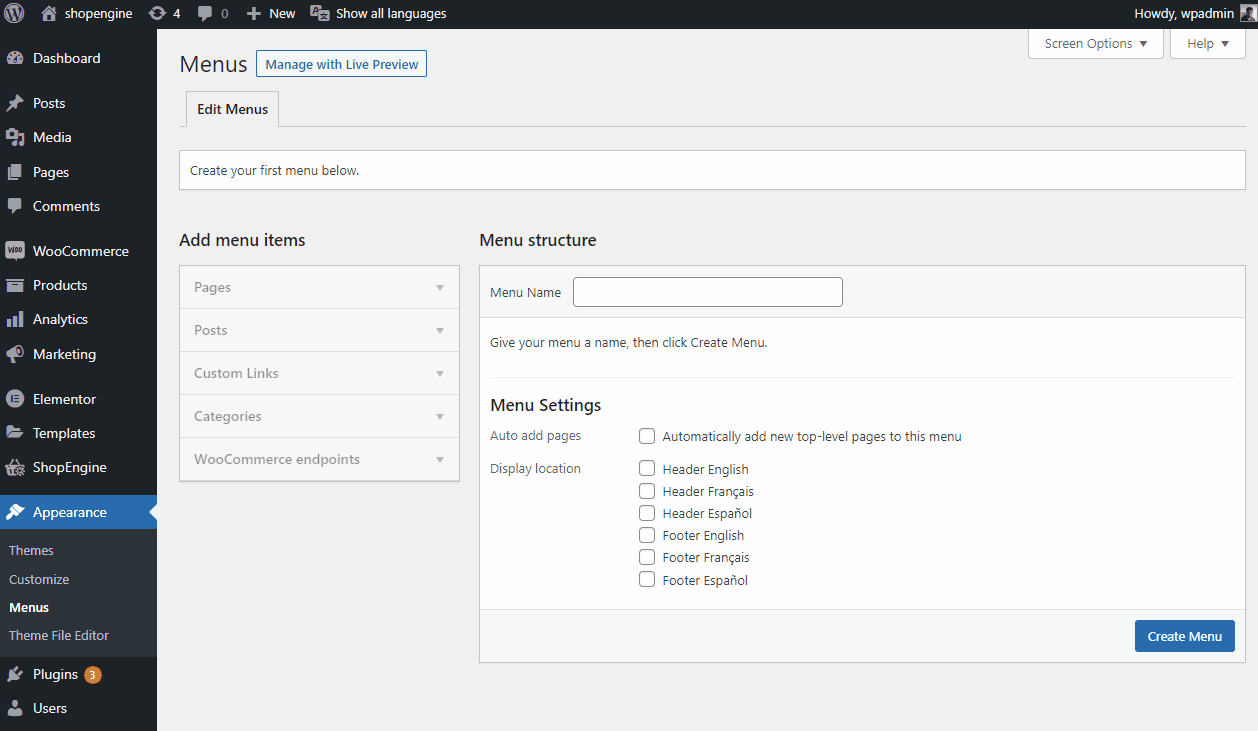
- Under Menu structure, enter a Menu Name.
- Under Menu Settings > Display Location, select Header English, Header Français.
- Click on the Create Menu.
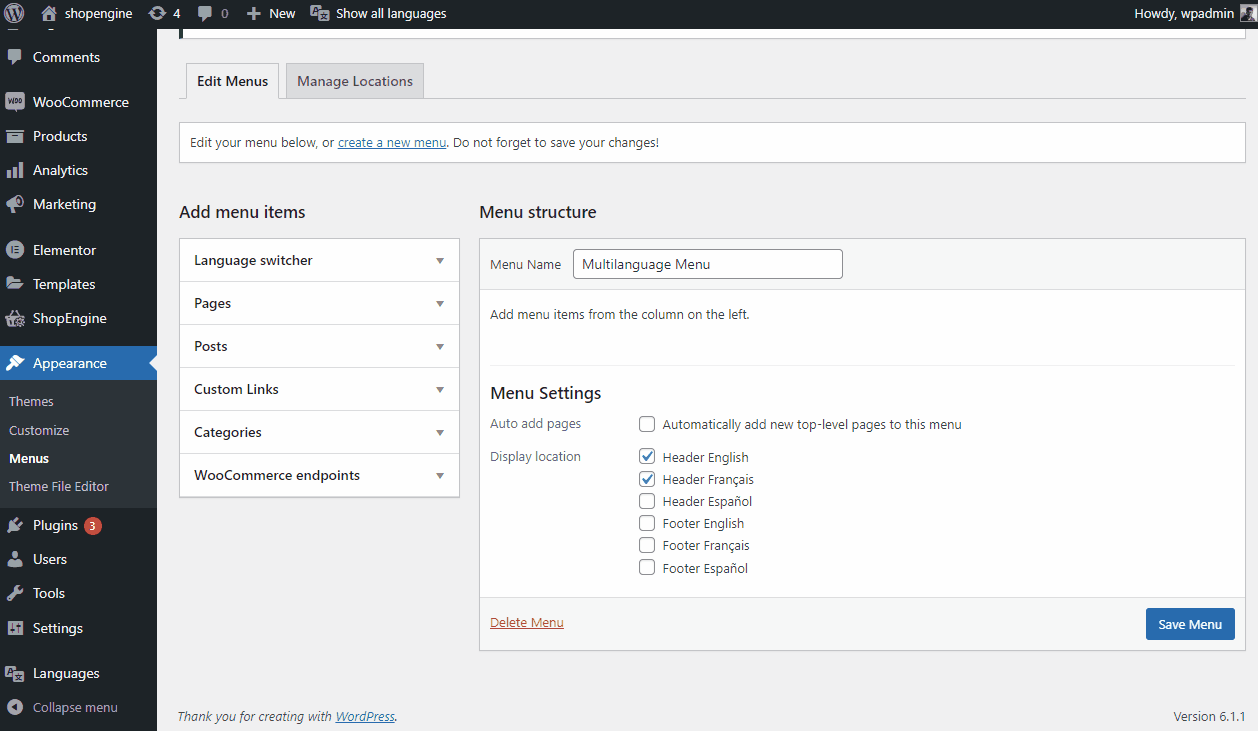
- After that, under the Add menu items and expand Language Switcher.
- Select Languages and click on Add to Menu button.
- Under the Menu Structure, expand Language and select Display language names.
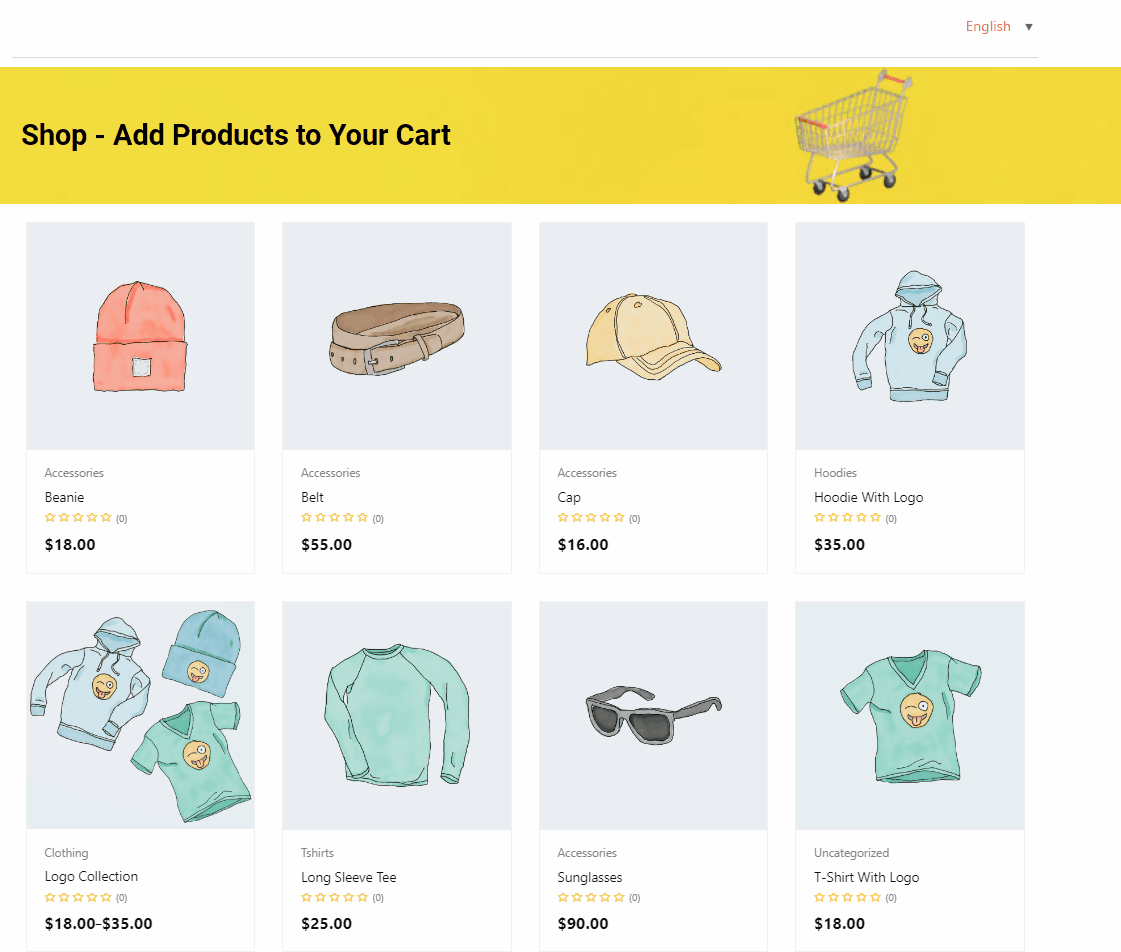
Finally, you have created a multi-language page for your WooCommerce website. Here is how it looks in the front end.