ElementsKit is a complete Elementor addon that comes with nearly all types of features for WordPress websites that includes the Elementor Audio Player widget.
Using the Audio player widget, you can embed music on your website with a user-friendly audio player control. The widget includes a couple of options to upload audio, plenty of audio and control options, and more.
Features of ElementsKit Audio Player Widget: #
- Upload audio via WordPress media library.
- Embed audio using URL.
- Audio options, including autoplay, loop, and mute.
- Play and pause control.
- Volume control.
- Progress bar control.
- Show playtime and total duration.
- Customize appearance of the audio player.
How to Add Audio Player in Elementor Websites? #
Now go through the below steps to easily add an audio player to your Elementor website without any coding or technical hassles. But, do remember that the ElementsKit Audio Player widget is a pro feature. So, you must install the ElementsKit Pro plugin to your Elementor websites.
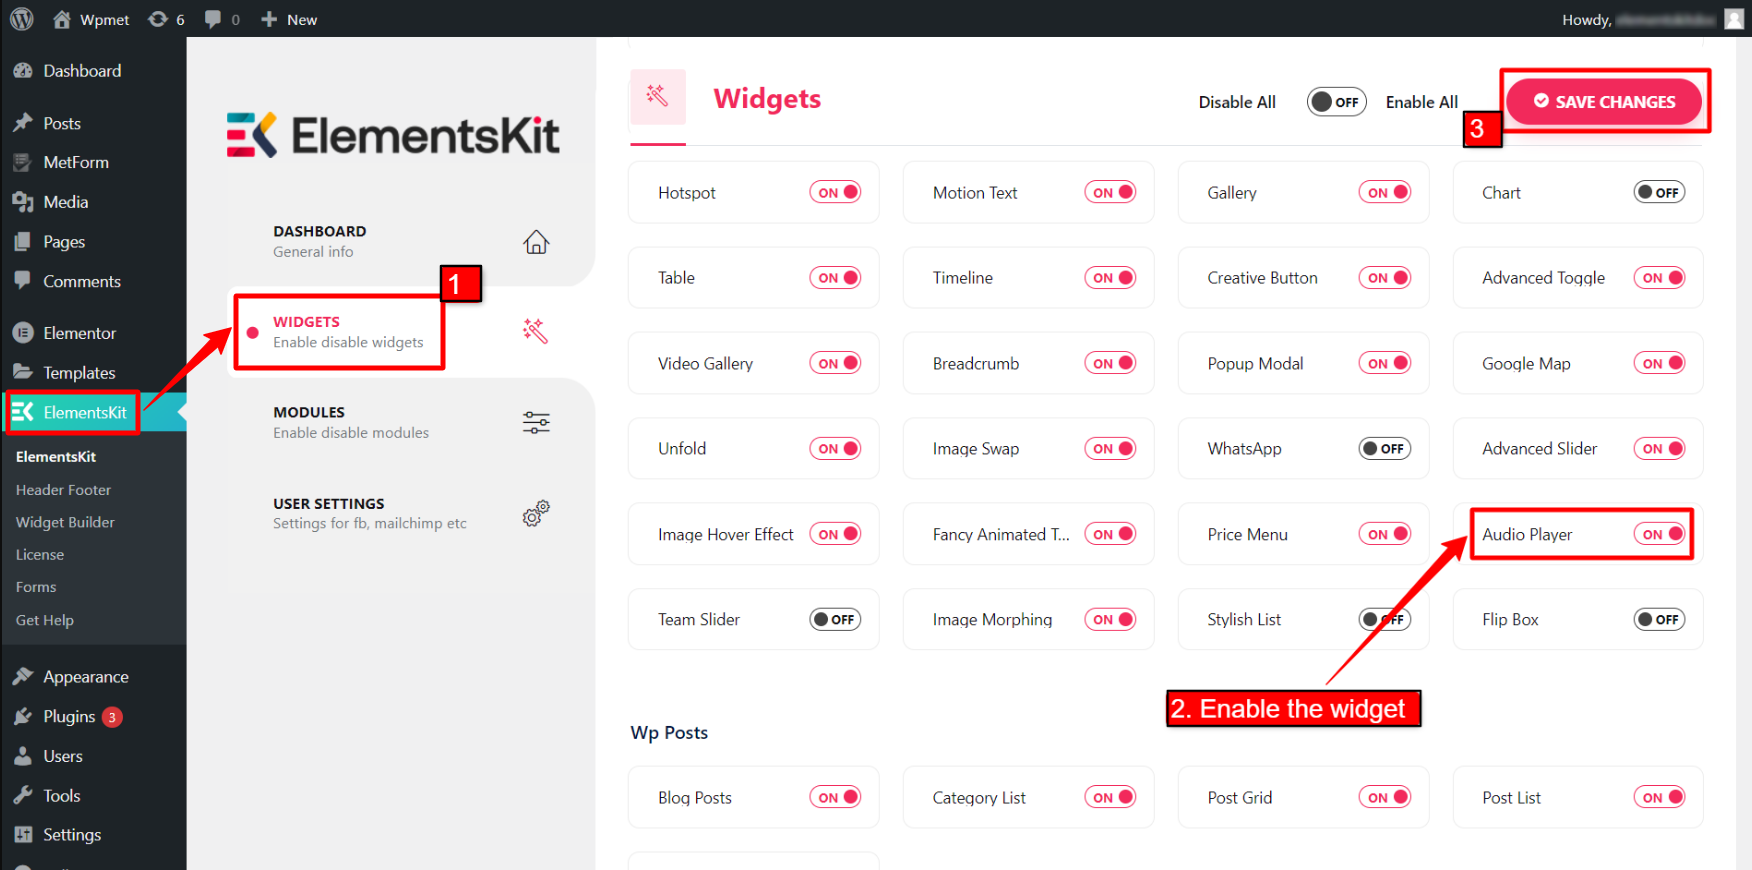
Step 1: Enable Audio Player Widget #
Firstly, you need to enable the widget from WordPress dashboard. To enable the Audio Player widget:
- Navigate to ElementsKit > Widgets.
- Find the Audio Player from the list and enable the widget.
- Click on the SAVE CHANGES.
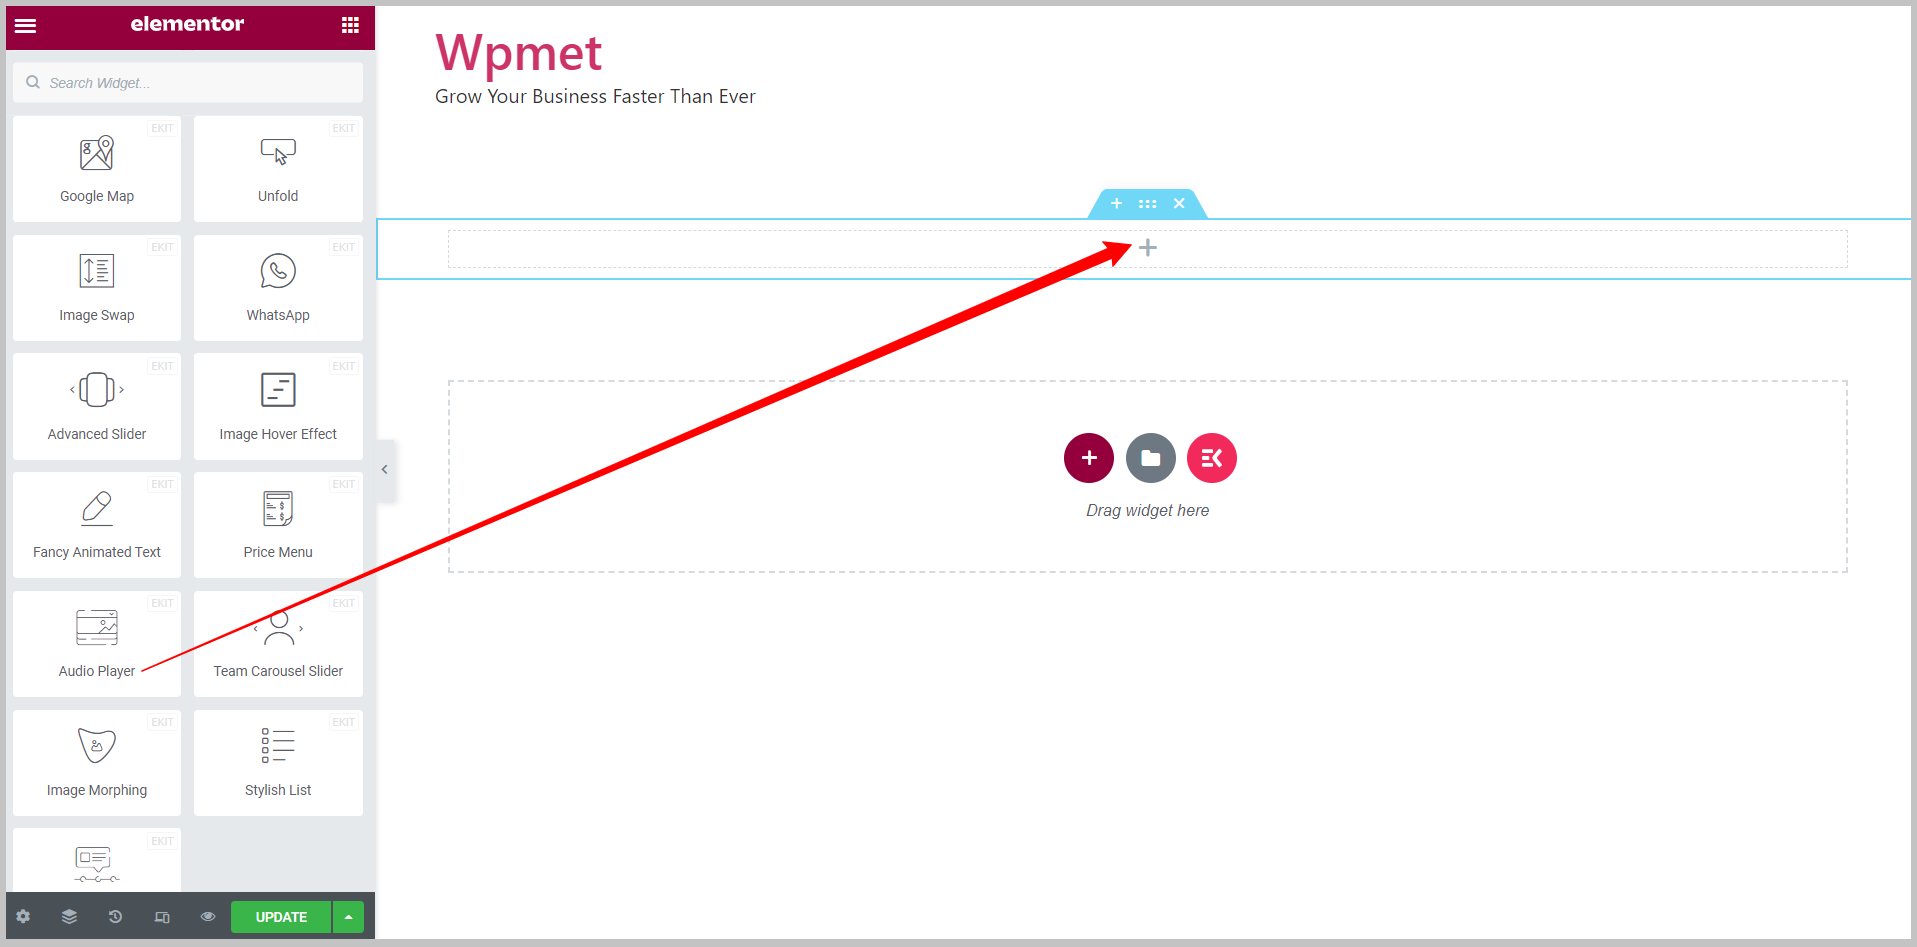
Step 2: Drag and Drop the widget #
After that, drag and drop the ElementsKit Audio Player widget into the Elementor editor.
Step 3: Configure Elementor Audio Player Widget #
Under the Content tab, you can upload the audio and configure the Audio Options and Control Options of the audio player. You can use the following options to configure WordPress audio player in Elementor.
3.1 Source #
You can either upload the audio file or use an URL to add audio to the player. There are two options available for the audio source.
Source – Self-Hosted: #
When you choose Self Hosted as the audio source, you can upload an audio file from your WordPress media library.
Choose “Self Hosted” as the source > Click on the upload button > add an audio file from the media library.
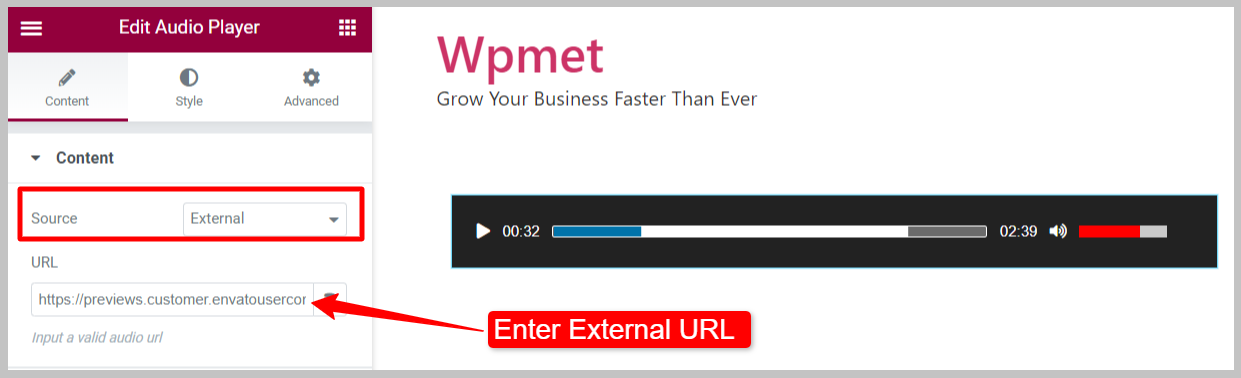
Source – External: #
By choosing the External source, you can embed audio from the internet with its URL.
Choose “External” as source > enter audio URL in the required field.
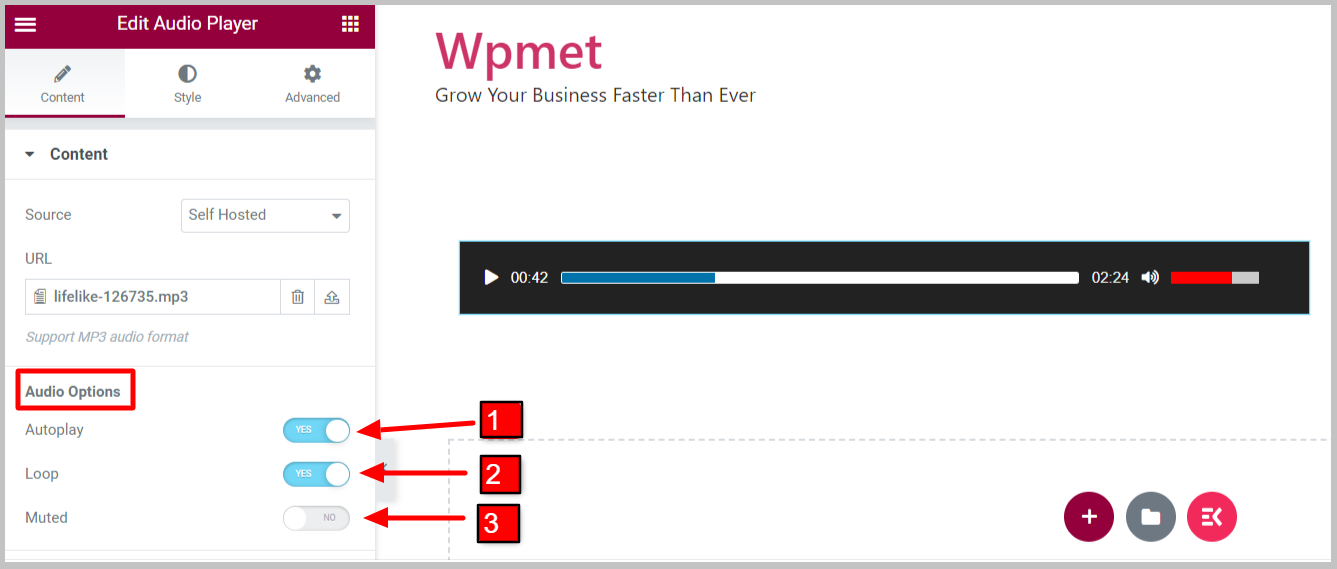
3.2 Audio Options #
Here are the audio options available with the Audio Player widget:
- Autoplay: Enable the autoplay, so that the audio will automatically be played when the page loads.
- Loop: Enable this option to play the audio on a loop.
- Muted: When enabled, audio is initially muted when the player starts. Users have to unmute the audio manually.
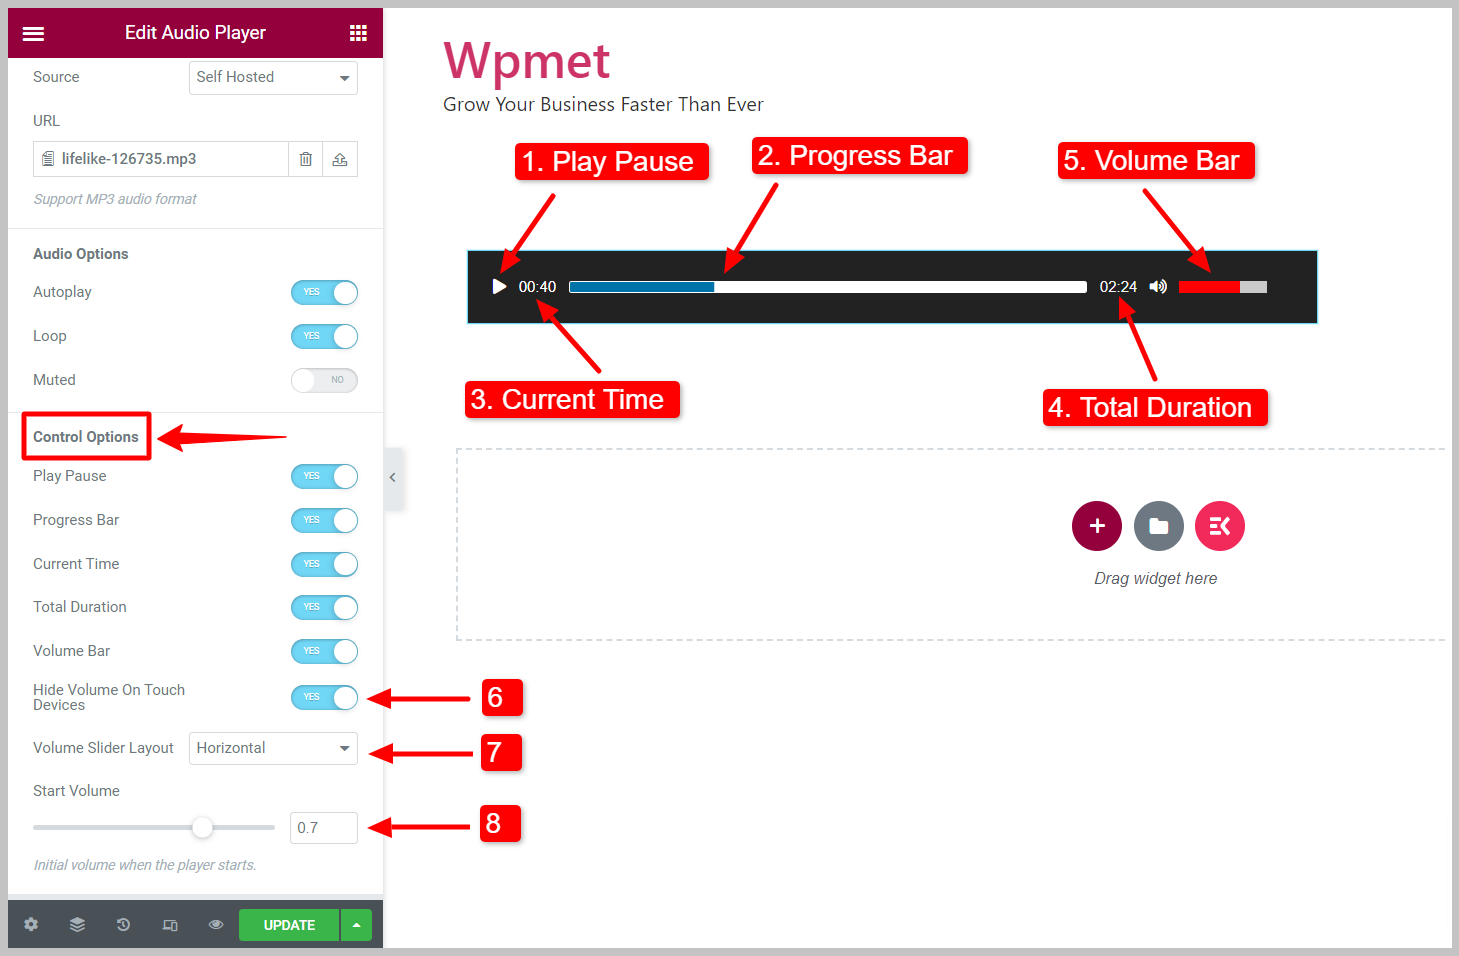
3.3 Control Options #
Here are the control options available with the Audio Player widget:
- Play Pause: Enables the play/pause control (button) for the users.
- Progress Bar: To show the audio progress bar on the player.
- Progress Handler: Let visitors control the progress of the music.
- Current Time: This shows the current playing time on the Elementor audio player.
- Total Duration: This shows the total duration of the audio.
- Volume Bar: To show and control the audio volume level.
- Hide Volume On Touch Devices: Enable this option to hide the volume bar on smartphones for a better user experience.
- Volume Slider Layout: There are two layouts available for the volume bar: Horizontal and Vertical.
- Start Volume: Set the initial volume level when the player starts.
3.4: Player Icons #
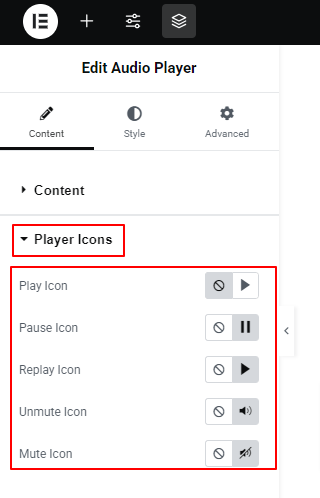
Under this setting, you will select an icon for the play, pause, replay, unmute, and mute options. You can also choose not to show icons for these options.
Step 4: Customize Elementor Audio Player Styles #
You can customize the Play Pause button, Progress bar, Time, and Volume styles on the Elementor Audio Player widget.
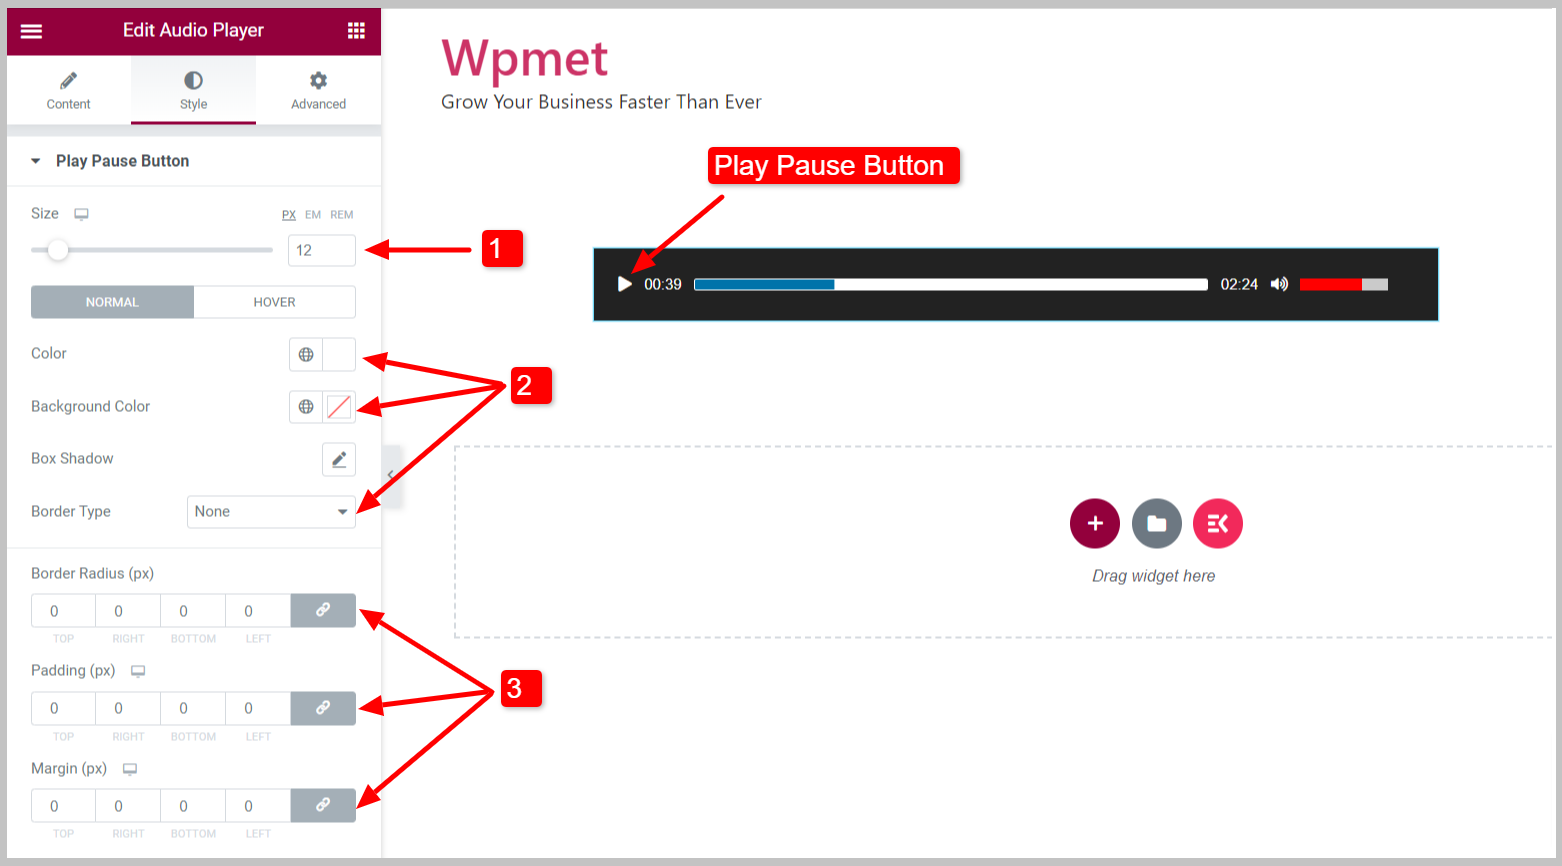
4.1 Play Pause Button #
To customize the Play Pause button,
- Adjust the Size of the button.
- Choose the button Color, Background Color, Box Shadow, and Border Type for the button.
- Set the Border Radius, Padding, and Margin.
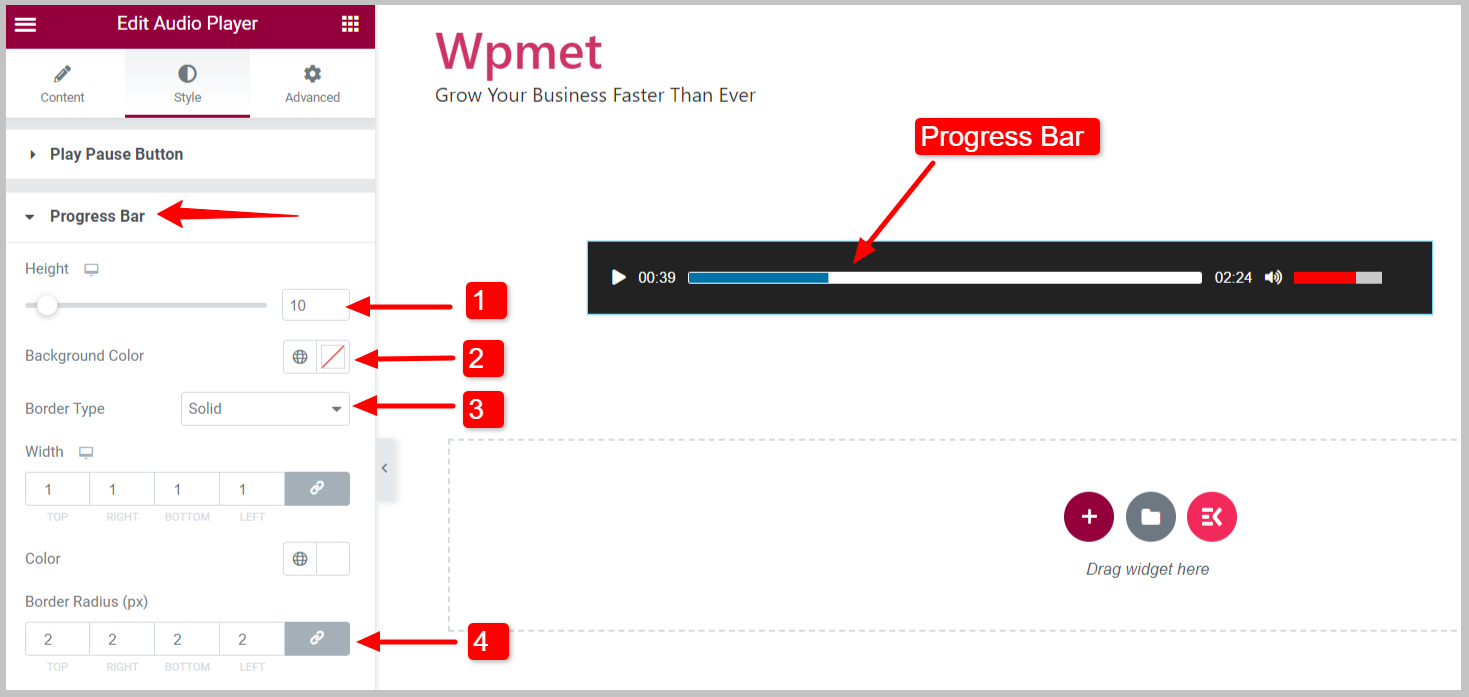
4.2 Progress Bar #
To customize the Progress Bar,
- You can adjust the Height of the progress bar.
- Choose the Background Color of the progress bar.
- Set the Border Type, Border Width, and Border Color.
- Adjust the Border Radius of the progress bar.
- Loaded Progress Bar: You can choose the Background color for the Loaded Progress Bar.
- Current Progress Bar: Set the Background color and Border Radius for the current progress bar.
- Time Hover: Select Background Color for time hover.

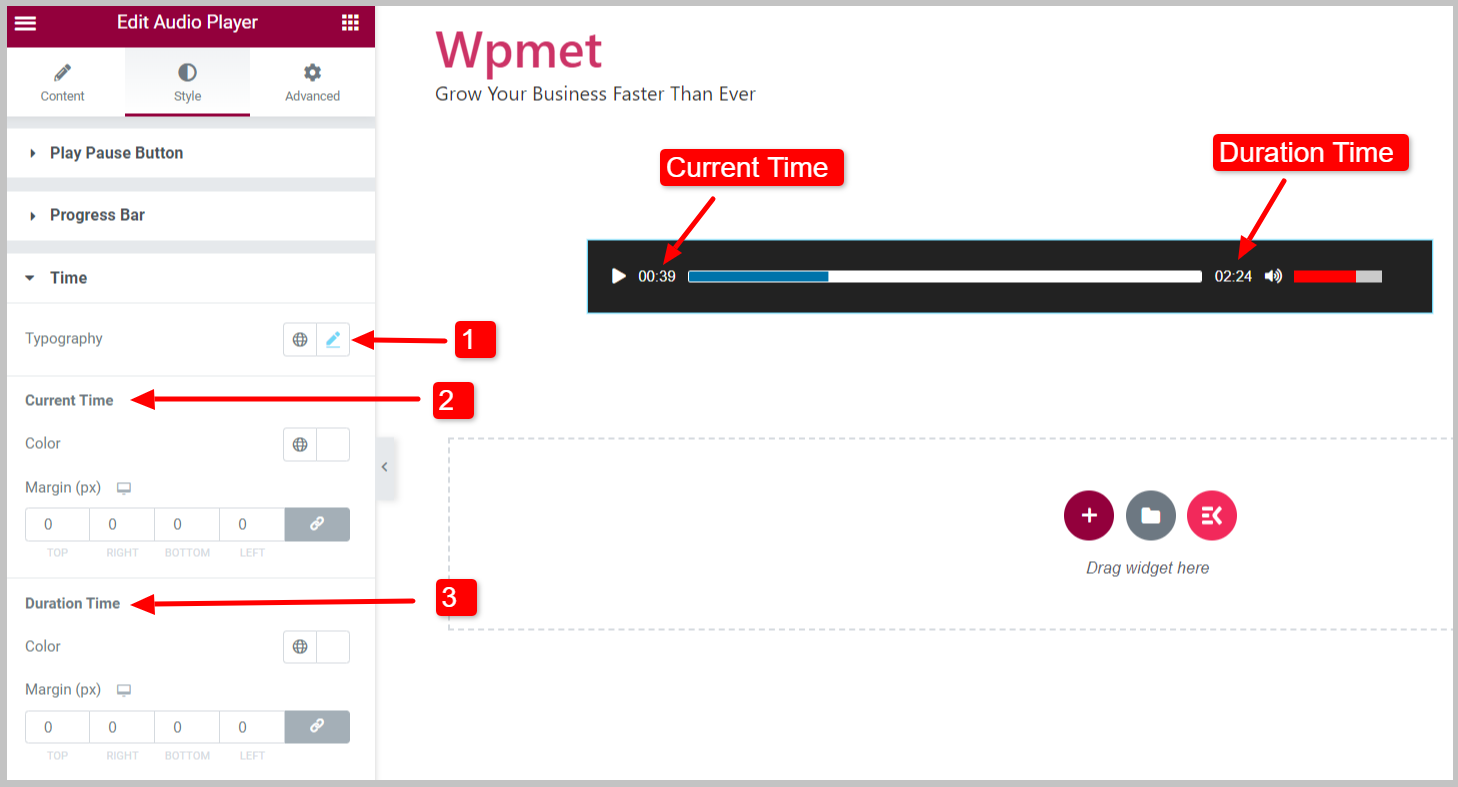
4.3 Time #
To customize the Time styles of the Elementor audio player,
- Set the Typography for the text digits.
- Choose a Color and adjust Margin for the Current Time.
- Choose a Color and adjust Margin for the Duration TIme.
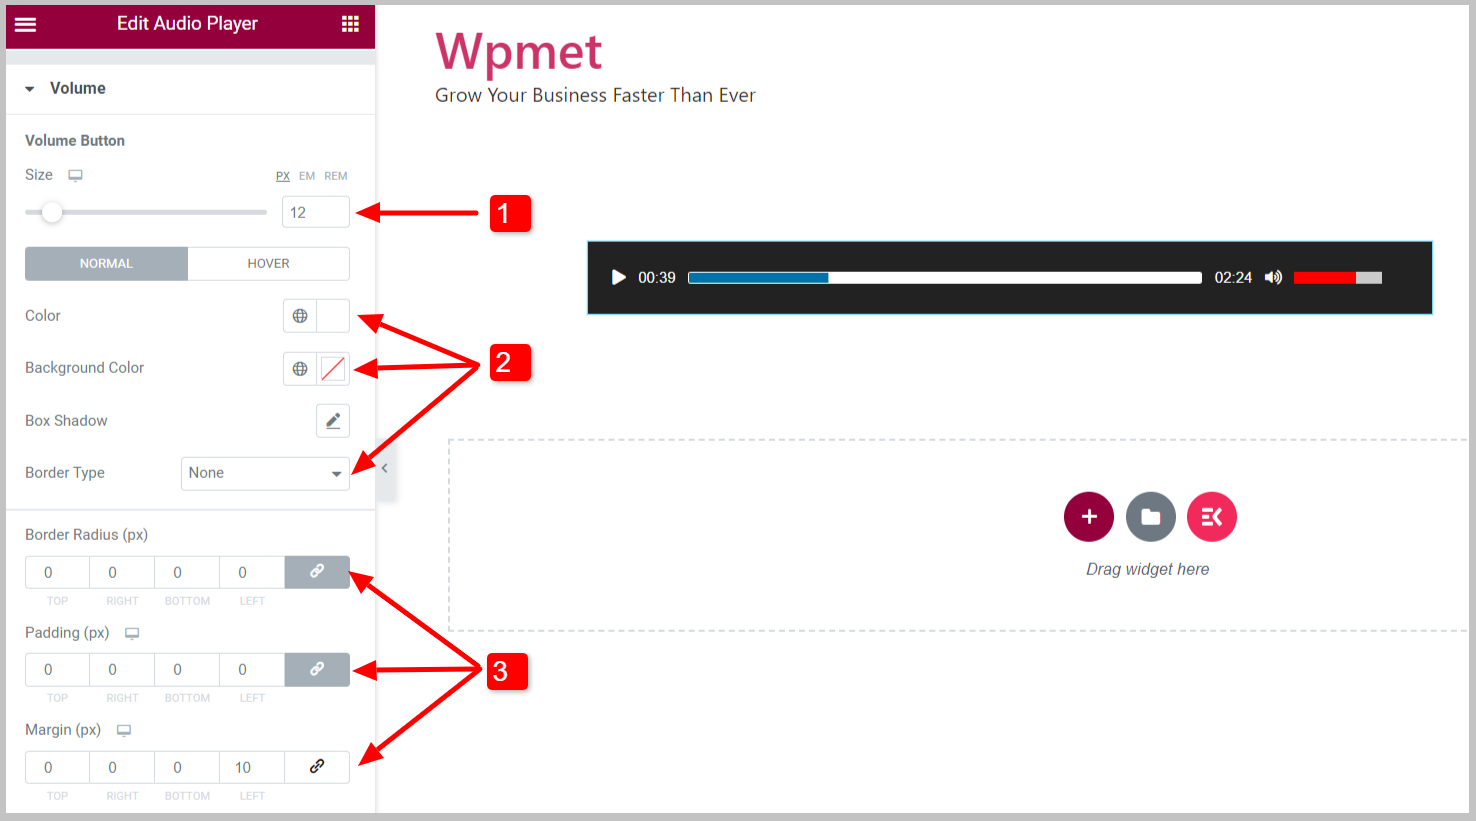
4.4 Volume #
To customize the Volume button styles,
- You can adjust the Height of the volume button.
- Choose the Background Color of the volume button.
- Set the Border Type, Border Width, and Border Color.
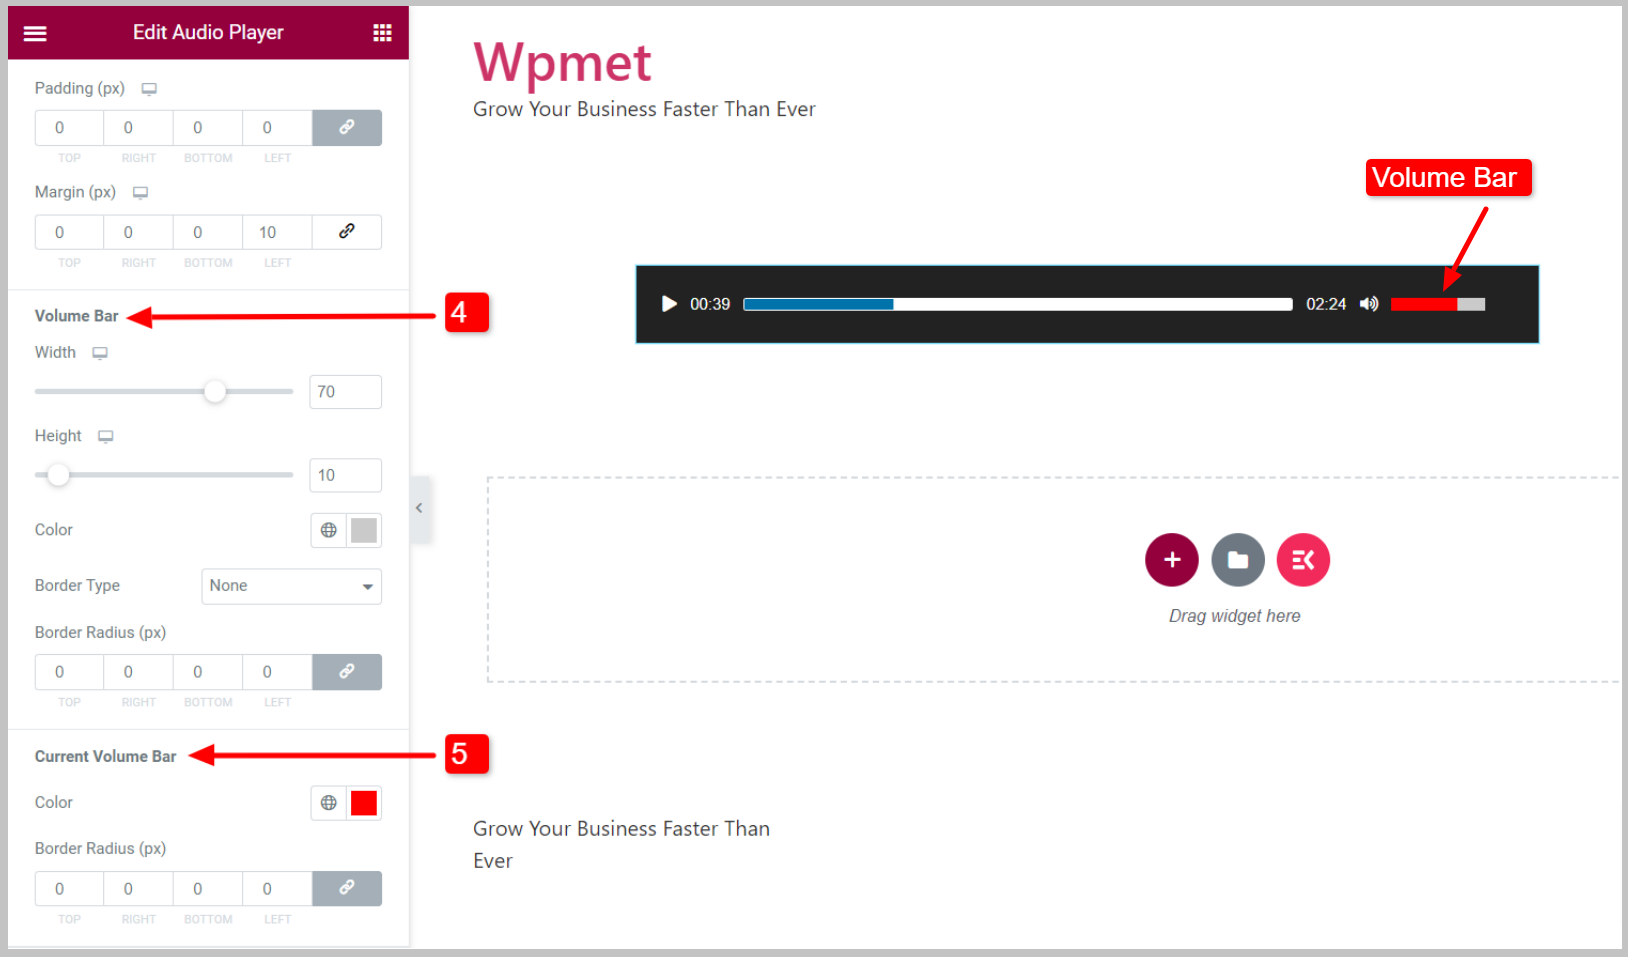
- Volume Bar: Adjust the height, width, color, and border styles for the volume bar.
- Current Volume Bar: Set the color and border radius for the current volume bar.
Finally, you can use the audio player on your website with all the useful features. The Elementor Audio Player widget comes with ElementKits Pro. Get the plugin to add audio and music to your WordPress site in the easiest way.


