ElementsKit is the complete solution to build websites with Elementor. With ElementsKit, you can integrate Elementor form into Google Sheets.
Using Google Sheets module, you can directly export data from Elementor forms on your website to Google Sheets. When a user submits a form on your website, the submitted data will be exported to a Google sheet that includes all the submissions.
Read this documentation to learn how to use the ElementsKit Google Sheets module.
Required Plugins: #
To use ElementsKit’s Google Sheet module, you need to install the following plugin on your WordPress site:
- Elementor: Download Plugin
- Elementor Pro: Get the Plugin
- ElementsKit Lite: Download Plugin
- ElementsKit Pro: Get the Plugin
Prerequisites: #
You must have an account on Google Cloud Platform. So if you don’t have an account, create one before starting the procedure.
Step 1: Enable the Google Sheet module #
To enable the module:
- Navigate to ElementsKit > MODULES from your WordPress dashboard.
- Find the “Google Sheet for Elementor Pro” module from the list.
- Toggle the button to ON for the module.
- Click on the SAVE CHANGES button.

Step 2: Create Google developer APP for integration #
This step involves creating a new project, registering the app for authentication, and generating the credentials.
2.1 Create a new project on Google cloud console #
To create a new project:
- Go to https://console.cloud.google.com/ and log in with your Google developer’s account.
- Navigate to Select a project > New Project.
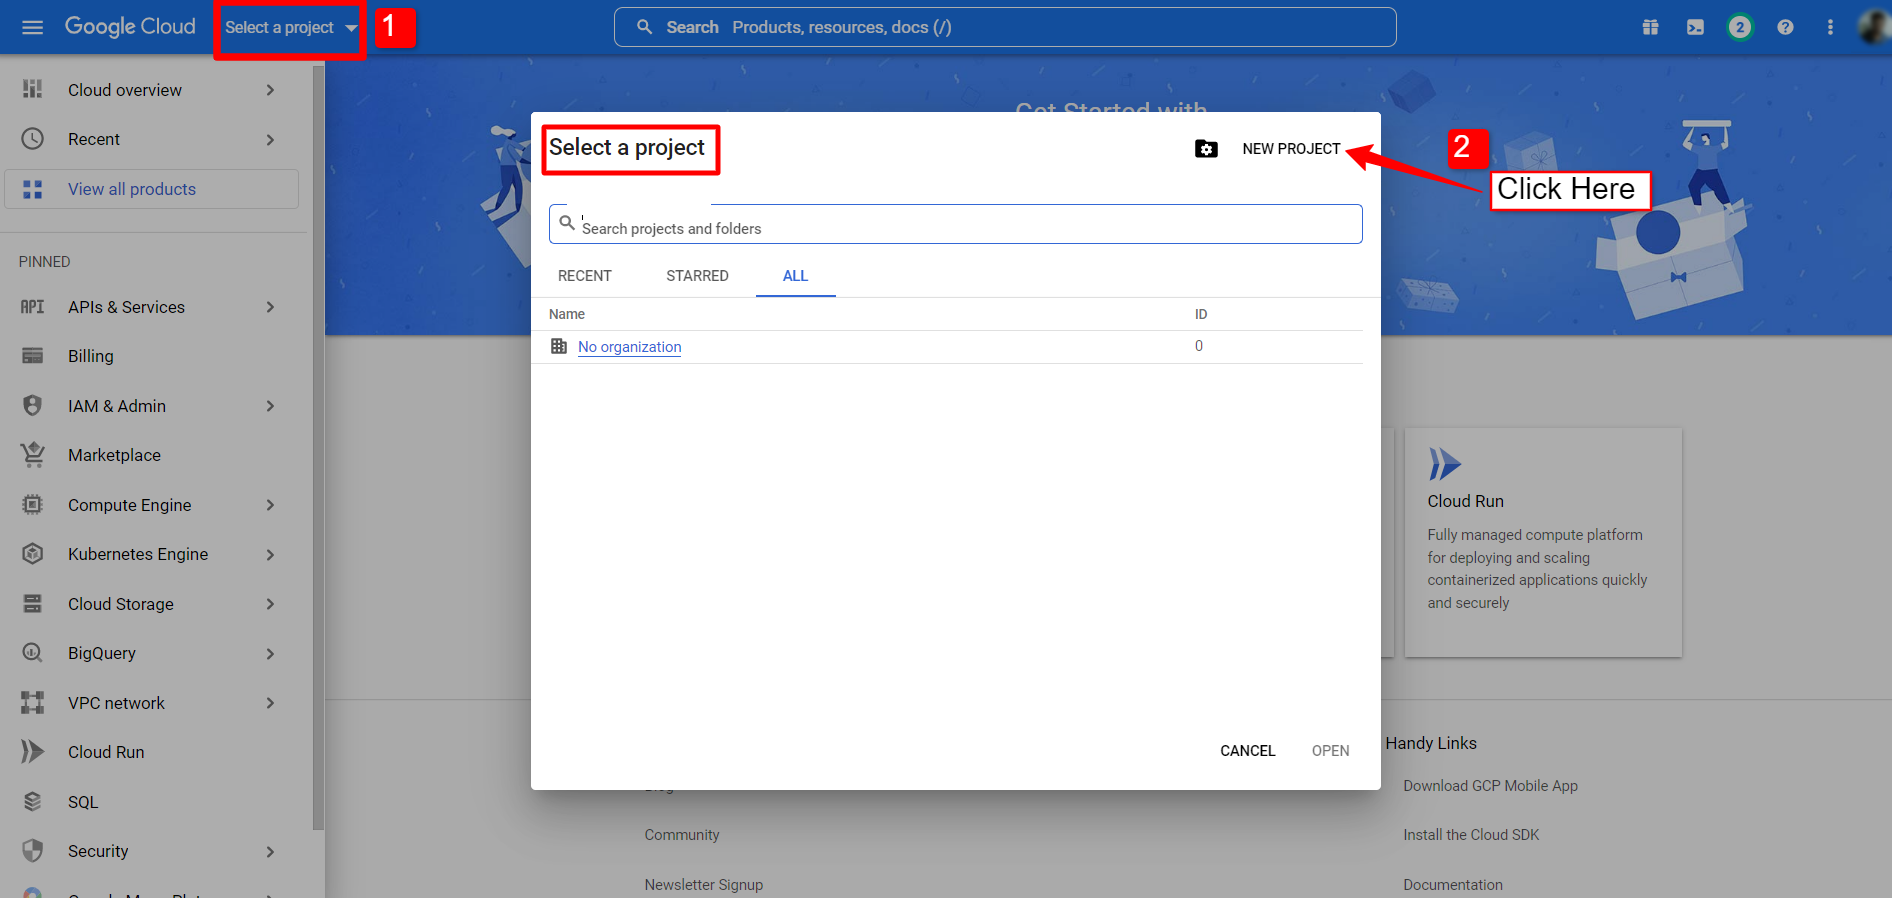
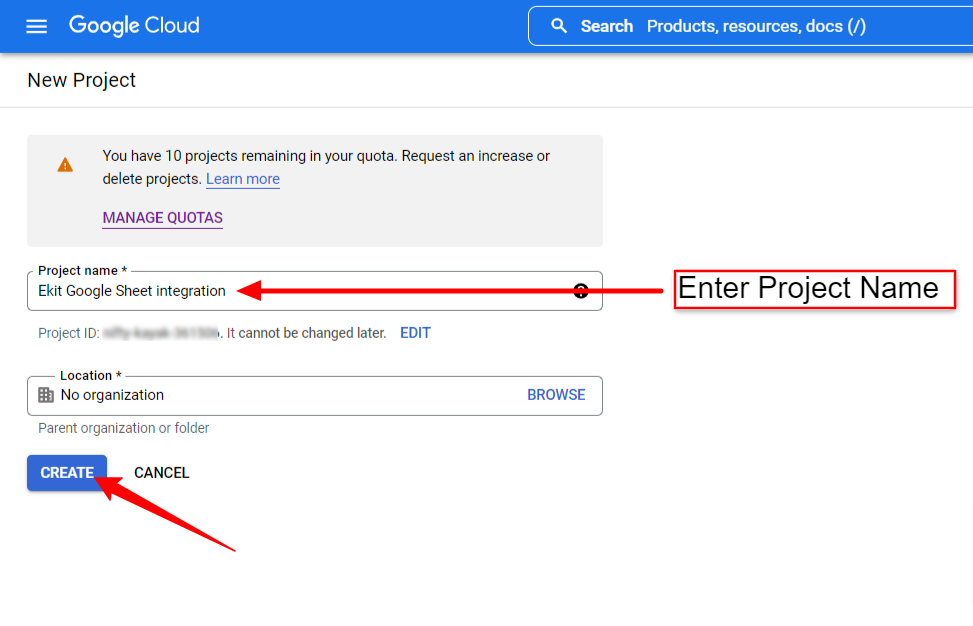
- For the New project, enter a Project name and Location (not required). Then click to create button.
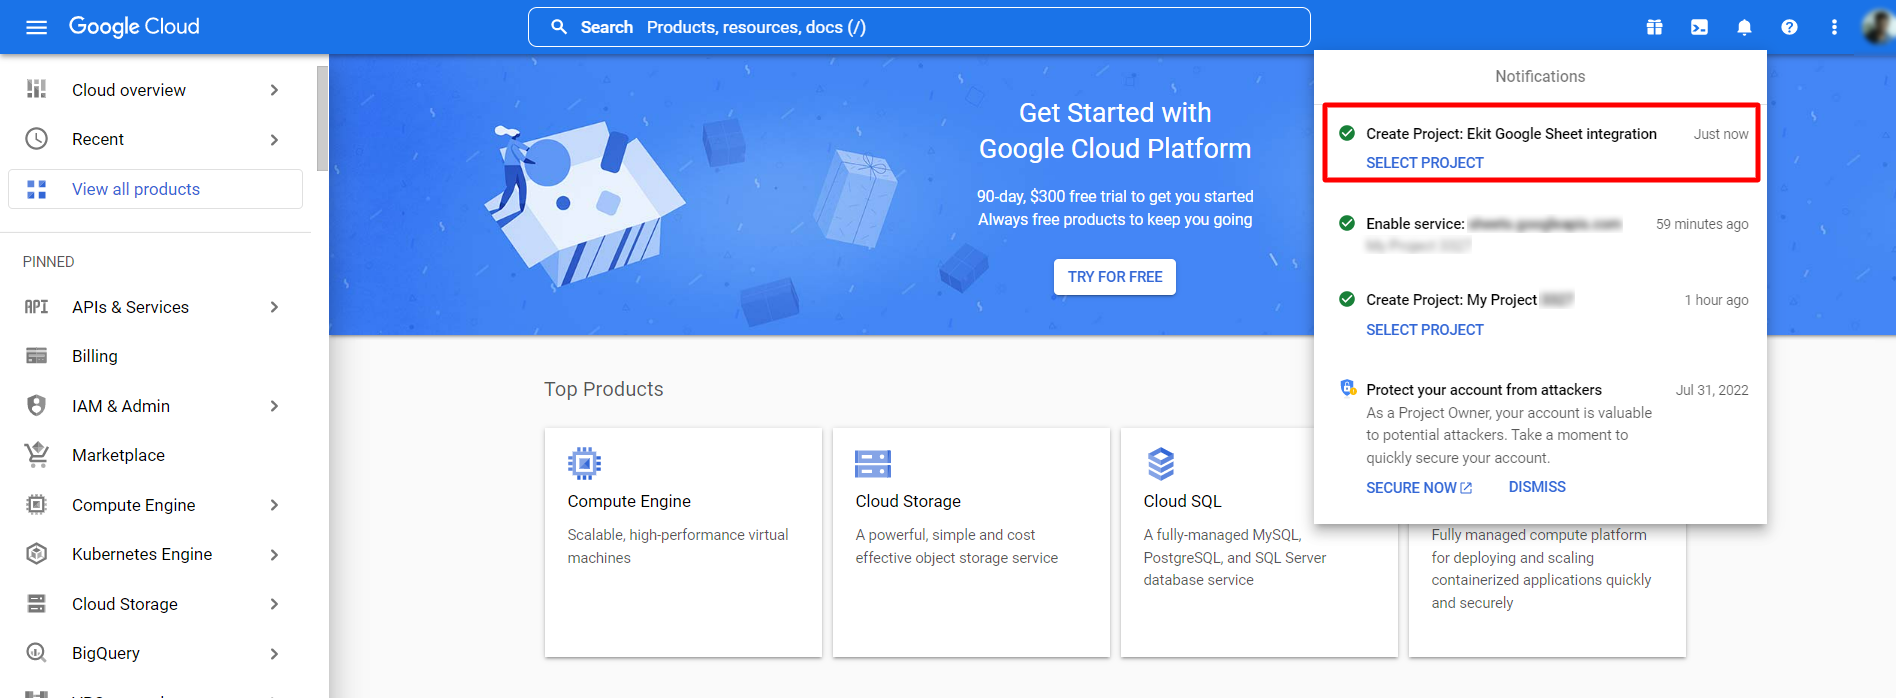
Creating a project might take a few seconds. Check the notification bar, when the project is created, click to select the project.
2.2 Register an App on the project #
The next step is to create a developer app for the project that you have just created. For that,
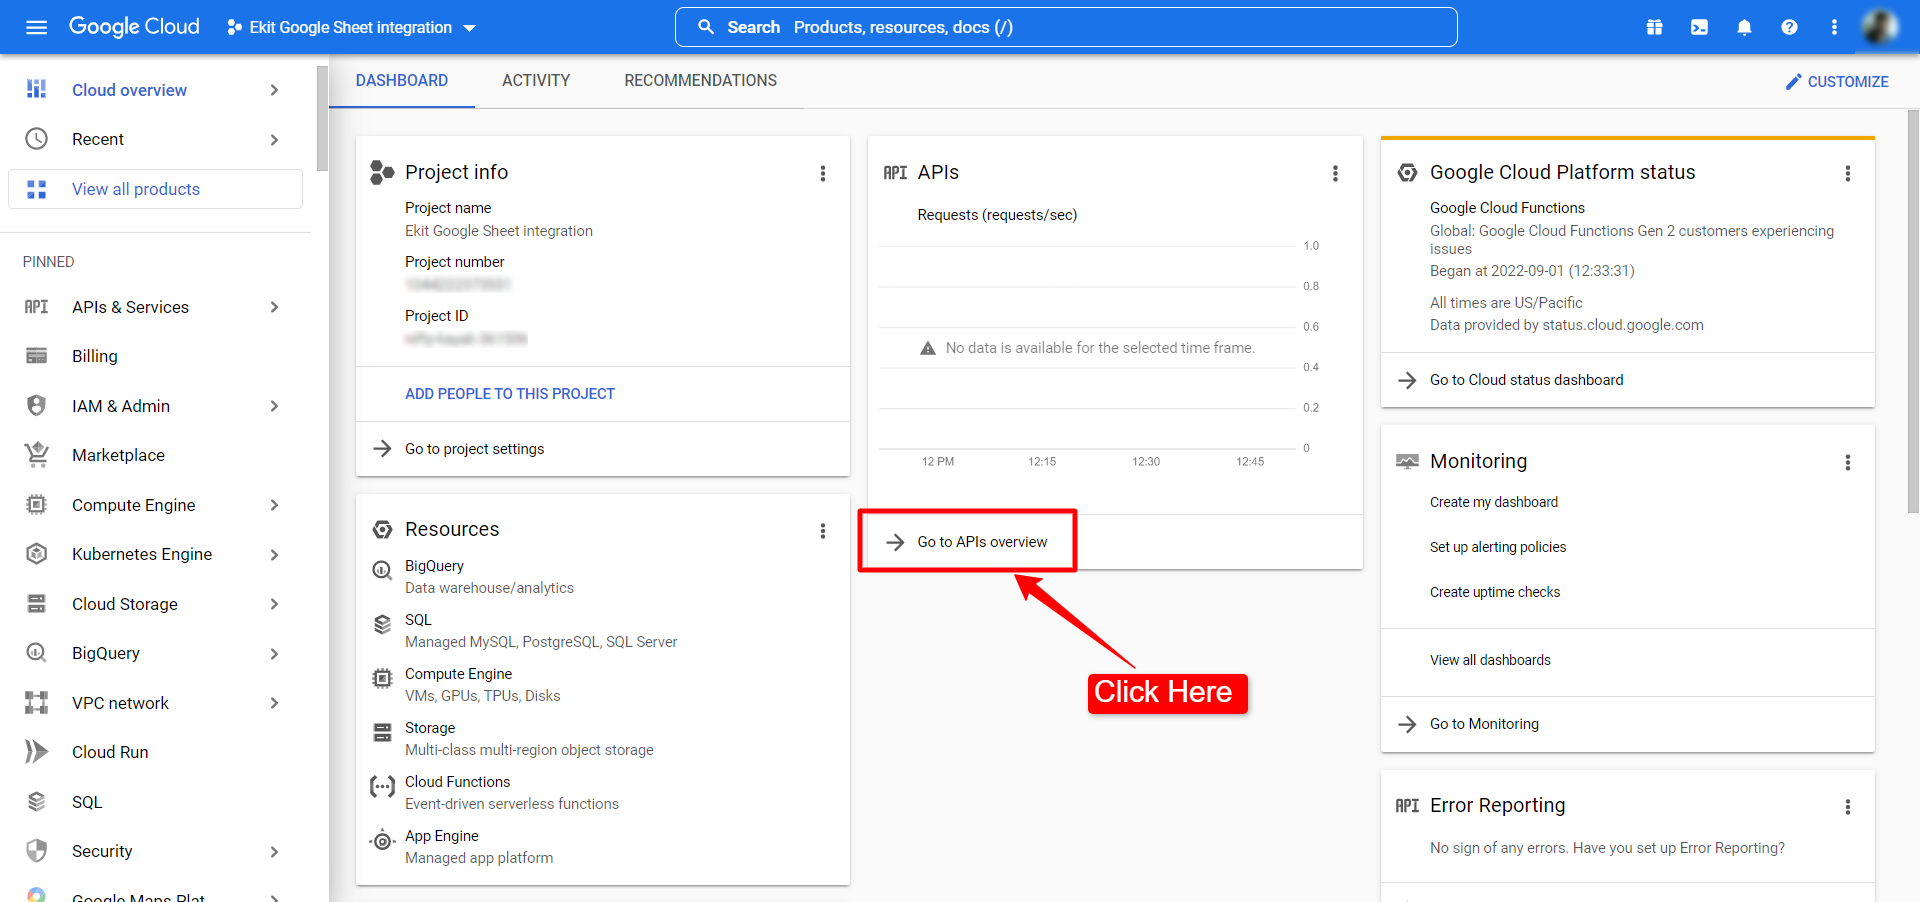
- Open the project dashboard. (You have already opened the dashboard from the last step).
- Click on the “Go to APIs overview” under the APIs column.
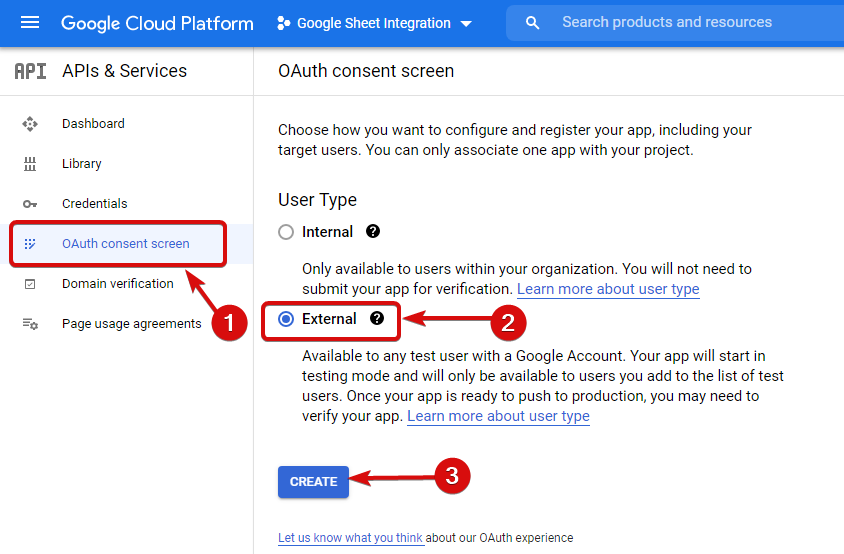
- Open the OAuth content screen from the left sidebar.
- On the OAuth content screen, set User Type to External.
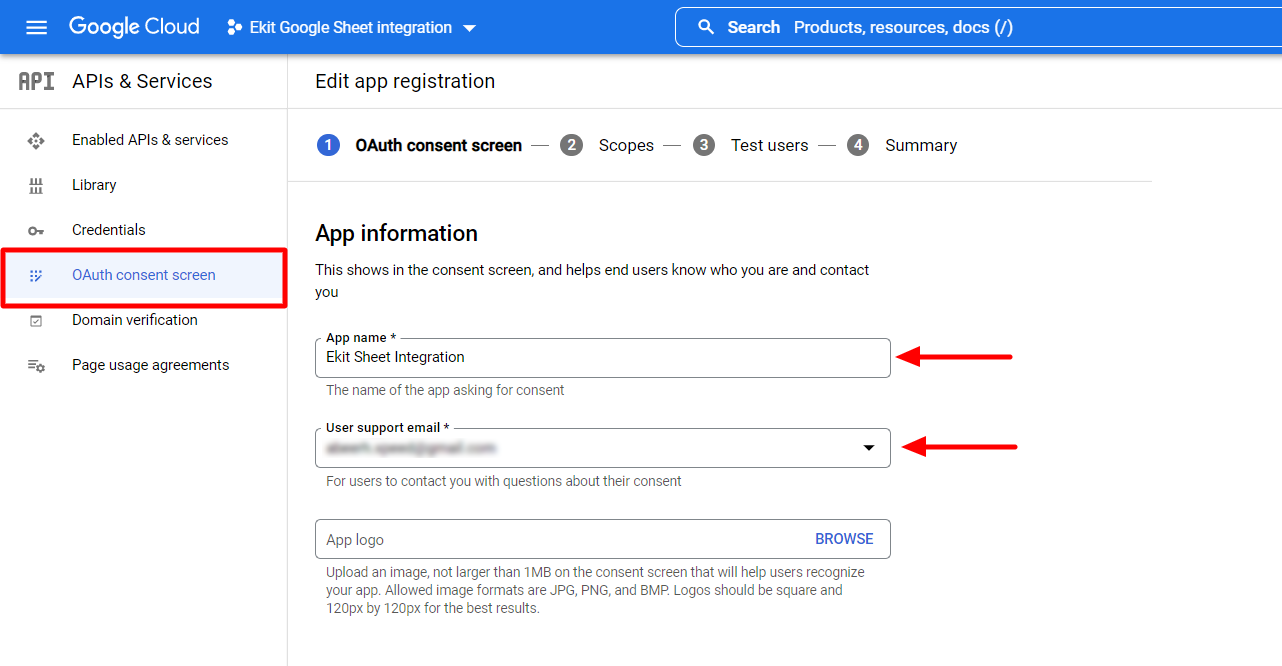
- Enter the App information including the App name and User support email.
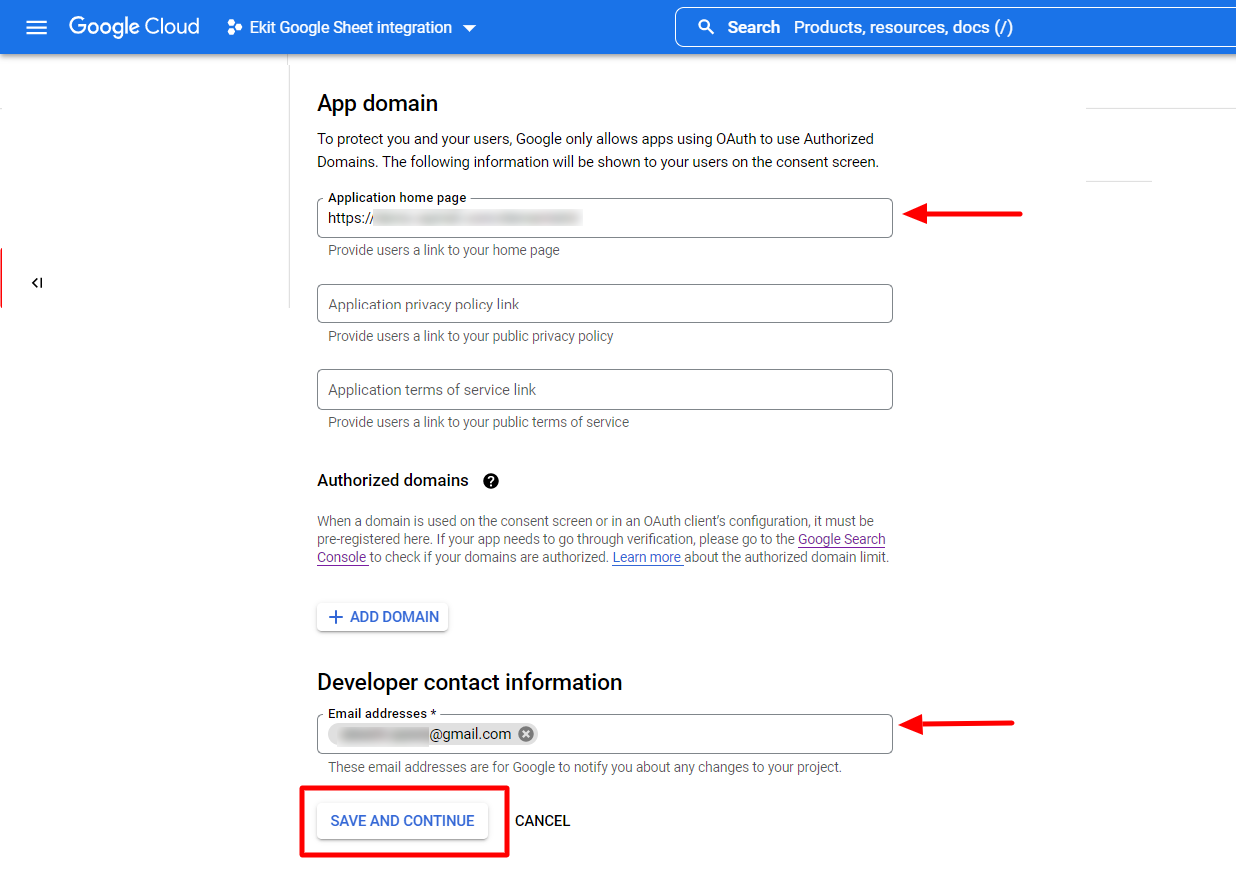
- Then enter App domain(s) including the Application home page, Authorized domains, and Developer contact information.
- Click on the SAVE AND CONTINUE button.
After that continue Scopes and Test users tab. Those are optional features. You can add information if want or can leave them as it is.
2.3 Create the App Credentials #
Then comes the step of creating App Credentials. For that,
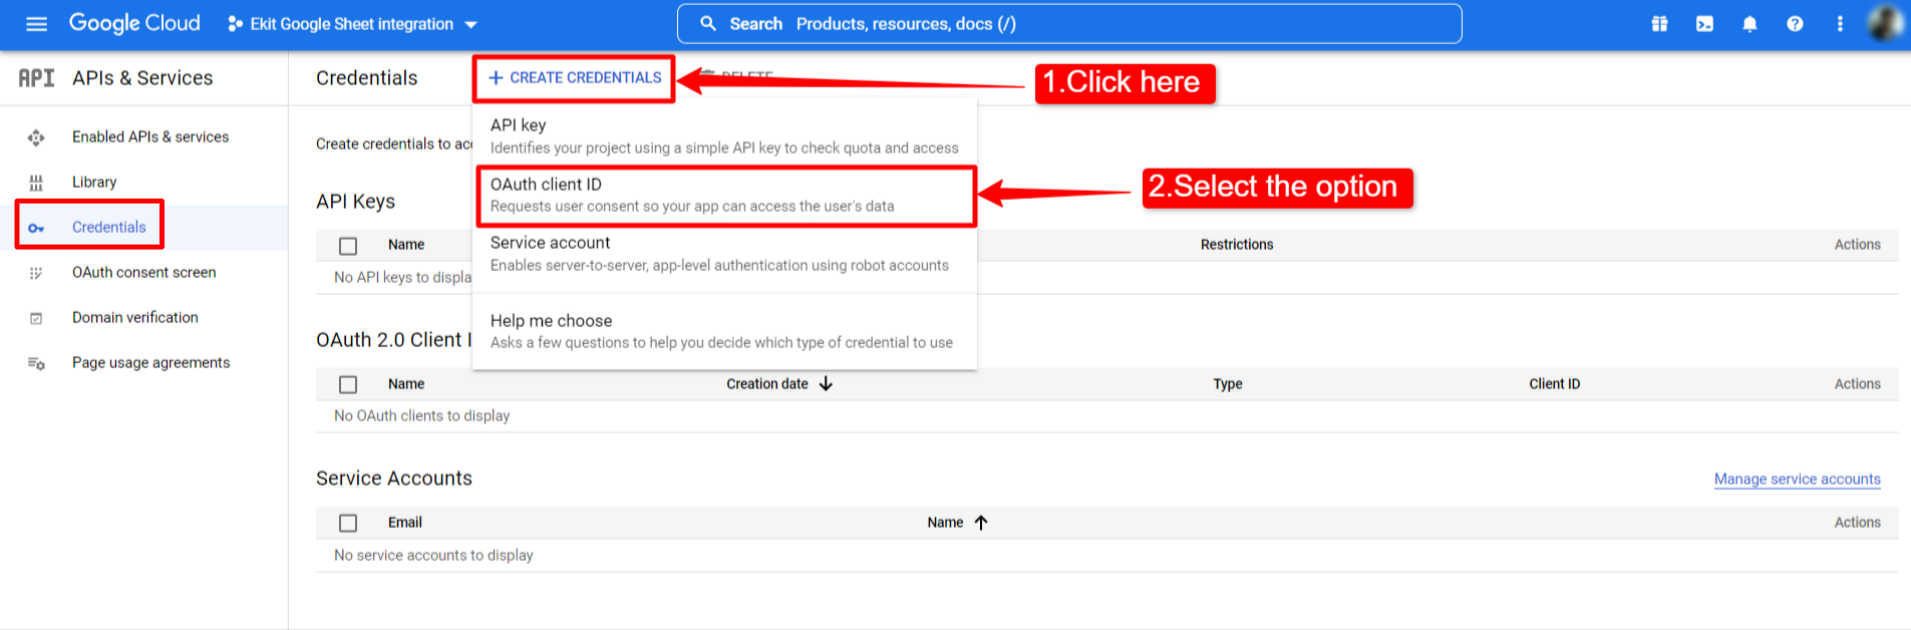
- Open the Credentials page from the left sidebar on the project dashboard.
- Click on the “+CREATE CREDENTIALS”. It will expand a dropdown list of credentials.
- Select OAuth client ID from the dropdown.
On the next page, you can then create OAuth client ID by entering the following information:
- Choose the Application type.
- Enter a Name.
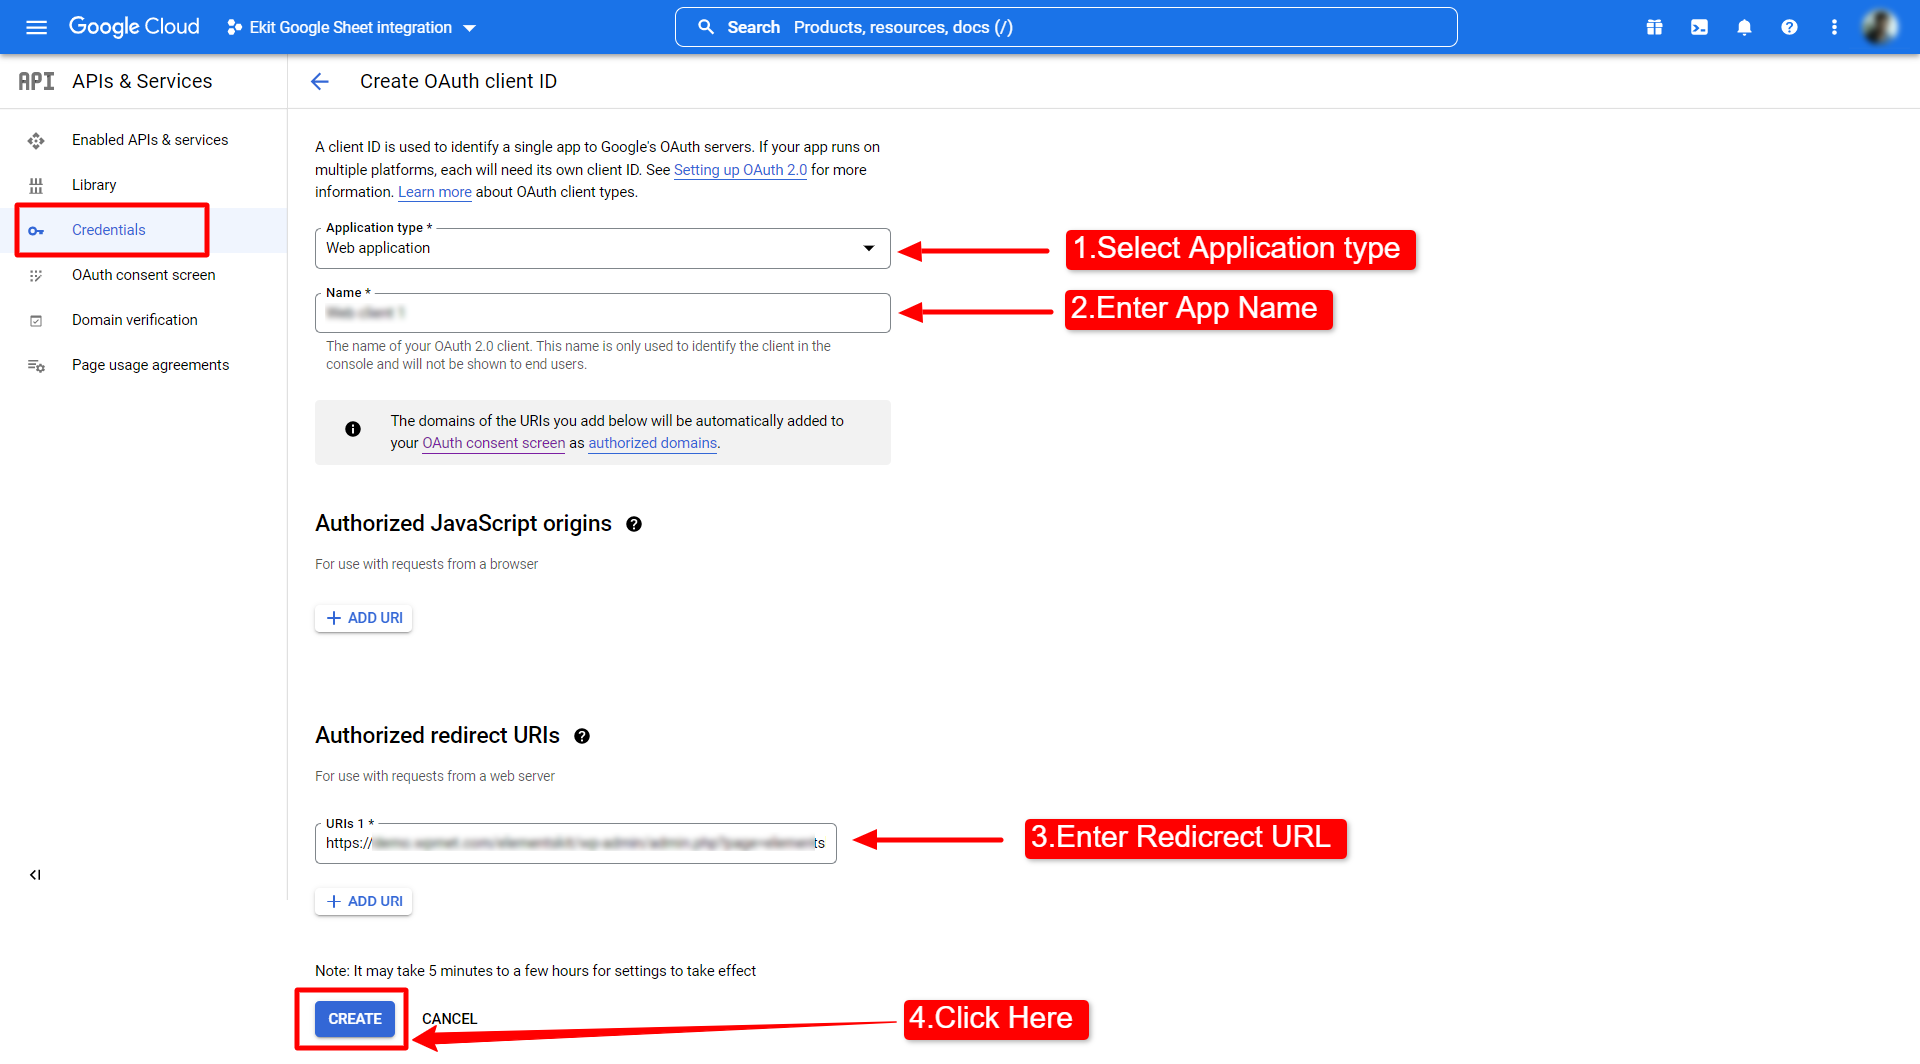
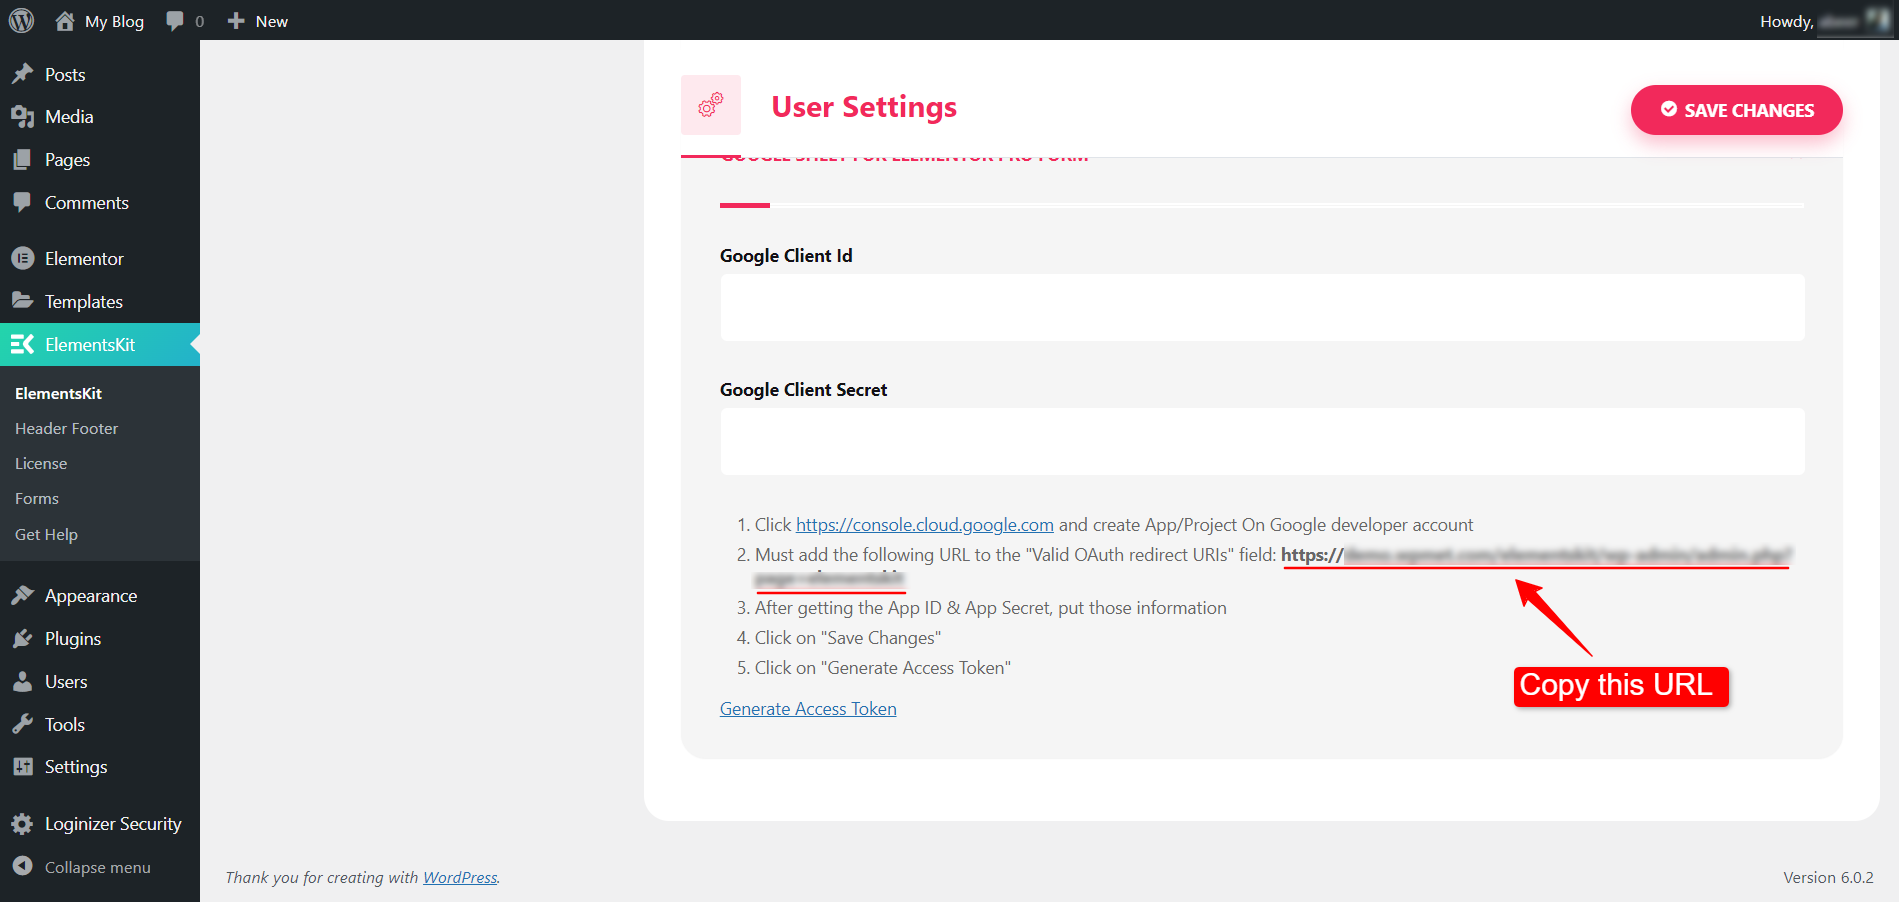
- Now you have to enter the Authorized redirect URL. You will get the URL from the ElementsKit plugin. For that, navigate to your WordPress dashboard > ElementsKit > Settings > Google Sheet For Elementor Pro Form and copy the “Valid OAuth redirect URL”.
- After copying the URL, go back to the credential page of your project dashboard on the Google cloud console and enter the Authorized redirect URL and click on the CREATE button to complete this procedure.
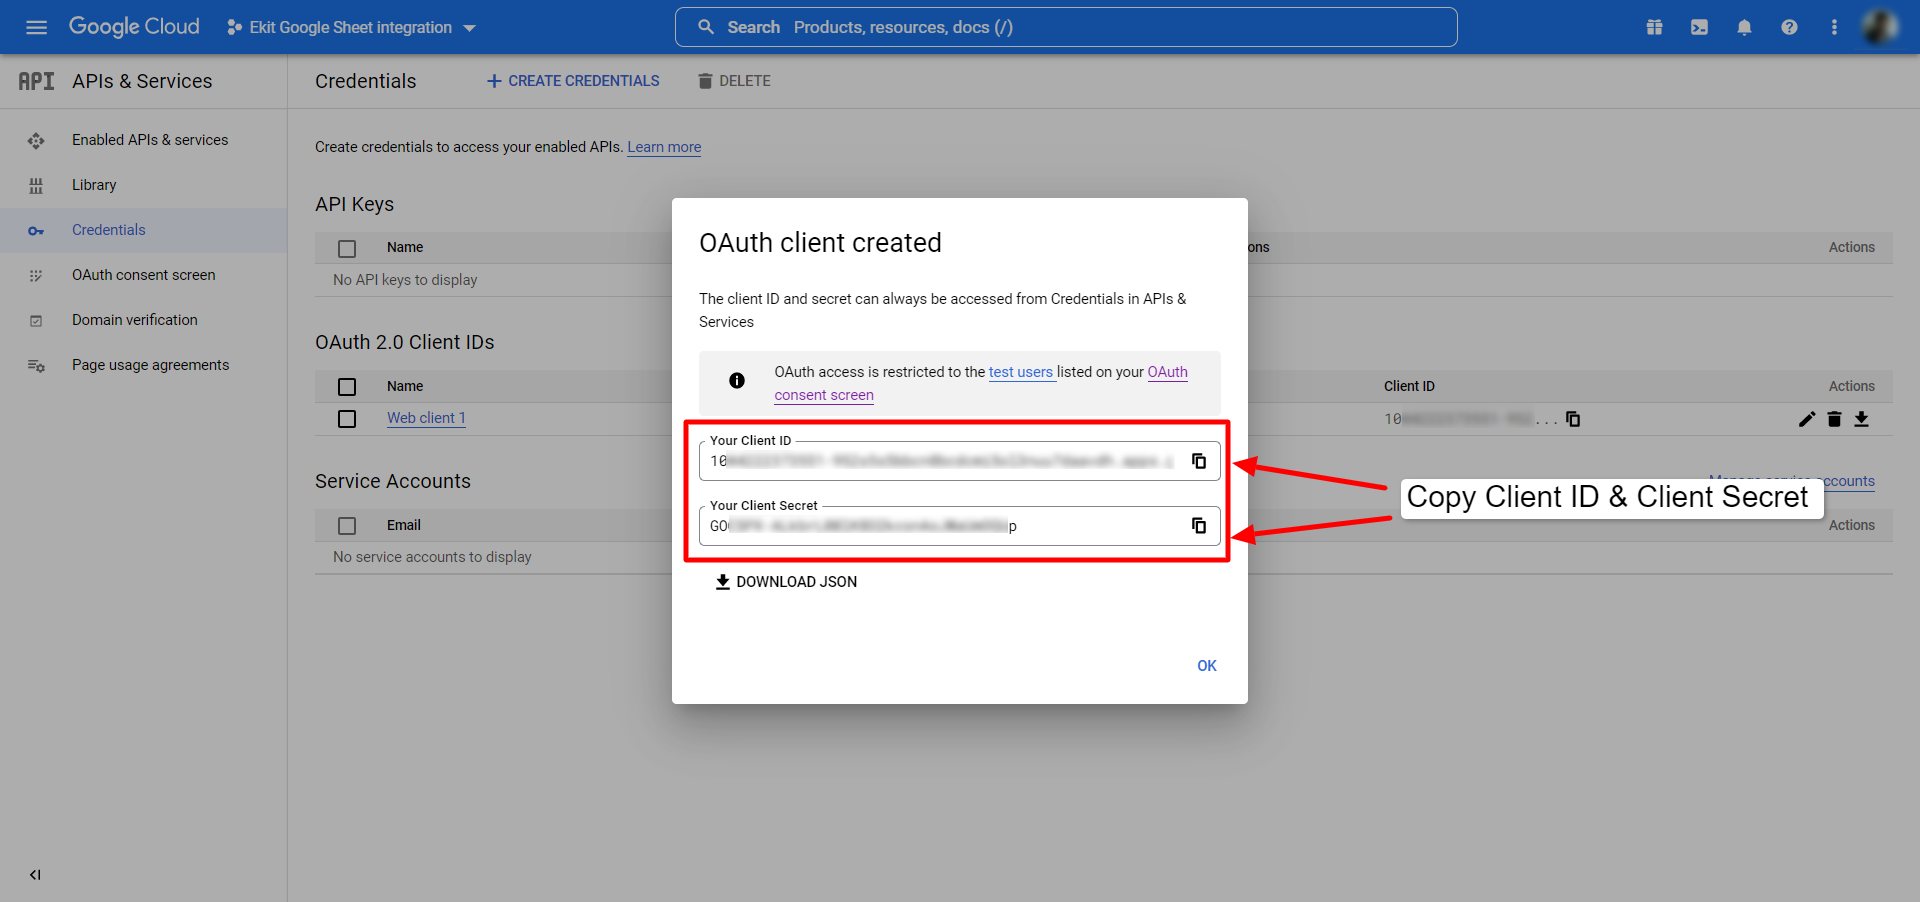
- Now OAuth client is created and a popup screen will appear where you will get Your Client ID and Your Client Secret. Copy those credentials and proceed to the next step.
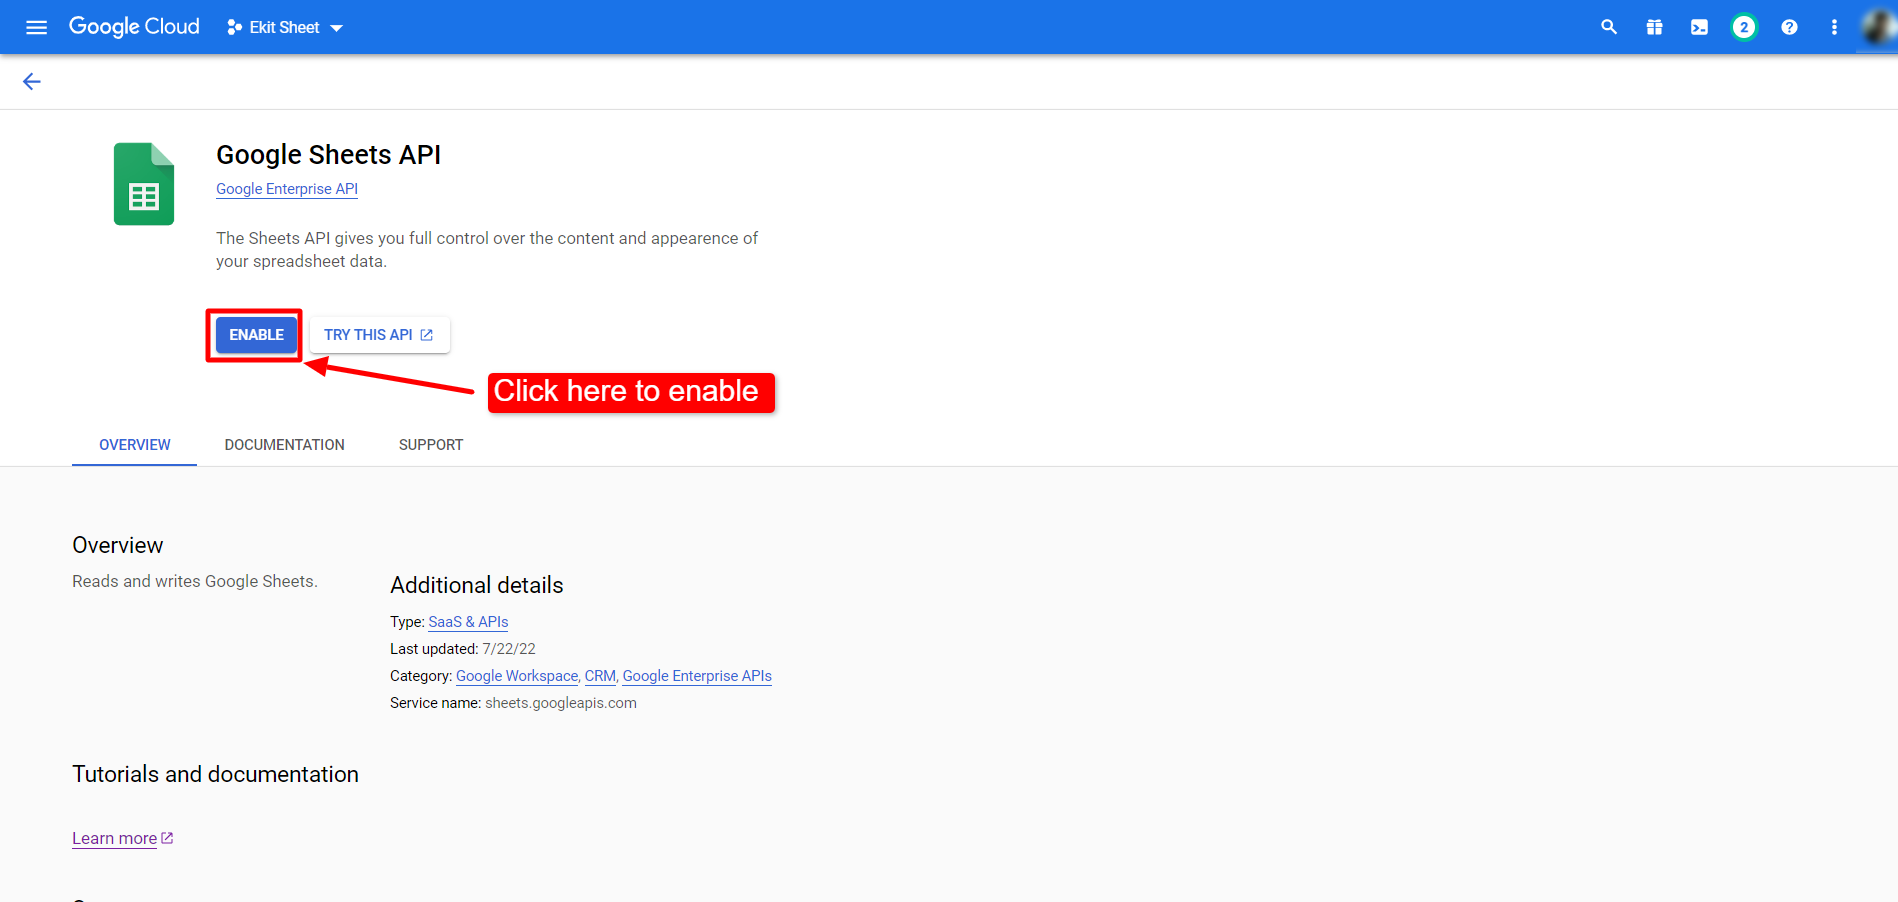
Step 3: Enable Google Sheets API #
Before proceeding ahead, you need to enable Google Sheets API. To enable it,
- Go to the API Library of your Google cloud console.
- Search for Google Sheets API.
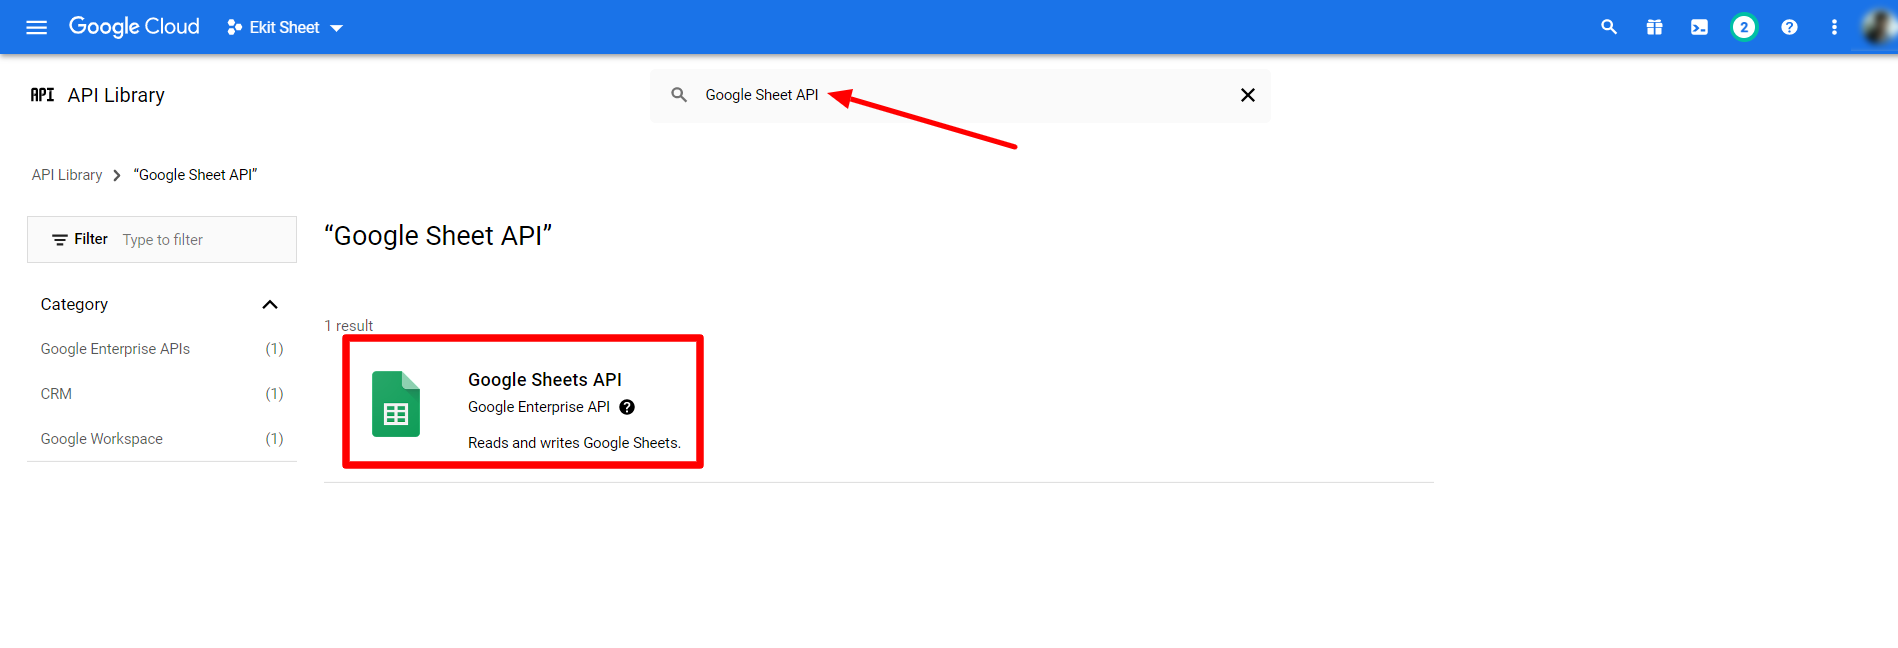
- Open the Google Sheets API page and click on the ENABLE button.
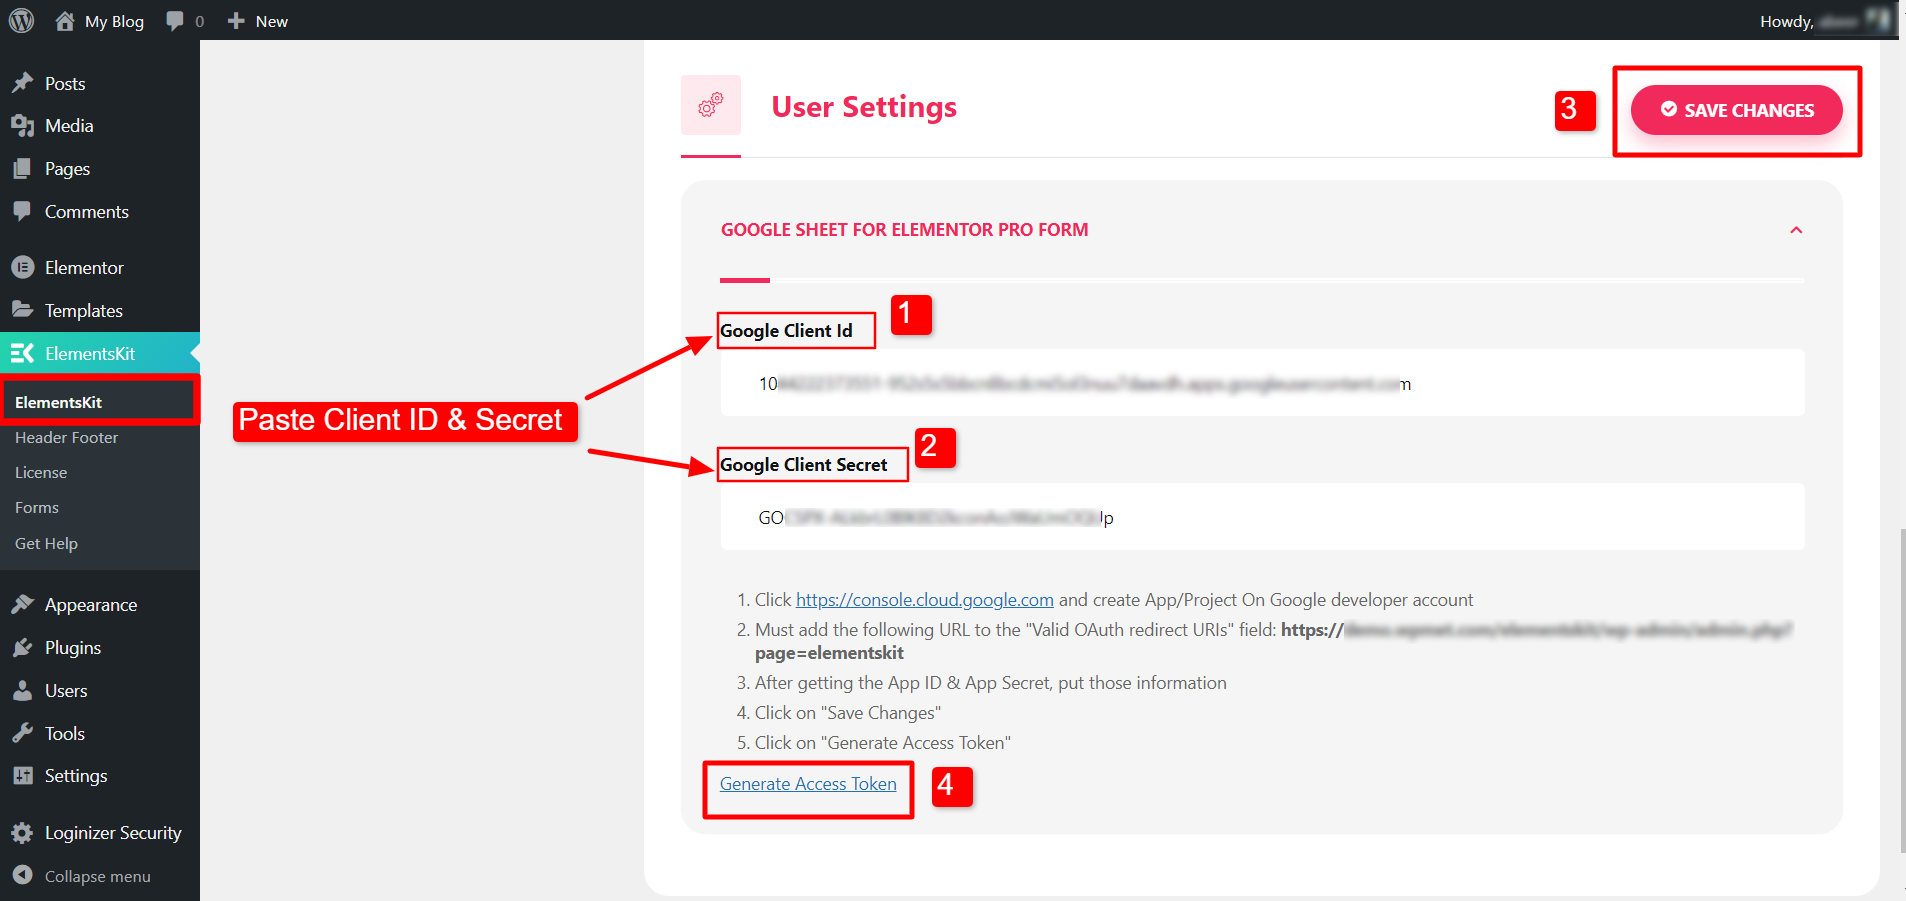
Step 4: Verify with App Credentials #
After creating the App Credentials, go to your WordPress dashboard. Then,
- Navigate to ElementsKit > User Settings.

- Open the options for Google Sheet For Elementor Pro Form.
- Paste the Google Client ID and Google Client Secret on the respective field. (These are the credentials you have created and copied in at the end of Step 2).
- Hit the SAVE CHANGES button.
- Then click on the Generate Access Token.
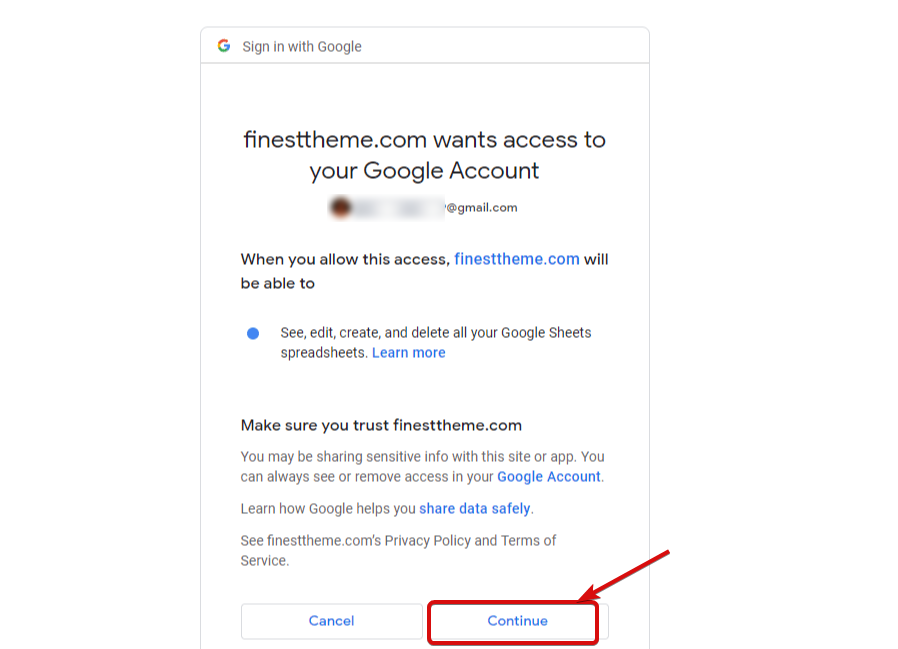
Once you click on the Generate Access token, you will have to log in with your Google account and continue. After login, a screen will appear where it says, “Google has not verified this app”. Don’t worry and just click on go to unsafe mode.
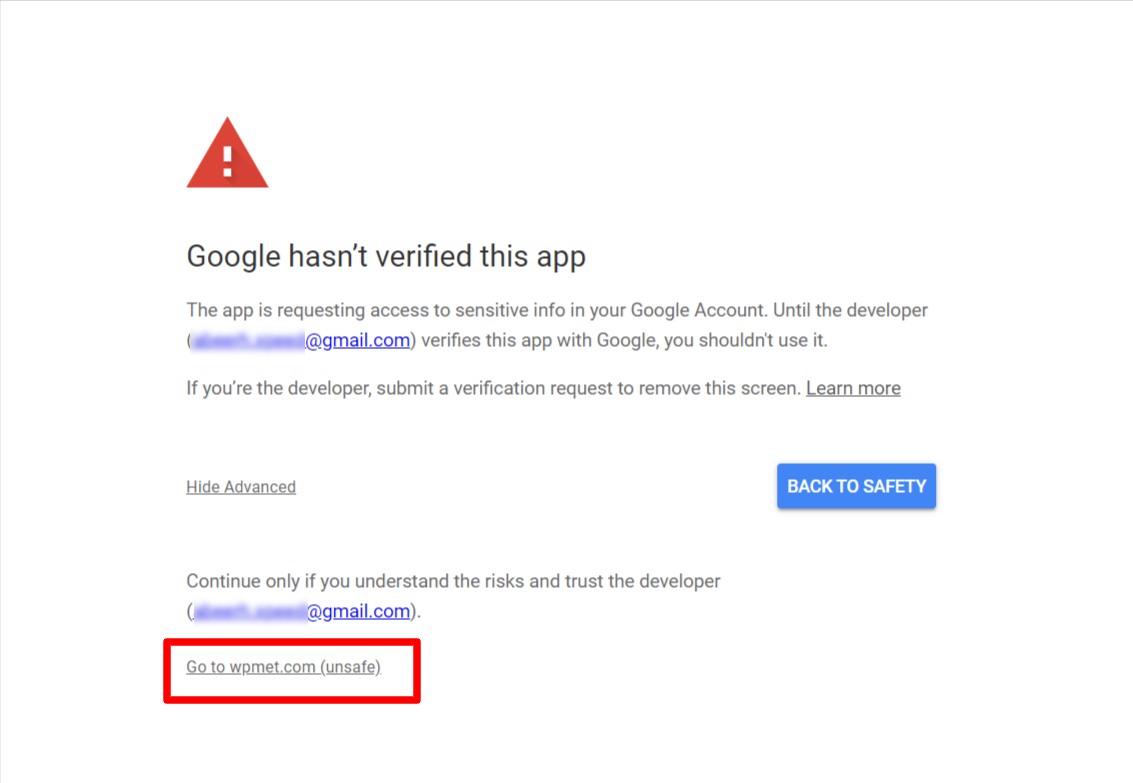
After that, click on Continue to confirm the access.
Step 5: Export data from Elementor form to Google Sheet #
- Open a page with Elementor editor.
- Drag & Drop the Elementor Pro Form widget to the page.
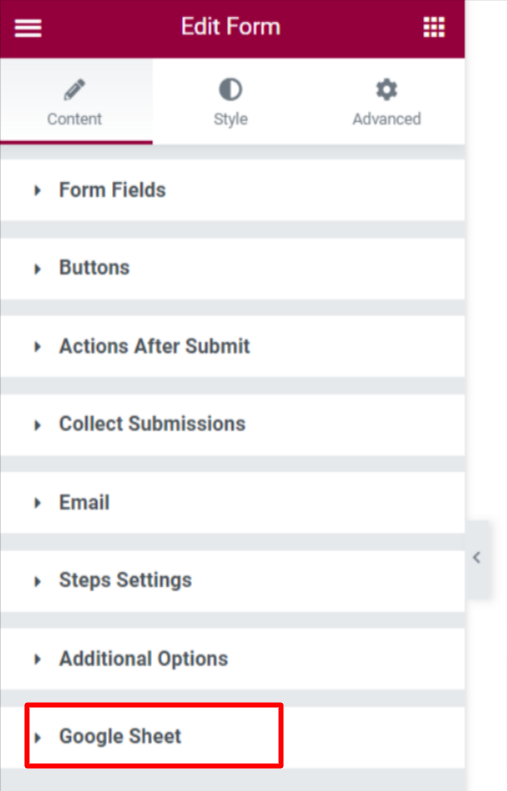
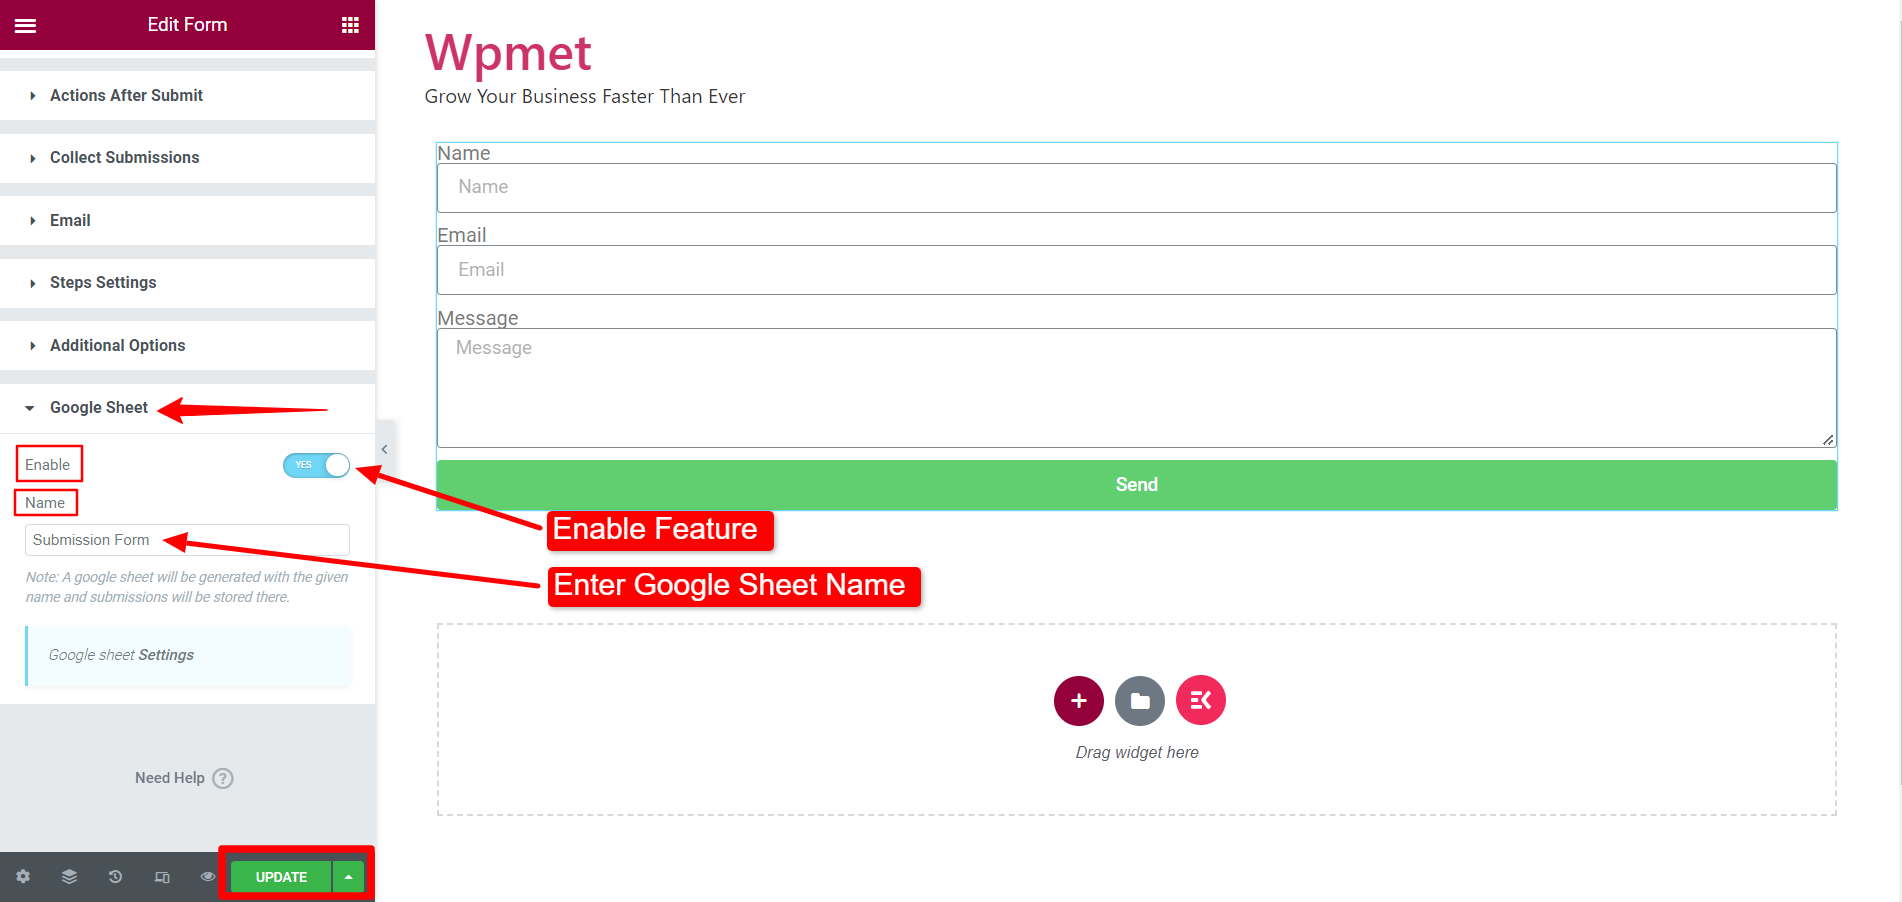
- Find the Google Sheet section under the Content tab.
- Enable the feature.
- Enter a Sheet Name.
- Click on the Update button.
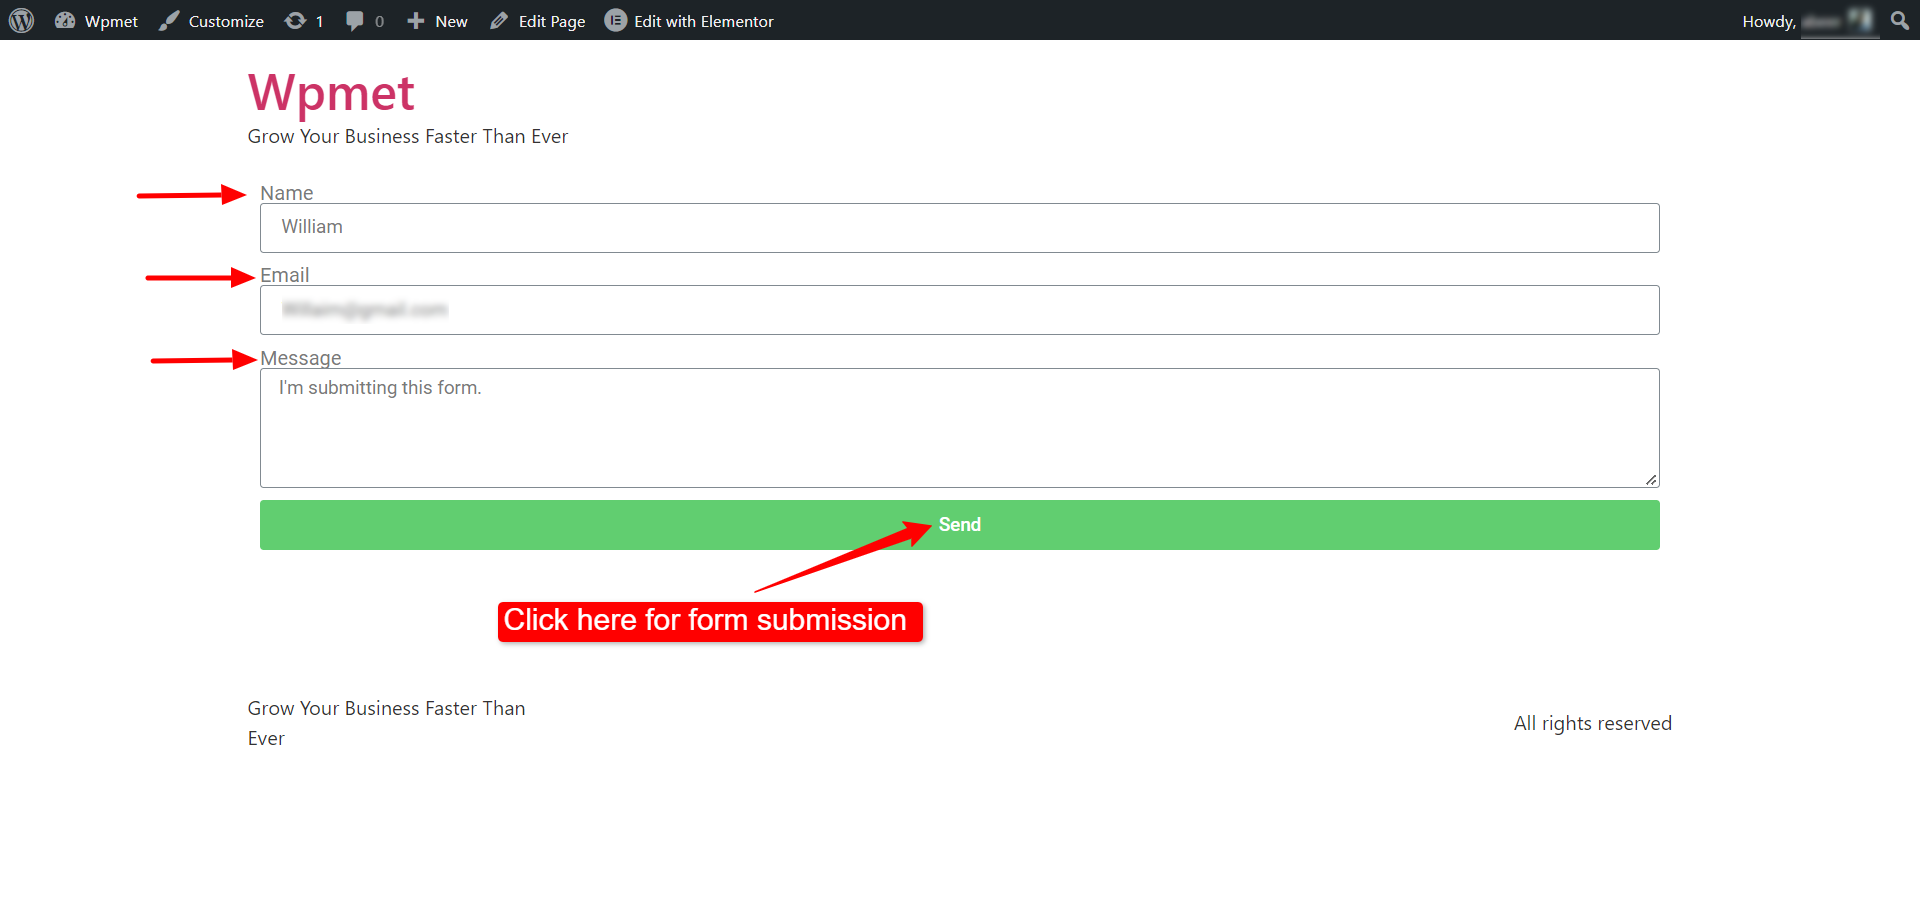
After that open the form in preview and submit the form with the required information.
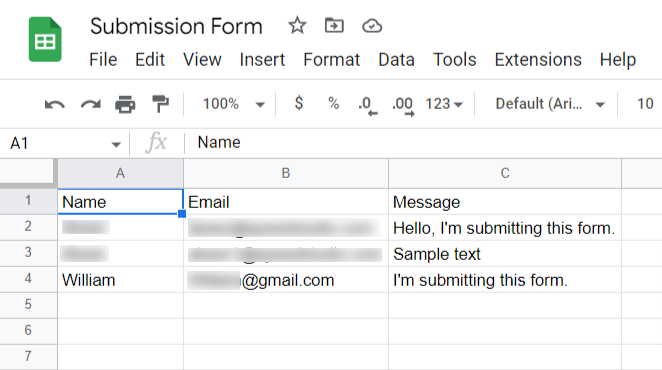
Now go to the Google Sheets menu and find the form name you entered earlier.

Finally, open the sheet file, and you’ll see the data you have submitted with the Elementor form added to the Google Sheet.