Get Started #
Metform lets you create a lengthy form with great ease. Now, create WordPress Multi-Step Forms easily by using any widgets.
Watch the video guide to add Elementor multi-step form:
Or, follow the step by step instructions below to add a WordPress multi-step form:
Prerequisite: #
To create a WordPress multi-step form, you need to have the following plugins installed in your WordPress site.
- Elementor: Download Plugin
- MetForm: Download Plugin
- MetForm Pro: Get the Plugin

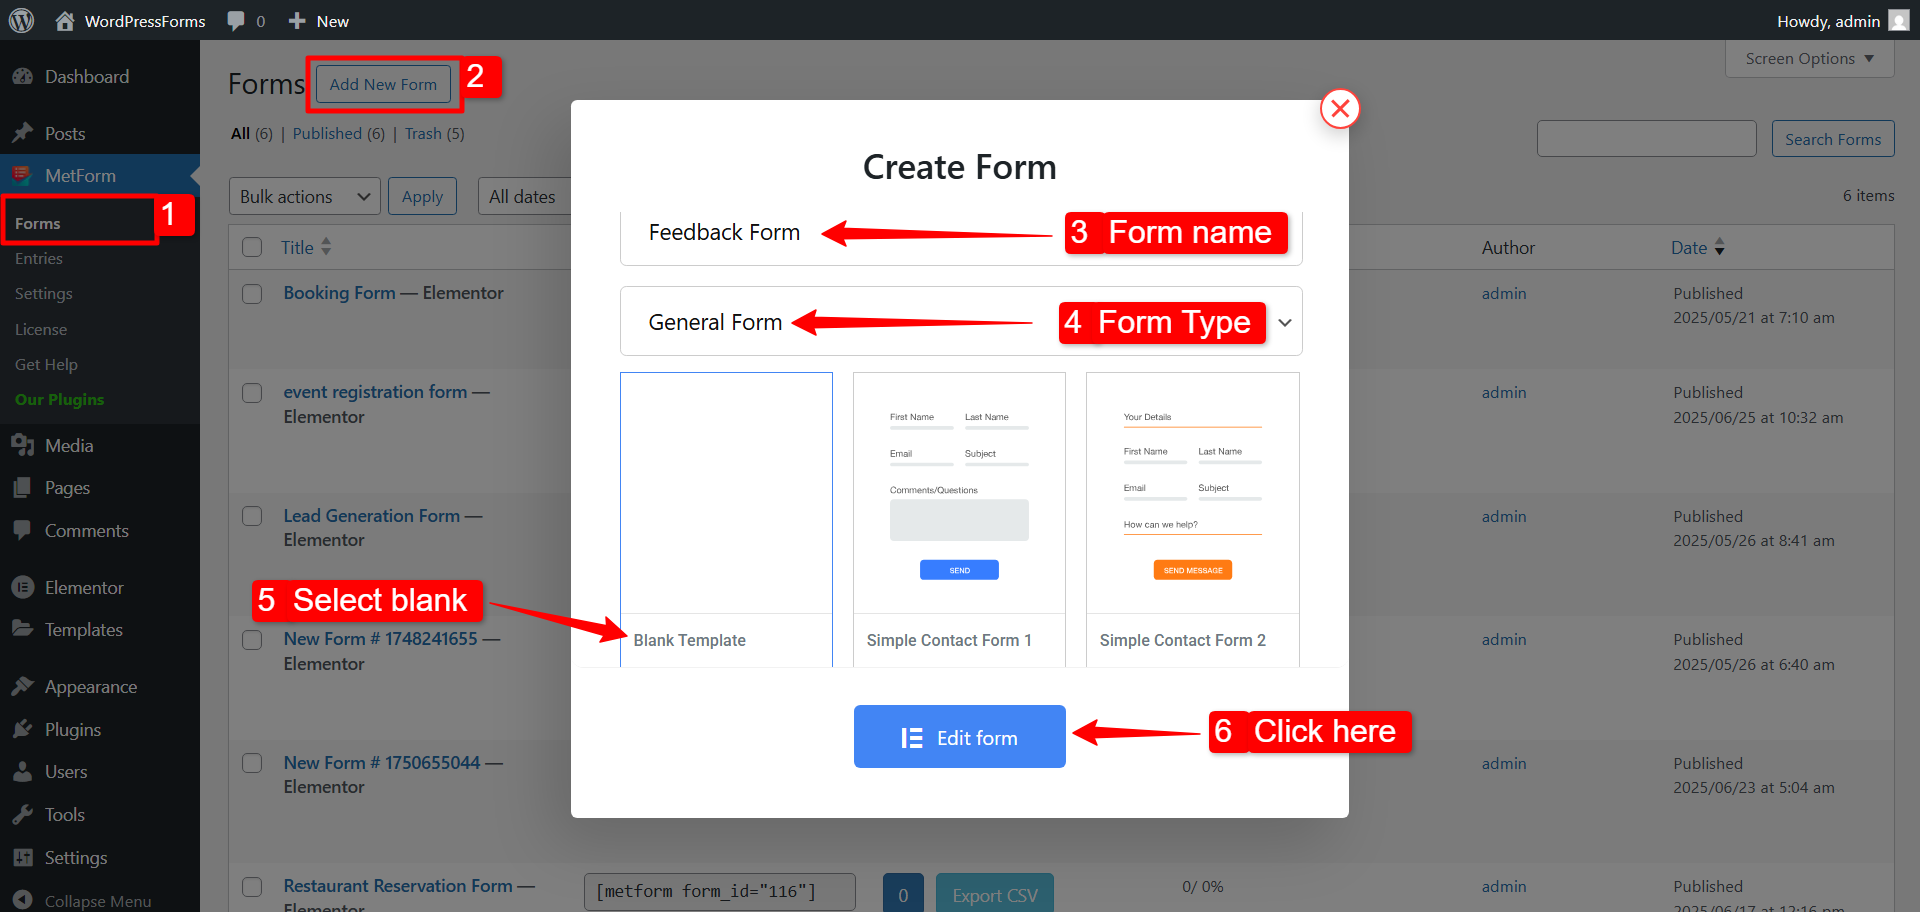
Step 1: Create a new form with MetForm #
To create a new WordPress form with MetForm:
- Go to MetForm → Forms in your WordPress dashboard.
- Click on the Add New Form button at the top right corner. A pop-up window will appear.
- In that window, add a name for the form.
- Set the form type to General Form.
- Select the blank template.
- Finally, click on the Edit Form button.
Now you will be redirected to the Elementor editor, where you can start designing your WordPress multi-step form.
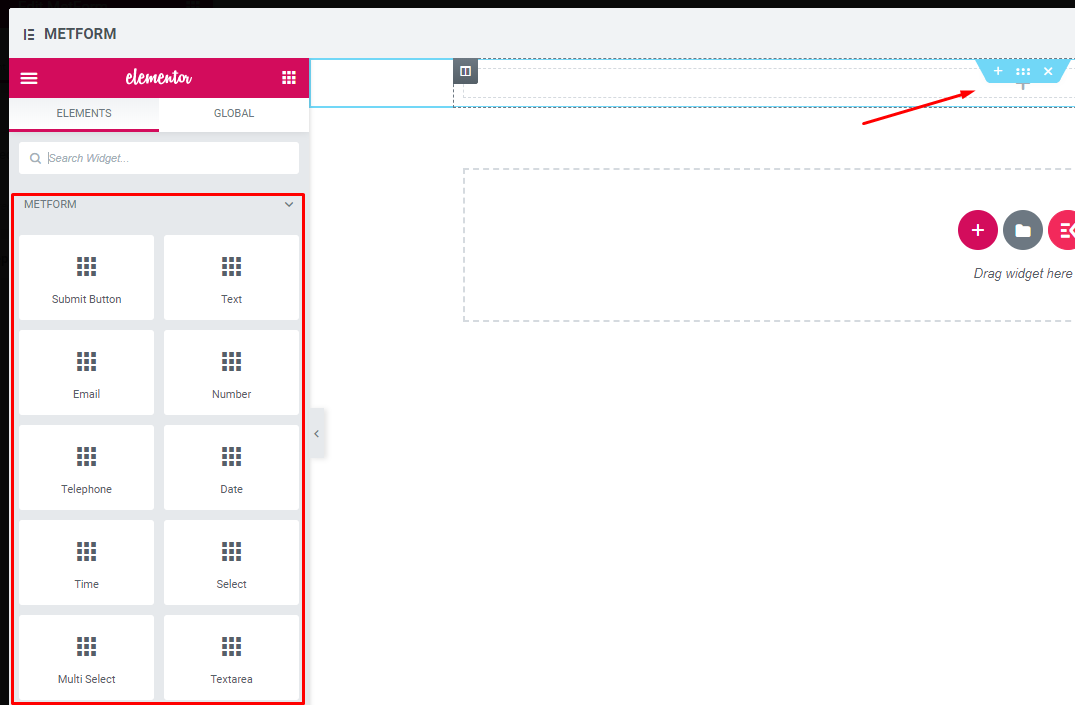
Step 2: Design WordPress multi-step form in Elmentor editor #
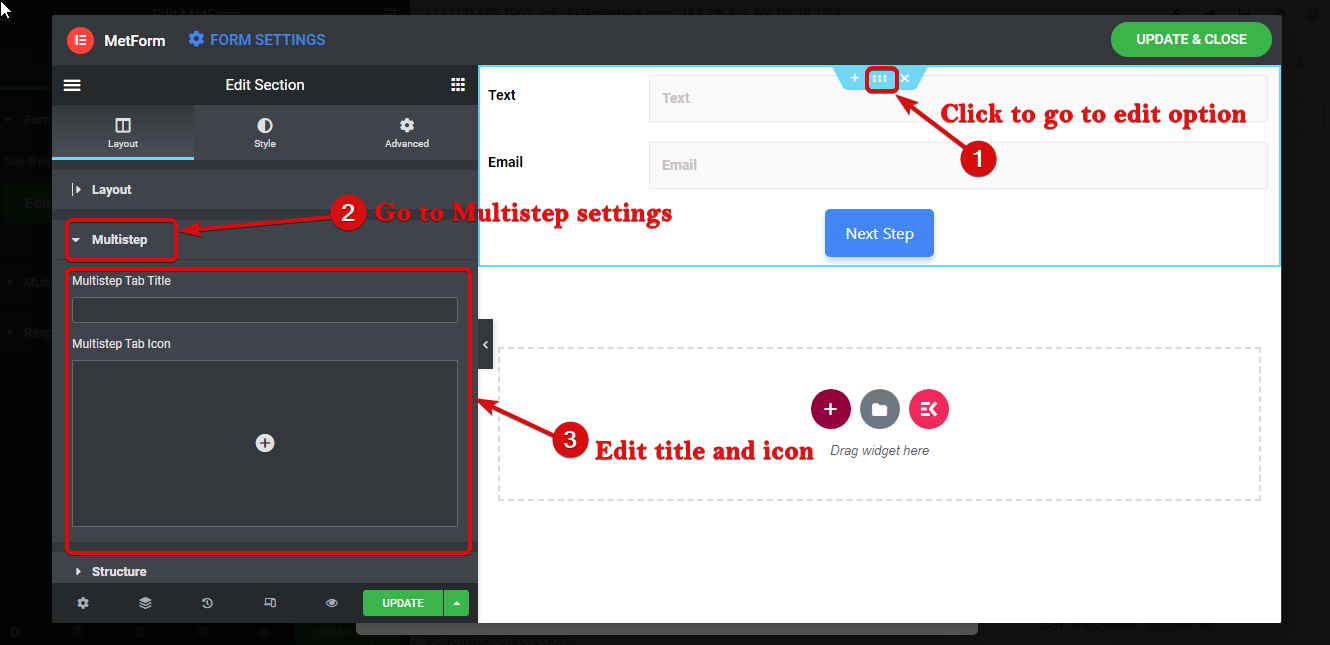
In the Elementor editor, click the ‘Plus’ sign button to add a new section.

Now build your Form using any widgets
Drag and drop the Next Step button widget.
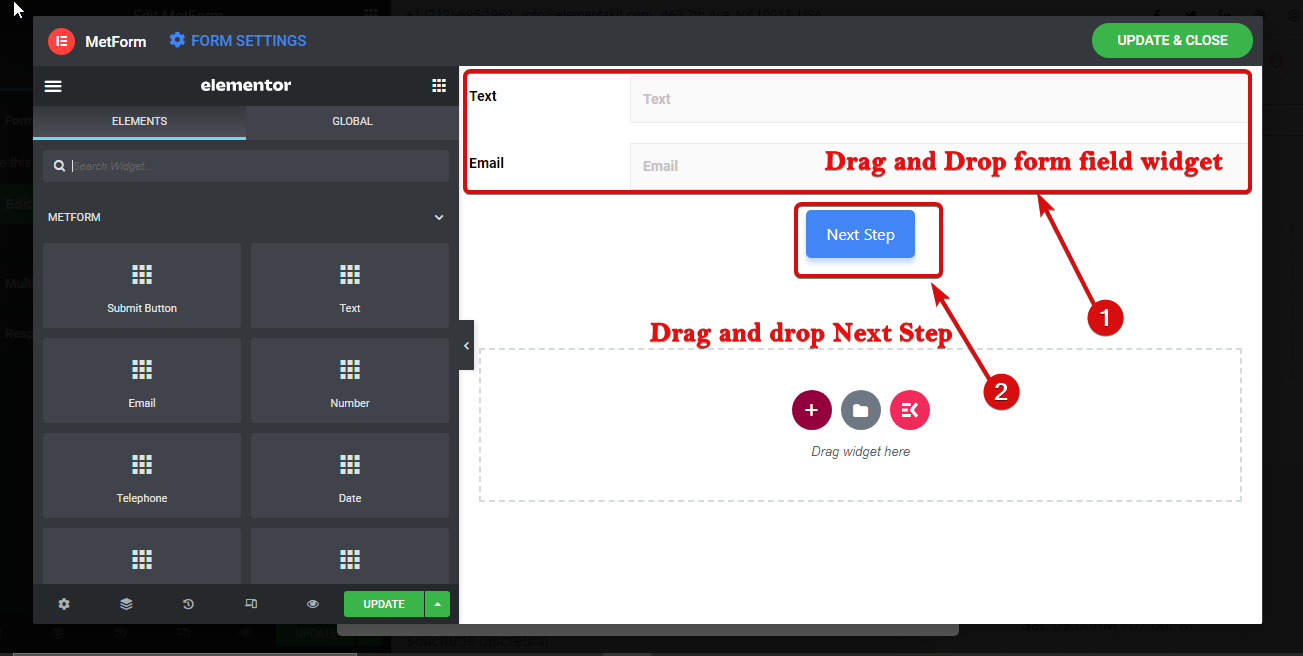
To name the section. Click on the six dots to go to the settings of the section. Then go to layout ⇒ multistep. Here change the multi-step tab title and add an icon if you want. You can add an icon from the library or upload a new one.
Step 3: Add new section for the secon step of the form #
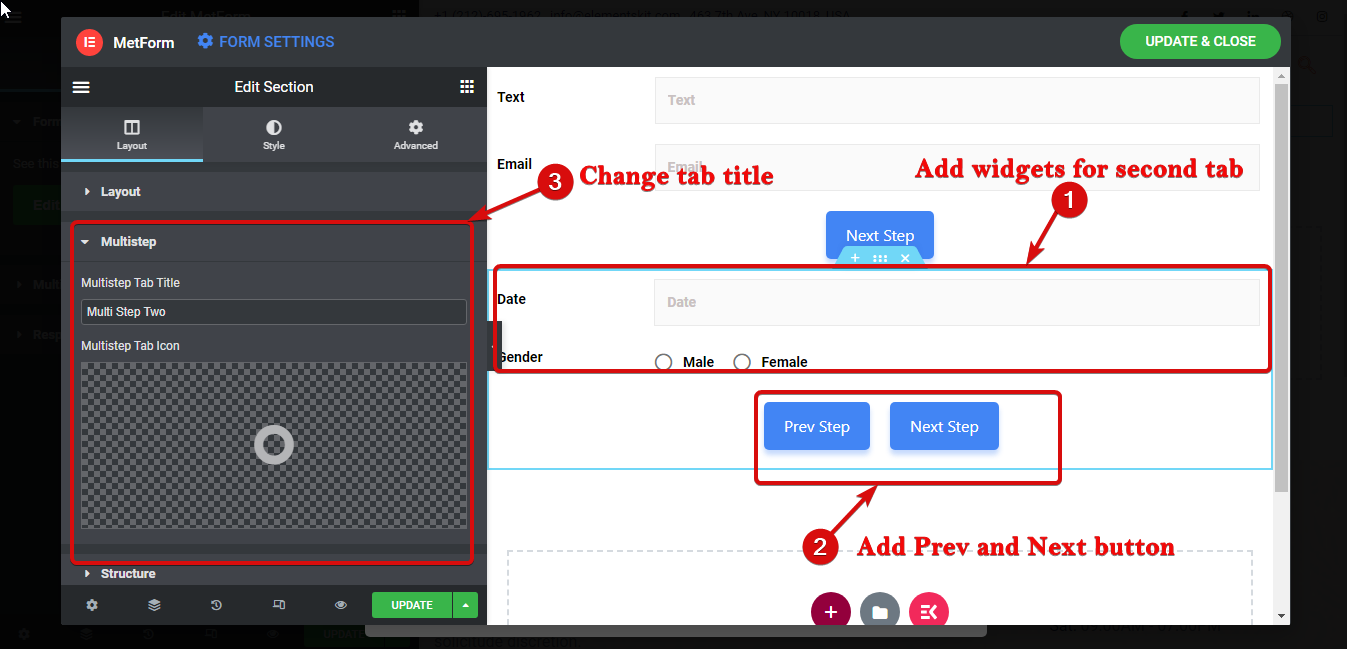
To add a new step/ phase of the form again take a new section by clicking on the + sign.
Note: Remember, you need to start a new section (not the inner section) for a new tab/step of the form.

Now drag and drop the widgets again to build your second step. After that add Prev and Next buttons. Then follow step 7 to give a proper name and icon to this section/tab.
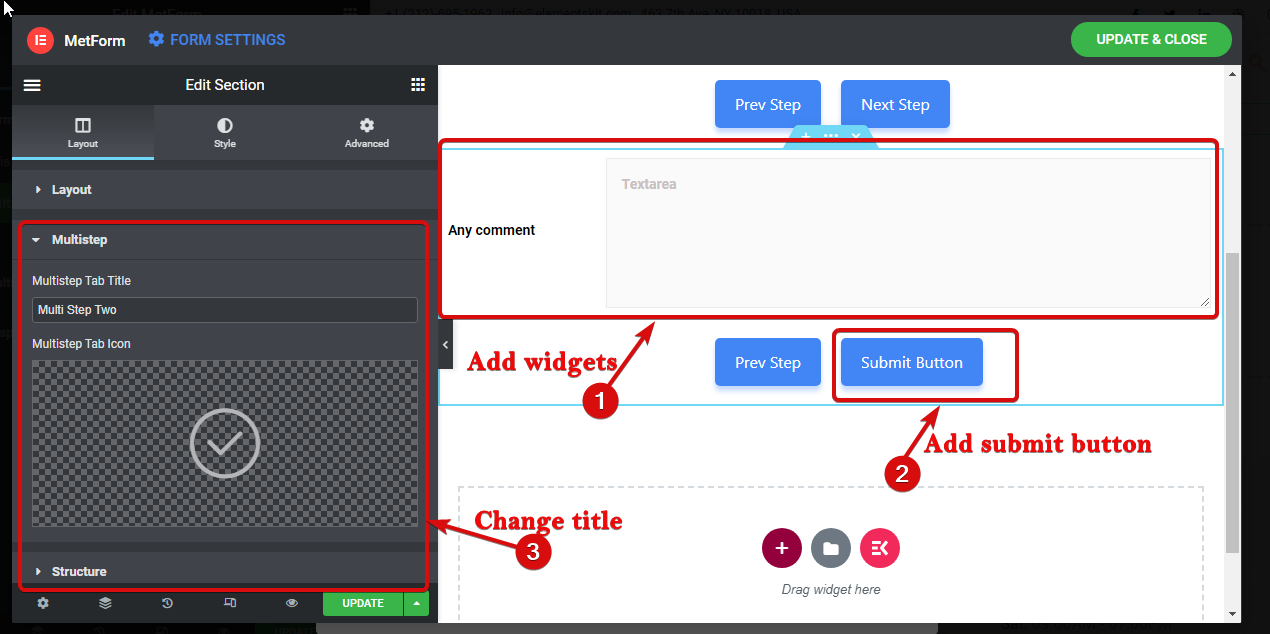
Step 4: Complete deisinging the multi-step form #
Repeat the step 4 to create another step of the form. But this time add submit button instead of Next to complete Elementor multi-step form.
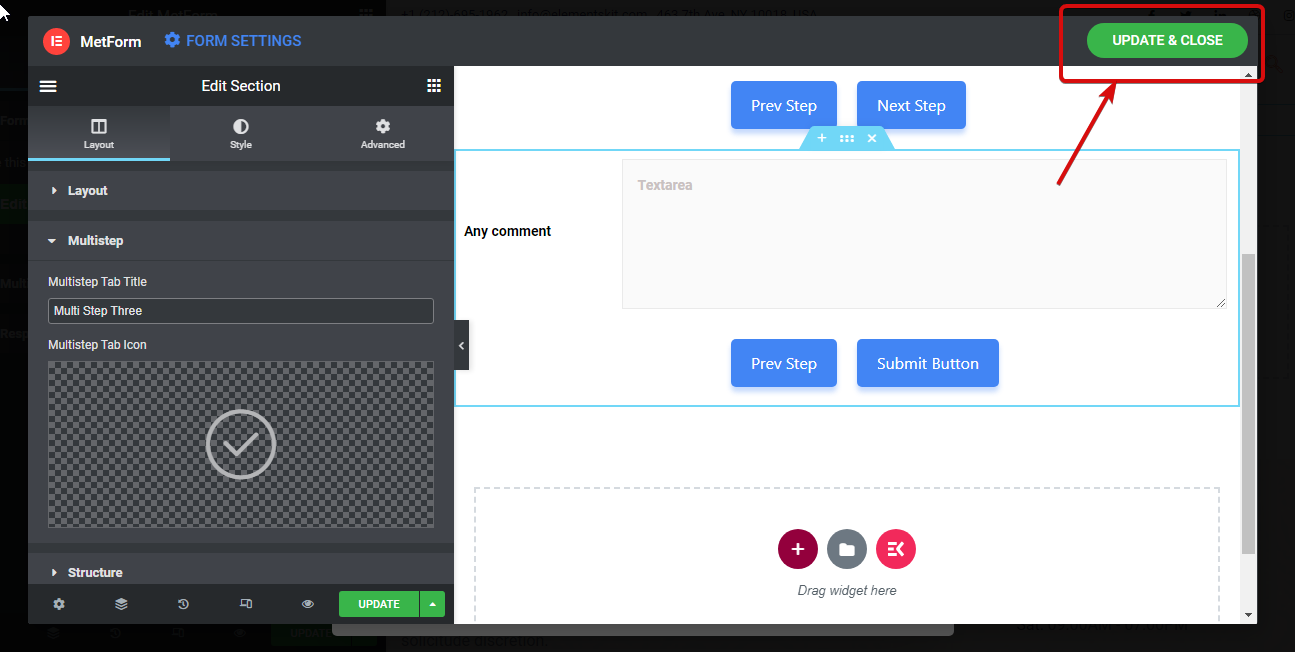
Finally, click on update and close to save the multi-step form design and go back to settings.
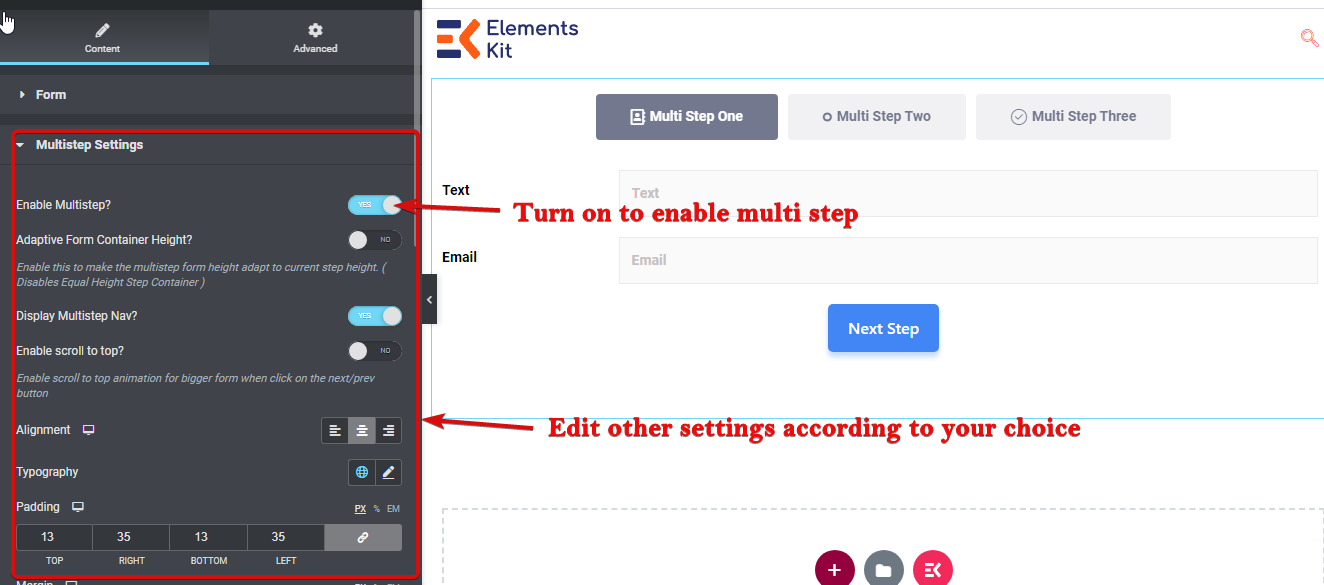
Step 5: Configure WordPress multi-step form settings #
Now it’s time to turn on the multi-step feature. To do that, go to Content ⇒ multistep settings and edit the following settings:
- Enable Multistep: Turn this option on to enable the multistep option.
- Adaptive Form Container Height: This option will enable the form to take the height of the current step.
- Display Multistep Nav: You can disable this option in case you don’t want to show the nav option on the top.
- Enable scroll to the top: Turn this option on to have a scroll to the top option.
- Alignment: Here you can set the alignment of the multi-step nav to left, right, or center.
- Typography: You can change the family, weight, transform, line height, etc for the multi-step.
- Padding: Set the left, right, top, and bottom padding for the multi-step form.
- Margin: Adjust the left, right, top, and bottom padding for the multi-step form.
- Text
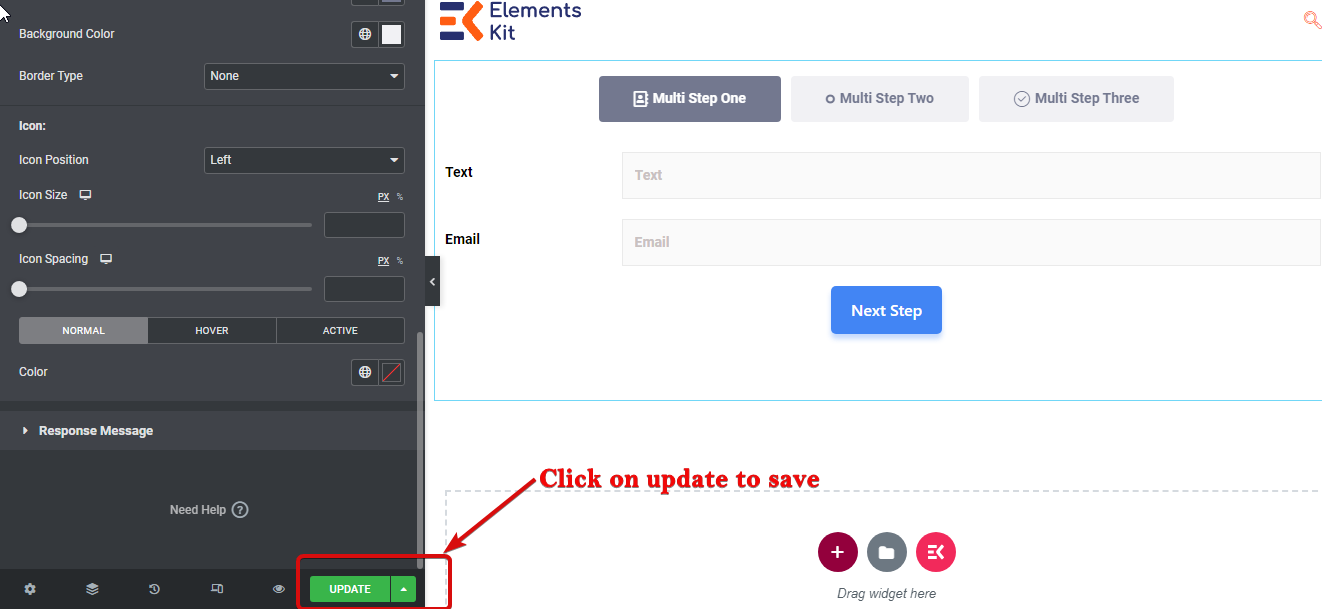
- Normal: Here you can edit the Color, Background Color, Border Type, Icon size, icon spacing, and icon size for the normal mode.
- Active: Choose the Color, Background Color, Border Type, Icon size, icon spacing, and icon size for the Active mode.
- Hover: Edit the Color, Background Color, Border Type, Icon size, icon spacing, and icon size for the hover mode.
Finally, click on update to save the form with this free WordPress multistep form plugin.
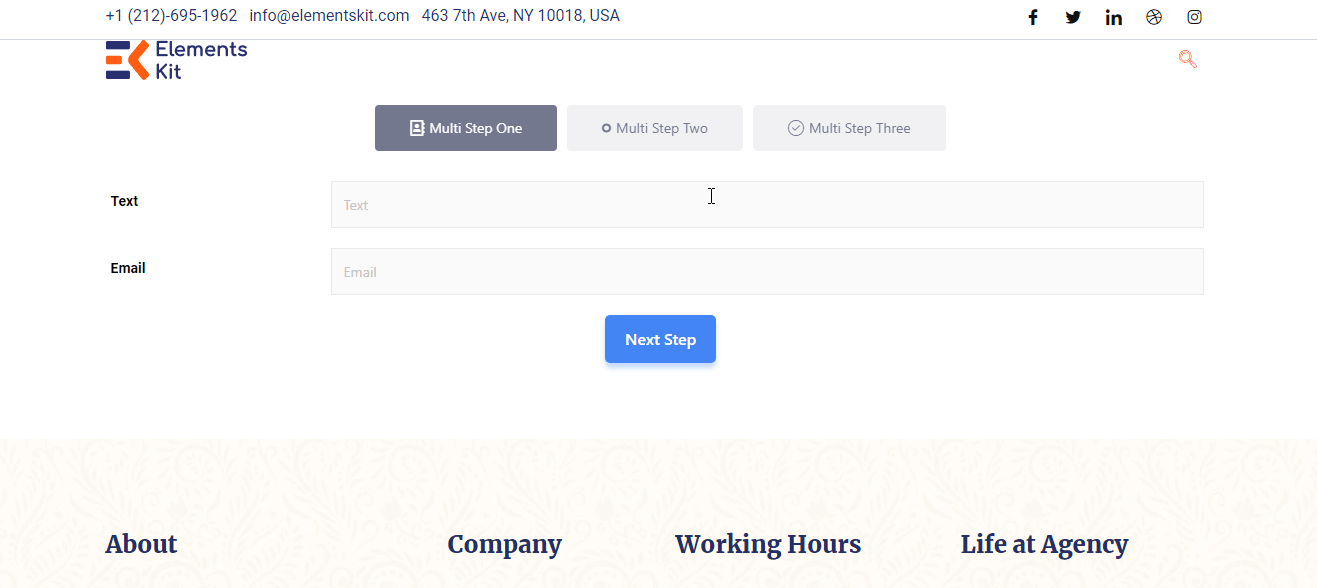
Here is a created multi-step form example by Metfrom: