With the ShopEngine Advanced Coupon Module, you can set up coupons that will be only applicable to specific states of a country set by you. This shipping address will be considered for these advanced coupons.
To apply this conditional coupon, you will get two new options (country and state) while creating a coupon on your WooCommerce site. You can set the country/states for which this coupon will be applicable.
Note: Click here to learn more about WooCommerce coupons.
How to use ShopEngine Advanced Coupon Module #
Learn how to use ShopEngine Advanced Coupon Module in just 4 simple steps.
Step 1: Enable ShopEngine Advanced Coupon Module #
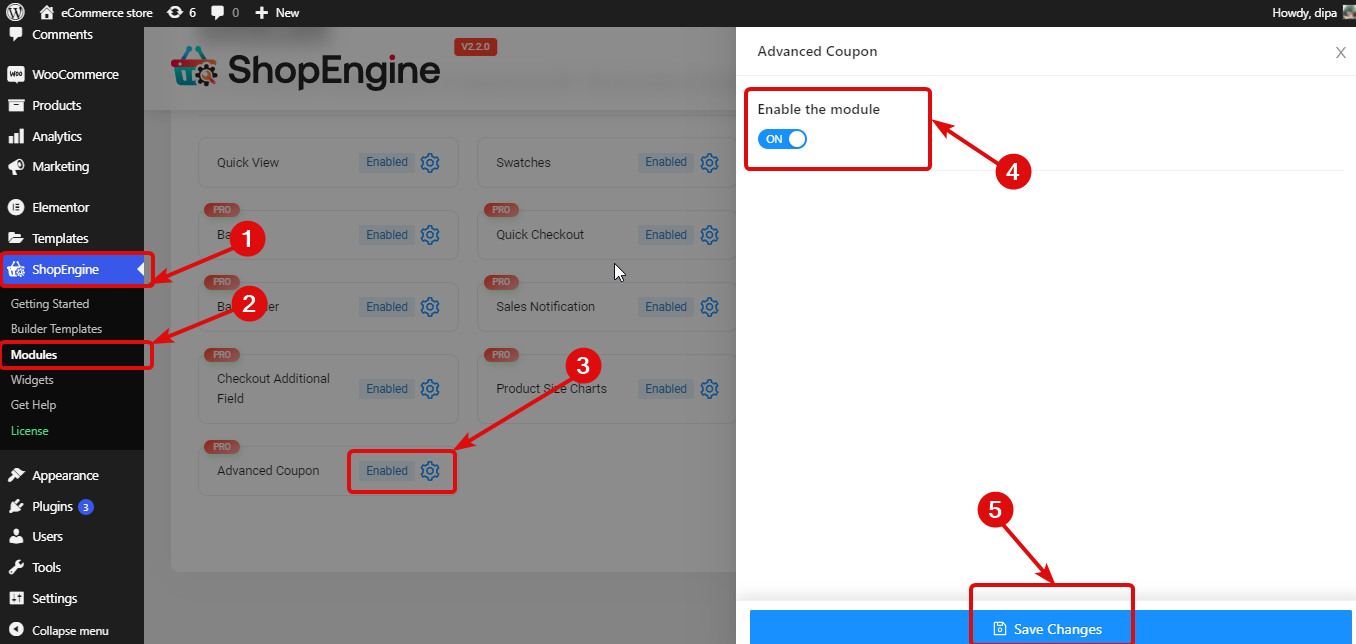
First, you need to turn on the module. To do so, navigate to ShopEngine ⇒ Modules ⇒Advanced Coupon. Then, click on the Settings Icon. Once the settings popup opens, turn on the toggle button of the Enable the module option.
Step 2: Create up a discount coupon #
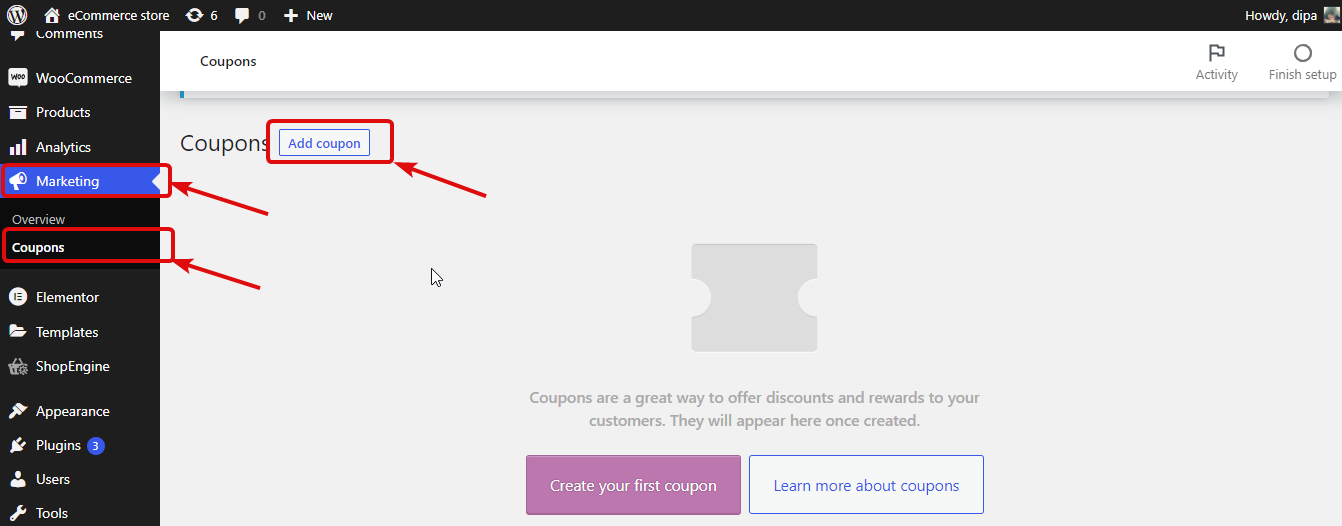
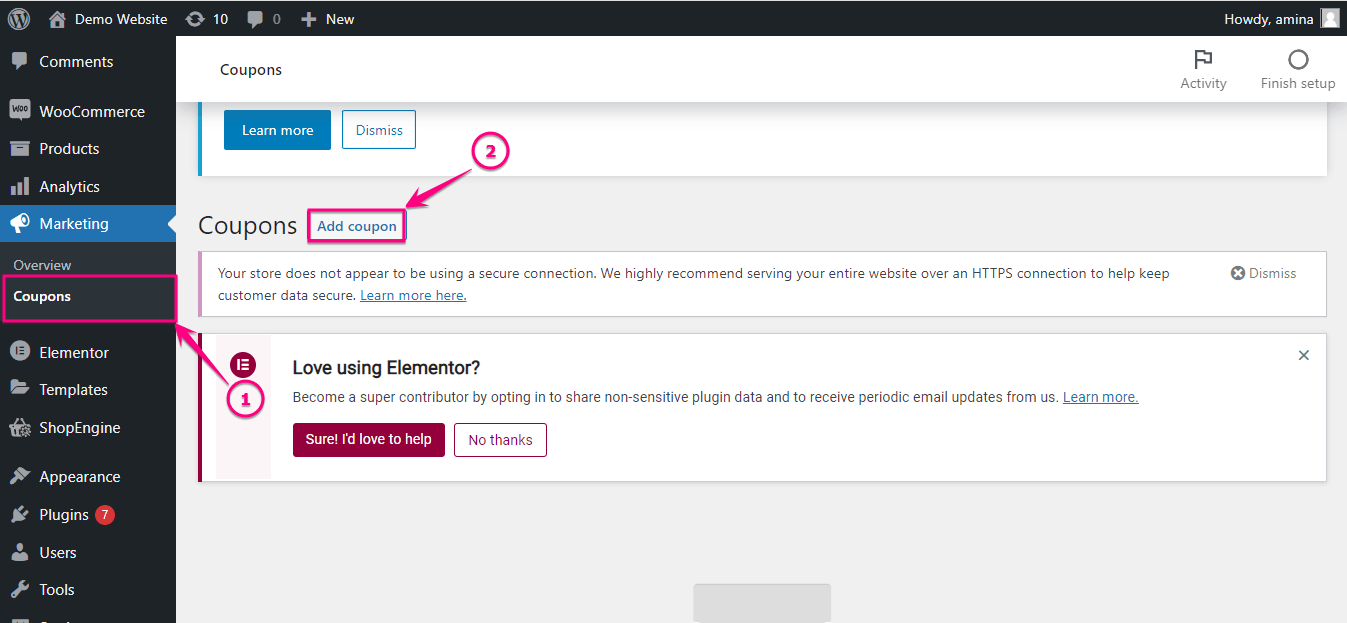
To create a Advanced Coupon, from the WordPress dashboard, go to Marketing ⇒ Coupons. Then click on the Add coupon.
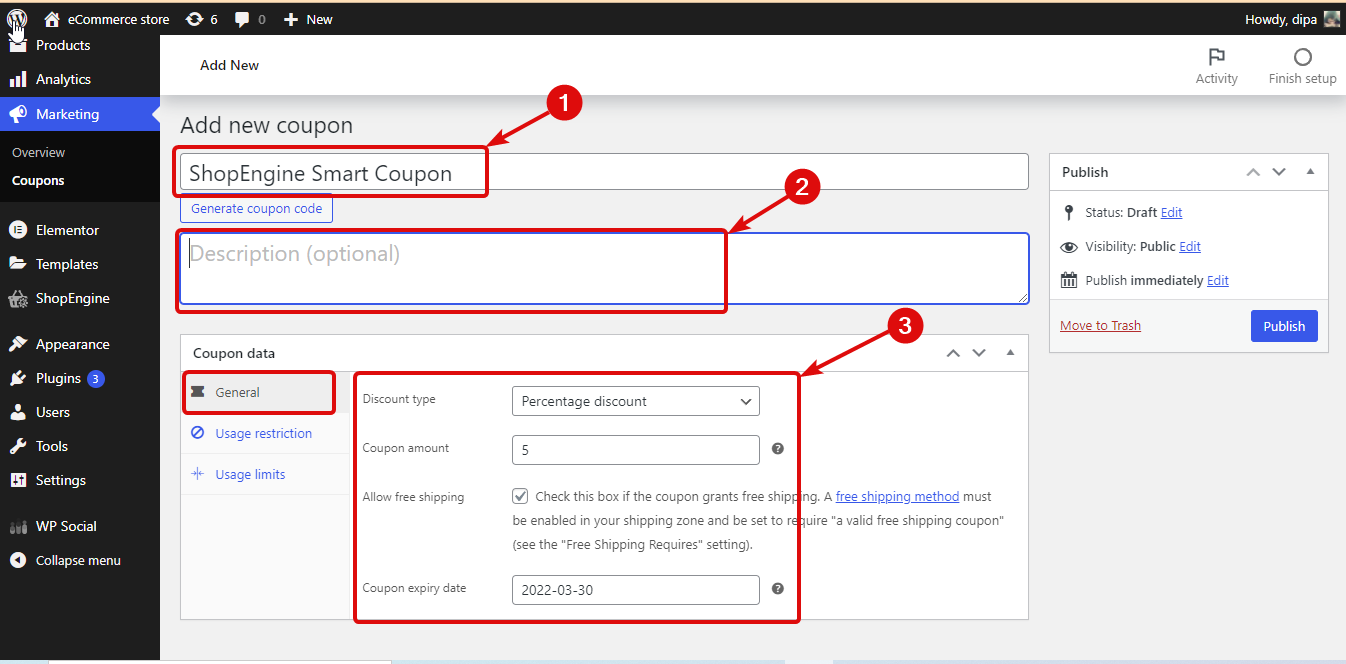
Now, provide a name and description (optional). Then under the Coupon data General tab, choose the Discount type, coupon amount. Check the Allow free shipping option if you want your customers to enjoy free shipping with this coupon. Finally set the coupon expiry date.
Step 3: Set up Advanced Coupon Settings #
Now, it’s time to add Advanced features to your coupon. To add that, move to the user Restrictions tab. Scroll down and you will find two new options added to the default WooCommerce coupon User restrictions settings. Here you can
- Allowed – Country / Region (optional): Select the country for which you want the coupon to be available.
- Allowed – State / Country (optional): Here you can specify different states of a country, only for which the coupon will be applicable. YOu can select multiple states. If there is no option to add states for a specific country, then the coupon will be applicable to the whole country location.
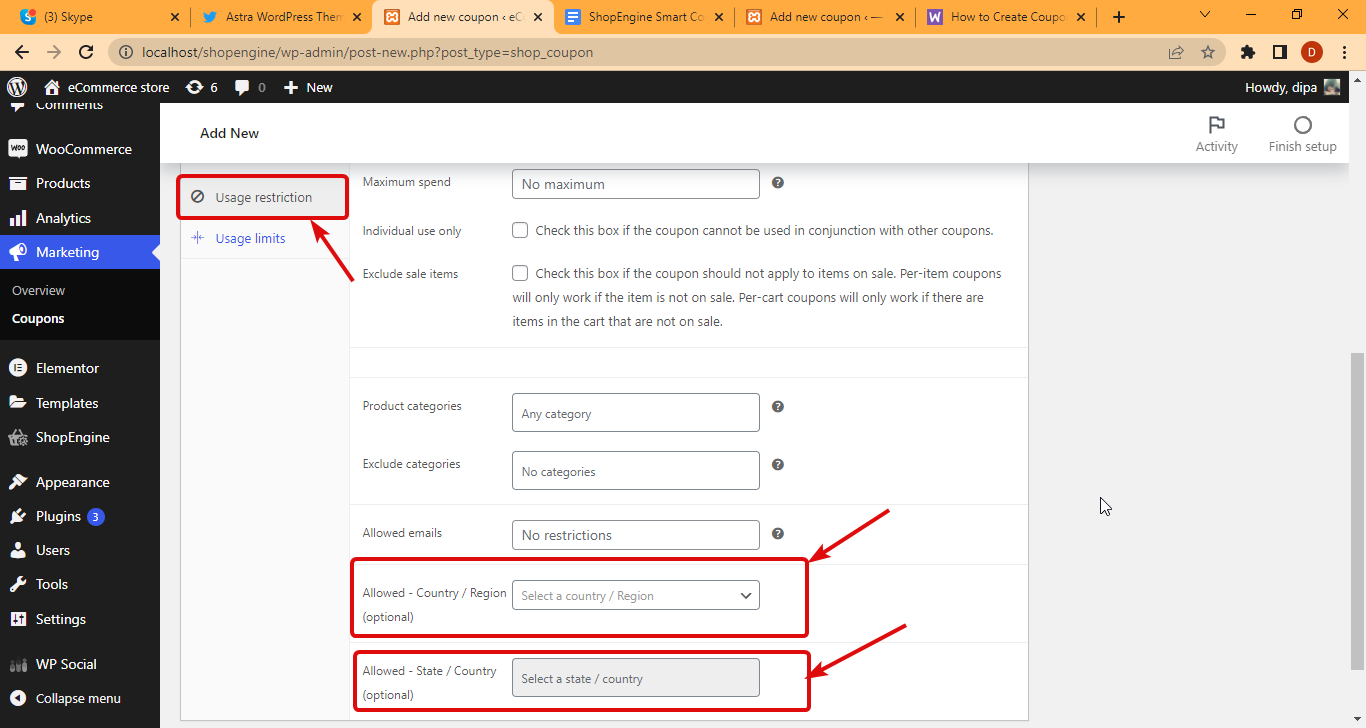
Note: The county and state of your order’s shipping address will be considered for a coupon if your shipping address is different from your billing address.
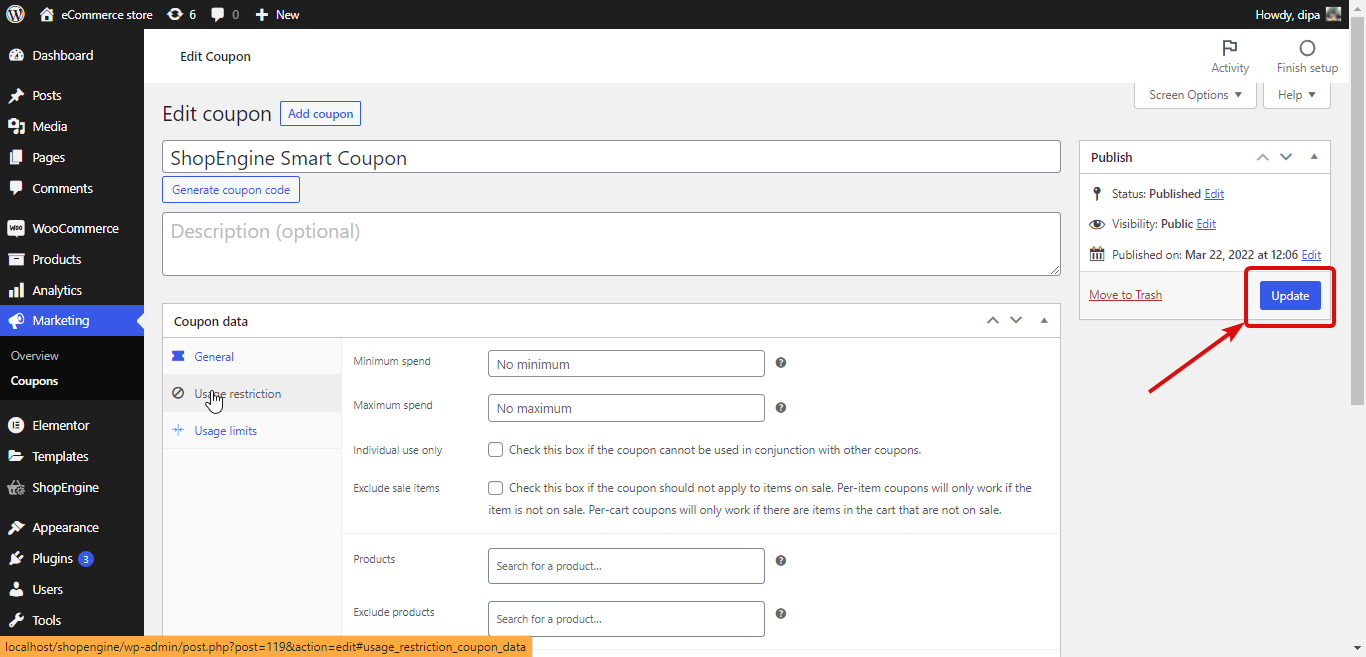
Step 4: Publish to activate Advanced Coupon by ShopEngine #
Once you have all the information, scroll up and click on publish to save and make the coupon available for users.
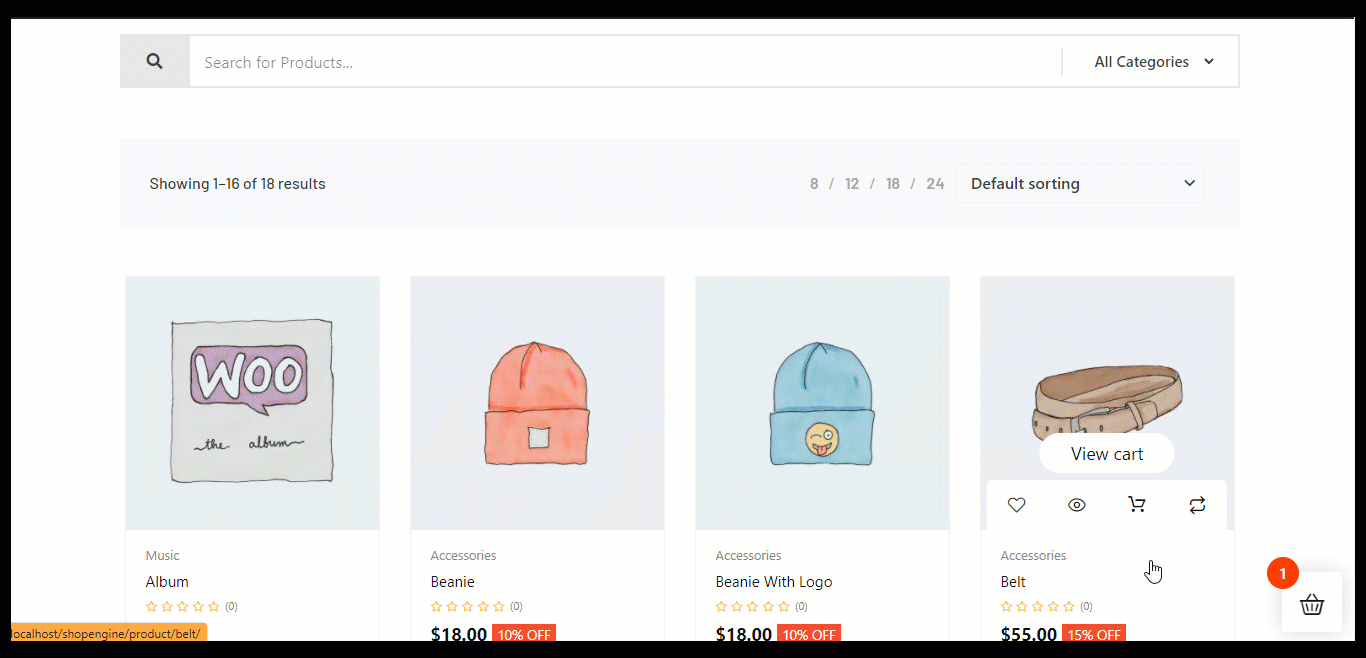
Final Preview of ShopEngine Advanced Coupon #
Now, from the front end, if you try to apply the coupon code with a shipping address that is not allowed in the settings, the system will show up a notice.
How to add Bulk coupons using the Advanced coupon module #
A Bulk coupon allows you to create multiple numbers of coupons at once to fulfill marketing goals efficiently and effectively. You can apply these created coupons to your potential customers. There are some benefits of using a Bulk coupon such as your time will be saved as you don’t need to create coupon codes individually. Now with ShopEngine, you can create a massive number of coupons just within a few seconds. So, let’s see how it works:
Step One: Enable the advanced coupon module. #
First, to add bulk coupons, you have to enable the Advanced coupon module of ShopEngine. After that, you can enjoy the bulk coupon option of ShopEngine.
Step two: Add multiple coupons using the Bulk coupon feature of ShopEngine. #
After enabling the Advanced module, you need to create multiple coupons. To do that, go to Marketing>> Coupons and click the “Add coupon” button.
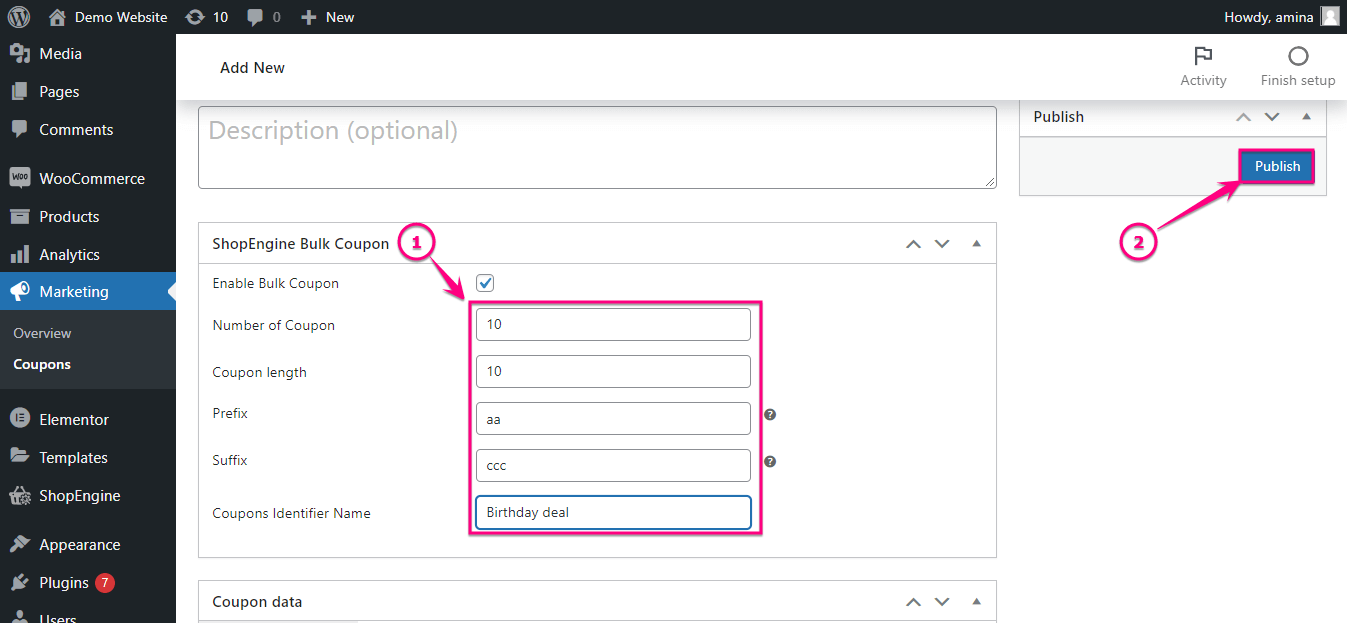
After that, enable the Bulk coupon.

Now, you need to fill in the following fields to create multiple coupons:
- Number of Coupon: Enter the number of coupons, you want to create with the bulk coupon feature of ShopEngine.
- Coupon length: Add the length of your coupon.
- Prefix: Type down the Prefix for your coupon.
- Suffix: Like Prefix you need to add Suffix. But one thing to note is that Prefix length+ Suffix length is equal to or less than X (X denotes Coupon length-5). For example, if you select coupon length 10 then your Prefix and Suffix length must not be more than 5.
- Coupons Identifier Name: Give a name here. By doing this, all of your created coupons will be under this group.
After that, click the publish button.
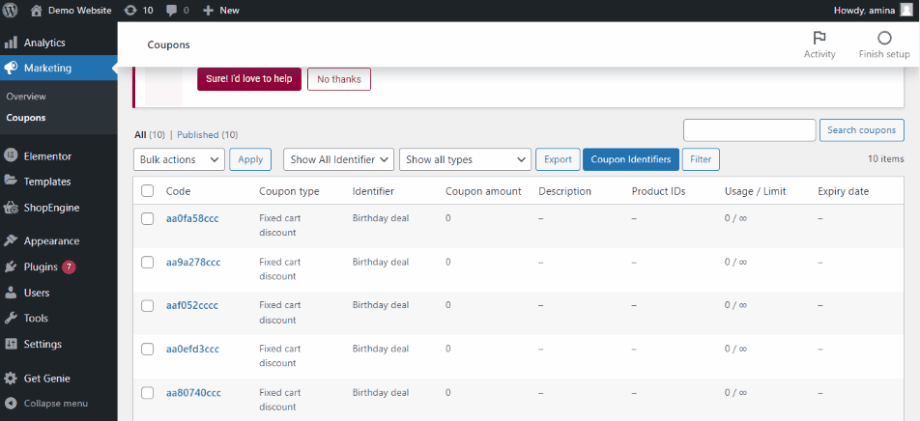
Here are your created multiple coupons. From here you can edit coupons by clicking the edit option and you can also export all the coupons by clicking the export button after selecting the category.