Overview #
Image Swap is a simple way to change the display of any image when you mouse over them and may revert back to the original image by mouse out of the image. Here’s a comprehensive article to explain every method in detail. Follow the step-by-step process to connect the Image Swap.
Plugin Required: #
- Elementor: Download plugin.
- ElementsKit Lite: Download plugin.
- ElementsKit Pro: Get the plugin.
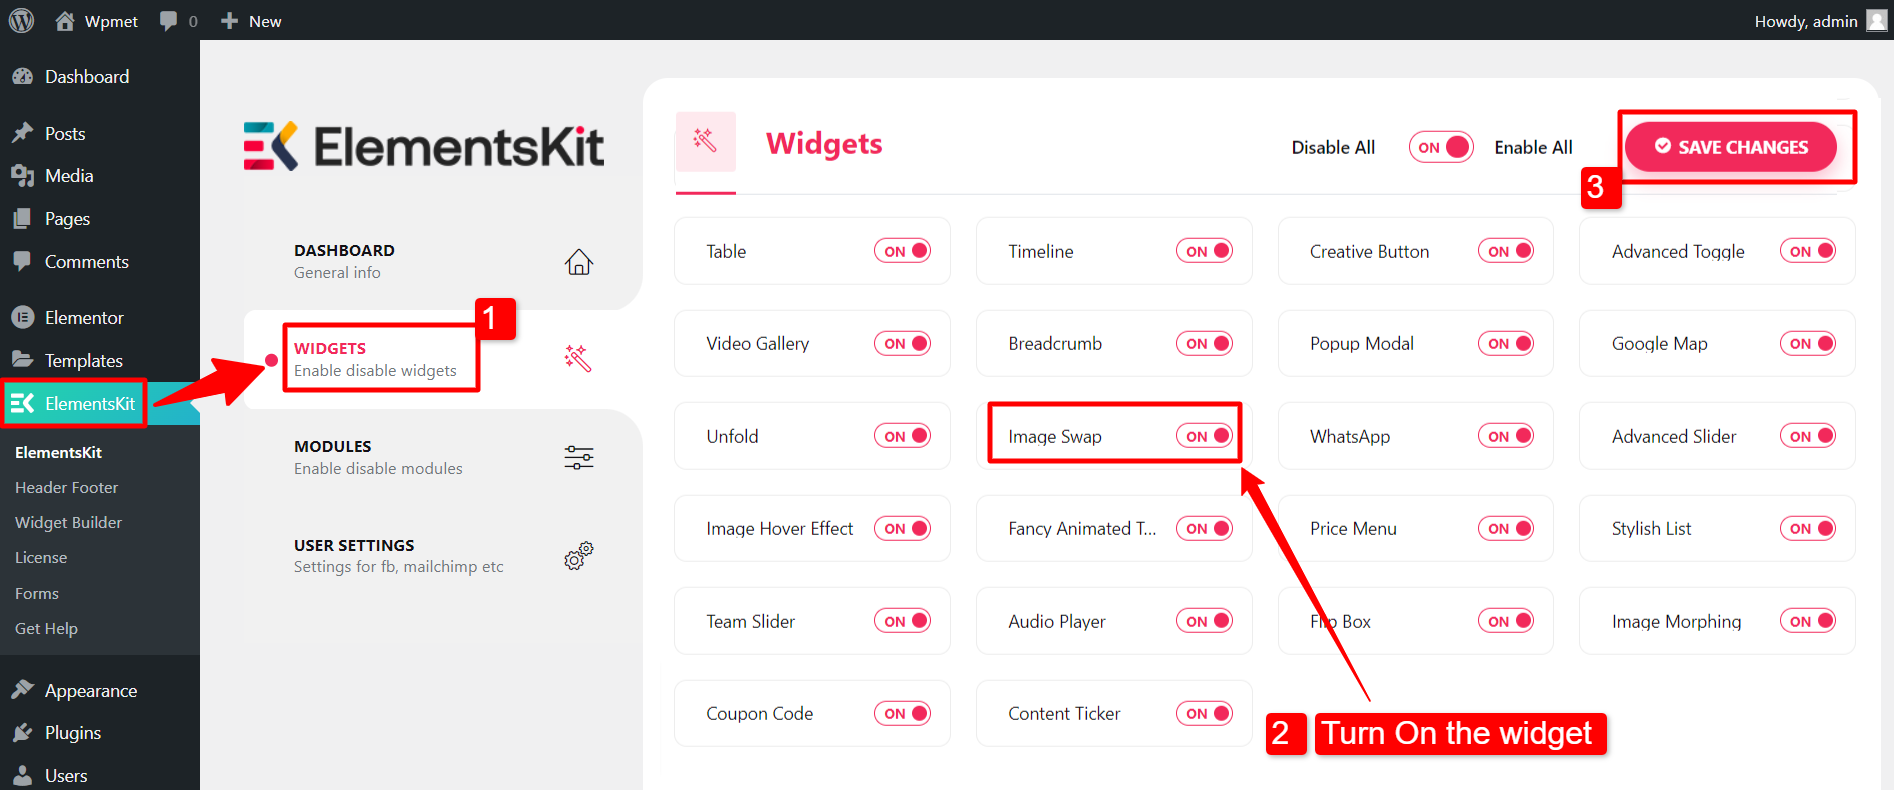
Step 1: Enable Image Swap widget #
Firstly, you need to enable the widget from the WordPress dashboard. To enable the Image Swap widget:
- Navigate to ElementsKit > Widgets.
- Find the Image Swap from the list and enable the widget.
- Click on the SAVE CHANGES.
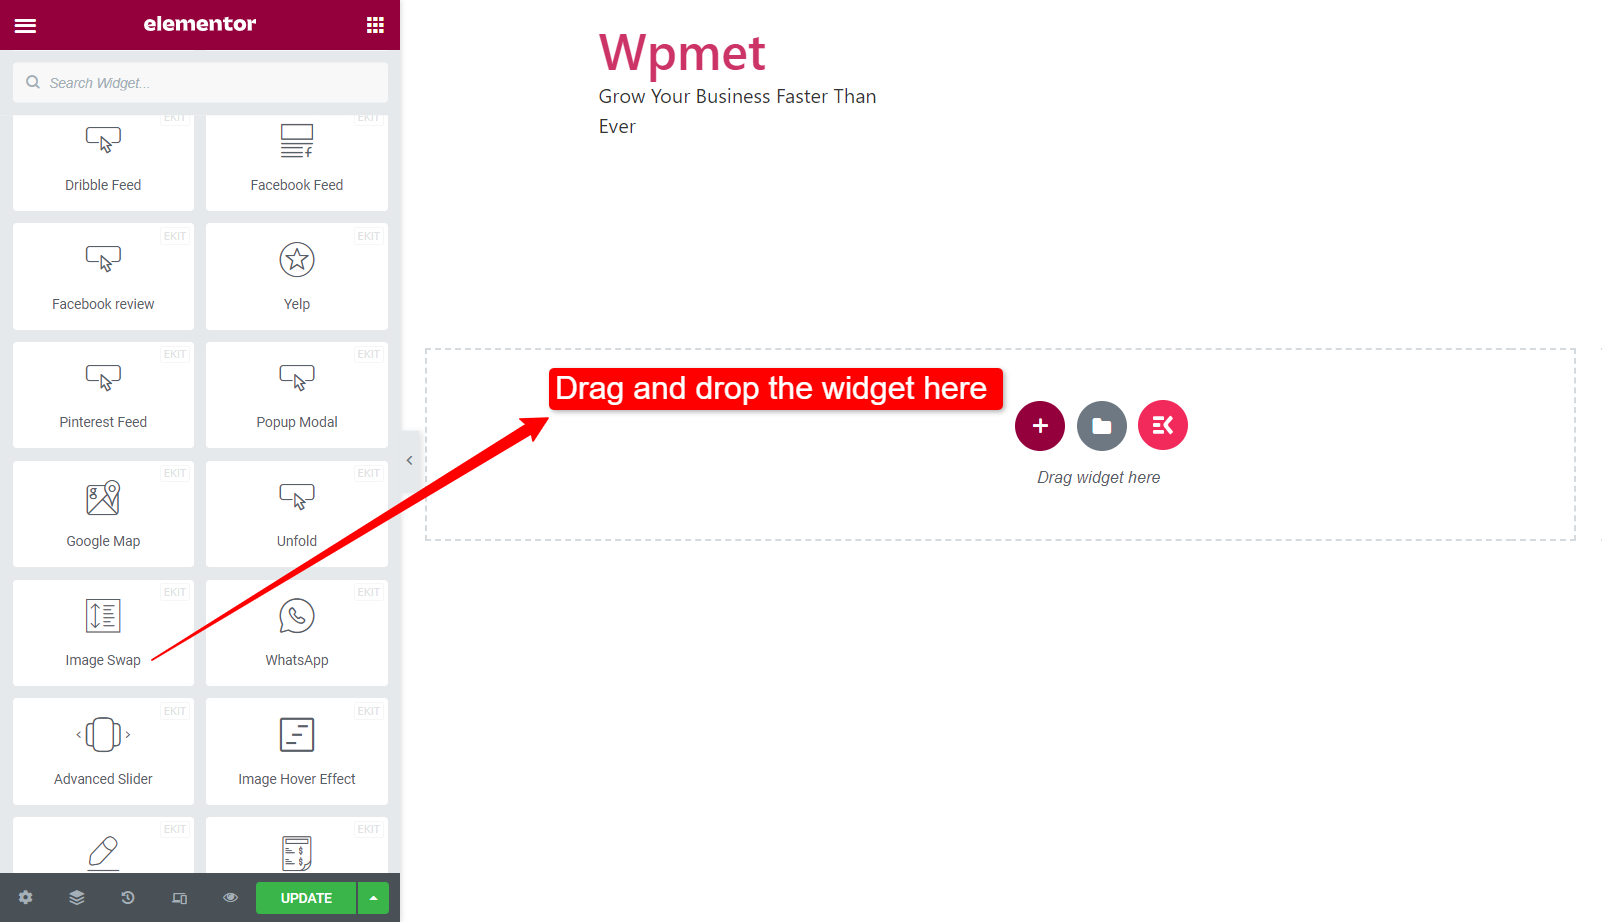
Step 2: Drag and Drop the widget #
After that, open the Elementor editor, then drag and drop the ElementsKit Image Swap widget into the design area.
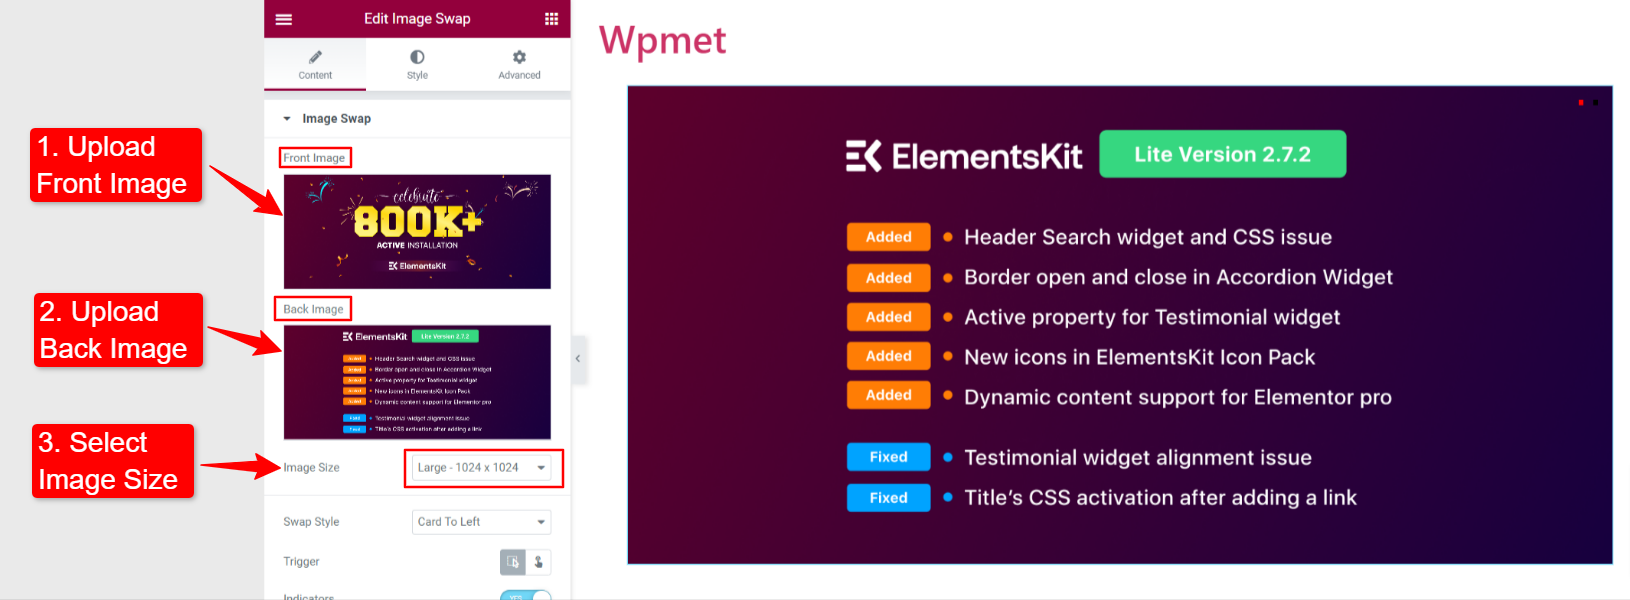
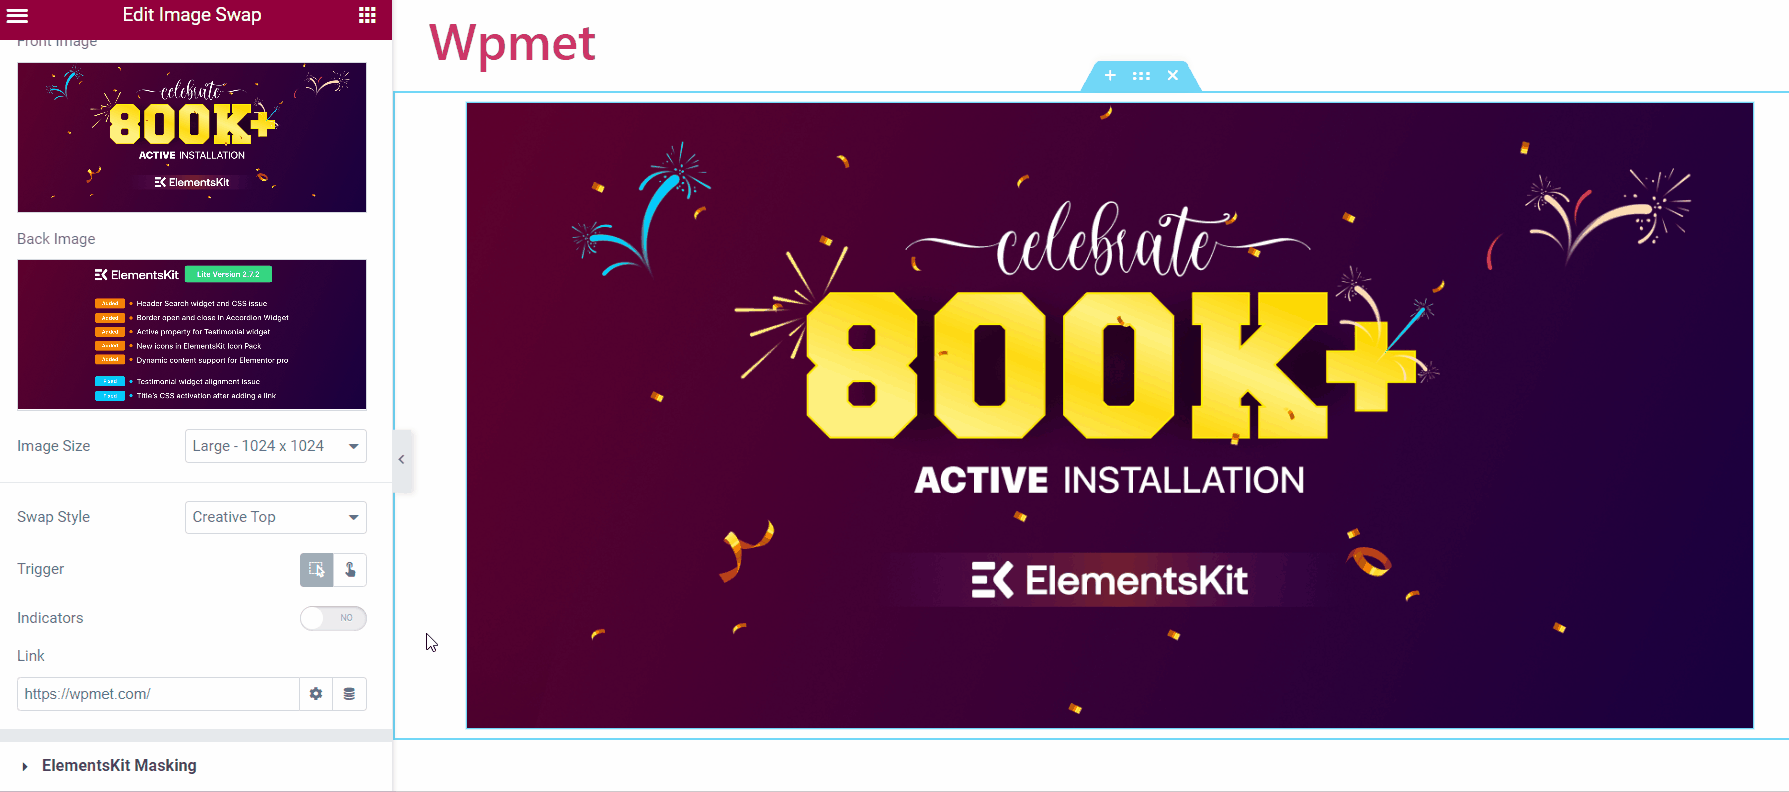
Step 3: Configure Image Swap widget #
In this step, you can add the front and back images, set the image size, choose swap style, and more.
- Front Image: Upload the first image as the front image.
- Back Image: Upload the second image as the back image.
- Image Size: Select an image size from the given options.
- Swap Style: ElementsKit Image Swap widget comes with 21 swap styles. You can choose any of the styles.
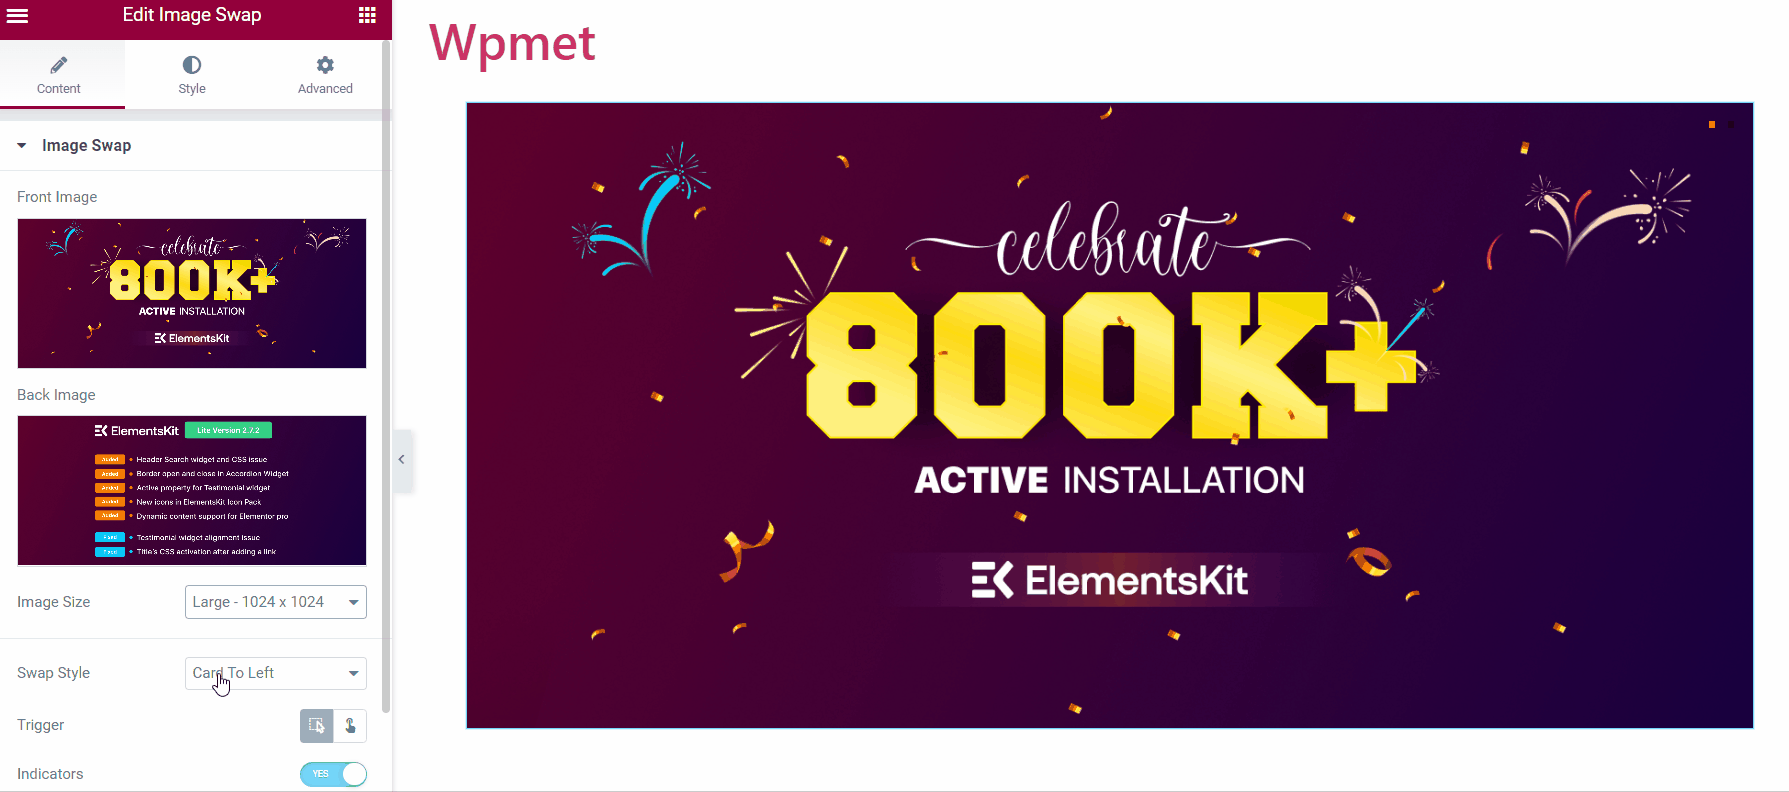
- Tigger: Choose how to trigger the swap effect from the following options.
- Hover: The swap effect will trigger when you hover the mouse over the image.
- Click: The swap effect will trigger when you click on the image.
- Indicators: It indicates the active image (image on show) and the image on the back.
- Link: You can add an URL to the images.
Step 4: Customize Image Swap widget #
Now you can customize the image and indicator styles.
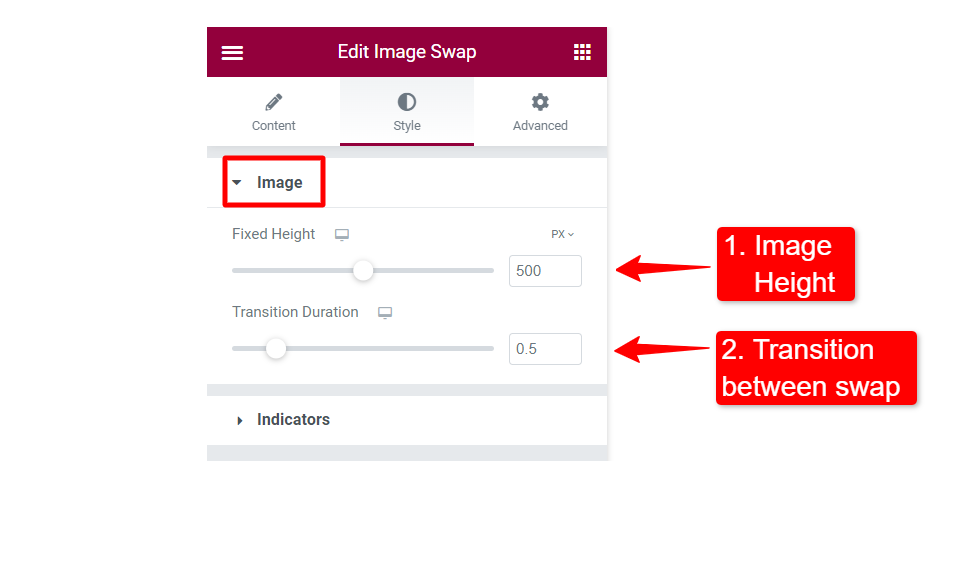
4.1 Image #
- Fixed Height: Adjust the height of the image.
- Transition Duration: Set the transition time between the image swap.
4.2 Indicators #
- Normal Color: Set the color of the indicator.
- Active Color: Choose an active indicator color.
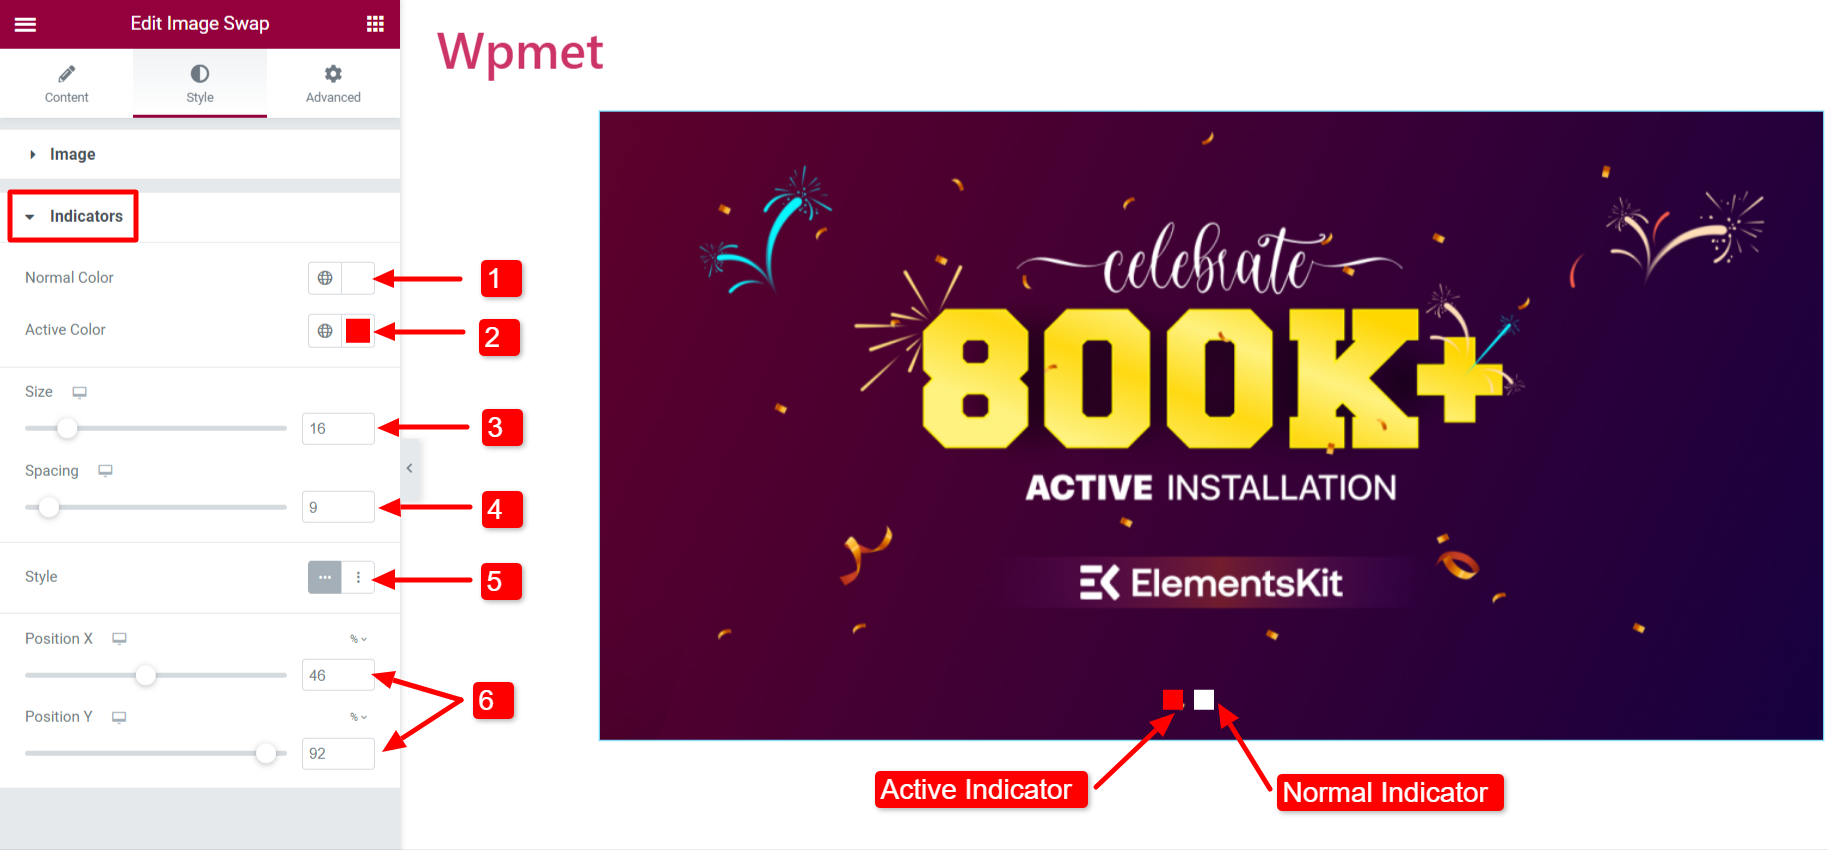
- Size: Adjust the size of the indicators.
- Spacing: The space between the two indicators.
- Style: Two styles are available for the indicators: Horizontal and Vertical.
- Position: Adjust the position of the indicators. Position X: To change the horizontal position, Position Y: To change the vertical.
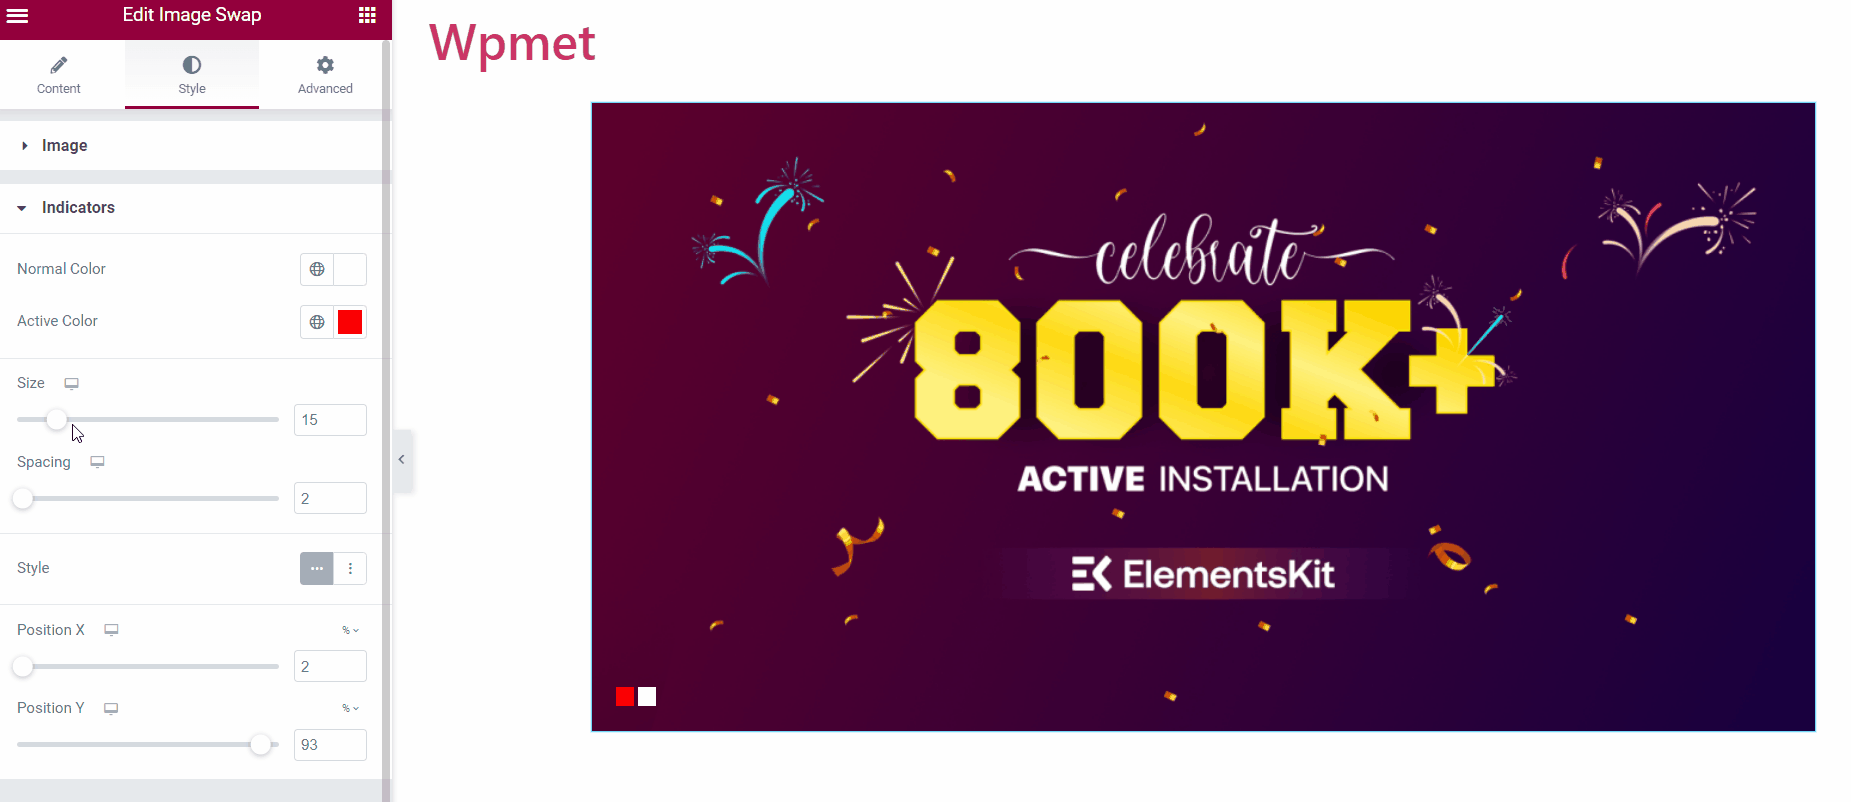
Finally, you can add the image swap widget to your website. Here is how it works:
Like the Image Swap widget, ElementsKit comes with hundreds of advanced elements for Elementor. Get ElementsKit and use those elements to build WordPress websites with full of features.


