Wpmet Flash Sale!

Text
Ending in:
Wpmet Symbol
00
Days
:
00
Hrs
:
00
Mins
:
00
Secs
Discount Still Available For You.

Map Integration

Adding map integration is an advantage for your website that will help you to find out your customer’s location. Now with MetForm, you can easily add google map location to your form.

How to Create a Map Integration #

It is a very helpful feature that will help you to know your customers or form submitters more. Through MetForm you can easily create map integration by adopting two steps. Let’s dive in for adding this integration.

Prerequisites:  #

For Google Maps integration to your WordPress forms, you need to have the following plugins installed on your WordPress site:

Step 1: Generate and insert map API key. #

Access your admin dashboard.

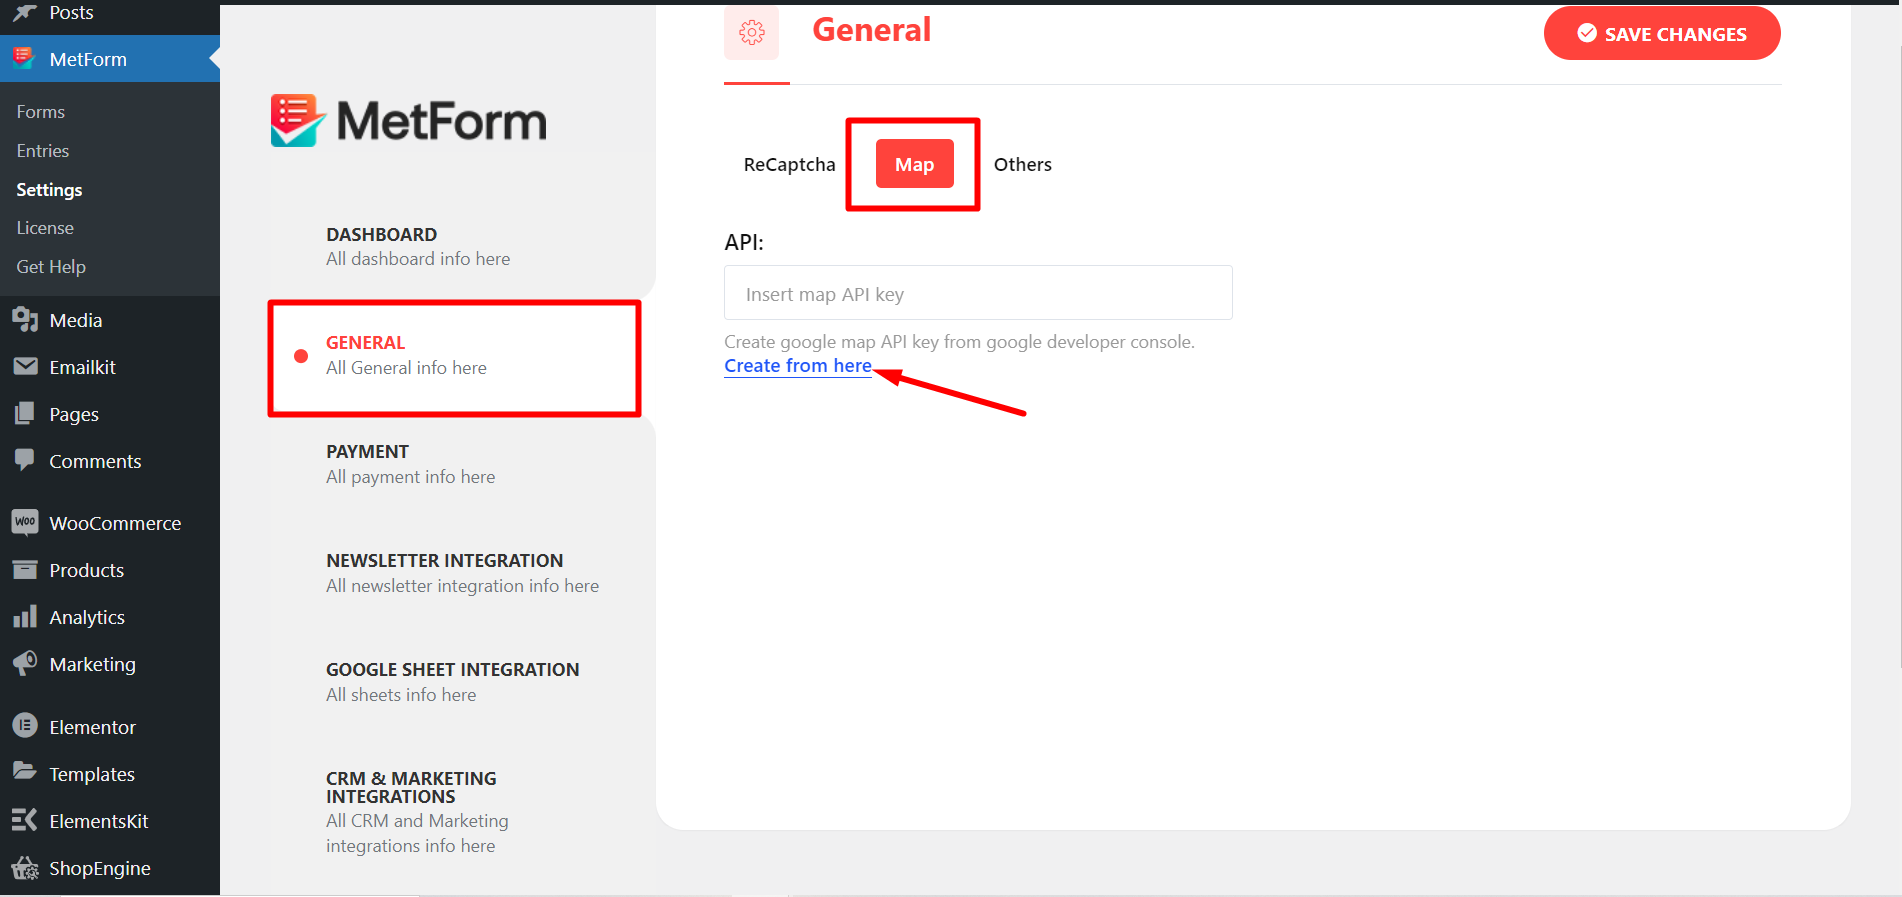
  • Hover your mouse on MetForm and click Settings.
  • Visit general -> map
  • Press the “create form here” link like the image
Go to MetForm settings, click General and click create form here

It will redirect you to the Google Cloud Platform from where you have to login or sign up.

Now, you have to click the navigation menu.
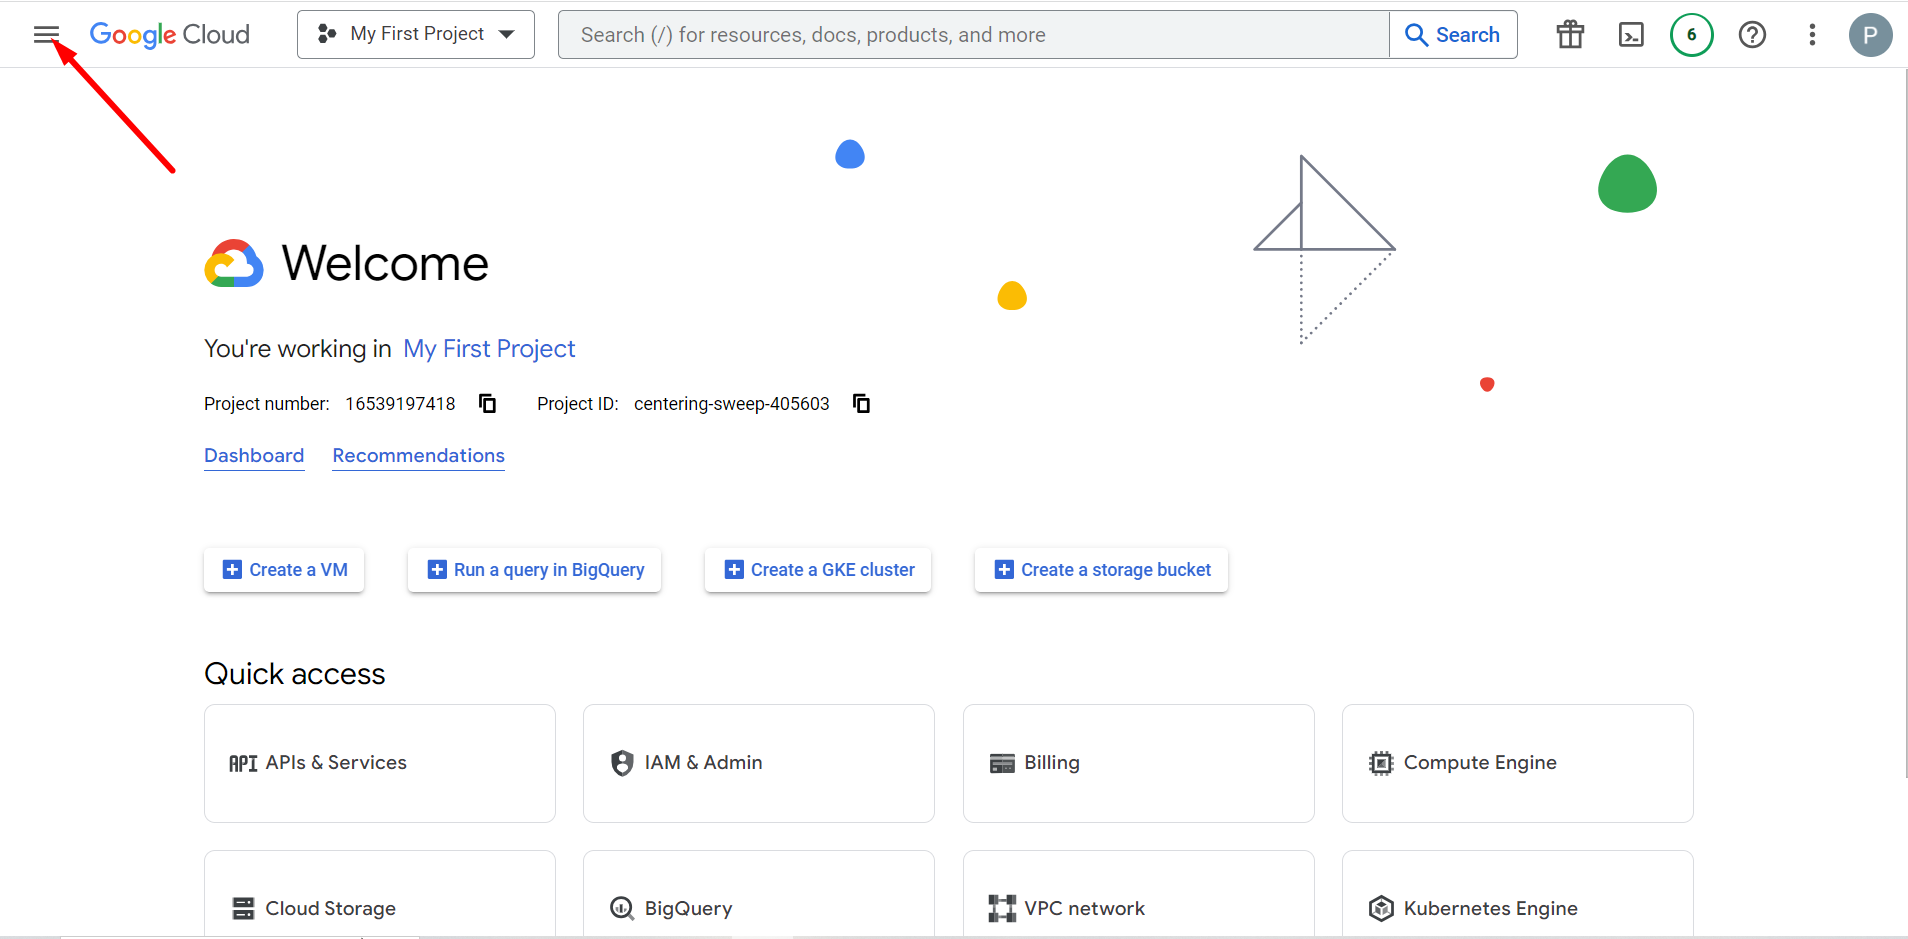
  1. Find APIs & Services
  2. Go to Library
  3. Find Maps JavaScript API and Places API
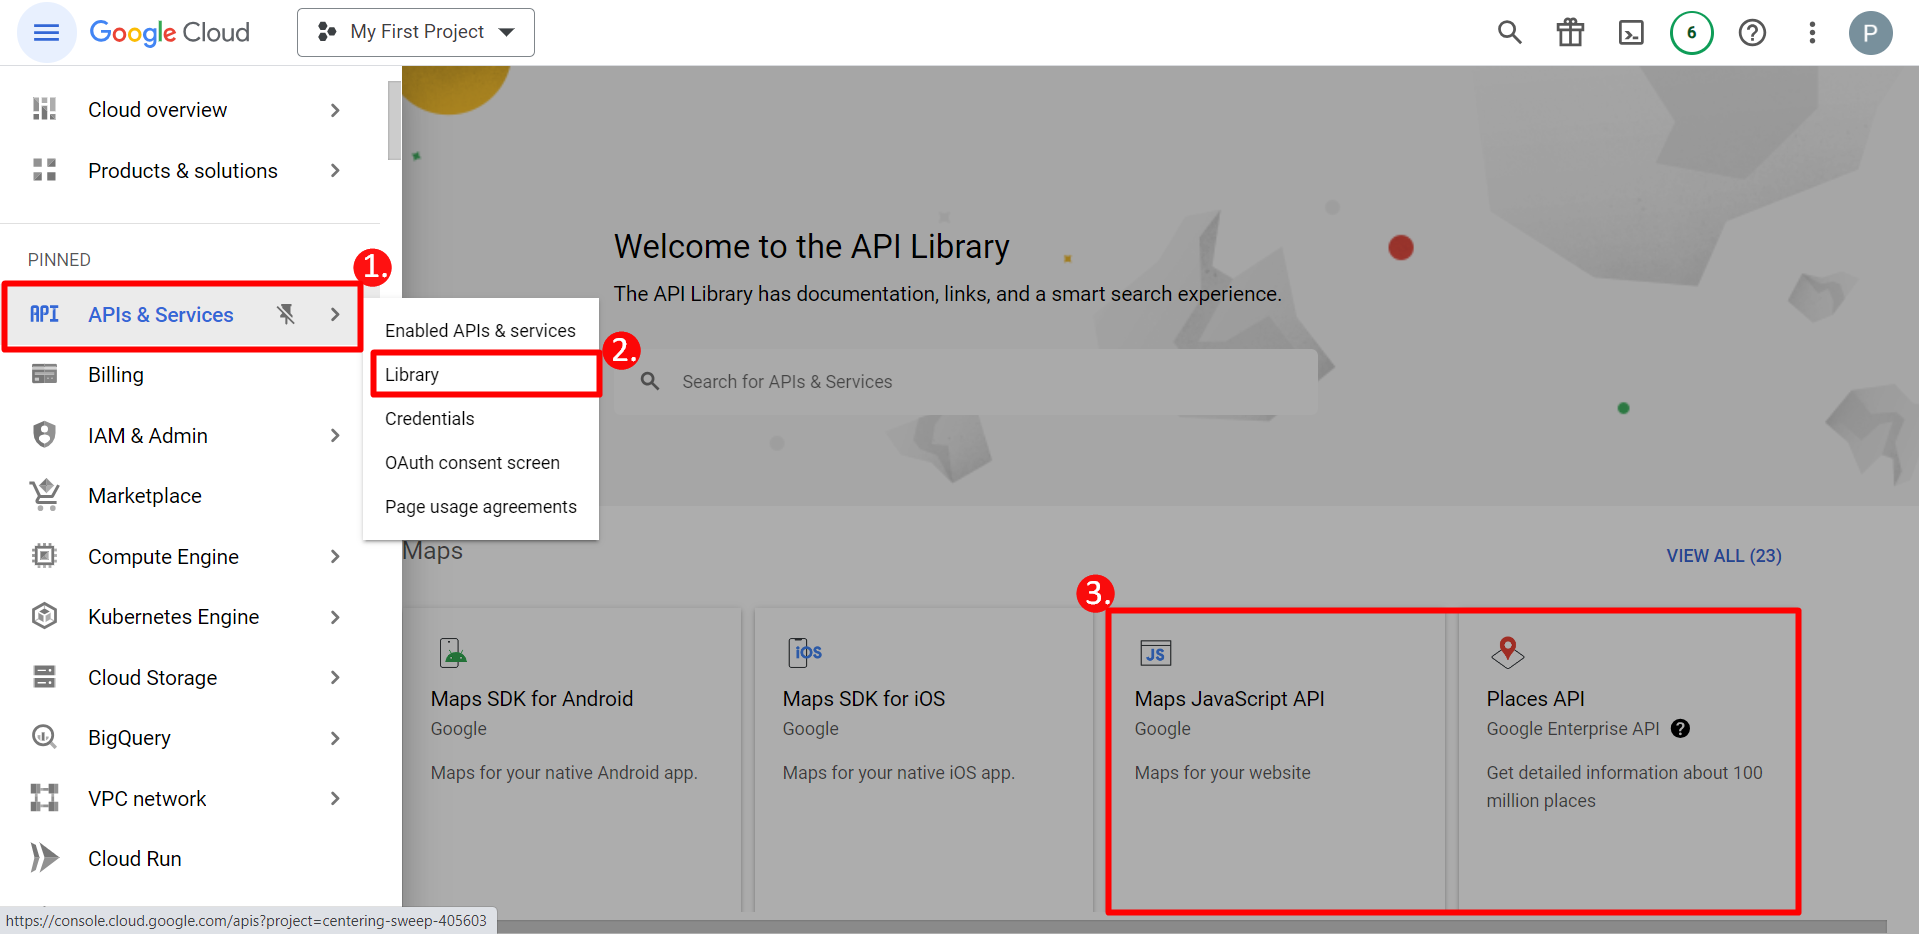
Next, you have to click JavaScript API and enable it.
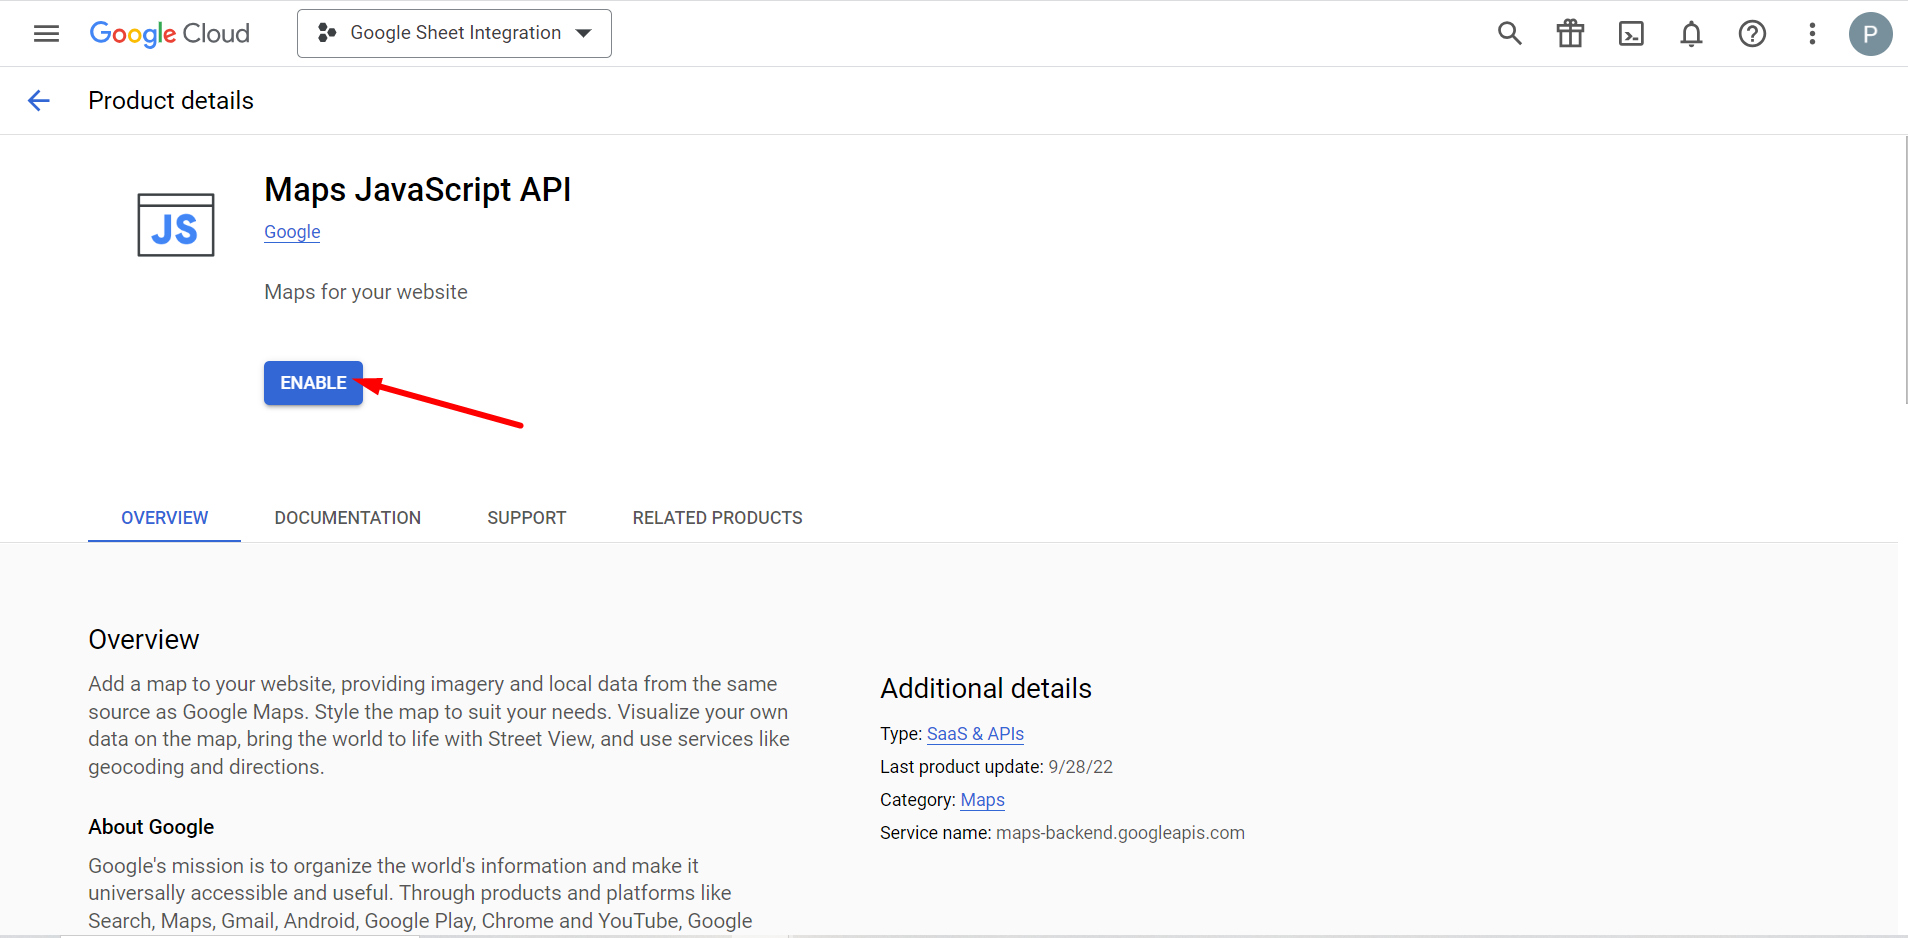
Enable JavaScript for map integration

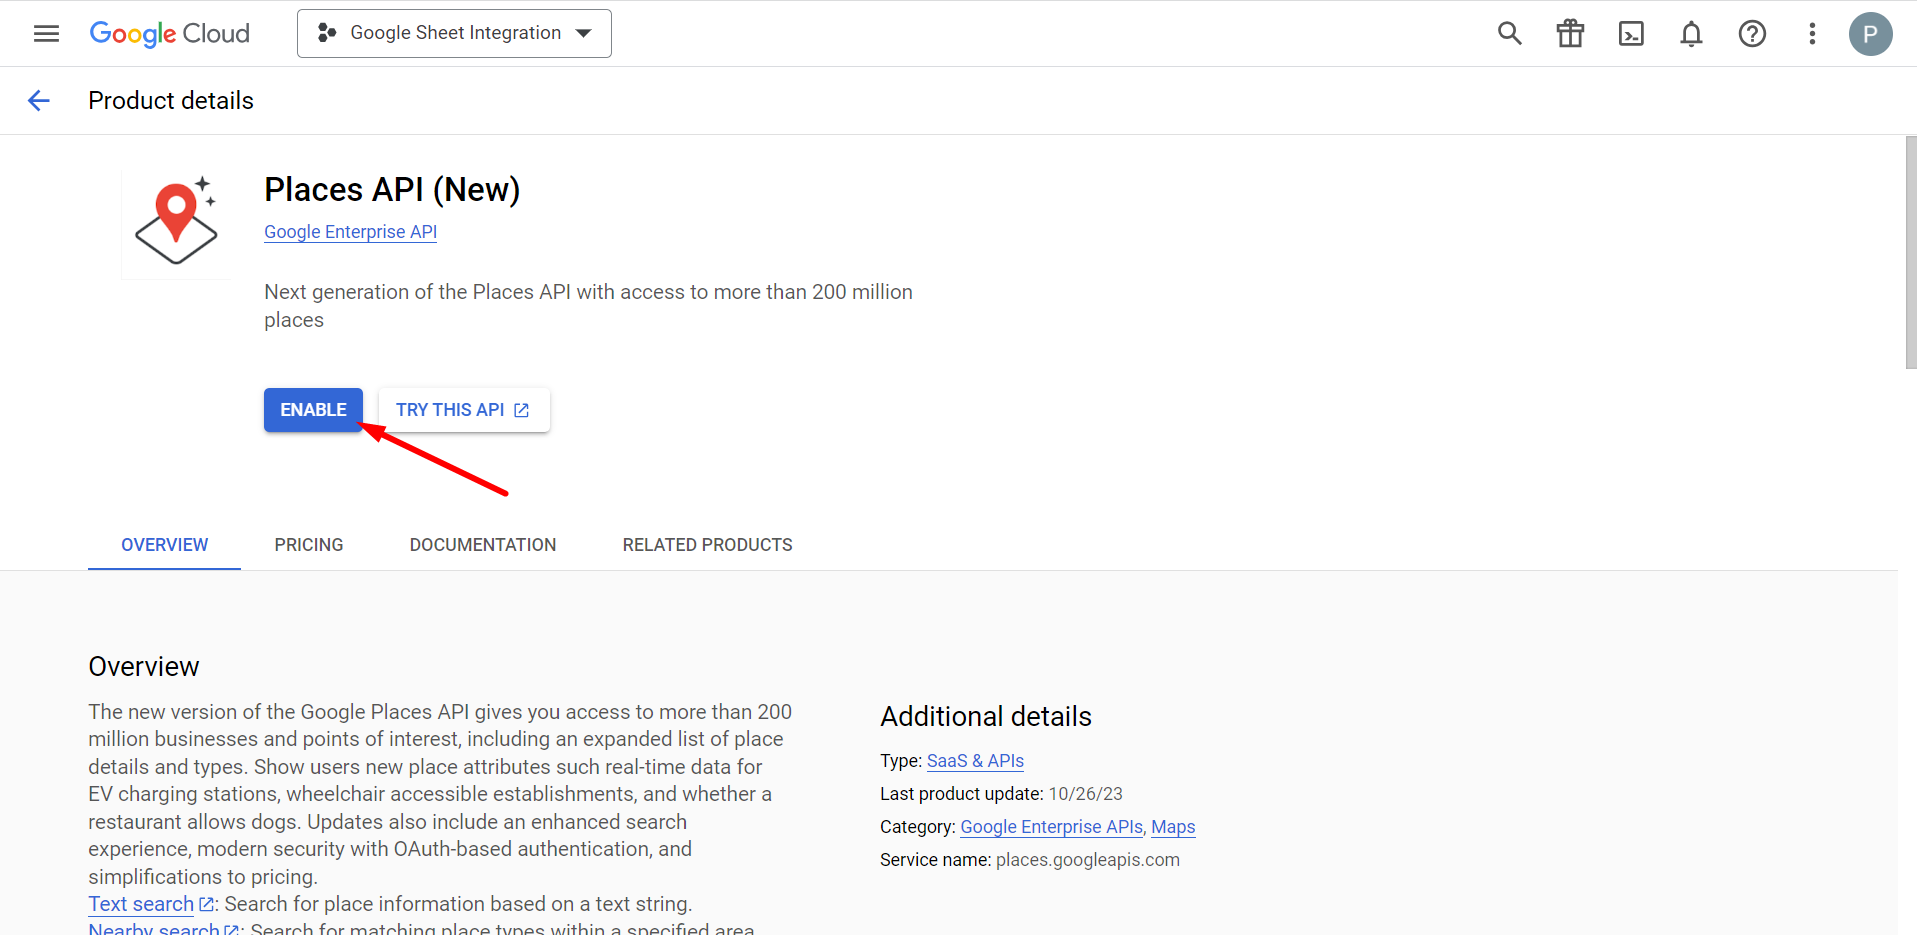
Like JavaScript, you need to enable the Places API.

Enable places API for integrating with map

However, you’ll also need to enable the Geocoding API. This is required so the address can auto-fill automatically whenever a pin is placed or moved on the map.

Enable Geocoding API


Next, go to Credentials.

Go to Creadentials

Click + Create credentials and select API key.

Click + Create credentials and select API key
  • You’ll see a window now. From here, select the Map JavaScript API and Places API for the API restrictions
  • Press ok
Select Map Geocoding API, JavaScript API and Places API then press ok

Your API key has been generated, copy it.

Copy the generated API key

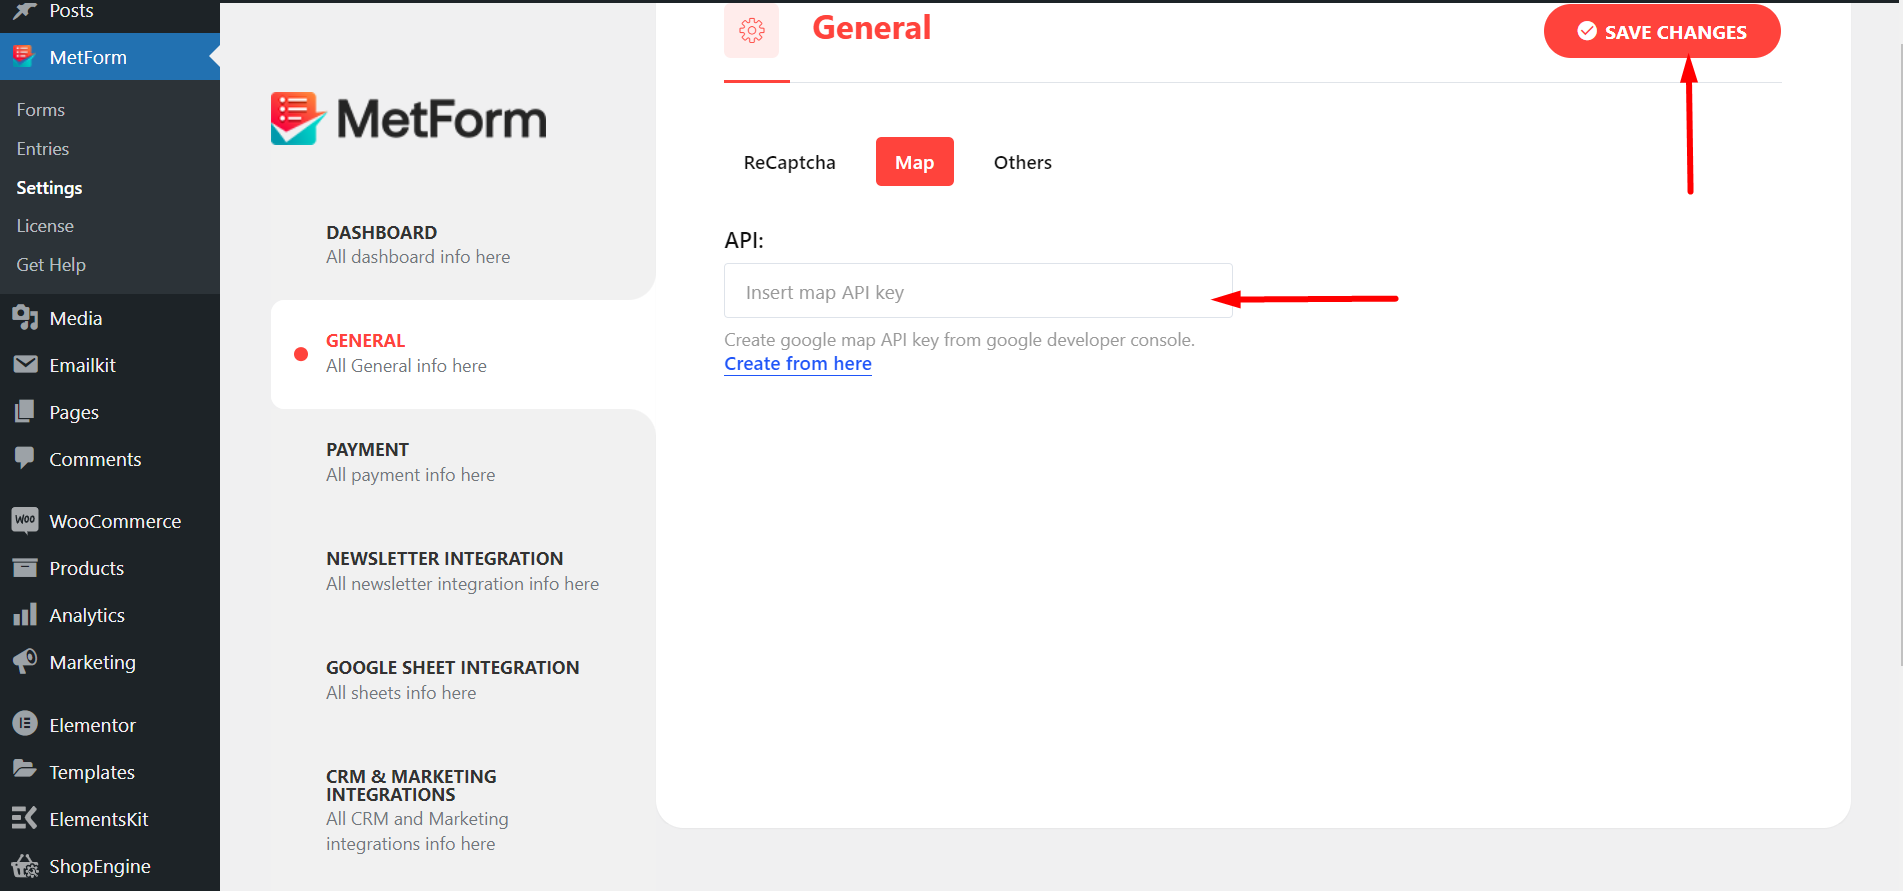
Now, return to MetForm, enter that copied key in the API box and press the Save Changes button.

Insert the copied API key and save the changes

Learn more about the general settings of MetForm.

Step 2: Add a New Form to Integrate with the Map #

You need to create a form.To do it, go to Forms from MetForm. A popup from settings will open up after clicking the Add New button.
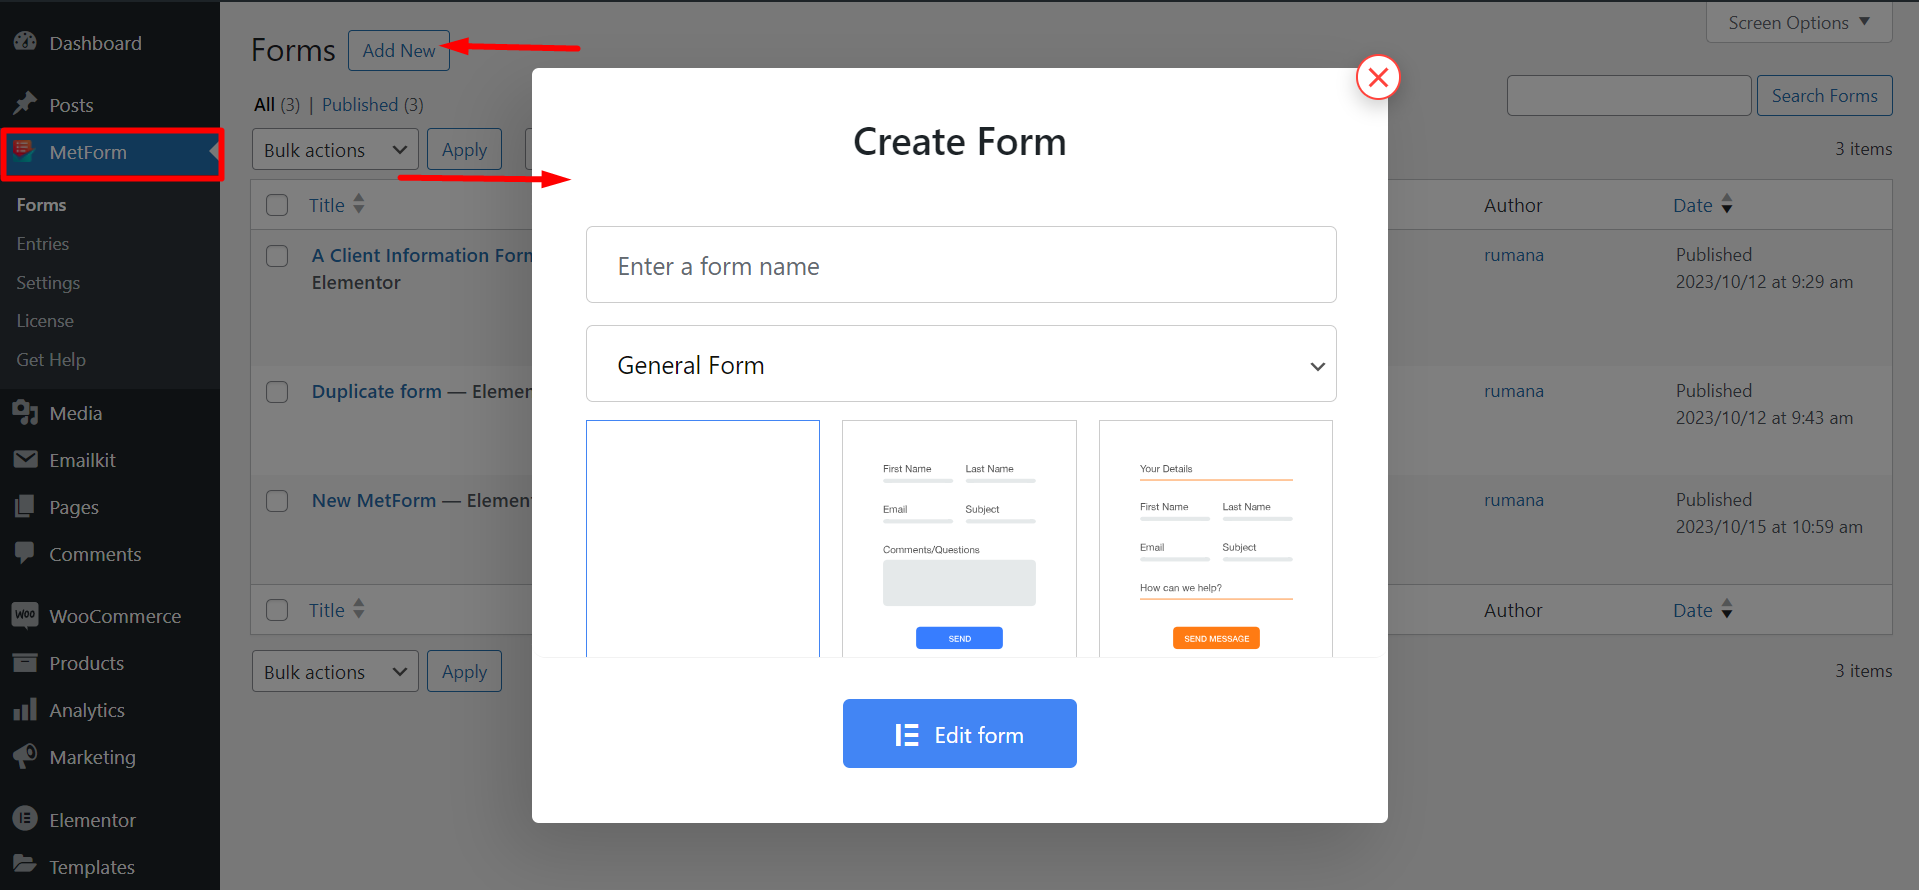
  1. Select General
  2. Take a new blank template
create a new blank form with Metform

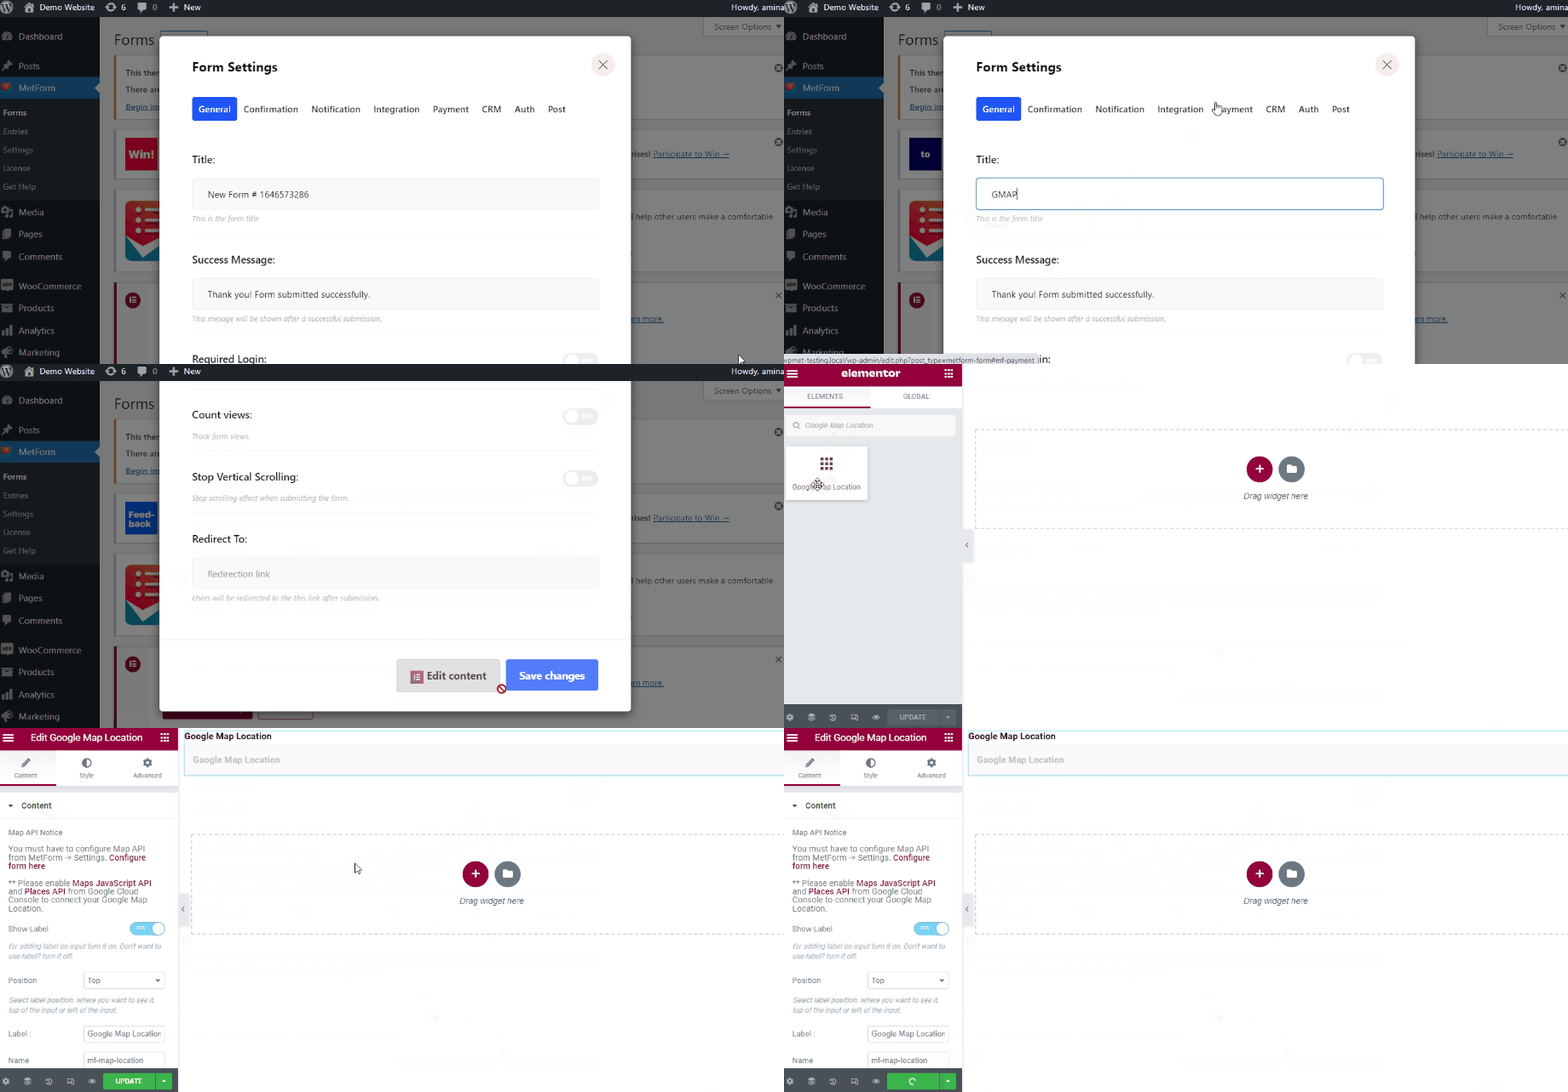
Go to the form settings –

  • In the General tab, write a title for your form
  • Scroll down and click the Edit content button
Give a title to the new form and click Import

This will redirect you to the Elementor dashboard, from where you need to drag and drop the MetForm Google Map Location widget.

Search for MetForm Google Map Location widget and drag it to the editor

Customize the Widget #

The content tab offers these controls –

  • Map API Notice: Instructions to configure Map API from MetForm → Settings, with a “Configure form here” link and a reminder to enable Maps JavaScript API, Places API, and Geocoding API
  • Show Label: Toggle (Yes/No) — controls whether a label shows above the input.
  • Position: Dropdown (currently “Top”) — sets label position (top or left of the input)
  • Label: Text field (“Google Map Location”) — the label text that will be displayed
  • Name: Text field (“mf-map-location”) — unique field name, must be entered without spaces or special characters
Customizing content of  MetForm Google Map Location widget

Settings part –

Required?: Turn “Yes” to make this field mandatory for form submission.
Warning message: The message shown to the user if they try to submit without filling this required field.

Map Settings –

  • Show Map: Toggles whether an interactive map appears below the address search box.
  • Select Point by Clicking Map: If “Yes,” users can click anywhere on the map to set the location.
  • Draggable Marker: If “Yes,” users can drag the pin to fine-tune the exact location.
  • Default Latitude: Sets the starting latitude coordinate the map centers on by default.
  • Default Longitude: Sets the starting longitude coordinate the map centers on by default.
  • Default Zoom: Controls how zoomed-in the map is when it first loads (higher = closer).
  • Map Height (px): Sets the height of the map display in pixels.
Customizing map settings of  MetForm Google Map Location widget

Let’s style the map. Go to the the Style tab.

Label:

  • Color: Choose the color of the label text
  • Typography: Set the font style for the label
  • Padding: Adjust top, right, bottom, and left padding
  • Margin: Adjust top, right, bottom, and left margin

Input:

  • Padding: Adjust top, right, bottom, and left padding
  • Margin: Adjust top, right, bottom, and left margin
  • State: Switch between Normal, Hover, and Focus states
  • Input Color: Set the color of the input field
  • Background Type: Choose the background style
  • Border Type: Select the border style, default or custom
  • Typography: Set the font style for the input text
  • Border Radius: Adjust the roundness of the input corners

Place Holder:

  • Typography: Set the font style for the placeholder text
  • Color: Choose the color of the placeholder text
Style MetForm Google map


After customization, update the changes and check if it works fine.
Here is the final look of map integration:
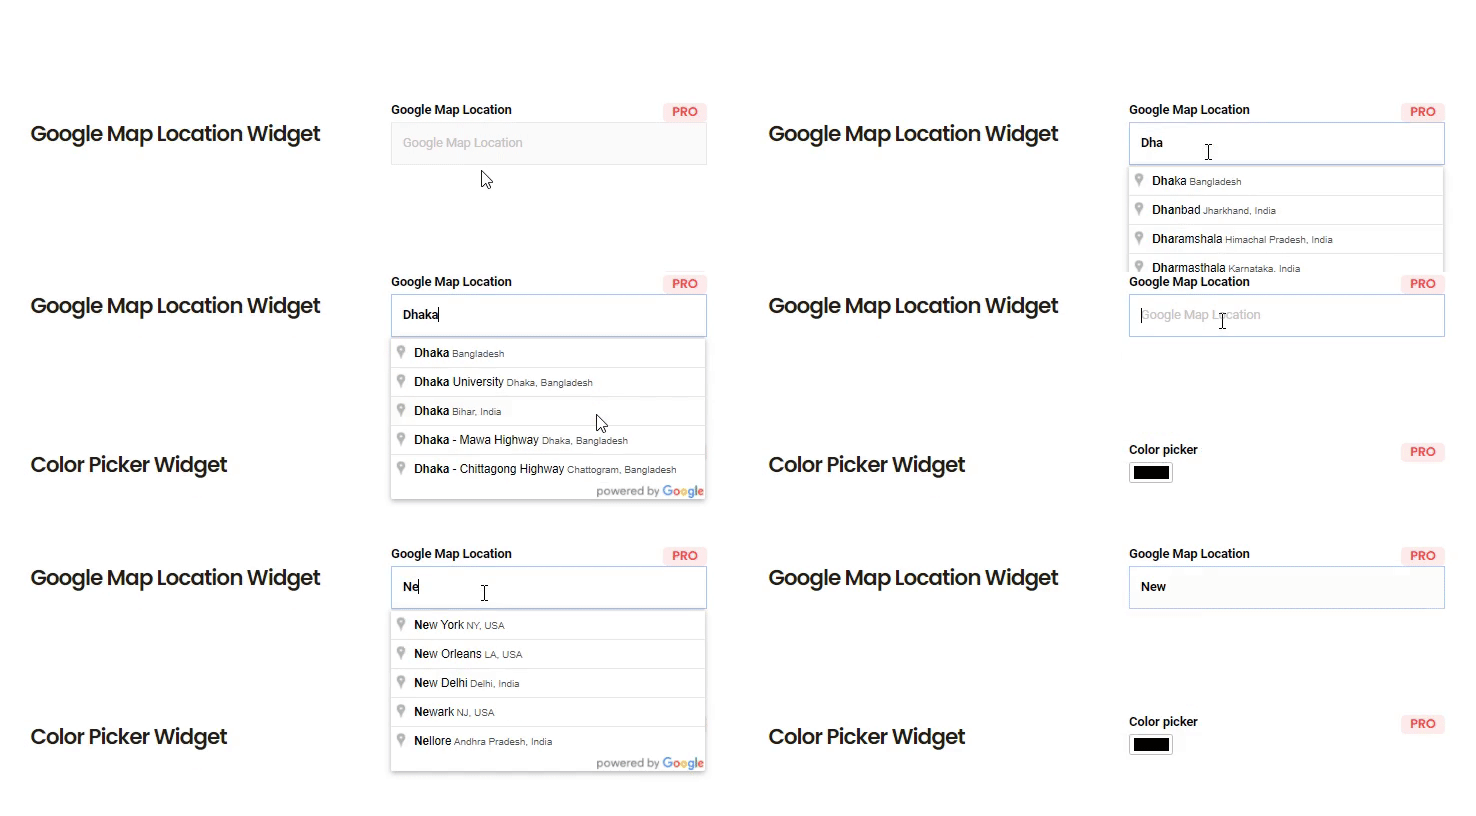
Final look of map integration

What are your feelings

Updated on August 5, 2026