With ShopEngine, you have the flexibility to create and tailor the WooCommerce reset password page to match your brand’s identity and provide clear, user-friendly instructions to your customers.
How to create and customize a WooCommerce reset password page #
To create a WooCommerce reset password page first you need to enable the widget, then create a WooCommerce password reset template.
Required Plugins:
- WooCommerce: Download Plugin
- Elementor Free: Download Plugin
- ShopEngine Lite: Download Plugin
- ShopEngine Pro: Get Plugin
Step 1: Enable the widget #
To enable to Reset Password Link Form, first login to your WordPress dashboard. After that,
- Navigate to ShopEngine > Widgets.
- Find the Reset Password Link Form widget and toggle to “ON“.
- Click on the SAVE CHANGES button at the top right corner.
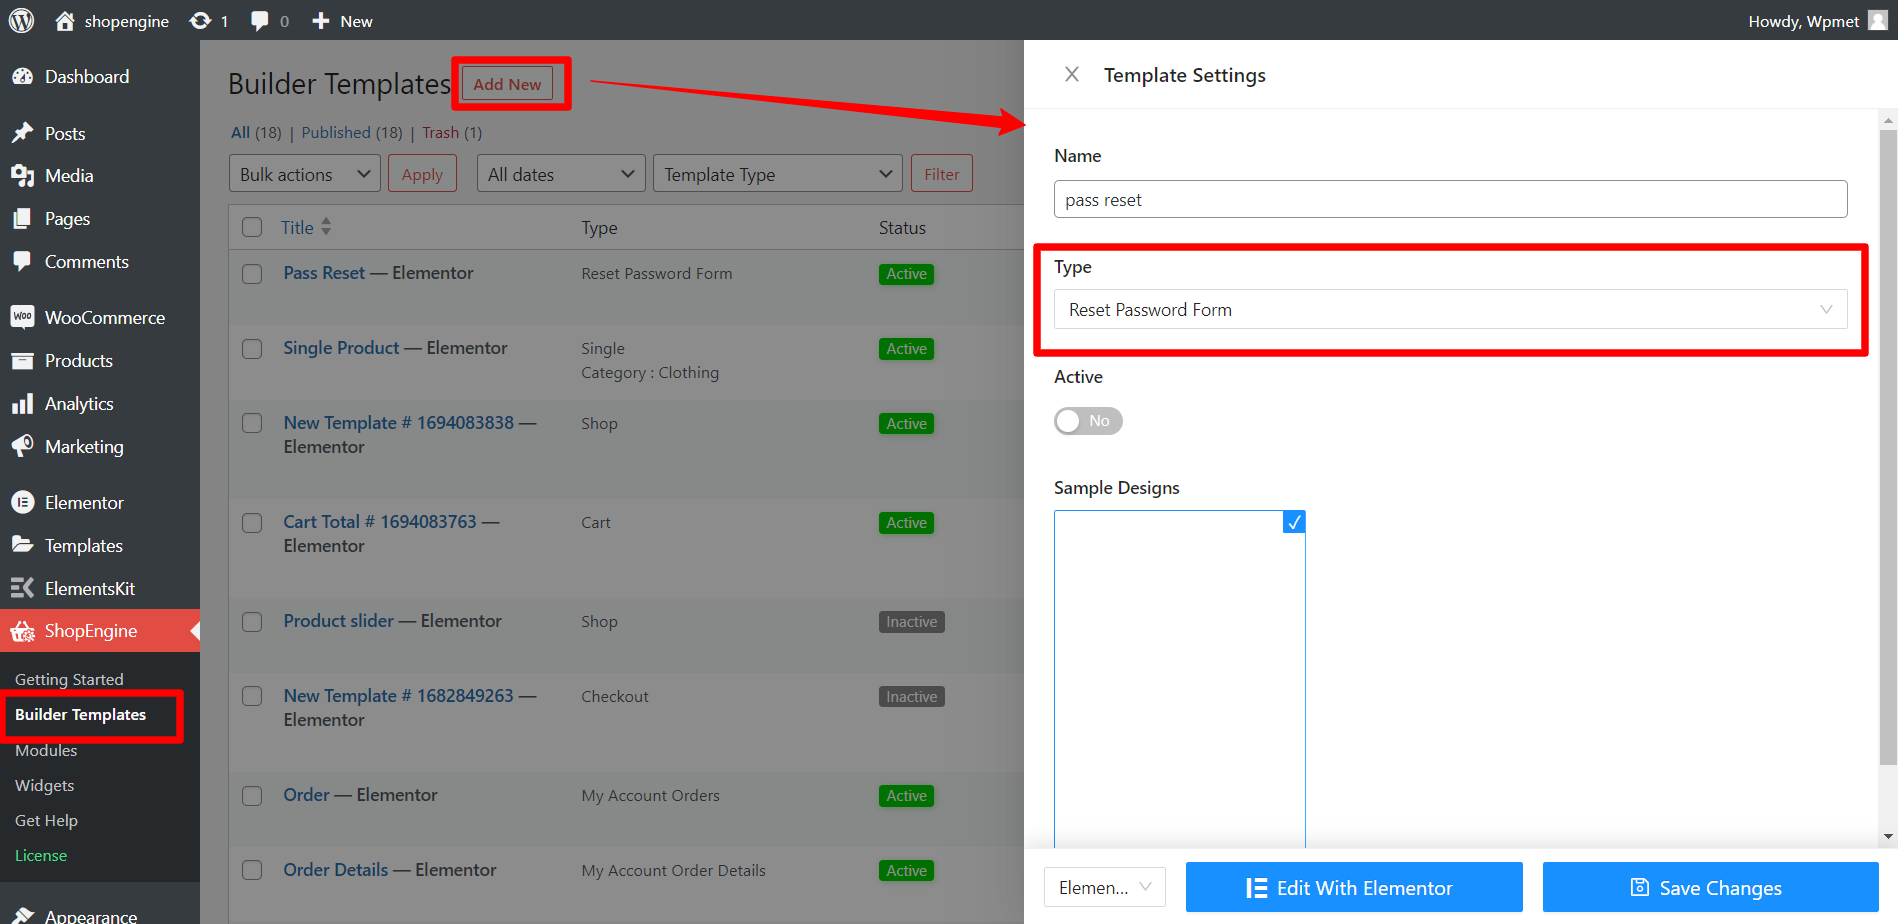
Step 2: Create WooCommerce reset password page template #
The Reset Password Link Form is only available for “Reset Password Form” template. Therefore you need to create a template for this page.
To create a template:
Go to ShopEngine > Builder Template > Add New, and configure the template from Template Settings.
Read the documentation: How to create Reset Password Template for details.
After that, click the “Edit With Elementor” button to customize the template in Elementor Editor.
Step 3: Customize Reset Password Form widget #
In the Elementor Editor, drag and drop the Reset Password Form widget into the design area.
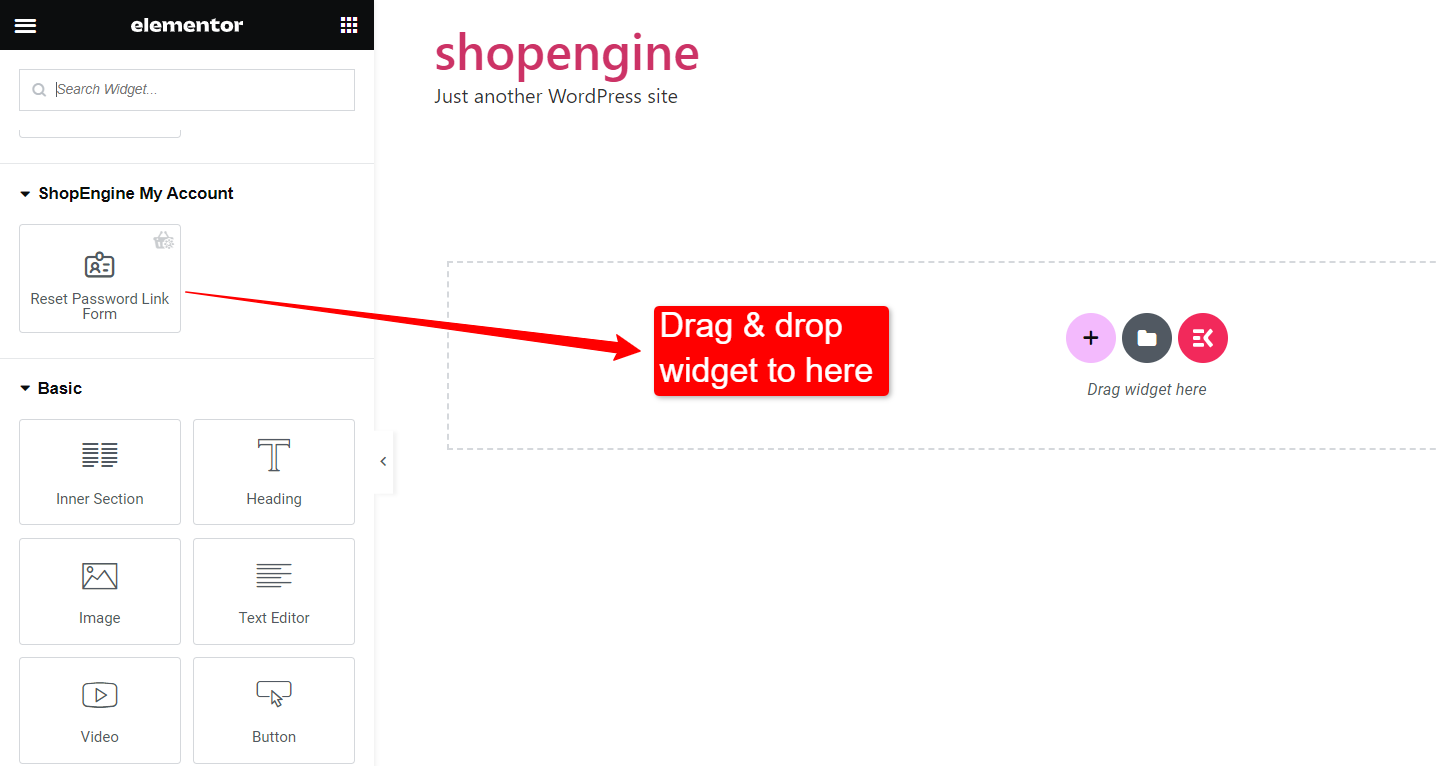
With Reset Password Form widget, you can customize the Label, Input, and Button styles.
3.1 Label
The following customizable options are available for Label:
- Choose the text color of the label.
- Adjust Font Size for label text.

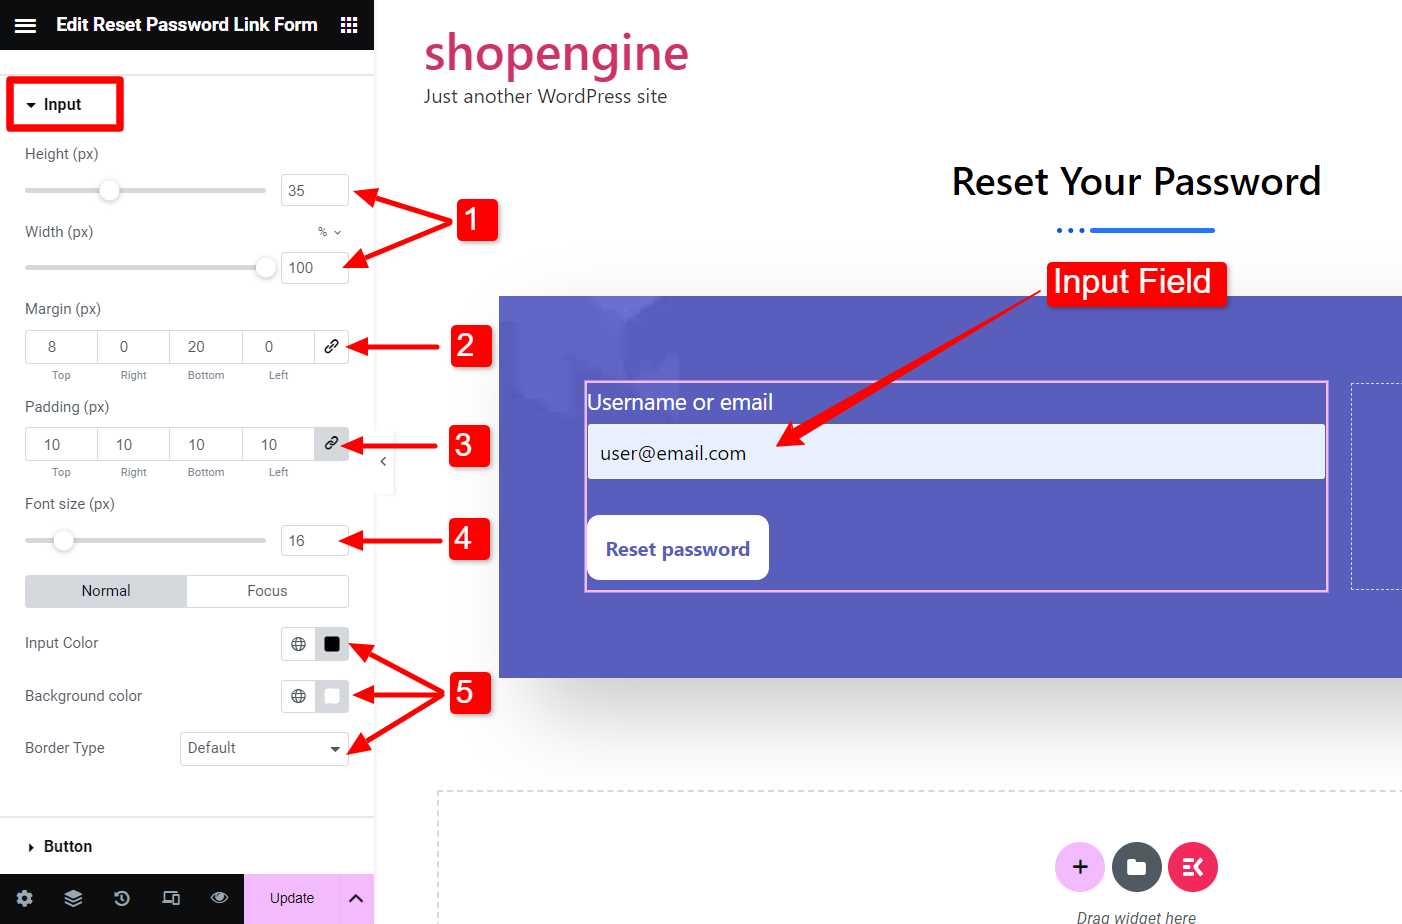
3.2 Input
You can customize the Input field as follows:
- Adjust the Height and Width of the input field individually.
- Set the Margin for the input field.
- Set the Padding for the input field.
- Adjust the Font Size for the input text.
- You can individually set the Input Color (text color), Background Color, and Border Type for the normal and focused state.
3.3 Button
The Button styles can be customized as well.
- Choose a Text Color for button text.
- Choose a Background Color for the button.
- Set the Typography for the button text.
- Adjust the Padding of the button.
- Adjust the Border Radius.
You can set separate styles for the Normal and Hover states of the button.
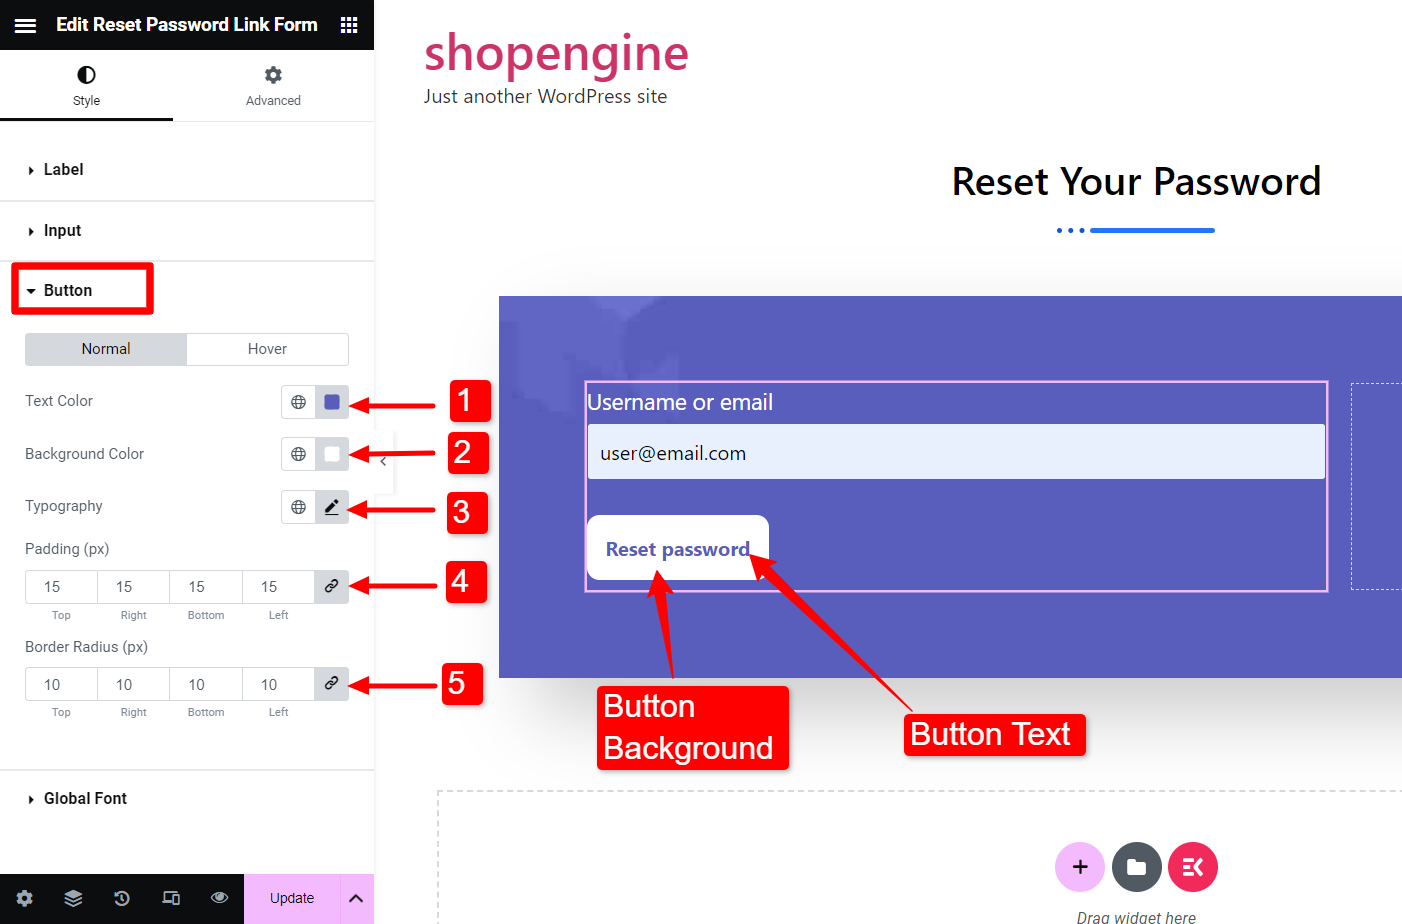
Finally hit the Update to complete the customization.
ShopEngine comes with tons more amazing features to make life easy while building WooCommerce websites. Get ShopEngine Pro and get access to advanced features right now!


