

Let’s take a tour of the EmailKit dashboard. In this documentation, we will introduce all the EmailKit controls and settings.
How to use the EmailKit dashboard? #
As you add a new email or start to edit an existing one, you will get access to the EmailKit dashboard. In this editor screen, you will see two separate areas for controlling all the feature settings.
- EmailKit Topbar
- EmailKit Left Panel
EmailKit Top Bar #
The top bar is essentially the horizontal header area of the EmailKit dashboard. Here are its settings:
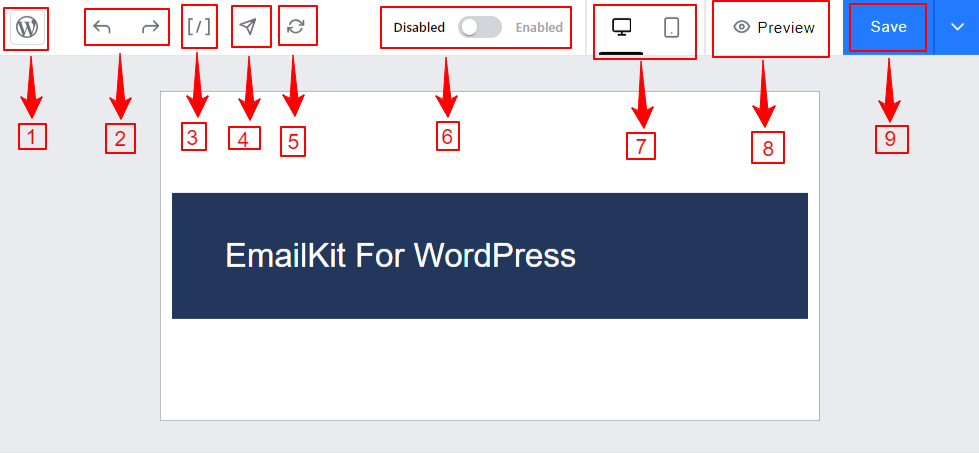
- View Pages: Clicking this will return you to the regular WordPress dashboard. Make sure, you have saved all the customization you have done before hitting this button.
- Undo/Redo: Click the left-facing (Undo) arrow to recover an incorrect action. And, the right-facing (Redo) arrow to redo something undone.
- Shortcodes: This option will open up all the WooCommerce shortcodes to use in your email design. Use the search option to find one then, copy and paste it where you want.
- Test Email: Send a test email with just one click to any email address to get a feel for how the email will look.
- Reset: Clicking this button will return you to the original templates and you will lose all your customizations.
- Disable/Enable: Use this toggle button to activate or deactivate one email template. Enabling an EmailKit template allows you to replace the default WordPress or WooCommerce email templates.
- Responsiveness: Get an instant preview of the email template in the editor panel based on mobile and desktop devices.
- Preview: Clicking it will take you to another screen, where you can see the email preview based on computer, tablet, and mobile screen. You can also select a device model from the dropdown.
- Save Button: Use this button to save all your customization.
EmailKit Left Panel #
From the left panel of EmailKit, you will get access to all the elements, templates, and customization for the email body styling.
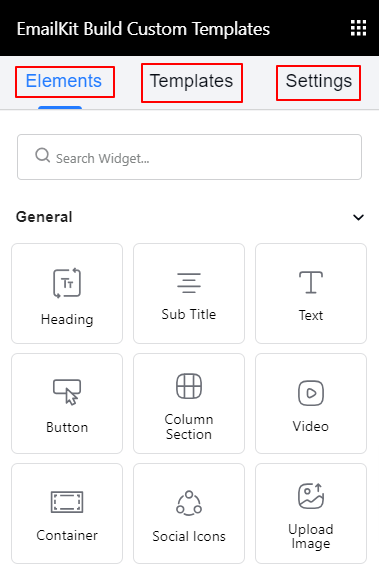
- Elements: EmailKit comes with a massive collection of content elements to design a complete email template. These elements are divided into three categories: General, WooCommerce, and WordPress.
- General: Heading, Text, Button, Column Sections, Social Icons, Video, Divider, etc.
- WooCommerce: Shipping Address, Billing Address, Order Item, Password Reset, etc.
- WordPress: New User Register and WP Reset Password.
- Template: Save your customized template for future use.
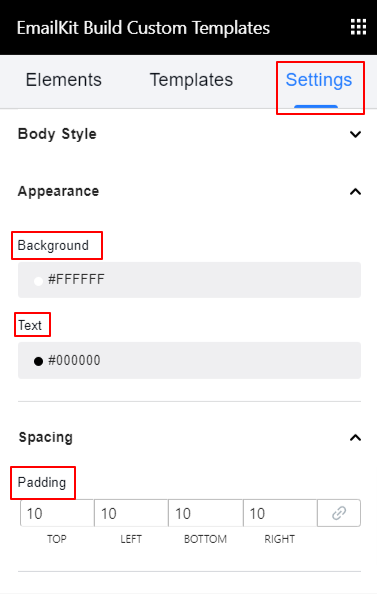
- Settings: From this tab, you will style the email body. Go to the, Under Body Styles settings and set the following customization.
Appearance:
- Background: Use the color pickers to define the background color.
- Text: Choose a color for the email body template typography.
Spacing:
Padding: Add more spaces to the email body.


