

With the Product Size Charts module by ShopEngine, you can add a product size chart of any information you want in an image format on the product page. You can add as many charts as you want and a single one from the product settings of each product.
How to add Product Size Charts to your WooCommerce site using ShopEngine #
You can add Product Size Charts to your WooCommerce Elementor website by following 7 simple steps.
Before that, get ShopEngine Pro now 👇
Step 1: Enable Product Size Charts module of ShopEngine #
From the WordPress dashboard, go to ShopEngine ⇒ Modules ⇒ Product Size Charts and click on the settings icon.
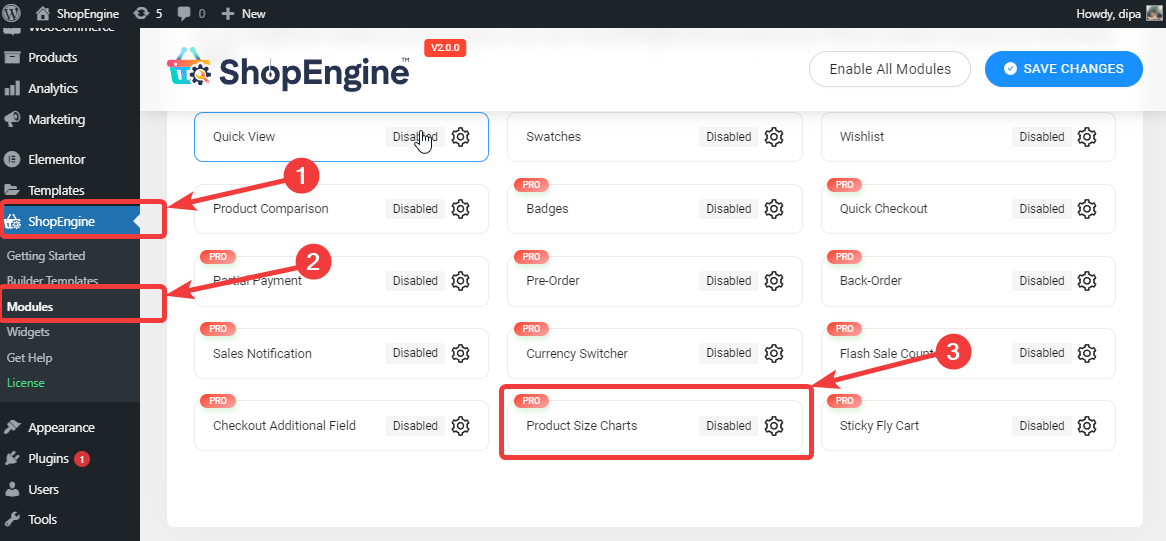
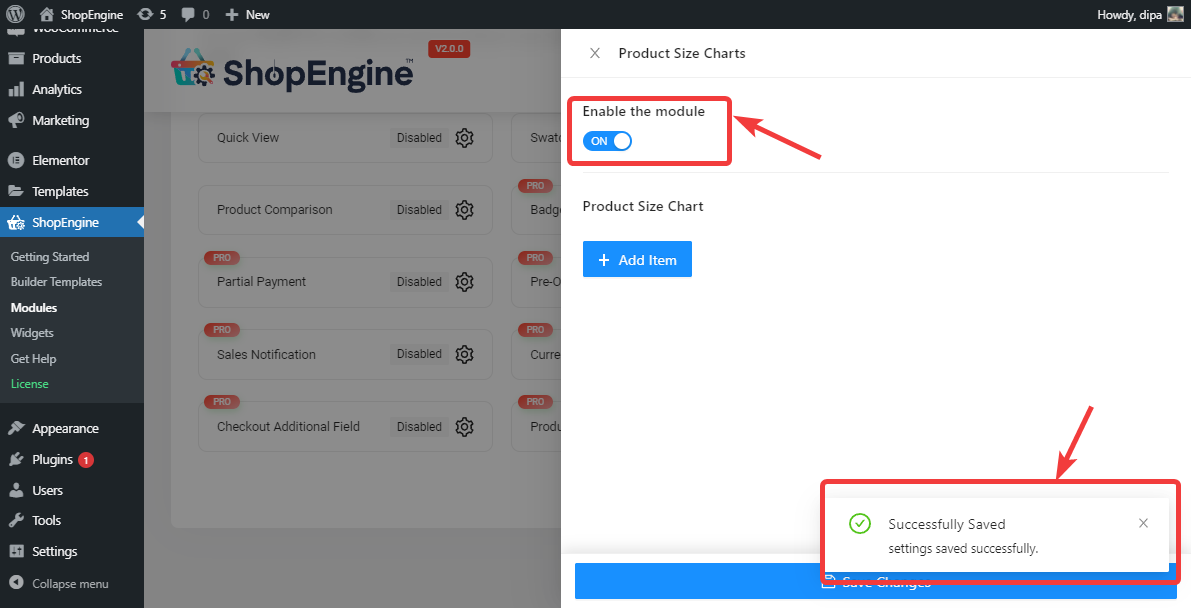
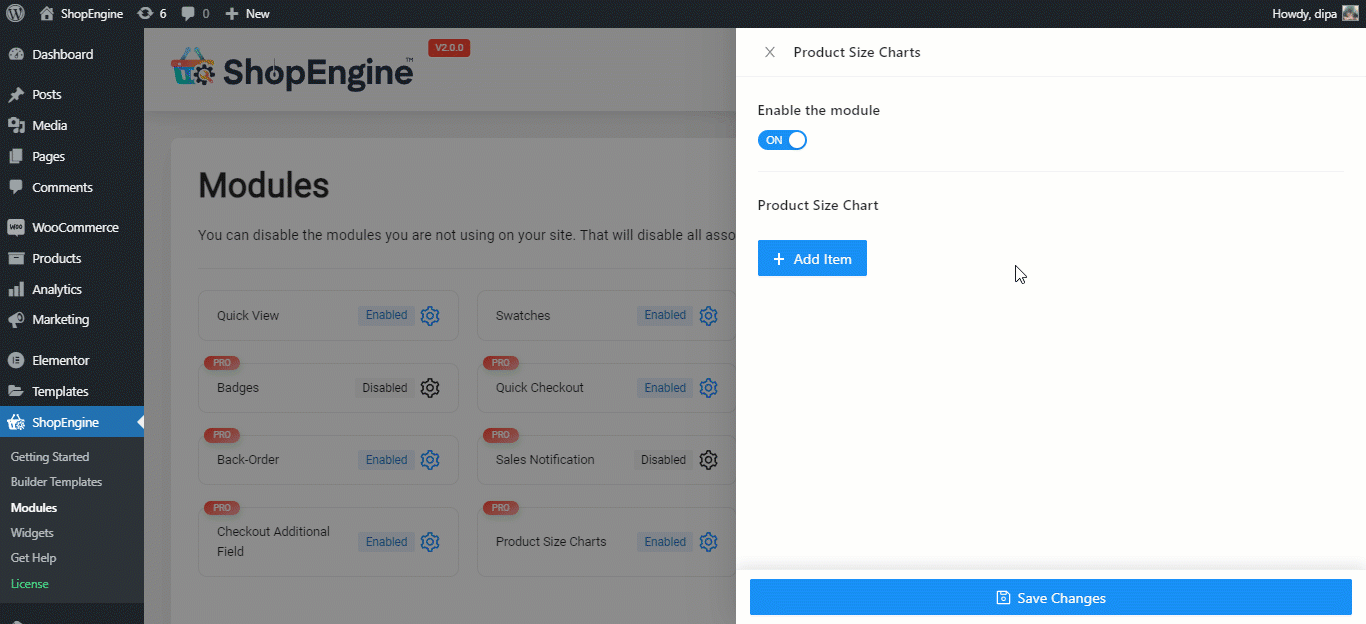
Once you see the settings, turn on the Enable the Module option. You should see a successfully saved message after that.
Note: You can also enable all the modules at the same time. Check out how you can turn on all the modules at once.
Step 2. Add a new product size chart #
To add a new size chart click on the +Add New button

Expand the arrow sign, give a name for the chart tile, click on the select icon to choose a image for this product size chart and select category to which you want to assign the size chart. Once you start typing the category name, a drop down will appear, you can select from that. And finally, click on save changes.
Note: The assigned size chart will be applicable on all the products of the category.
Note: You can add as many charts as you want. After you add and save you can come back anytime to edit the chart title and image of already added charts. And also delete any of the existing charts.
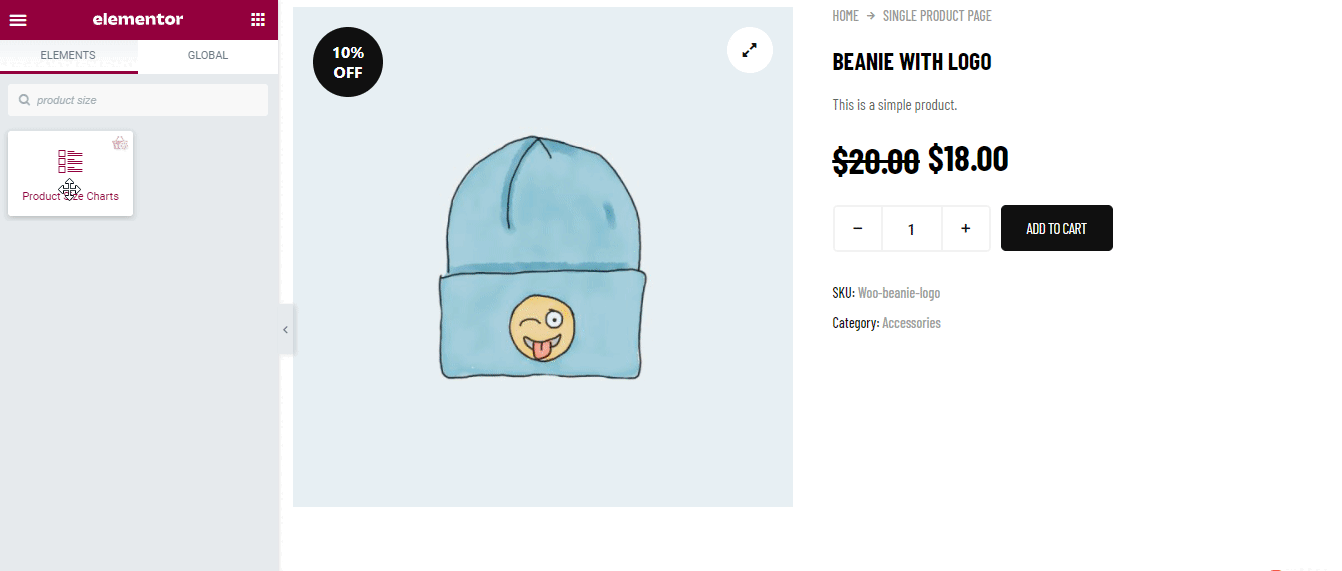
Step 3. Add Product Size Charts widgets to Single Product Template #
Once you are done creating your size charts, you need to add the Product Size Charts widget to your single product page template by ShopEngine to make it visible on the front end.
Note: If you need help on how to create and edit a single product template of shopEngine checkout our documentation.
Once you are on the Edit with Elementor mode of the single product template, search for Product Size Charts widgets and simply just drag and drop on your desired place.
Step 4. Choose Normal Size Chart/ Modal Size Chart Type and customize #
You will get two settings for size chart which includes:
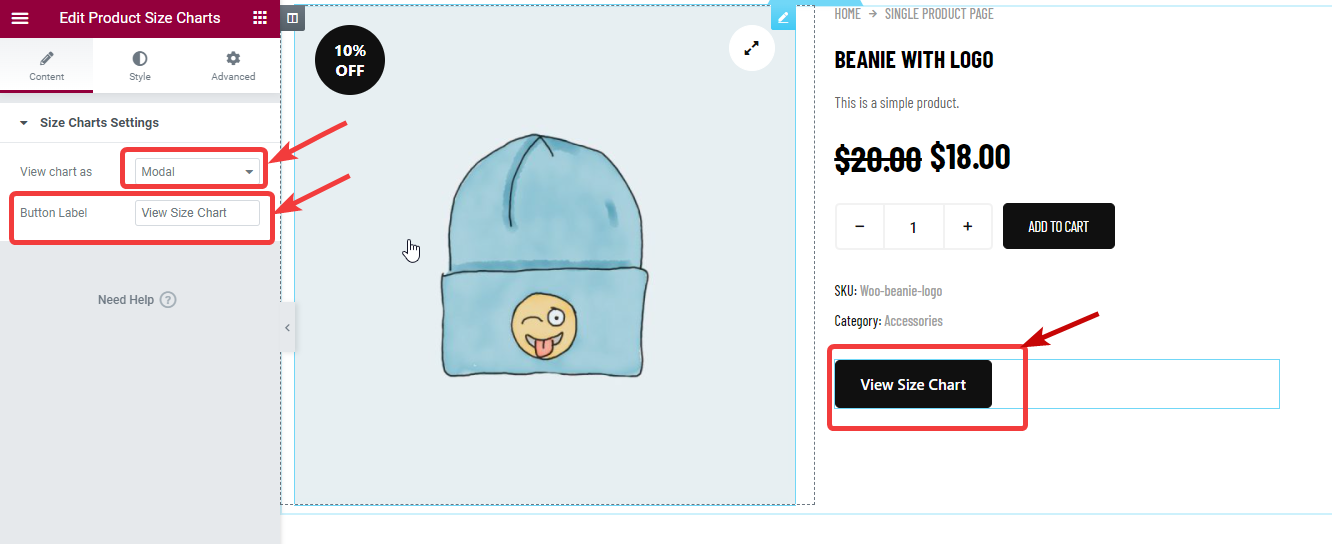
You can display the size chart in two ways, Modal and Normal.
Modal Size Chart: #
Modal is the default option and with modal you also get the option to set a custom button Label.
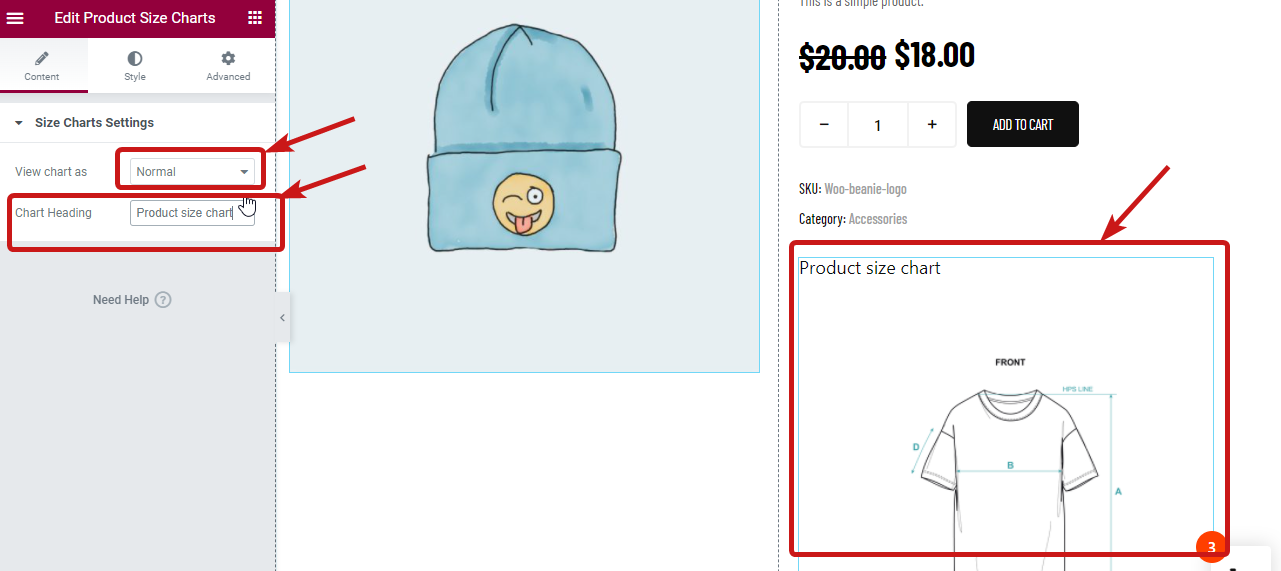
Normal Size Chart: #
If you want to choose a normal mode, from the View chart as dropdown choose Normal. After you choose normal, you will get a new option Chart heading where you can set a custom heading for the image.
Step 5. Style Settings of Modal/Normal Product Size Chart #
Depending on the type of view size chart option you choose, you will get relevant style settings. To access the style settings, move to the style tab on the Elementor editor.
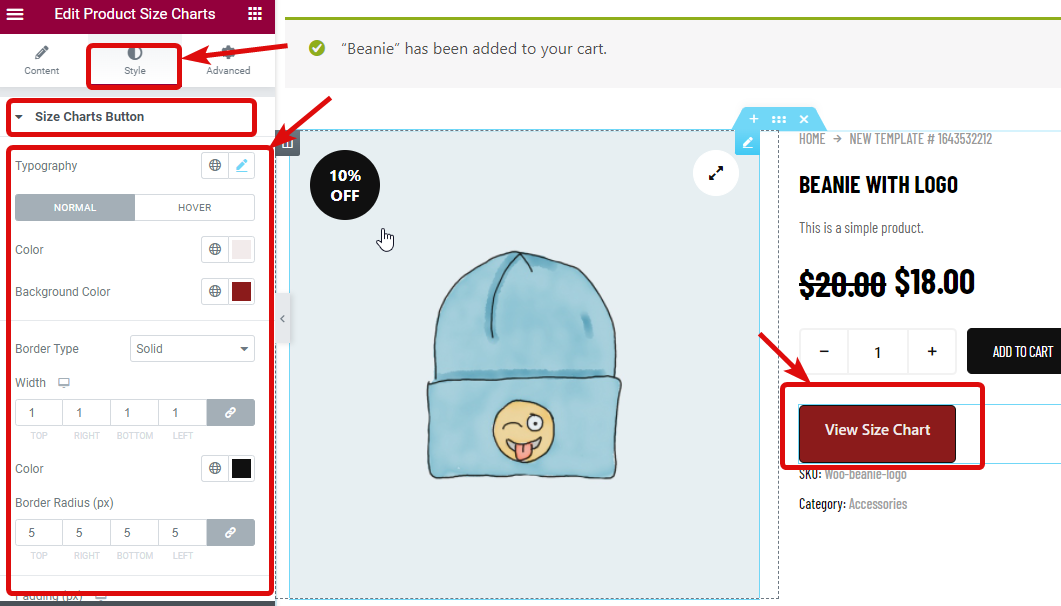
Style Settings for Modal Size Chart: #
For the modal view option of size chart you will get the following style settings that you can customize according to your choice.
Size Charts Button: Expand the size chart menu and you will find the following option:
- Typography:Choose the font size, font family and font weight.
- Color and background color: Select the color and background color for both hover and normal view.
- Border Type: You can choose border type as none, solid, doubled, dashed etc.
- Width: Choose the left, right, top and bottom width.
- Color: Select a color for the border.
- Border Radius (px): Provide a border radius.
- Padding (px): Adjust the top, right , bottom and left padding.
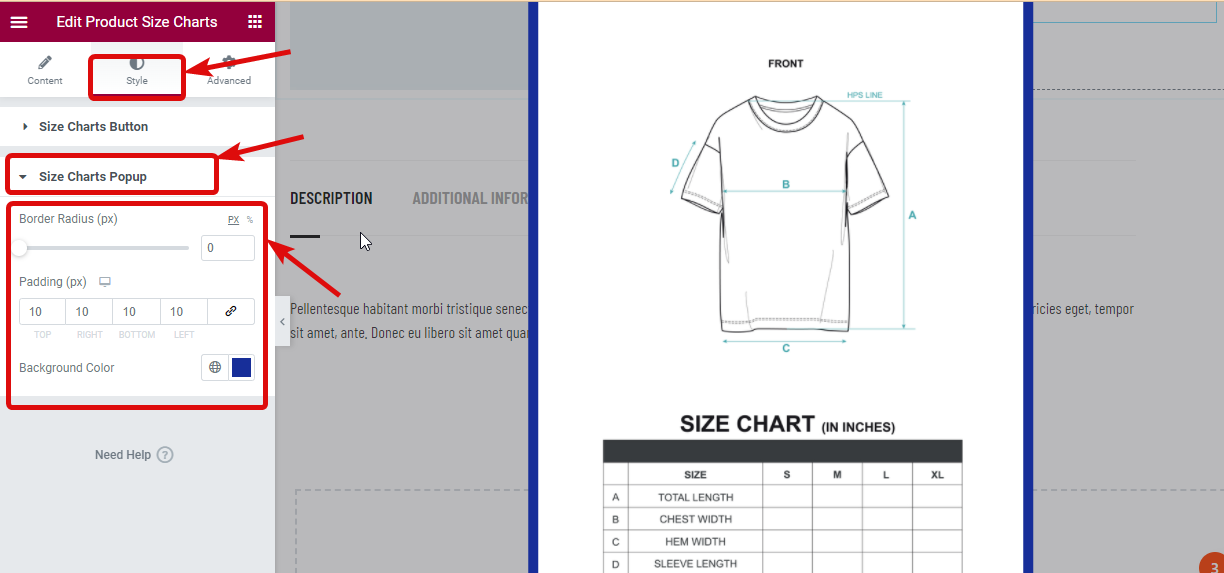
Size Chart Popups: Expand the size chart popup to customize the following option:
- Border Radius (px): Choose a border radius value.
- Padding (px): Adjust the top, right , bottom and left padding
- Background Color: Here you can choose the background color of the image.
If you want to go for the Modal view then after making all the changes click update to save and move to the next step.
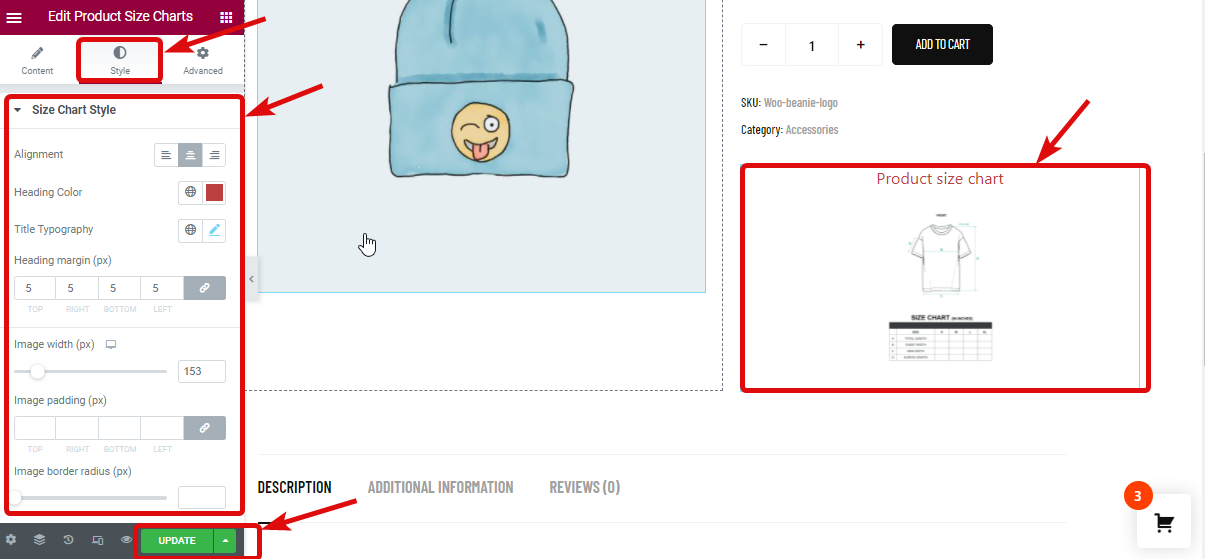
Size Settings for Normal Size chart: #
On the other hand, if you go for a normal view, you will find many options under the Size Chart Style option that you can customize:
- Alignment: Here you can adjust the alignment of the size chart heading.
- Heading Color: Choose a color for the heading.
- Title Typography: Here you can customize the font family, size, font weight and line height.
- Heading margin (px): Adjust the margin around the heading here.
- Image width (px): Here you can adjust the height of the image.
- Image padding (px): Provide padding value for the image
- Image border radius (px): Select a value for the border radius.
Finally click on update to save.
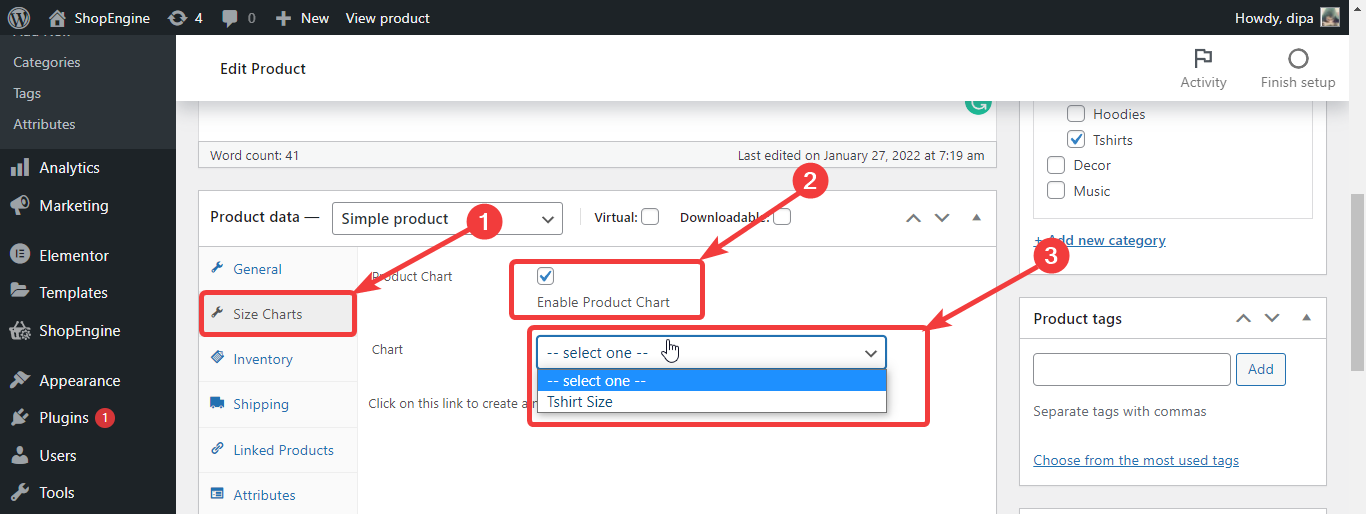
Step 6. Add size charts to product (Optional) #
Note: If you want to assign a new different size chart to a specific product, then you can follow this step. The new size chart that you will assign to a new product will have higher priority than the category size chart.
To add the product size chart to your products, from the WordPress dashboard go to Products ⇒ All products and click on edit option of the product you want to edit.

Now from the product settings, go to Size Charts, Check the Product chart option. Once you check the chart option, the chart dropdown will be accessible. Choose the option you want from the dropdown
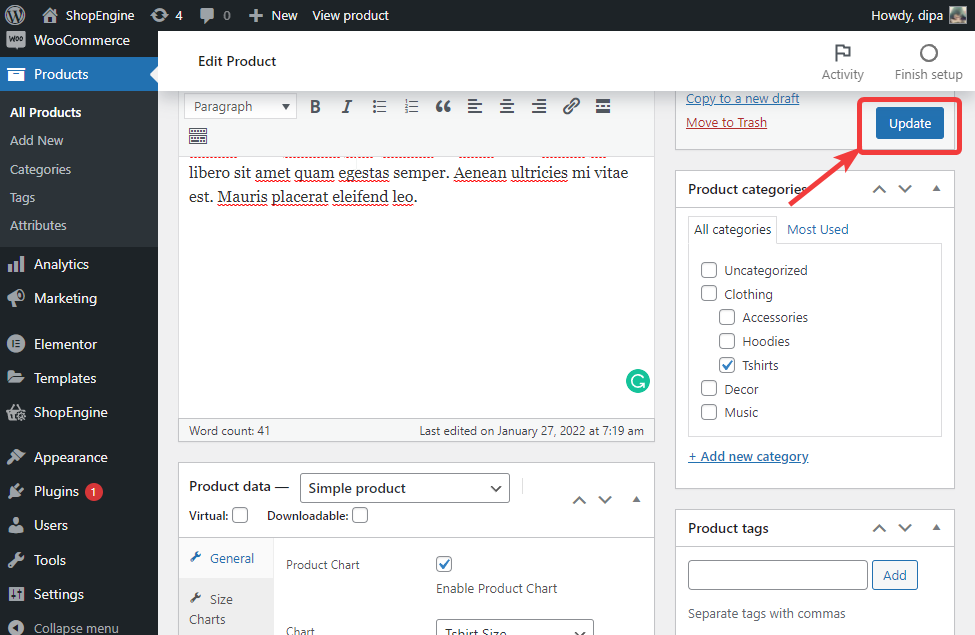
Step 7. Finally, update the product and see preview #
Once you choose your product chart, click on update to save.
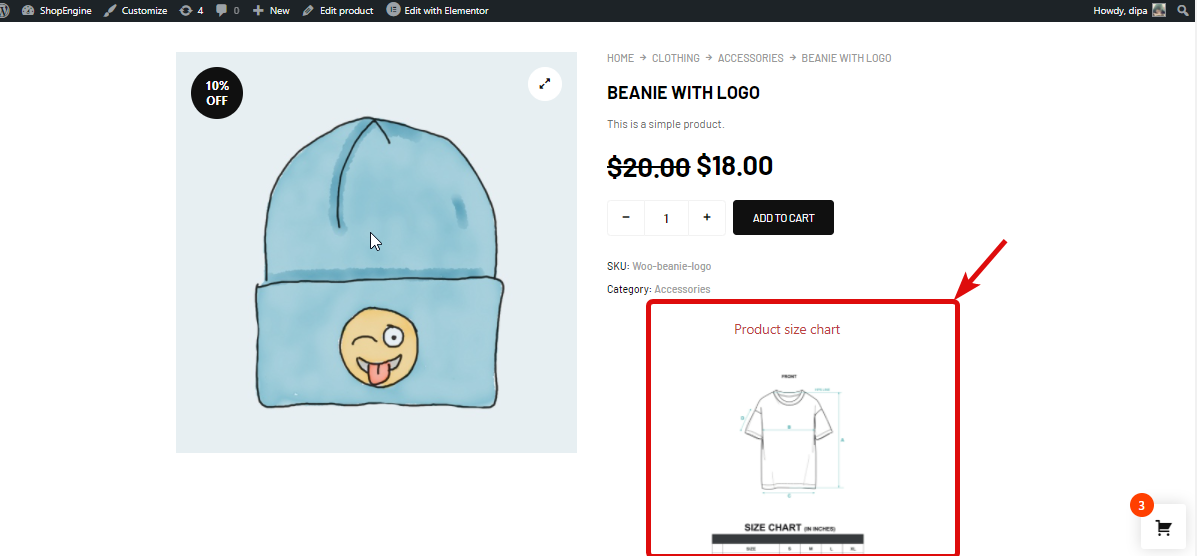
Now to see the final result go to the product page you just edited and you should see the product chart like the preview below.
Note: You need to manually add size charts to all the products for which you want to display the size chart.
Here is preview of Product size cart with normal view
Here is preview of Product size chart with Popup view


