


If you want to boost the revenue for your WooCommerce store, cross sell popup is a great option. ShopEngine has made it easy with its cross sell popup module. If you want to integrate the cross sell popup, follow the instructions shared in this doc.
How to Enable Cross Sell Popup for WooCommerce? #
To integrate the cross sell option for any product of your WooCommerce store, follow the following steps.
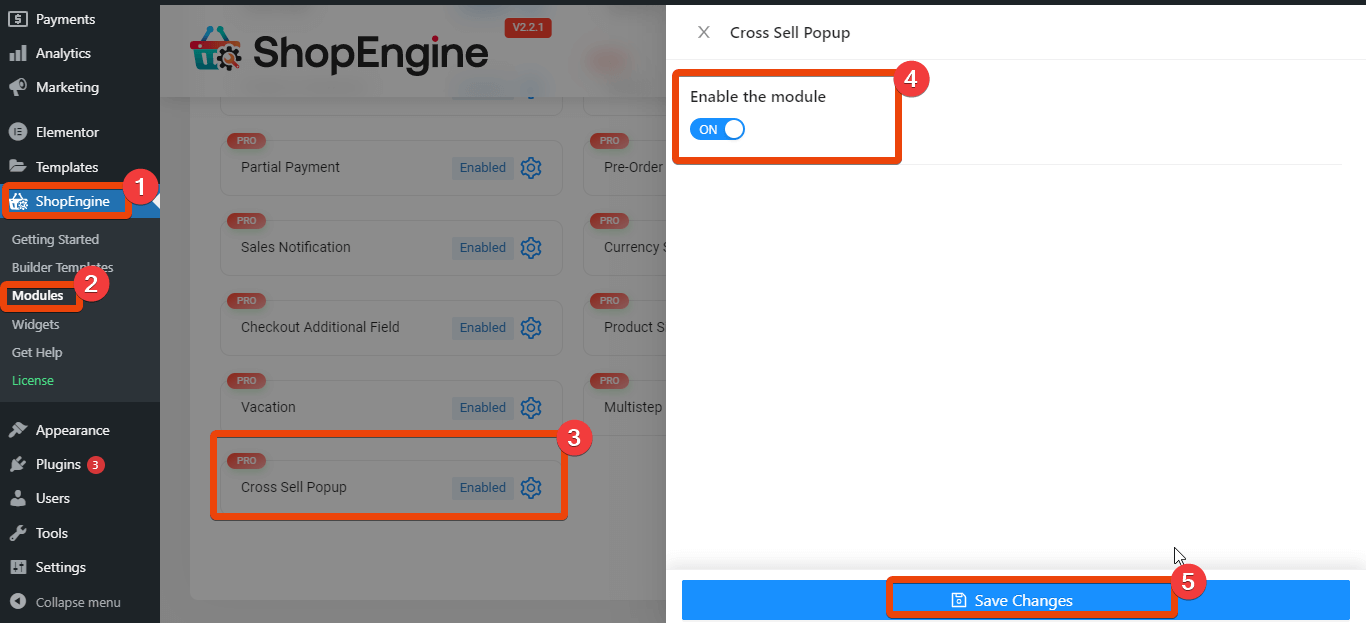
Step 1: Enable the Cross Sell Module #
From your WordPress dashboard, go to ShopEngine > Modules. All the modules will appear. From the list, enable the ‘Cross Sell Popup’ module.
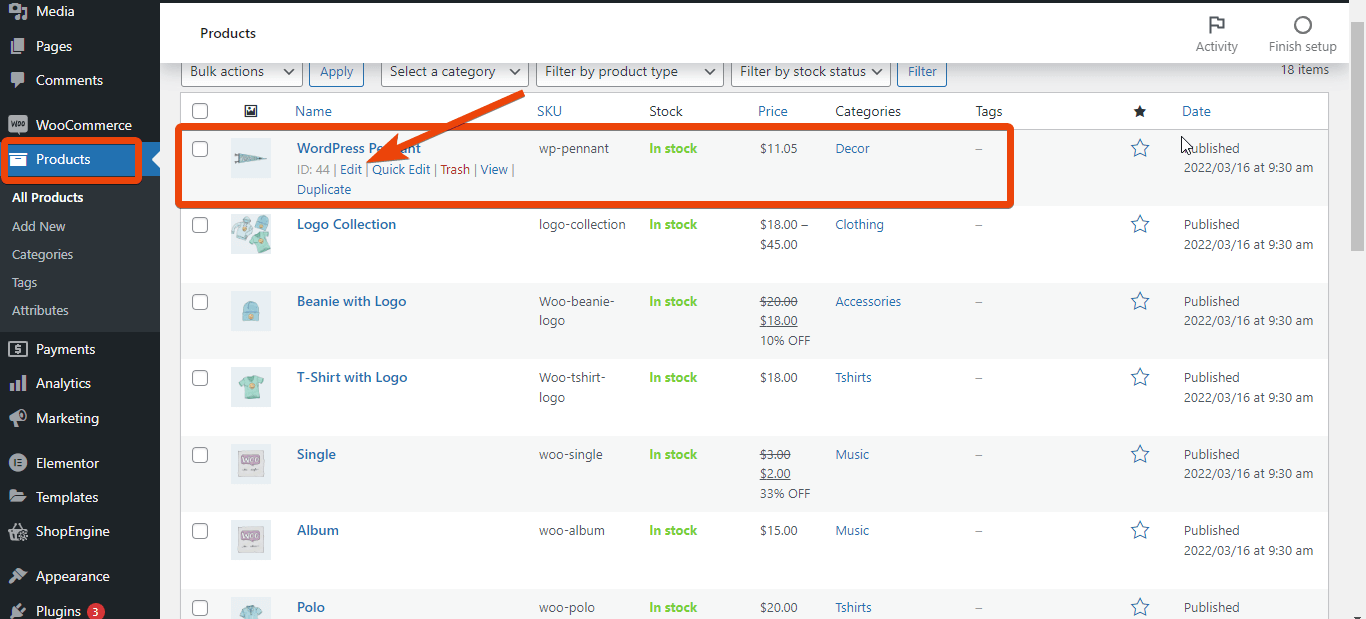
Step 2: Edit the product page #
Now you need to edit the product page for which you want to show the popup for cross sell. Go to ‘products’ and from the list select your required product.
From the product page, go to ‘linked products’ option and click on it. You will see the cross sells option. Now you need to add the products for popup. Enter the first three letters of a product name and you will see the product in the suggestion.
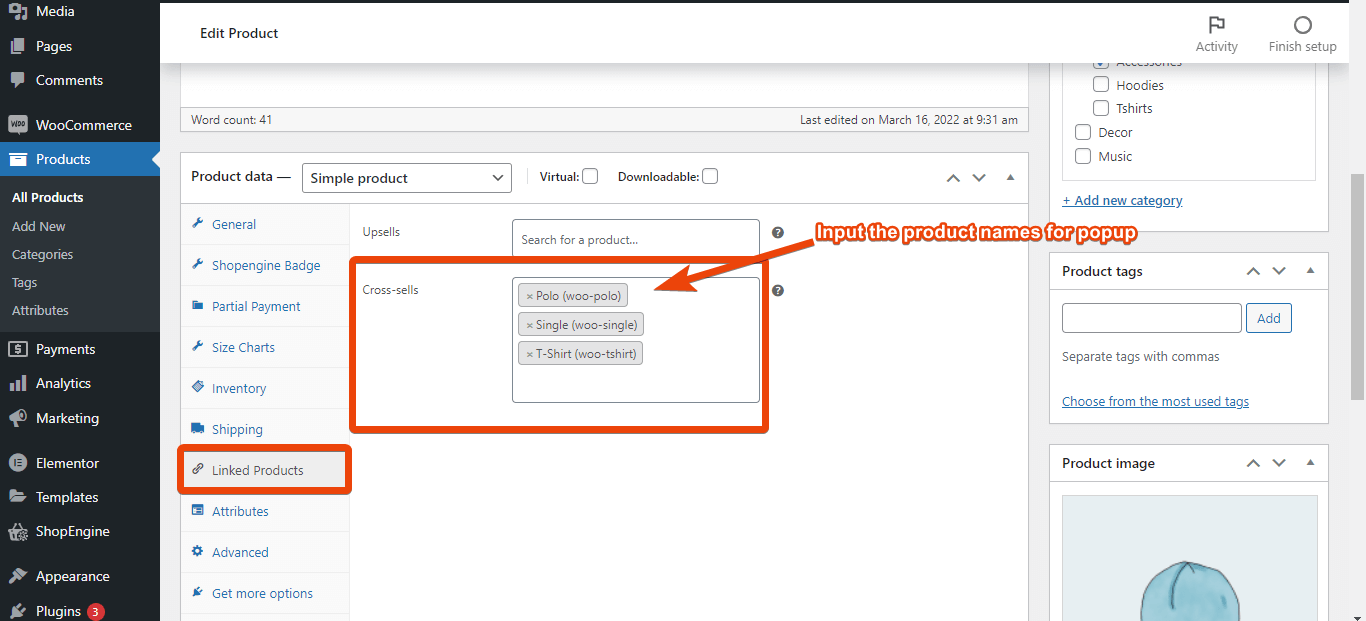
Now add the products for popup one by one. Once you have added the products for popup, update the product page.
Step 3: Preview the product page #
After adding the products for popup, preview the product page and select ‘ADD TO CART’.
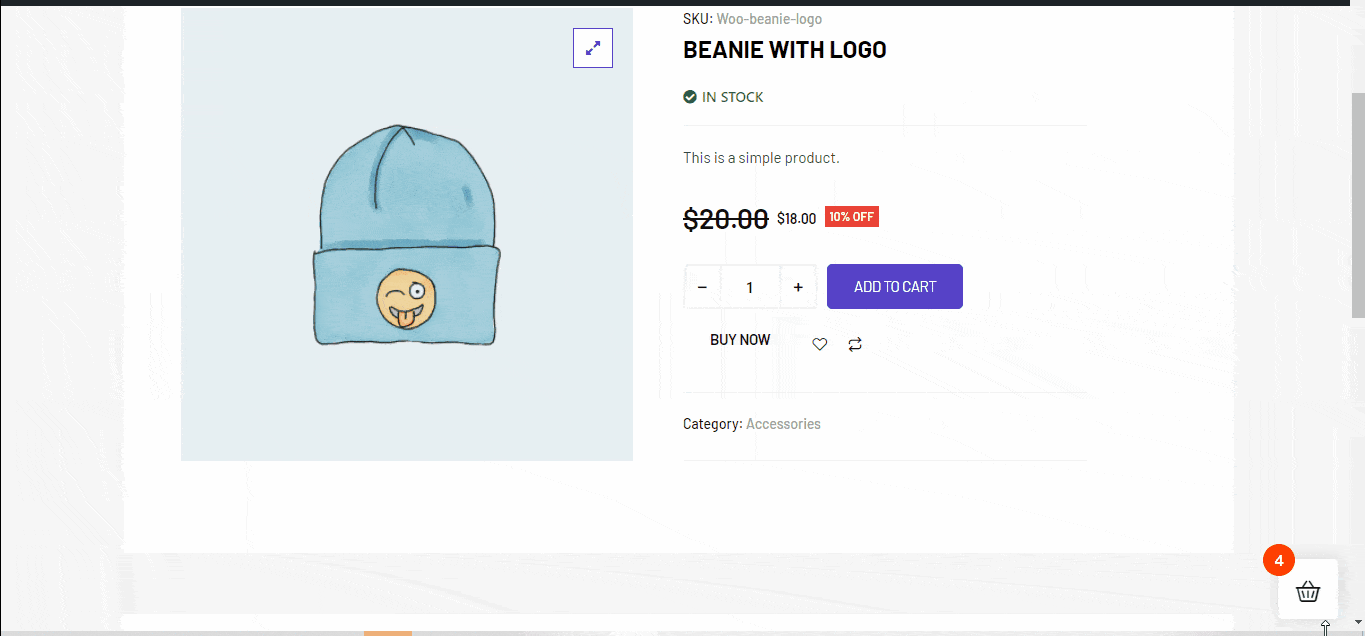
If you have integrated the cross sell popup properly, it will show a popup with products.
Check it and if everything looks good, a cross sell popup is working for your WooCommerce store. In a similar style, you can add cross sell popups for other products as well.


