

ElementsKit is the compact Elementor addon that comes with all the customizable features you need for your WordPress site using 85+ ElementsKit widgets, extensions, and modules. This includes the Elementor heading title widget that lets you add customized heading to pages on your WordPress website.
How to change the heading style in an Elementor? #
Using the ElementsKit Heading widget you can style the WordPress page headings the way you want. To use the widget, you need to have the ElementsKit plugin installed on your WordPress site. After that, enable the Heading widget, then configure the Elementor heading title attributes, and customize the heading style. Read this documentation to learn how to use the ElementsKit Heading widget for Elementor.
Step 1: Enable Heading Widget #
To use the Elementor heading title widget from ElementsKit, first, you have to enable the widget.
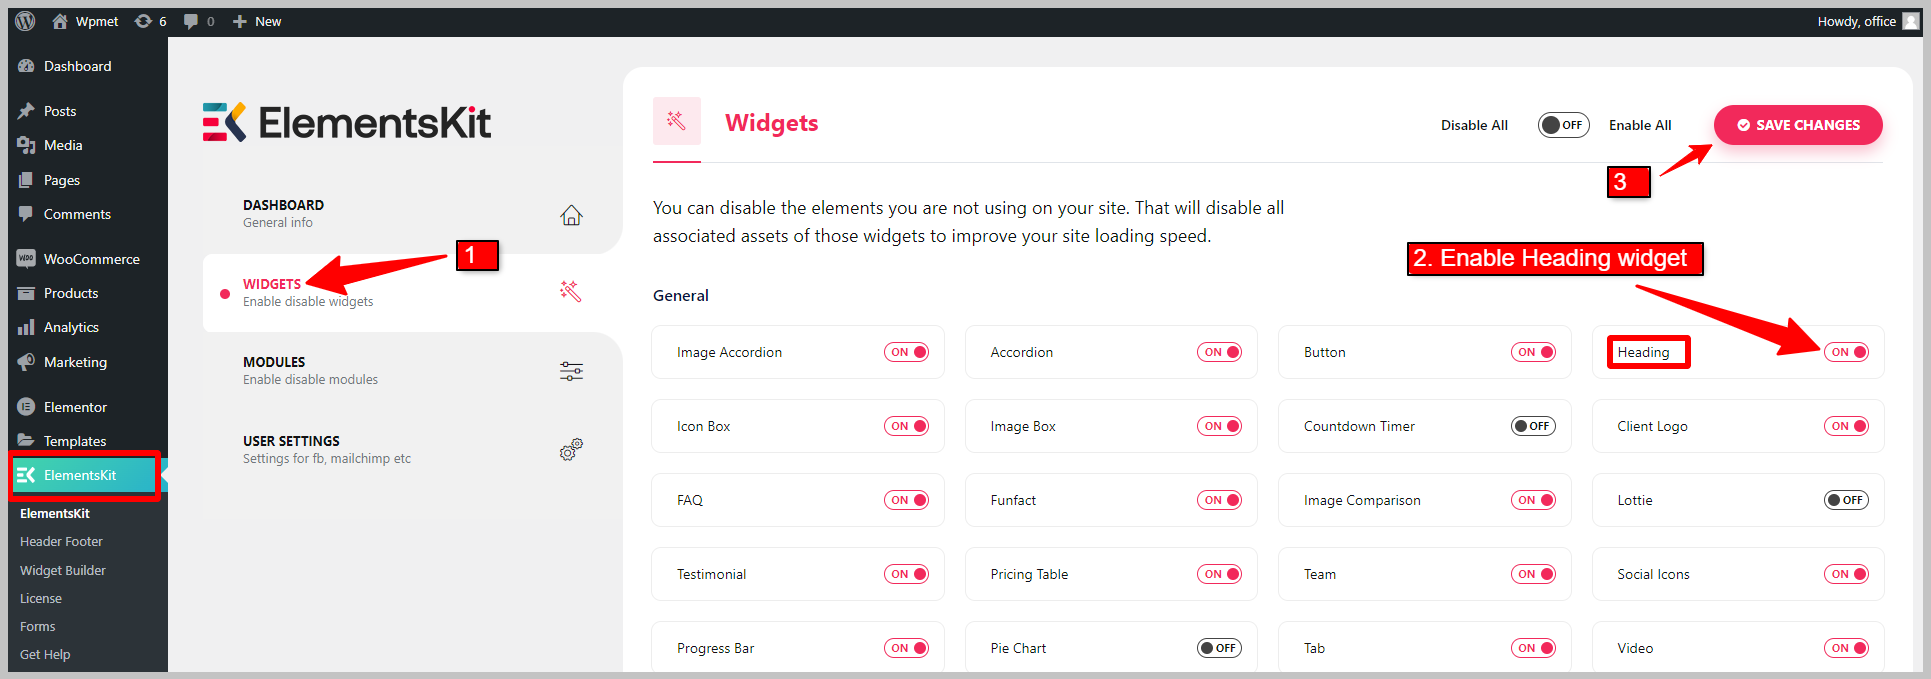
- Go to ElementsKit > Widgets from your WordPress dashboard.
- Find the Heading widget and enable the widget.
- Click on the SAVE CHANGES button at the top right corner.
Step 2: Configure the heading title in Elementor #
Now open the Elementor editor, then drag and drop the ElementsKit Heading widget. You can configure the Title, Subtitle, Title Description, Shadow Text, and Separator.
2.1 Title #
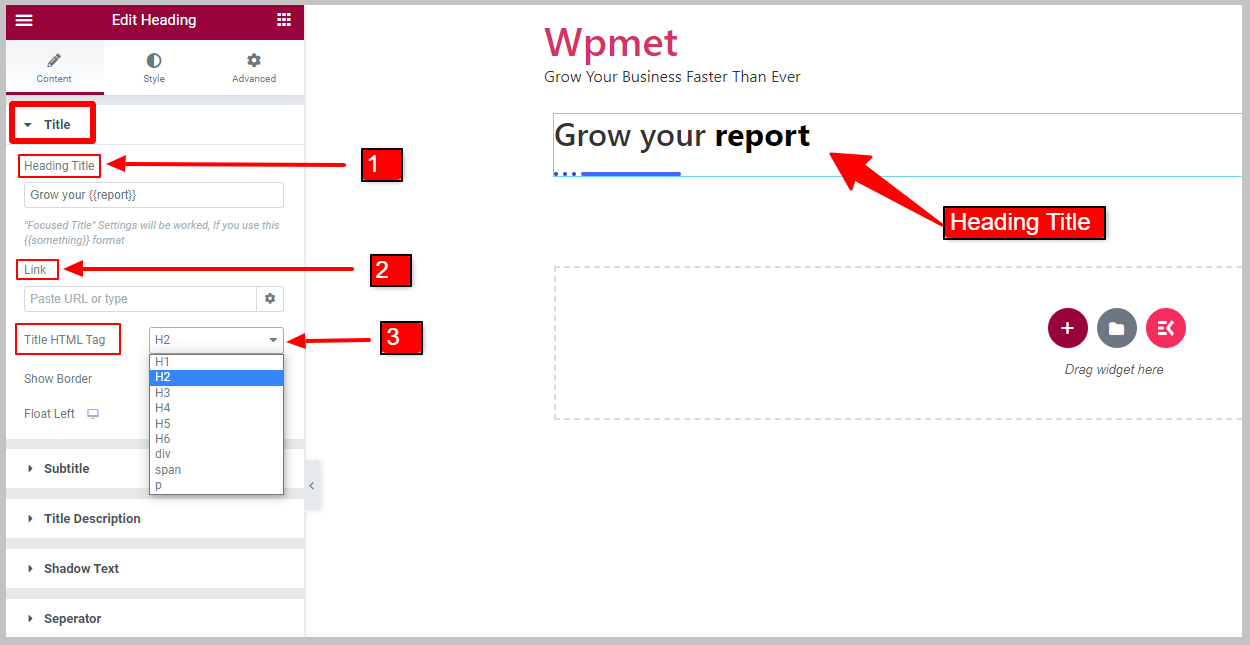
In the Title section,
- Enter the Heading Title. You can bring focus to a part of the heading by putting that part under the curl bracket {}.
- Add a URL Link for the Elementor heading title.
- Select the Title HTML Tag (H1, H2, H3,…) for the heading.
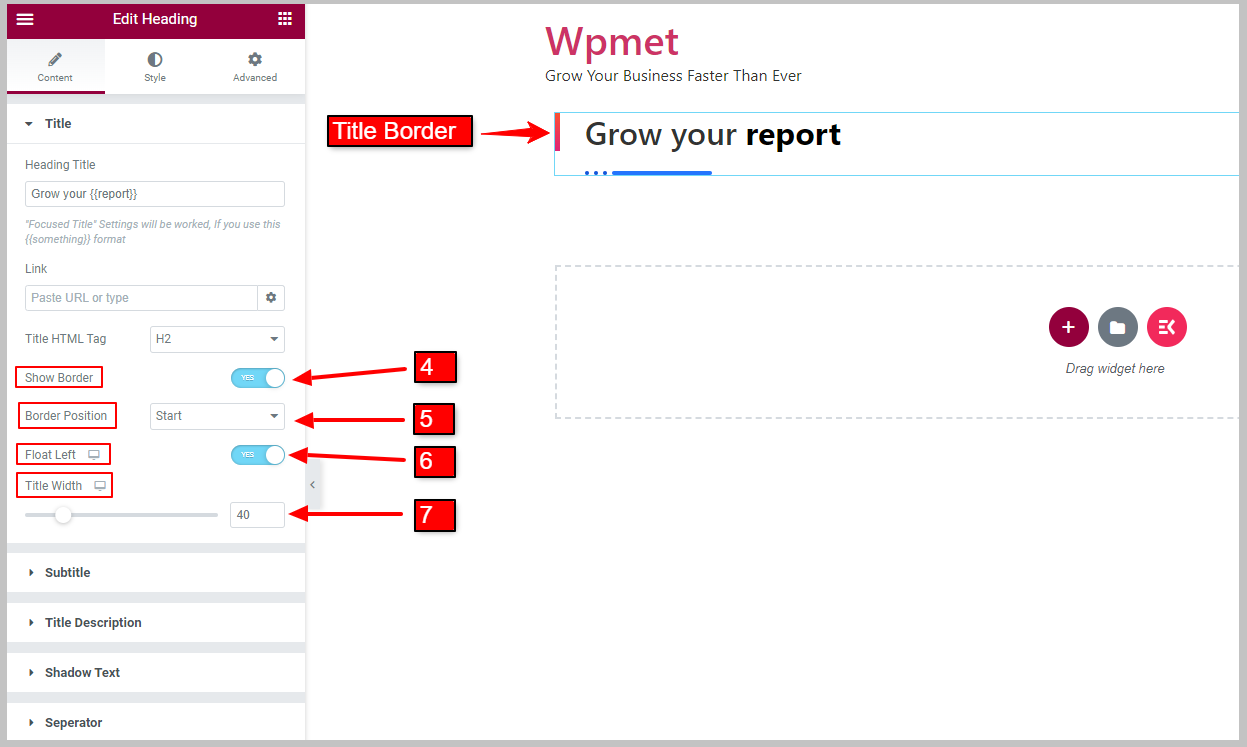
- Enable Show Border to display the border beside the heading title. When you enable the title border, the Border Position option will appear.
- Choose the title Border Position from the given option: Start or End of the title.
- Enable the Float Left option. When Float Left is enabled, the Title Width option will appear.
- After that, you get to adjust Title Width
2.2 Subtitle #
To display subtitles, first enable the Show Sub Title option.
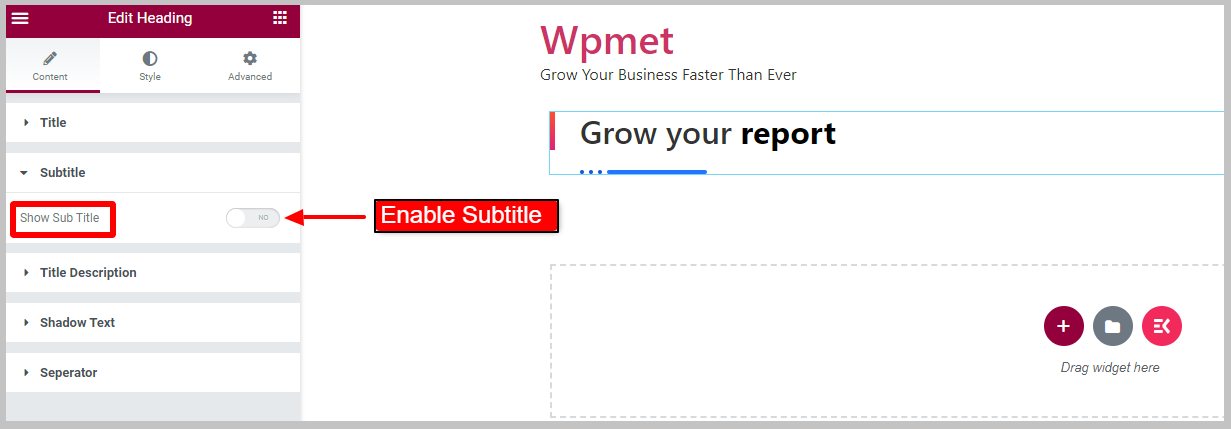
- Enter Heading Sub Title.
- Set Sub Title Position from the given option: Before Title and After Title.
- Select the Sub Title HTML Tag (H1, H2, H3,…) from the given option.
- You can enable the Show Outline option. [Note: This option only works if the Border Sub Title is disabled.]
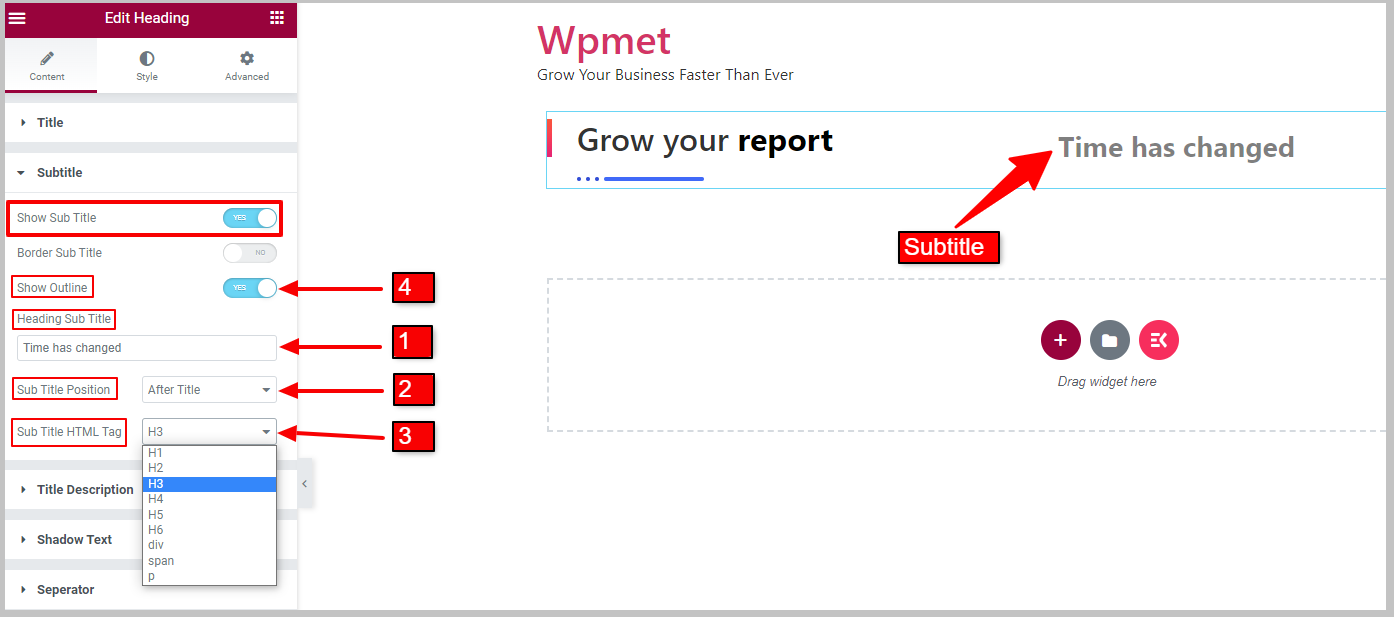
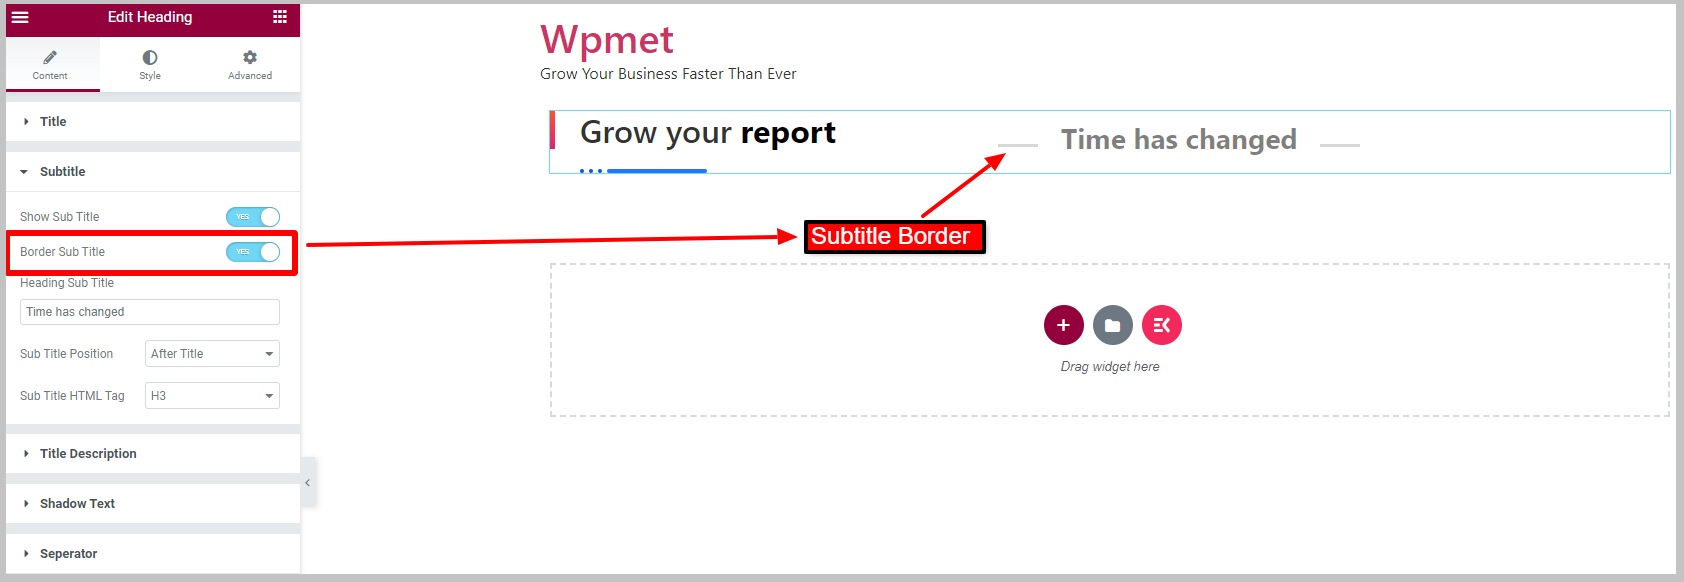
You can also enable Border Sub Title to display the border around the subtitle. When you enable the subtitle border, the Show Outline will be disabled.
2.3 Title Description #
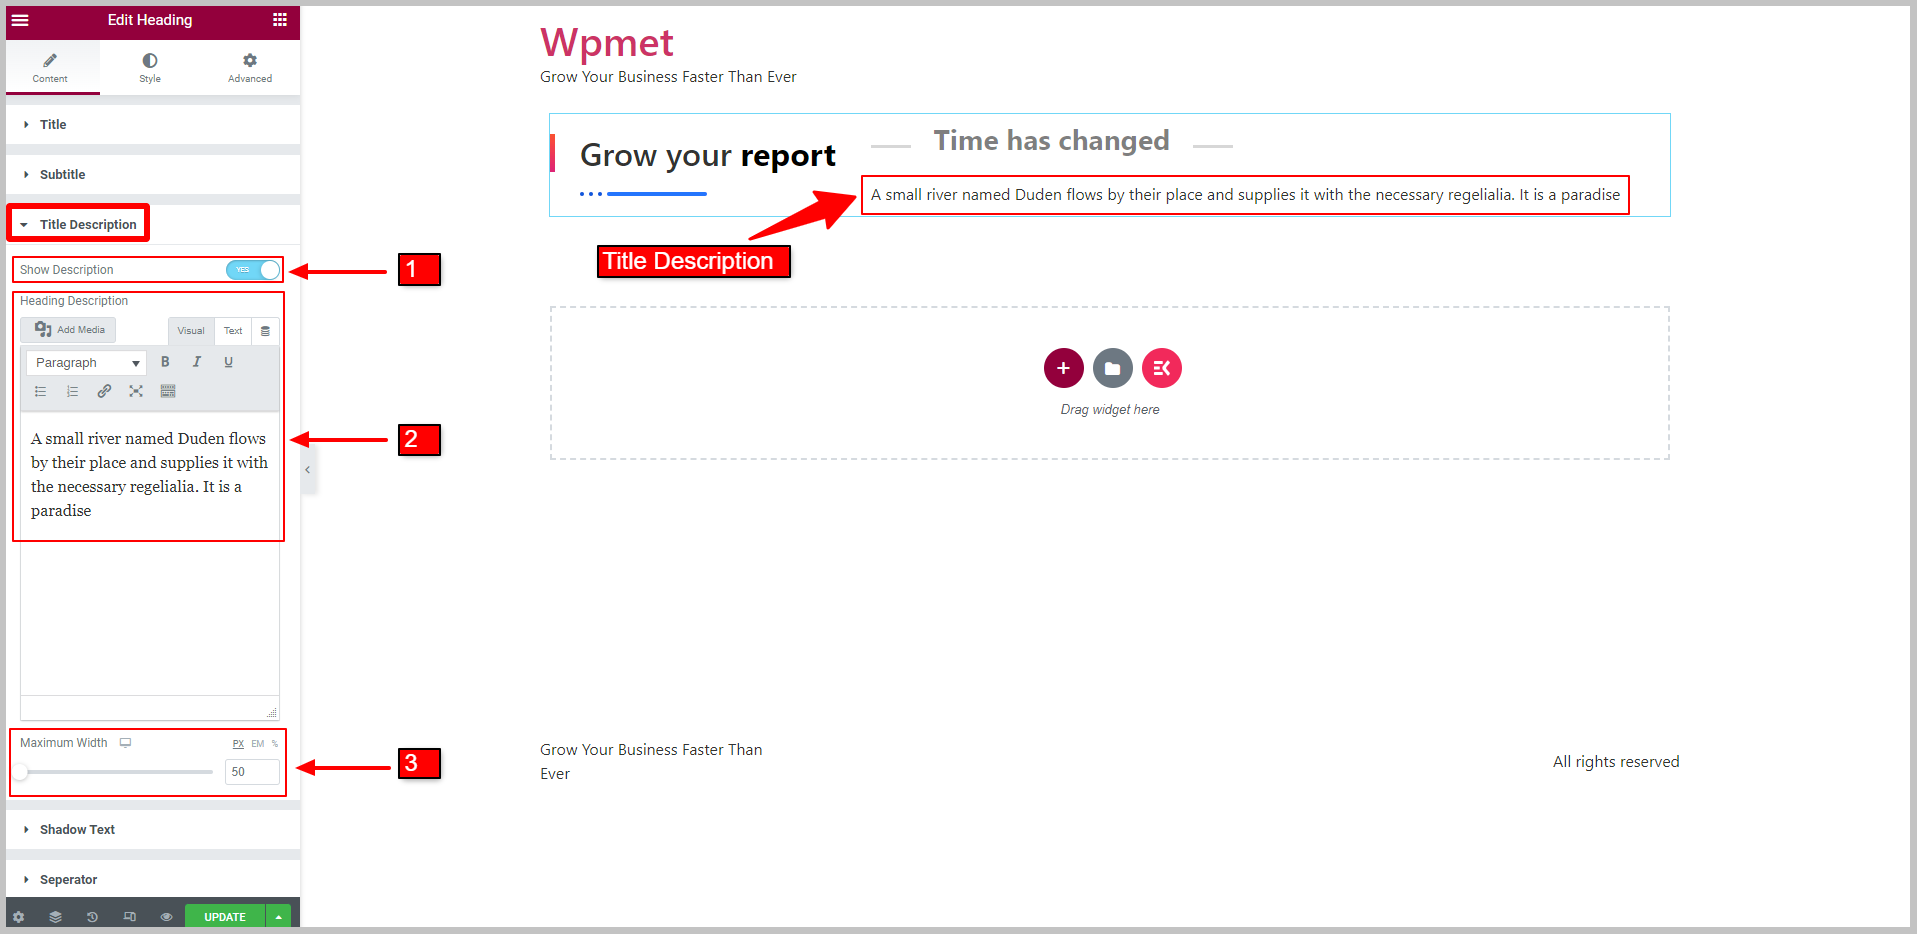
To display the description alongside the heading title,
- Enable the Show Description feature for the heading title widget.
- Enter the Heading Description on the respective field.
- You can adjust the Maximum Width for the description.
2.4 Shadow Text #
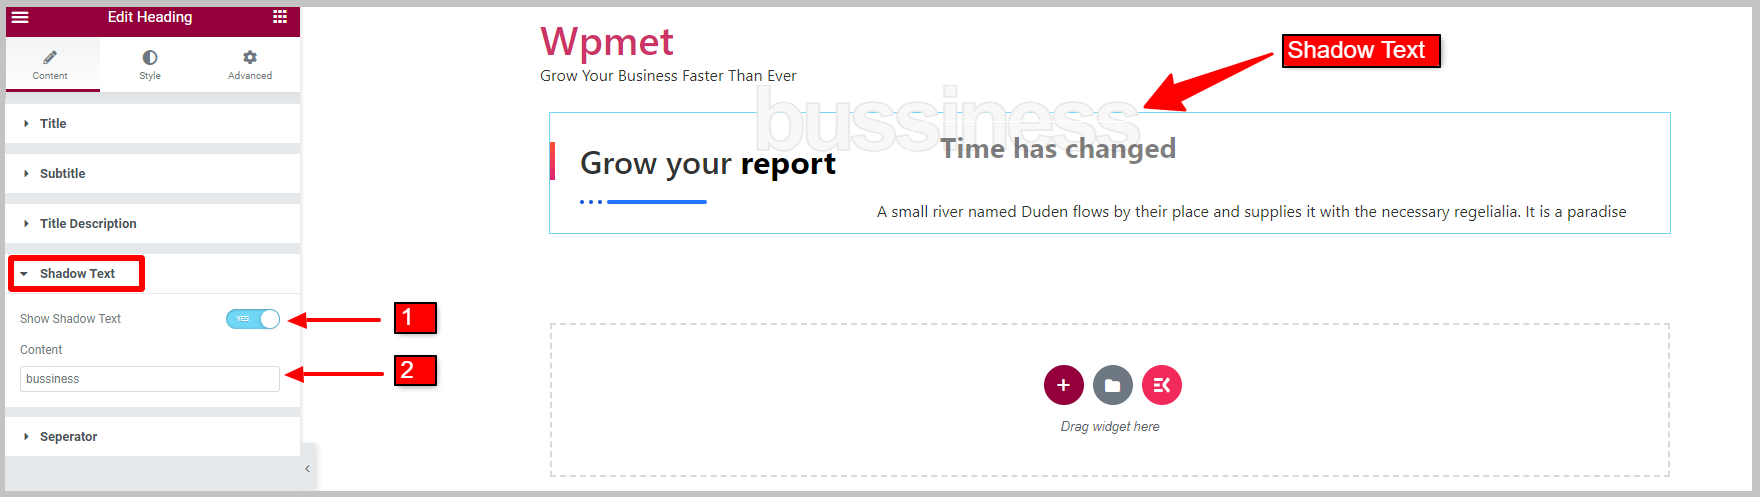
To display a shadow text,
- Enable the Show Shadow Text feature.
- Enter the Context of the shadow.
2.5 Separator #
To show the separator for a heading title,
- Enable the Show Separator feature for the Elementor heading title.
- Select the Separator Style from the given options: Dotted, Solid, Solid with Star, Solid with Bullet, and or Custom.
- Set the Separator Position at the Top of the title, Before title, After title, or Bottom of the title.

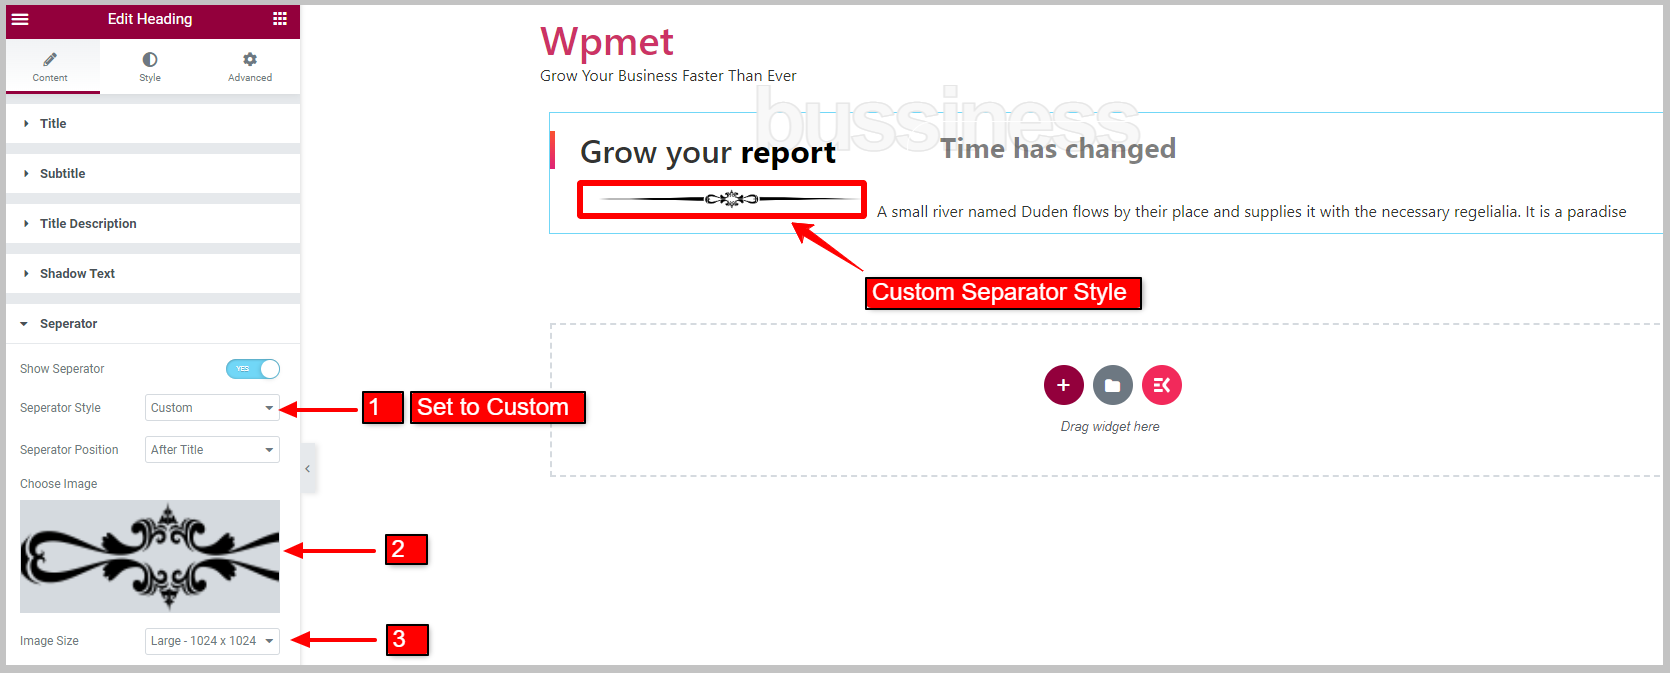
Custom Separator Style:
When you choose Separator Style to Custom, you get to choose the image and image size.
- Select Separator Style to Custom.
- Choose image from the media library.
- Choose the Image Size size from the given option.
Step 3: Customize the heading title widget style #
Using ElementsKit’s Heading title widget for Elementor, you can customize the title, focused title, subtitle, title description, separator, and shadow text.
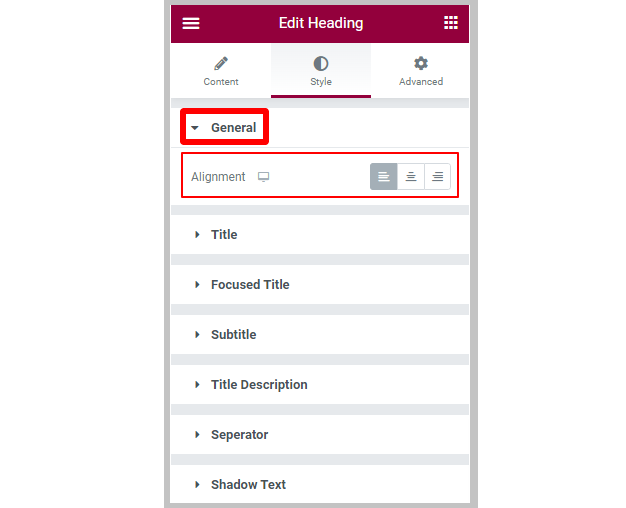
3.1 General #
Under the General section, set the Alignment to left, right, or center.
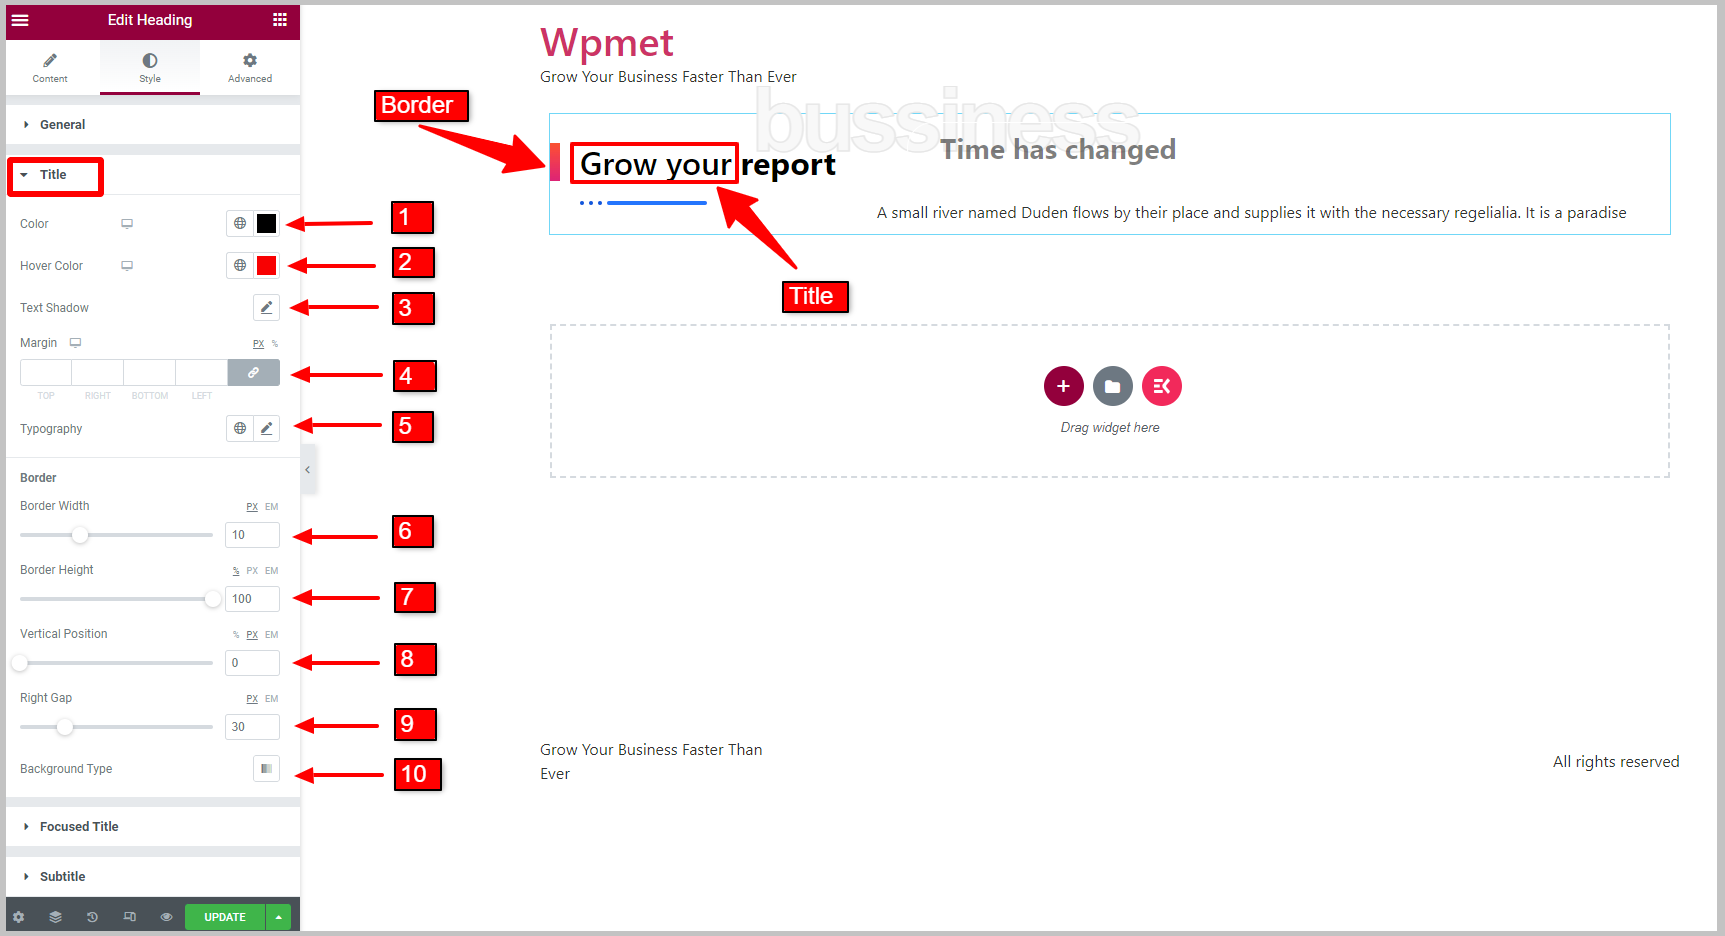
3.2 Title #
To customize the Title style in the heading title widget,
- Select the Color for the title.
- Select the Hover Color for the title.
- Adjust Text Shadow.
- Set Margin for the heading title.
- Set Typography.
For the title Border,
- Adjust Border Width.
- Adjust Border Height.
- Set the Vertical Position.
- Adjust the Right Gap between the border and title text.
- Select the Background Type for title border.
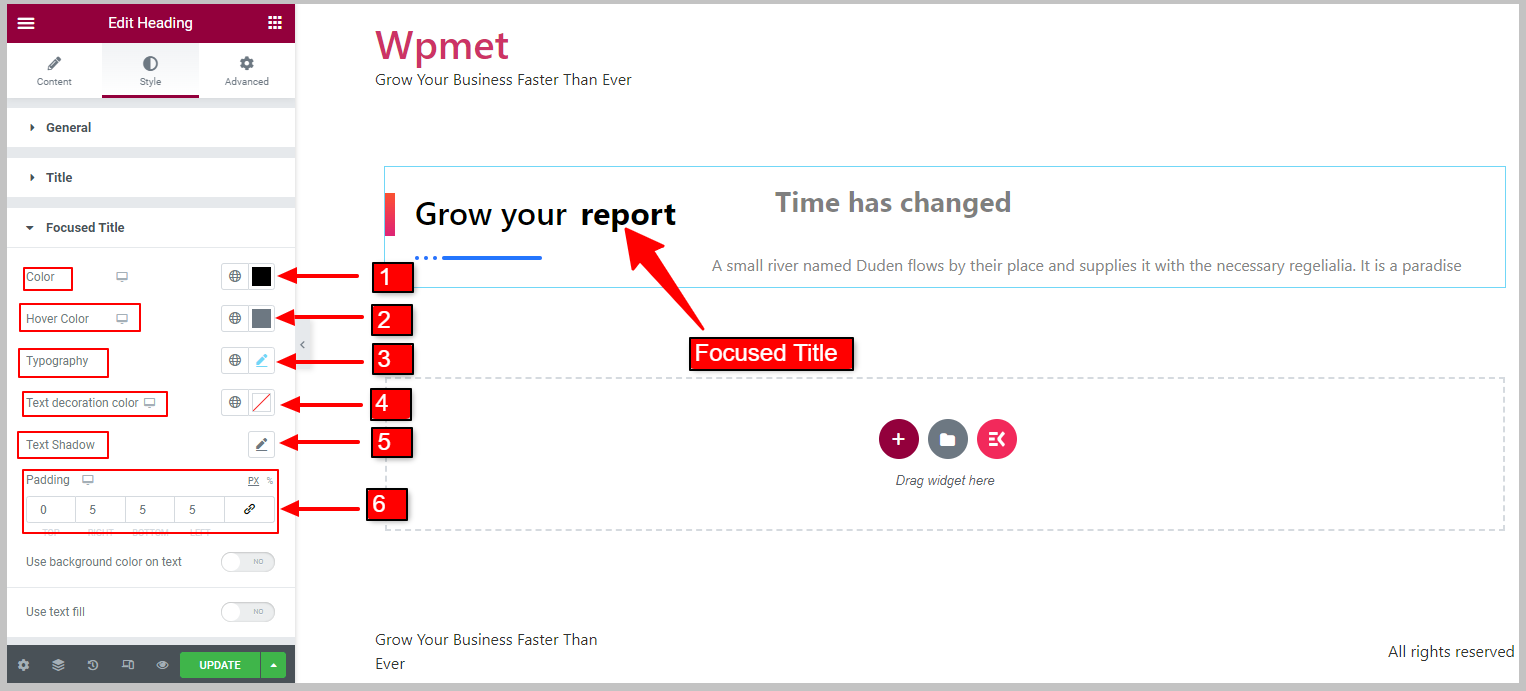
3.3 Focused Title #
To customize a Focused Title,
- Select the Color for the focused title.
- Choose Hover Color for the focused title.
- Set the Typography.
- You can set a Text Decoration Color.
- Option to set Text Shadow is available too.
- Set Padding for the focused title.
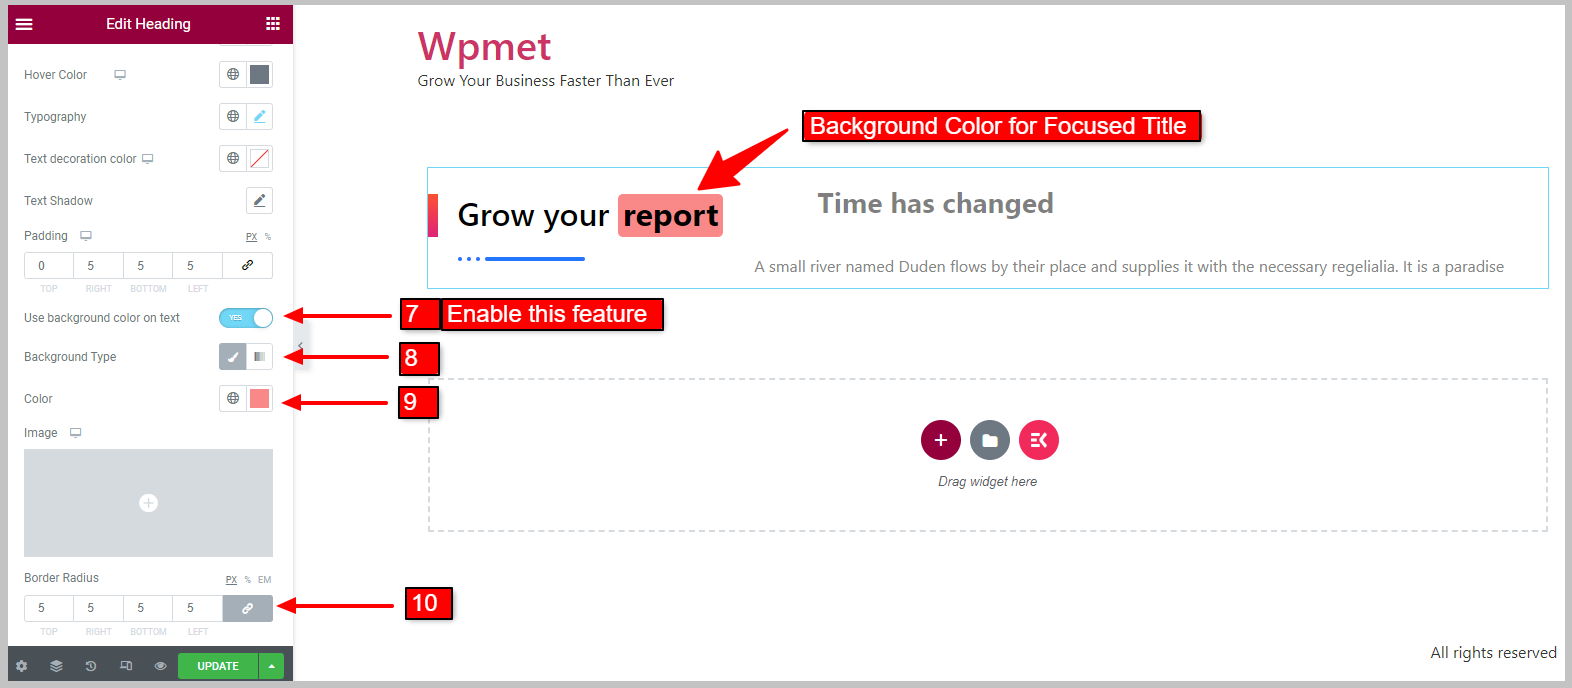
Background Color for Focused Title:
[Note: When you enable this feature, Use text fill feature won’t be available. Similarly, when Text Fill is enabled, Focused Title Background Color won’t be available]
- Enable the Use background color on text feature.
Once enabled, the following features will appear:
- Select the Background Type.
- Choose Background Color
- Set Border Radius for the focused title background.
Text Fill for Focused Title:
[Note: When Focused Title Background Color is enabled, this feature won’t appear. Similarly, when Text Fill is enabled, Focused Title Background Color won’t be available]
- Enable the Use text fill feature for Focused Title.
Once enabled, the following features will appear:
- Select the Background Type for Text Fill.
- Choose the Text Fill Color.

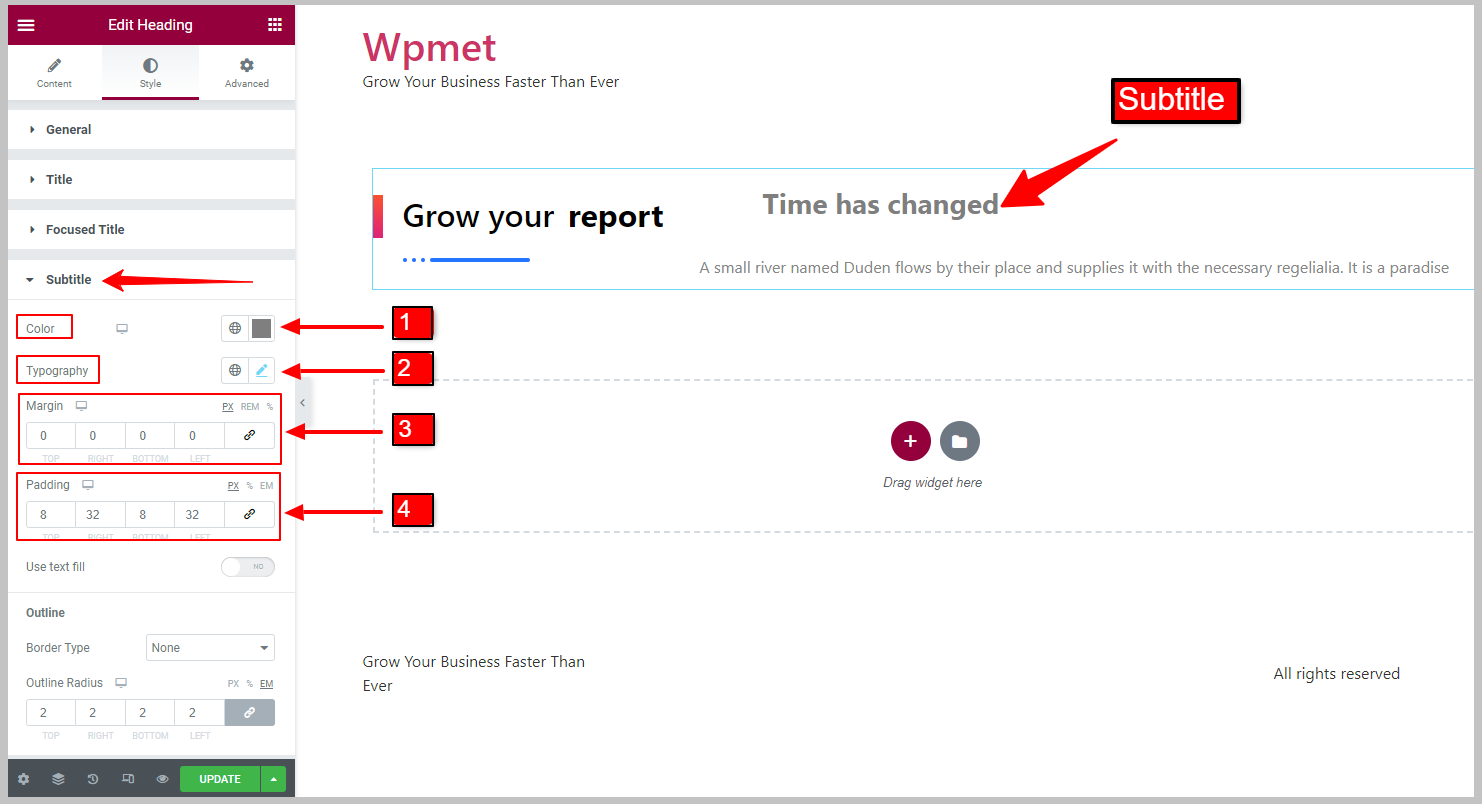
3.4 Subtitle #
To customize the Subtitle styles,
- Choose Color for Subtitle.
- Set the Typography of the subtitle text.
- Adjust Margin for the subtitle.
- Adjust Padding for the subtitle.
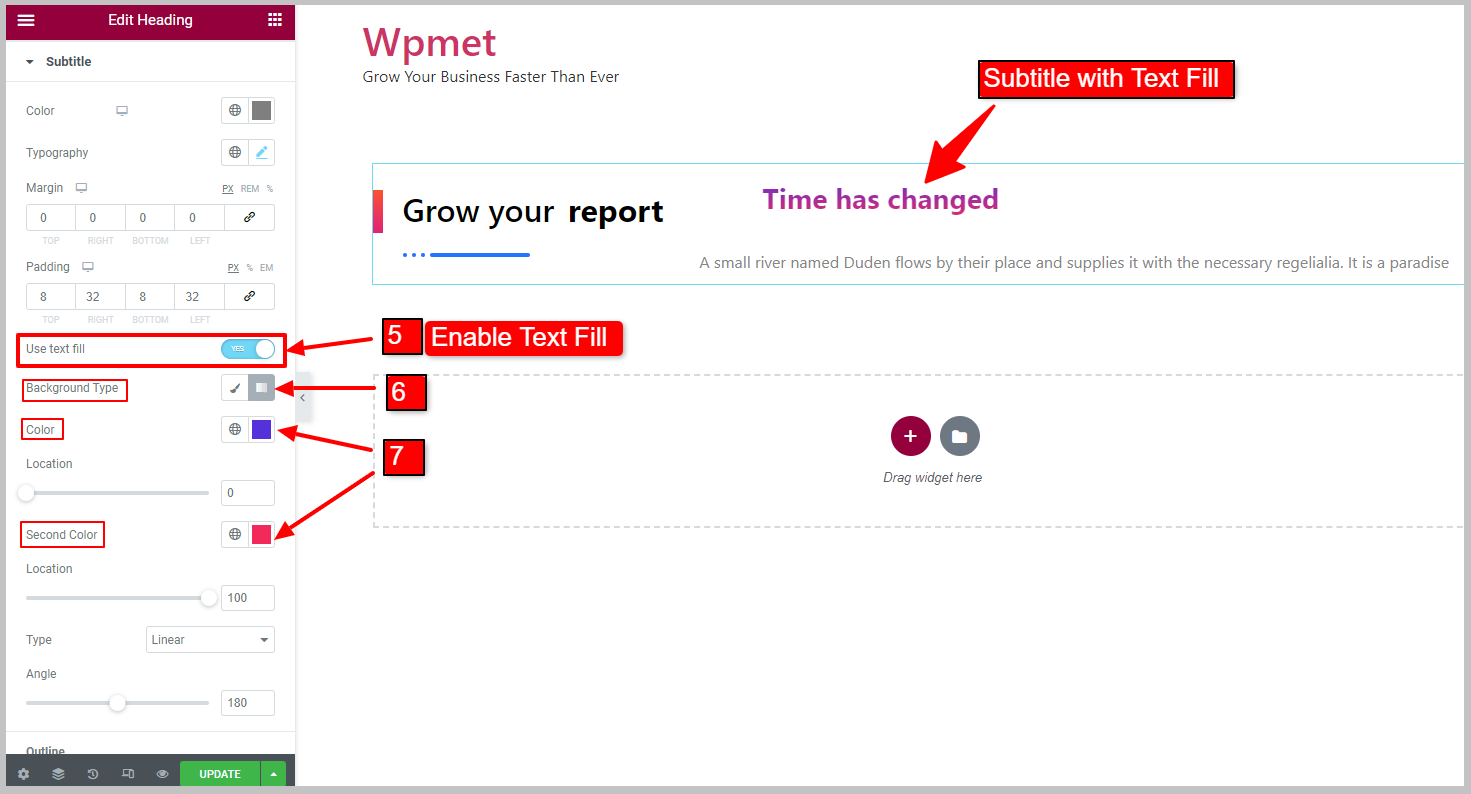
Text Fill for Subtitle:
- Enable the Use text fill feature for Subtitle.
Once enabled, the following features will appear:
- Select the Background Type of Subtitle.
- Choose the Subtitle Text Fill Color
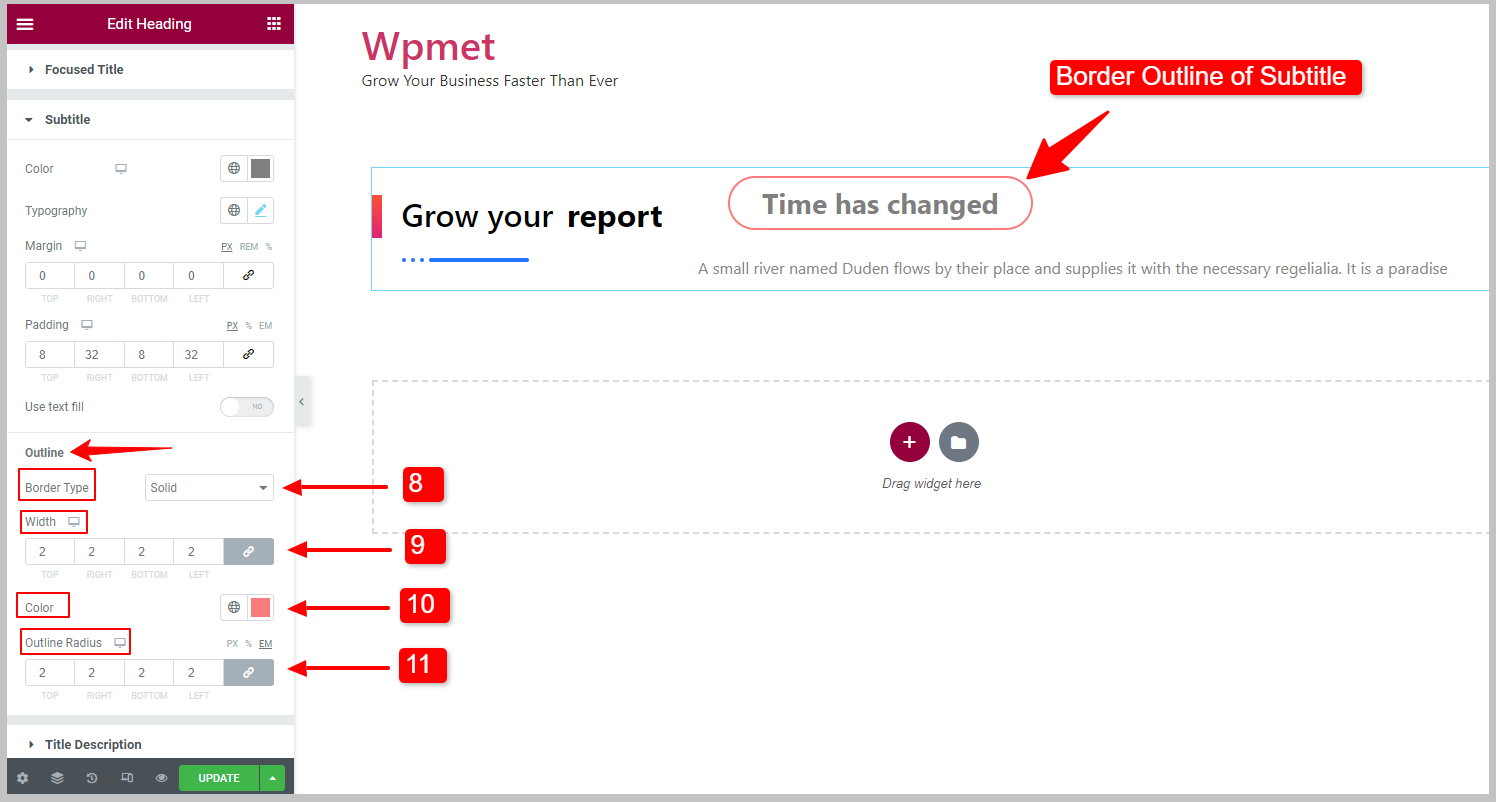
Subtitle Outline:
You can draw an outline around the subtitle.
- Select the Border Type for the Subtitle outline.
- Set the Width of the outline.
- Choose the Border Color.
- Adjust the Outline Radius for the subtitle.
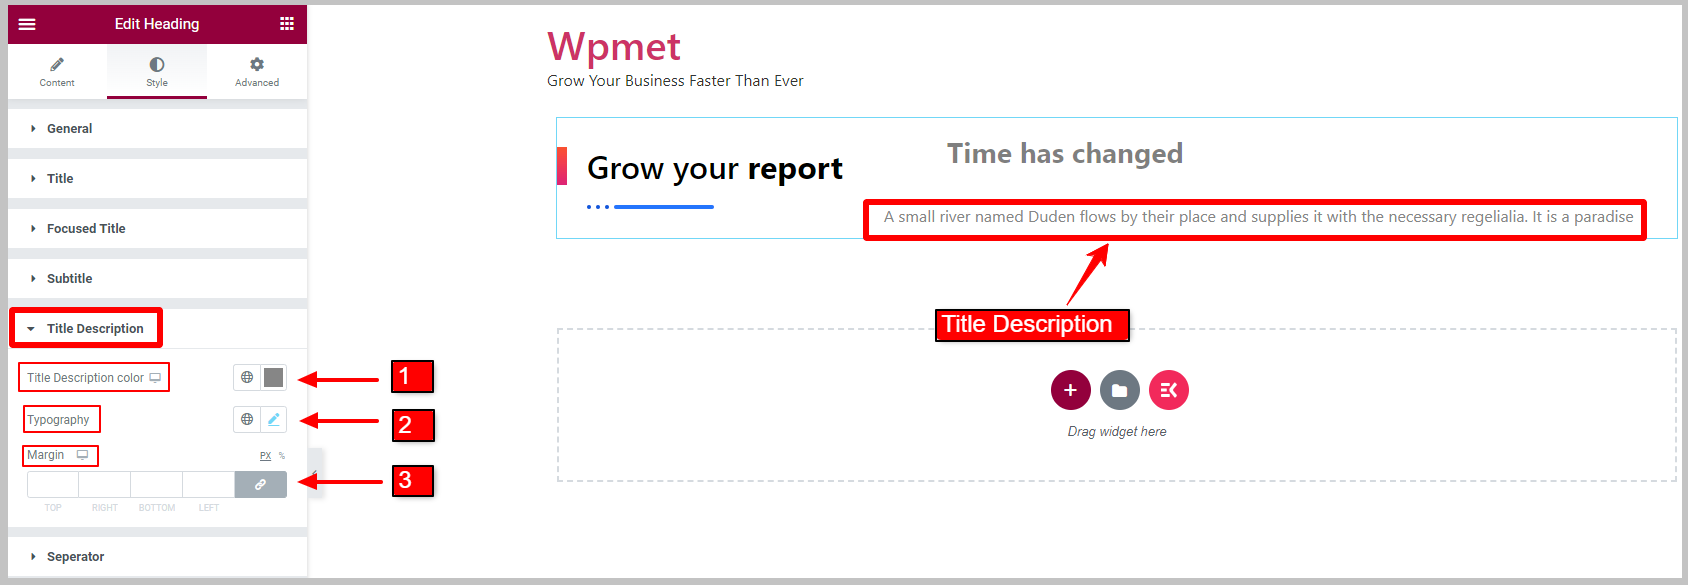
3.5 Title Description #
To customize Title Description,
- Choose the Title Description color.
- Set the Typography.
- Adjust the Margin for the title description.
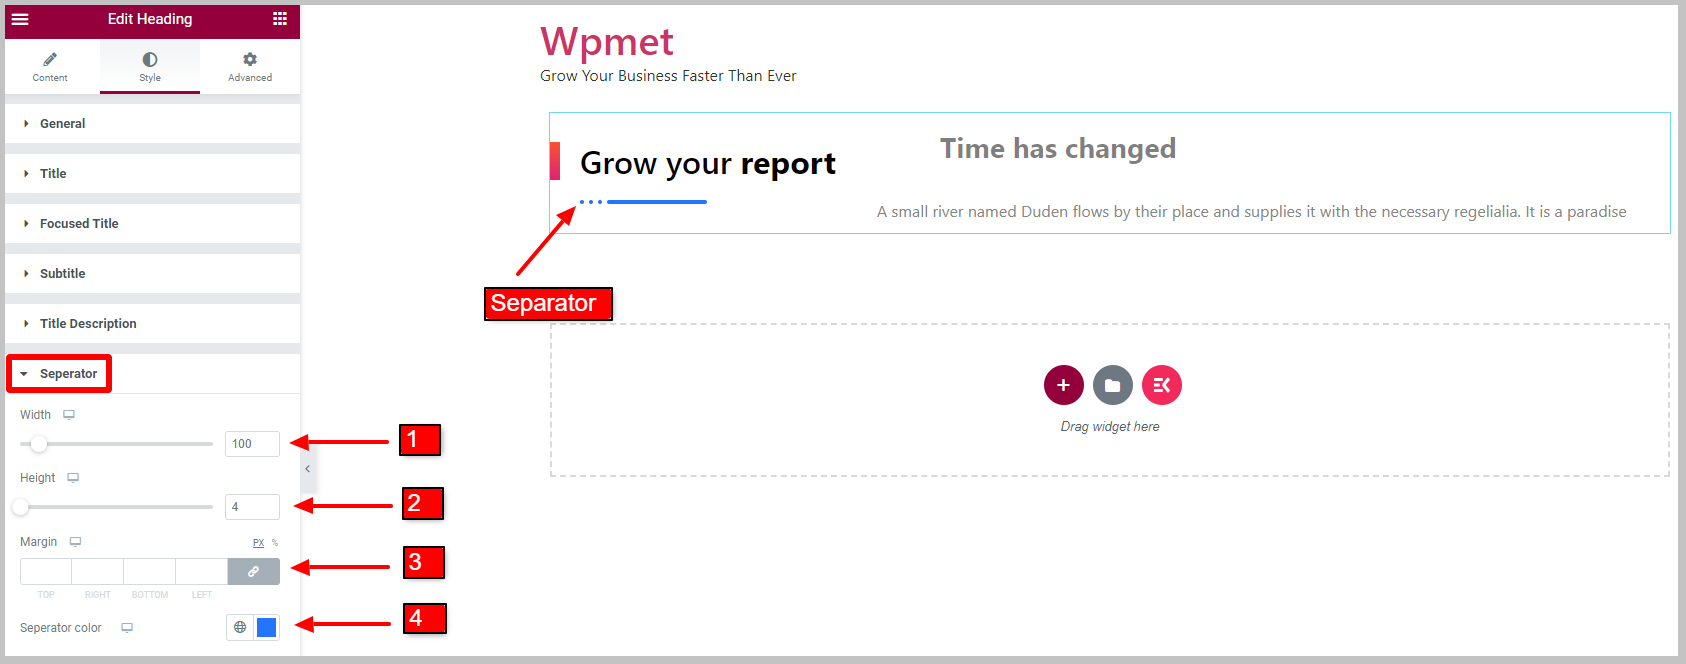
3.6 Separator #
For the title Separator,
- Adjust the Separator Width.
- Adjust the Separator Height.
- Set Margin for separator.
- Choose a Separator color.
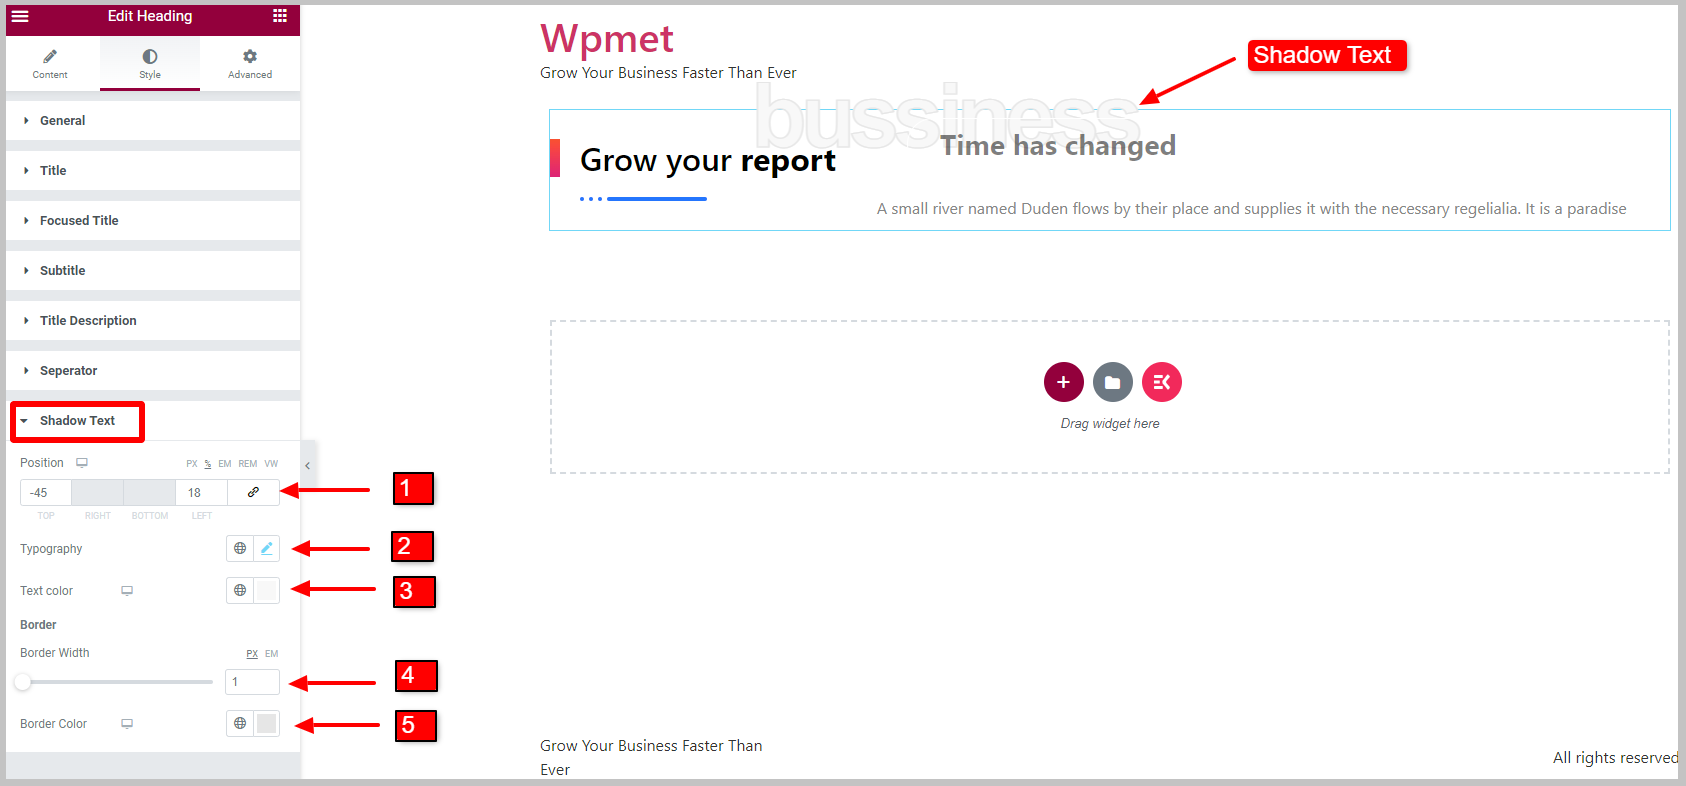
3.7 Shadow Text #
To customize the Text Shadow Style,
- Adjust the Position of Shadow Text.
- Set the Typography.
- Choose the Shadow Text Color.
- Adjust Border Width.
- Choose a Border Color for Shadow Text.
That’s about it. Now you can finally add a stylish and customizable heading title in Elementor with subheadings, descriptions, and shadow text, using the Elementskit Heading widget.


