Overview #
Display the mega menu vertically on your WordPress site with our vertical mega menu widget for Elementor page builder. With our Elementor widget, you can customize your mega menu content, select icons, choose icon color, choose badge text, color, position, etc. Here’s a comprehensive article to explain every method in detail.
Get Started #
Just follow the step by step process:
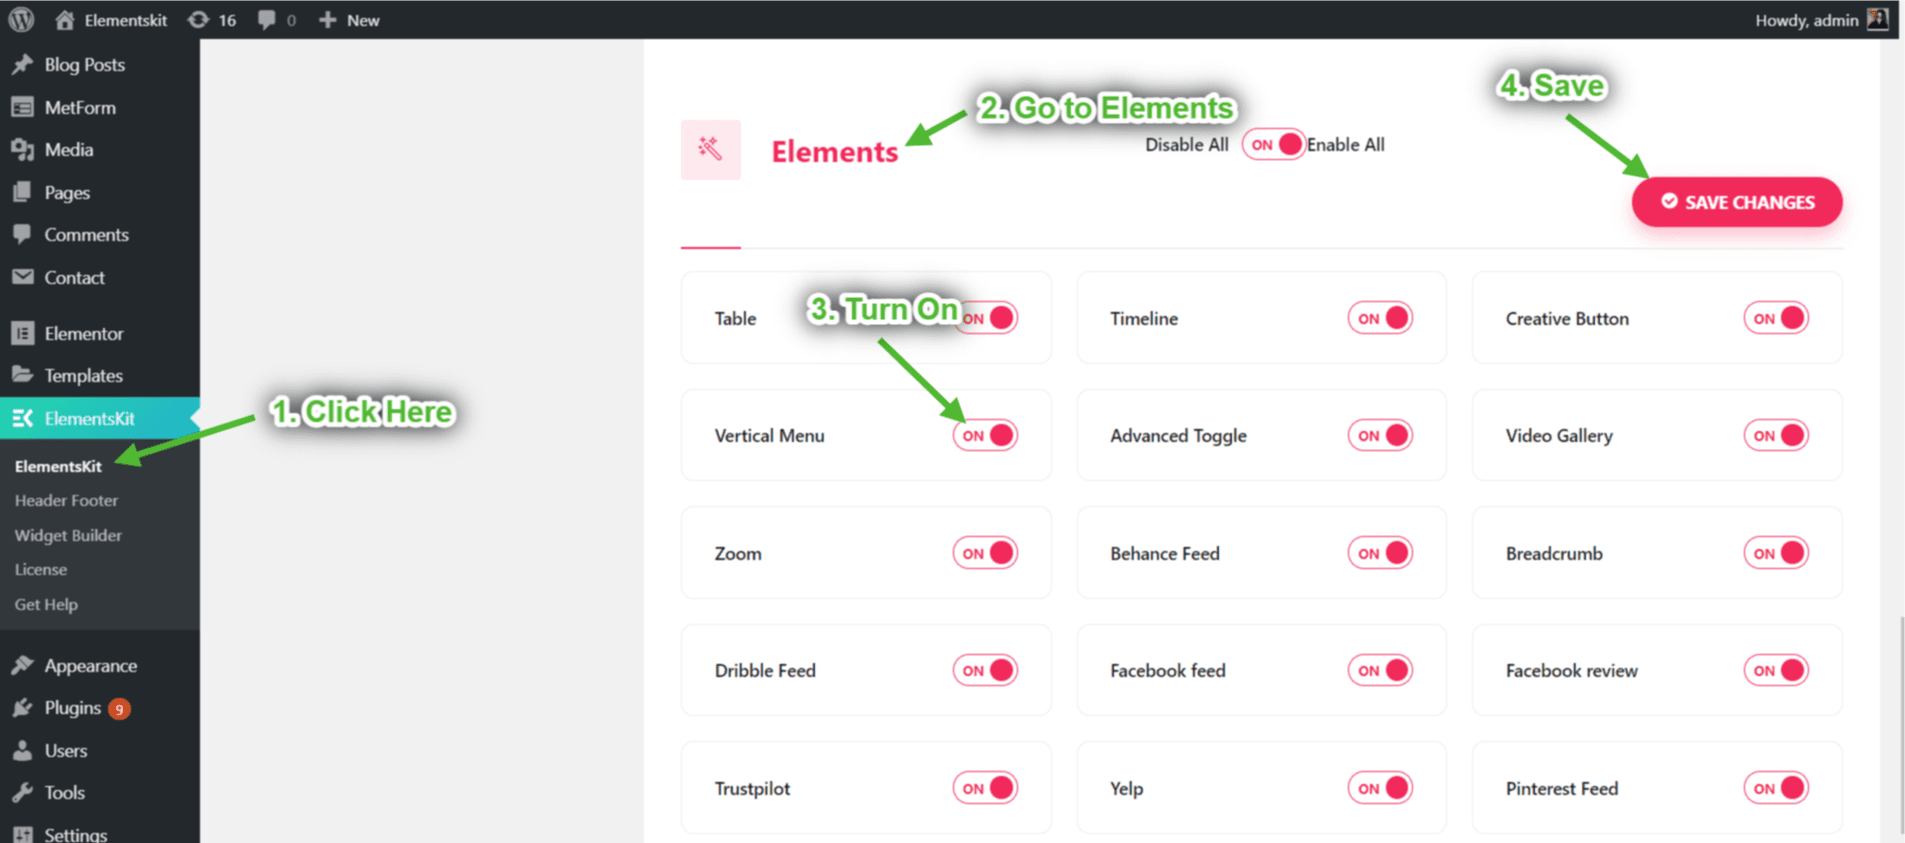
Step 1: Turn on the vertical menu #
- Make sure Vertical menu is ON from ElementsKit → Elements.
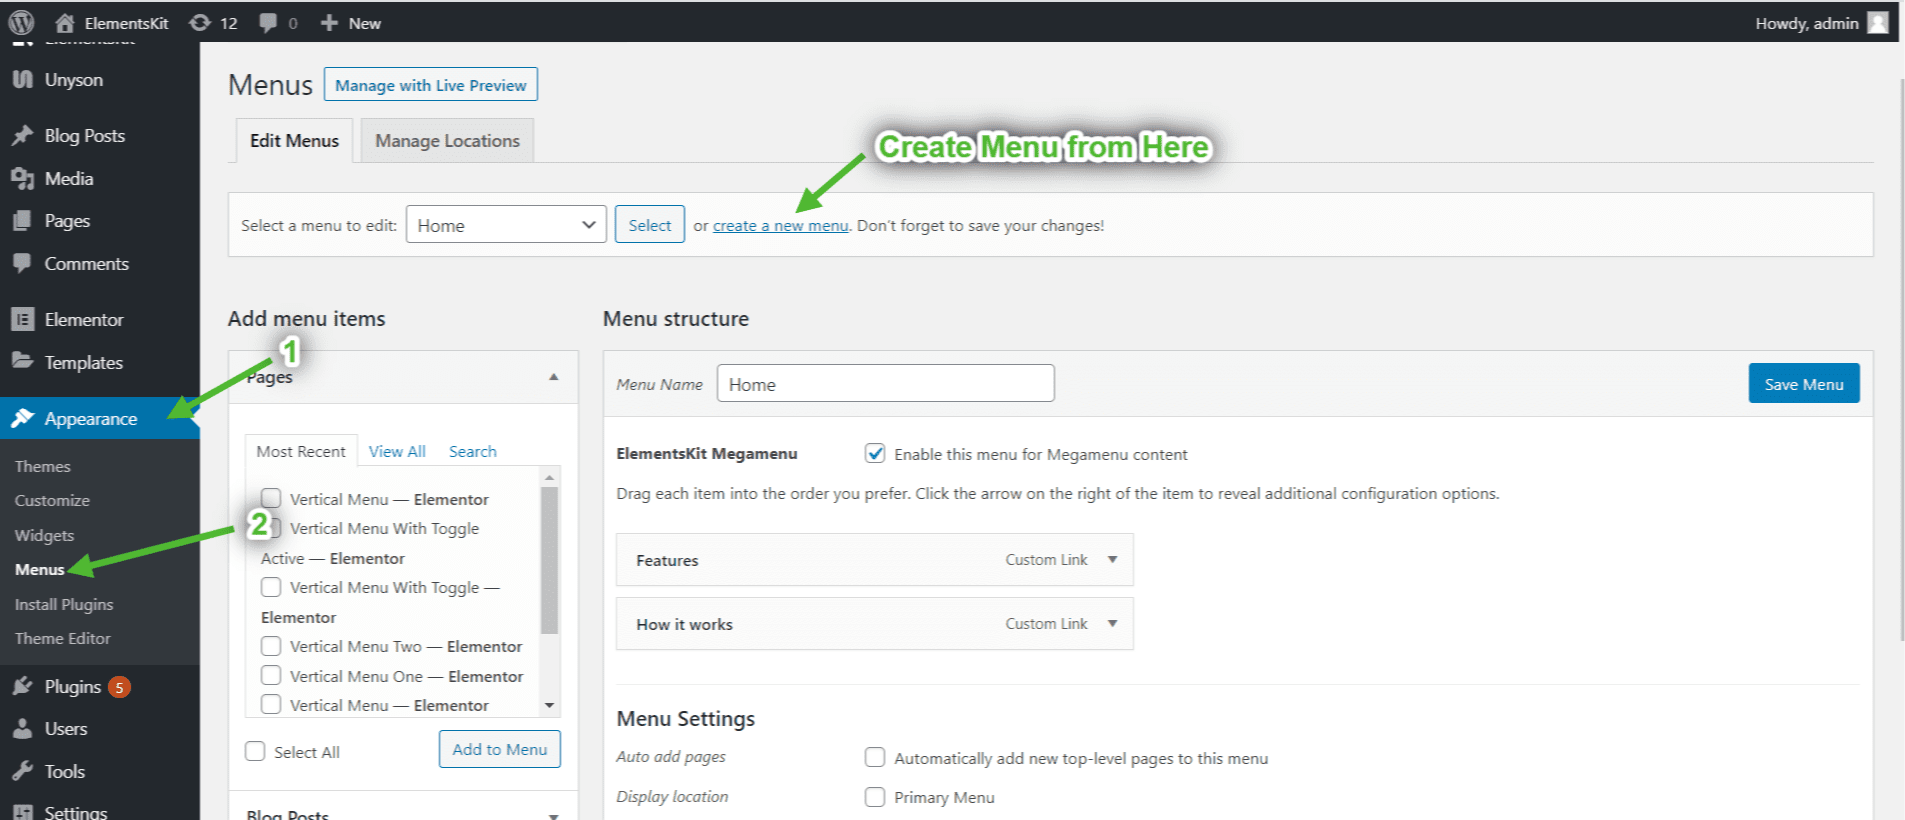
Step 2: Add Menu #
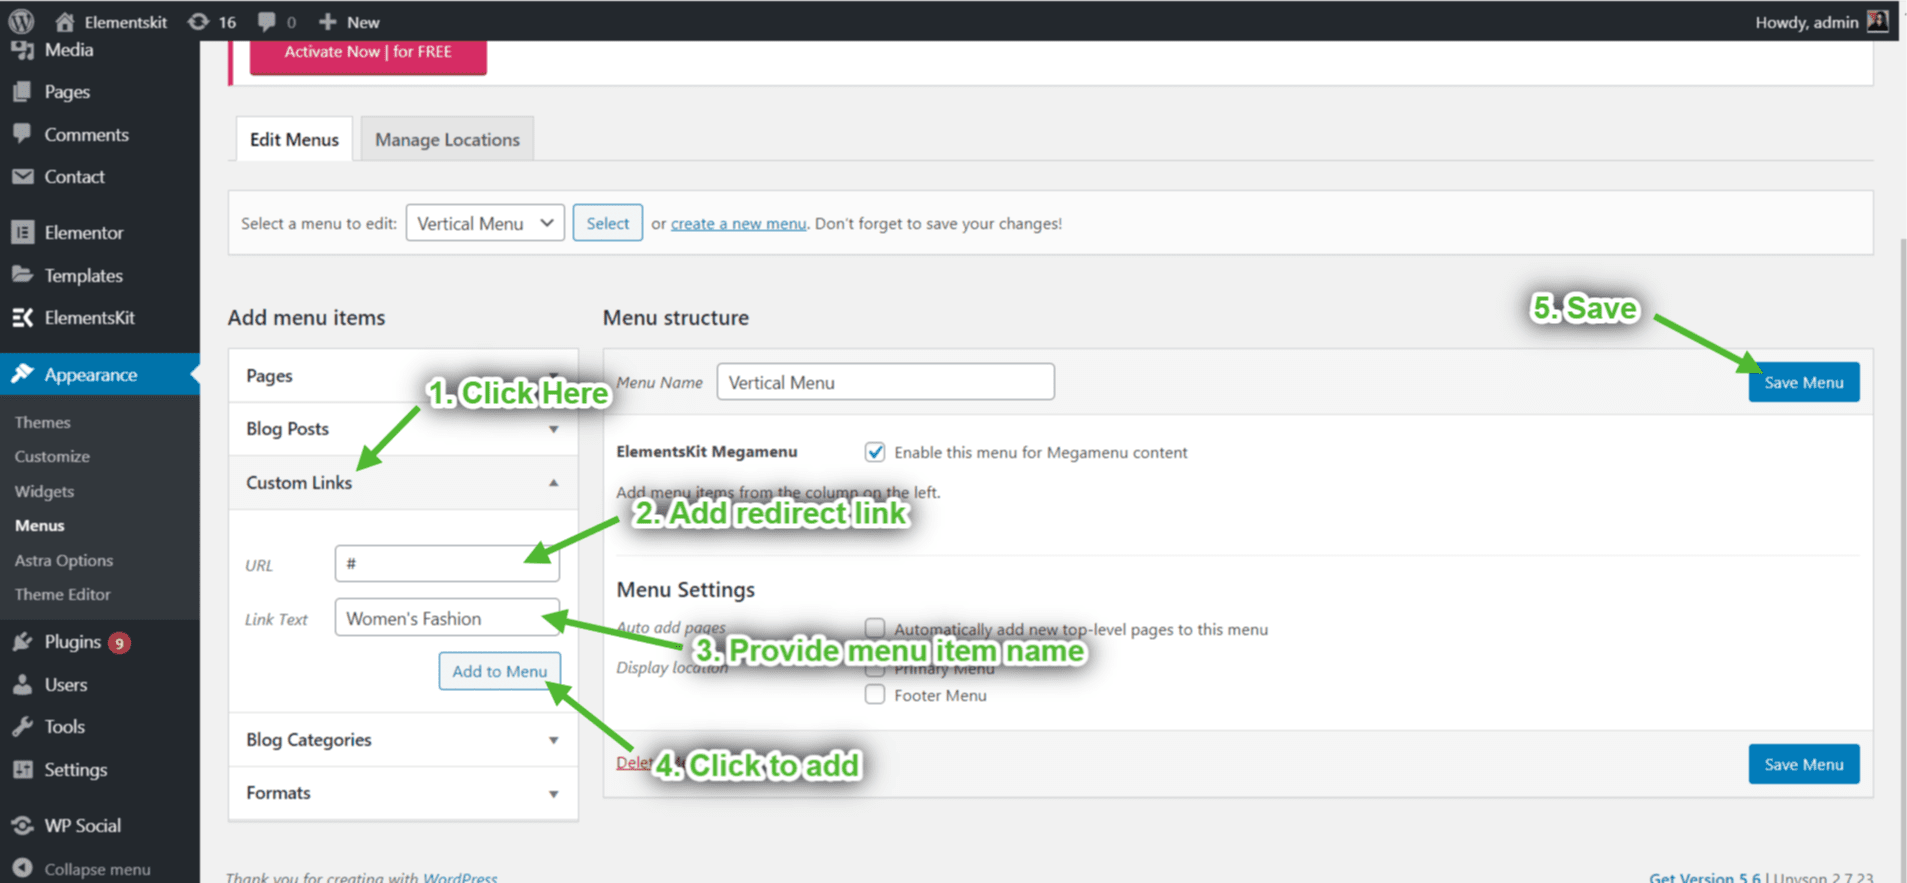
- Click on Create a New Menu.
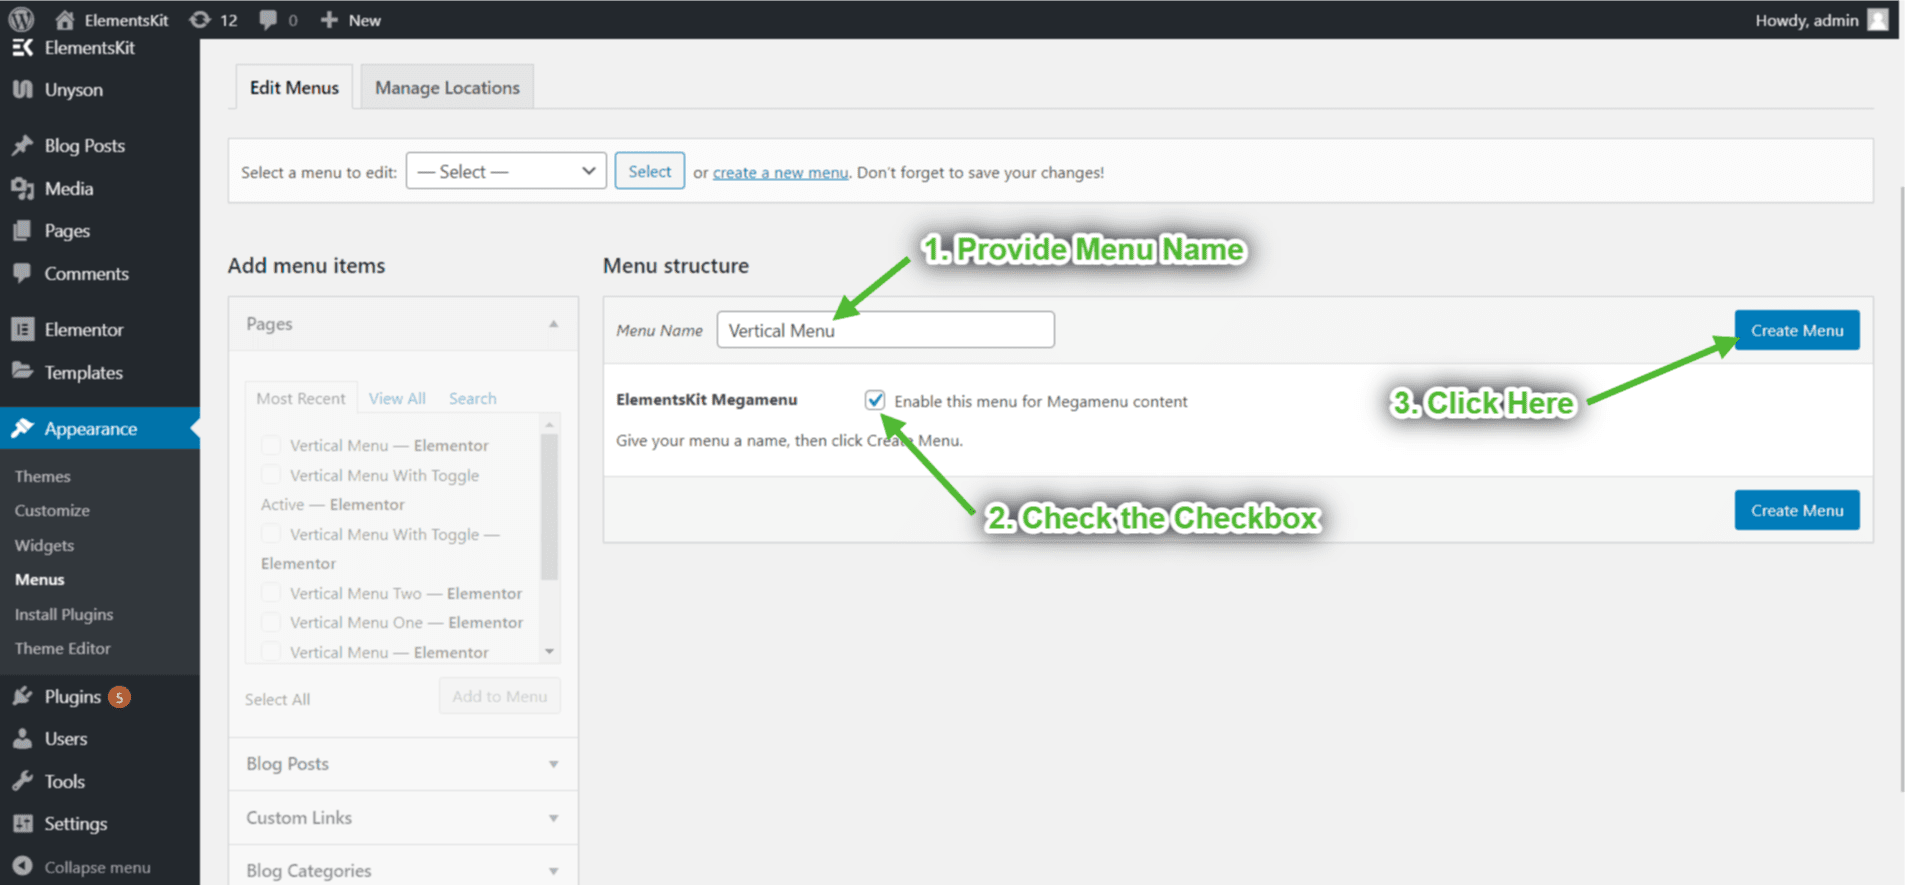
- Provide Menu Name=> Check the Checkbox “Enable this menu for Megamenu content”=> Create Menu.
- Click on Custom Link-> Provide Menu Item Link-> Provide menu item name on Link Text-> Add other Menu Items, in the same way, -> Click on Save Menu.
Step 3: Customize Vertical Mega Menu #
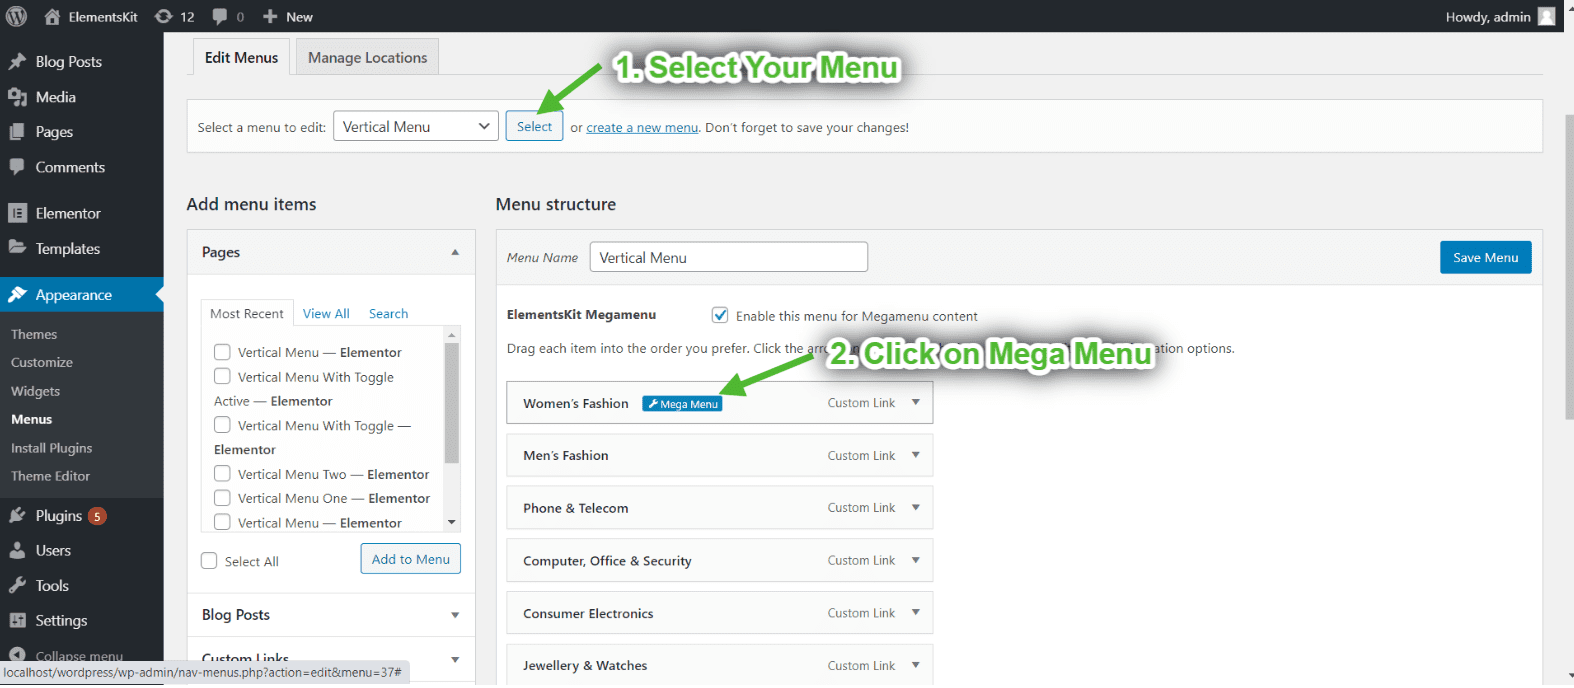
- Click on the Mega Menu with Setting Icon on which Menu item you want to Customize.
Step 4: Add Mega Menu Content #
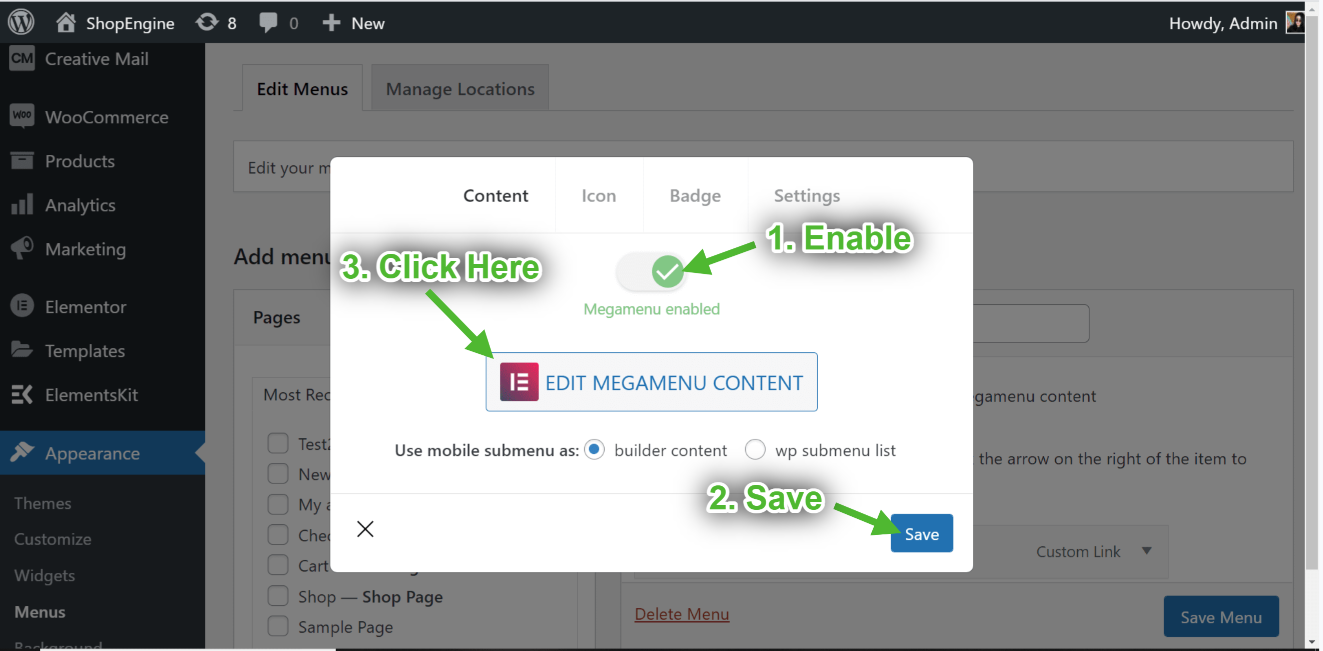
- A popup will open=> go to Content Tab=> toggle the Mega Menu enable option=> Save=> click on EDIT MEGAMENU CONTENT button.
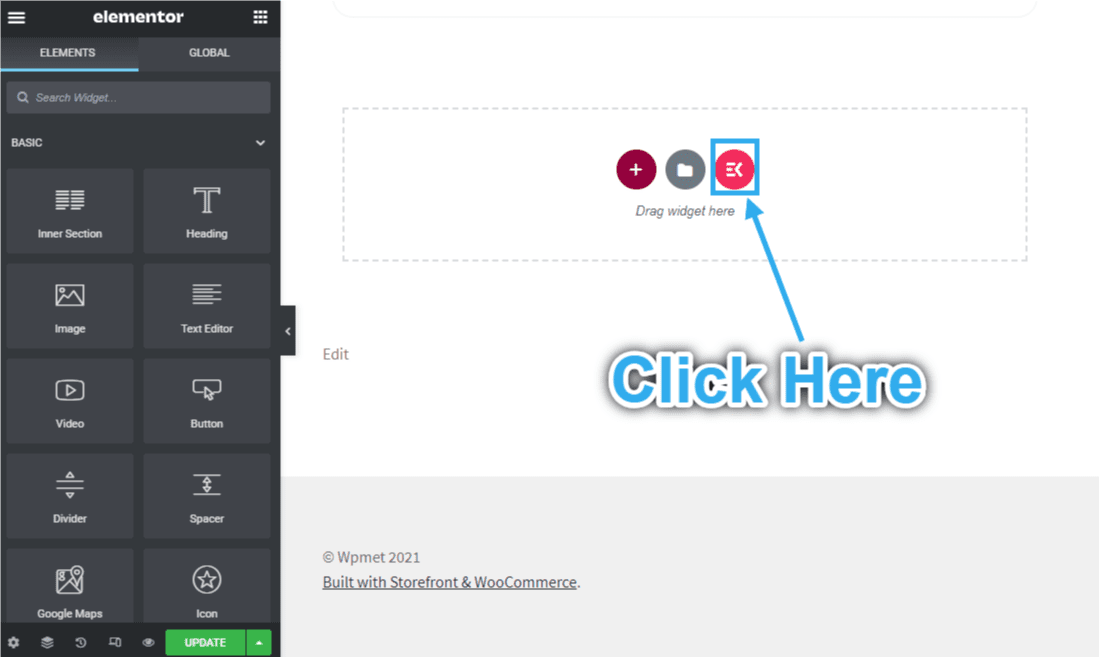
You can drag and drop any widget or you can add your imported template from here.
- Click on the selected icon.
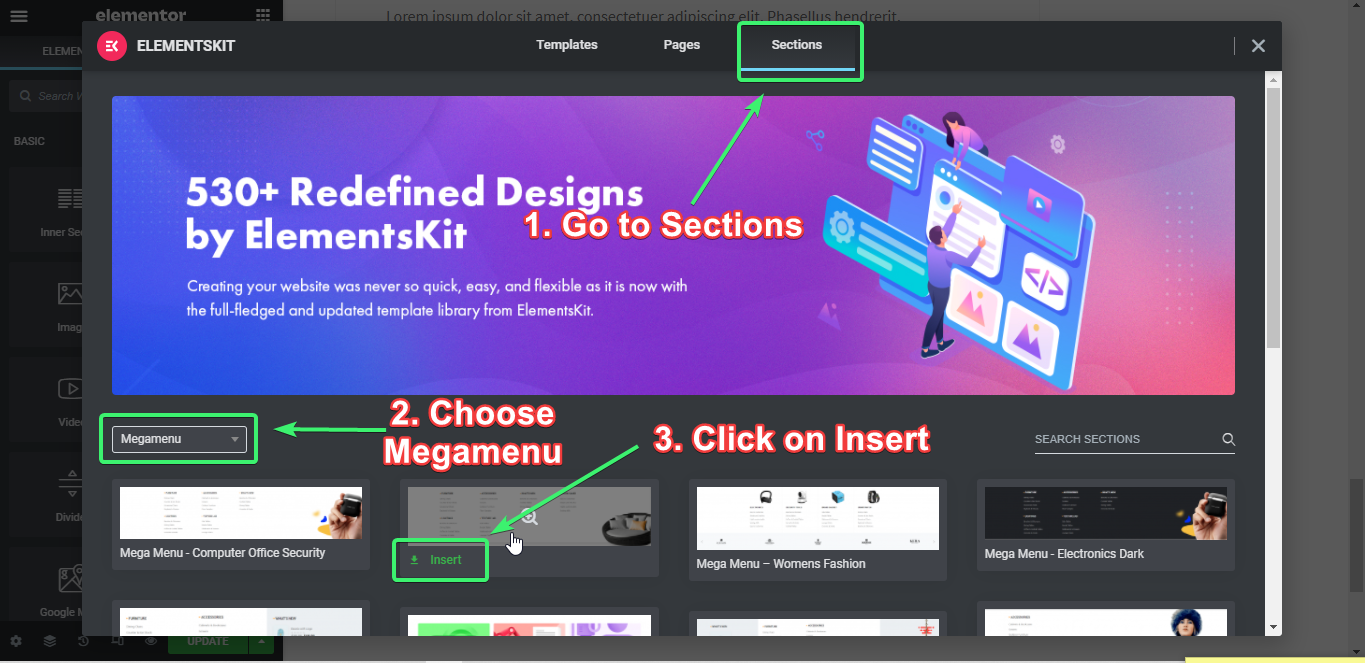
- Click on Sections=>Megamenu => Choose your desired Megamenu template and click on Insert.
Customize megamenu content #
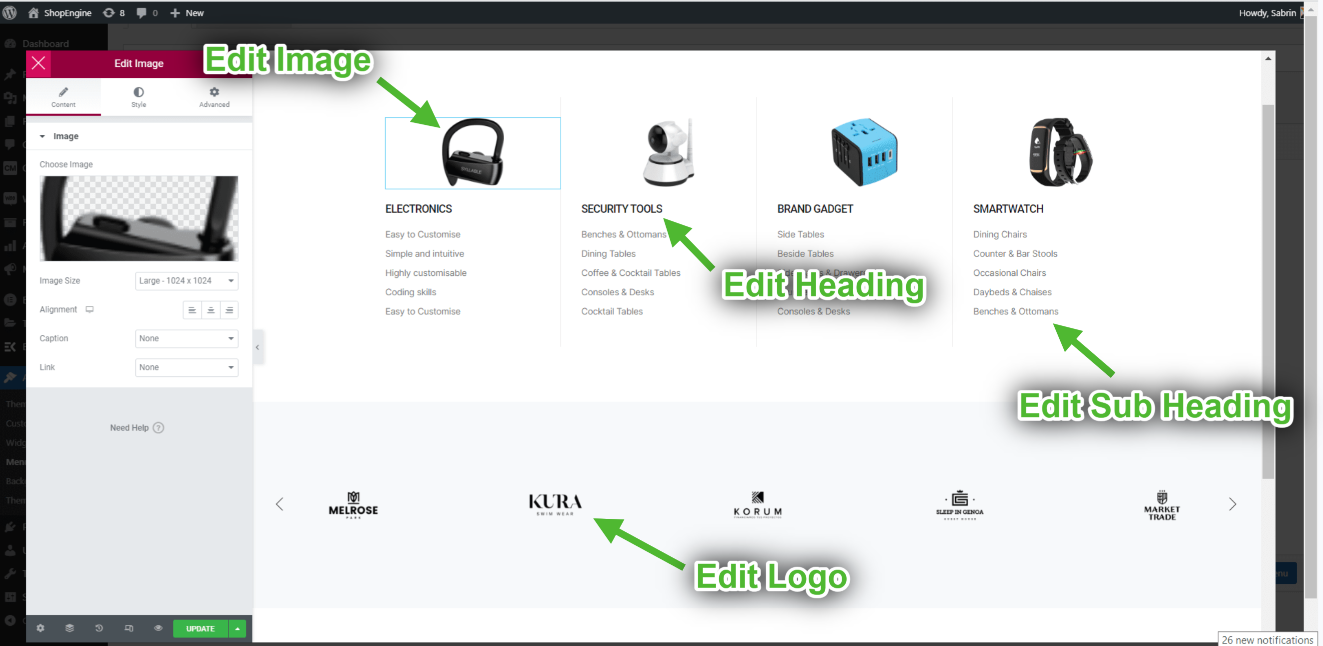
- Edit Image-> See Documentation How to Edit Image: https://help.wpmet.com/docs/image.
- Edit Heading and Sub-Heading-> See Documentation How to Customize Heading Title: https://help.wpmet.com/docs/widget-documentation.
- Edit Logo->See Documentation How to Customize Logo: https://help.wpmet.com/docs/client-logo.
After Edit Click on Update=> Close the tab.
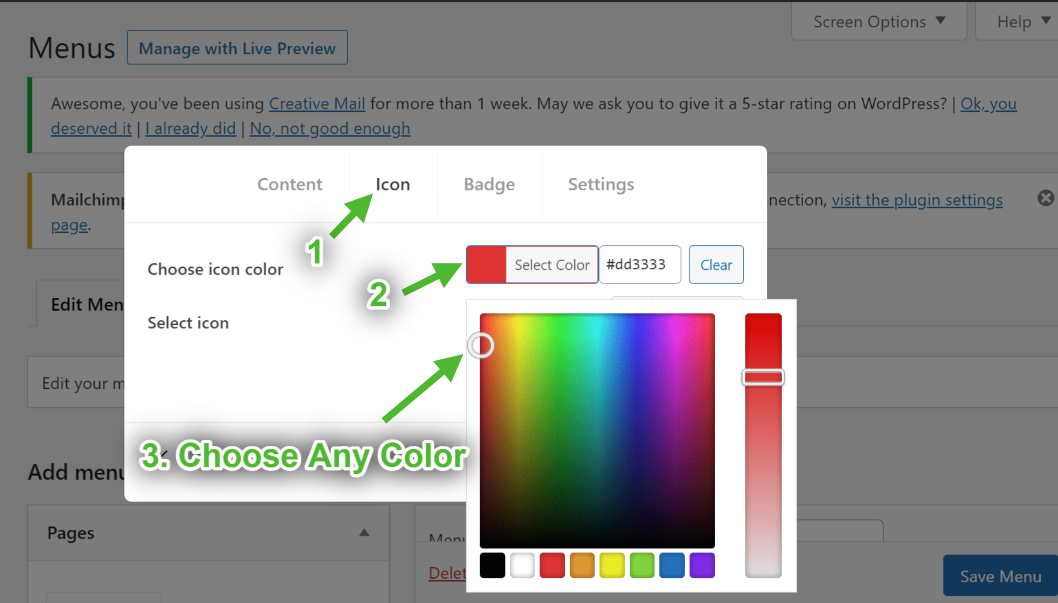
Customize Menu Icon #
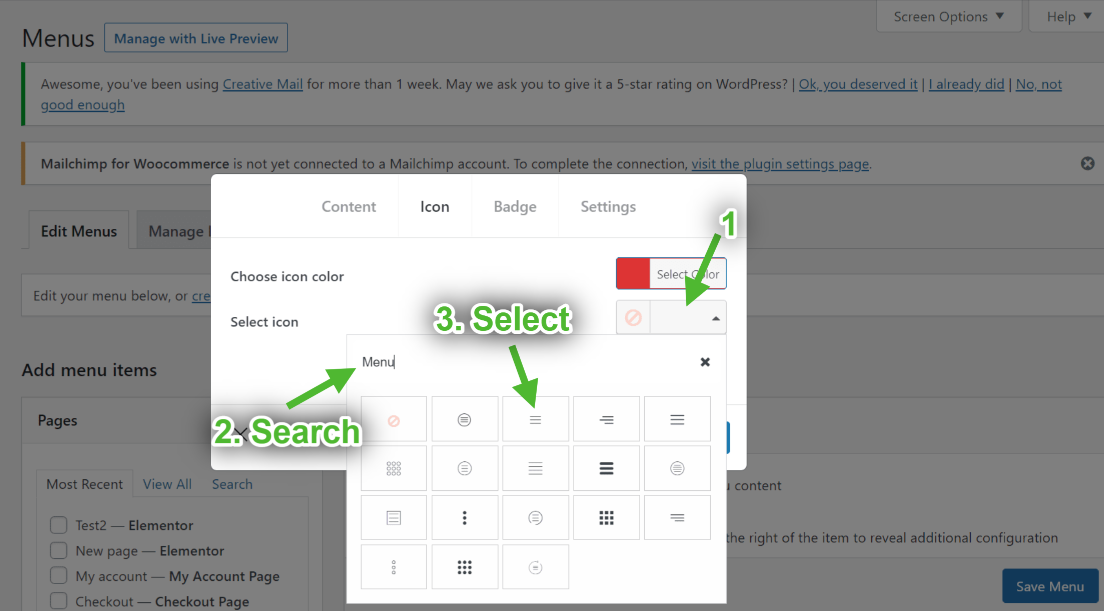
- Now go to Icon Tab=> Choose any color from the Color Palette.
- Select Icon from the Icon Library.
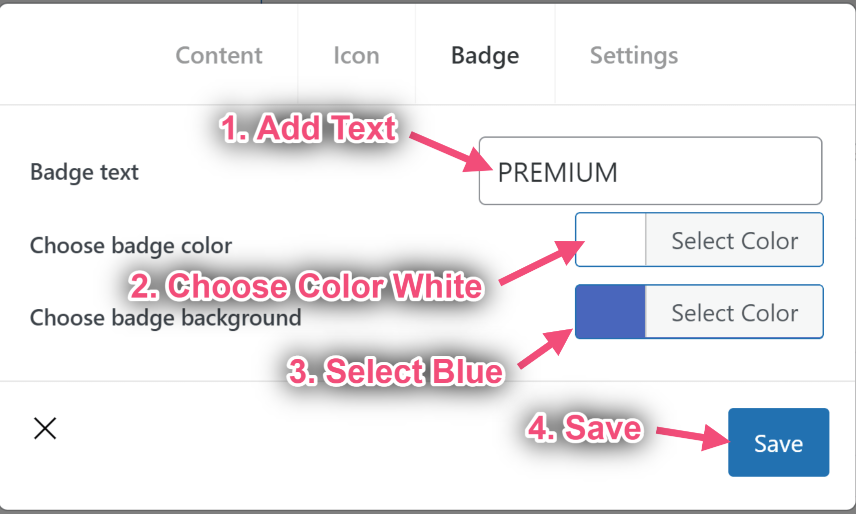
Customize Menu Badge #
- Add or Edit Text.
- Choose Badge Color.
- Choose Badge Background Color.
- Click on Save.
Vertical Menu Position #
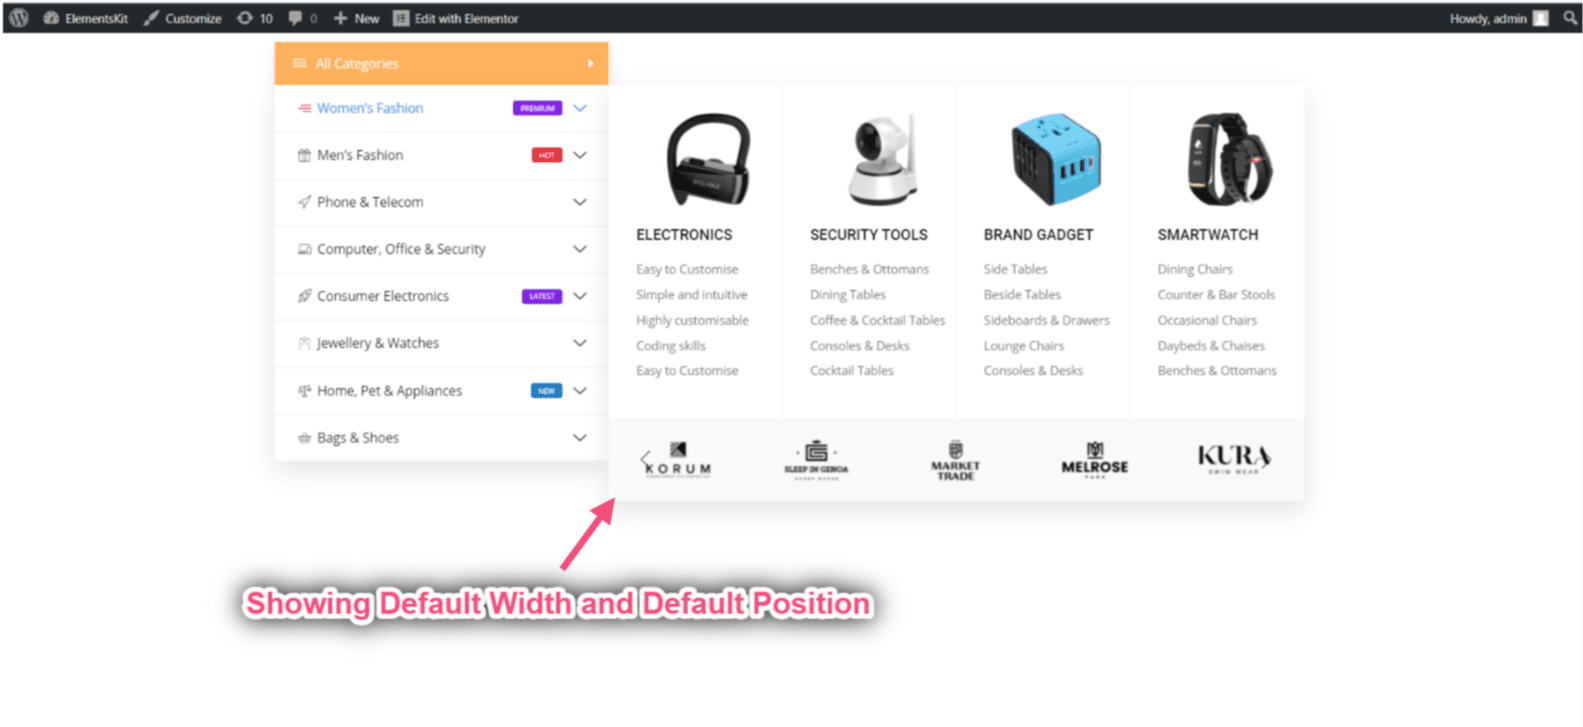
Default Width
- Select Mega Menu Width: Default.
- Select Mega Menu Position: Default.
- Save.

- Site View: Showing Default Width with Default Position.
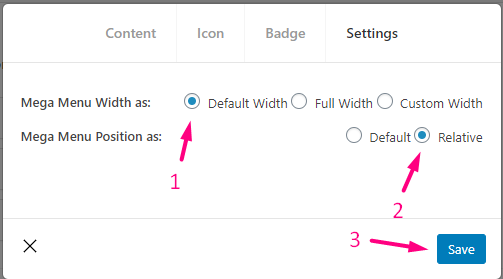
Default with Relative
- Select Mega Menu Width: Default.
- Select Mega Menu Position: Relative.
- Save.
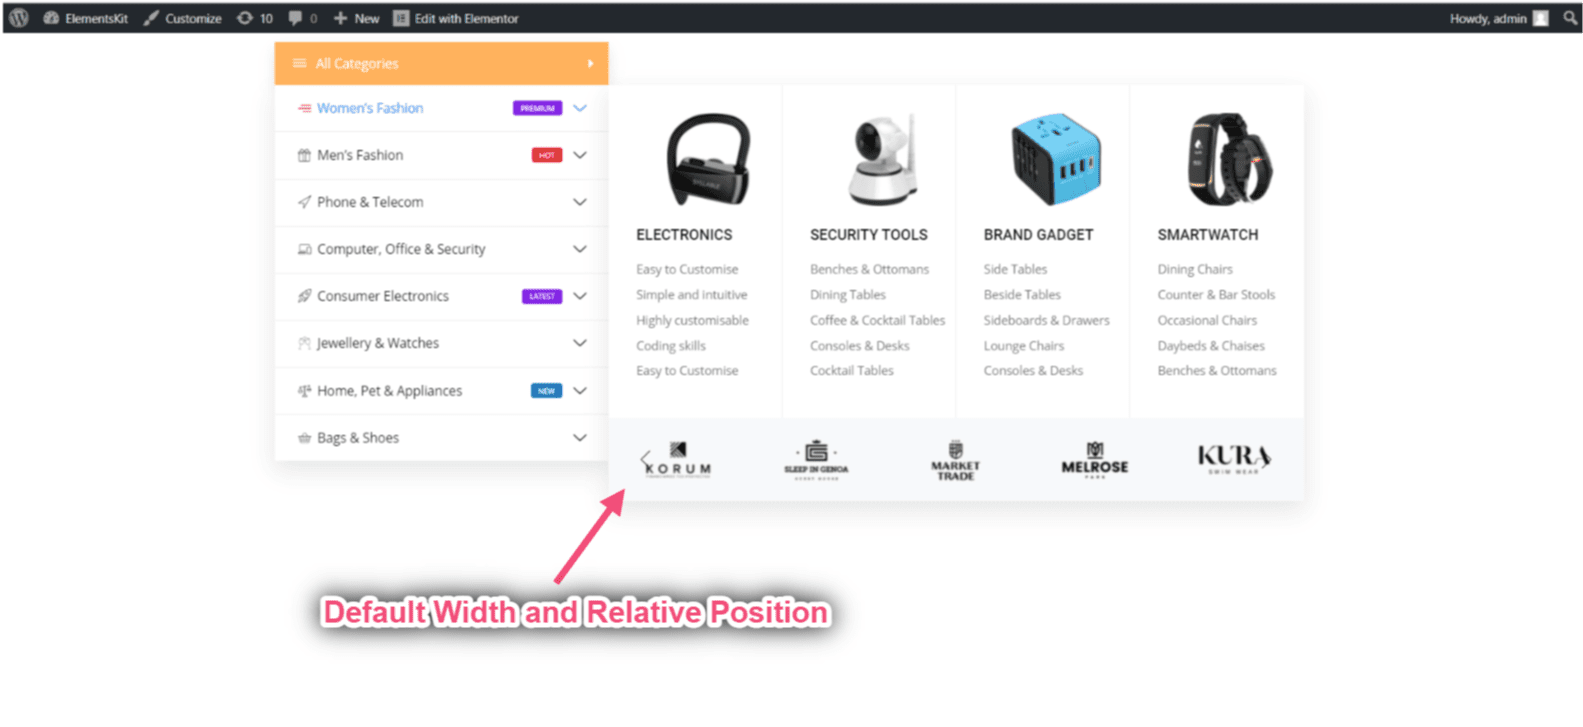
Site View: Showing Default Width with Relative Position.
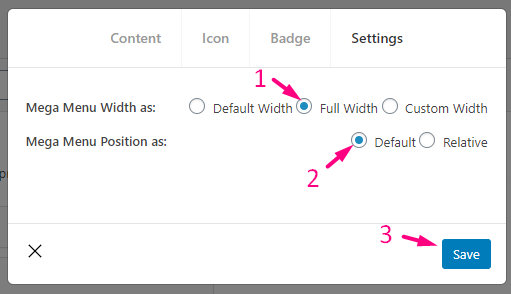
Full Default Width
- Select Mega Menu Width: Full Width.
- Select Mega Menu Position: Default.
- Save.
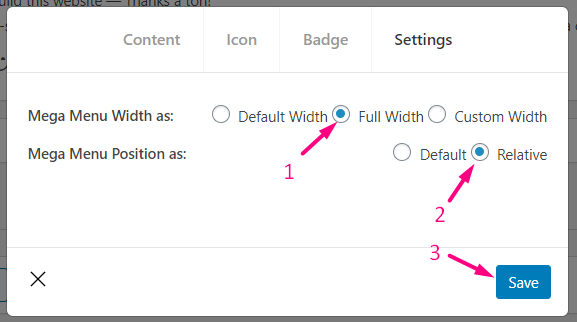
Full Width with Relative
- Select Mega Menu Width: Full Width.
- Select Mega Menu Position: Relative.
- Save.
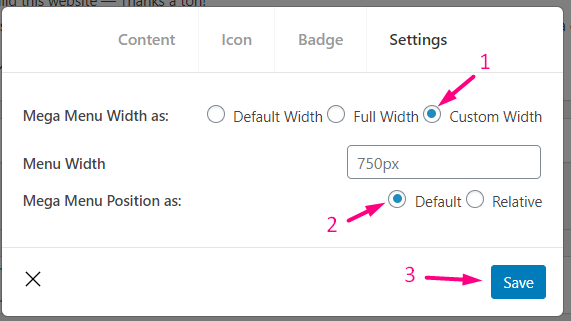
Custom Default Width
- Select Mega Menu Width: Custom Width.
- Provide any custom width but by default, it is 750px.
- Select Mega Menu Position: Default.
- Save.
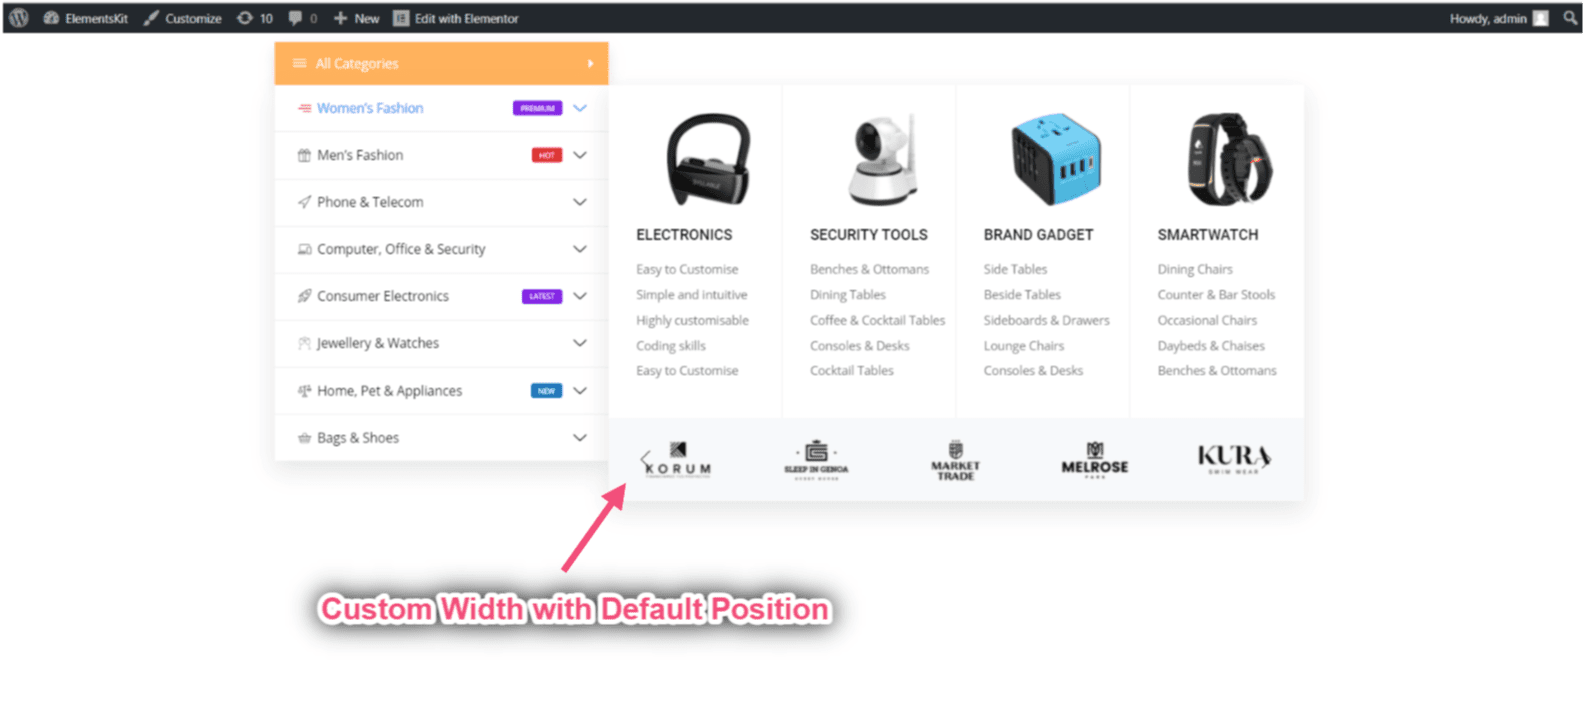
- Site View: Showing Custom Width with Default Position.
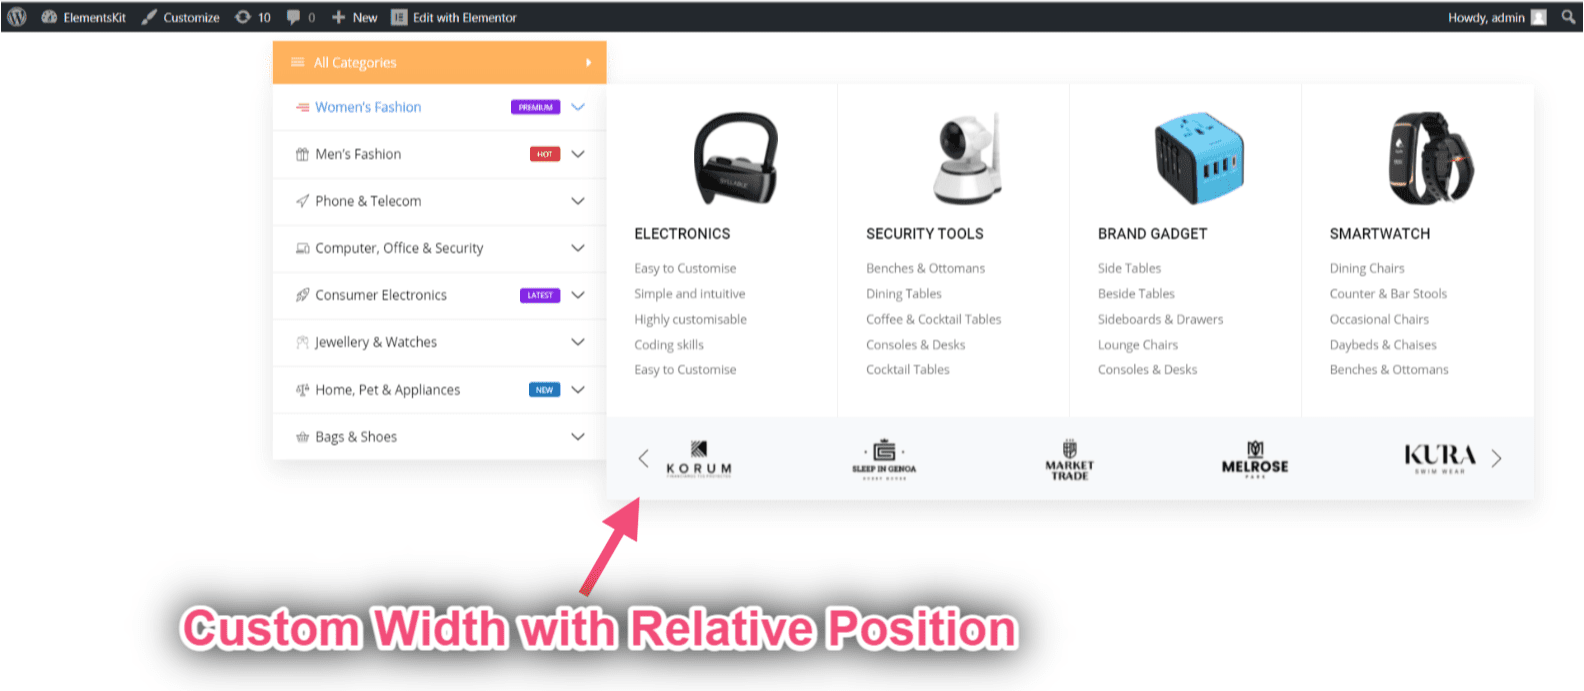
Custom Width with Relative Position
- Select Mega Menu Width: Custom Width.
- Provide any custom width but by default, it is: 750px
- Select Mega Menu Position: Relative.
- Save.

- Site View: Showing Custom Width with Relative Position.
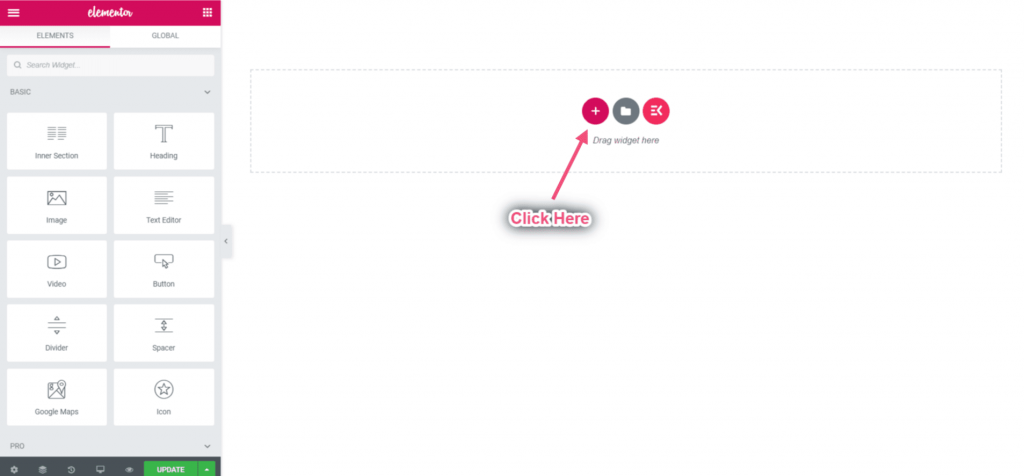
Step 5: Add Vertical Mega Menu #
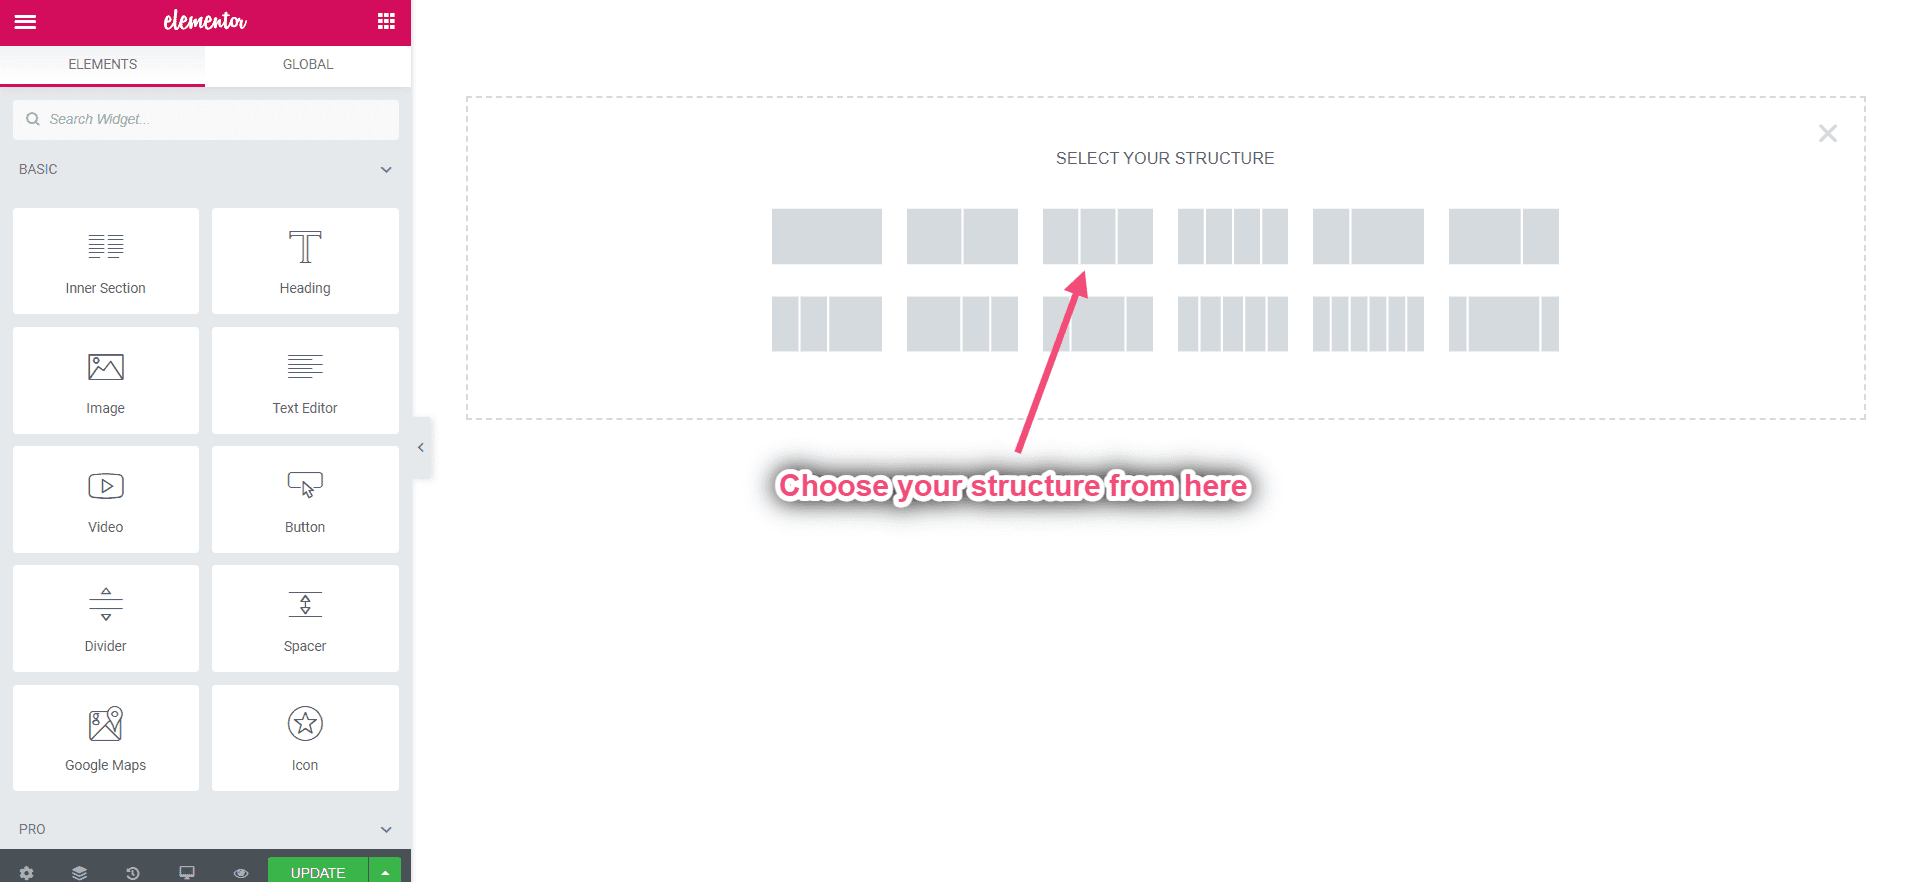
- Click on the “+” Icon.
- Choose your structure from the selected area.
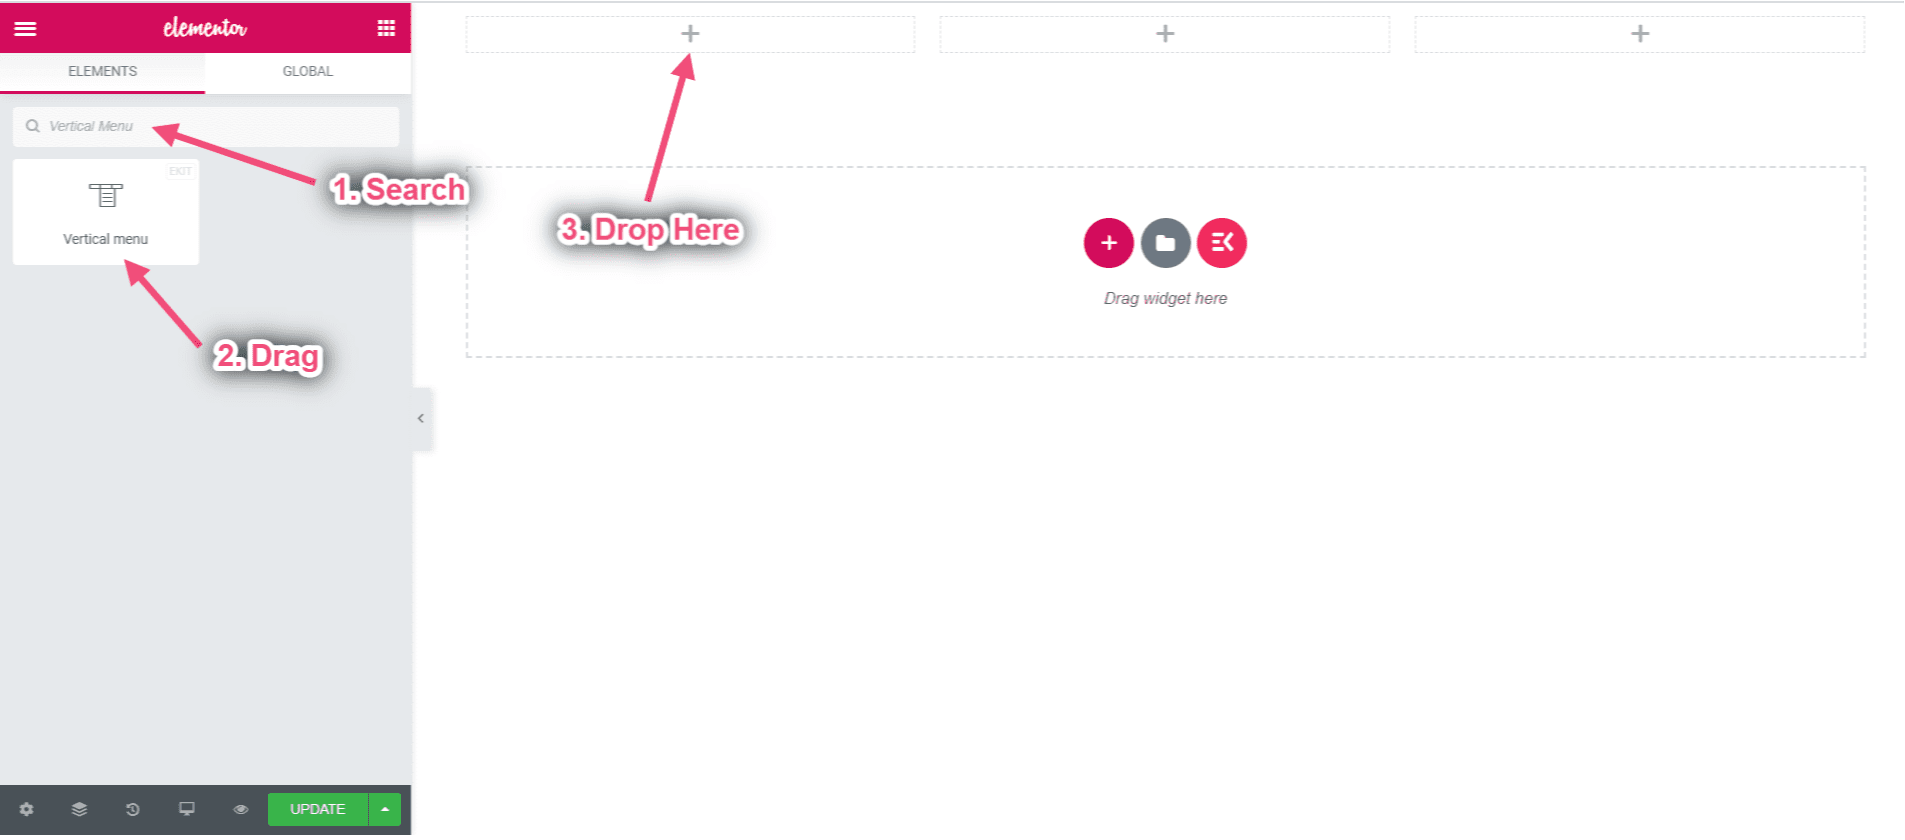
- Now search for Vertical Menu-> Drag-> Drop on the selected area.
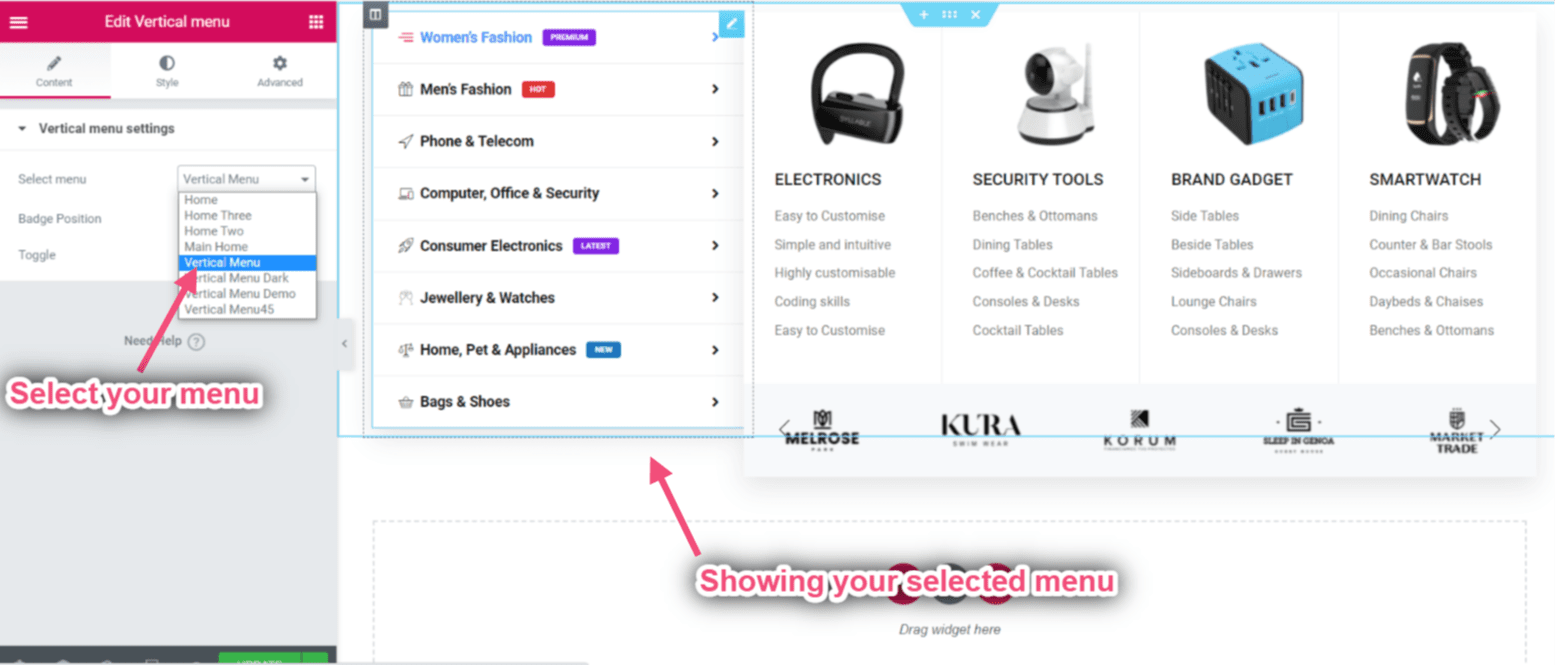
Select Vertical Menu #
- Select Menu From the Drop-Down.
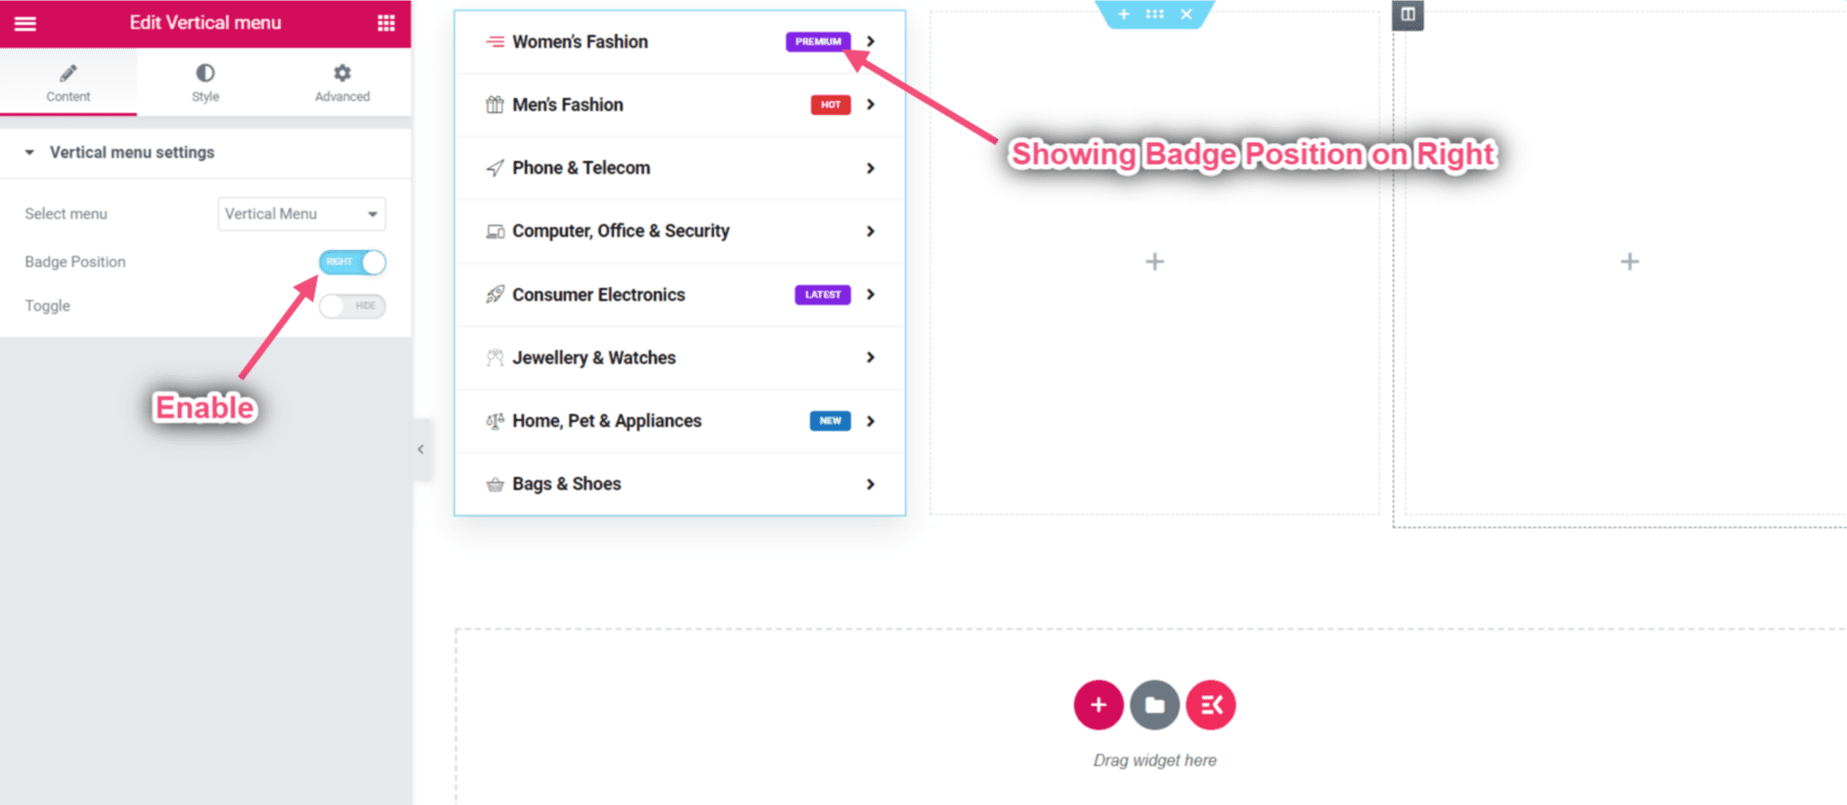
Control Badge Position #
- Enable Badge Position on the Right Side.
Dropdown Indicator Icon #
You will see a default dropdown icon that loads automatically. But you can change it and add a new one. Or, you can even add your custom icon. For this,
- Click the “+” icon next to the dropdown indicator icon.
2. Then, you will see a popup with an icon library. Here, click your preferred icon.
3. Next, hit the “Insert” button to add the icon to the menu.
4. Now, to add a custom icon, look for the “My Libraries” option in the popup and click the “Upload” button.
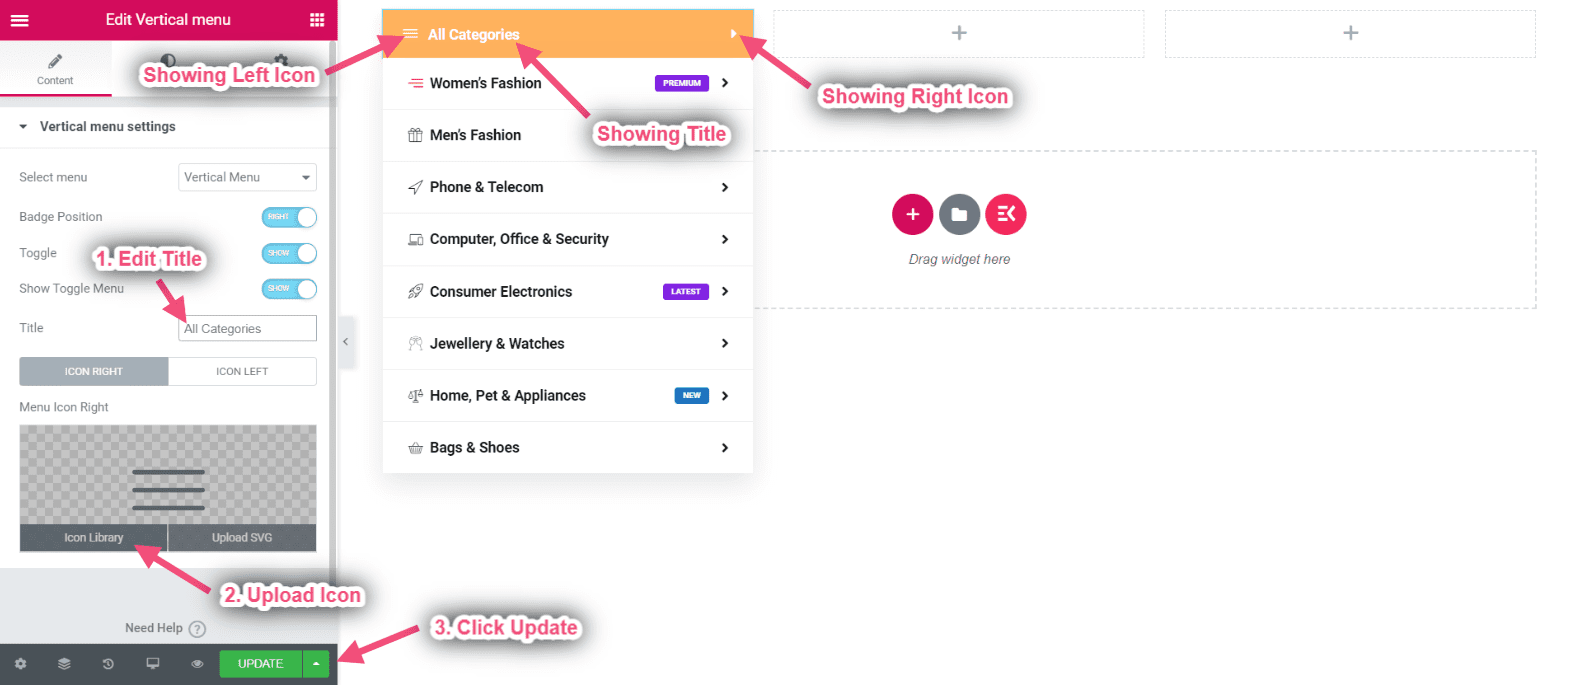
Show Toggle #
- Enable to Show Toggle.
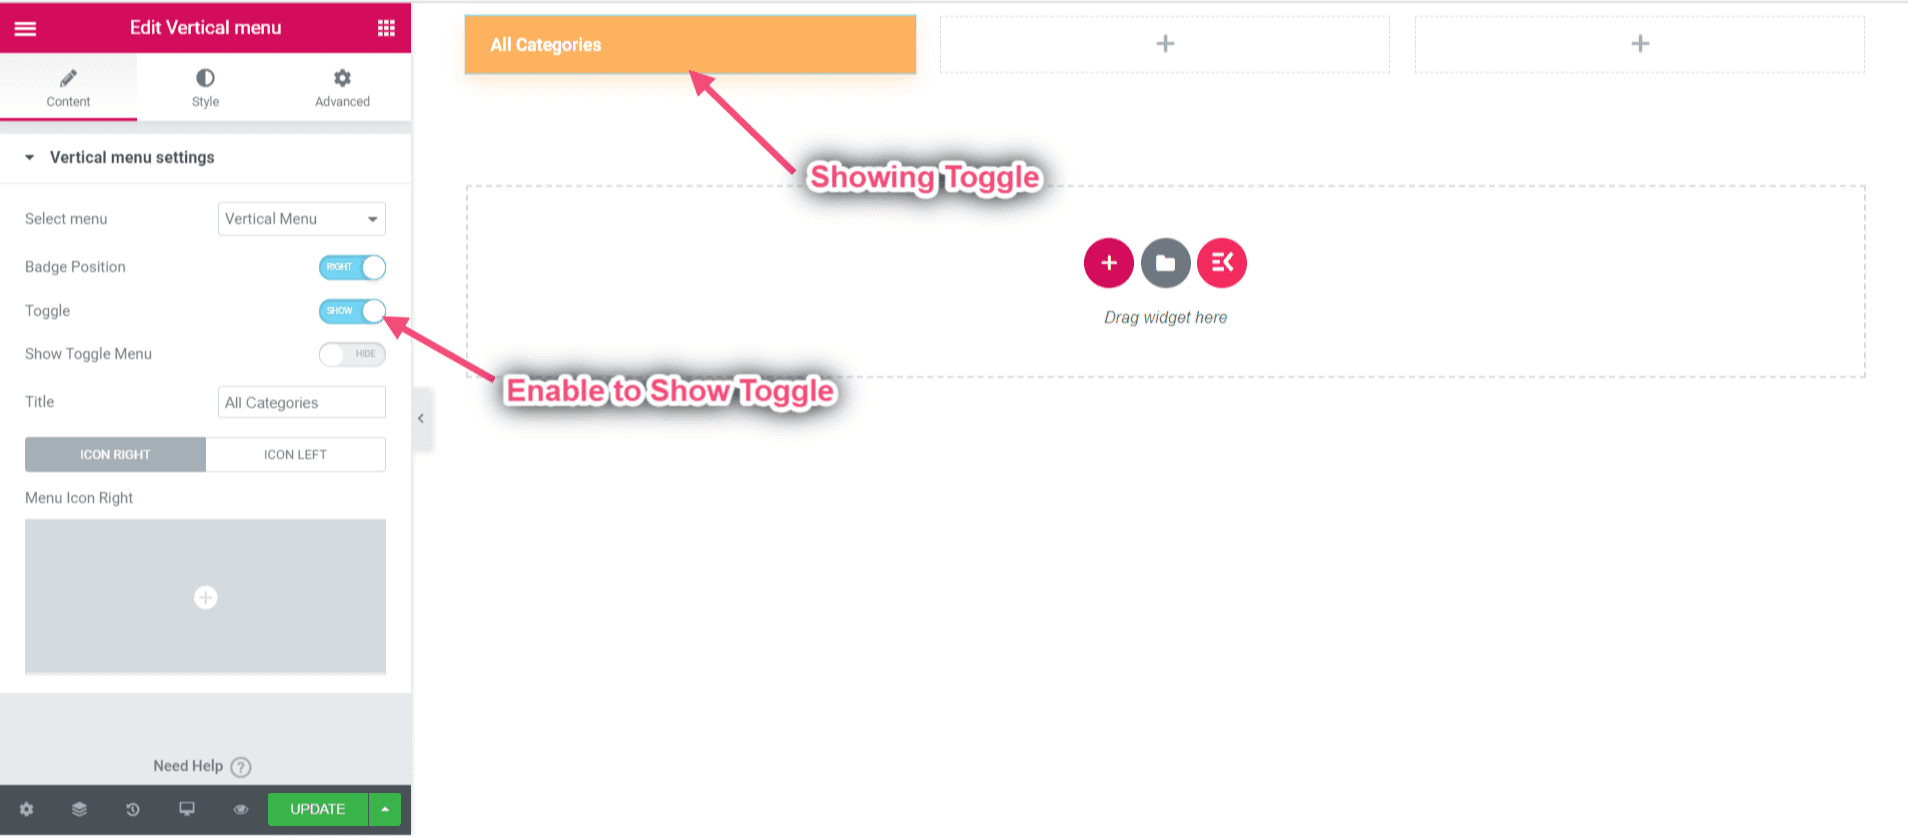
- Show or Hide Toggle Menu.
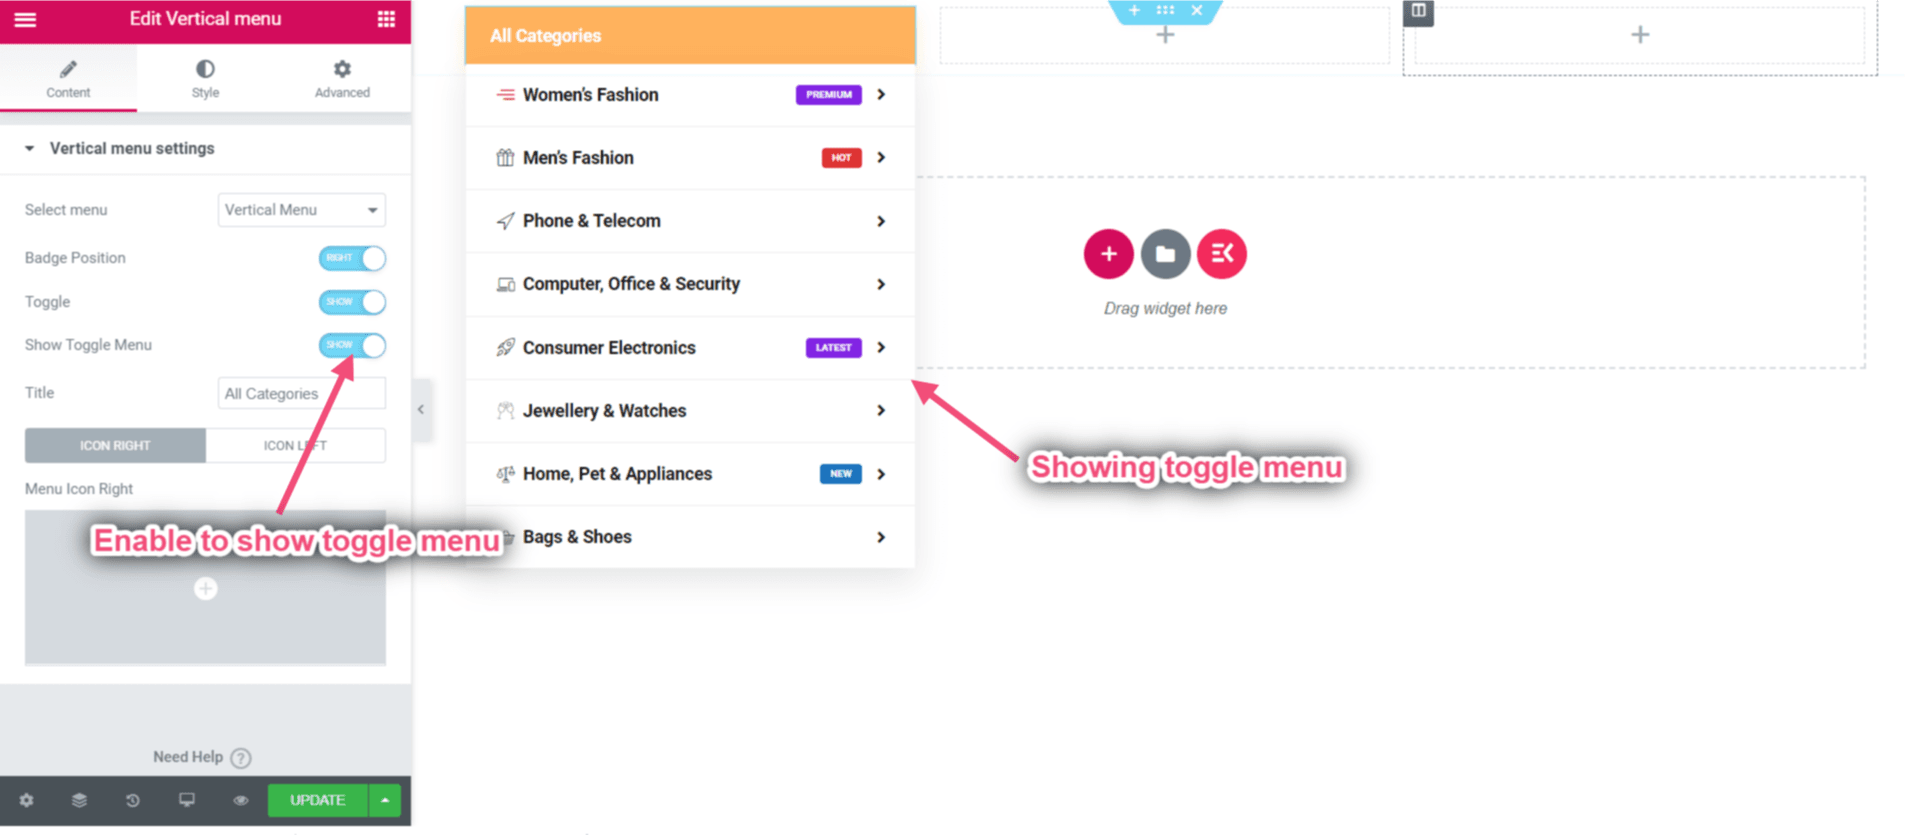
- Add or Edit Title.
- Upload Right and Left Icon.
- After Edit Click on Update=> Click on the Visit Site Icon.
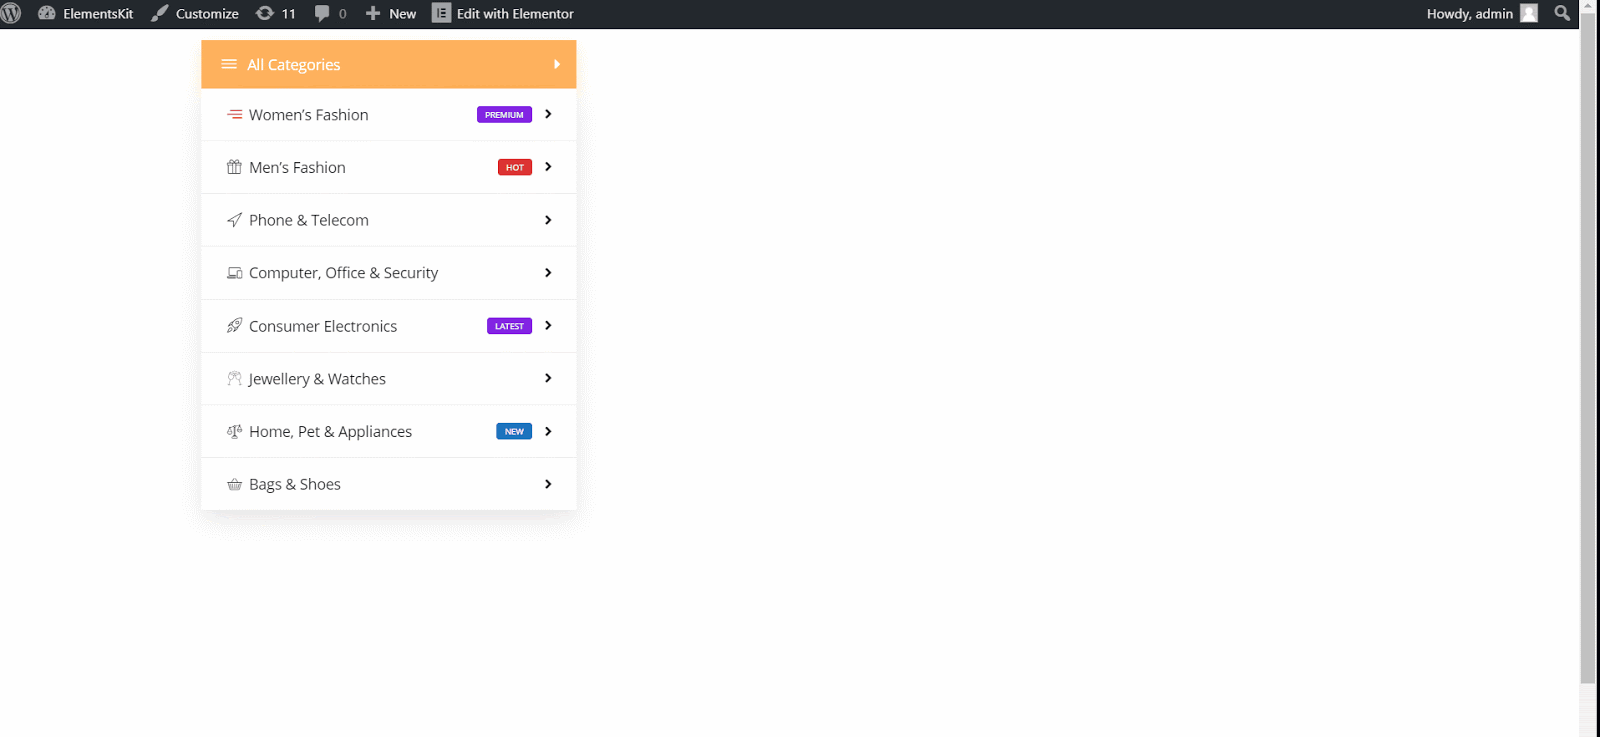
Final Output #
- You can see the final result of the Vertical Mega Menu.
- Demo Link: https://wpmet.com/plugin/elementskit/megamenu/#vertical_tabs.