

The Flip Box Widget helps you to create animated boxes that flip to the other side once users take action.You can create Elementor flip box on click and hover both. You can customize both sides of the flip box using this widget.
Note: You will need to install Elementor and ElementsKit to follow the process. If you need help installing and activating ElementsKit Pro, check out the ElementsKit installation guide.
How to add the flip box to the WordPress site using ElementsKit #
Follow the steps described below to add a flip box to your WordPress site with ease using ElementsKit and Elementor:
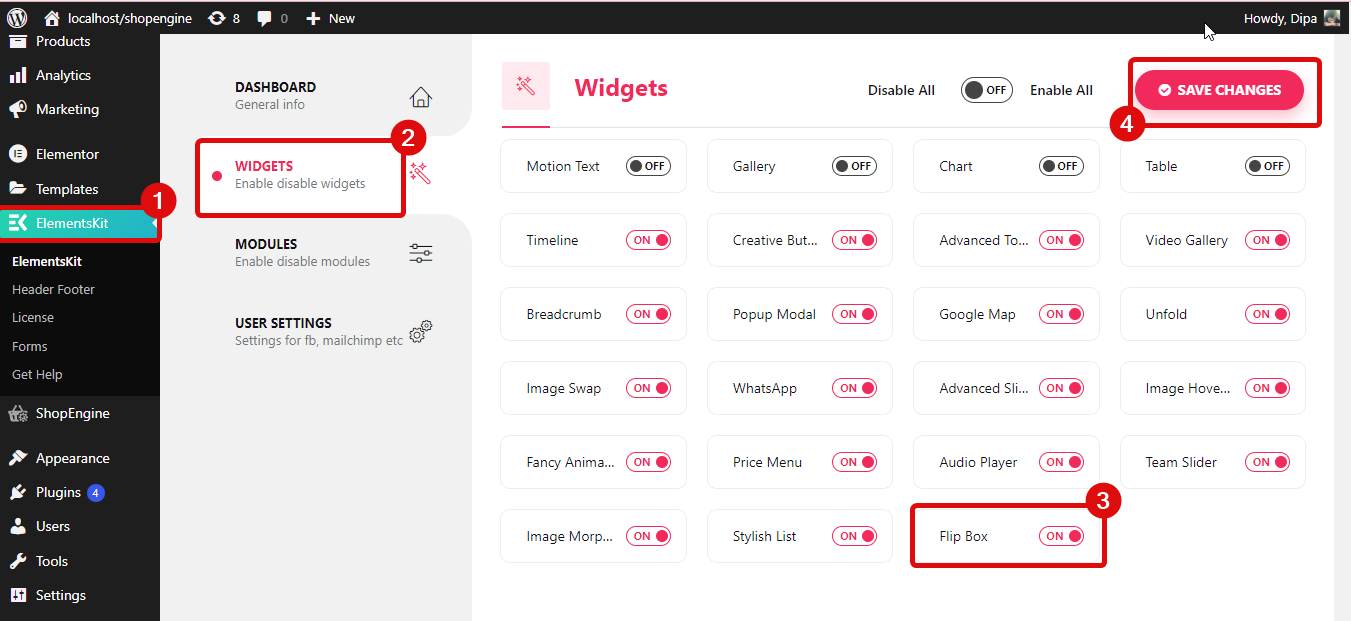
Step 1: Enable the flip box widget #
Navigate to ElementsKit ⇒ widgets ⇒ flip box widget, turn on the widget, and click on Save Changes.
Step 2: Drag and drop the widget #
Edit the page with Edit with Elementor option. Then search for the flip box widget with the Ekit icon and simply drag and drop the widget on the page.

Step 3. Customize the settings #
Expand the Flip box menu to alter the following settings :
- Flip: You get four options for flip: Flip in, Zoom In, Slide in, and 3D.
- Flip Direction: Multiple options are available for flip direction. However, the option will appear based on the value you select for the Flip option.
- Flip Trigger: Here you can choose the option that will trigger the flip. Three options are available: Hover, Box Click, and Button Click.
- Flip Box Height: You can adjust the flip box height using this option.
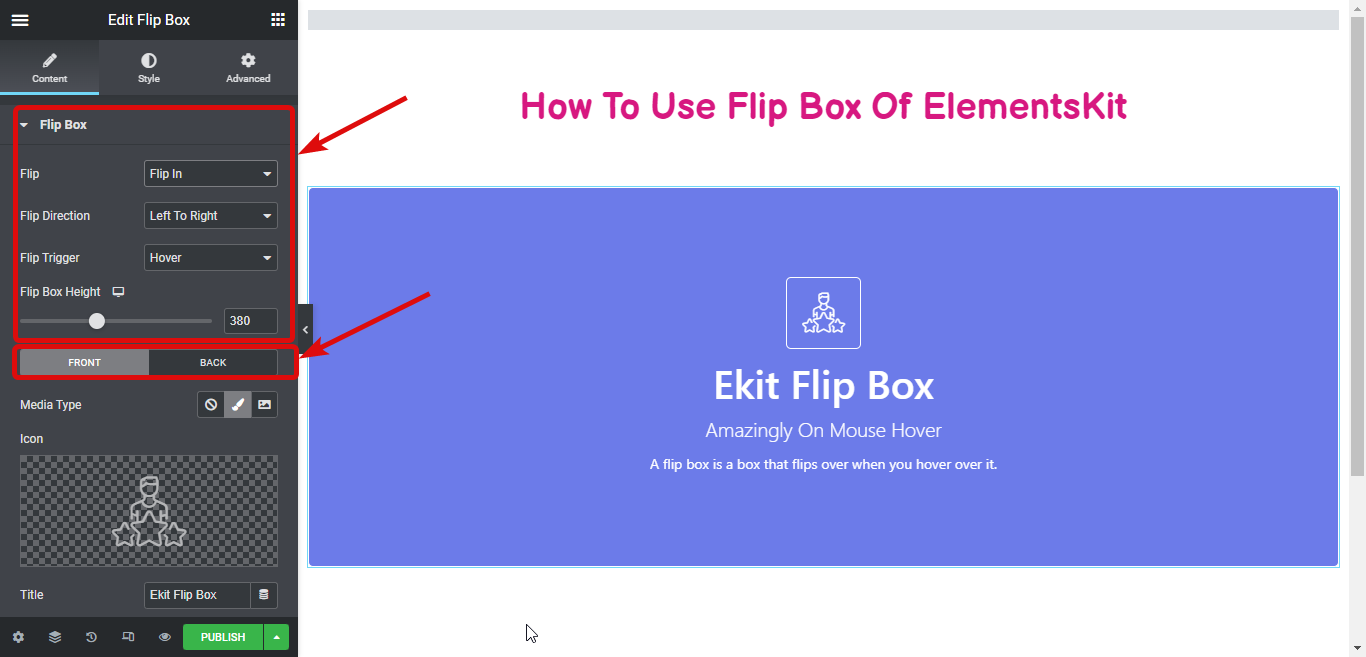
Under Flip box height, you will find two tabs FRONT and BACK. Select any of the options to customize the elements of the flip box for each side. You will find the same option for both sides.
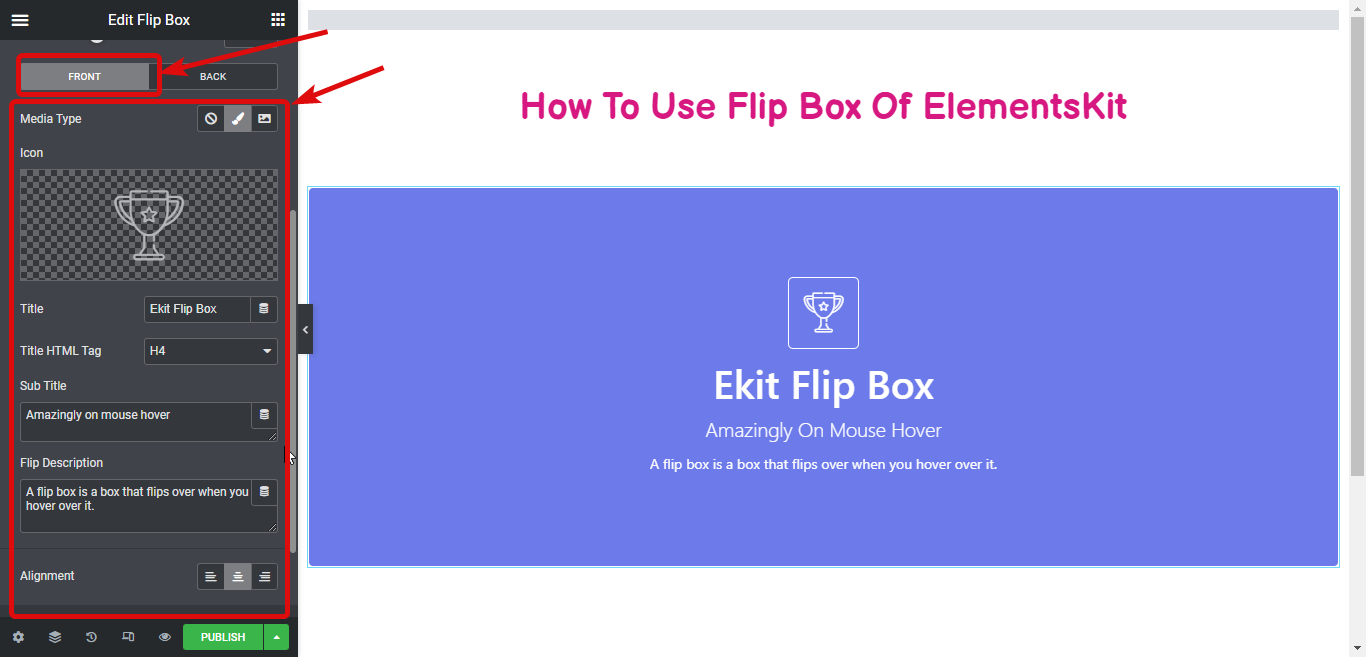
The options you can customize for each flip box side include :
- Media Type: You can choose an icon or image. You also can choose the none option if you don’t want to add any media files.
- Icon/ Choose file: Depending on the option you choose for Media Type, you can choose the icon/image here.
- Title: Provide a title.
- Subtitle: You can add a subtitle here.
- Flip Description: Write a relevant description using this option.
- Alignment: You can set the alignment to be left, center or right.
After you are done preparing content for both sides of your flip box, it’s time to alter the style.
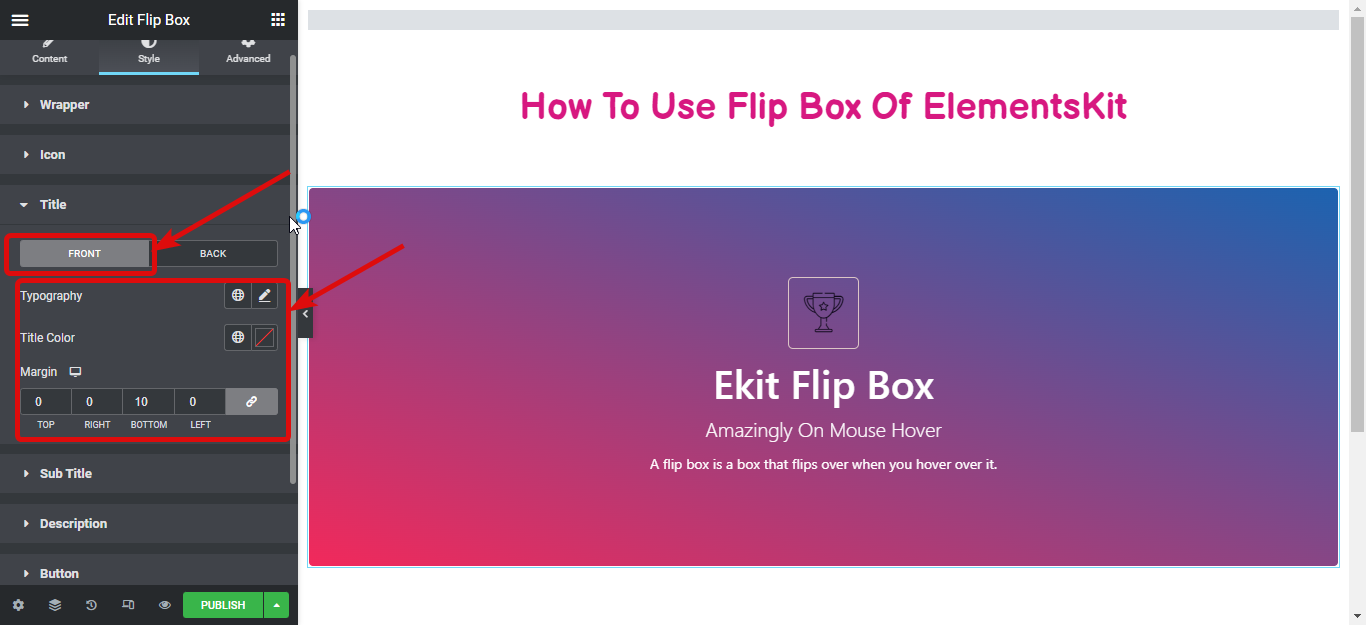
Step 4: Stylize your flip box #
Now move to the Style tab and expand each of the sections to alter related style options:
Wrapper: Under the wrapper, you can customize Background Type, Color, Location, Second Color, Location, Type, Angle, and so on. You can customize the options for both the front and back sides of the flip box.

Icon: If you expand this option you can alter Color, Background Type, Box Shadow, Border Type, and so on for both the normal and hover view. You can customize the icon style for both the front and back end of the flip box.
Title: Here you can customize the Typography, Title Color, and Margin of the title for both sides of the flip box.
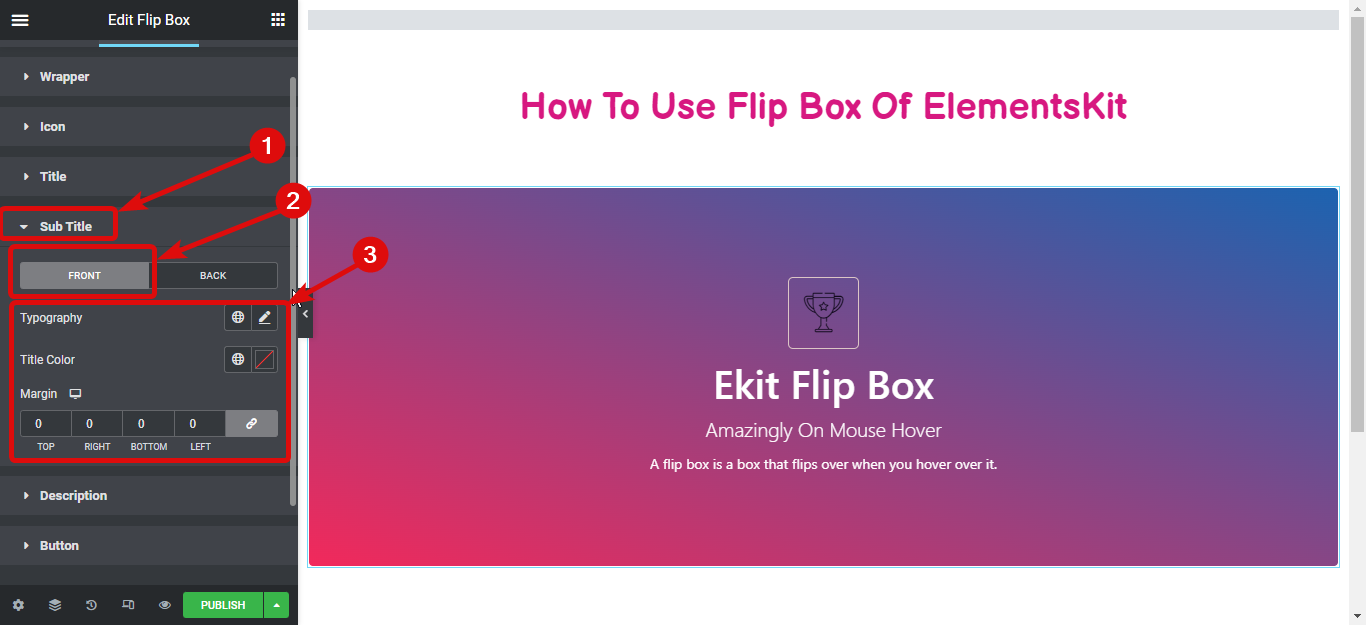
Subtitle: Expand this option to customize typography, Title Color, and Margin of the subtitle for both sides of the flip box.
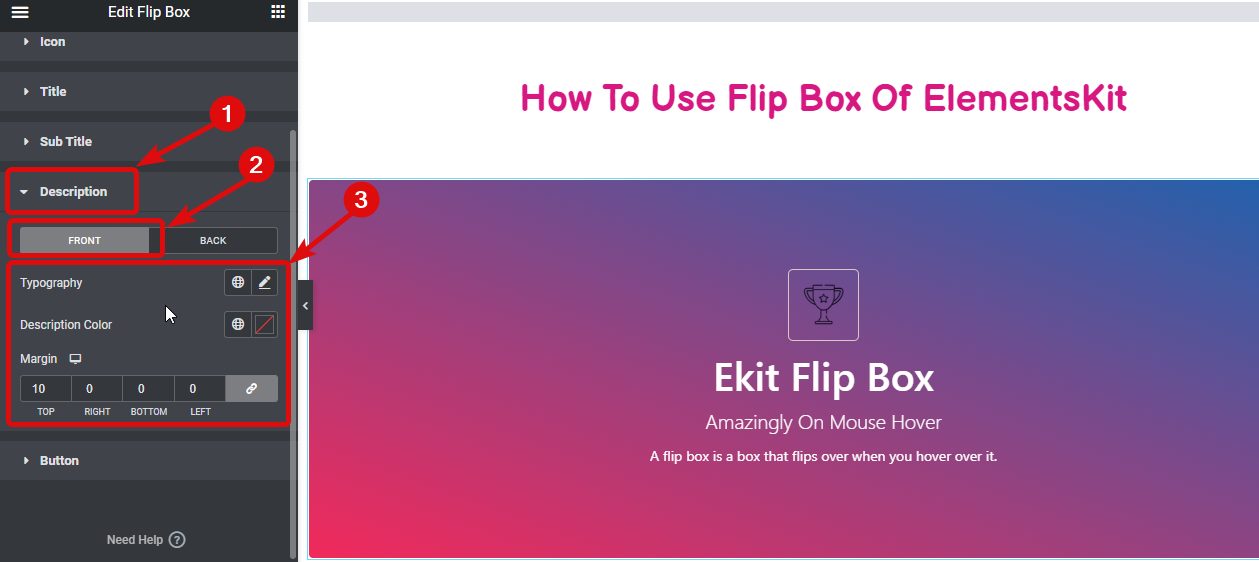
Description: Here you can customize the Typography, Description Color, and Margin of the description for both sides of the flip box.
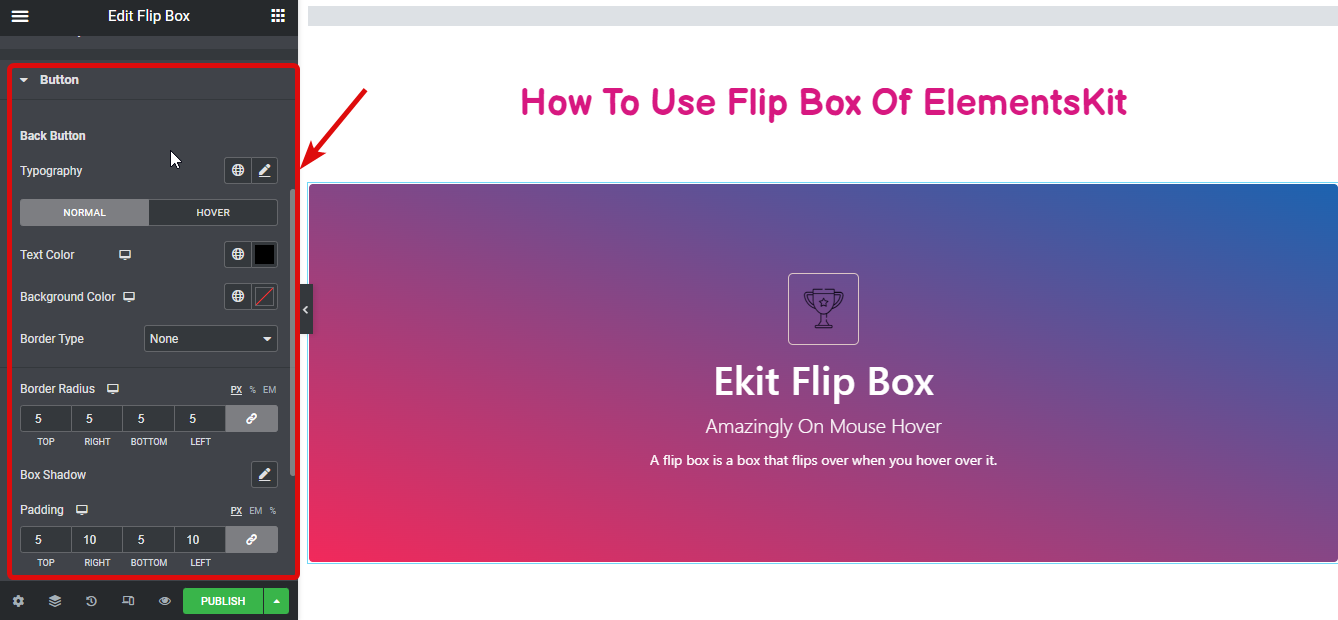
Button: Expand the button section to customize Text Color, Background Color, Border Type, Border Radius, Border Box, and many more options. You can style the button for both normal and hover views.
Finally, click on publish/ update to save the changes and preview your Elementor flip box:


