Checkout Additional Field allows you to add a custom form field to the checkout page. You can add a custom form field to the billing form, shipping form, and Additional form widget.
This module is useful in case you are looking to add an extra custom form field to your check-out page in addition to the existing ones that WooCommerce provides. Moreover, you also have to option to make the form field required/ not required depending on the information you want the customer to submit.
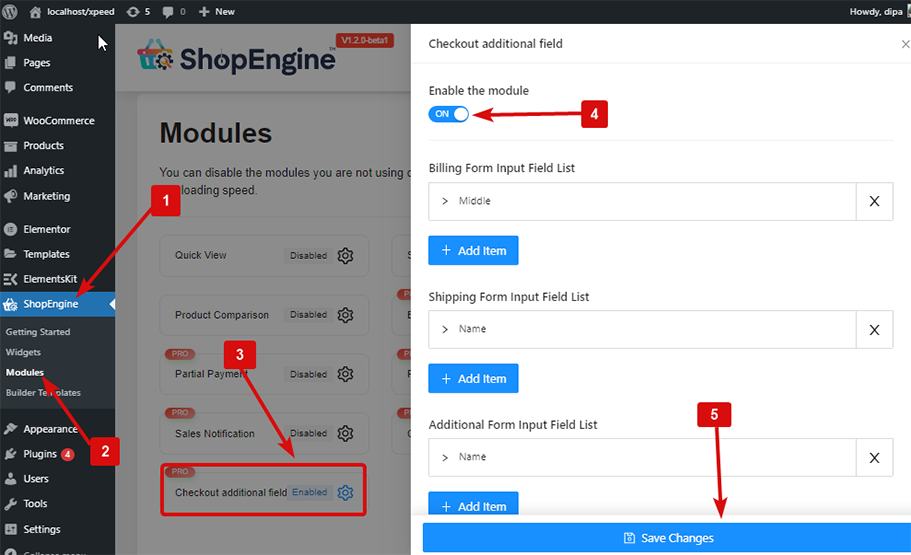
Step 1: Enable Checkout Additional Field Module #
You need to enable the module for it to activate. To enable the module
- Go to: ShopEngine > Modules > Checkout Additional Field
- Click on the Settings Icon
- Turn on the Enable the module option
- Save changes.
Note: You can also enable all the modules at the same time. Check out how you can turn on all the modules at once.
Step 2: Settings of Checkout Additional Field Module #
Let’s check how you can add, edit and delete form field items.
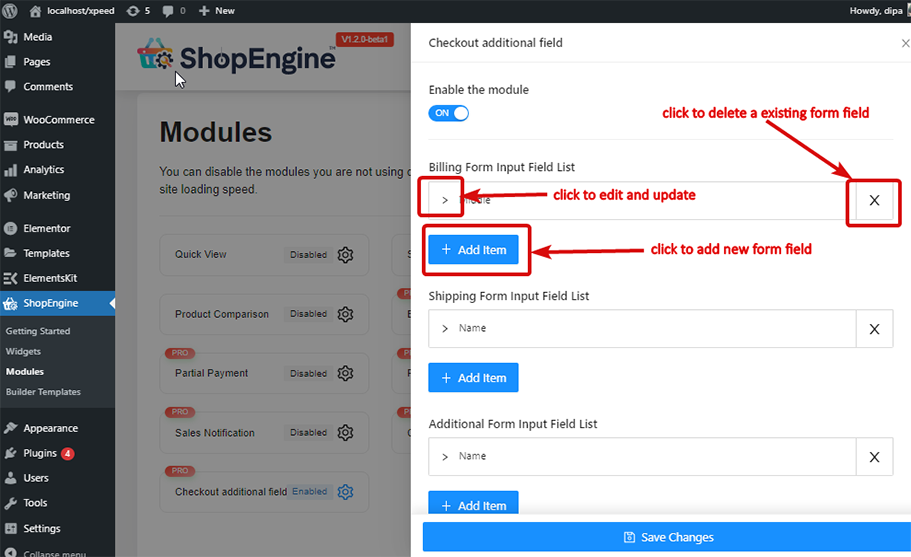
Add: #
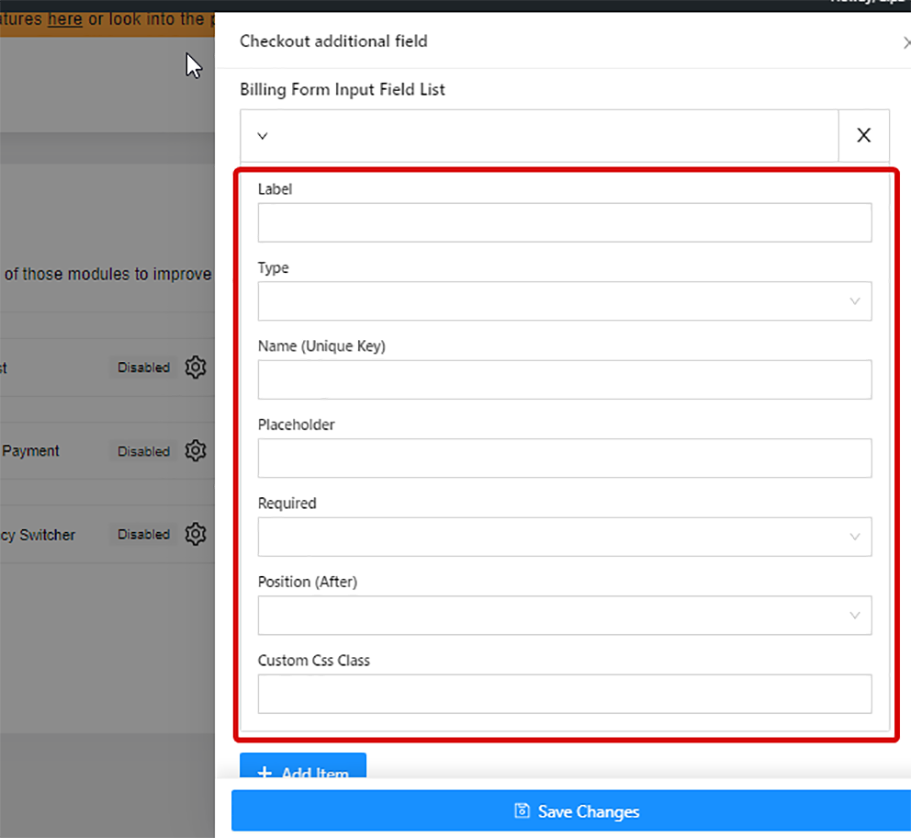
To add any form field + Add Item item and add the following field:
- Label: Give a label title here.
- Type: Chose the type of field you want.
- Name (Unique Key): Give a unique key. Make sure there is no space between, no special character. And always make sure you give a unique name for each field you create.
- Placeholder: Write the text for the placeholder.
- Required: Chose if you want to make this field required or not.
- Position (After): Chose the position of the field.
- Custom CSS Class: You can add any custom CSS class here if you want to.
Now click on save changes to save the field form.
Edit: #
To edit, the existing item clicks on the > option to make all the changes and click save changes to update.
Delete: #
To delete any of the created forms click on the X icon and click on save changes.
Note: If you make any of the form field required, then you must add that relevant Checkout Form Widget to the Checkout template. And you can change the styling of the newly added form field from the related widget settings.
Here is the final preview of how Checkout Additional Field Module: