The sales notification module will let you show product sales notifications through a popup to your website visitors. You can make your site social proof by this notification. Now, ShopEngine has added a new module that is sales notification. By using this module, you can easily add a sales notification in a few seconds.
Why use sales notification? #
You have already learned what a sales notification is. Now it is time to know the benefits of using a sales notification. Here are the reasons why you should use a sales notification:
- It will boost your sales.
- Will make your site social proof. As a result, you can gain the trust of your customers.
- You can encourage your customers to try out your product.
- User engagement will be increased.
Steps of adding sales notification in WordPress with ShopEngine #
Luckily, now you don’t need to use a separate plugin to add a sales notification to your WordPress site. ShopEngine provides a sales notification module along with 17+ modules. Here are the easy 2 easy steps of adding a sales notification. Follow the following steps:
Step 1: Enable the Sales notification module. #
First, enter your admin dashboard and go to ShopEngine>> modules.
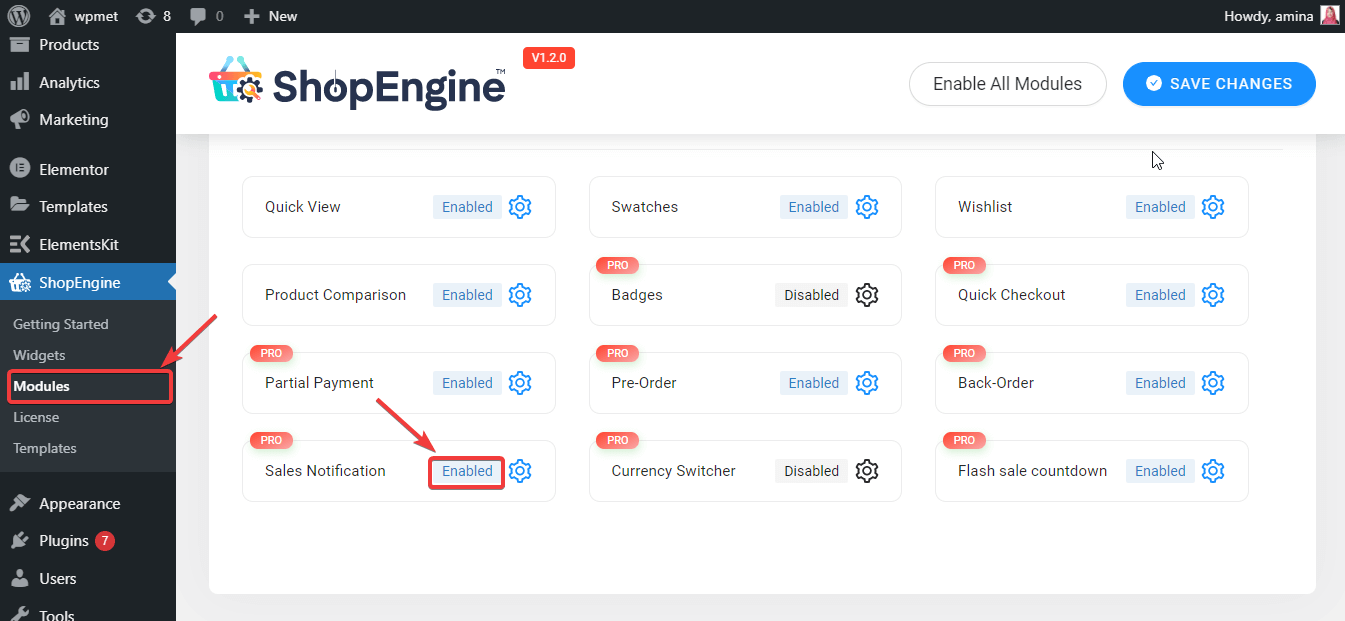
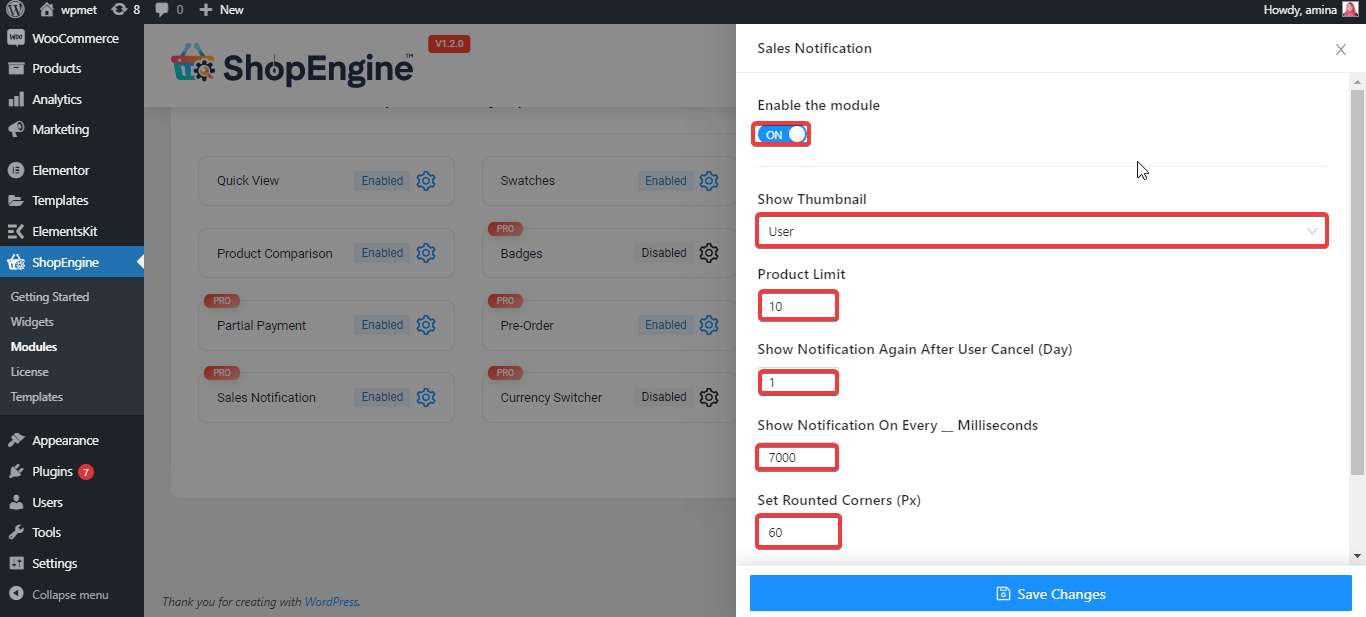
After that, enable the module and insert the following information in the gaps:
- Show thumbnail: Here you can set user or product.
- User: If you choose this option then your visitors can see the picture of your customer who has recently purchased your product.
- Product: It will show the purchased product.
- Product limit: You can enter the product limit for showing notifications.
- Show notification again after user cancel: This defines the time of showing notification after canceling it by site visitors.
- Show notification on every- millisecond: Visitors will see sales notification every 7000 milliseconds. You can customize it.
- Set rounded corner: You can set pixels for your sales notification. It will make your sales notification more round or square.
How to Add FAQ Schema Markup Using Elementor? #
In the previous section, we showed you how to create a stylish and useful FAQ section on Elementor websites. Now, we’ll walk you through the process of adding FAQ schema markup to your Elementor website.
Here are some requirements to run this process.
Prerequisites
- A WordPress-powered Website
- Elementor Page Builder
- Rank Math SEO Plugin
Before making our first step, we want to inform you that there are a bunch of different plugins out there that can help you add FAQ schema to your Elementor website. However, we’re going to use the “Rank Math SEO” plugin because it integrates with Elementor. So, we’ll have a convenient and streamlined workflow.
So first install and activate this plugin. See this guide on how to install the Rank Math SEO plugin on your WordPress website.
After completing the onboarding process, you can return to the dashboard. Now, whenever you add a new page, you’ll see an SEO option in the Elementor page builder.
Now, start with the first step.
Step #1: Adding The Accordion Widget #

Let’s start with enabling the Elementor page builder on an existing page or inserting a new one. Then, search for the “Accordion” widget from the Elementor dashboard and simply drag and drop the widget on the page. At this time, you only need to add your content and personalize it.
Step #2: Enable FAQ Schema Option #

In the Content tab of the Accordion widget settings, you will see an “FAQ Schema” option. Just toggle the button next to it. Due to this action, the FAQ Schema will be enabled on your Elementor website page. Although this is a built-in feature of Elementor, using it you can insert FAQ schema on the website page with the Rank Math free version.

Besides, Rank Math SEO plugin pro version users will find another option called “Add FAQ Schema markup” in the Accordion widget settings. This feature enables the FAQ Schema to only the contents of the Accordion widget. Thus, it separates the FAQ Schema from other Rank Math schemas on the page.
Do note that it’s not recommended to turn on both options simultaneously. That way, your page will have both the Elementor and Rank Math FAQ schemas. Which may result in an error like duplicate field ‘FAQPage’. Therefore, the page will not be optimized to appear in FAQ-rich results.
All done, click the update or publish button to save your changes. But, we need to know if it is working properly. Next, we’ll learn to test the result.

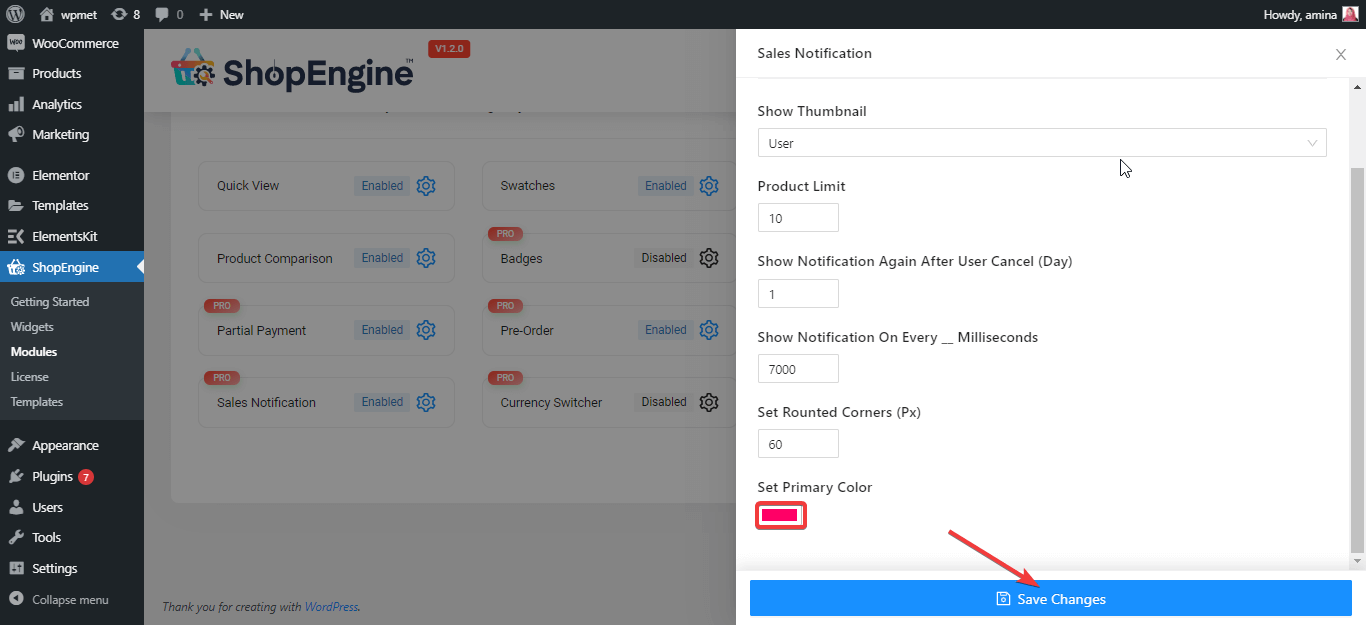
- Set primary color: Set color for your sales notification.
Finally, press the save changes button and make your notification live.
Step 2: visit your site. #
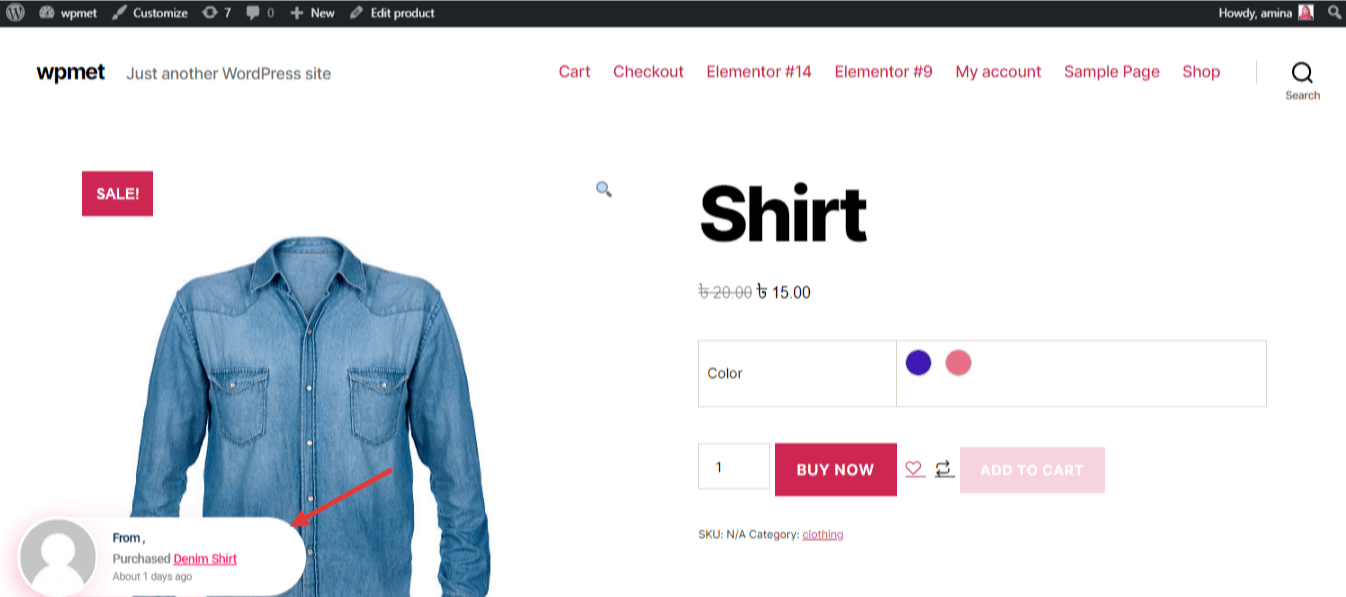
Now, visit your site and see how it works. Here is the outcome of using a sales notification module of ShopEngine.
Note:
Sales notification will only show after purchasing a product. Without purchasing, it can’t get data to produce a notification.