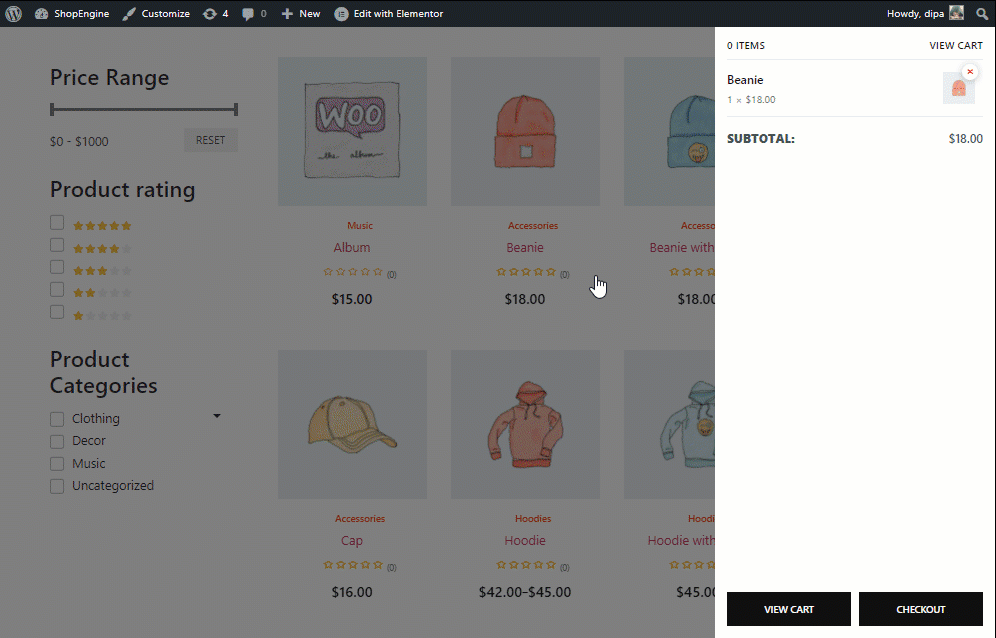
The Sticky Fly Cart Module of ShopEngine adds a floating cart (also known as side cart and cart drawer) to your WooCommerce Elementor website. It provides you with a mini cart icon that you can expand to see all the products in your cart.
You can remove the products from your cart using this fly cart and also go to the cart page and check out the page with a single click. This fly cart remains visible on WooCommerce pages.
How to add Side Cart to your WooCommerce site using ShopEngine #
You can add a sticky fly cart to your WooCommerce Elementor website by following 3 simple steps.
Step 1: Enable Sticky Fly Cart module by ShopEngine #
From the WordPress dashboard, go to ShopEngine ⇒ Modules ⇒ Sticky Fly Cart and click on the settings icon.
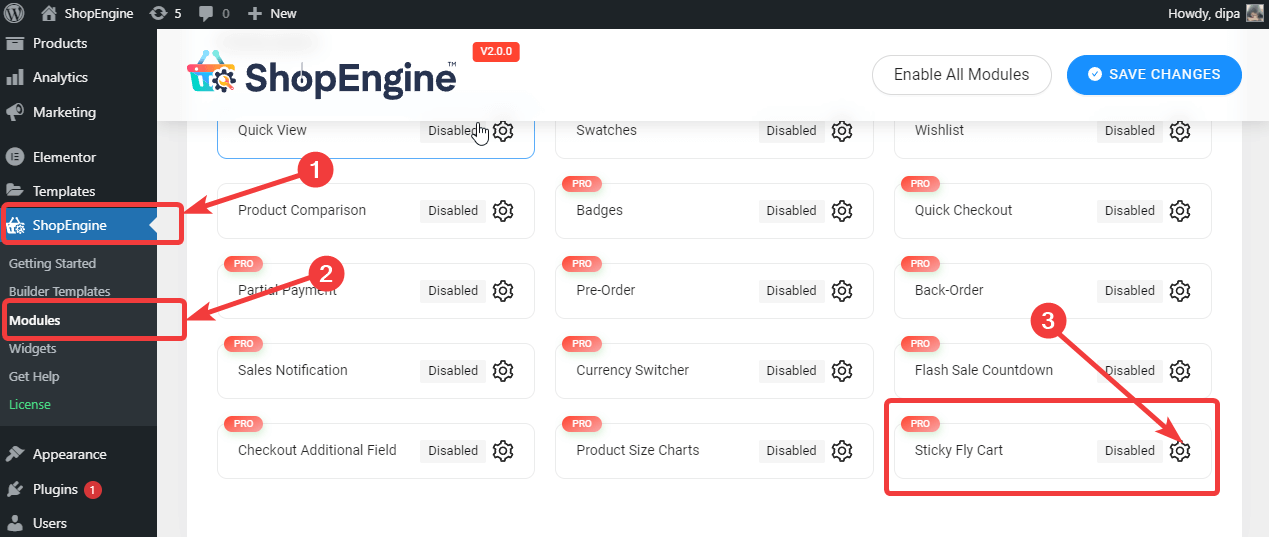
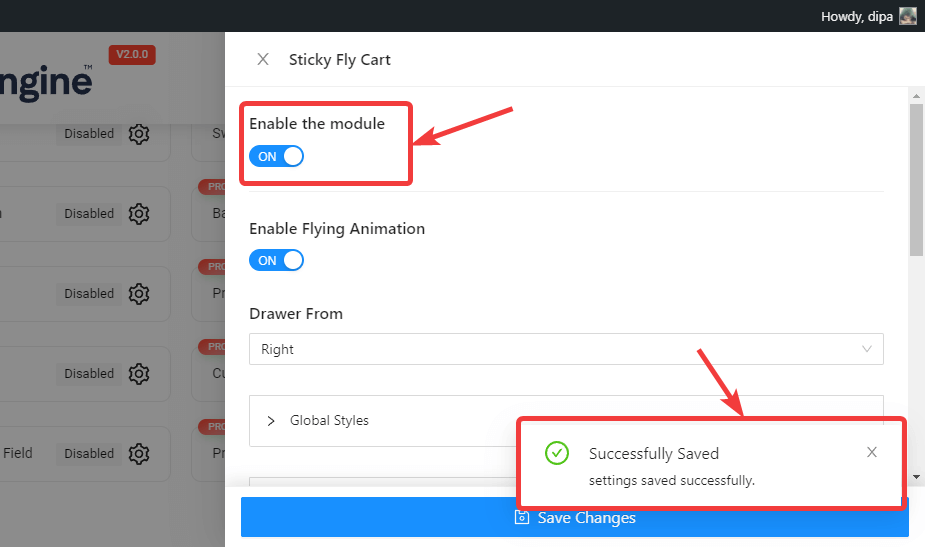
Once you see the settings, turn on the Enable the Module option. You should see a successfully saved message after that.
Note: You can also enable all the modules at the same time. Check out how you can turn on all the modules at once.
Step 2. Customize the settings of Sticky Fly Cart #
Once you enable the module, it’s time to customize the following settings:
- Enable Flying Animation: Turn this option to enable flying animation on your sticky cart.
- Exclude Page: Enter the pages where you want to stop the sticky fly cart from appearing.
- Drawer From: This option will decide whether the Fly cart will be placed on the left side or right side.

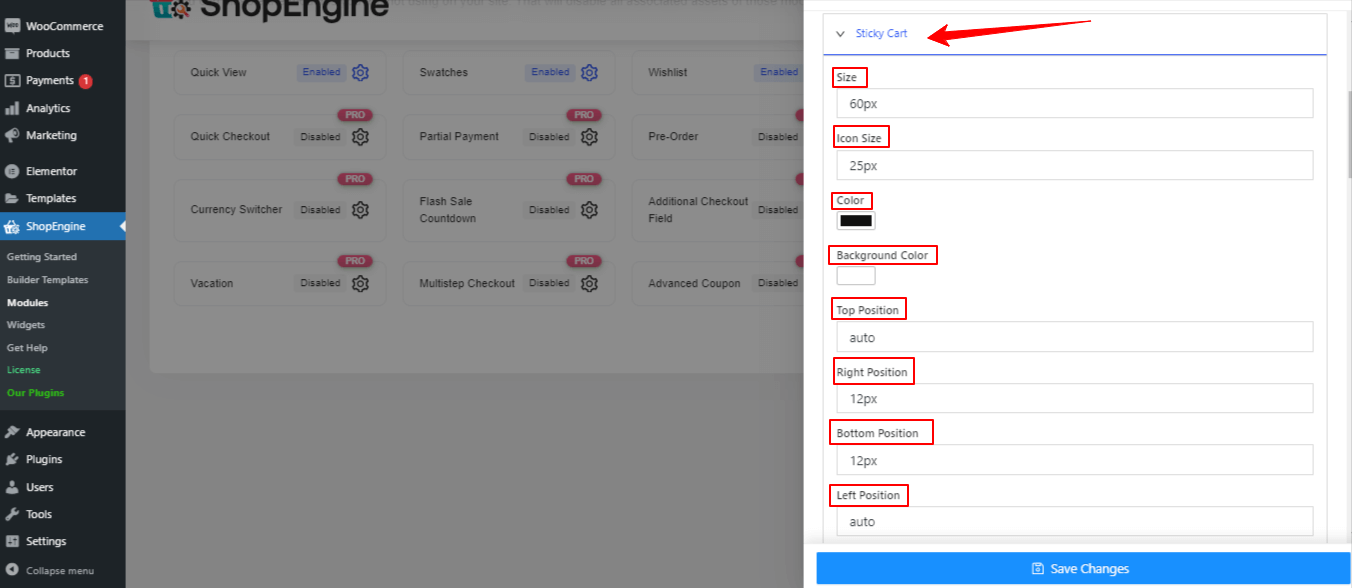
- Sticky Cart: Click on the Sticky Button arrow icon to access and customize the following settings:
- Size: Here you can set the size of the sticky cart button.
- Icon Size: Change the cart icon size that’s inside the sticky cart button.
- Background Color: Change the sticky button background color.
- Top Position: You can leave the top position as auto.
- Right Position: Set the right position in pixels.
- Bottom Position: Here you can set the bottom position in pixels.
- Left Position: Change the left position here.
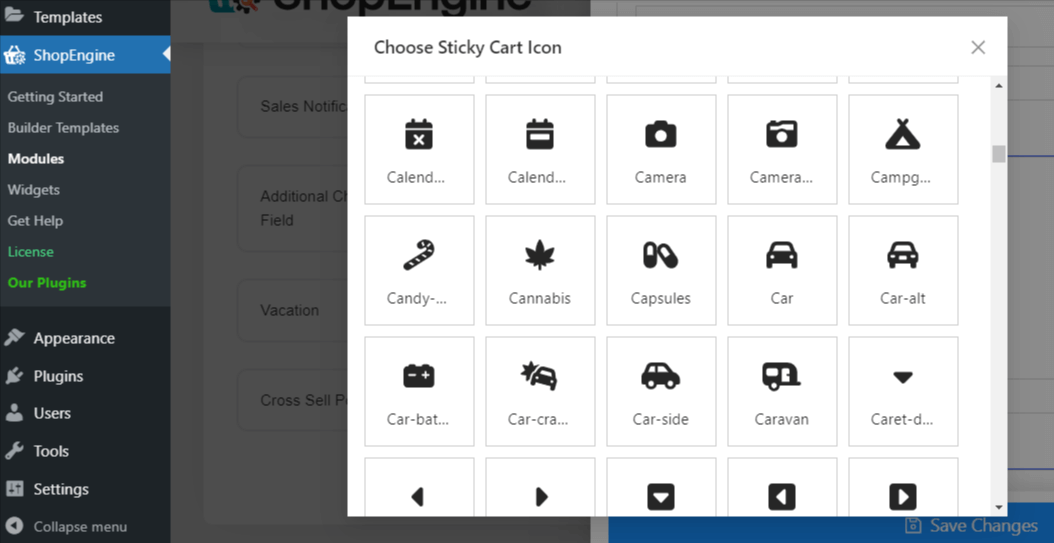
- Sticky Cart Icon

Change the default sticky cart icon by clicking the “Select Icon” option. Doing this will appear a popup with a range of icons to use as the sticky cart icon.
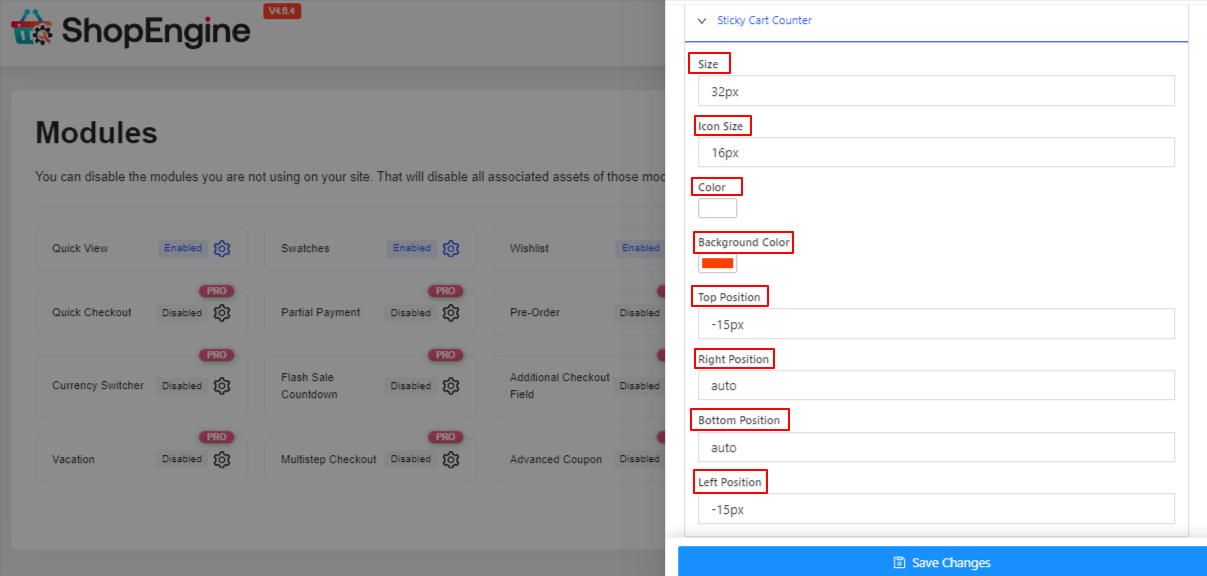
- Sticky Cart Counter: Click on the Sticky Button Counter arrow icon to access and customize the following settings:
- Size: Change the size here.
- Icon Size: Here you can change the icon size.
- Color: Choose a color for the counter.
- Background Color: Select a background color for the button counter.
- Top Position: You change the top position here if you want.
- Right Position: Change the right position here.
- Bottom Position Alter the button position if you want.
- Left Position: You can change the left position using this option.
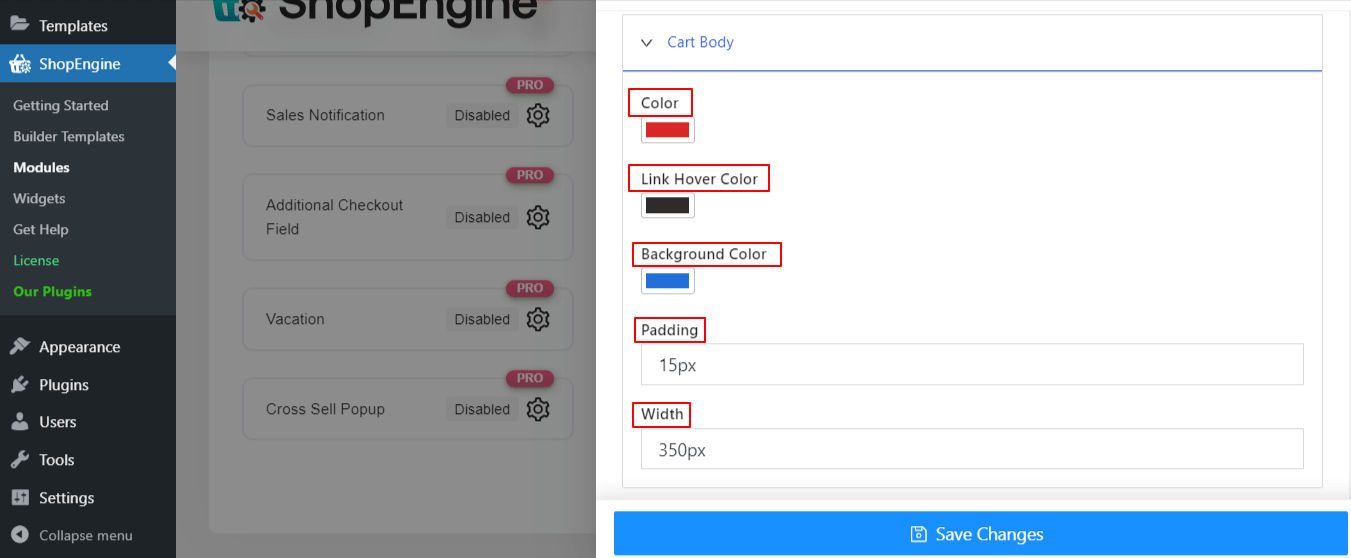
- Cart Body: Click on the Cart Body arrow icon to access and customize the following settings:
- Color: Give a color to the cart body.
- Link Hover Color: Use the color picker to add a color as hover effects on link.
- Background Color: Change the background color.
- Padding: Adjust the padding if you want.
- Width: Set the width here.
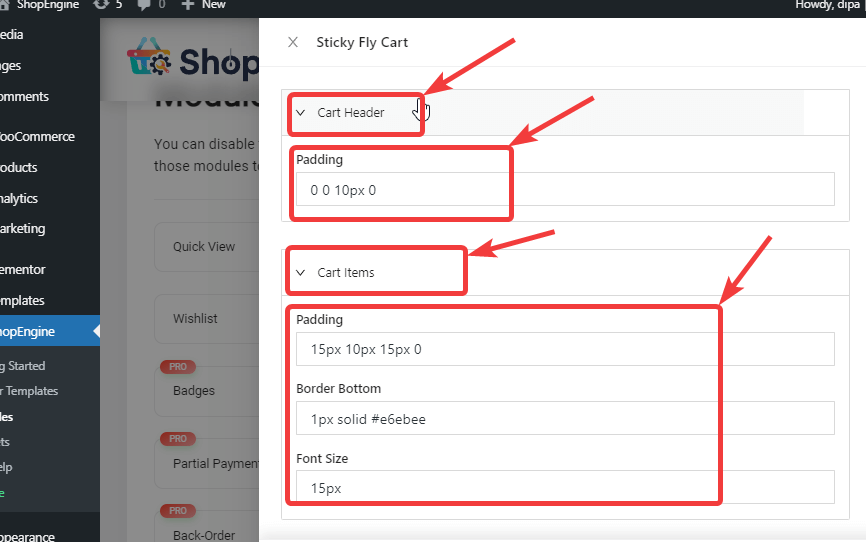
- Cart Header: Click on the cart header and adjust the top,left,bottom right padding.
- Cart Items: Click on the Cart Items arrow icon to access and customize the following settings:
- Padding: Adjust the top,left,bottom right padding.
- Border Bottom: Here you can change the border bottom size,type and color.
- Font Size: You can change the font size here.
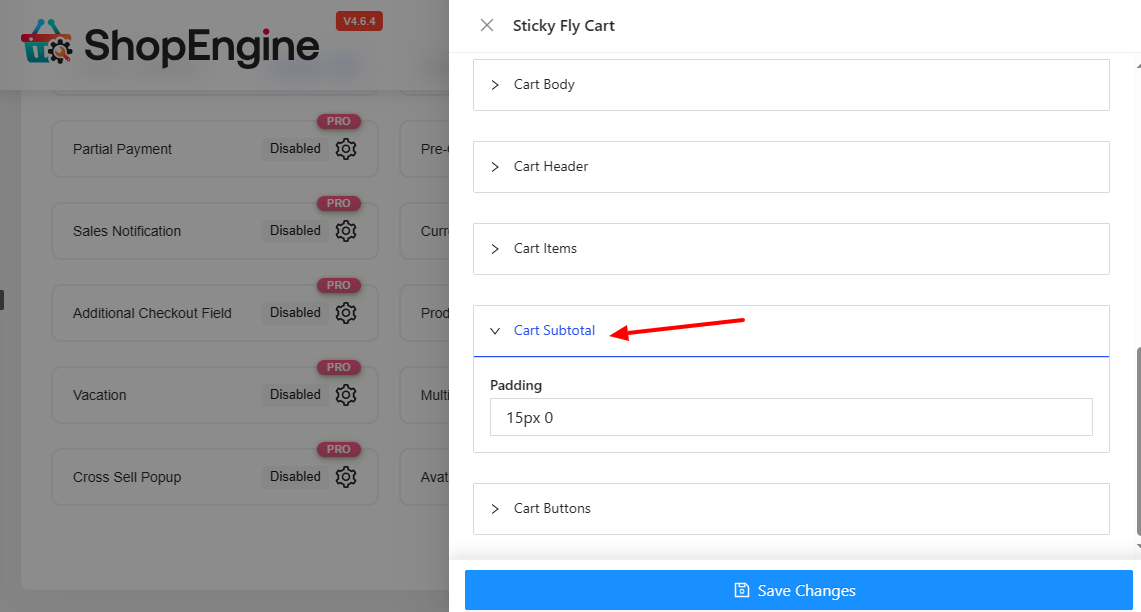
- Cart Subtotal: Click on the cart subtotal and adjust padding.
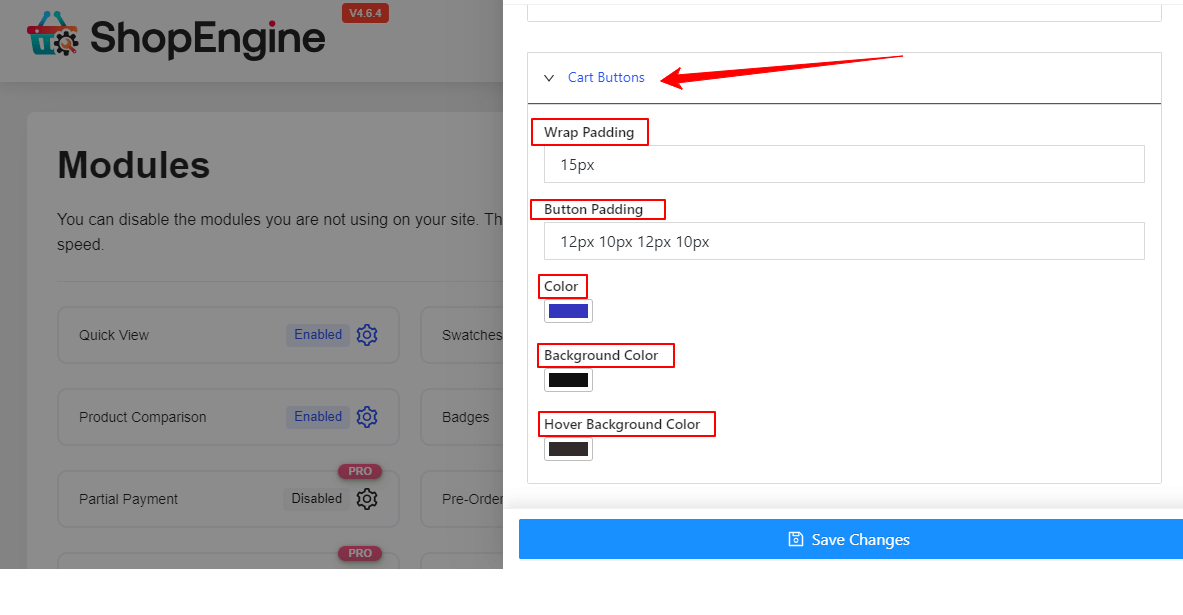
- Cart Buttons: Click on the Cart buttons arrow icon to access and customize the following settings:
- Wrap Padding: Change the wrap padding value here.
- Button Padding: Adjust the top, left, bottom and right padding here.
- Color: Pick a color for the cart buttons.
- Background Color: Give a color the cart button background.
- Hover Background Color: Use a background color as hover
Step 3: Save and preview Sticky Fly Cart #
Finally click on the Save Changes button to update.
Now if you go to the front end of your website, you should see a sticky fly cart like the preview below.