English
  German
  Spanish
  Italian
  French
  Danish
  Portuguese
  Swedish
  Polish
  Korean
  Japanese
 How to Create a WooCommerce Archive Page with ShopEngine #
WooCommerce Archive pages are led to organizing a list of products under a specific price, category color, tag, etc. Here you will get some specified ShopEngine Archive Widgets including Category, Archive Title, Archive Count, Archive Products., Product Filters, etc. Using these widgets, you can easily arrange your Archive page in your desired way.
Just follow the step-by-step process to create & beautify your Archive page with ShopEngine, an WooCommerce archive page builder:
Quick Overview
This guide will present creating a WooCommerce product archive page using ShopEngine’s provided archive widgets. This plugin supports Elementor’s drag-and-drop interface that facilitates beginners who have zero to minor technical expertise.
Plugins needed: ShopEngine, WooCommerce, and Elementor.
After installing these plugins, you need to enable the archive widgets. Then you need to create and customize an archive page template with ShopEngine’s archive widgets.
Step 1: Create an WooCommerce Product Archive Page Template #
- Navigate to ShopEngine-> Templates from your WordPress dashboard.
- Click on the Add New button to create a new template.
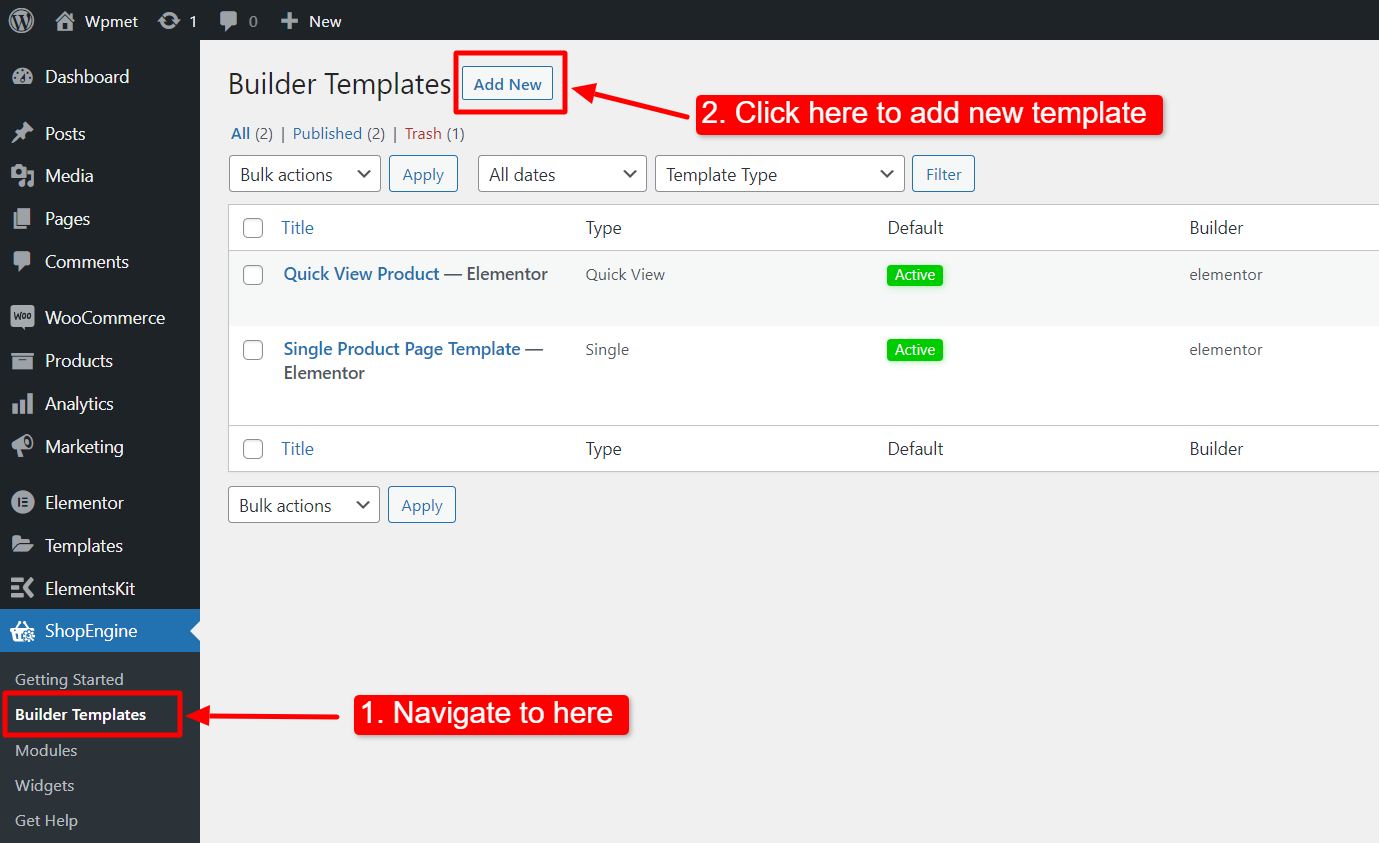
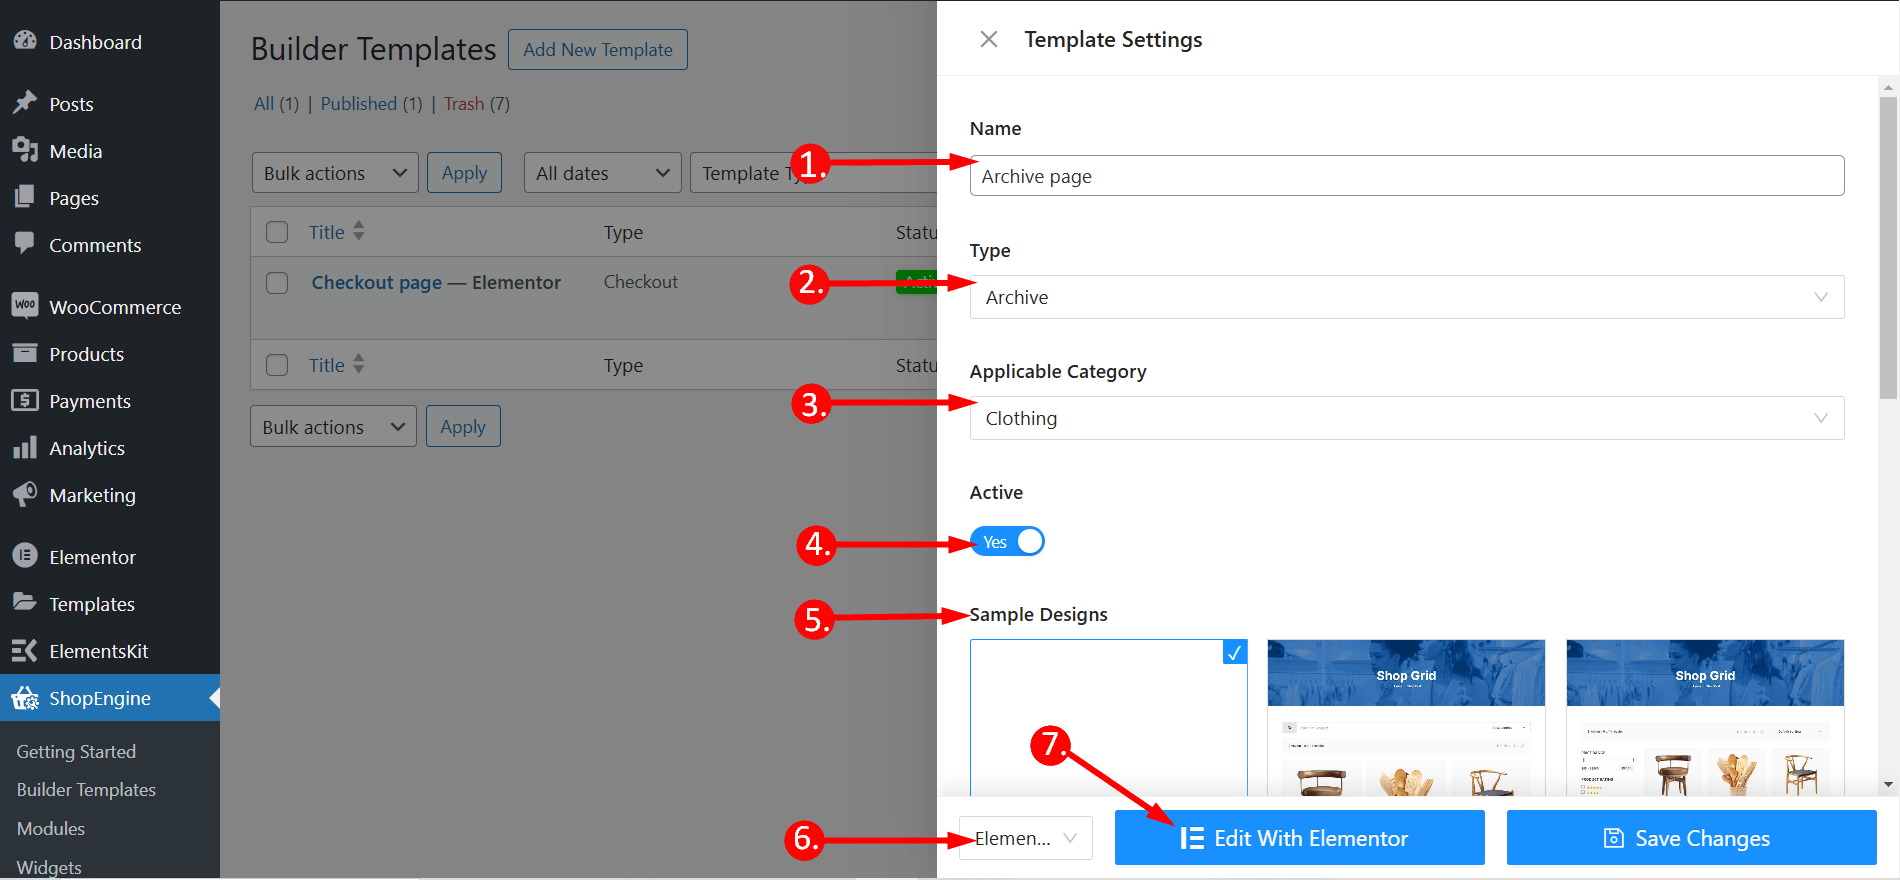
After that, an off-canvas window will show up for template settings. In the Template Settings,
- Enter a Template Name.
- Set the template Type: Archive.
- Select an Applicable Category for products. (Optional. However, if you choose a category, you have to create another template for general products as well as products of other categories).
- Enable Set Default to set the template as Default.
- Select a design from the available templates or create a design on your own using single product page widgets. We will show the template created from the scratch.
- Choose which editor you want to use for editing the template from the given options: Elementor and Gutenberg.
- Now Click on Edit with Elementor/Gutenberg or Save changes.
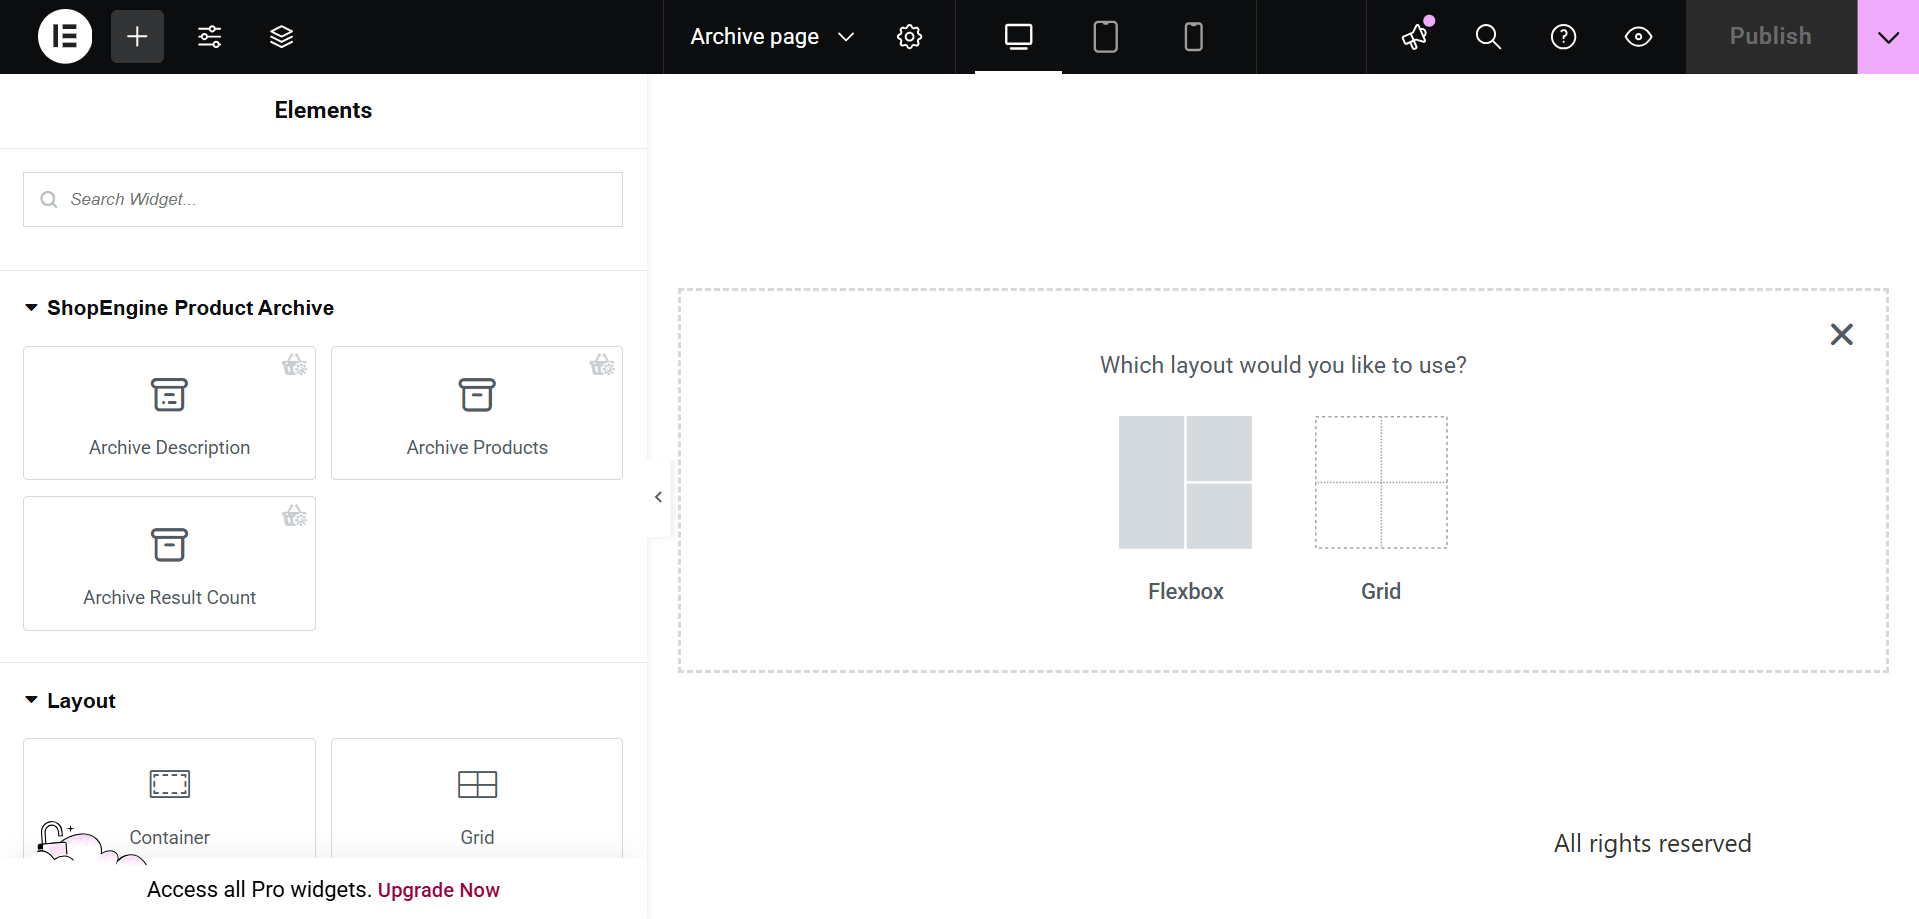
Step 2: Choose a structure #
- Choose your structure from the selected area.
Step 3: Design your WooCommerce archive page with ShopEngine Archive Widgets #
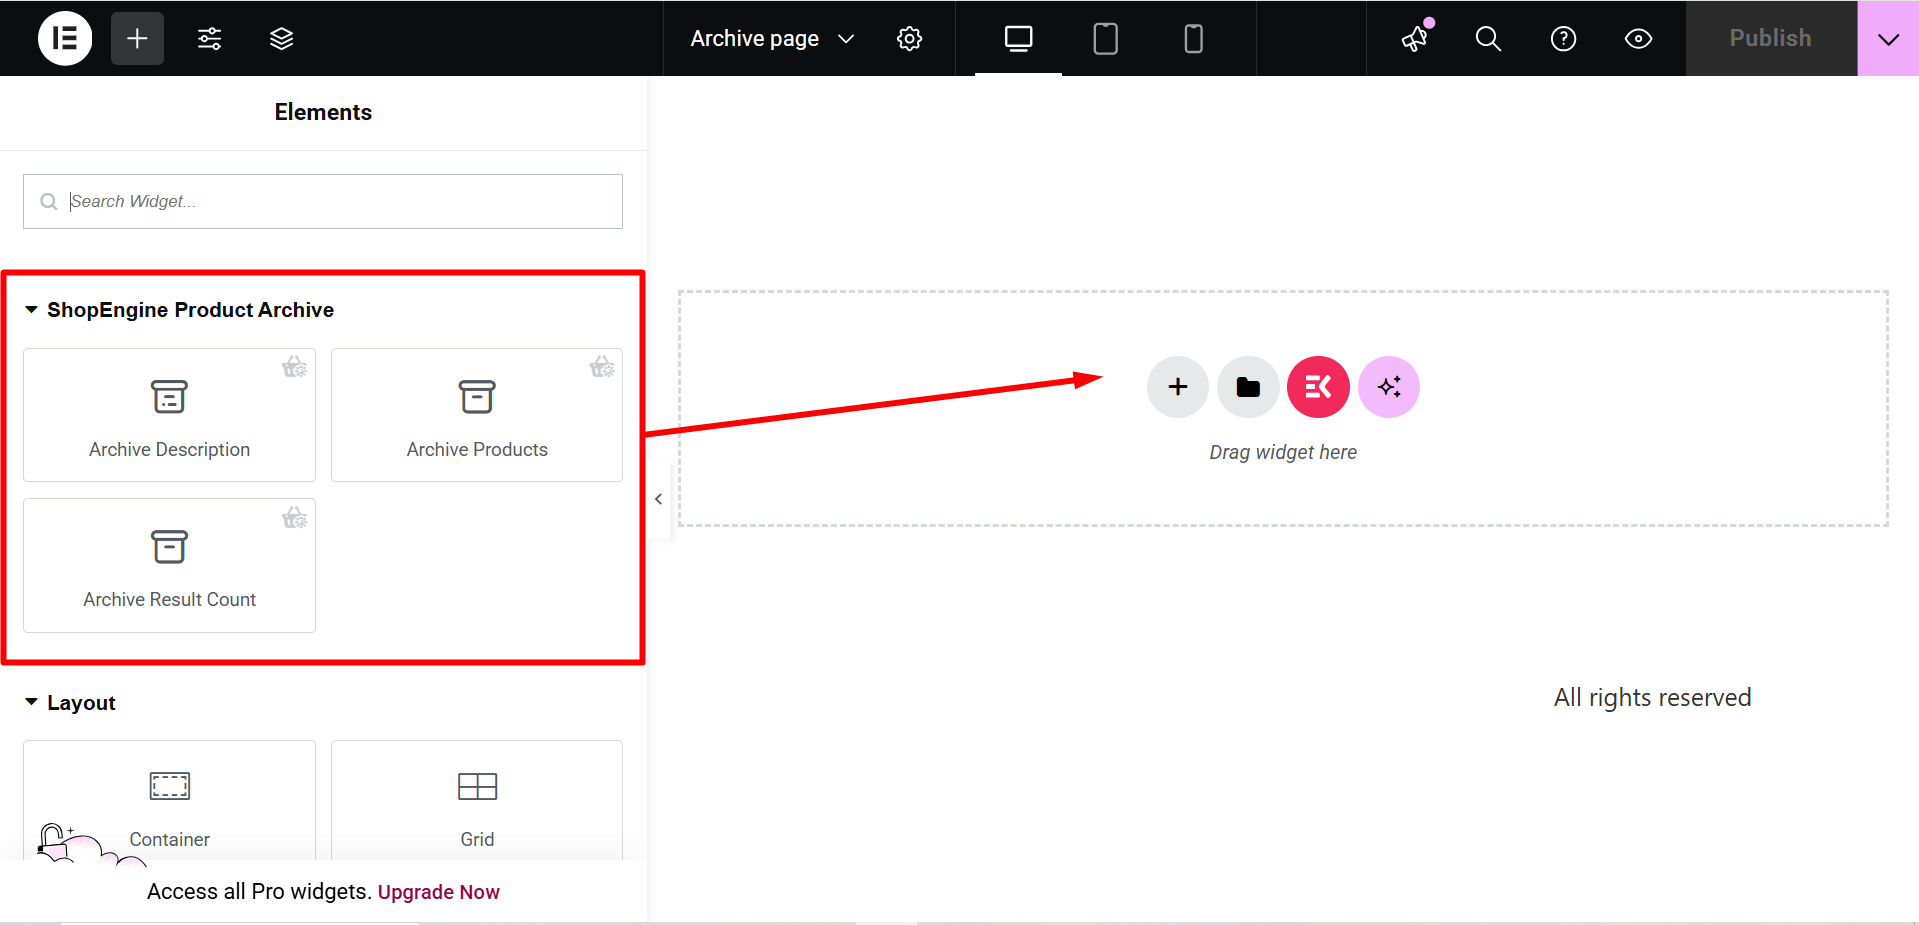
Go to a ShopEngine Block and you can design your own. Here you will get some specified ShopEngine Archive Widgets including Category, Archive Title, Archive Count, Archive Products, etc. Let’s see how to customize them:
Now just drag the following widgets and drop them on the selected area.
- Category.
- Archive Title.
- Archive Count.
- Archive Products.
Step 4: Publish your Archive Page #
- After you’ve finished designing, click Update.
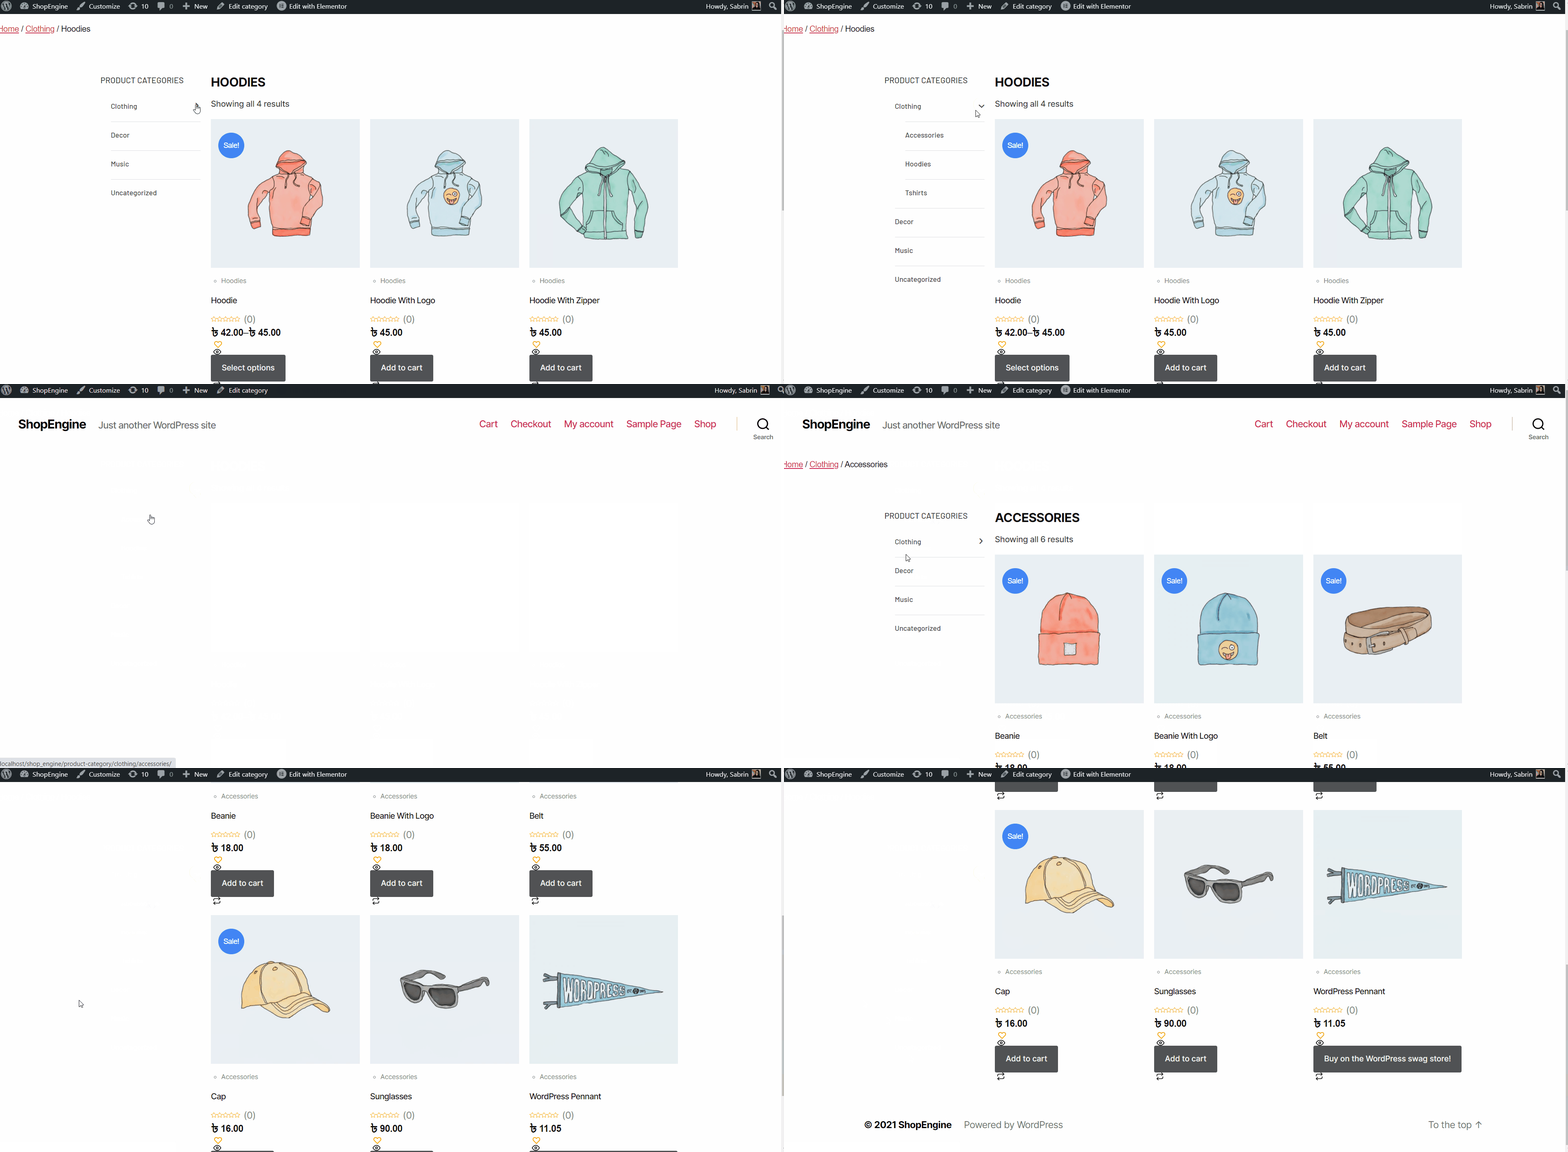
Now view the Archive Page from the front end. There you can see the Archive page you have designed and check every functionality of the page is working perfectly.