Getting Started #
In order to allow your visitors to login with their Google account, first you must create a Google App. The following guide will help you through the Google App creation process. After you have created your Google App, head over to “Settings” and configure the given “App ID” and “App secret” according to your Google App. Let’s Learn…
Create Google App #
- Go to https://console.developers.google.com/apis/
- Log in with your Google ( if you are not logged in )
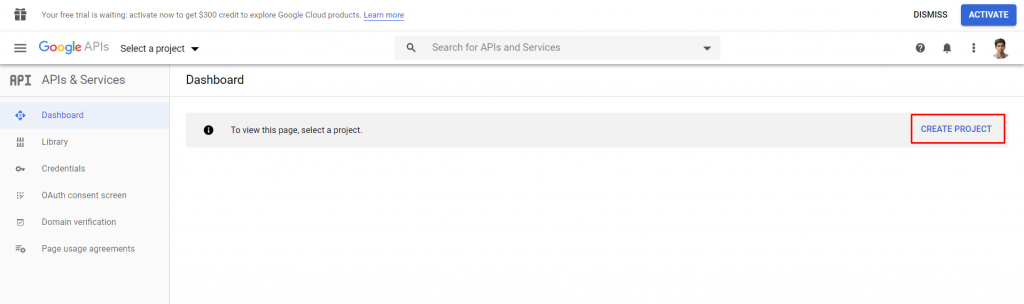
- If you don’t have a project created. You’ll need to create a project. Click Create Project Button.
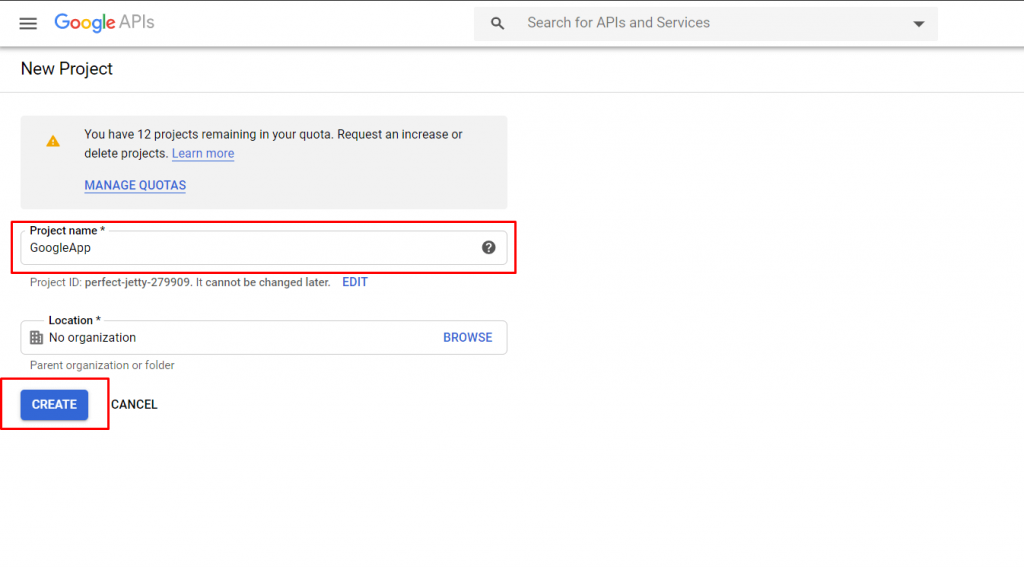
- Here you need to give a project name then click Create button. Once you have the project created you’ll end up in the dashboard.
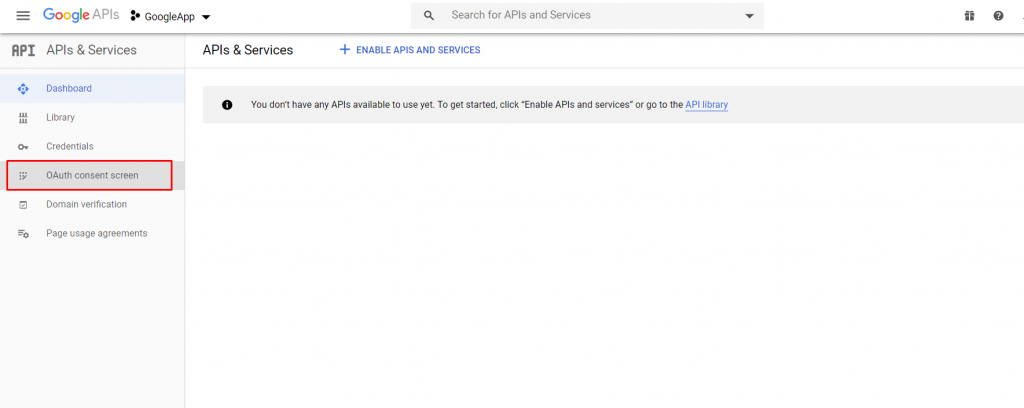
- Click the OAuth consent screen button on the left side of your screen.
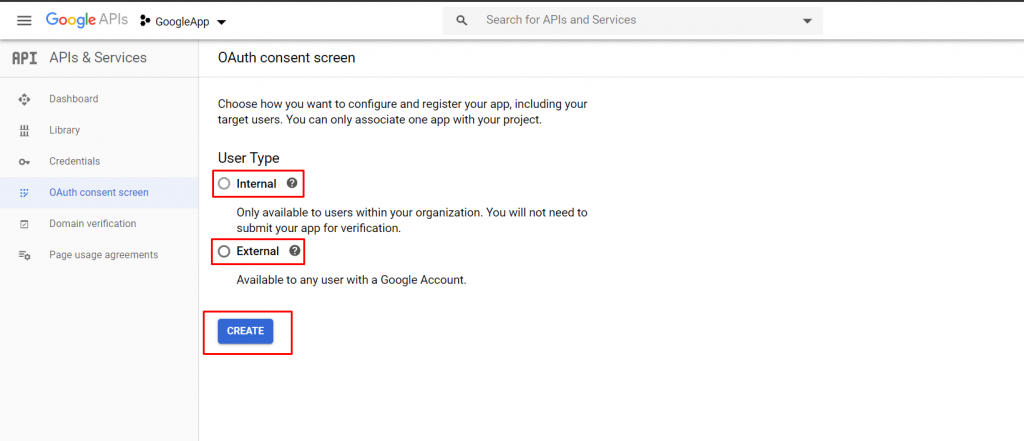
- Choose a User Type according to your needs (Internal or External). If you would like to use this app for other purposes, go through this OAuth API verification FAQs
- After selecting User Type click create button
- Enter a name for your App to the Application name field, which will be displayed as the name.
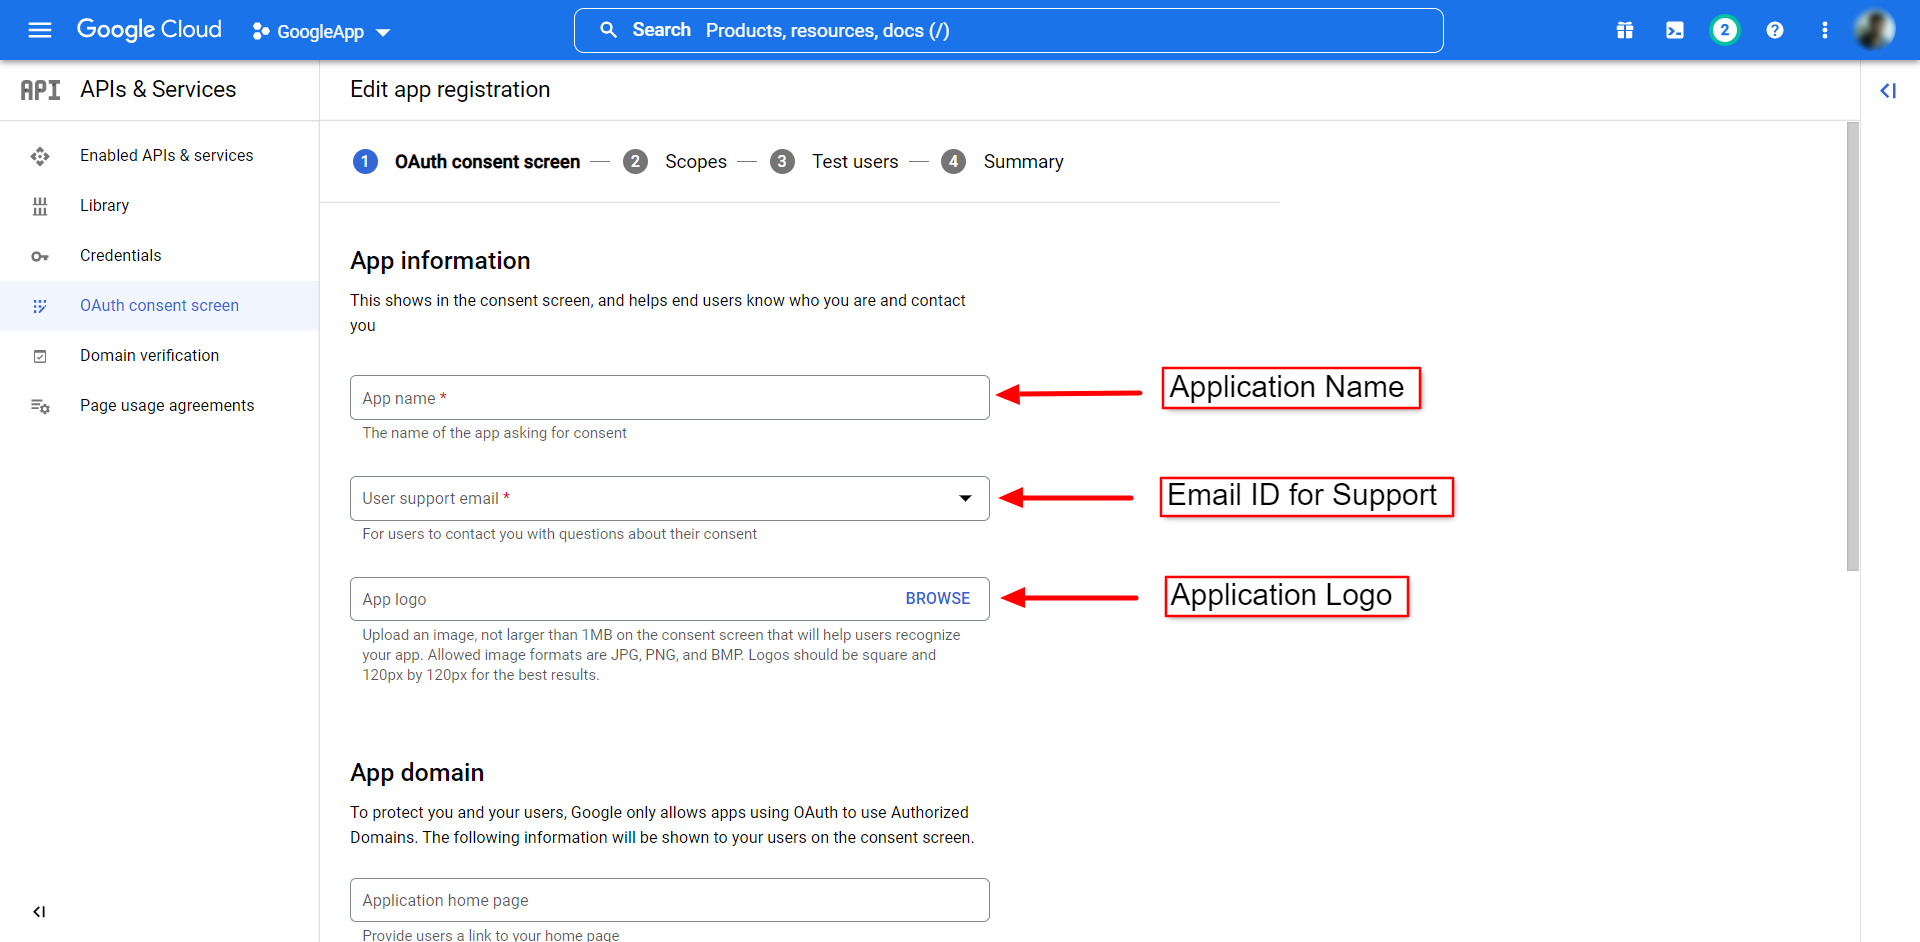
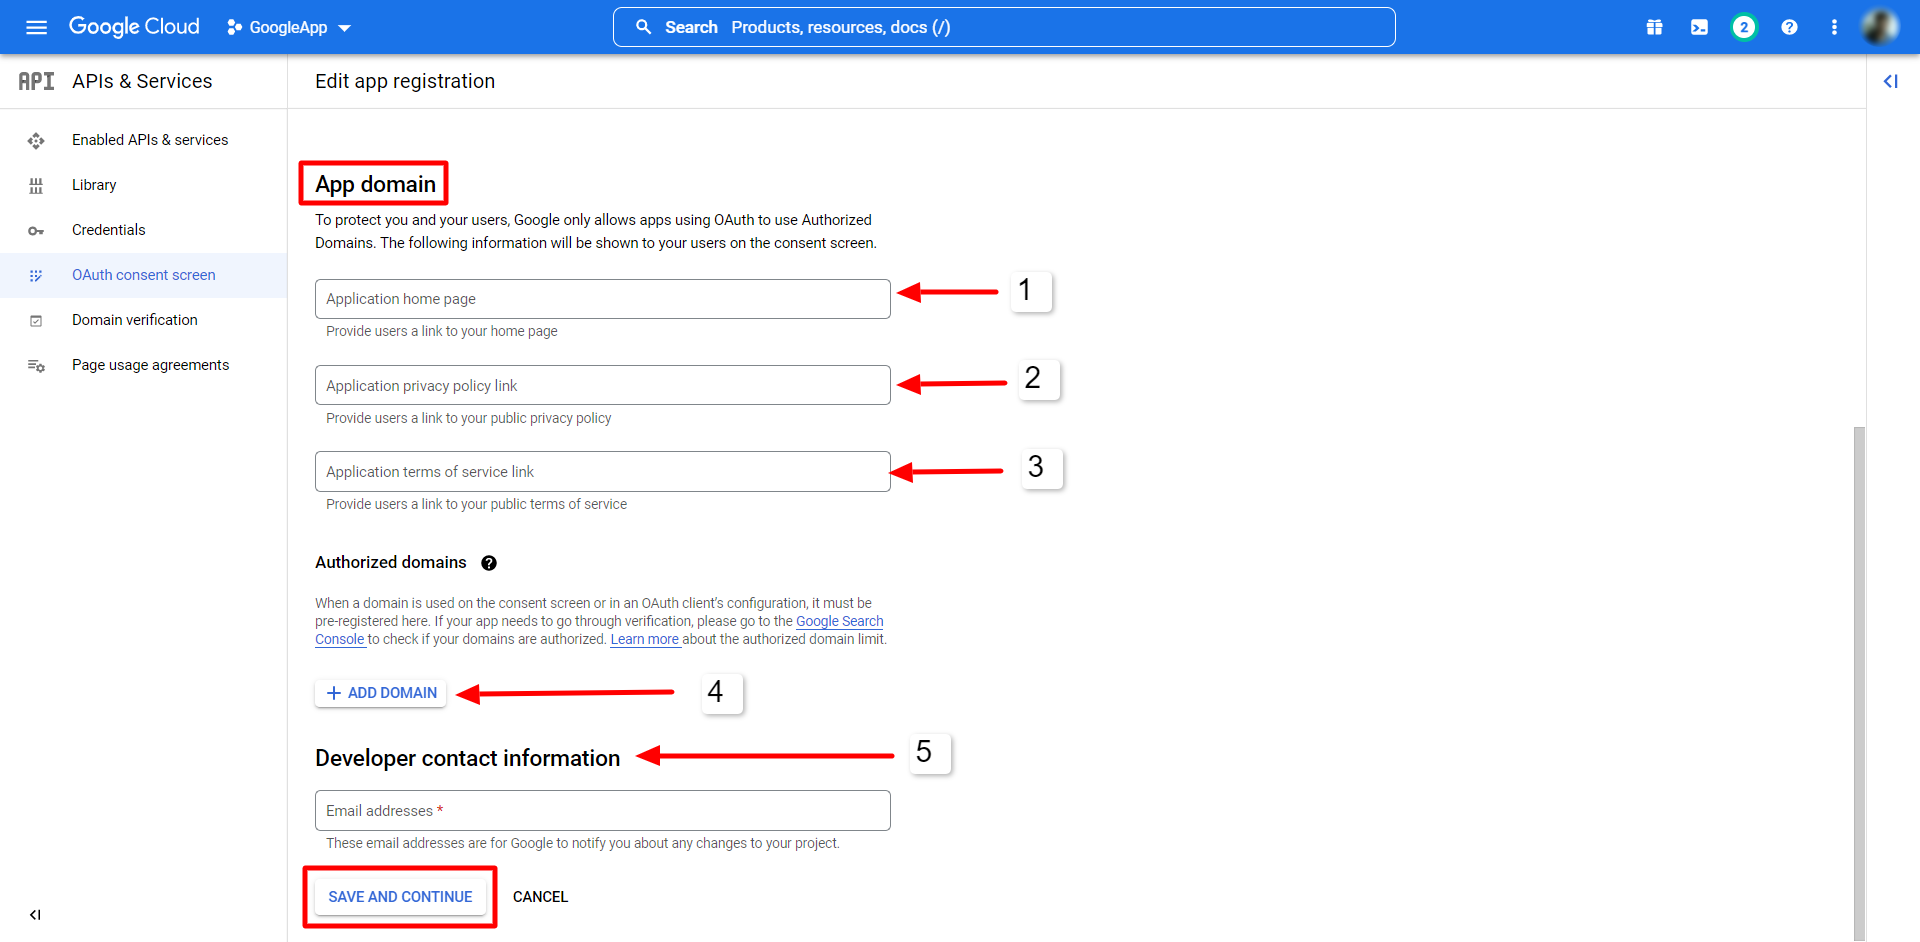
- Fill up other information like Authorized domains, Application Homepage link, Application Privacy Policy link, etc. You can find several privacy policy generators by searching on google.
- Save your settings!
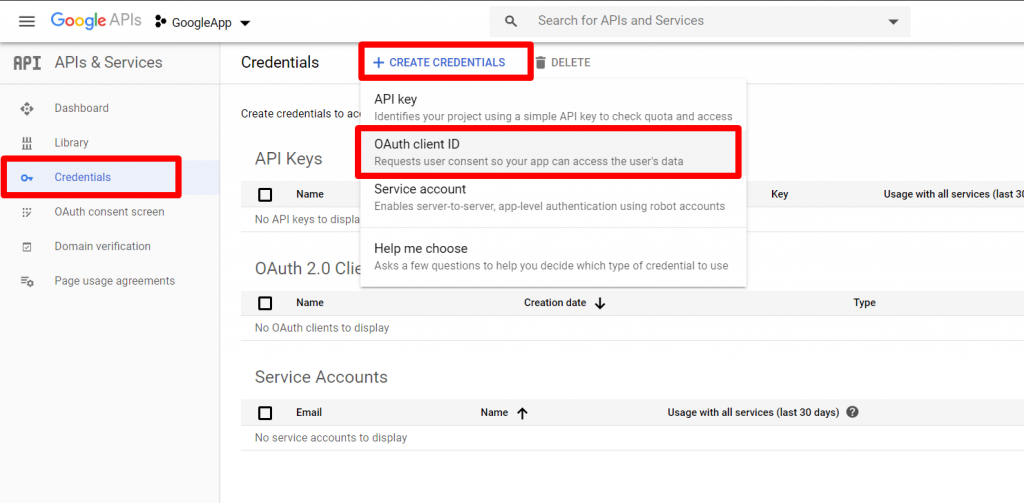
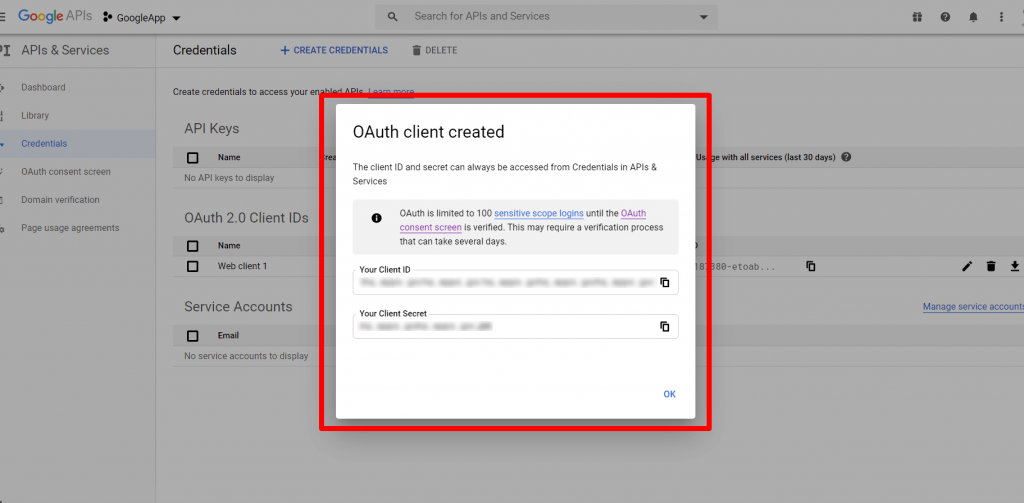
- Now from Credentials > Create Credentials > select oAuth client ID.
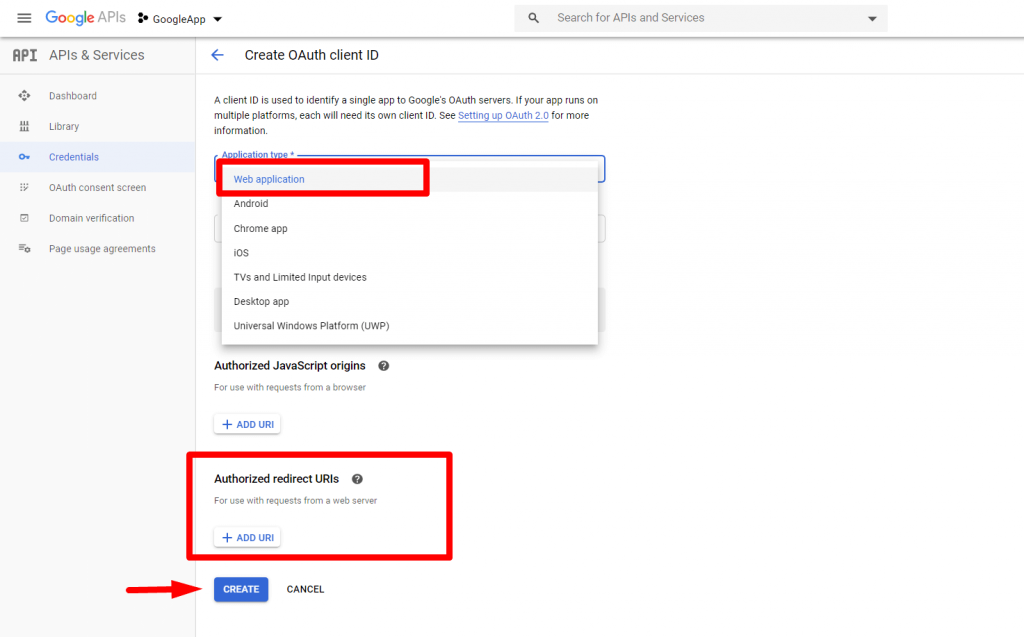
- From the oAuth client ID. you page you will need to select Application type as Web Application and Full up Authorized redirect URIs.
- You will find the redirect URIs form WP Social Plugin.
- Click get started button of Google login.
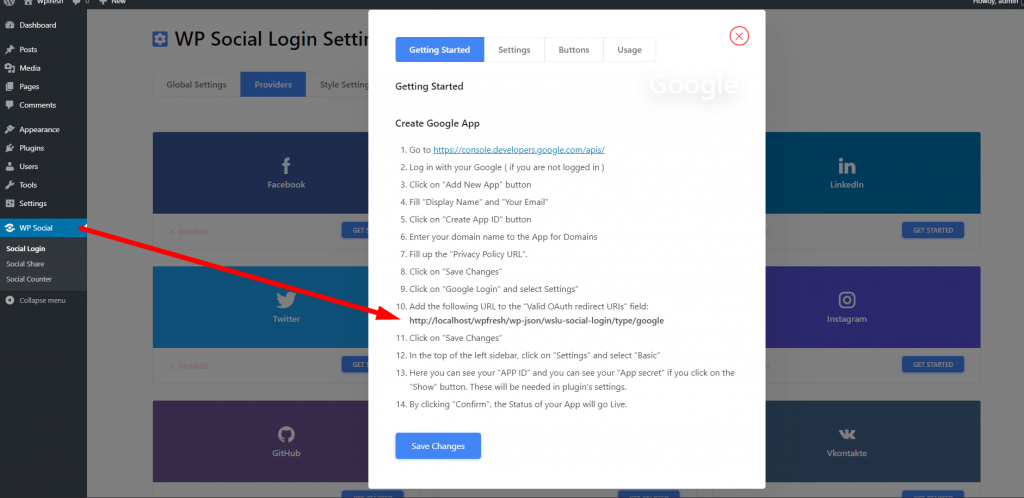
- After that, you can see your client ID and client Secret.
Use your client ID and client Secret with WP Social #
After the successful Google app creation, the next step is to add the Google credentials to your site. For that, log in to your WordPress site, then,
- Navigate to WP Social > Social Login from your dashboard.
- Switch to the Providers tab.
- Click to Settings under Google.
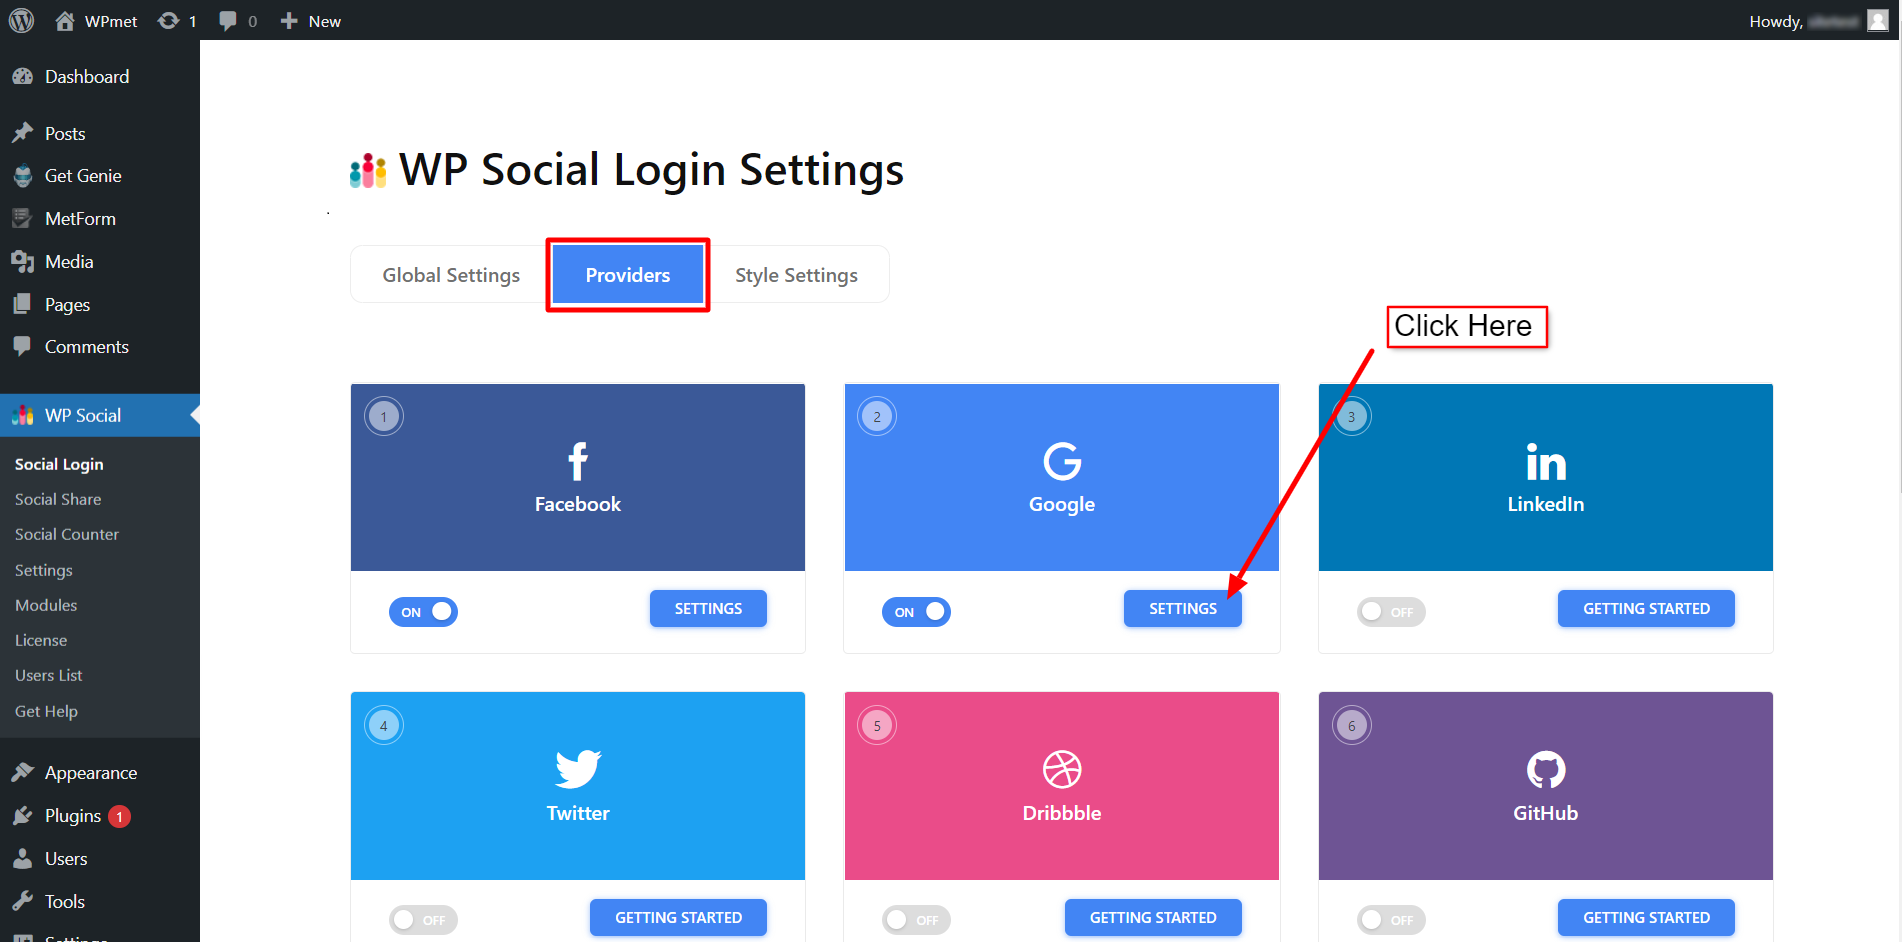
- In the popup, move to the Settings tab.
- Enter the App ID in the required field.
- Enter the App Secret in the required field.
- The click Save Changes button.

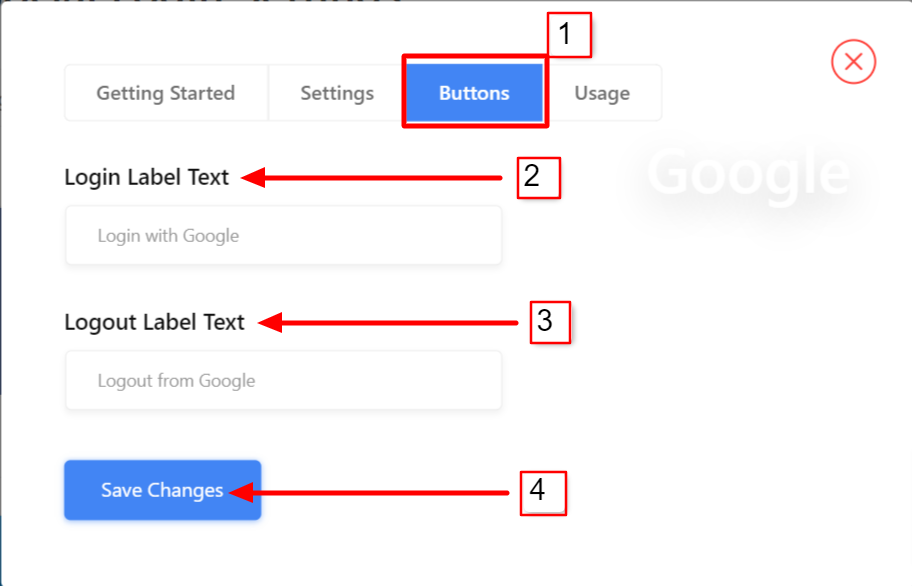
Add Login Button Label #
You can customize the button label for Google Login. To add/change the button label,
- Move to the Buttons tab.
- Enter Login Label Text.
- Enter Logout Label Text.
- Then Save Changes.
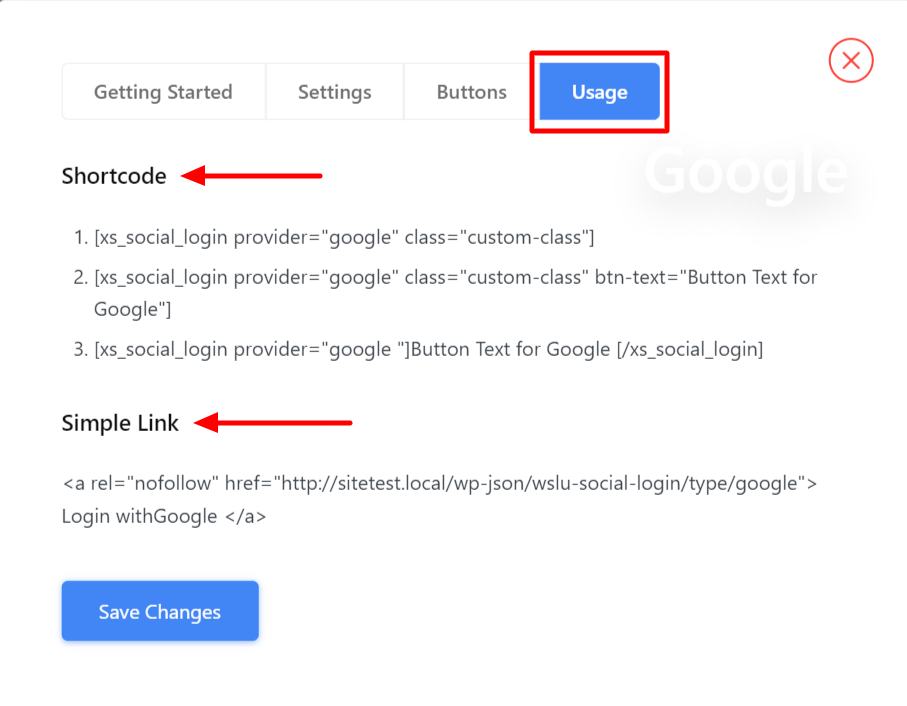
Find ShortCodes and Simple Link #
You can find the ShortCodes for Google Login in the Usage tab. Read the documentation of WP Social Shortcodes Usage to learn how to use those shortcodes.
You also have a Simple Link for Google Login button.
Finally, you are able to add a Google Login button to your website and let the user log in to the website using their Google Account.


