With the Products Filters widget, shoppers can filter their product searches depending on attributes such as Price, Rating, Color, and Category.
Let’s learn how you can use Product Filters Widgets on your wooCommerce site:
How to add product filters in your Elementor WooCommerce website #
Learn how to add to your Elementor WooCommerce website and customize product filter layout and style. This process consists of just 4 steps.
Step 1: Enable Product Filters Widget #
To enable the Product Filters widget,
- Go to ShopEngine > Widgets > Product Filters
- Turn on Product Filters under General section
- Save changes

Note: You can also turn on Product Filters with a global setting that turns on all the widgets of ShopEngine at the same time.
Step 2: Add Product Filters #
Before you can add the widget you need to create ShopEngine Shop/ Archive Template first. Check out the documentation on how to create a Shop Template.
To add Product Filters:
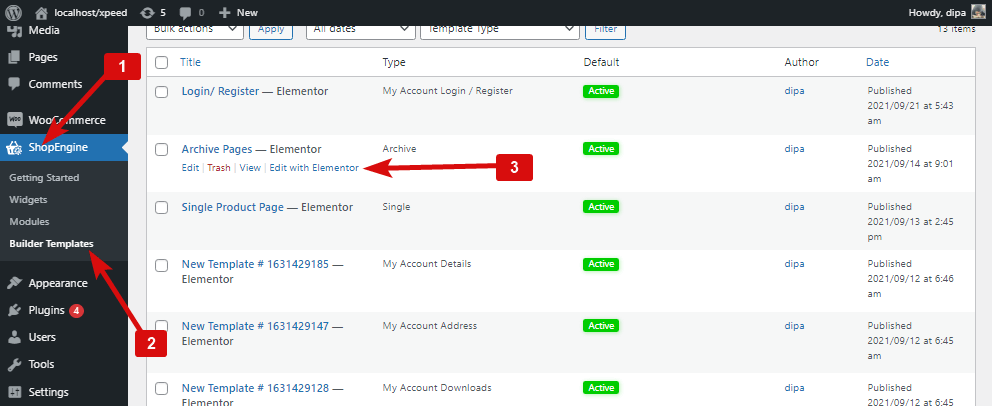
- Go to ShopEngine > Templates > Archive Template
- Click on Edit with Elementor
- Search for Product Filters on Elements Search option
- Drag and drop the widget
- Click on Update to save changes.
Step 3: Customize Content Settings of Product Filters #
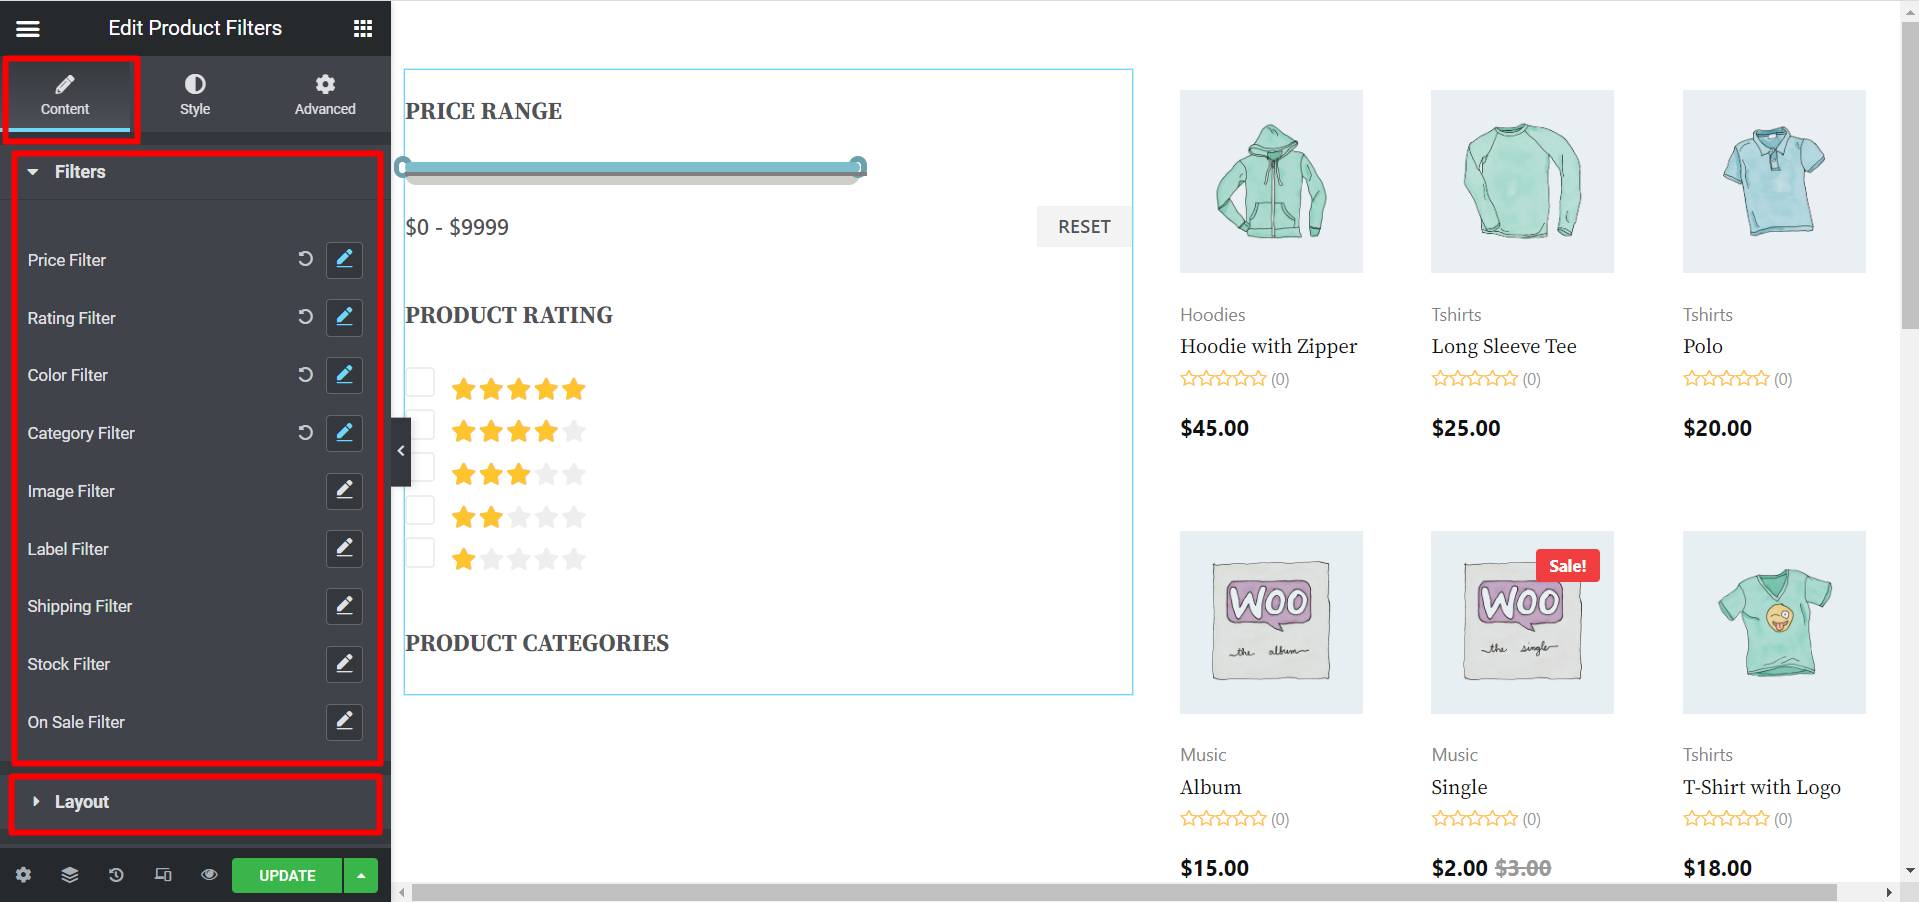
Go to Content > Filters to customize the following settings:
- Price Filter: Click on the edit option to change the Title, Price Range, Min Price, Max Price and Dot Type. Dot type is the end points of the price line.
- Rating Filter: You can change the rating filter title.
- Color Filter: Here you can change the filter name. You can also turn on/off the show color dot option.
- Category Filter: You can customize the Title, Product Categories, and Order by. Show hierarchy. You can also hide empty categories from here.
- Image Filter: You can change and customize the title. Users can then filter the products based on product images.
- Label Filter: You can change the title and users can filter products based on labels.
- Shipping Filter: Users can choose this filter to filter the products based on shipping method.
- Stock Filter: This filter allows the users to filter the products based on the stock amount.
- On Sale Filter: If users wish, they can filter the products based on the sale. So, if your store is offering any sale, customers can easily find them.
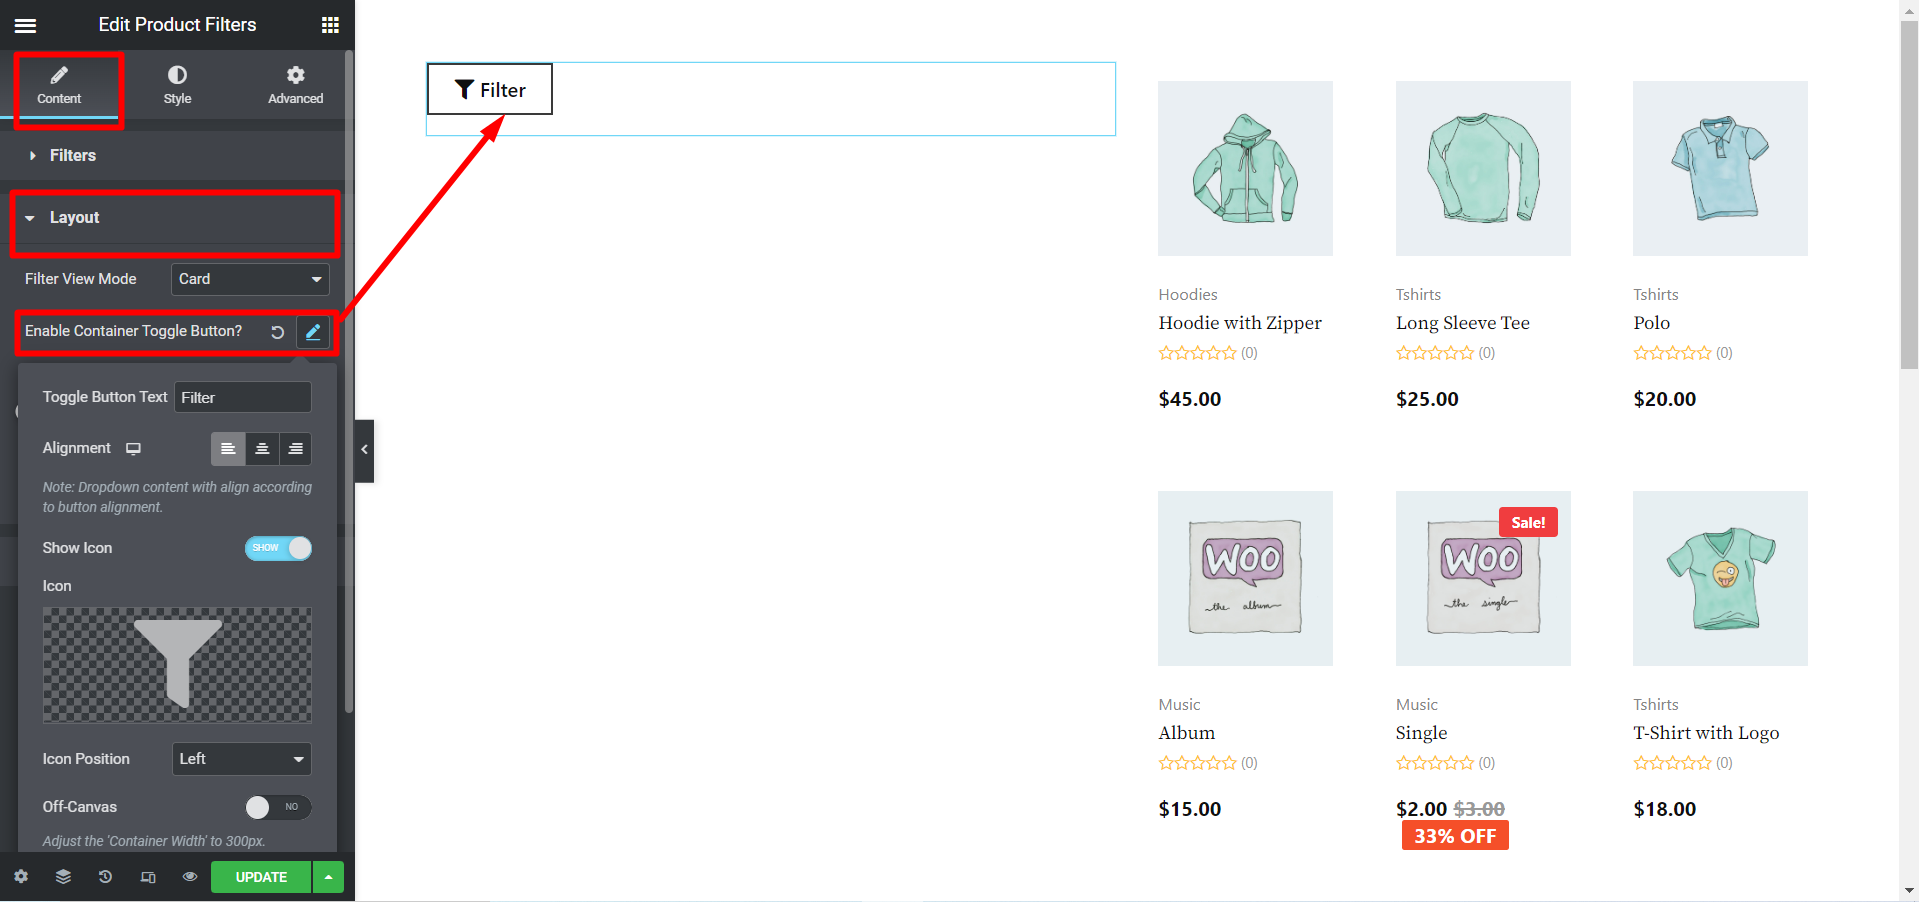
Go to Content > Layout to customize the following settings:
- Enable container toggle button: Here you can turn on the toggle button option so the whole widget can be hidden under a toggle button. You can also set the alignment, set if you want to show the icon, upload an icon, choose the icon position and also the container width.
- Columns (per row): Choose how many filers you want per column.
- Column Padding: Adjust the left, right, top and bottom padding of the column.
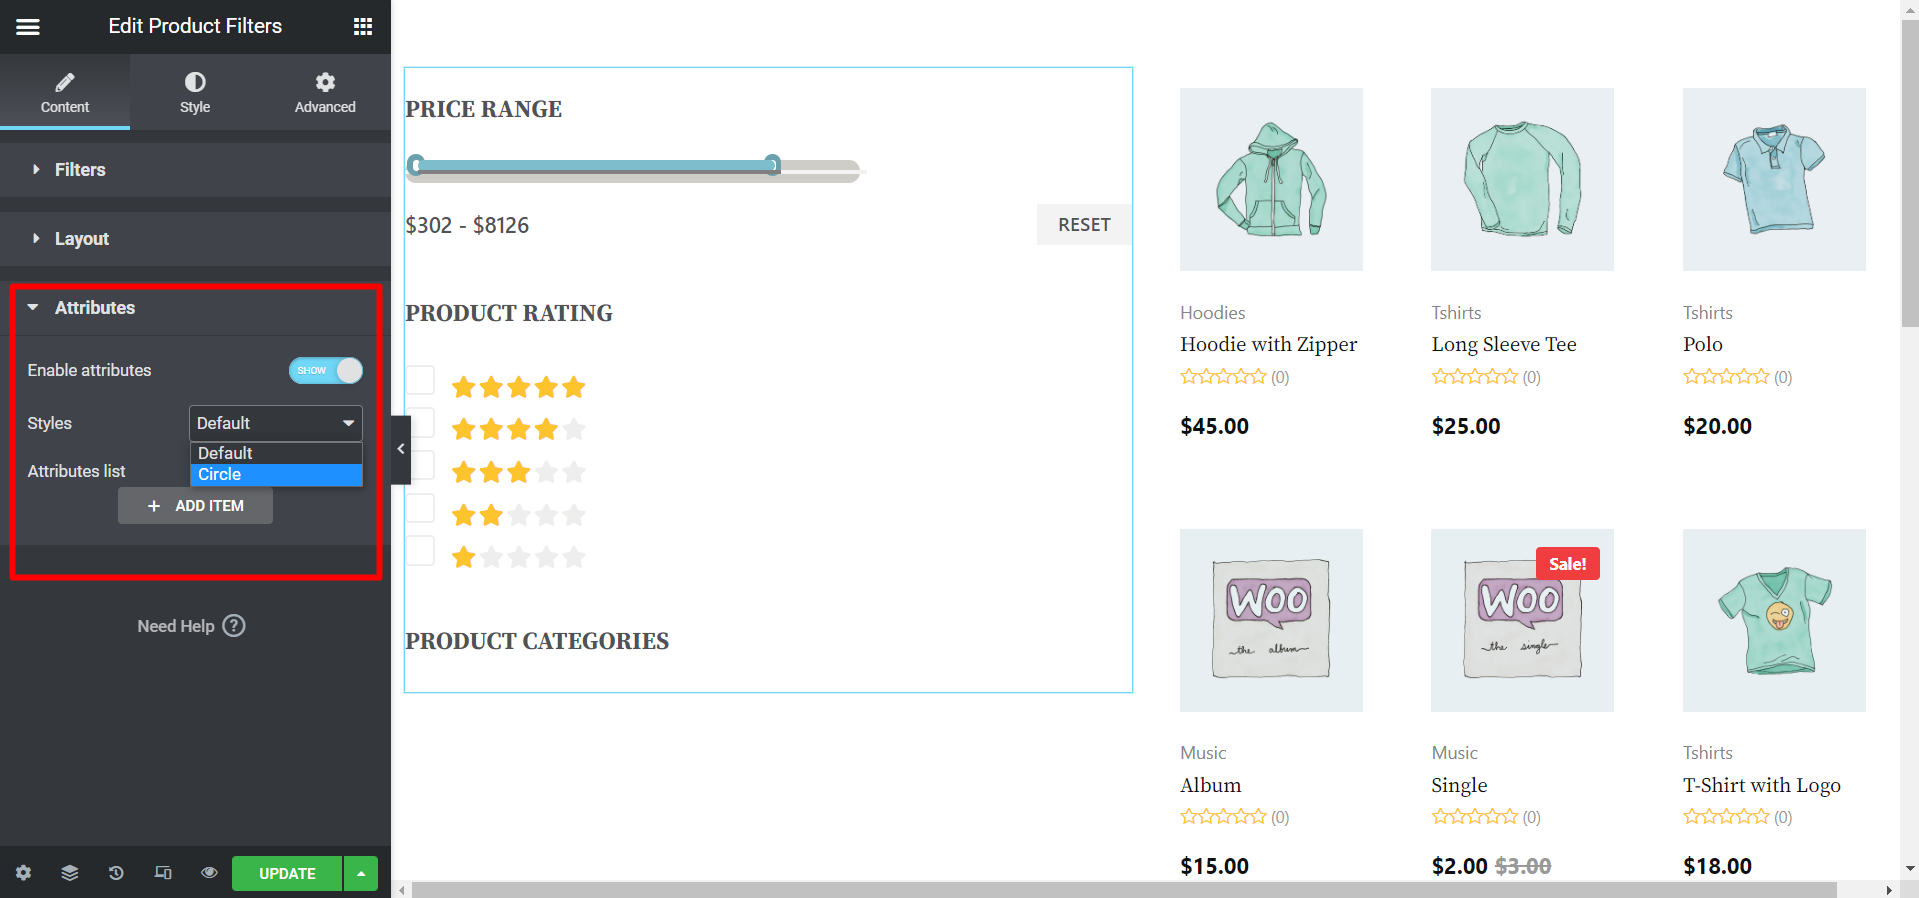
Go to Content > Attributes to customize the following settings:
- Enable attributes: If you want to display attributes set SHOW otherwise HIDE.
- Styles: Choose Default or Circle as attributes’ style.
- Attributes list: You can add new items and edit the details here.
Step 4: Style Settings of Product Filters #

Go to Style tab to customize the following style settings:
- Common Styles: Expand this option to change Title, Typography, Body Typography, Heading Color, Filter label Color, Global Font Family, Title padding Bottom, Item Margin Bottom, Checkbox Style, Checkbox Icon, Icon Library, Checkbox Border Color, Checked Icon Color, Checked Background, Margin right, Checkbox Icon Size, Checkbox Size, Vertical position and Border Radius.
- Filter Toggle Button & Container: To work on this option, firstly, you have to turn On the Enable Container Toggle Button? option from the Content section as we have described before. To understand clearly, see the image below. Now, you can edit this option in the Style section, and change the text color and background for both normal and hover views. Also, there are choices to change Border Type, Width, Color, Padding, Margin, Container Background Color, Border Type, Container Padding (px), and Container Box Shadow.
- Price Filter / Range Slider: Expand this option to change Slider Color, Active Slider Color, Range Pricing Text Color, Reset Margin bottom, text and background color for both normal and hover view.
- Rating Filter: Here you can chose the rating icon, color of the active icon, space between the rating and star size.
- Category Filter: Adjust the top, right, bottom and left padding around sub category.
After making all the changes click Update to save. Now Product Filters should be visible on the storefront with all the customization and styling.
Here is the preview of Product Filters Widget
ShopEngine’s product filter widget has different functionality that eases a customer’s product searching process. And the documentation should be helpful in your study and installation of the widget.


