AWeber #
AWeber is an email marketing service provider that assists people in staying in touch with their subscribers who have asked to be on their mailing list. Integration of AWeber with MetForm can be done by following simple steps.
Using the MetForm you can easily integrate AWeber with Elementor form. Read this documentation to learn the process to integrate AWeber and MetForm.
Prerequisite: #
You need to have the AWeber Developer Account and AWeber User Account to integrate the AWeber service into MetForm.
Plugins Required: #
- MetForm Lite: Download Plugin
- MetForm Pro: Get the plugin
Step 1: Create AWeber API app #
The first step of Aweber – MetForm integration is to create the AWeber API app.
- Log in to your AWeber developer account.
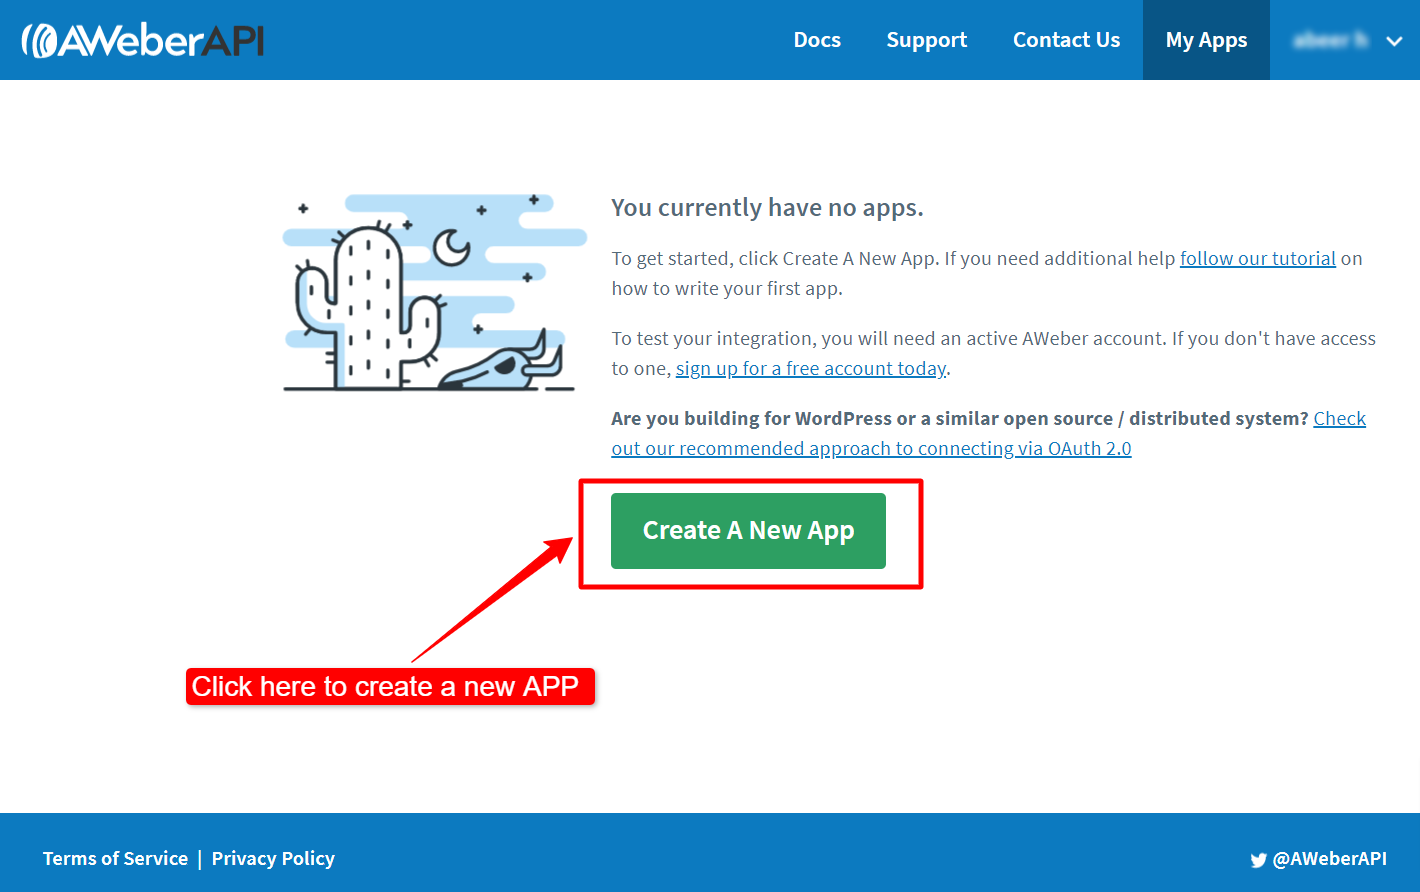
- Go to AWeber- MyApp (https://labs.aweber.com/apps).
- Click on the “Create A New APP” button.
Enter the following Credentials:
- Application Name: Enter a name for the Application.
- Author: Name of the application author.
- Application Website: The website URL that will use for the integration.
- Client Type: Set the client type to Credential.
- OAuth Redirect URL: To get the “OAuth Redirect URL”: 1. Open a new tab on your browser, 2. login to the WordPress dashboard, 3. navigate MetForm >> Setting >> NEWSLETTER INTEGRATION, 4. there you will find the Redirect URL, Copy the URL, 5. go back to the AWeber app creation tab on your browser, and 6. paste the URL under the OAuth Redirect URL field.
- Description: Add a description for the application.

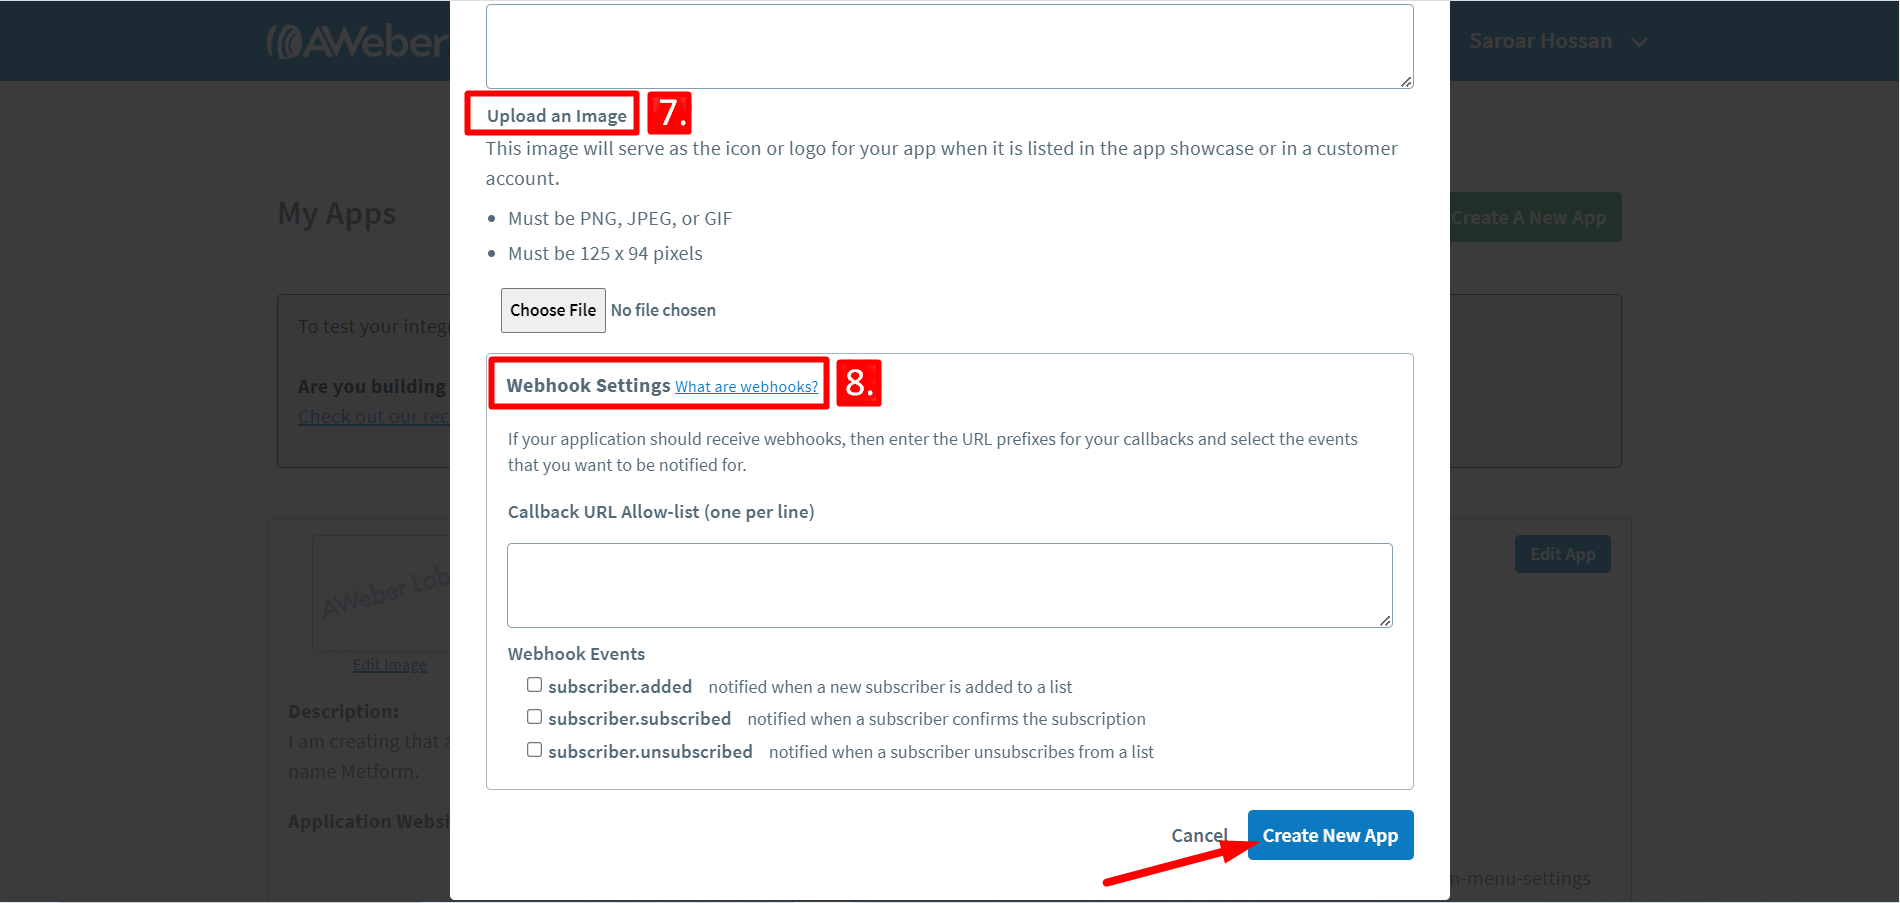
7. Upload an Image: You can upload a file to set an icon or logo for the app.
8. Webhook Settings: If you want your application to receive webhooks
Finally, click on the Create New APP button.
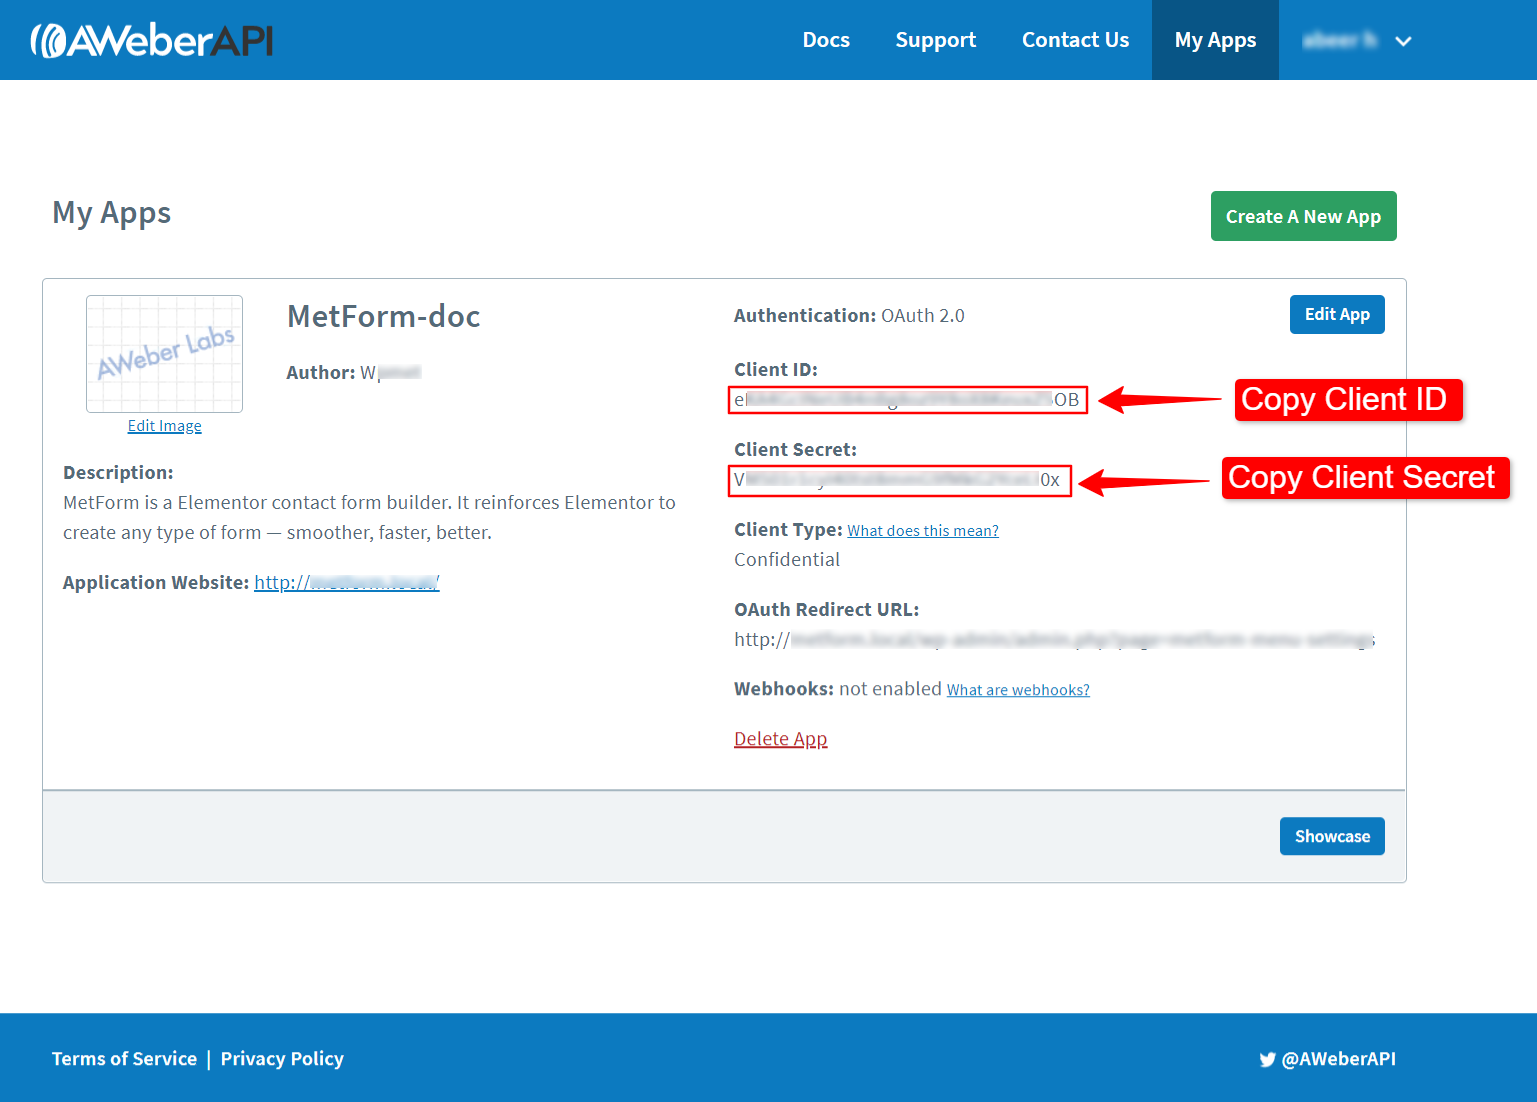
On the next screen, you will get the Client ID and Client Secret for the App authentication for your website.
Step 2: App Authentication #
To authenticate the Aweber app:
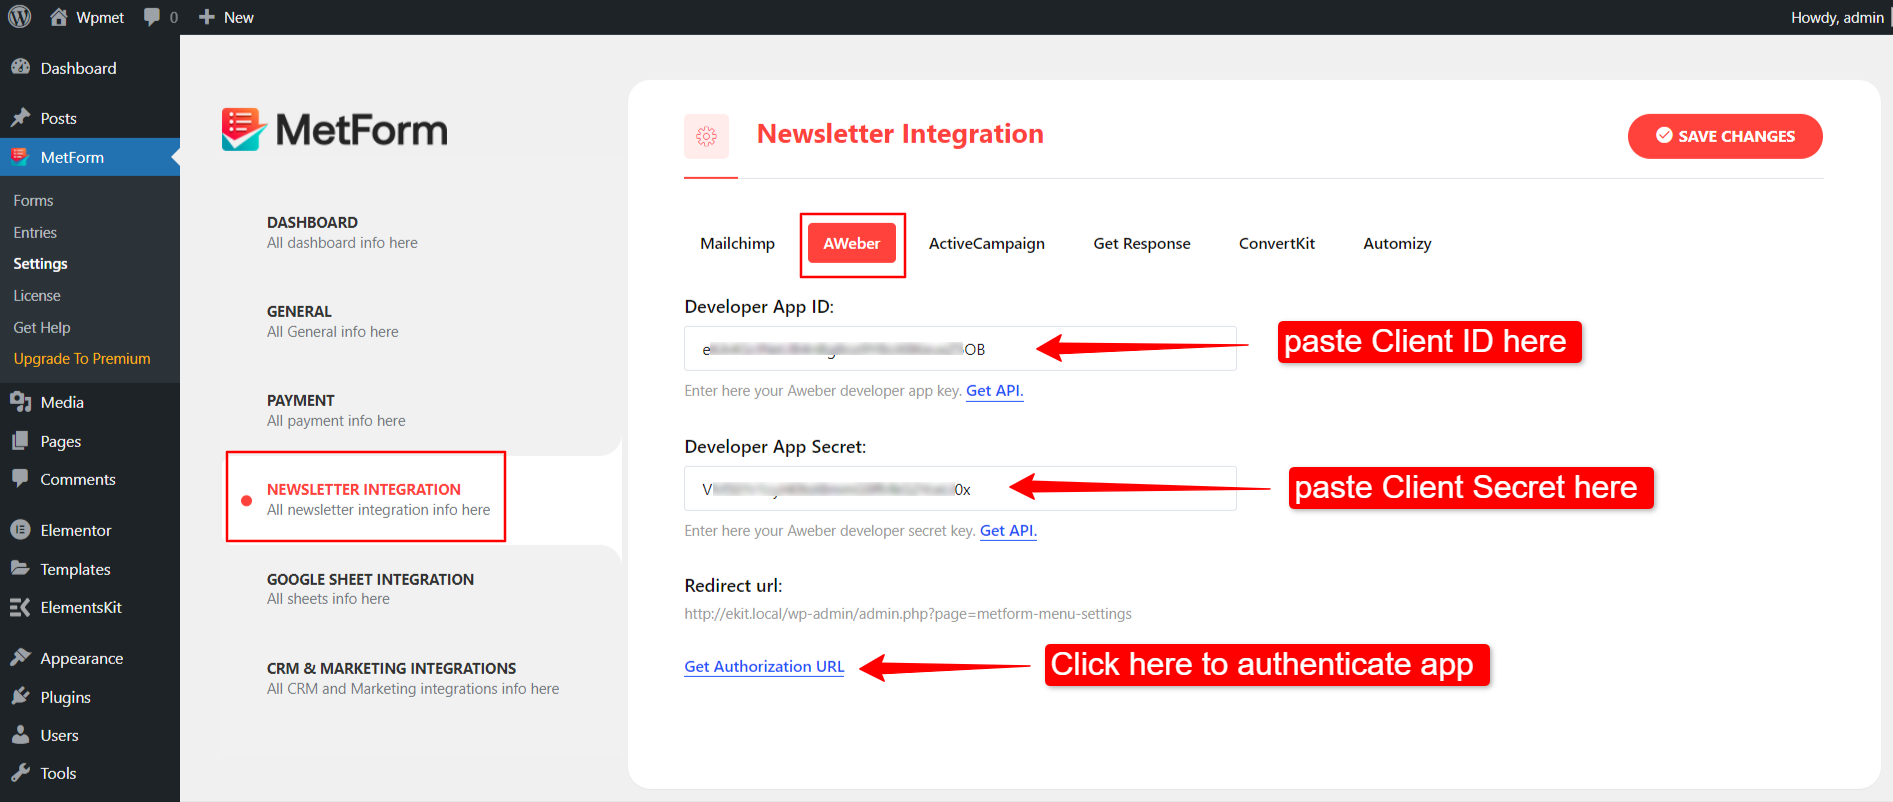
- Navigate to MetForm > Settings > NEWSLETTER INTEGRATION.
- Switch to the AWeber tab.
- Paste the Client ID in the Developer App ID field.
- Paste the Client Secret in the Developer App Secret field.
- Click on the Get Authorization URL button.
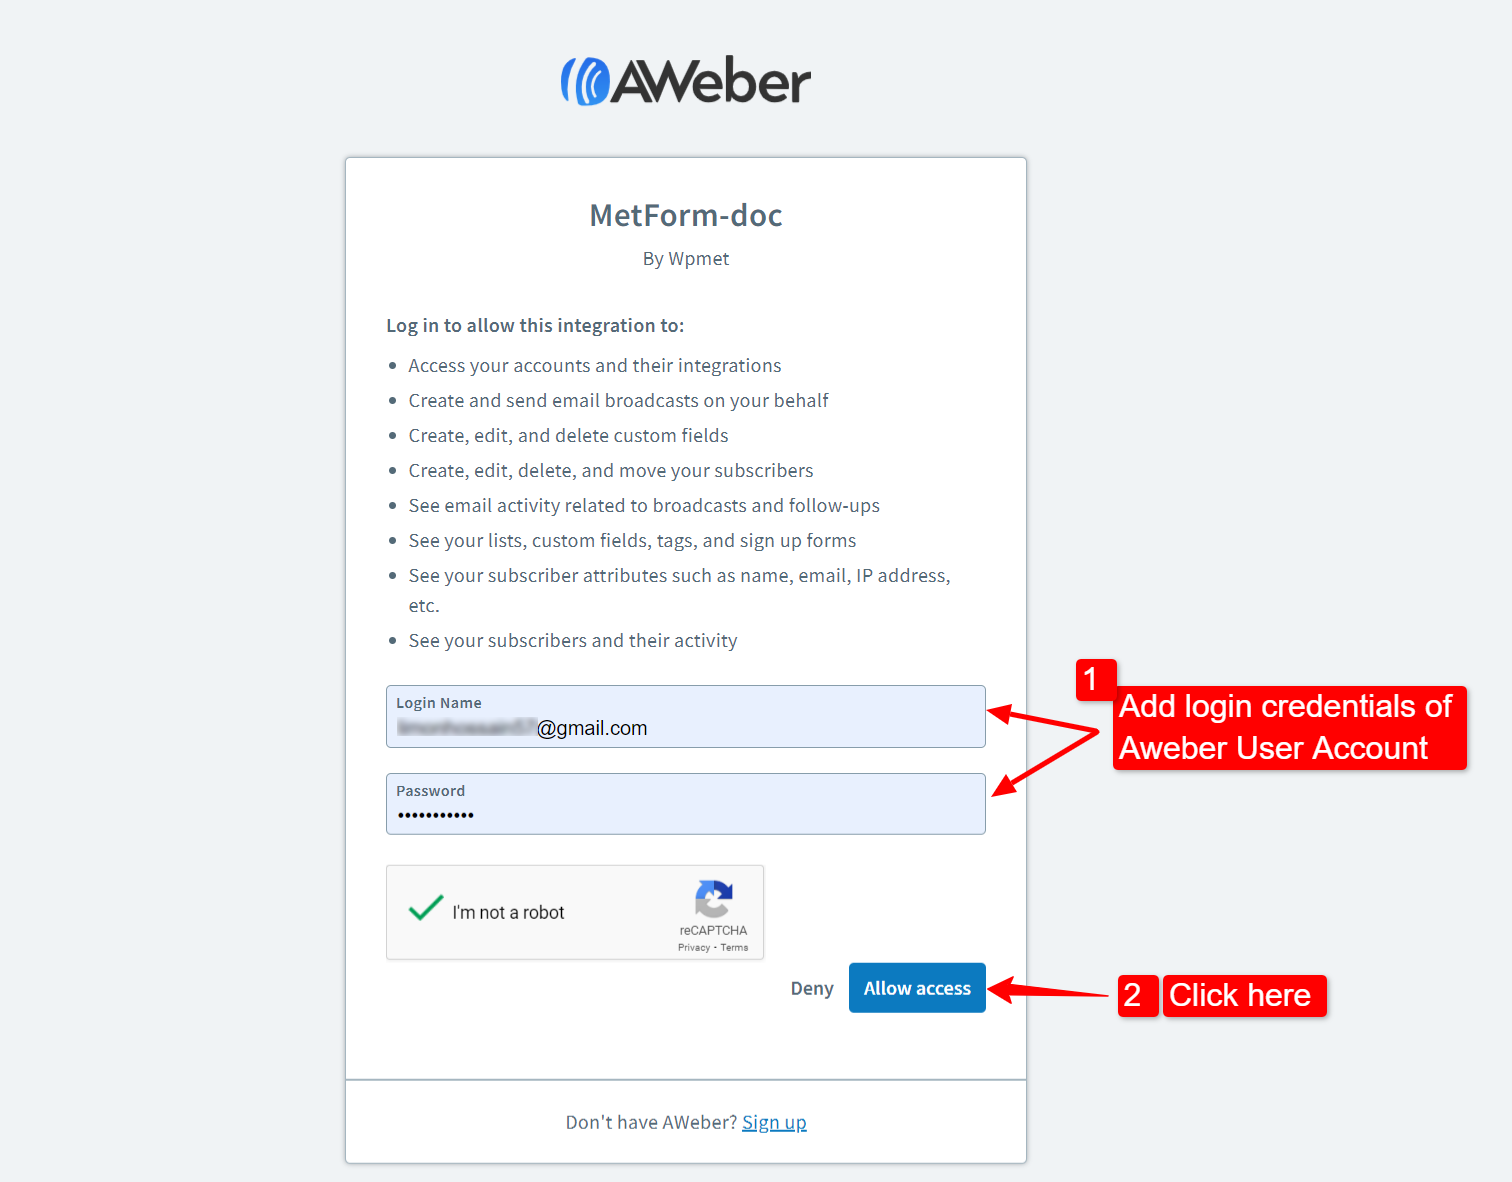
After clicking on the “Get Authorization URL” button, it’ll take you to the AWeber allow access page.
- Log in with your AWeber user account credentials, and
- Click on the Allow access button to allow the MetForm integration.
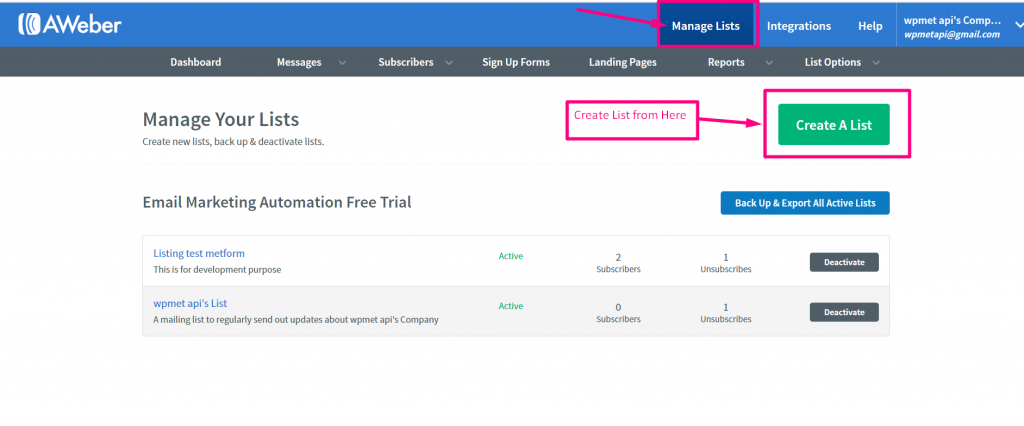
Step 3: Create an AWeber List #
To create an AWeber list:
- Log in to your AWeber user account.
- Go to the Manage Lists.
- Click on the Create A List button.
- Set a List ID name and activate the list.
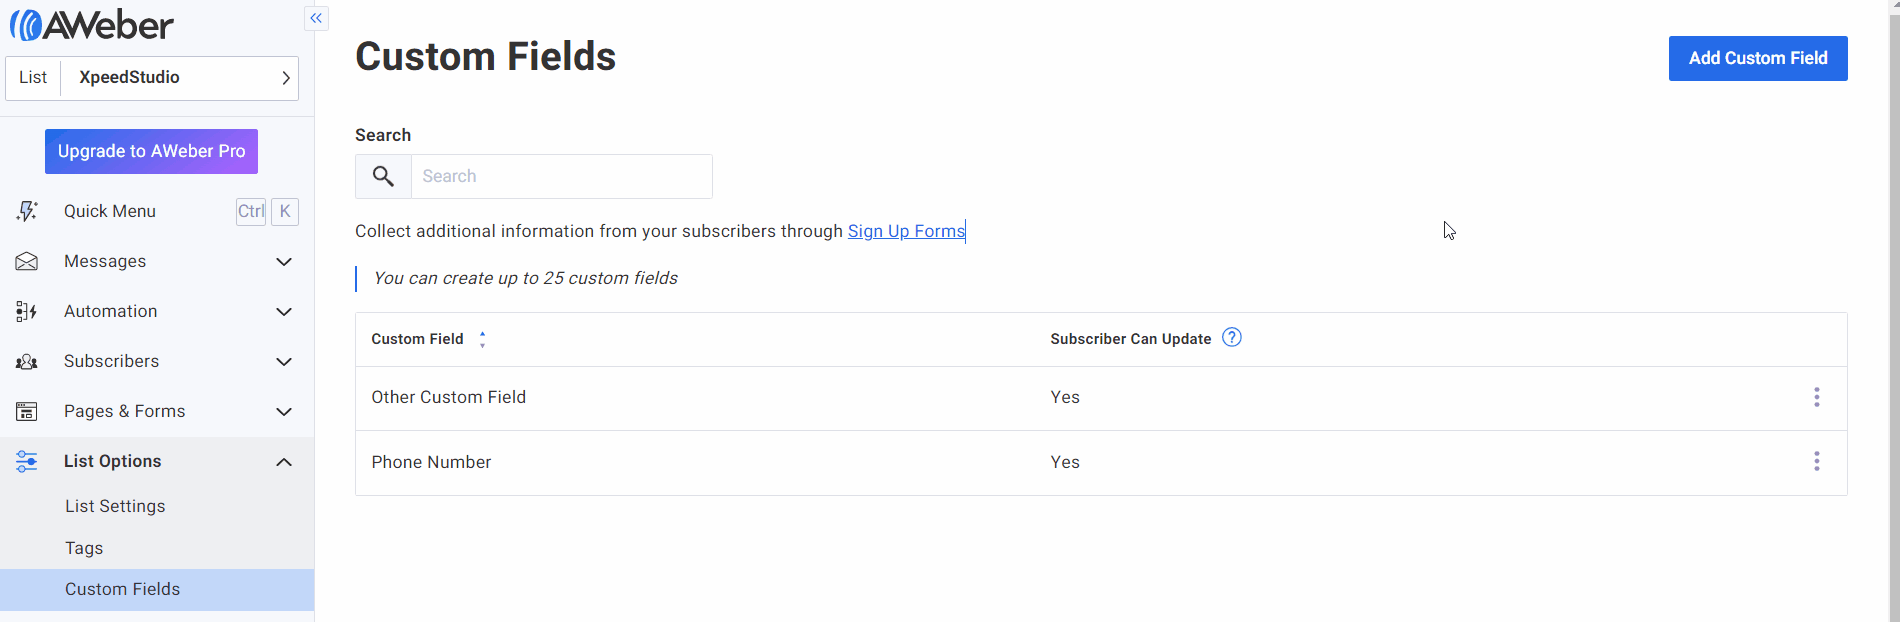
Step 4: Add Custom Fields #
MetForm supports custom fields for AWeber integration. You can add custom fields on the AWeber and use them to build Elementor forms with MetForm.
If you want to use custom fields on your Elementor form, firstly you have to add custom fields in the AWeber user dashboard. Secondly, define those custom fields according to the form field (described in Step 5)
To add custom fields:
- Go to List Options > Custom Fields from the AWeber user account dashboard.
- Click on the Add Custom Field button.
- Enter Field name.
- Enable Subscriber can update option.
- Click on the Add button.
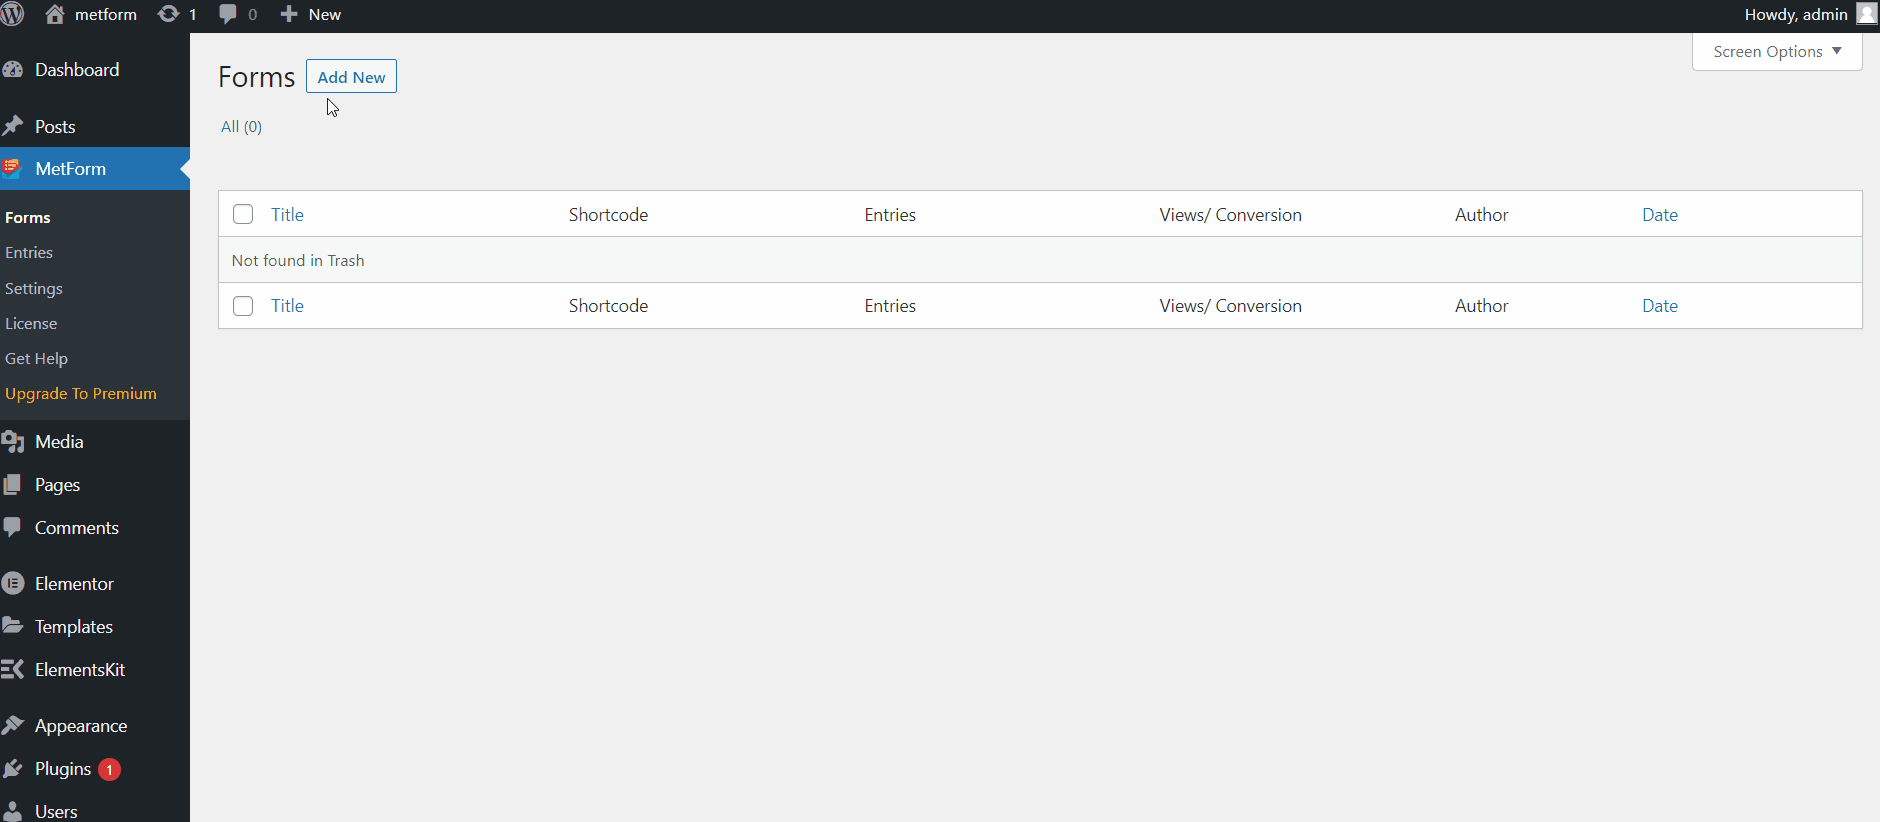
Step 5: Create a WordPress form with MetForm #
The next step is to create a WordPress form using MetForm.
- Navigate to MetForm > Forms from the WordPress dashboard.
- Click on the Add New button.
- Enter a form name.
- Set the form type to General Form.
- Select a template.
- Click on the Elementor Edit Form button.
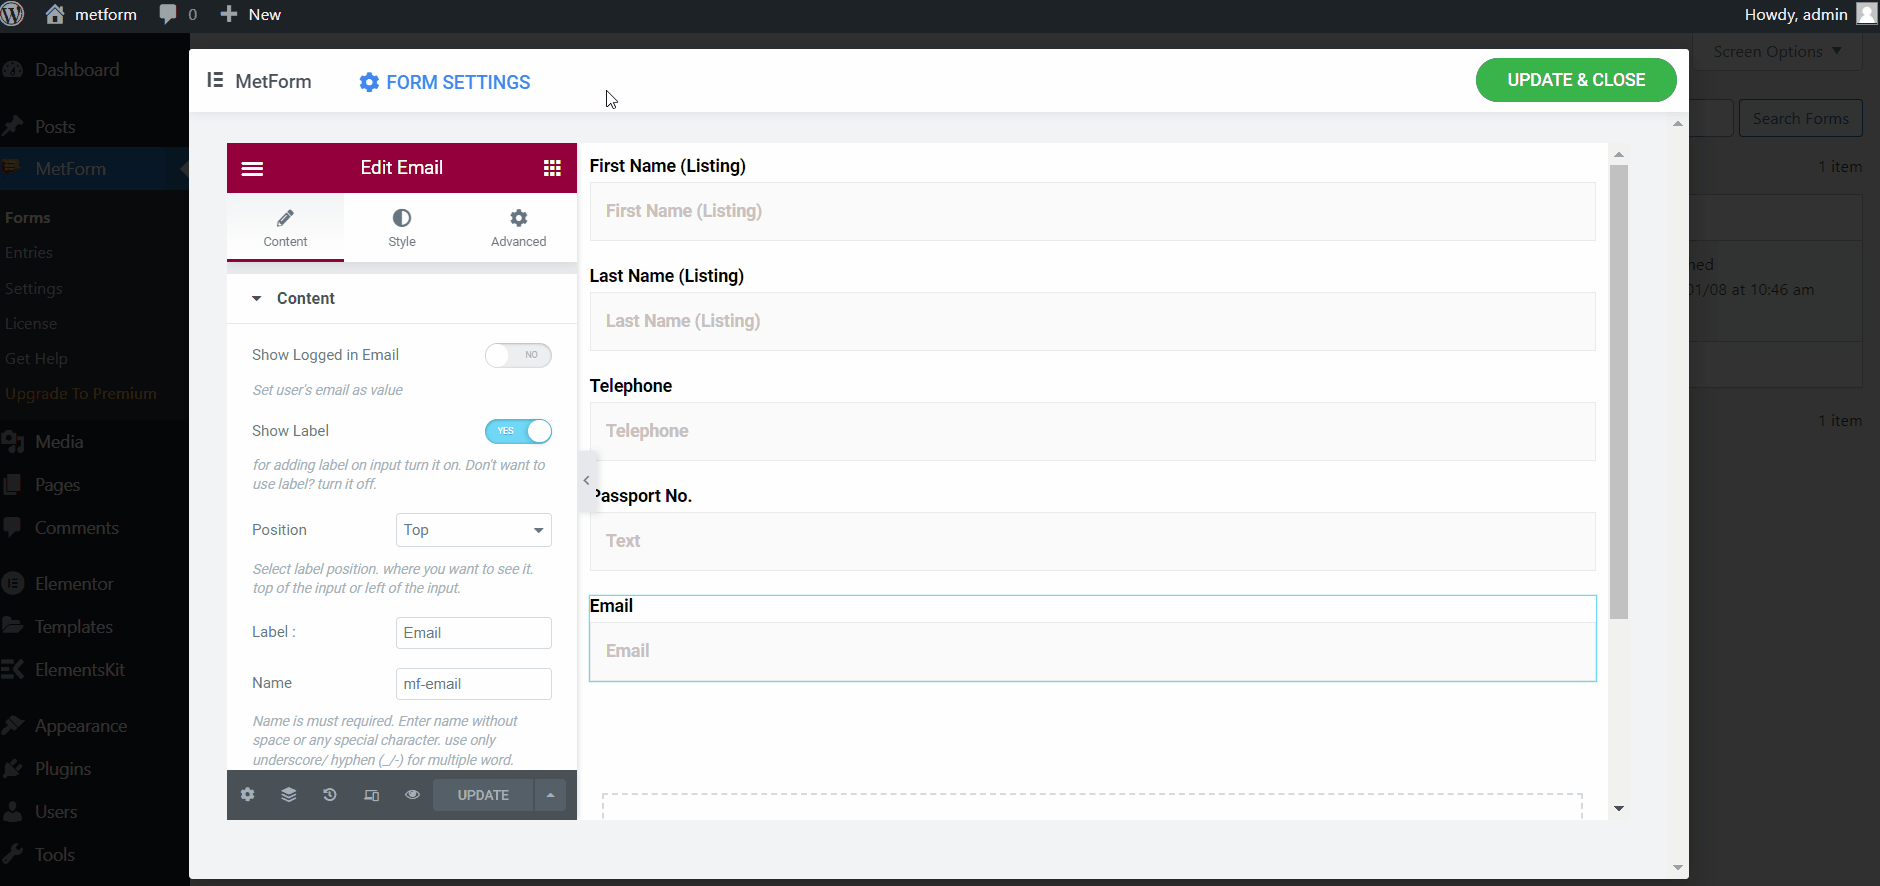
- In the Elementor editor, design the form with different fields.
Step 6: Integrate AWeber with Elementor form #
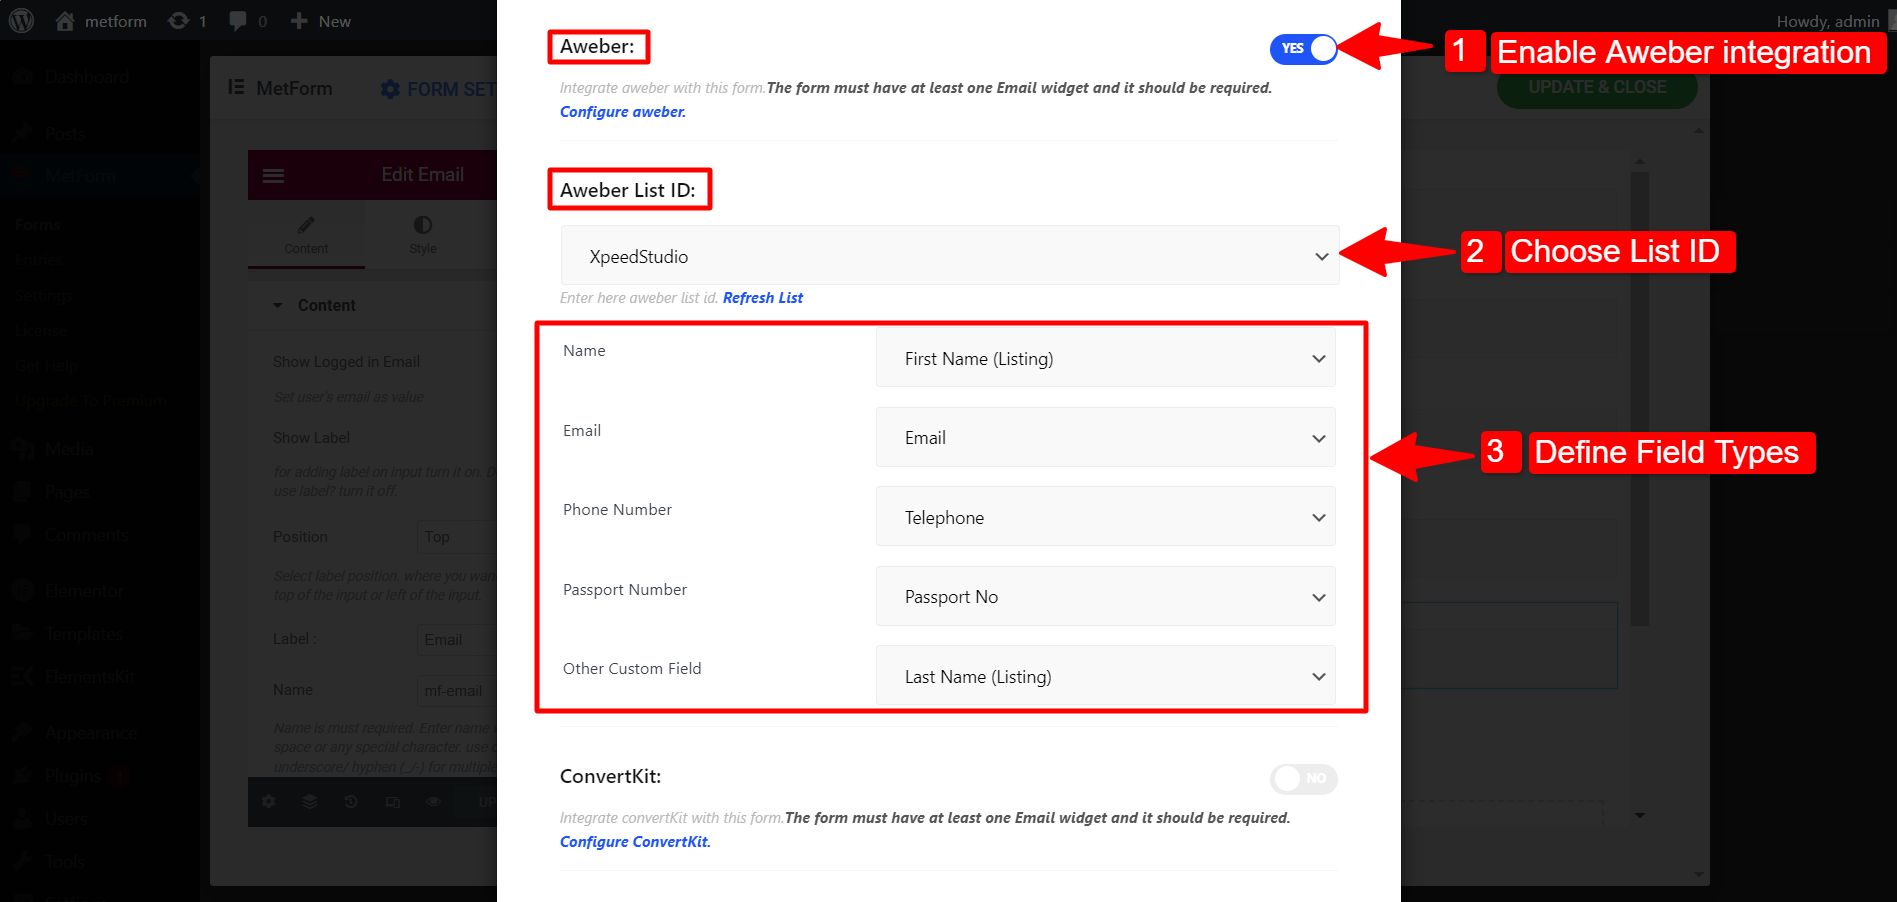
After that, you can integrate AWeber from Form Settings.
- Click on the Form Settings.
- Go to the Integration tab.
- Enable AWeber integration.
- Select the AWeber List ID.
- Now define the form fields according to the AWeber Custom Form Fields.
- Click on the Save Changes button.
Note: Carefully assign the Custom Form Fields. Because it will affect exporting the form submission data to the AWeber.
Finally, the AWeber integration with MetForn is completed. Form submission data will be exported to the AWeber subscriber list.
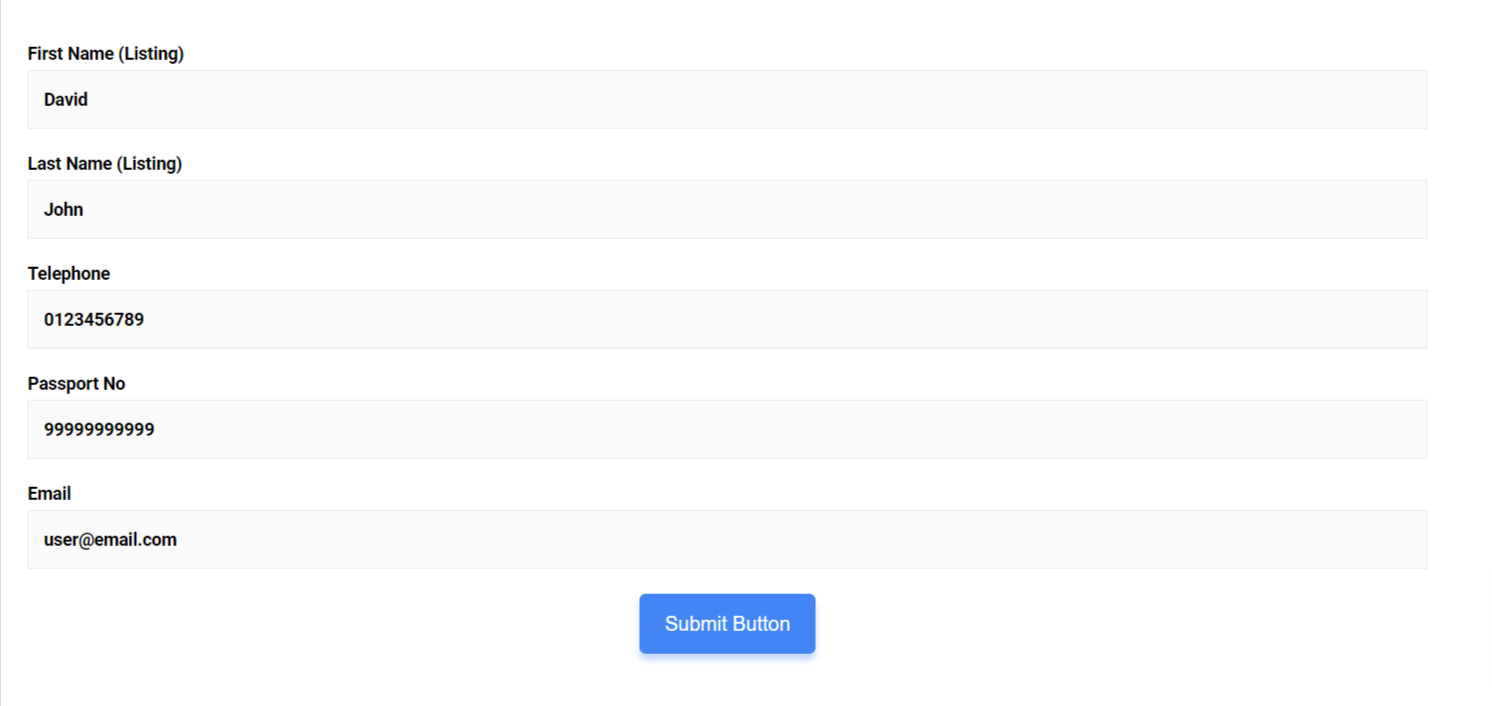
To see how it works, open the form in view mode and submit the form with the required information.
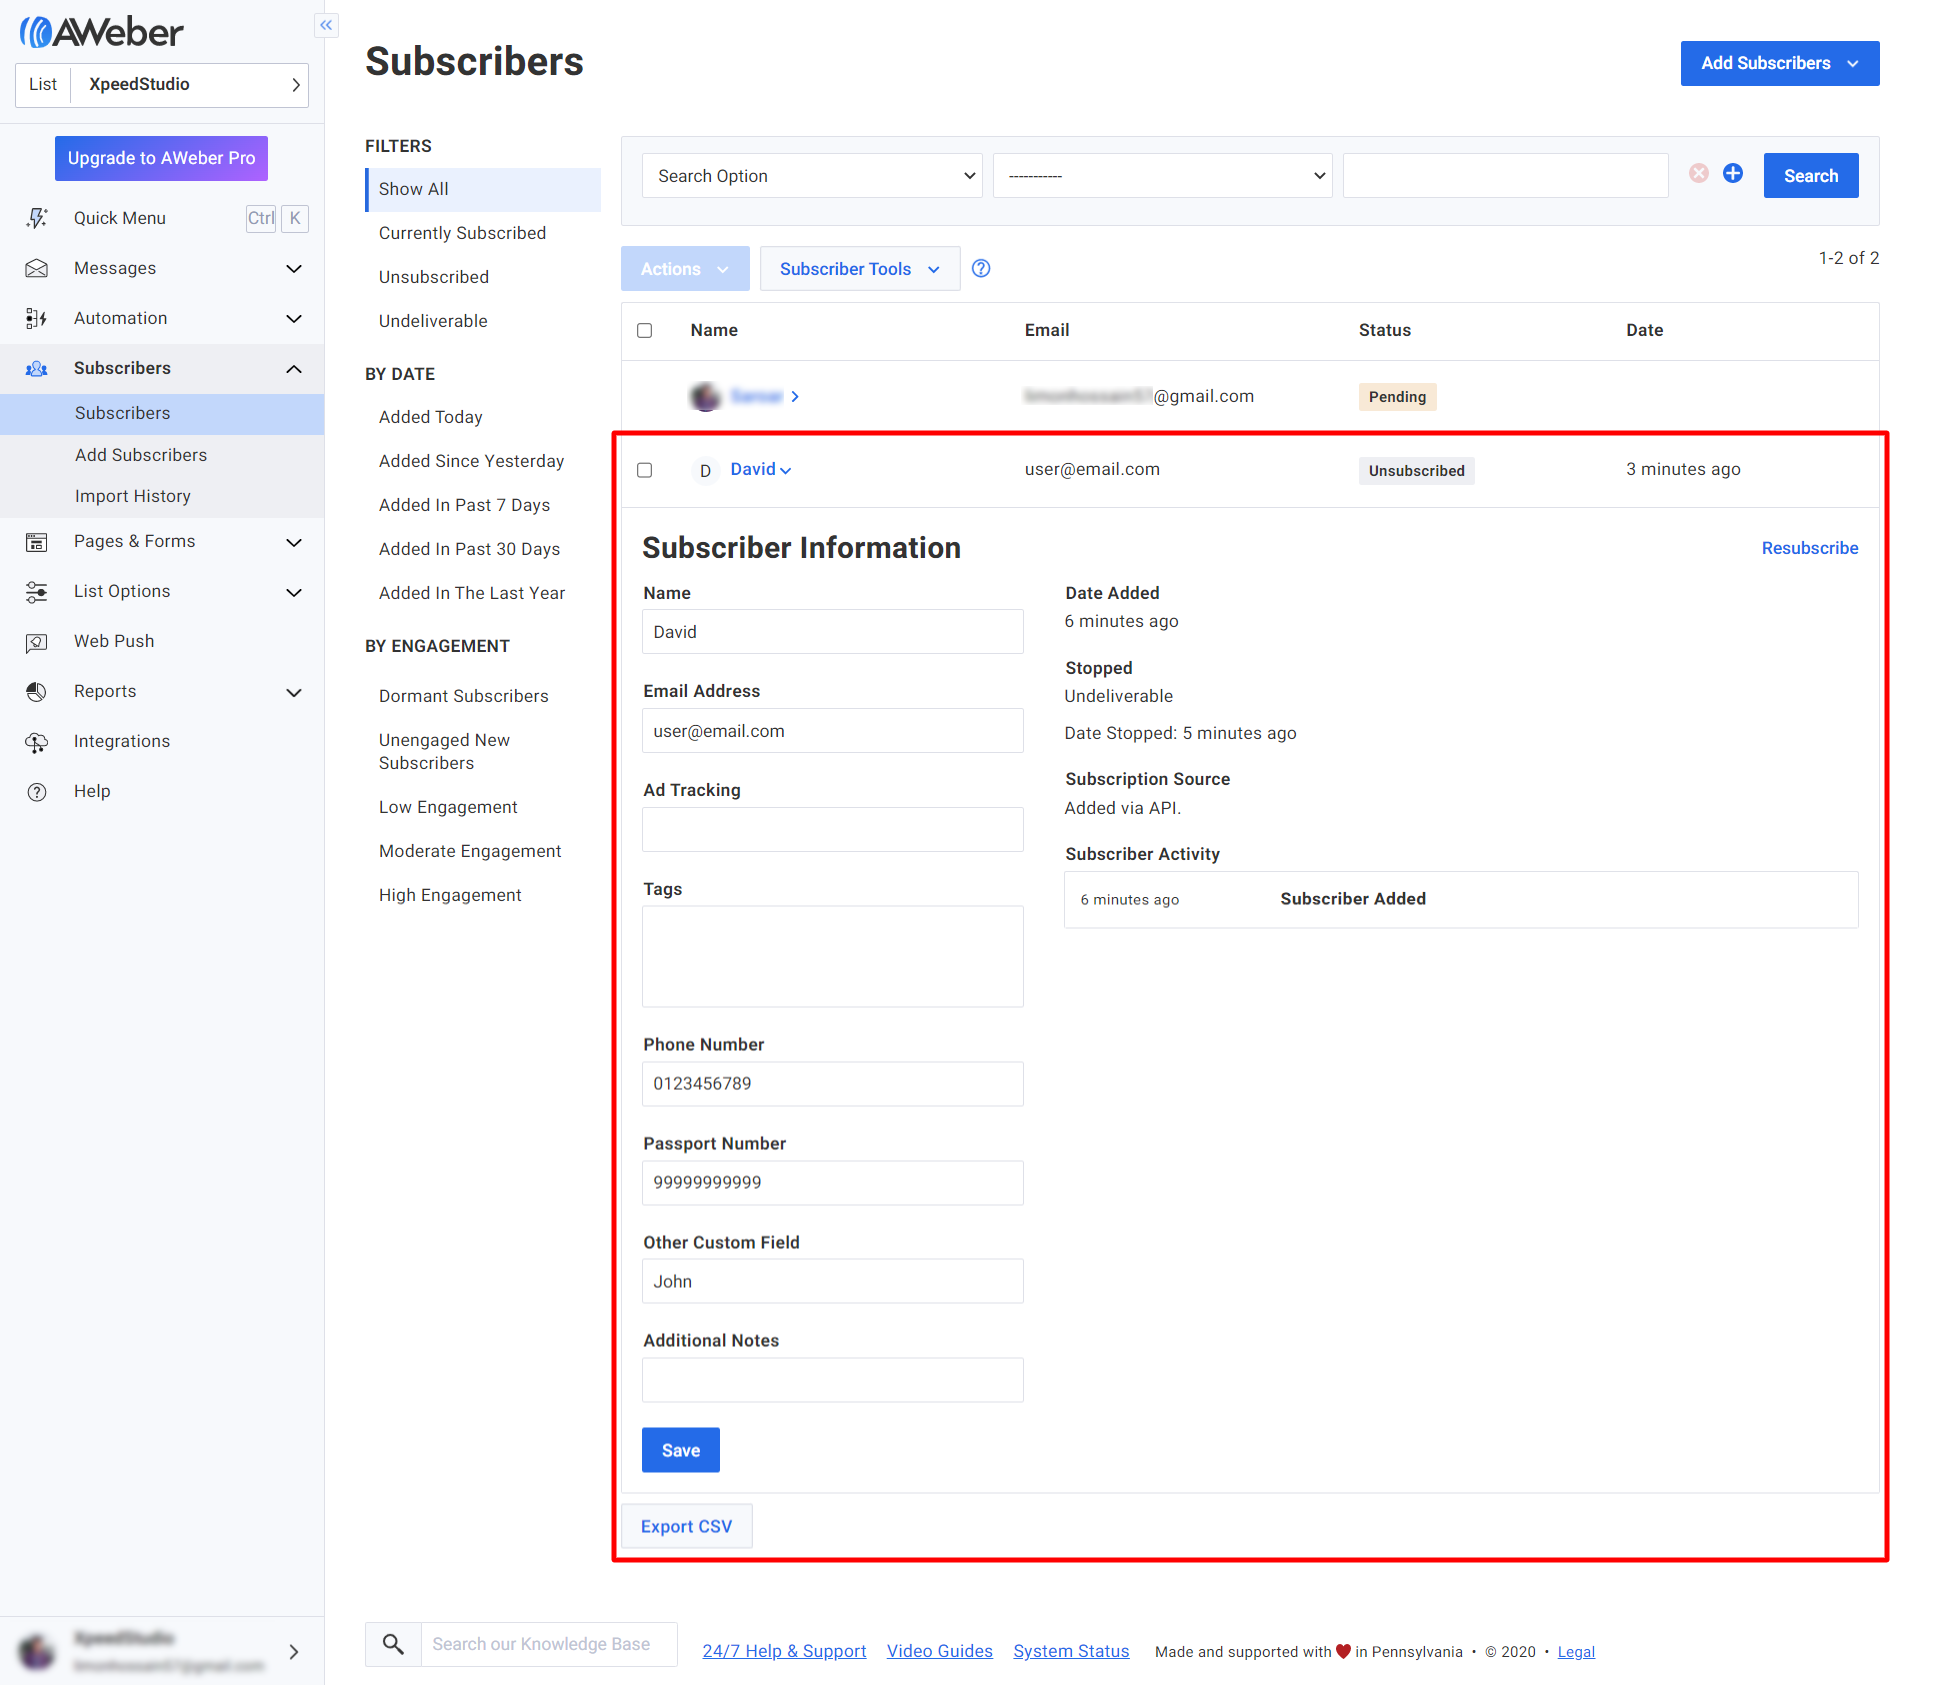
Now go to your AWeber user account dashboard, and navigate to Subscriber > subscriber. There you can see the list of subscribers and the details of those subscribers. Here is an example:
Like the AWeber integration, MetForm comes with hundreds of advanced features. Get MetForm and use those features for WordPress and Elementor form building.


