You can add products to the comparison list using a suitable comparison widget. It allows the buyers to compare your WooCommerce products by clicking a button attached to a product. You can design a custom page and set the widget simply. ShopEngine has brought such a handy button widget to give your customers the facility to compare selected items easily.
So, in this documentation, we will narrate the working process of the comparison button widget.
Working with Comparison Button Widget #
The widget is a very user-friendly feature. Before starting to customize it you have to enable the module and the widget first. Let’s see the complete working process.
First Step #
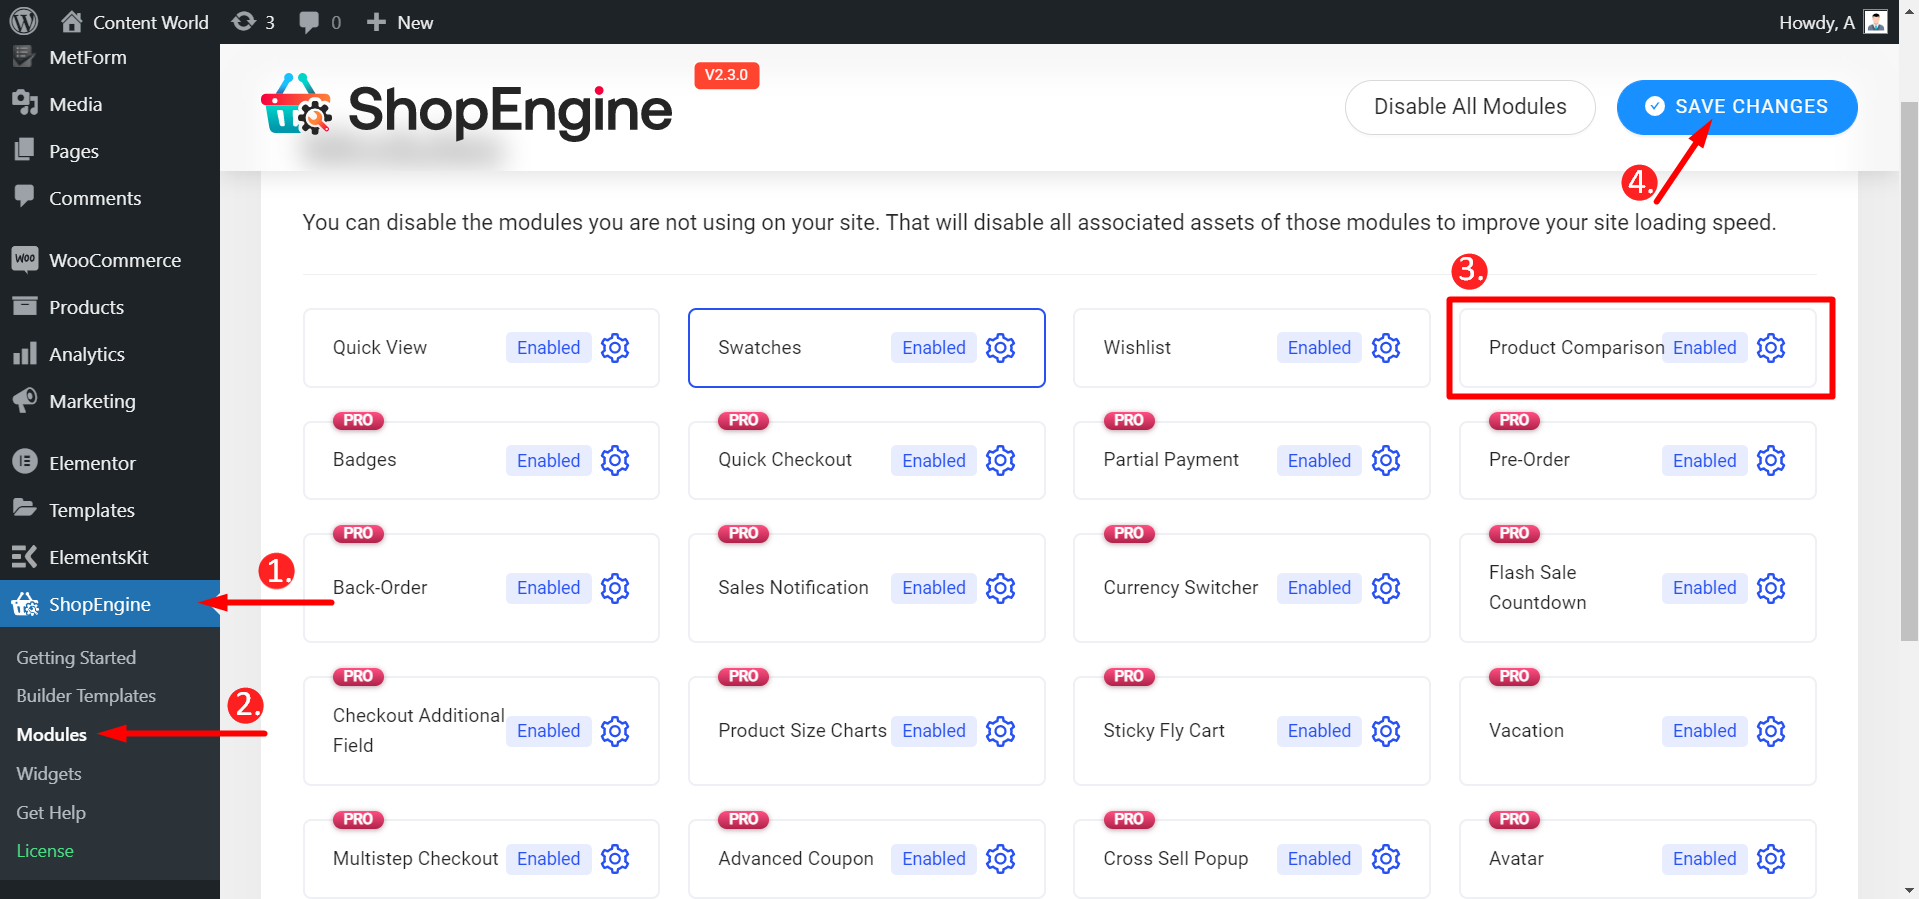
First, find the module named Product Comparison from your dashboard and enable it like the image below.
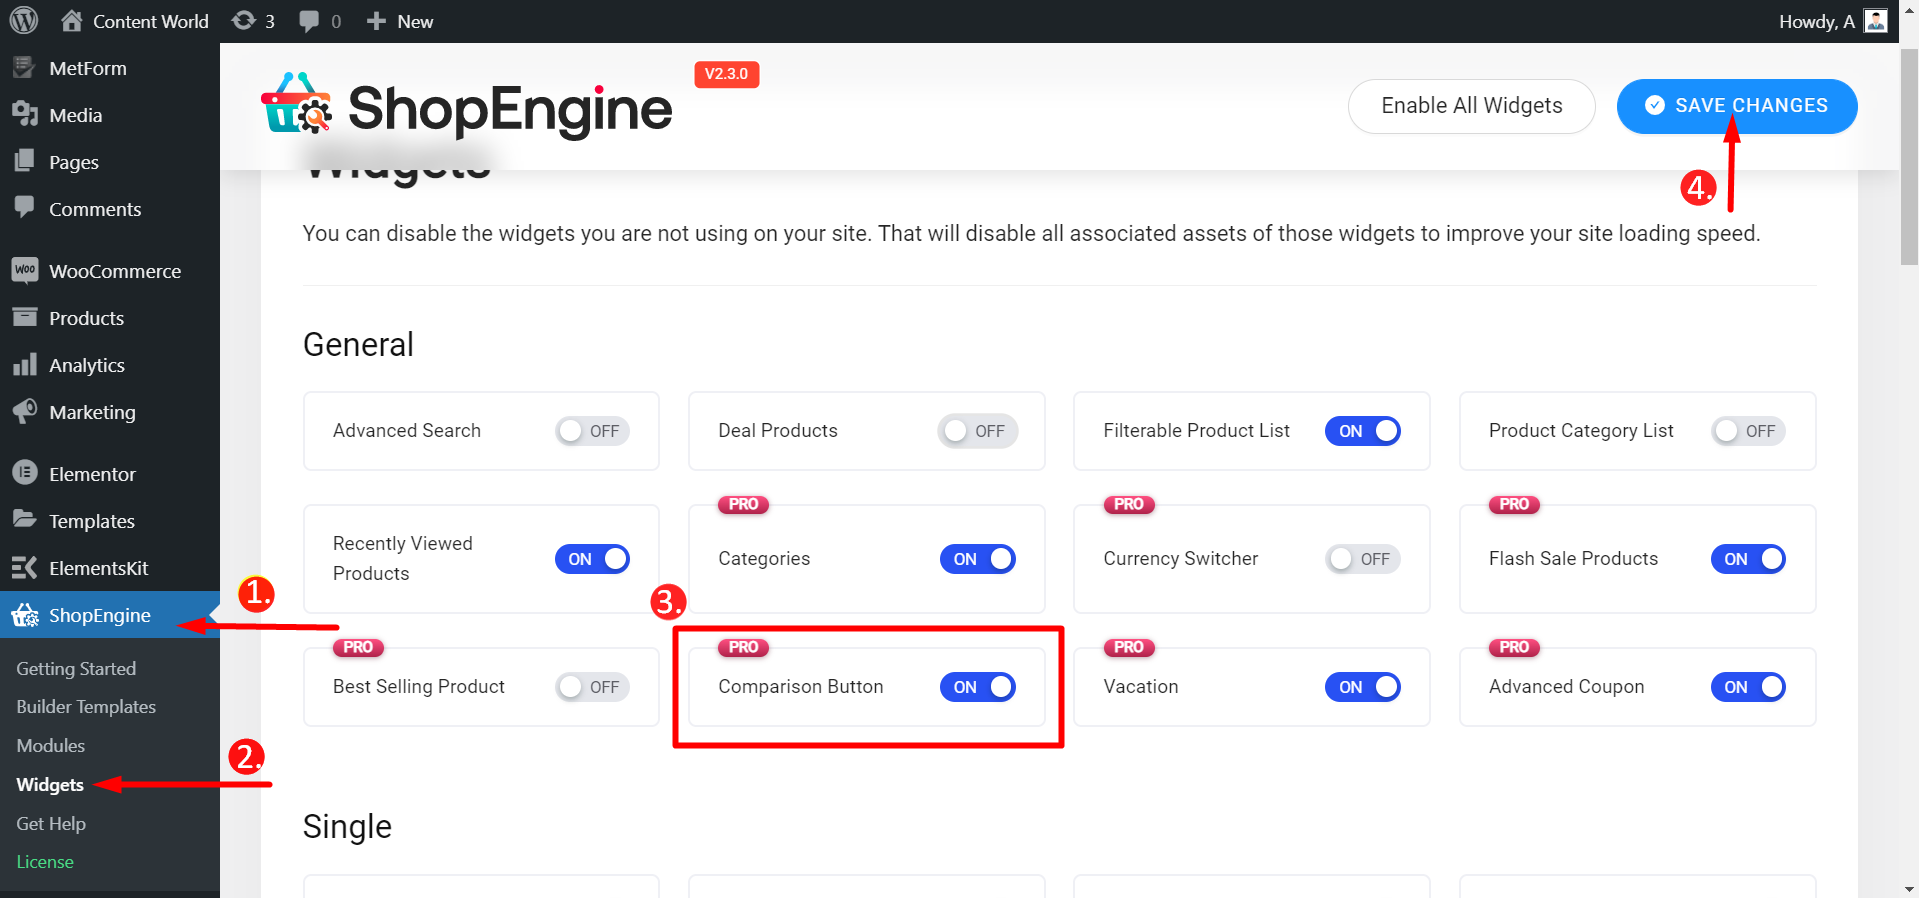
Next, go to widgets and enable Comparison Button similarly the below image is showing.
Second Step #
Before testing the comparison widget, make sure you have the Product list widget ON. Do it following the similar way of enabling Comparison Button.
Navigate to: Dashboard -> ShopEngine -> Builder Templates -> Create or Open a Single page -> Edit with Elementor -> Find Product list widget -> Find Comparison Widget
Edit the Widget #
In the Content section, the editing options you will get to customize the widget are,
- Label- Write the label name you want to display on the button.
Icon Settings
- Show Icon- Toggle the switch to ‘YES’ if you want to show the icon otherwise ‘NO’.
- Icon- Choose an Icon from the Icon Library or Upload SVG if you have any.
- Icon Position- Select the position of the icon here.
Counter Settings
- Show Counter?- If you want to show the number of products then toggle this option to YES, otherwise NO.
- Counter Position- Set where you want to show the counter.
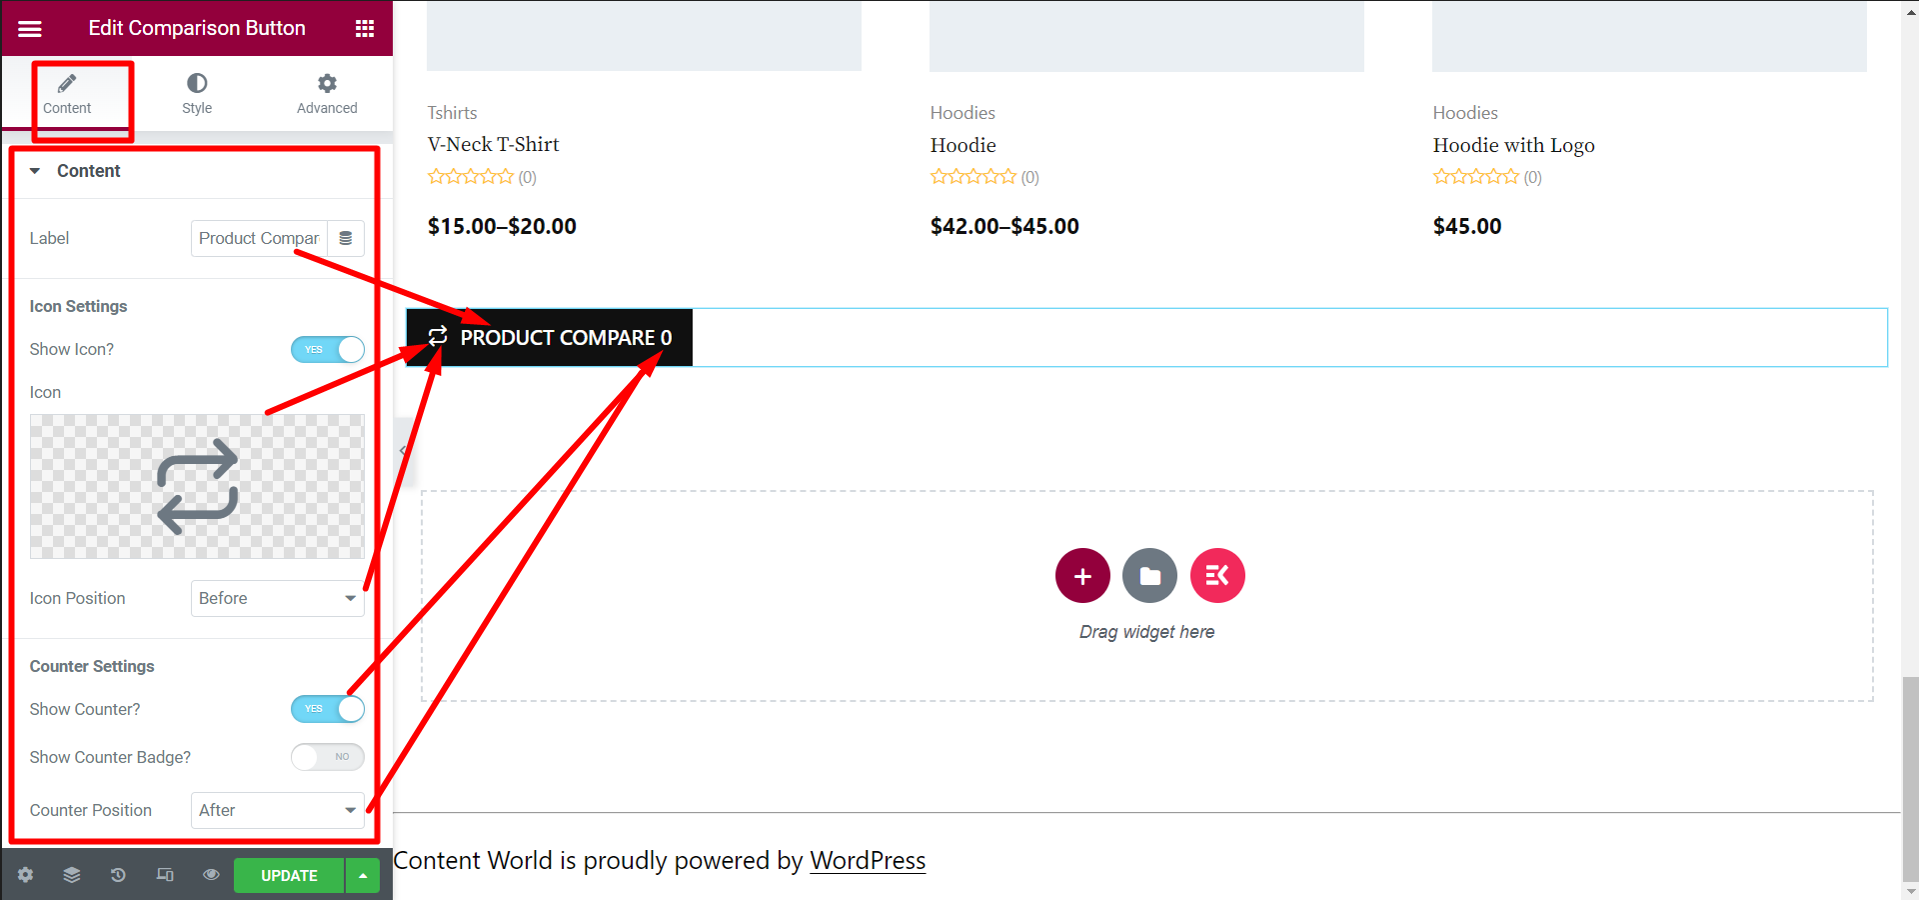
- Show Counter Badge?- If you enable this option, the counter will be seen as a badge at the top of the button.
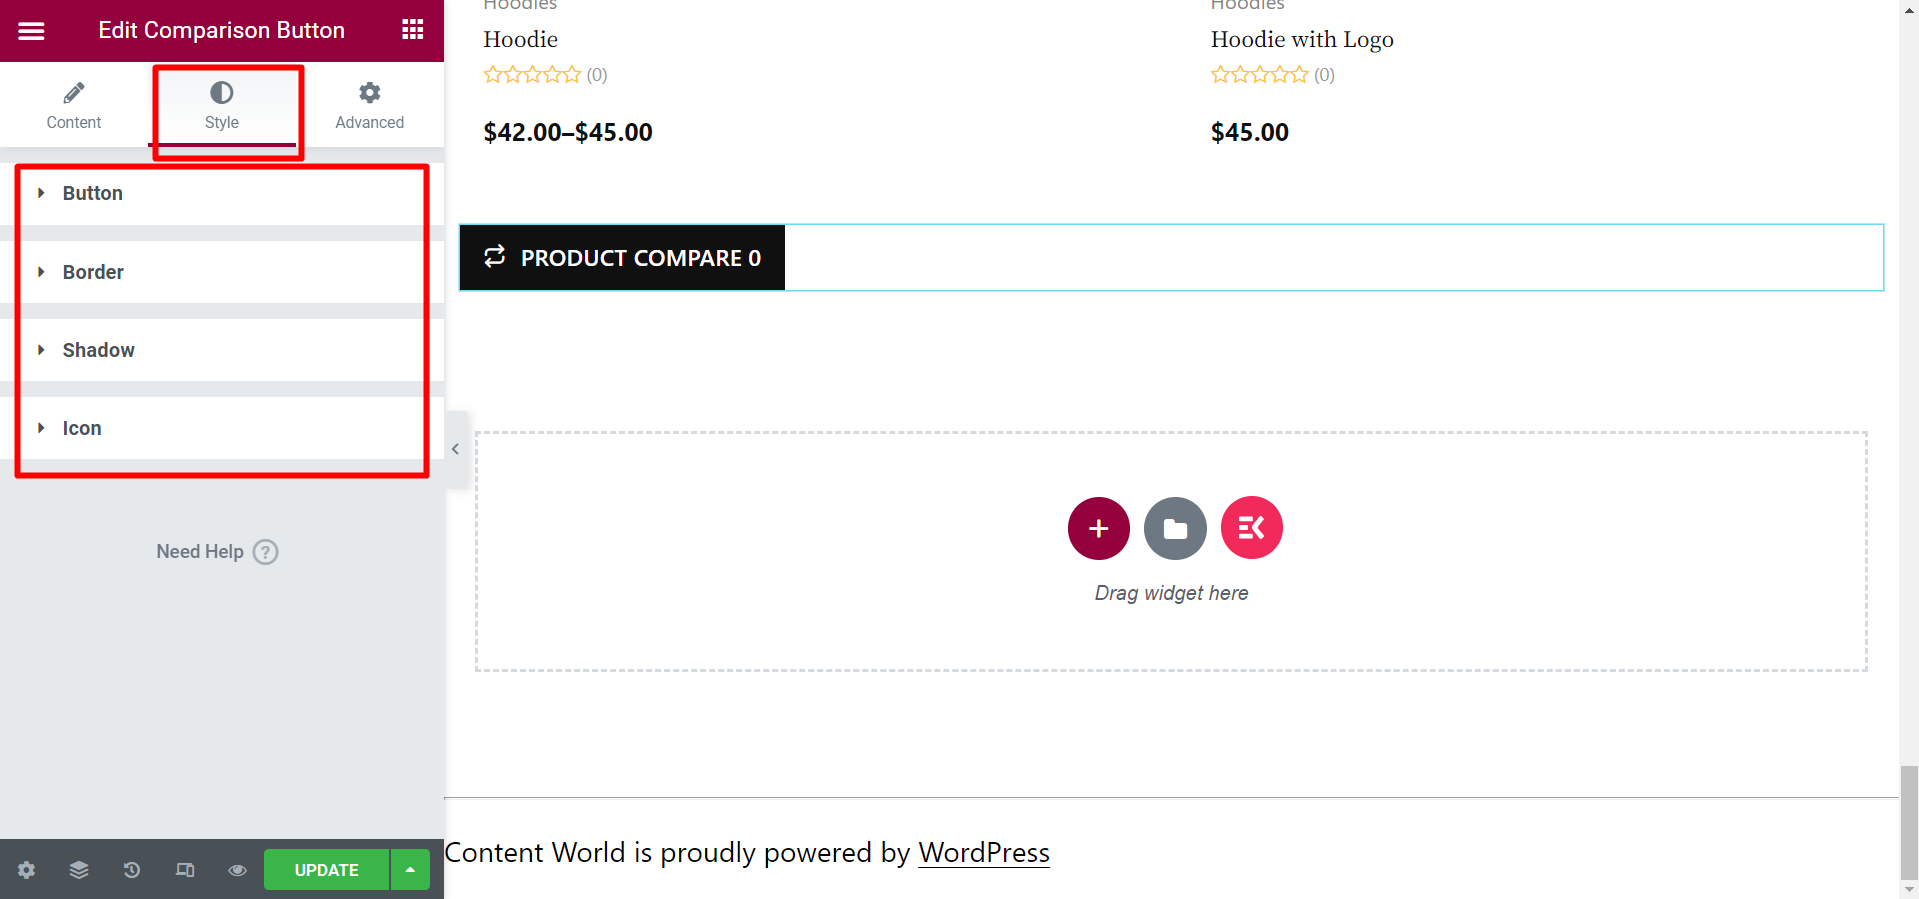
Next, in the Style section, there are more options to edit the specific view of the button. The editing options are- Button, Border, Shadow, and Icon. Here you can edit the button background color, typography, alignment, border color, set shadow effect, icon spacing, badge background color, etc.
Final Step #
After editing and designing the button, you need to update or publish the page. Finally, it will work and look like the GIF below.
Hope, the documentation is helpful. As you have seen, the widget is well-organized and simple. So, add a comparison button widget and allow your customers to compare products in a few clicks.


