

GutenKit Donut Progress Bar Block lets you easily give an appealing look to your data on your WordPress website using the default block editor. You can choose to display a number, icon, image, and supporting content, and also customize the pie chart with extensive styling options.
Let’s learn how to add the pie chart block from the Gutenberg editor area.
Step 1: Add GutenKit Donut Progress Bar Block #
Install the GutenKit plugin and go to the WordPress dashboard. Then, take a new page or post and follow the below steps:
- Enable the block editor.
- Find the “+” icon at the top of the editor screen.
- Clicking it will display a block library.
- Search for the GutenKit Donut Progress Bar block.
- Once you see it, click or drag & drop it to the editor screen.
Step 2: Add Pie Chart Number and Icon #
Now, open the block setting and step up to the content tab.
Content:
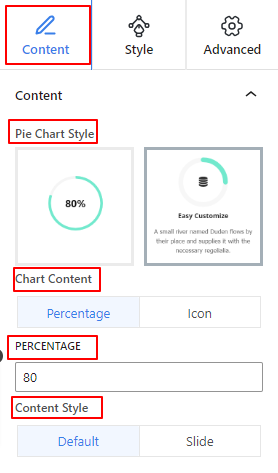
- Pie Chart Style: Choose to display your pie chart style with or without text.
- Chart Content: Show the percentage or icon for the chart content.
- Percentage: Enter the percentage number in this box.
- Icon: Add an icon or image from the library or upload it from your device.
- Content Style: Apart from the default style, you can add a slide animation effect on the hover state.
Step 3: Style Donut Progress Bar #
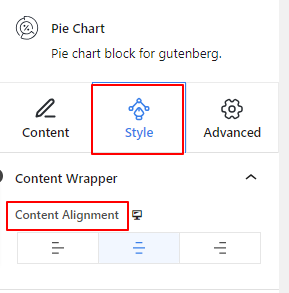
In this step, we’ll move to the Style Tab to customize the pie chart section. Let’s see how it functions:
Content Wrapper:
- Content Alignment: Define the horizontal positioning of the pie chart. (Left, Center, Right)
If you choose the second pie chart style, you will see the Title & Content setting in the Style tab. Also, both features have the same settings.
Title & Content:
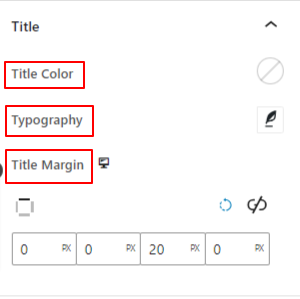
- Color: Add color to the title or description text.
- Typography: Use this setting area to customize the title or description text. As like chagrin font, weight, style, etc.
- Margin: Enter a value to add margin.
- Title Margin: Define the gap between the pie chart and the title.
- Content Margin: From there specify the gap between title and content.
Chart:
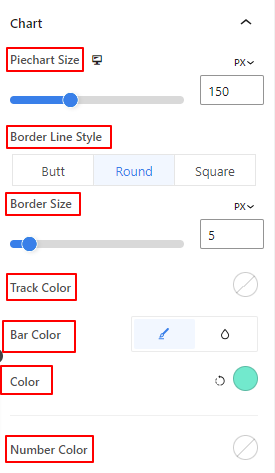
- Pie Chart Size: Use the slider to determine the size of the pie chart.
- Border Line Style: Choose a style for the border line. (Butt, Round, Square)
- Border Size: Define the thickness of the border using the slider.
- Pie Chart Image Size: Determine the size of the image. (This setting appears only if the image is selected in the content tab)
- Track Color: Use the slider to add a color to the pie chart track.
- Bar Color: Give color to the pie chart slice.
- Number Color: Give color to the percentage number using the color picker.
That’s it!
We have covered all the details on how to use GutenKit Pie Chart block on your Gutenberg website.
Hopefully, now you can add a pie chart to your Gutenberg website.


