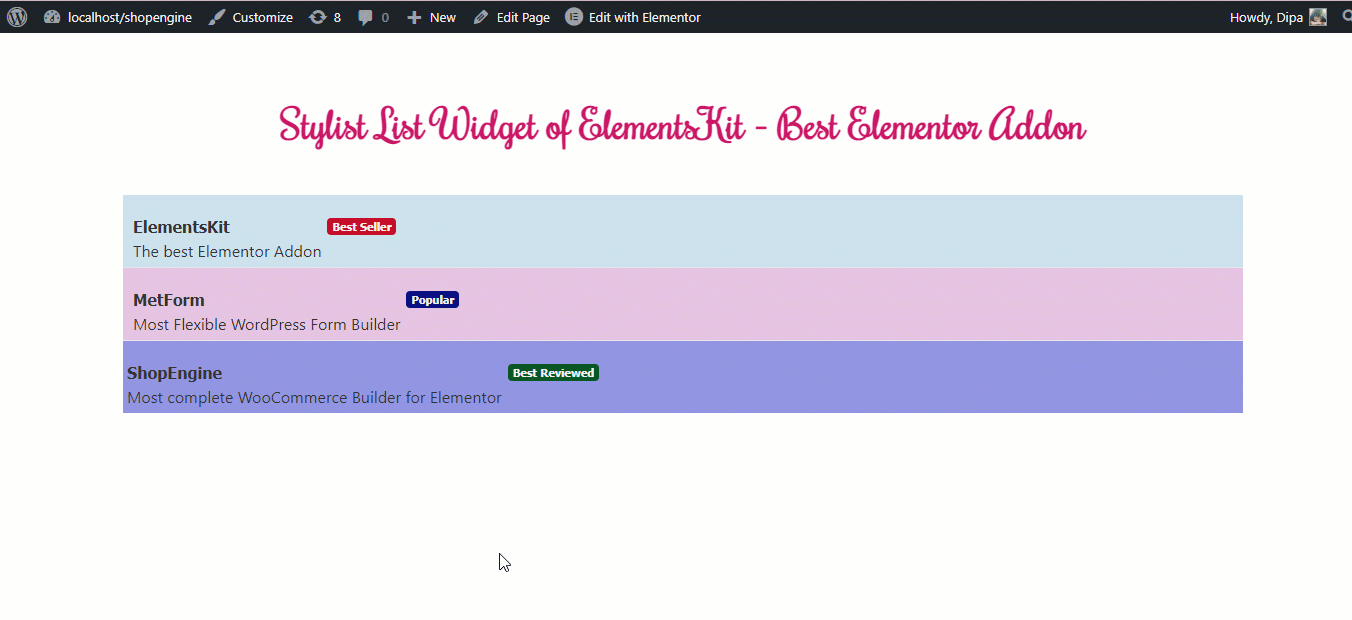
The stylish list widget allows you to add a stylish and attractive list to your Elementor site. This ElementsKit widget is easy to use and provides a huge range of customization and style options.
Note: You will need to install Elementor and ElementsKit to follow the process. If you need help installing and activating ElementsKit Pro, check out the ElementsKit installation guide.
How to add stylish list to WordPress site using ElementsKit #
Follow the steps described below to add a stylish list to your WordPress site with ease using ElementsKit and Elementor:
You can also check out the whole process in the video below:
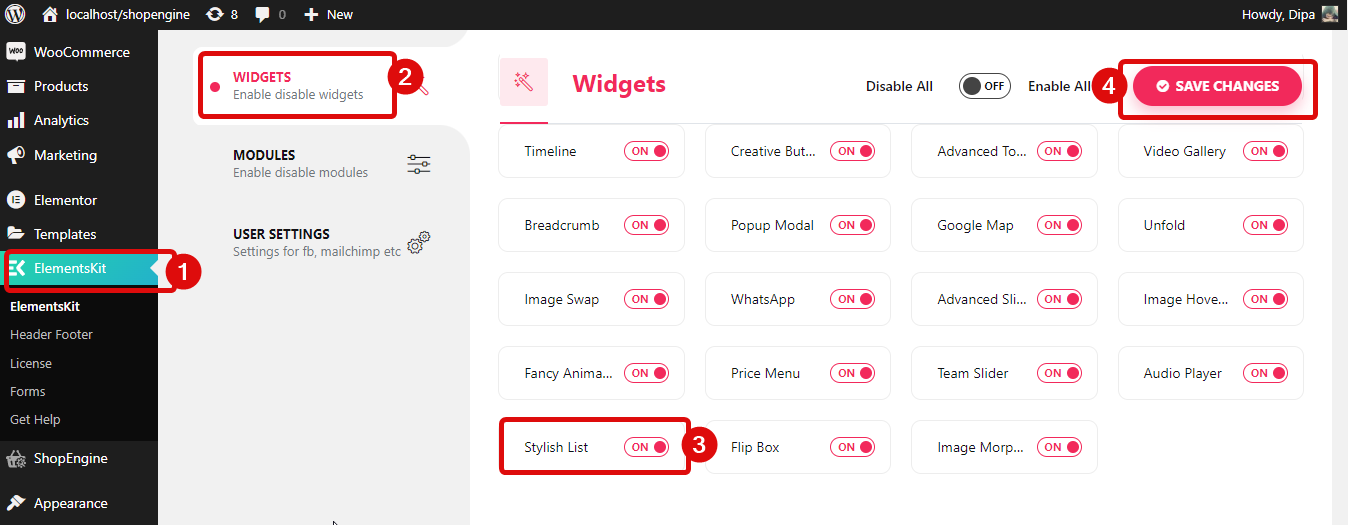
Step 1: Enable the Stylish List widget #
Navigate to ElementsKit ⇒ widgets ⇒ Stylish List widget, turn on the widget and click on Save Changes.
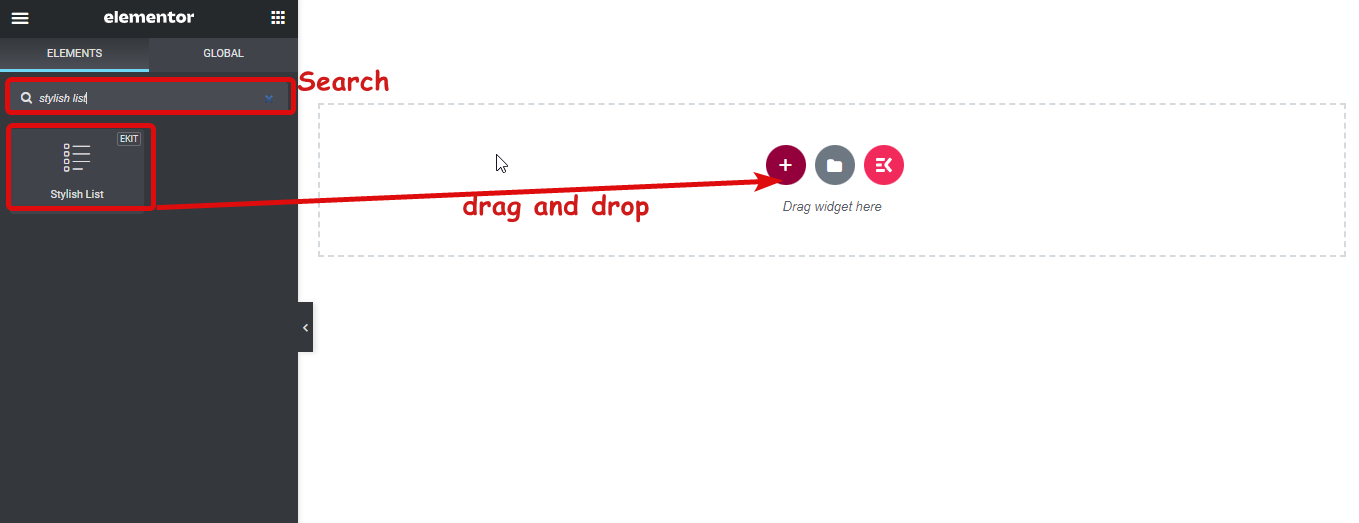
Step 2: Drag and drop the widget #
Edit the page with Edit with Elementor option. Then search for the Stylish List widget with the Ekit icon and simply drag and drop the widget on the page.
Step 3. Customize the settings #
Click on the edit icon to access the settings you can alter to customize your stylish widget. Here are the options:
- List Type: You can choose to either display the list as vertical or horizontal.
- Use Divider: Turn on the toggle button to use a divider. If you don’t want a divider, turn off the option.
- Use Counter: If you want to add a counter to your style, turn this option on. Once you turn you will find the following two options:
- Counter Style: You will get seven counter style options: Normal, Decimal Leading Zero, Upper Alpha, Lower Alpha, Upper Roman, Lower Roman, and Lower Greek.
- Counter Suffix: As counter suffix options you will get a dot, bracket, and colon. If you don’t wish to use suffixes, you can choose none.
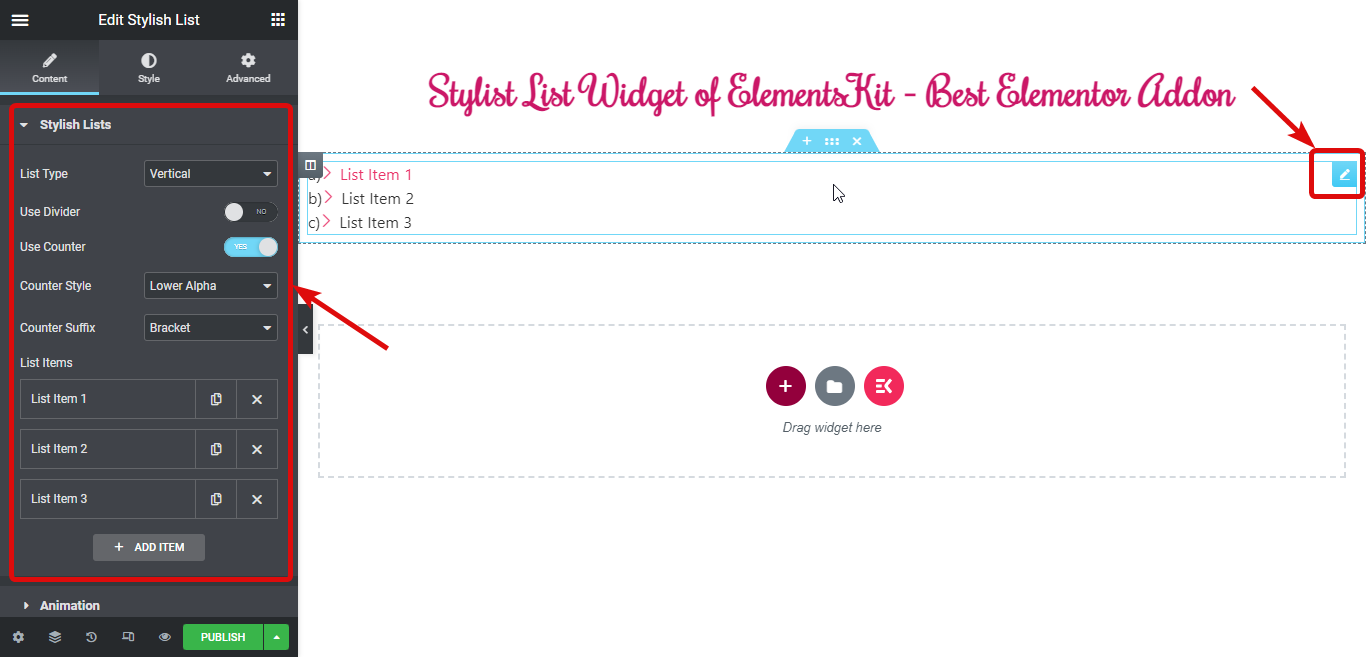
Under List Items, you can edit the default list items, duplicate any of the existing items, delete items and also add a new one.
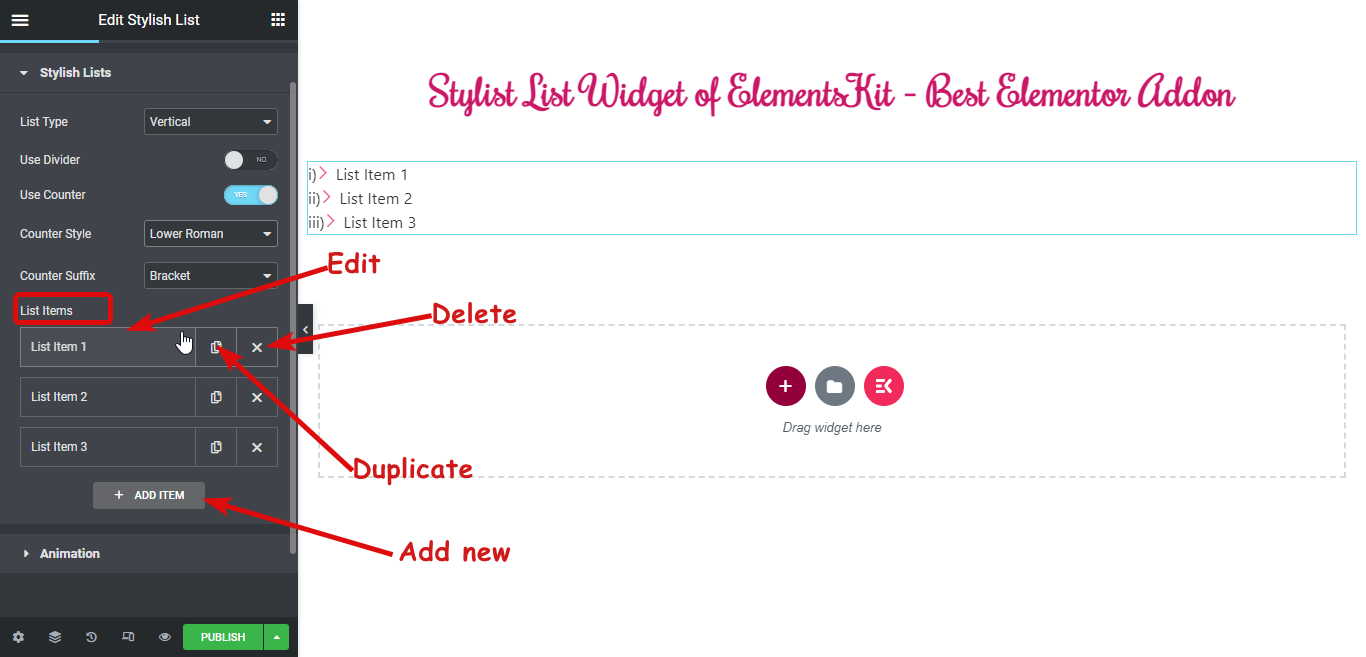
To edit any of the items, you need to click on that and you can alter the following options:
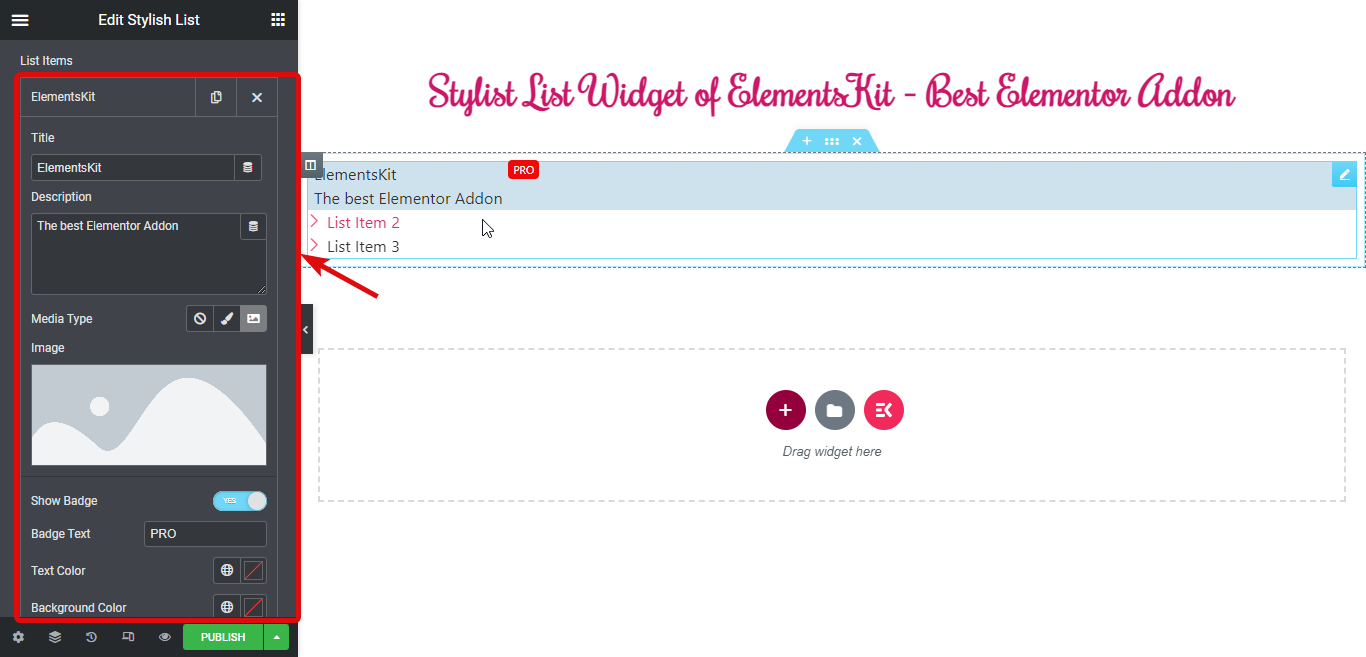
- Title: Enter the title for the list.
- Description: You can add a description to the list.
- Media Type: You can add either icon or an image to the list item.
- Show Badge: Turn on this option to add a badge to your list item. Once you turn on the option you will get the following option:
- Badge Text: Add the badge text.
- Text Color: Choose a text color for the badge.
- Background Color: Add a background color if you want.
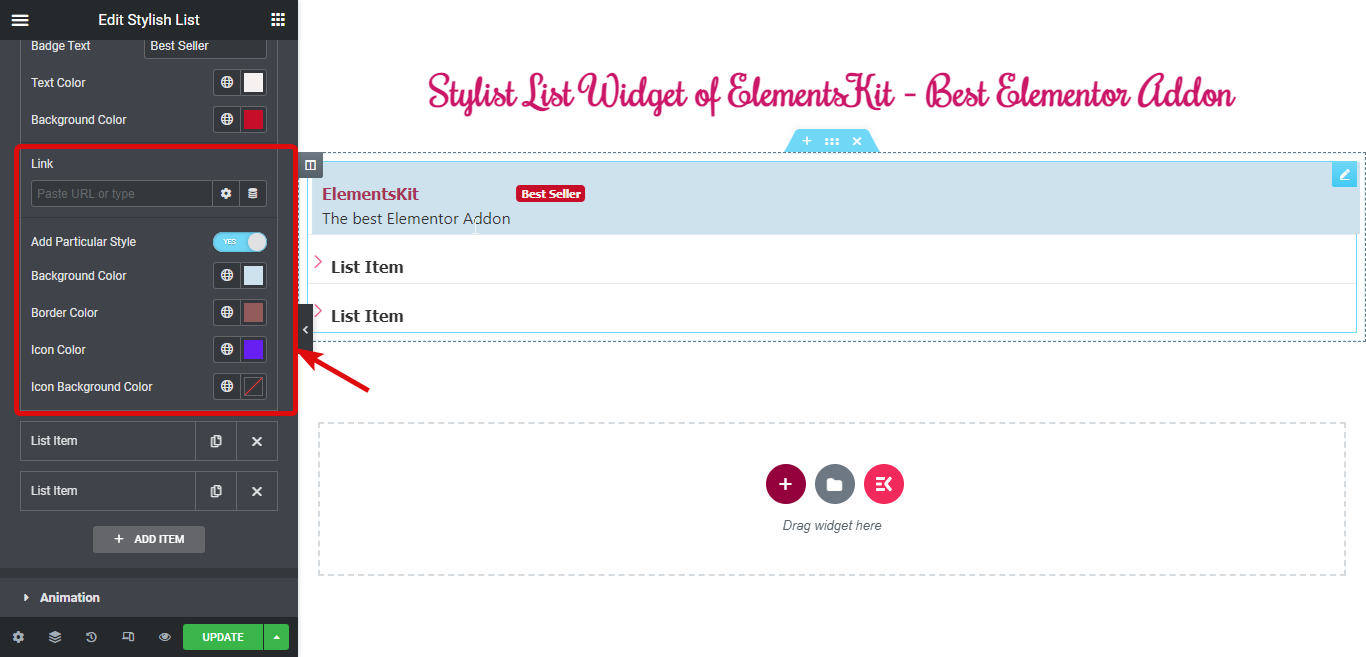
- Link: You can add a hyperlink to the list.
- Add Particular Style: If you want to add a particular style, turn the toggle button and alter the following options:
- Background Color: Choose a background color.
- Border Color: Add a border color if you wish.
- Icon Color: You can change the icon color.
- Icon Background Color: Layer the background color if you wish.
To add a new item, click on the + ADD ITEM option and provide and customize the options you need to perform while editing an existing item.
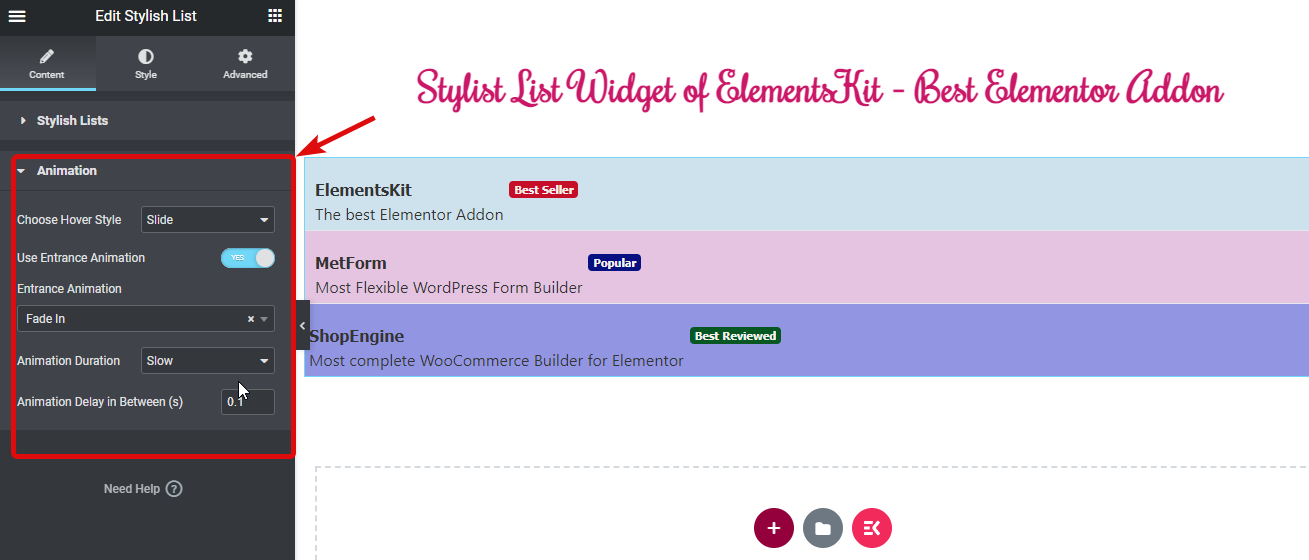
Now expand the animation tab and alter :
- Choose Hover Style: If you want, you can choose the hover style as blur or slide.
- Use Entrance Animation: Turn on this option to add entrance animation and choose an animation option from the entrance animation to the drop-down list. After that provide the Animation Duration and Animation Delay in Between.
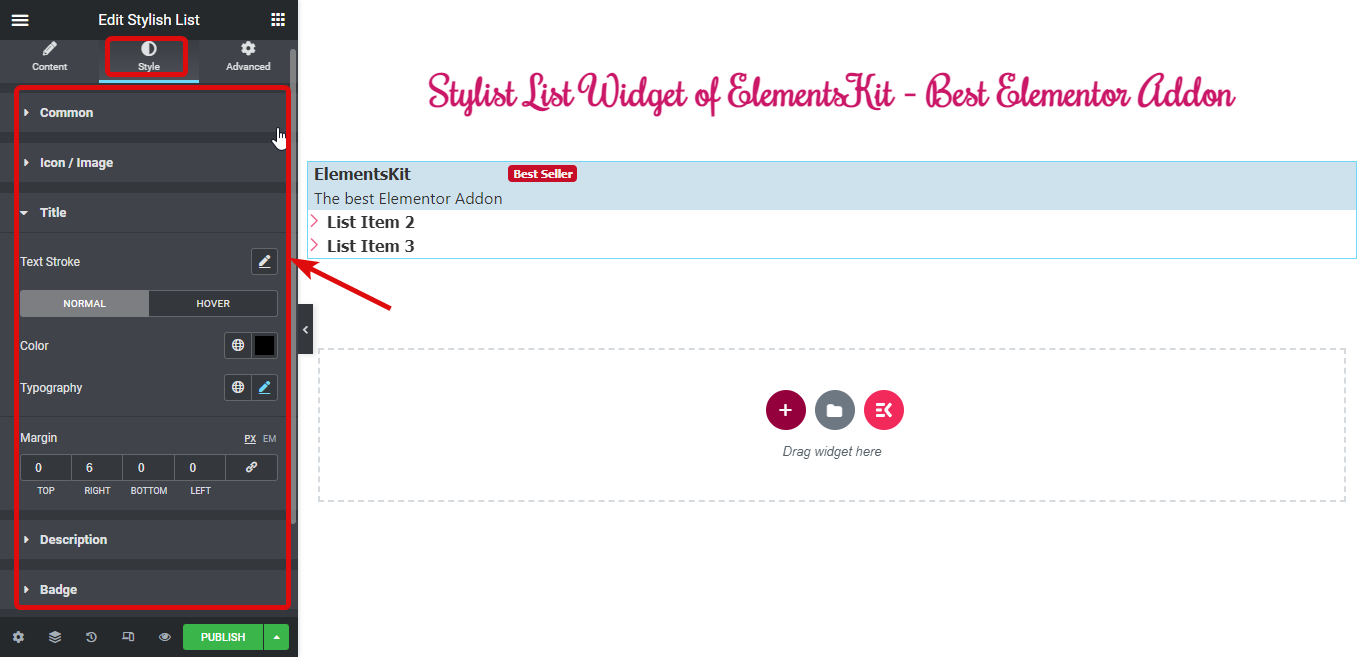
Step 4: Stylize your list #
Now move to the style tab and alter different options under the section:
- Common
- Icon / Image
- Title
- Description
- Badge
Finally, click on publish/ update to save the changes and preview your stylish list: