Marketers find quiz forms beneficial for engagement, promotion, making a decision regarding any issue, and many other reasons. And people nowadays often like to participate in online quizzes. MetForm has made creating forms for quizzes absolutely easy. This quiz feature allows you to add your preferred fields to a quiz form.
This documentation will show you how to create a quiz form using the MetForm pro.
Quiz Feature- MetForm #
Firstly, you have to create a quiz form to use the feature. It is simple from your Dashboard,
Access to- Dashboard -> MetForm -> Click Add New -> A Pop Up will be appeared, Write Form Name-> Select Form Type -> Edit Form
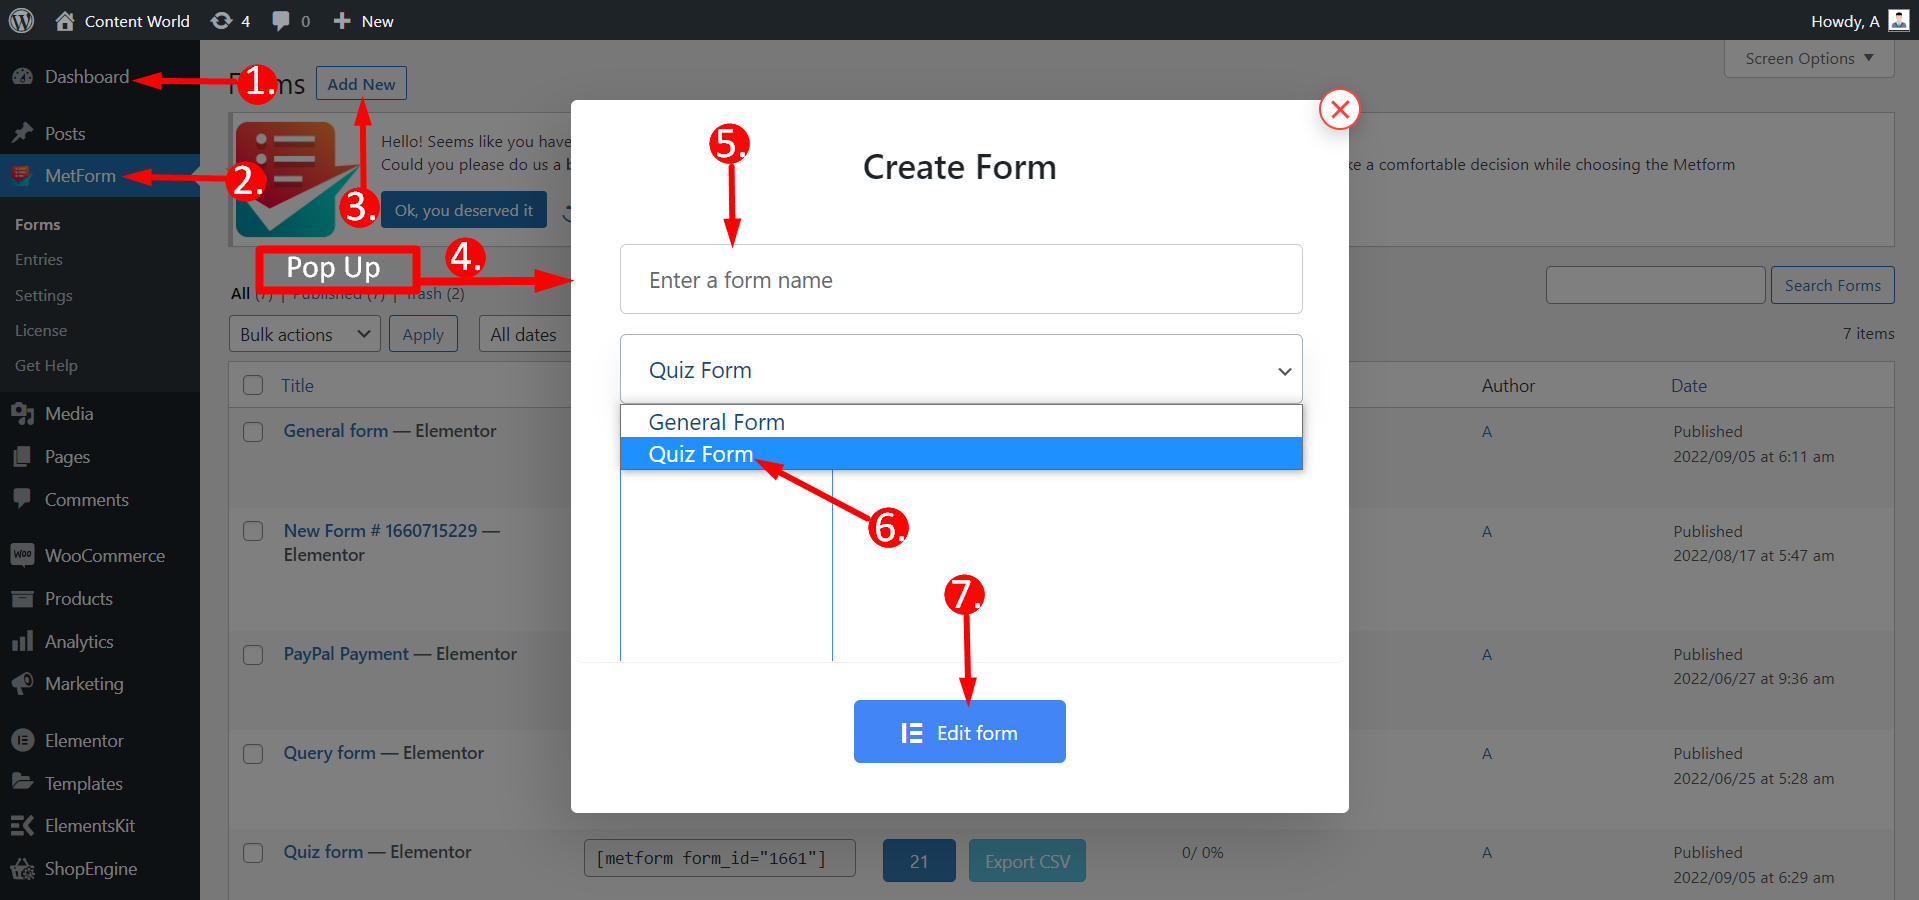
You can start editing now. Also, you will find Form settings, and Update & Close options here.
Field Types #
A quiz form usually requires a few standard options as well as widgets. To use MetForm quiz feature you will need 6 widgets- Text, Check box, Radio, Multi Select, Select, Image Select, and Toggle Select. Let’s take the widgets and learn to utilize the quiz feature.
Text #
You can take one or more text fields and design the quiz form according to your preferences. Here you will get Content, Settings, and Conditional Logic parts to edit. For example, in the content section, the fields are:
- Name- Set any unique name following the given instruction under the field.
- Label- Write a label name here; actually, it is a quiz question. For example, if you write What is your country name? It will display here.
- Point- You have to set a mark or point for that quiz question.
- Add answer for the question?– Toggle YES, you have to set the answer for the question. If you don’t set any answer then the system will be unable to detect the correct answer.
- Answer- Write the answer if you have set the above button to YES.
- Add negative point?– You can add a negative point for a wrong answer if you wish.
- Placeholder- Write anything to display at the place. For instance, if you write Text, the user will understand that he has to write texts here.
- Help Text- This field provides hints or instructions for any question for users’ benefit.

In the Settings section, the customization options are-
- Required?– If you think the Text Field is mandatory, set it as YES. The user must fill up or touch the option.
- Warning message- If the field is mandatory, then set here a warning message. For instance- This field is required.
- Validation type- You can set validation by character or word length and expression length. And based on your settings, you can adjust the related small fields accordingly.
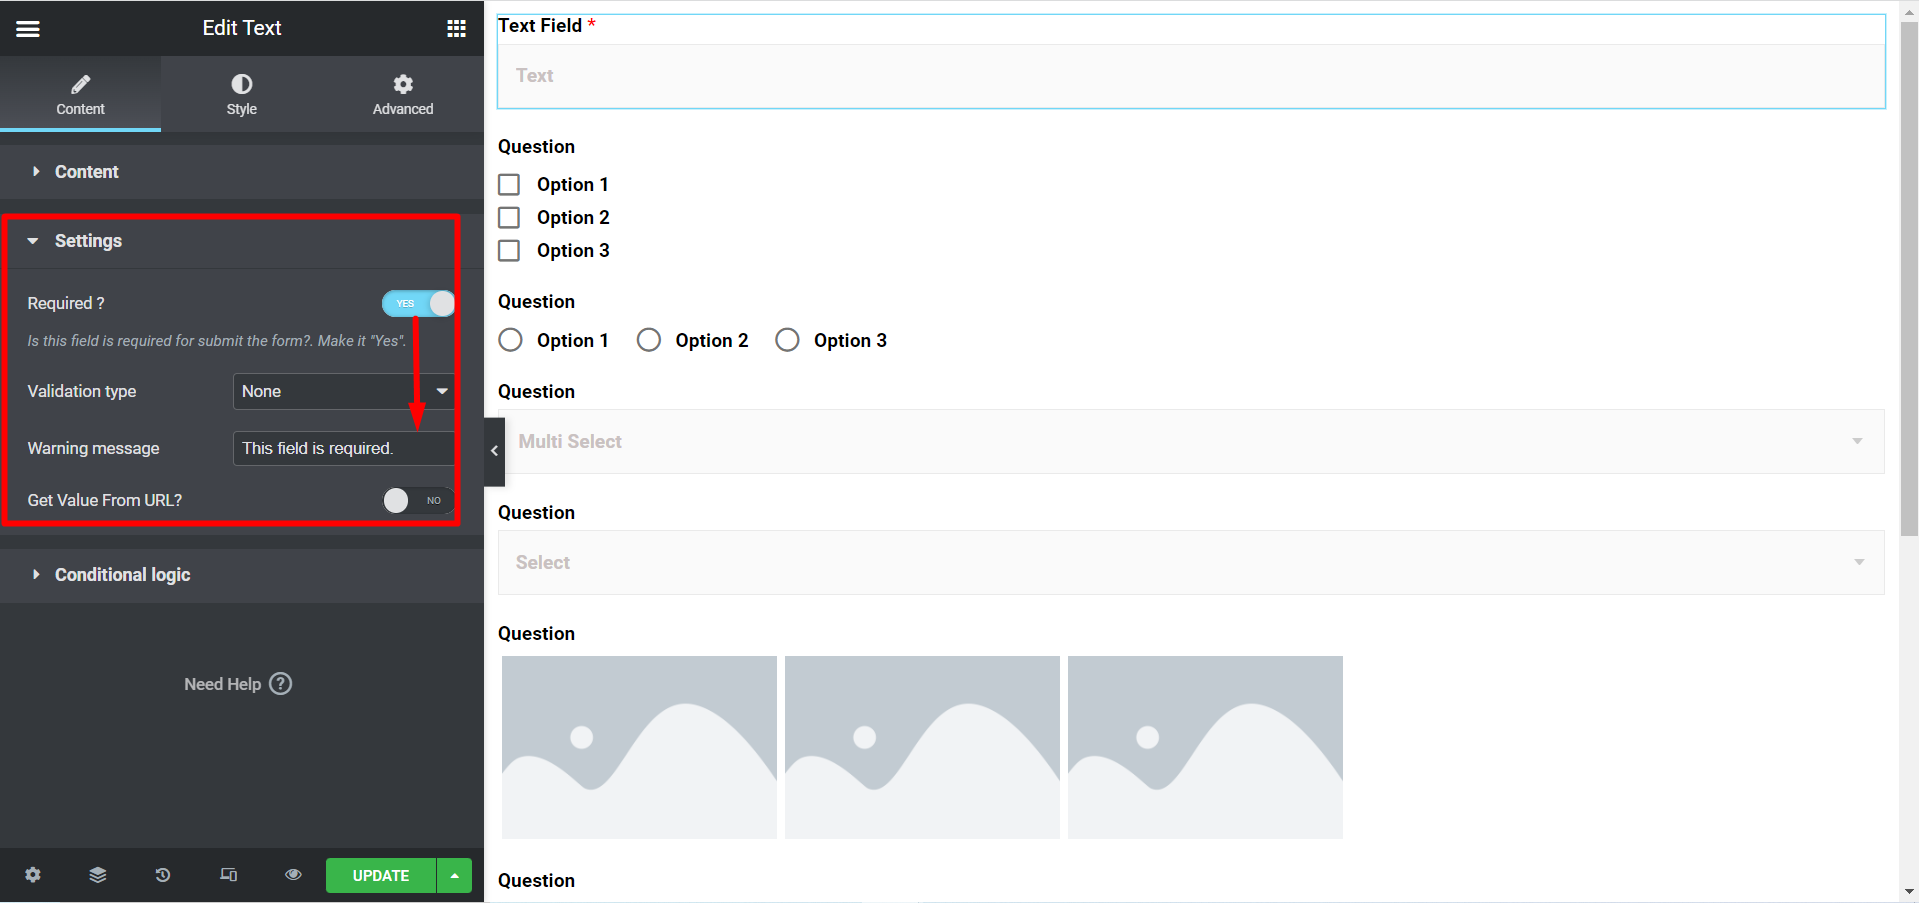
- Get Value From URL?- This is known as the auto-populate field. This feature of MetForm lets you change the URL to add default values for the fields like Check box, Switch, Radio, etc.. And, the website visitors will find those fields as an enabled condition.
Check this detailed documentation to get a clear understanding of the Get Value From URL? field.
- Conditional Logic- You can enable this option if you want to set AND or OR condition for any choice, and SHOW or HIDE any option.
Check Box #
Using this widget, you can set the answer choice options for the users. It has the same fields as Text Field and has three extra options:
- Option Display- There are choices to show the box Vertically or Horizontally.
- Option Text Position- You can keep the text before or after the box.
- Options- You can give the user as well as quiz participants multiple options if necessary.
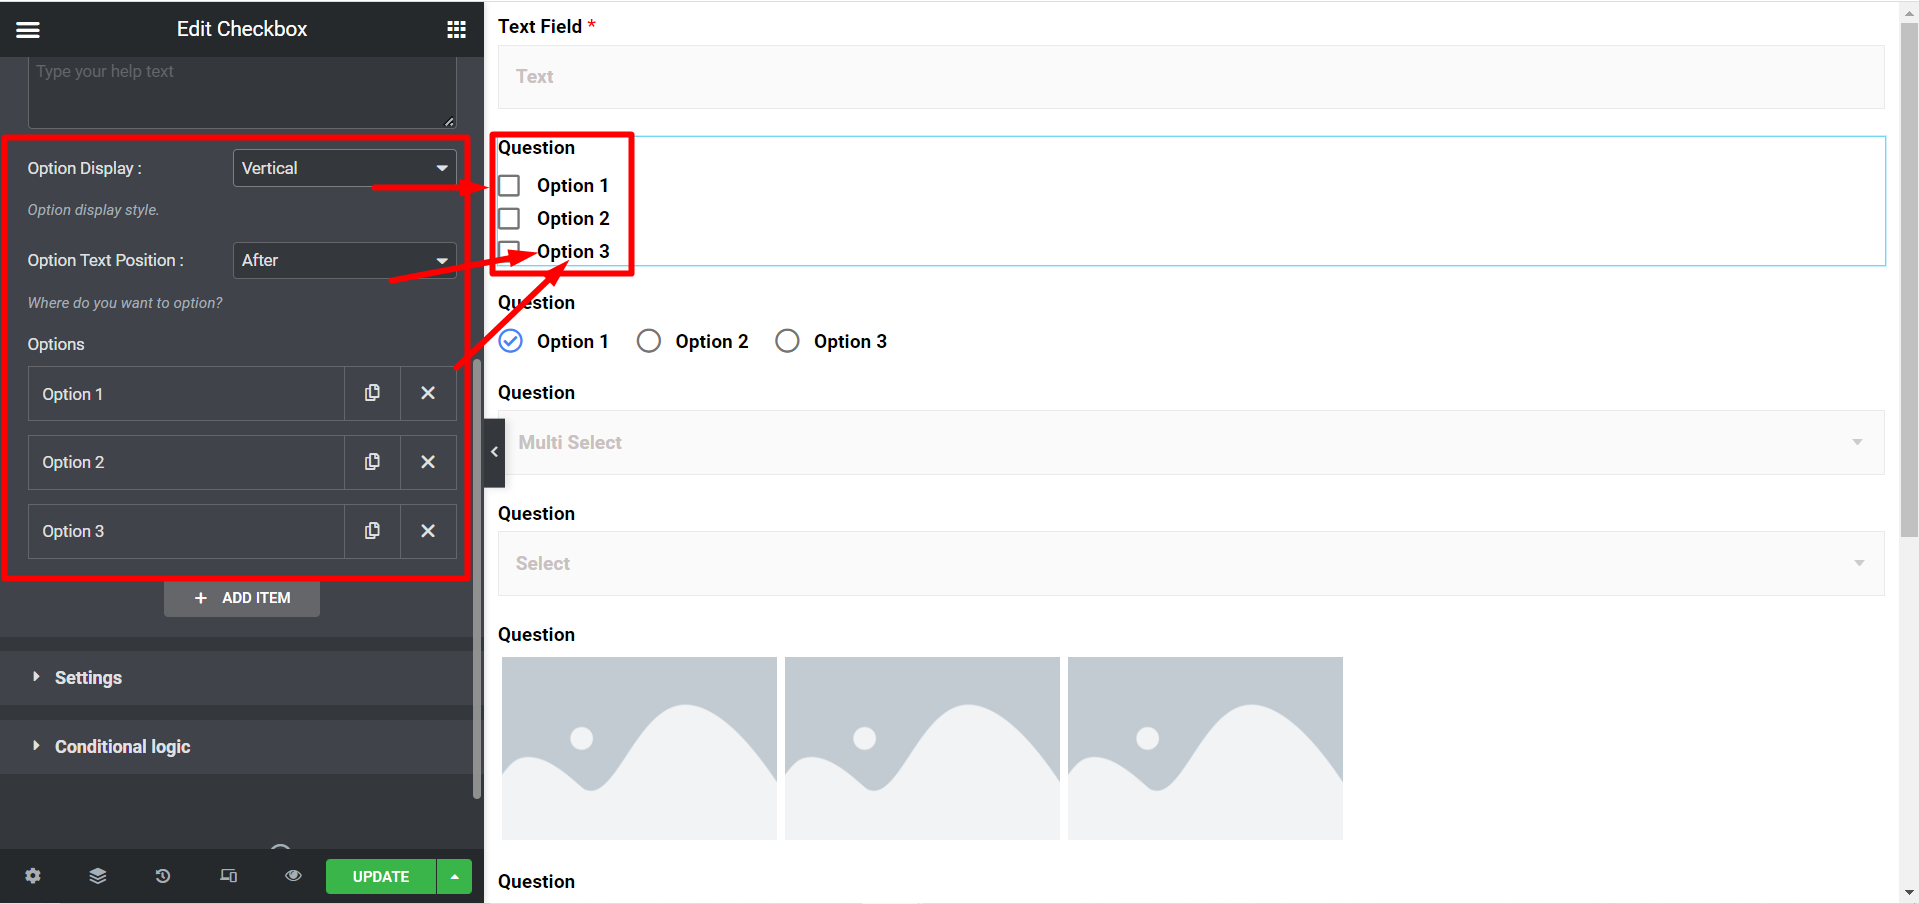
The benefit of the check box is a user can choose more than one option.
A quiz form also needs options such as Radio, Multi Select, Select, Image Select, and Toggle Select. These options’ Content, Settings, and Conditional Logic are all the same as Checkbox. You can customize each option according to your preferences. A quiz form use to has a Submit Button also.
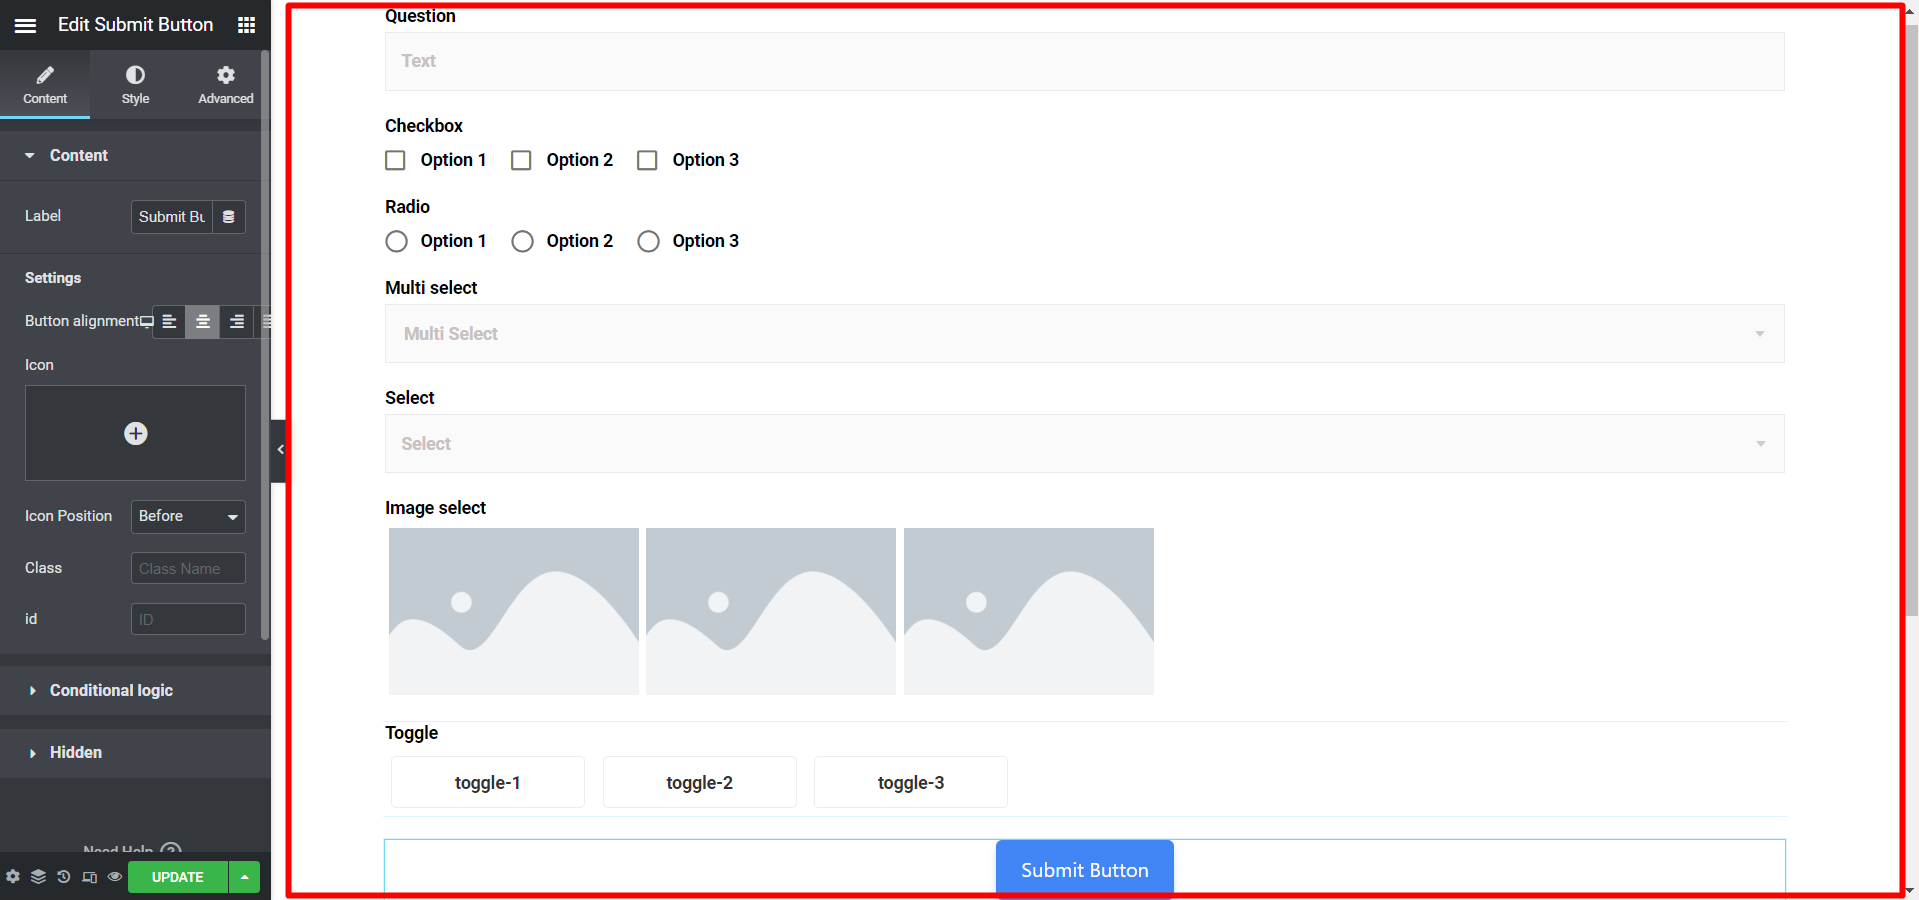
Note- There is no option to selecting multiple answers for Radio, and Select widgets.
However, as you saw, the editing options have predefine correct answers, set points, and negative marks setting alternatives.
Again, after submitting the form, it will give you a Thank you message along with the result instantly. Before that, make sure you have written the Success Message, and enabled the Show Quiz Summary options from the From settings.
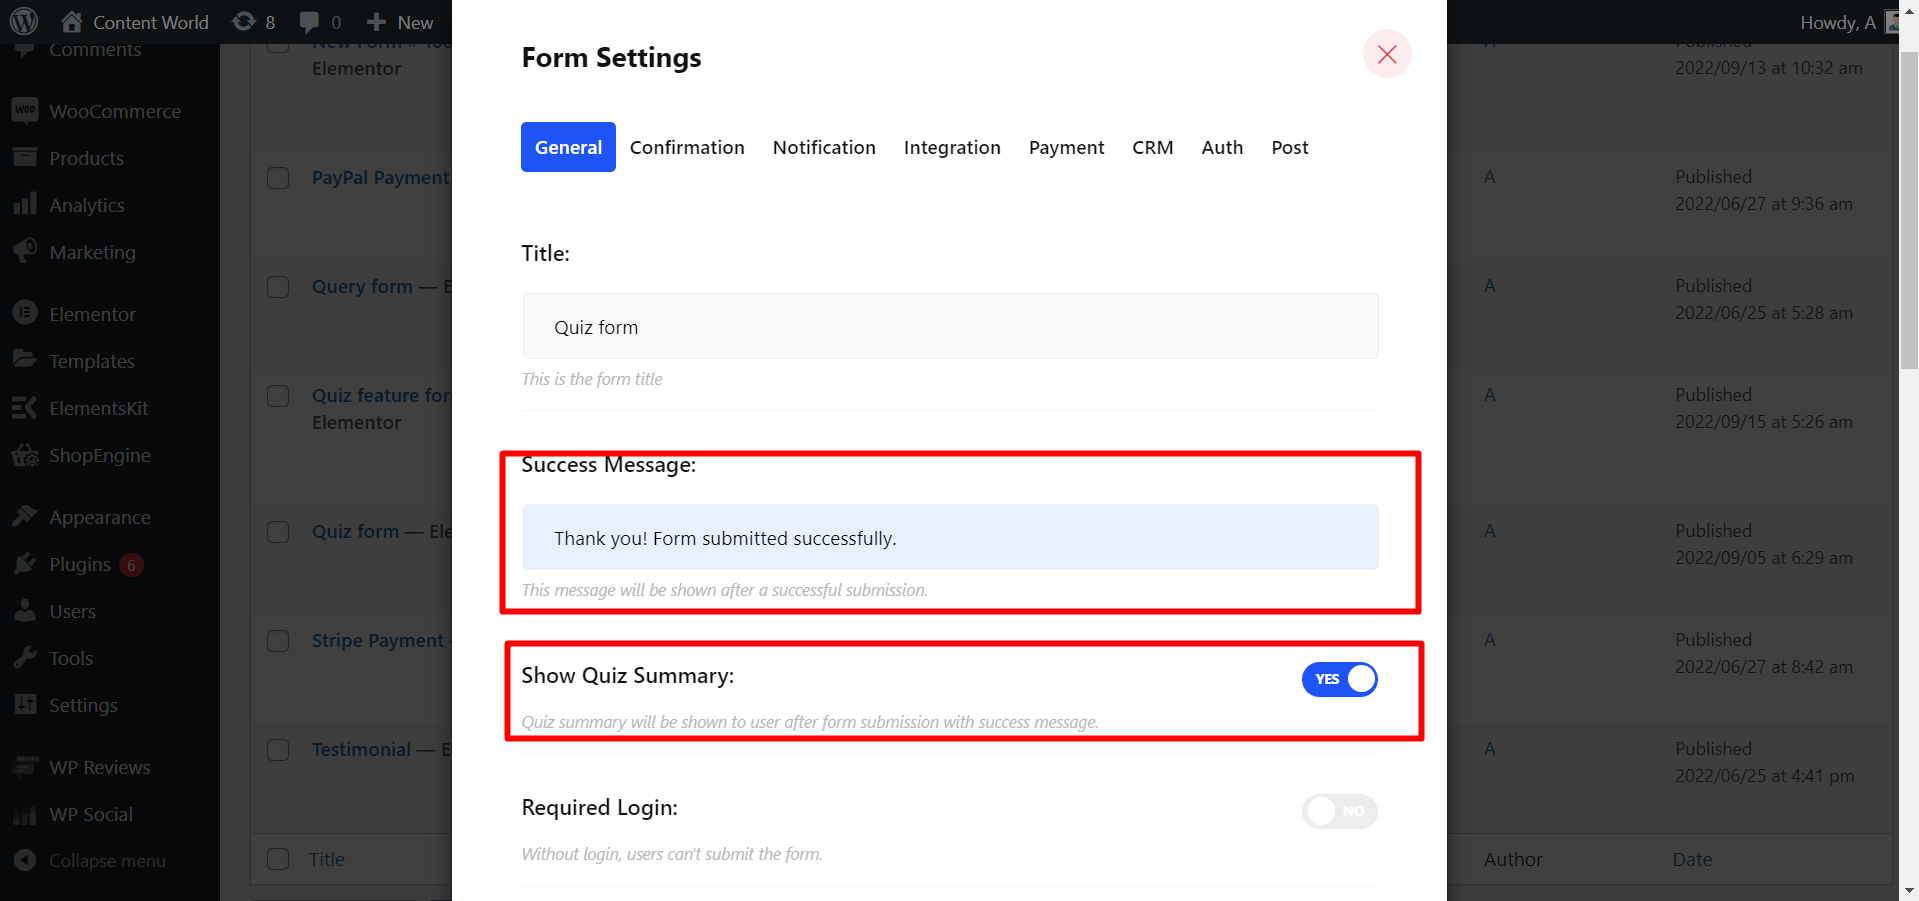
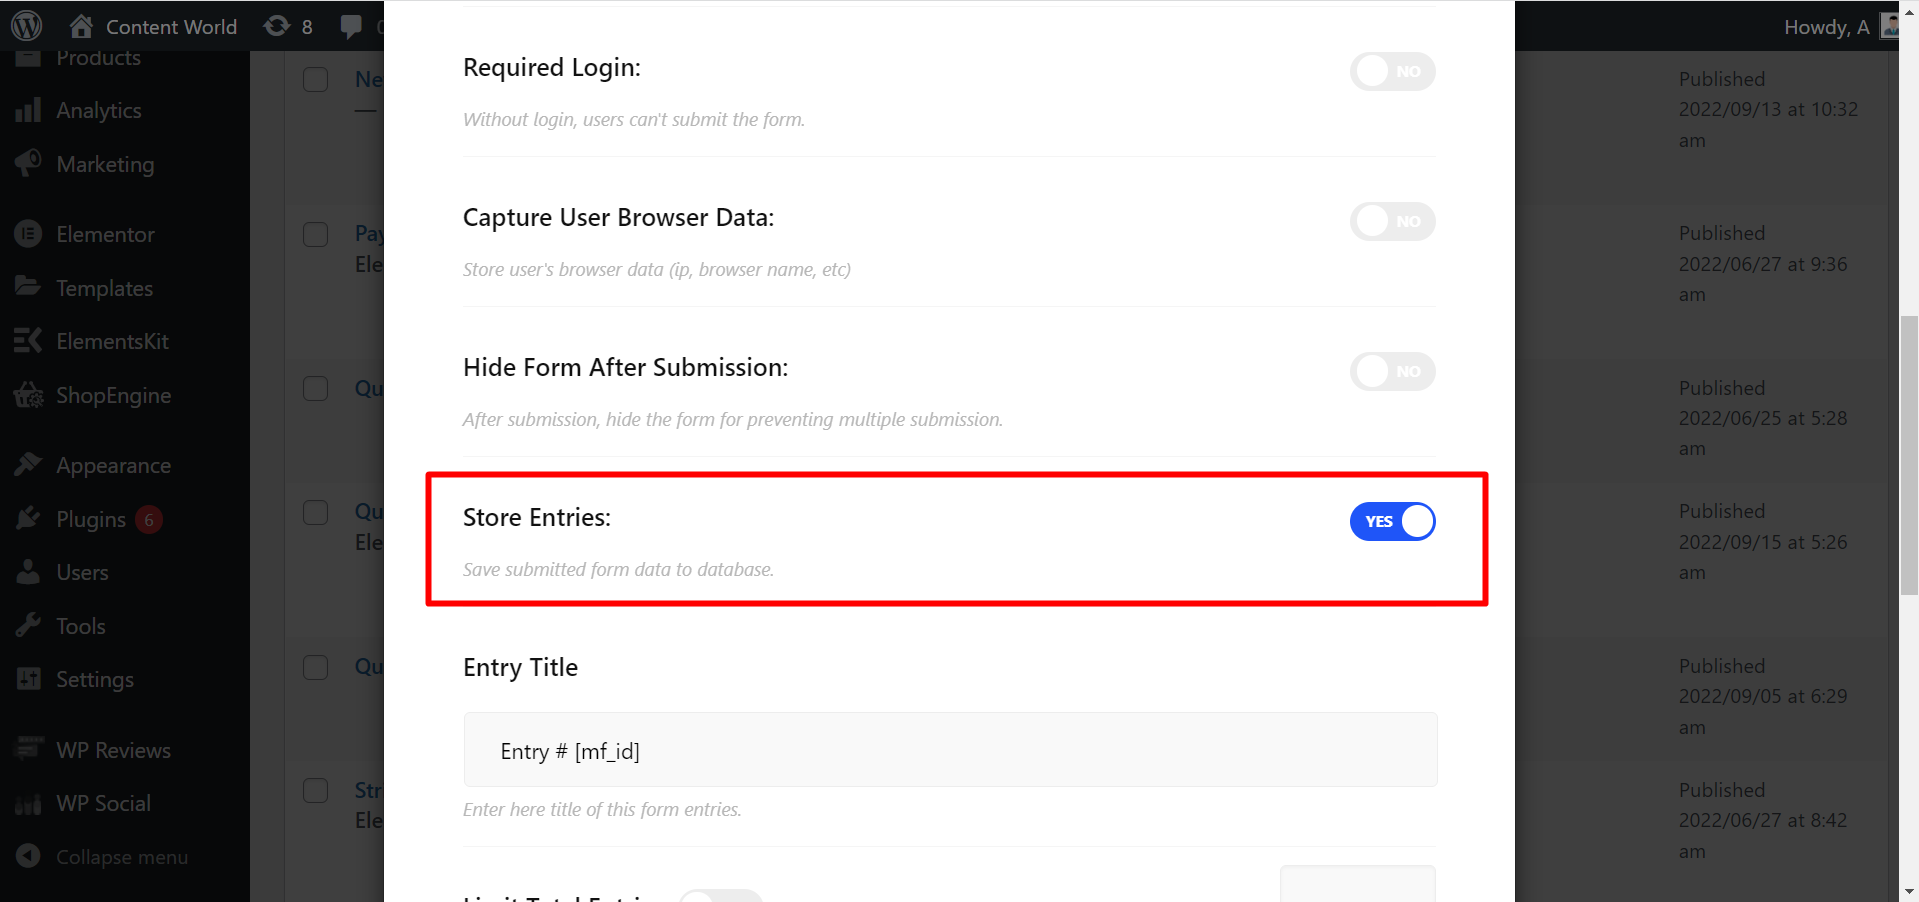
Again, if you forget to enable Store Entries, you will not find any quiz data stored in the form’s entry history. Do it from the From settings.
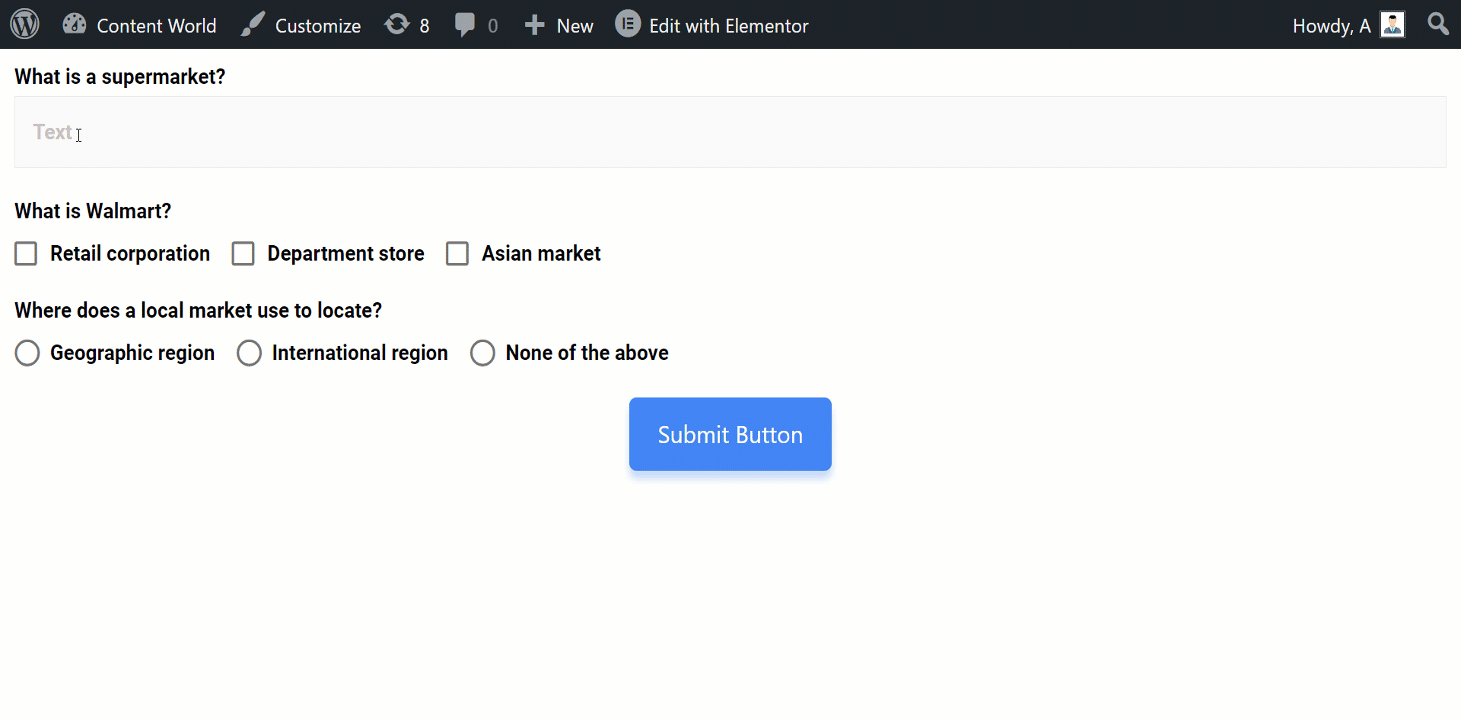
We have prepared an example by customizing three form editors. Remember that it will only work from the frontend. And, if you don’t predefine answers for each of the 7 widgets the system will not detect any answer and return 0 mark.
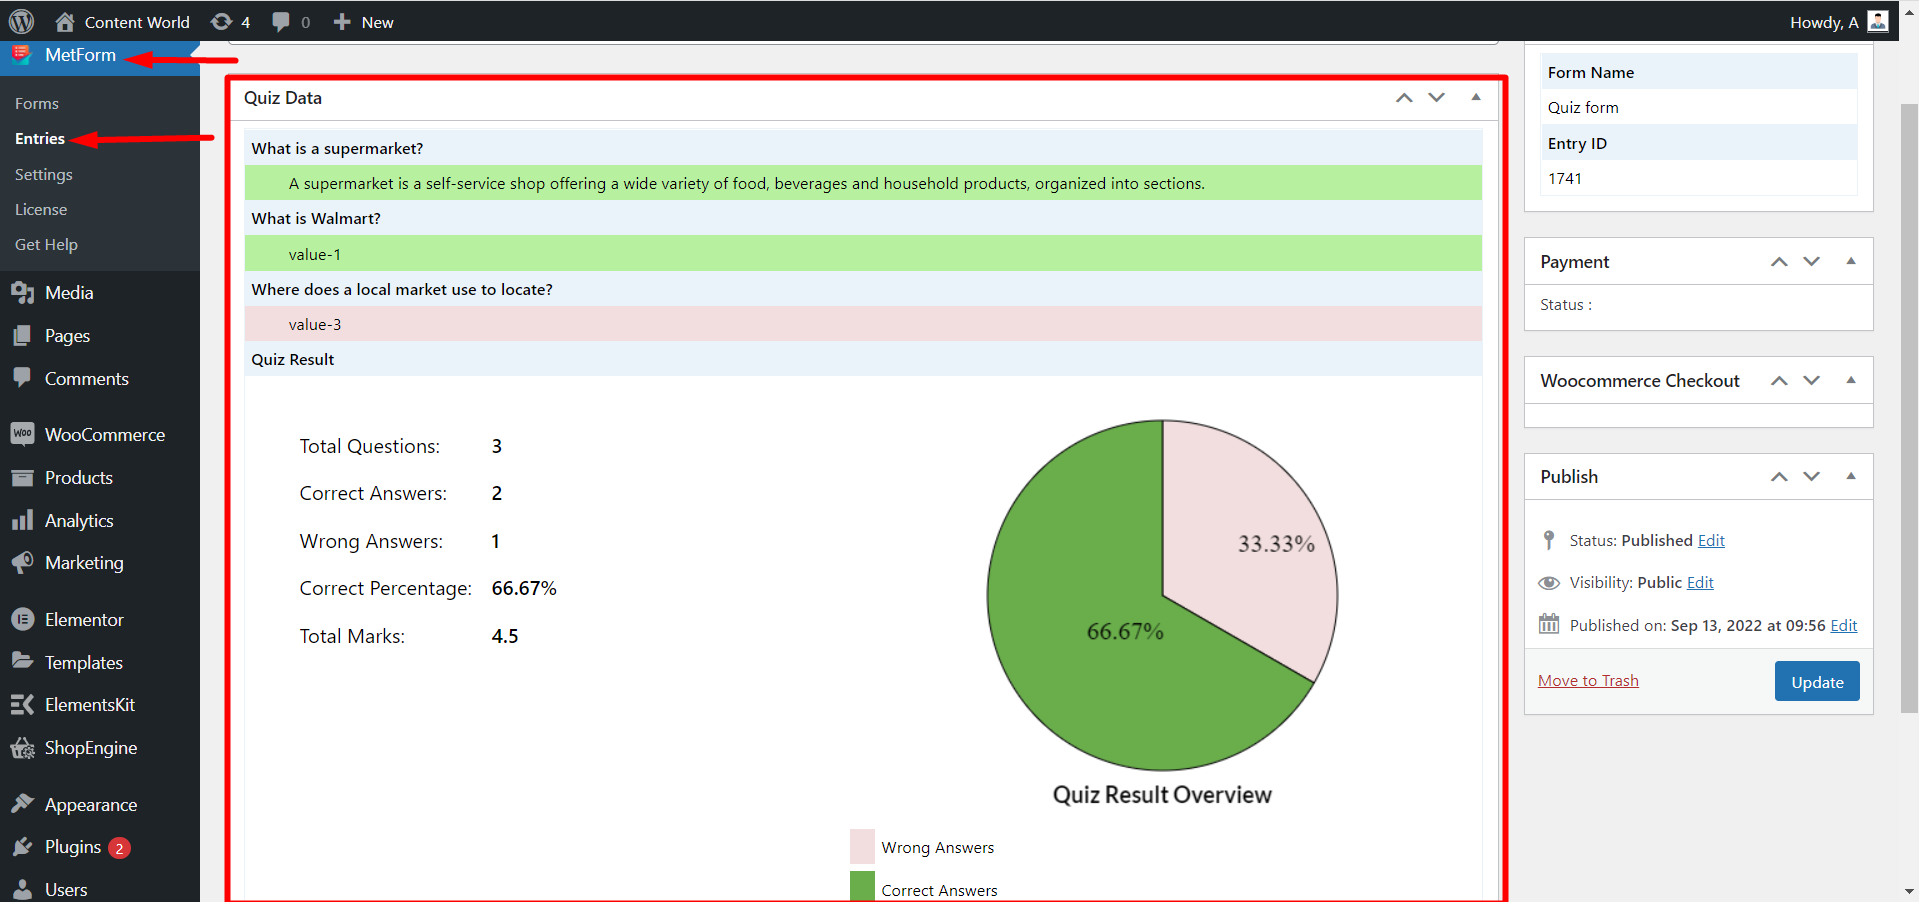
To check the quiz data and result in the overview, go to Dashboard -> MetForm -> Find Entries -> Find your quiz form and click view. Here is our result after submitting the form according to the above recipe-
The MetForm quiz feature gives you all the customization options you need to make a beautiful quiz form. It is not complex and saves time efficiently while ensuring a standard form structure.


