WP Social is an all-in-one WordPress plugin that helps you to make your website social media-friendly. Using the WP Social plugin, you can add WordPress login with social media, social share, and social count options to your website. This WordPress social media plugin integrates with popular social media like Facebook, Reddit, Twitter, Dribble, LinkedIn, and more.
WP Social Login lets you add a social login button on your website’s login page. To add a social button, you have to configure the social login settings from your WordPress dashboard. Read this documentation to learn how to configure WP Social login settings.
Step-1: Configure login setting of WP Social Login #
To configure WordPress login with social media using WP Social.
- Login to your WordPress site and go to WP Social > Social Login.
- Under the Global Settings, you will find options that help you configure WP Social login settings.
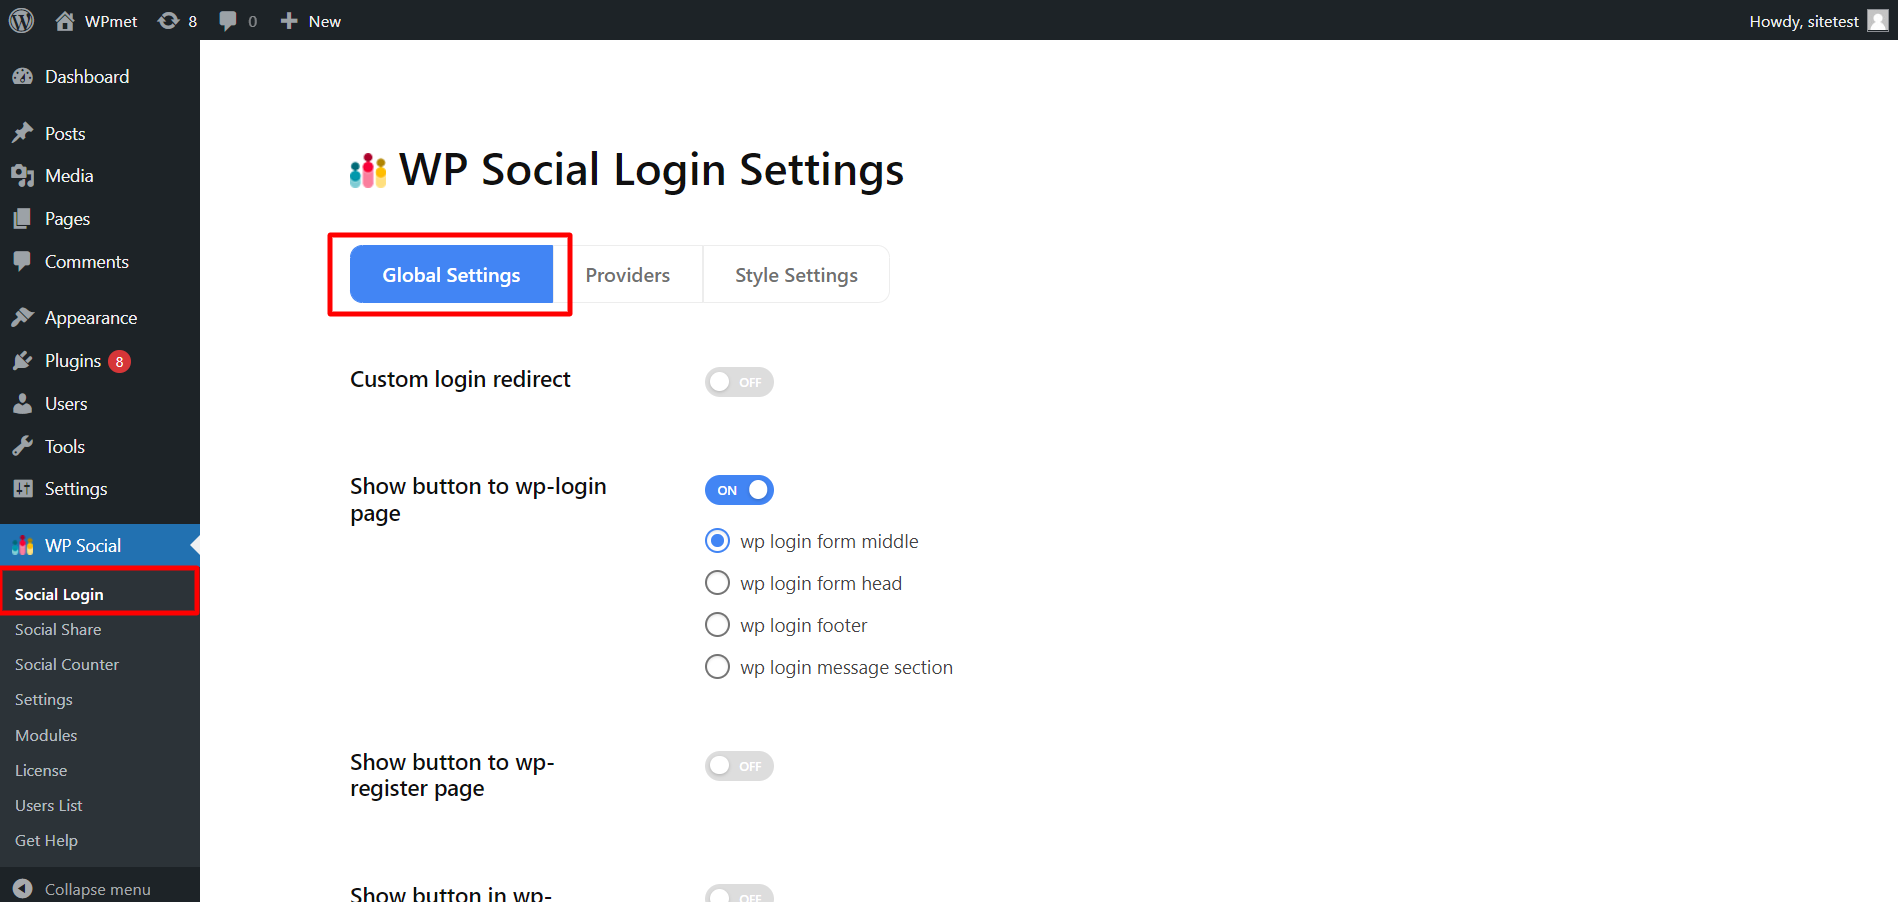
Here are the WP Social features to configure WordPress login with social media.
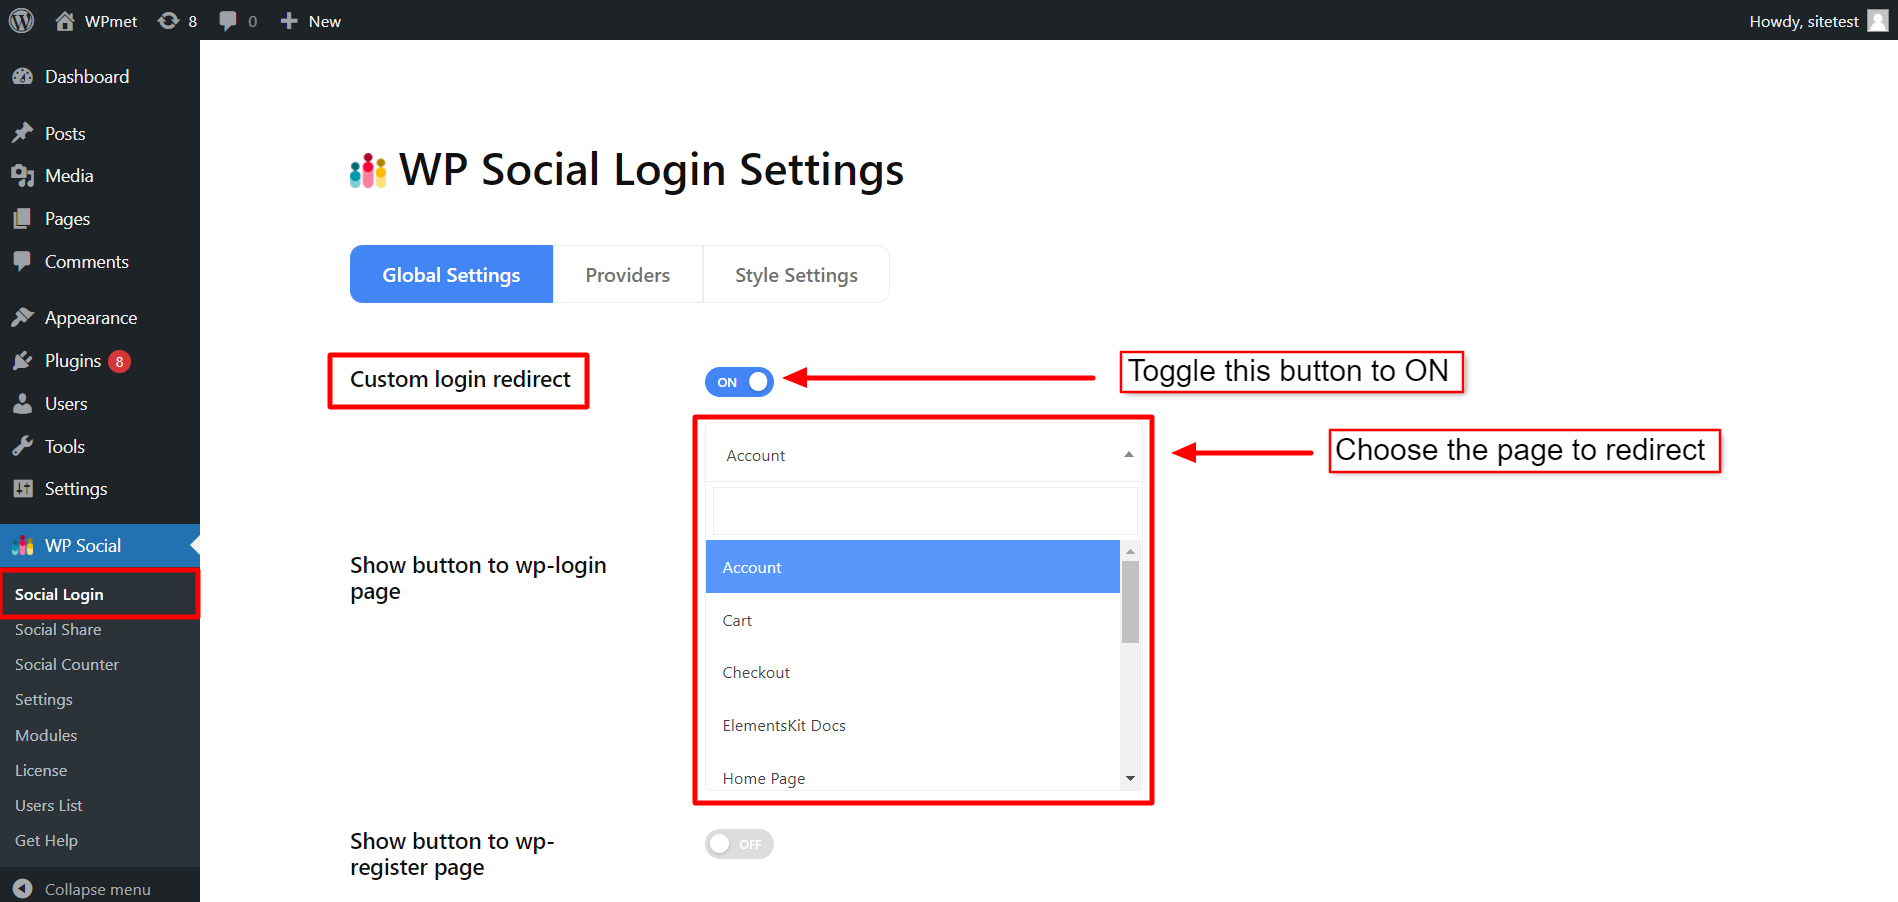
1.1. Custom login redirect #
Choose which page you want your visitors to see after the log in to your website.
- Enable the Custom login redirect option.
- Choose the page to redirect from the drop down list.
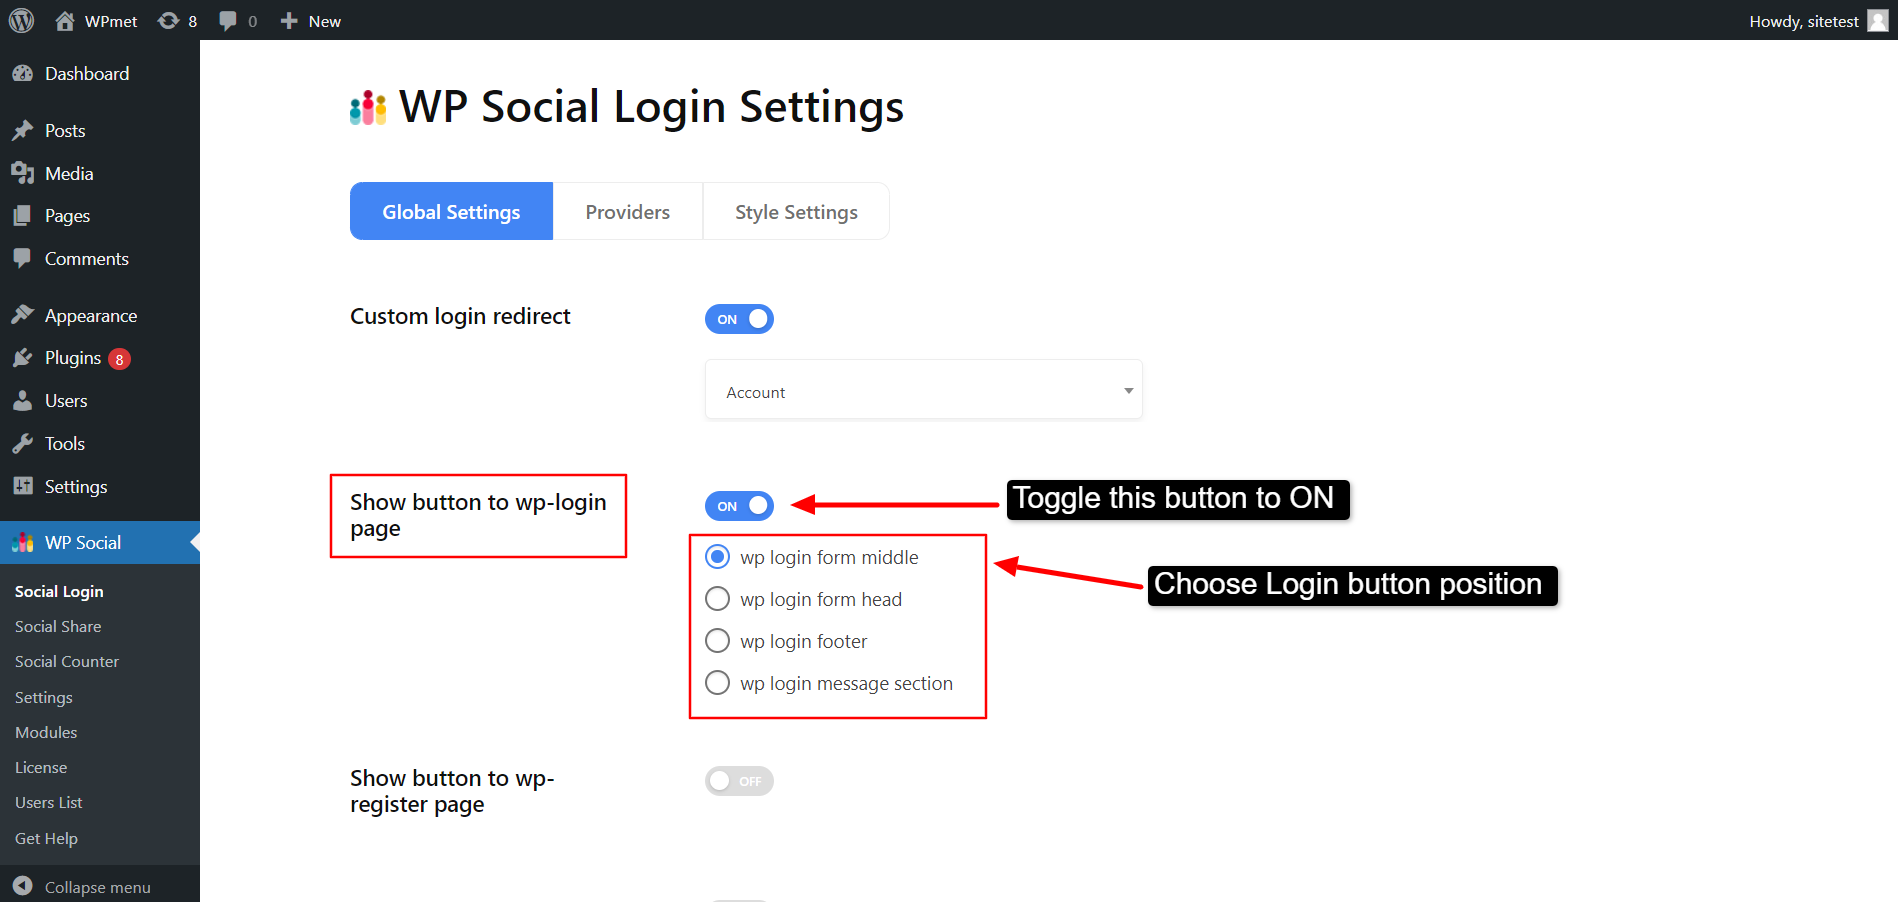
1.2. Show button to WP-login page #
This feature lets you decide the login button’s position on the login page. To Show button to wp-login page:
- Switch the toggle to ON to enable the feature.
- Choose where to show the button on the login page from the given options: at the middle, header, footer, or message section.
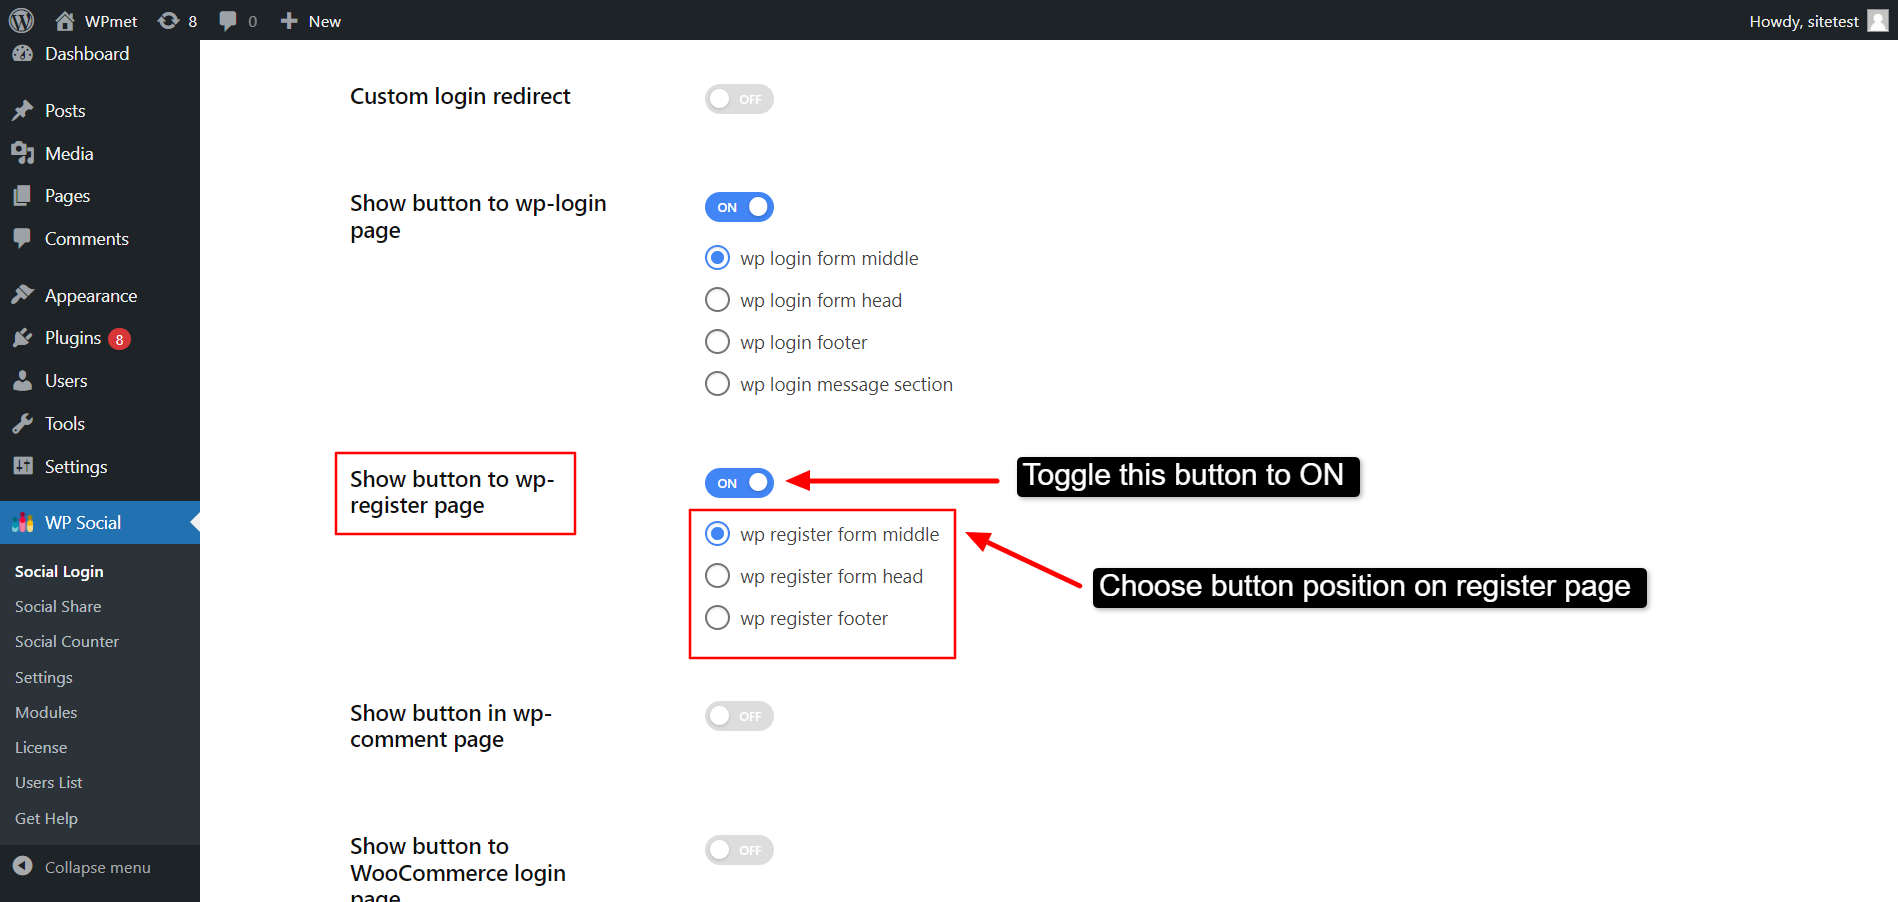
1.3. Show button to WP-register page #
You can add one-click registration with social media accounts by showing a button on the register page. To Show button to WP-register page:
- Switch the toggle to ON to enable the feature.
- Choose the position from the following options: at middle, header, or footer.
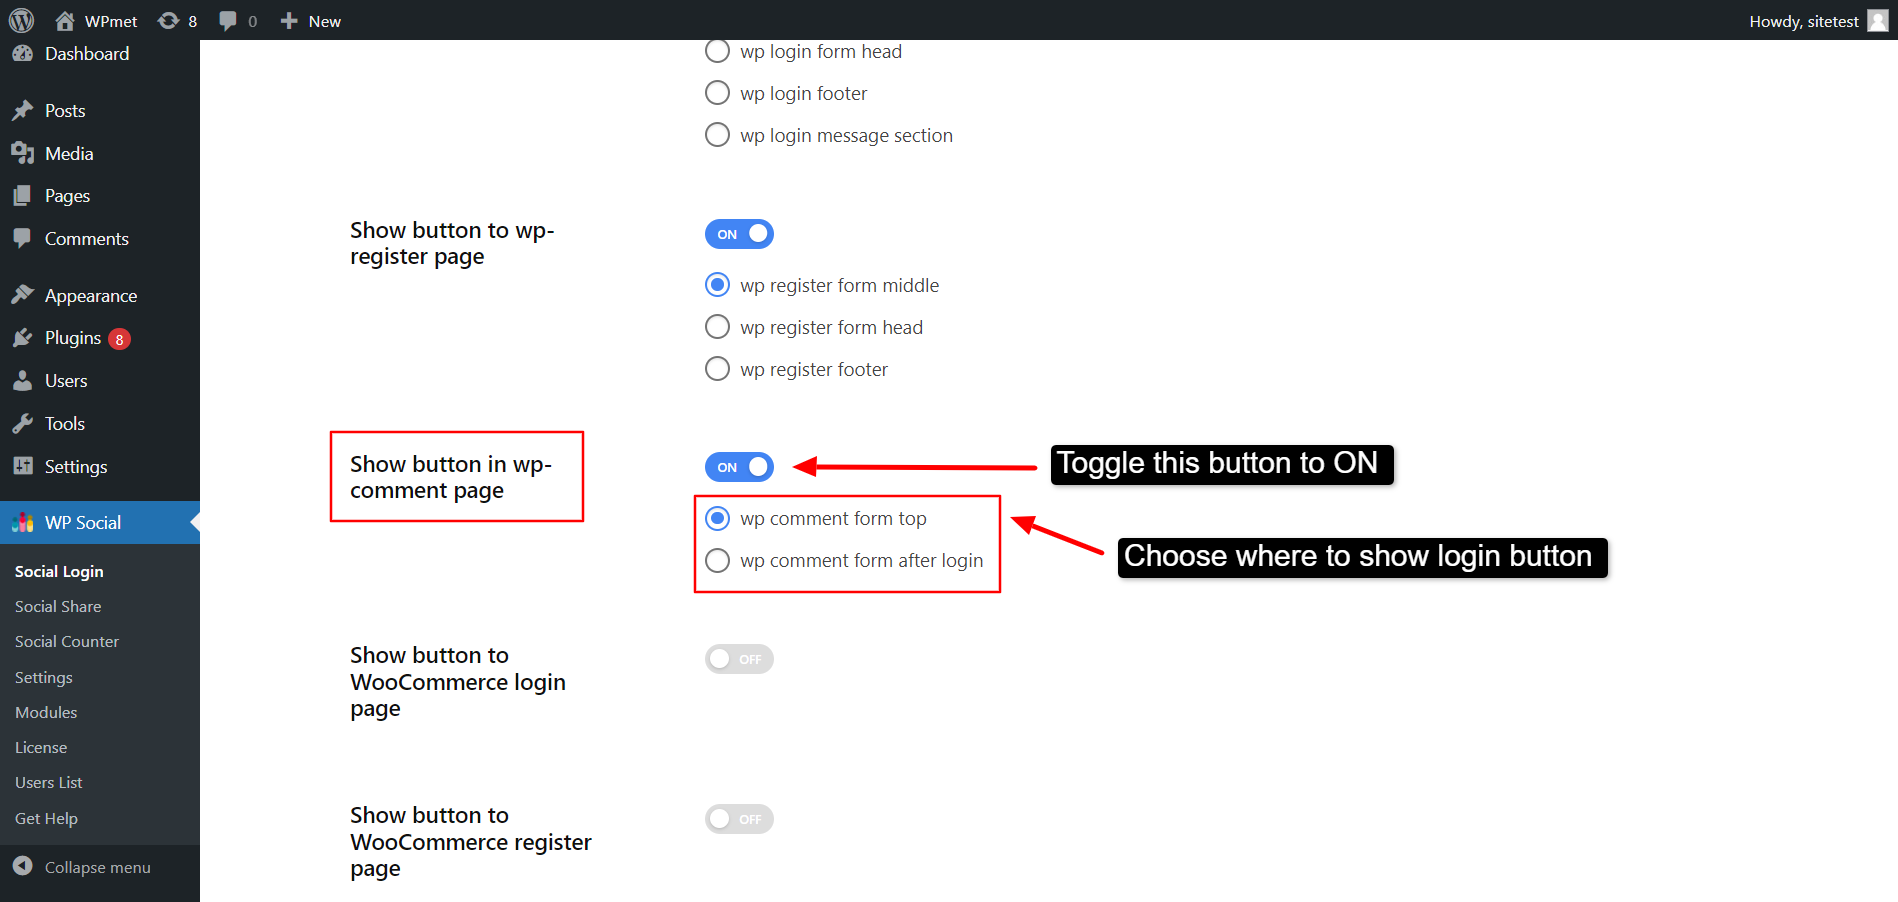
1.4. Show button in WP-comment page #
You can also show a social login button in the comments. To show button in WP-comment page:
- Enable the feature by switching the toggle to ON.
- Choose where to show the login button.
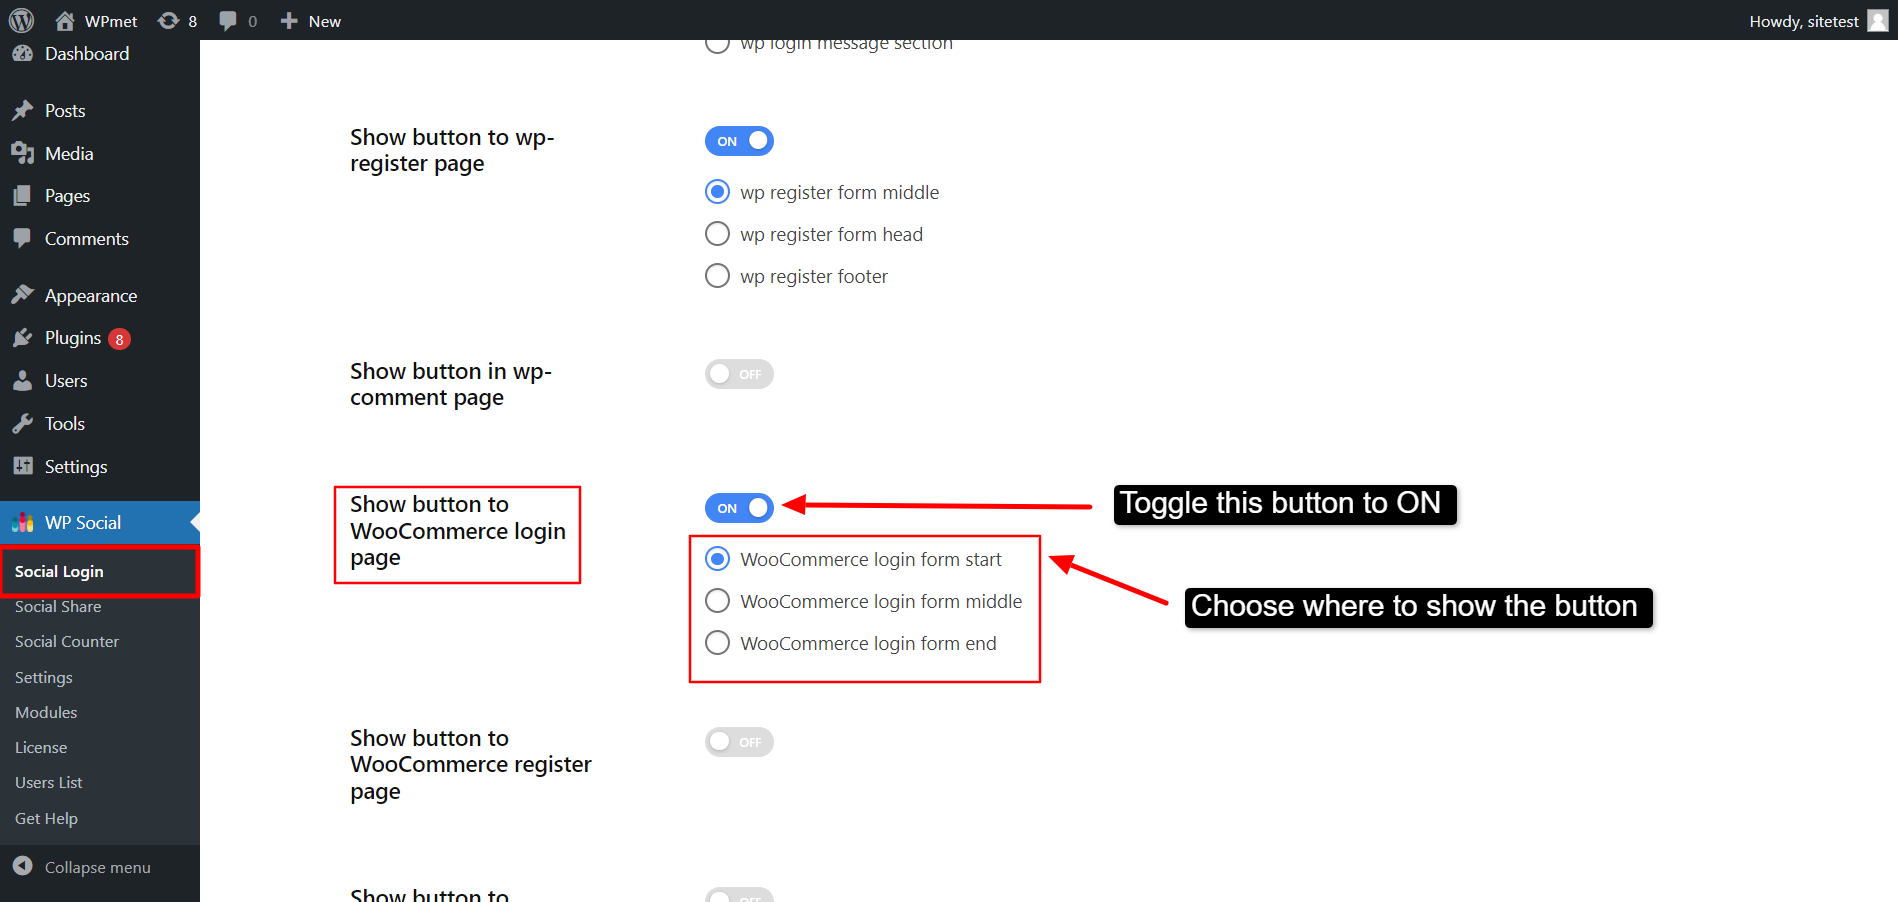
1.5. Show button to WooCommerce login page #
WP Social gives you the option to show login button to WooCommerce login page too. To use the feature:
- Switch the toggle to ON to enable the feature.
- Choose where to show the button from the given options: at start, middle, or end.
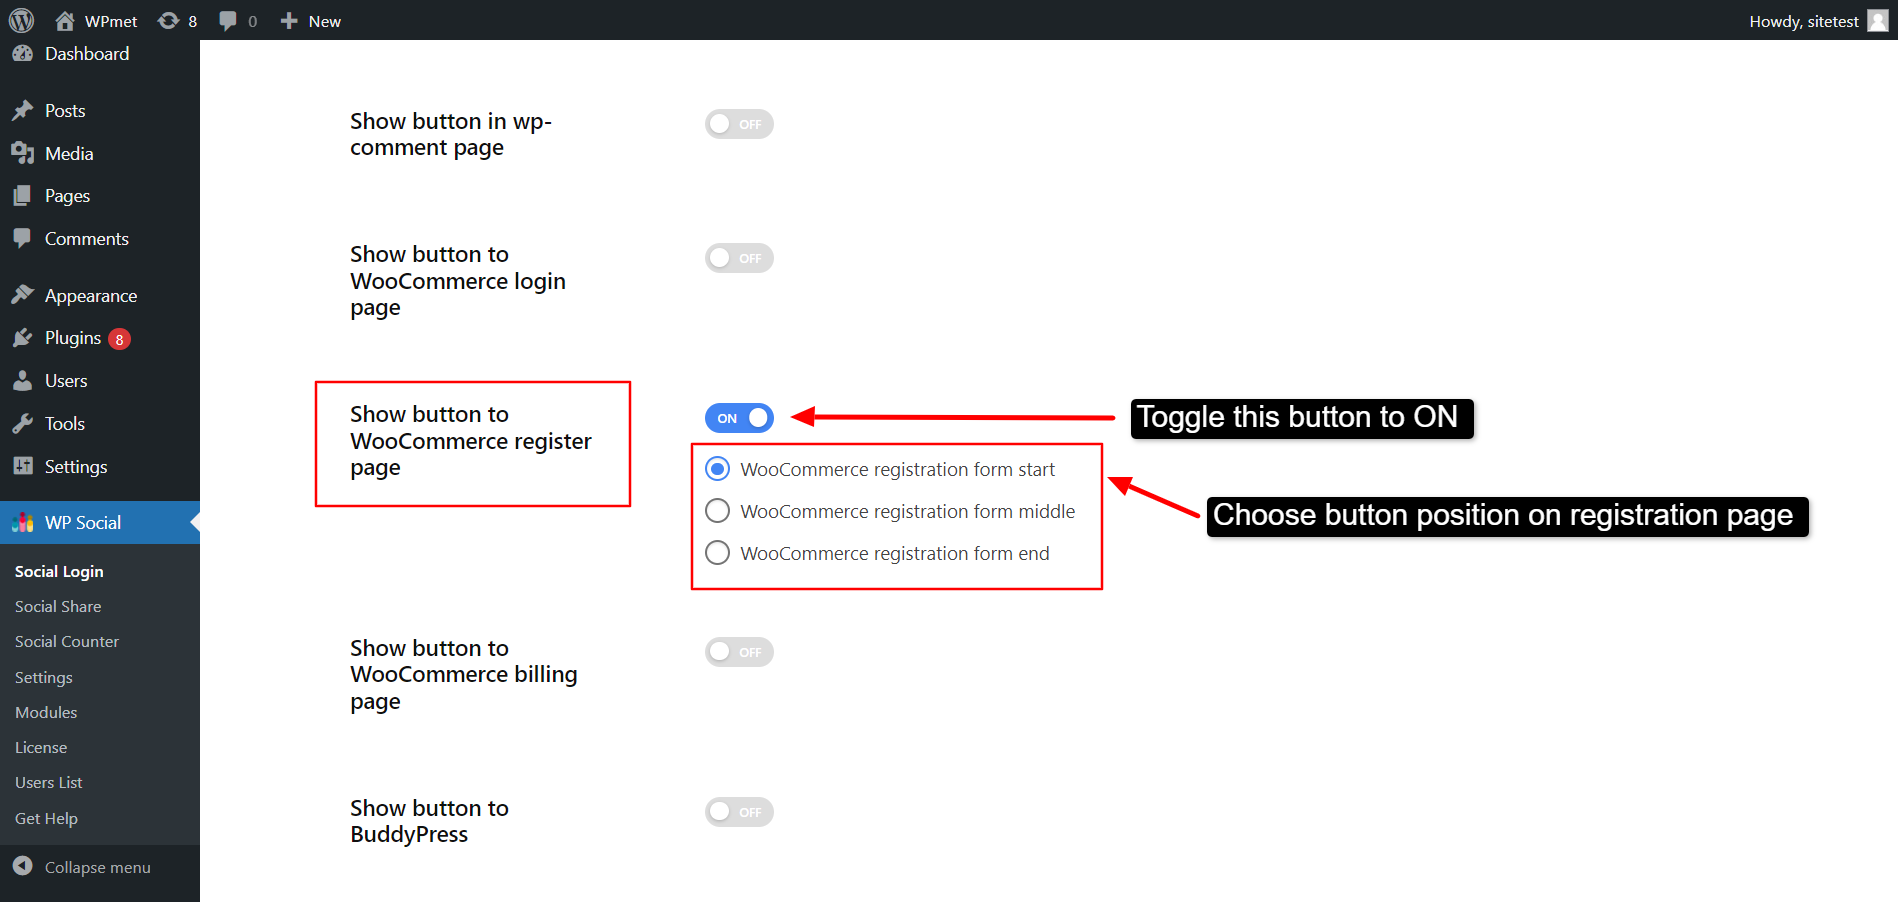
1.6. Show button to WooCommerce register page #
You can add one-click WooCommerce registration with social media accounts by adding a button on the register page. To show button to WooCommerce register page:
- Enable the feature by switching the toggle to ON.
- Choose to show the button on the registration page at the Start, Middle, or End.
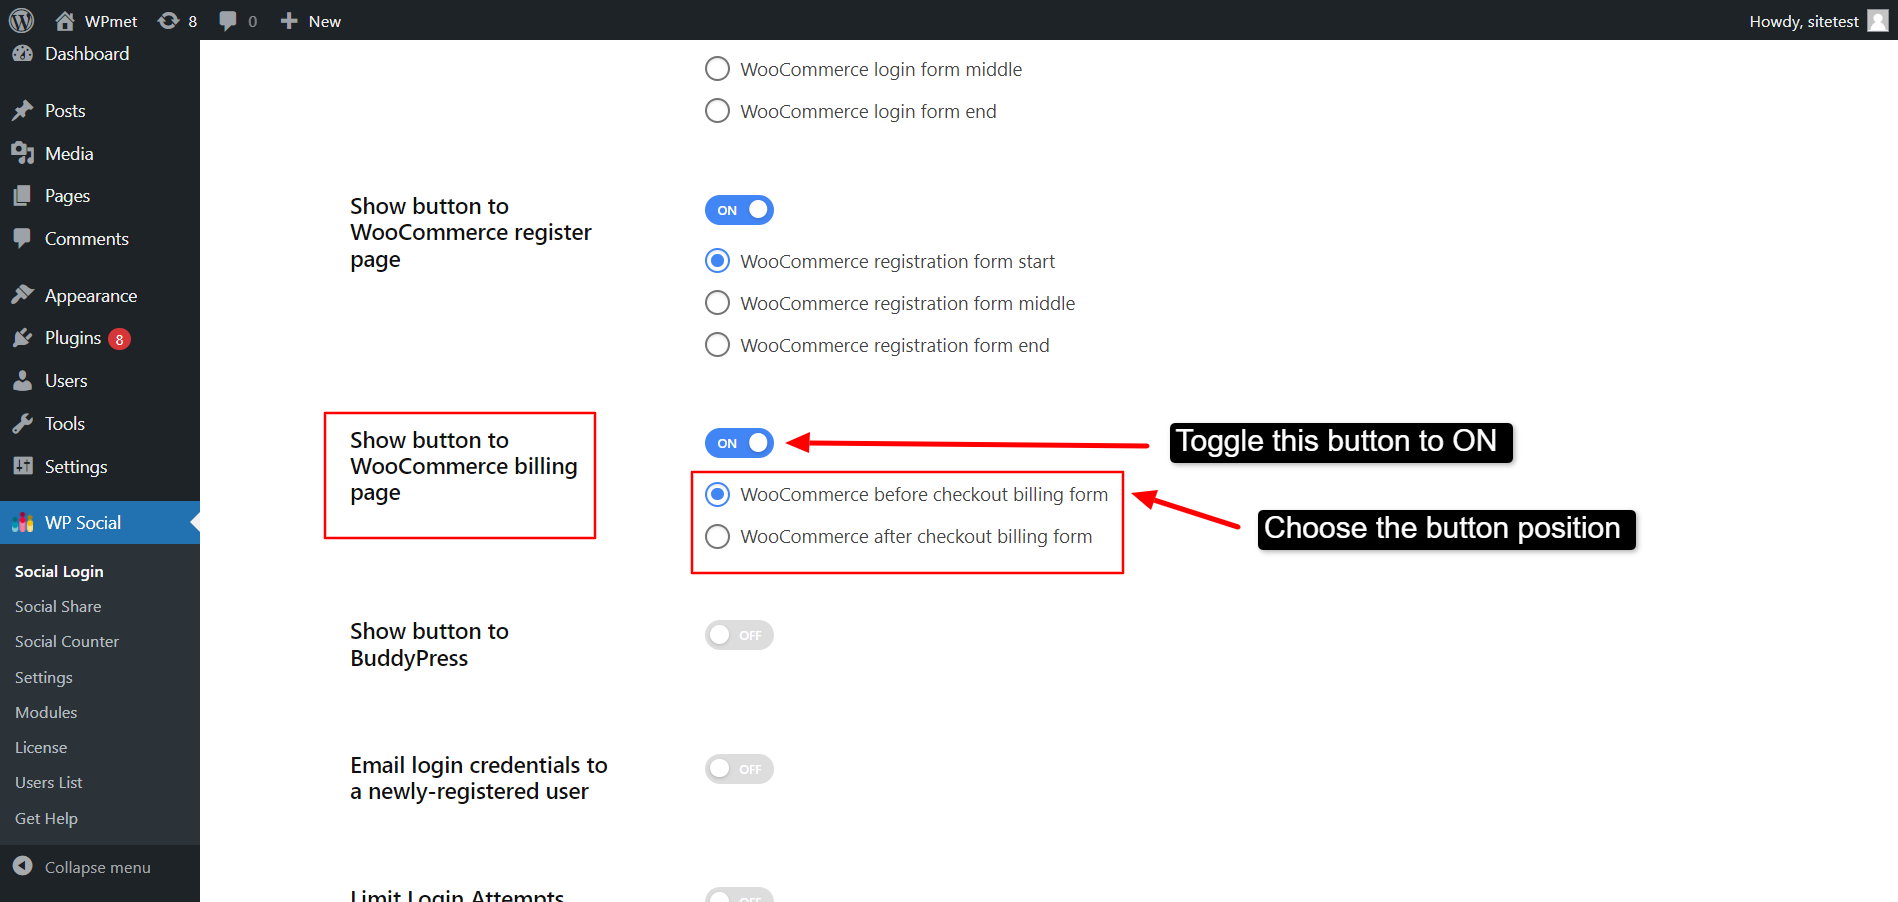
1.7. Show button to WooCommerce billing page #
The social login button can be added to WooCommerce billing page too. To show button to WooCommerce billing page:
- Switch the toggle to ON to enable the feature.
- Choose whether to show the button before checkout billing form or after checkout billing form.
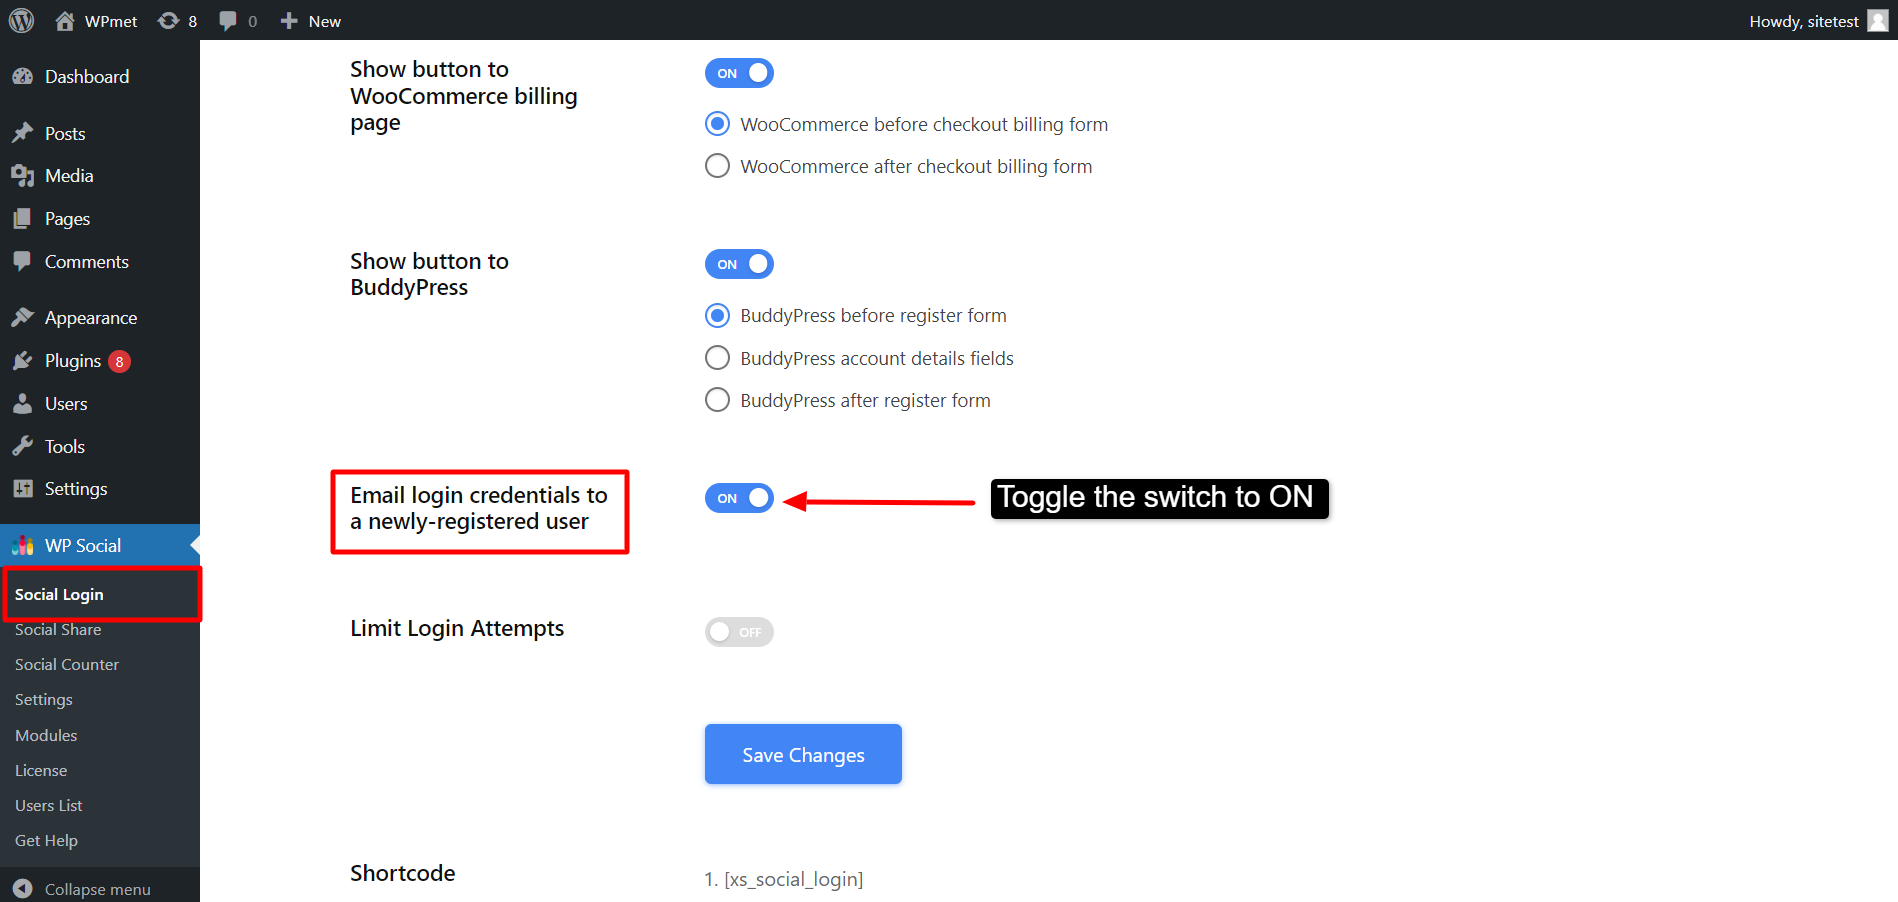
1.8. Show button to BuddyPress #
You can decide to show button to BuddyPress. For that,
- Switch the toggle to ON to enable the feature.
- Choose where to show the button from the given options: before register form, after register form, and account details fields.

1.9. Email login credentials to a newly-registered user #
You can also enable email login credentials for a newly-registered user.
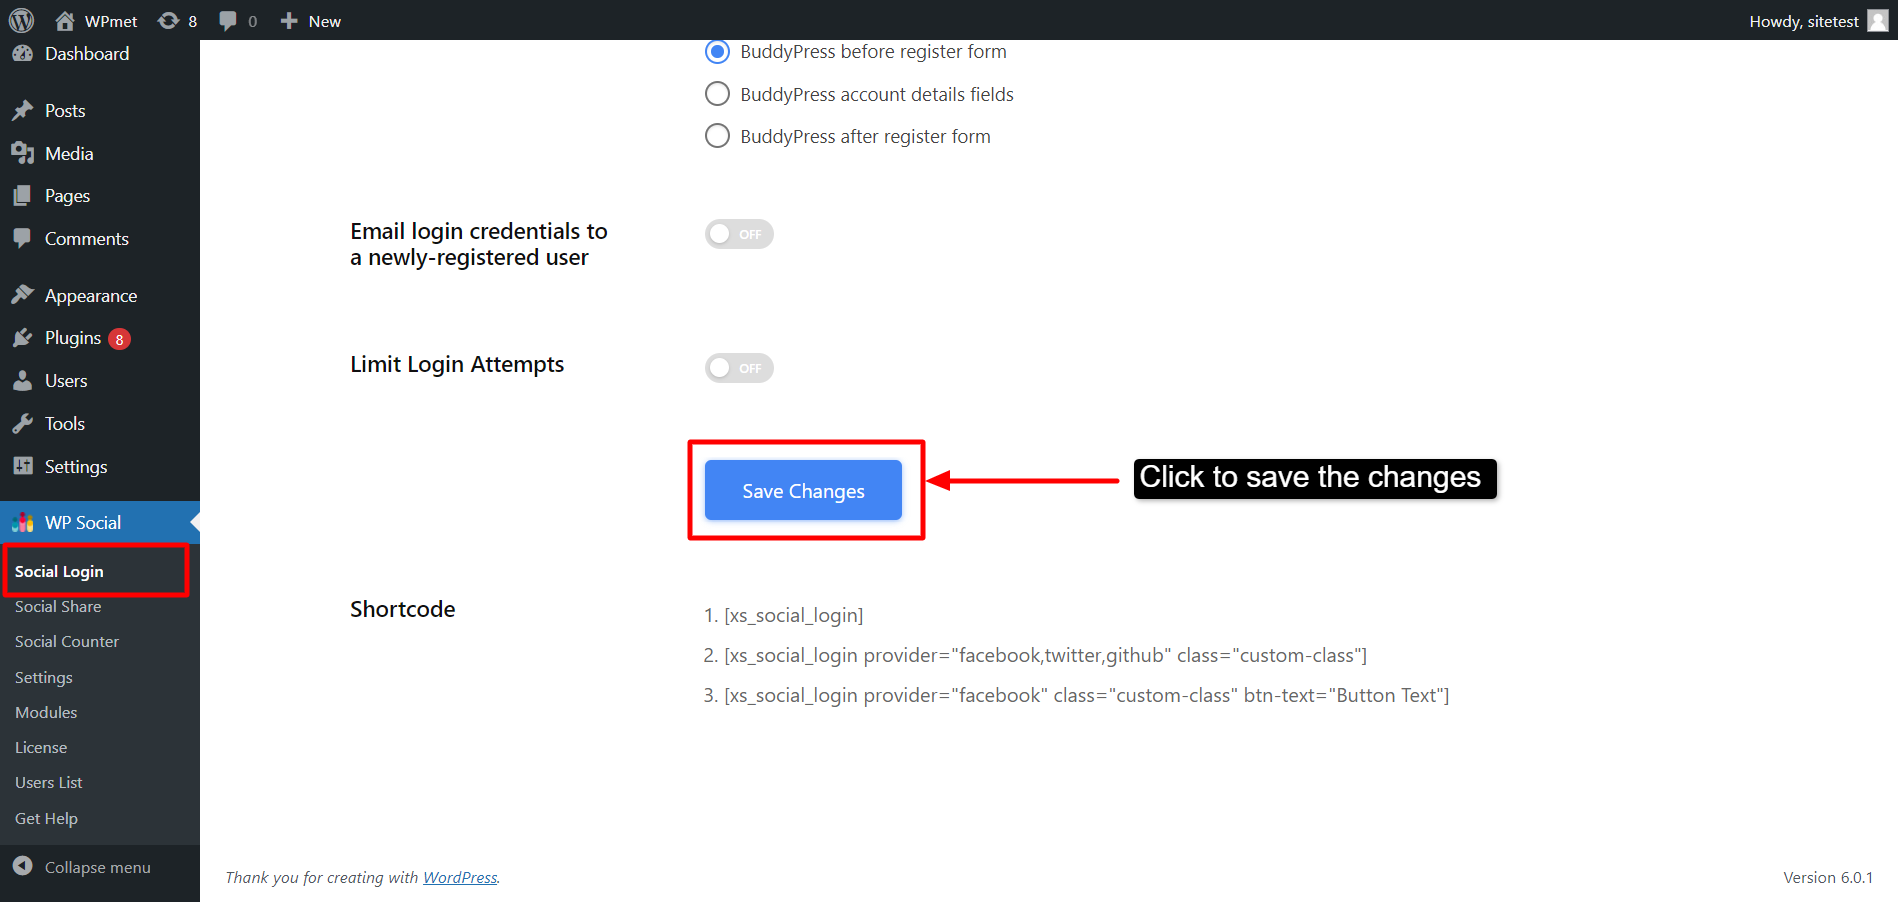
1.10. Limit login attempts #
WP Social allows you to limit login attempts on your site. You can decide how many failed login attempts (wrong username/ wrong password) you will allow at a time.
- Enable the feature by switching the toggle to ON.
- Set the number of Maximum attempts (failed login attempts).
- In the Time Lockout (in Minute) field, set the time to lock the login attempts after the user exceeds the maximum number of attempts with failed login.
- In the Wait for reset (in Minute) field, set how long your users have to wait for a reset after exceeding the maximum attempts.

Finally, click the Save Changes button to finalize the settings.
Step-2: Enable Social Platform for Login #
After that, you get to choose which social platforms you want to add to the login options. For that,
- Navigate to WP Social > Social Login.
- Go to the Providers tab.
- Turn on the providers you want to add.
- Click on the settings to set up each app individually for login.
See the WP Social APPs documentation to learn how to configure each social app for WordPress login.
Step-3: Set styles settings for login button #
WP Social comes with dozens of button styles for WordPress login with social media. To set a button style for login button:
- Login to your WordPress site and go to WP Social > Social Login.
- Move to Style Settings tab under WP Social Login Settings.
- Browse through available styles to choose one.
- Click on the Save Changes button.
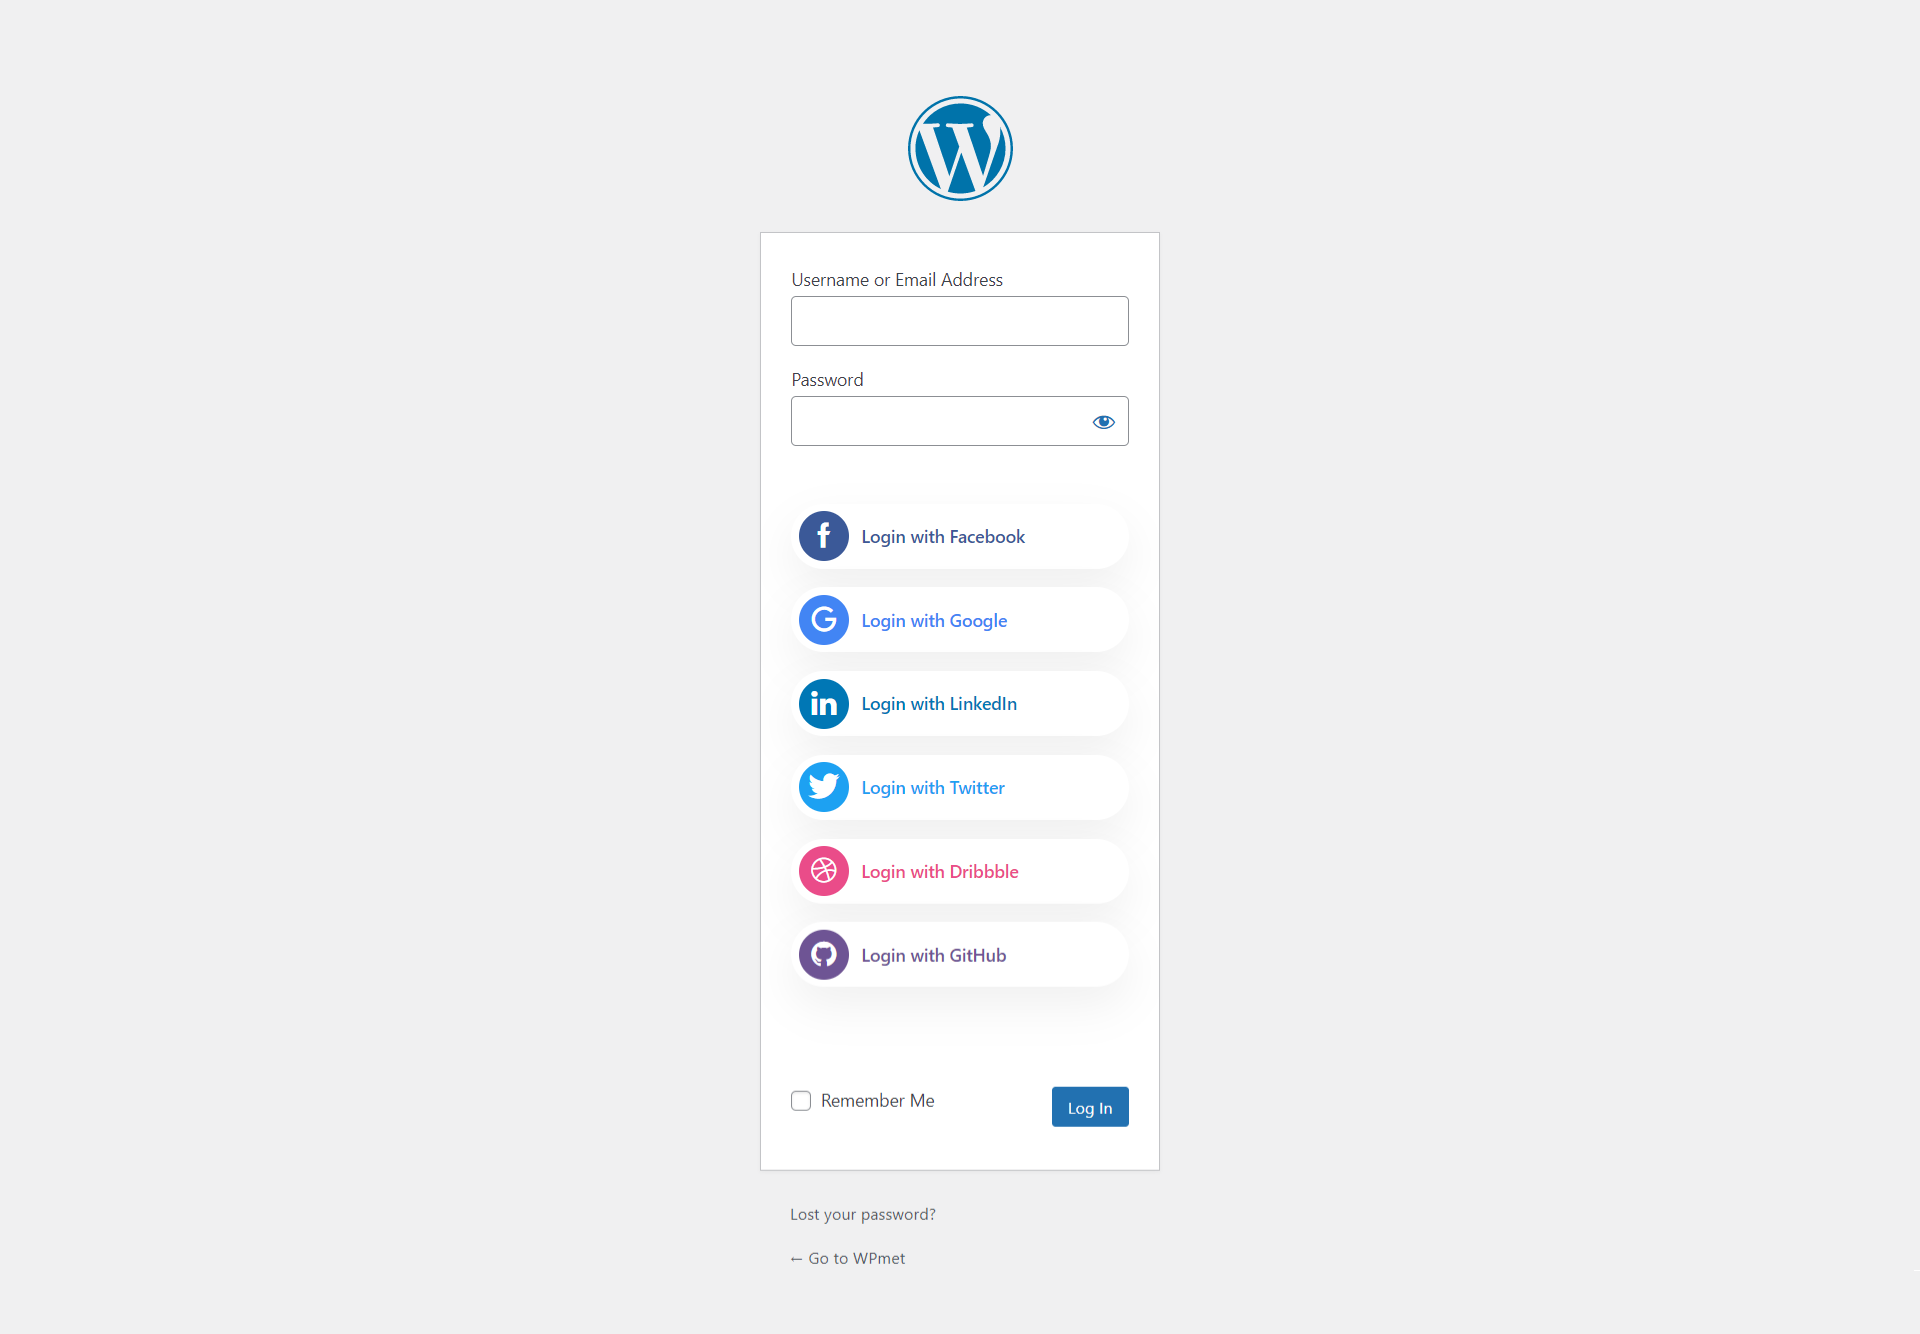
Finally you will have social login buttons added. Now your website users will be able to log in to your website using their social media accounts.