If you’re looking to create an Elementor mega menu in WordPress, ElementsKit’s Mega Menu module can make the process easy and fast. Read this documentation to learn how to create a mega menu in WordPress using ElementsKit in a few simple steps.
Overview #
ElementsKit is the all-in-one addon that gives you the best possible way to build WordPress websites with a wide range of widgets, modules, and highly customizable pre-designed templates.
That includes the Mega Menu module from the ElementsKit plugin. A mega menu is a powerful feature in WordPress that allows you to create a category-based expandable menu with flexible layouts. Elementor Mega menus are easy to use and can be a great way to show the website menu in an organized way.
Watch our video guide:
Or, follow the step-by-step instructions on how to create mega menu in Elementor:
Prerequisite: #
- Elementor Page Builder Plugin
- ElementsKit Pro
How to Create WordPress Mega Menu in Elementor #
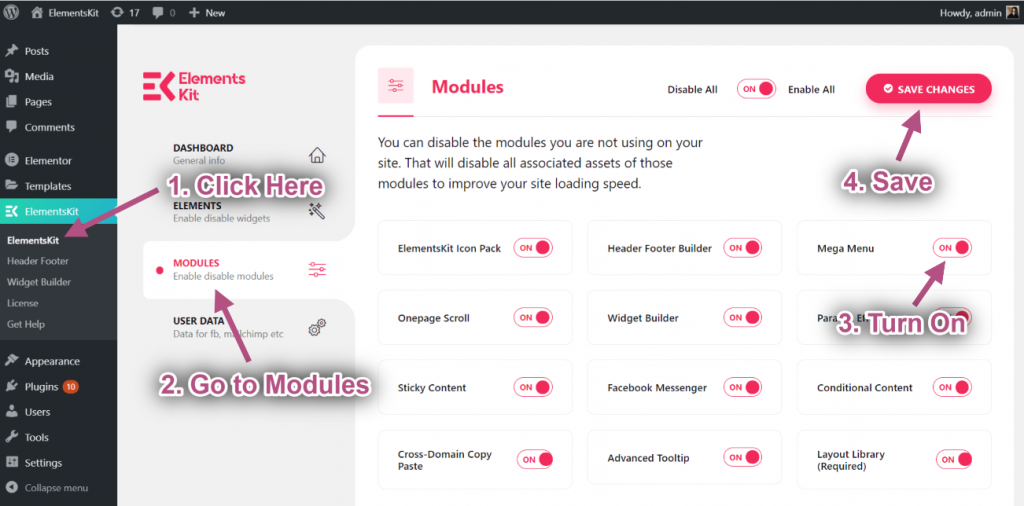
First of all, before creating an Elementor Mega Menu in WordPress make sure to enable the ElementsKit Mega Menu module from ElementsKit > Module on your WordPress dashboard.
Step #1: Configure Menu #
To create a WordPress mega menu on your website,
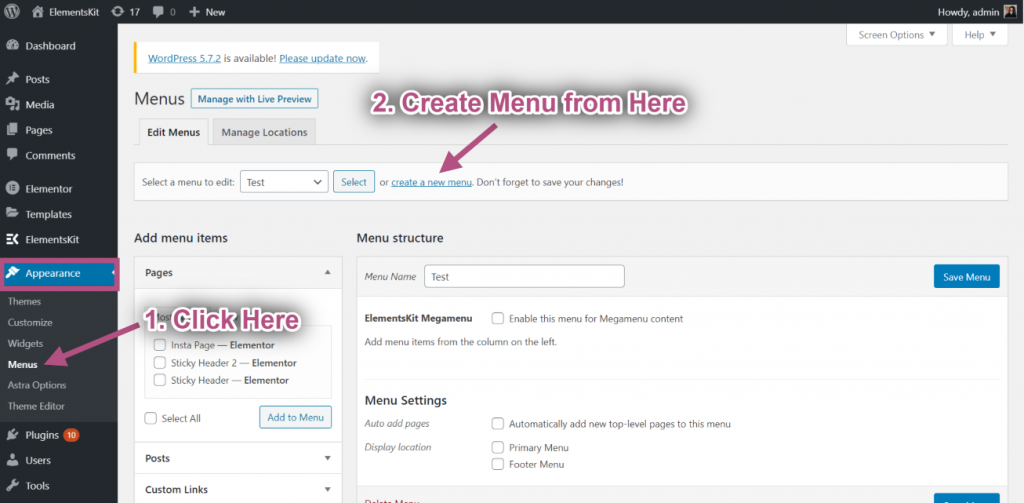
- Navigate to Appearance > Menus from the WordPress dashboard.
- Click on Create a new menu.
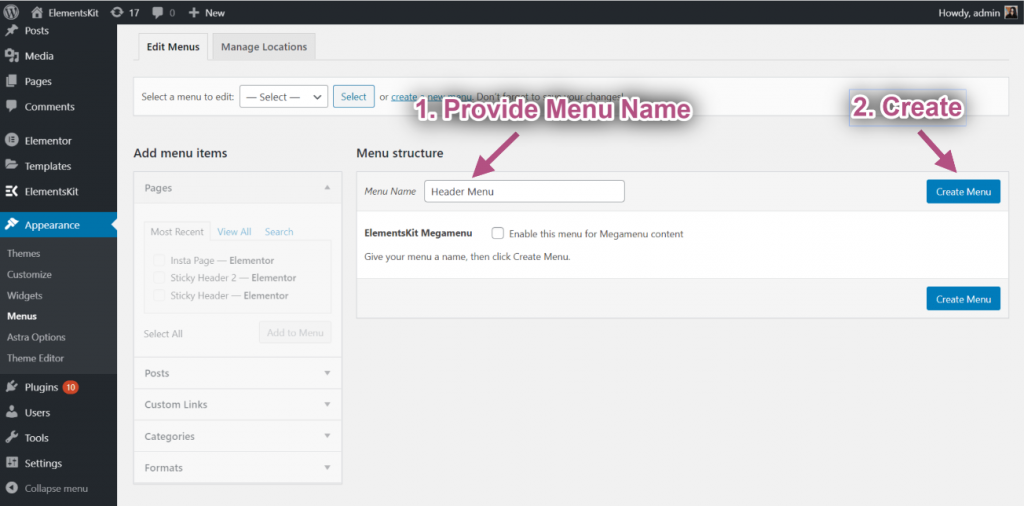
- Enter a Menu Name.
- Click on the Create Menu button.
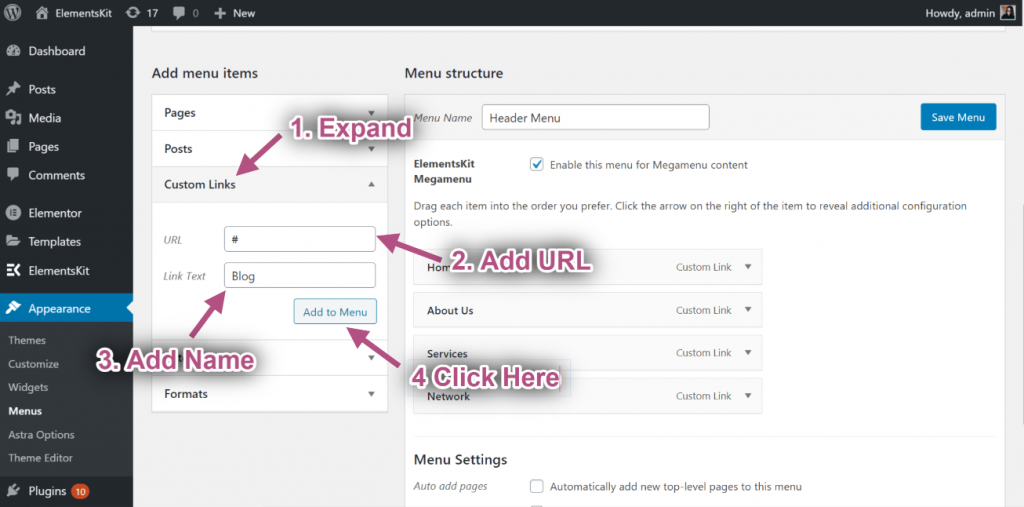
Now you can add items to the mega menu. For that,
- Expand Custom Links on the “Add menu item” on the right column.
- Enter a URL and Link Text.
- Click on Add to Menu.
Then add other menu items in the same way.
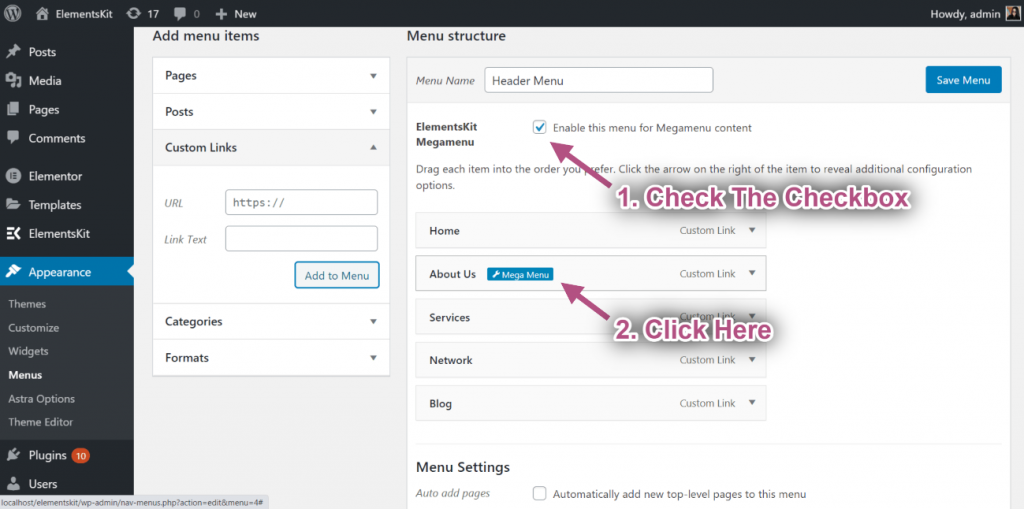
After that, check the checkbox for “Enable this menu for Megamenu content”. When the mega menu is enabled, you will click mega menu settings icon when you hover on the menu items.
Step #2: Customize Elementor Megamenu Content #
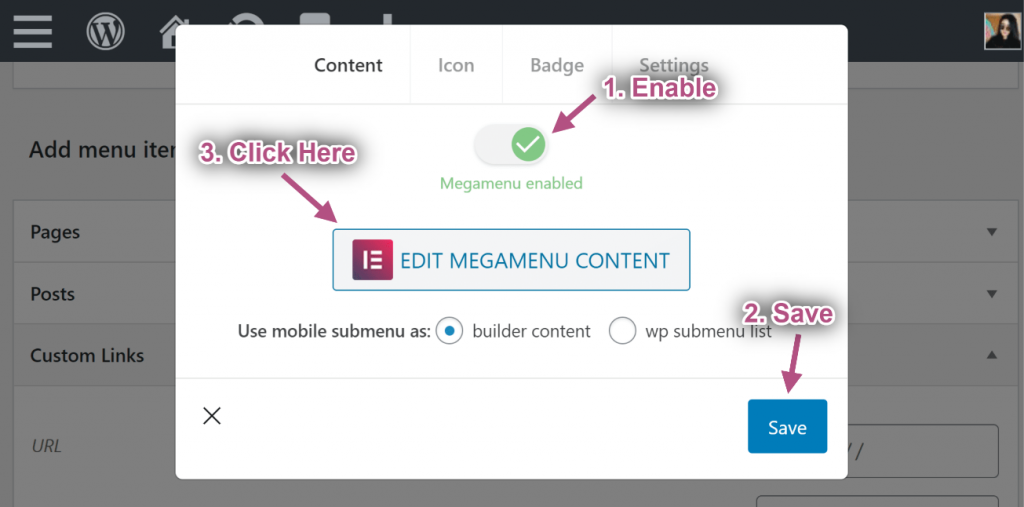
When you click on the mega menu settings icon, a popup will open. On the popup,
- Toggle button to enable Mega Menu.
- Click on the Save button.
- After that click the EDIT MEGAMENU CONTENT button. It’ll take you to the Elementor editor button.
- Click the ElementsKit Template Library Icon
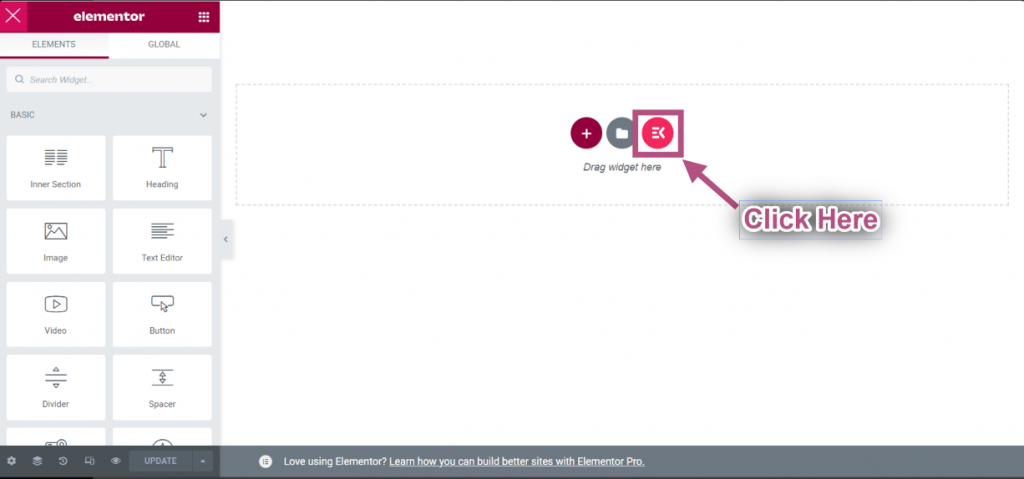
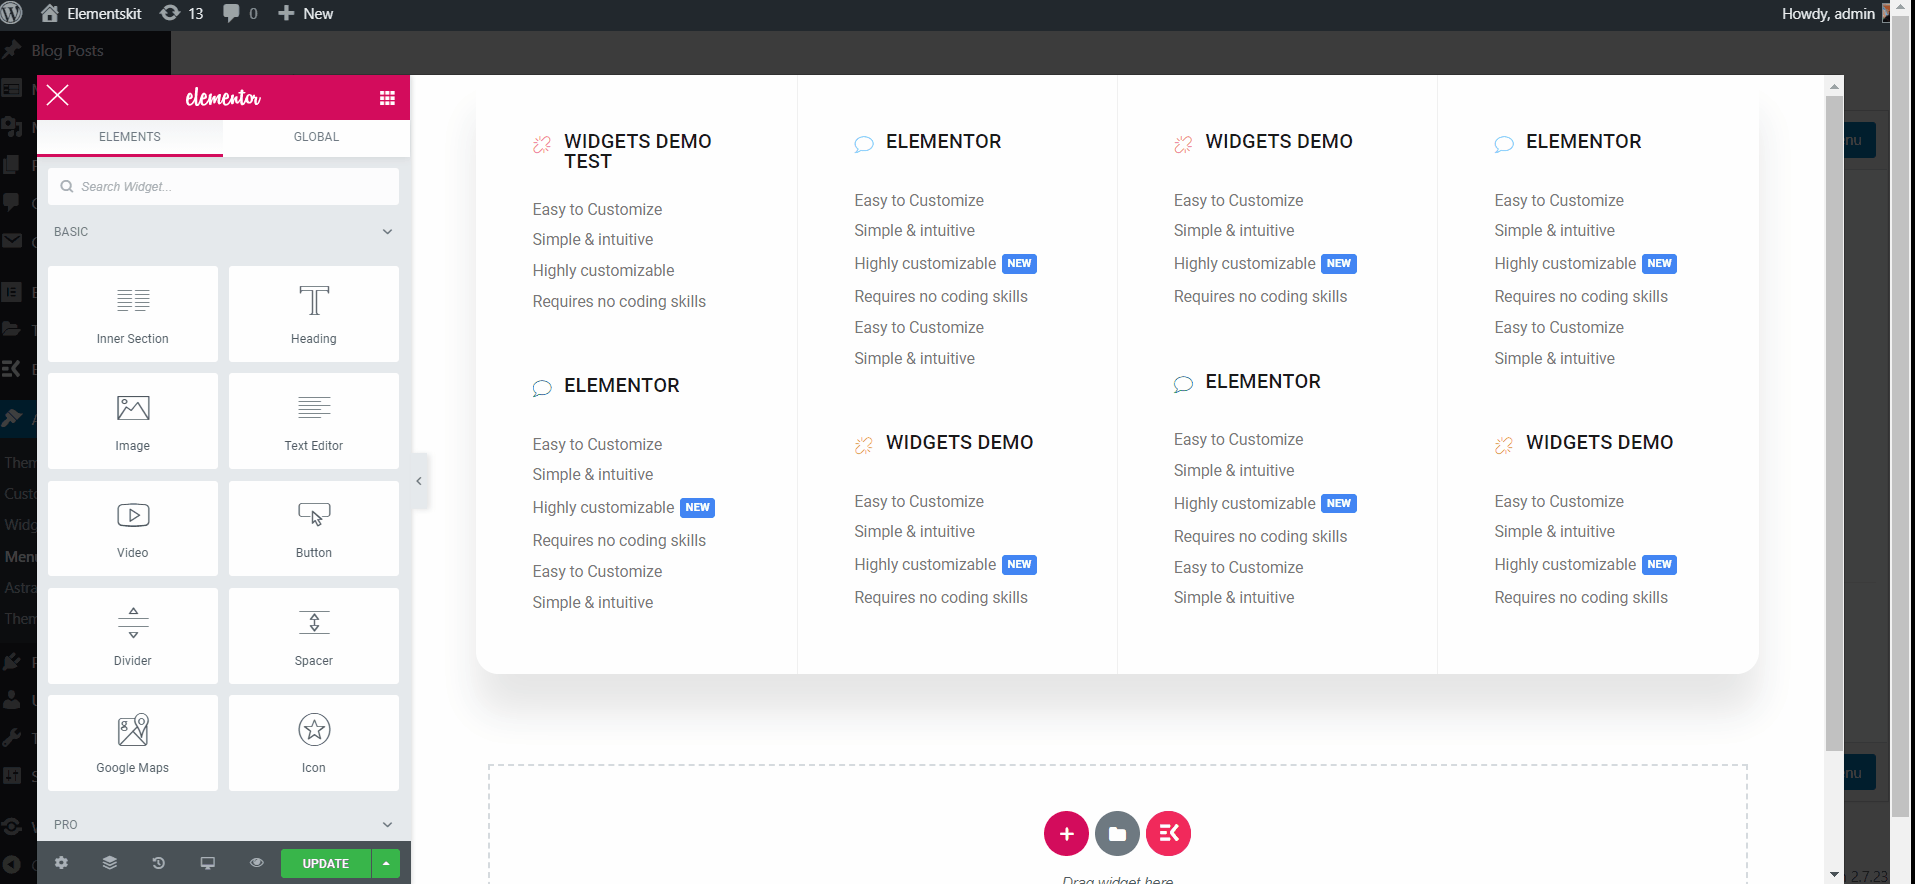
- Go to Sections=> Click on the Category=> Select Megamenu from the list.
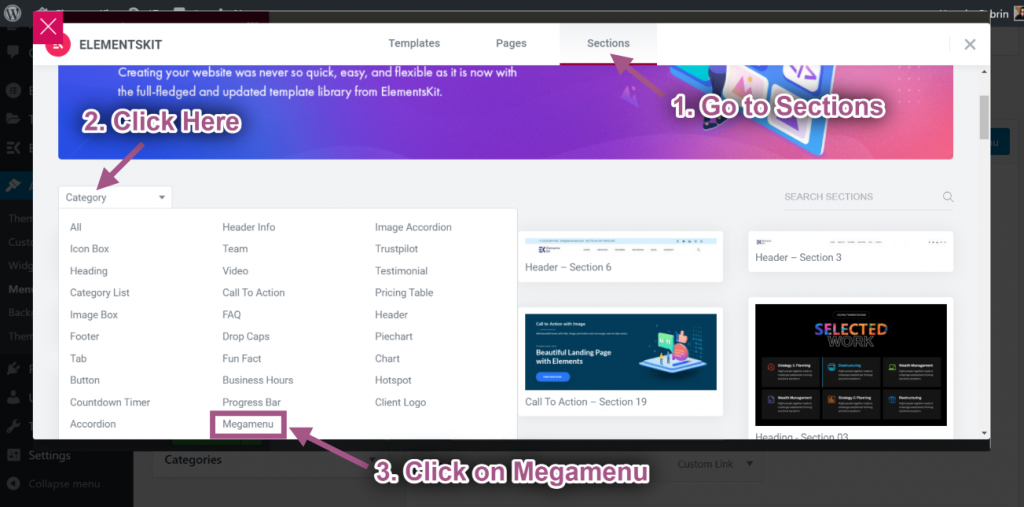
- Insert any Elementor Mega Menu Content.
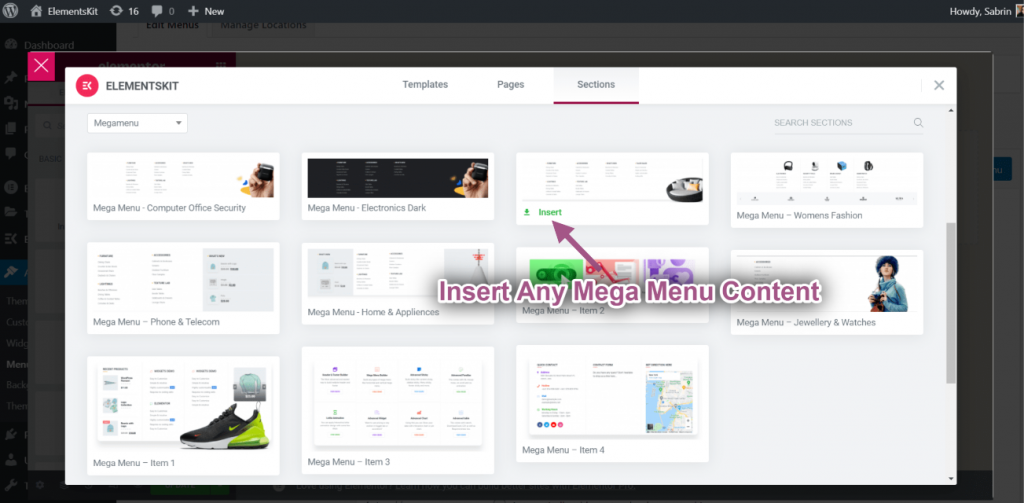
- You’ll see your inserted item will display.
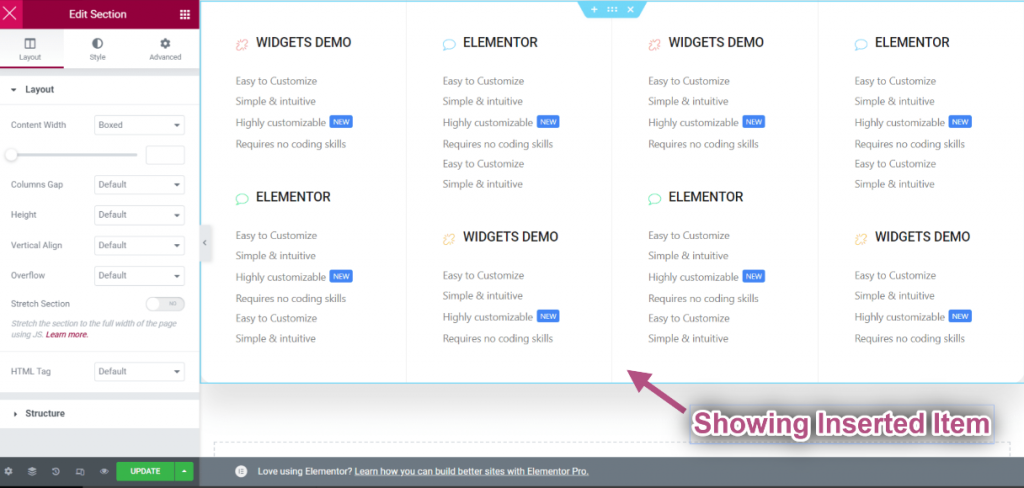
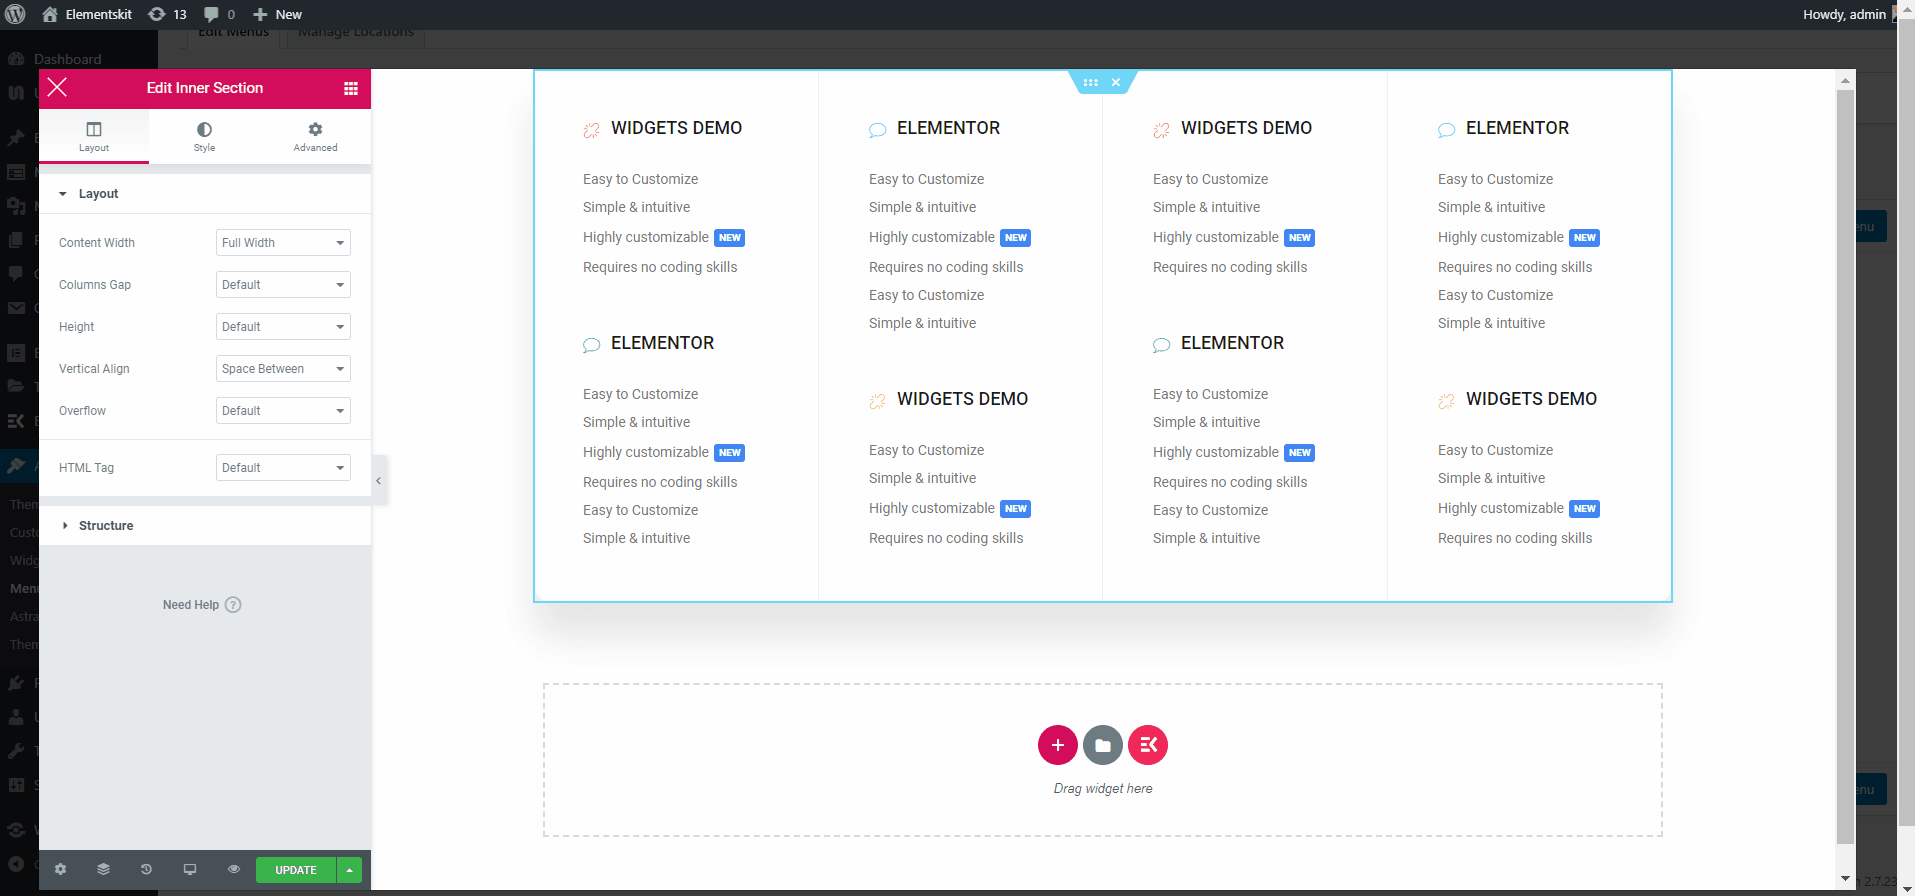
Control Layout #
- Edit the Inner section by clicking the dotted Section.
- Content Width Box: Customize your Content Width by dragging Right or Left.
- Content Full Width: Select Full width.

Select Column Gap #
- Column Gap=> Select your Column Gap from the dropdown.
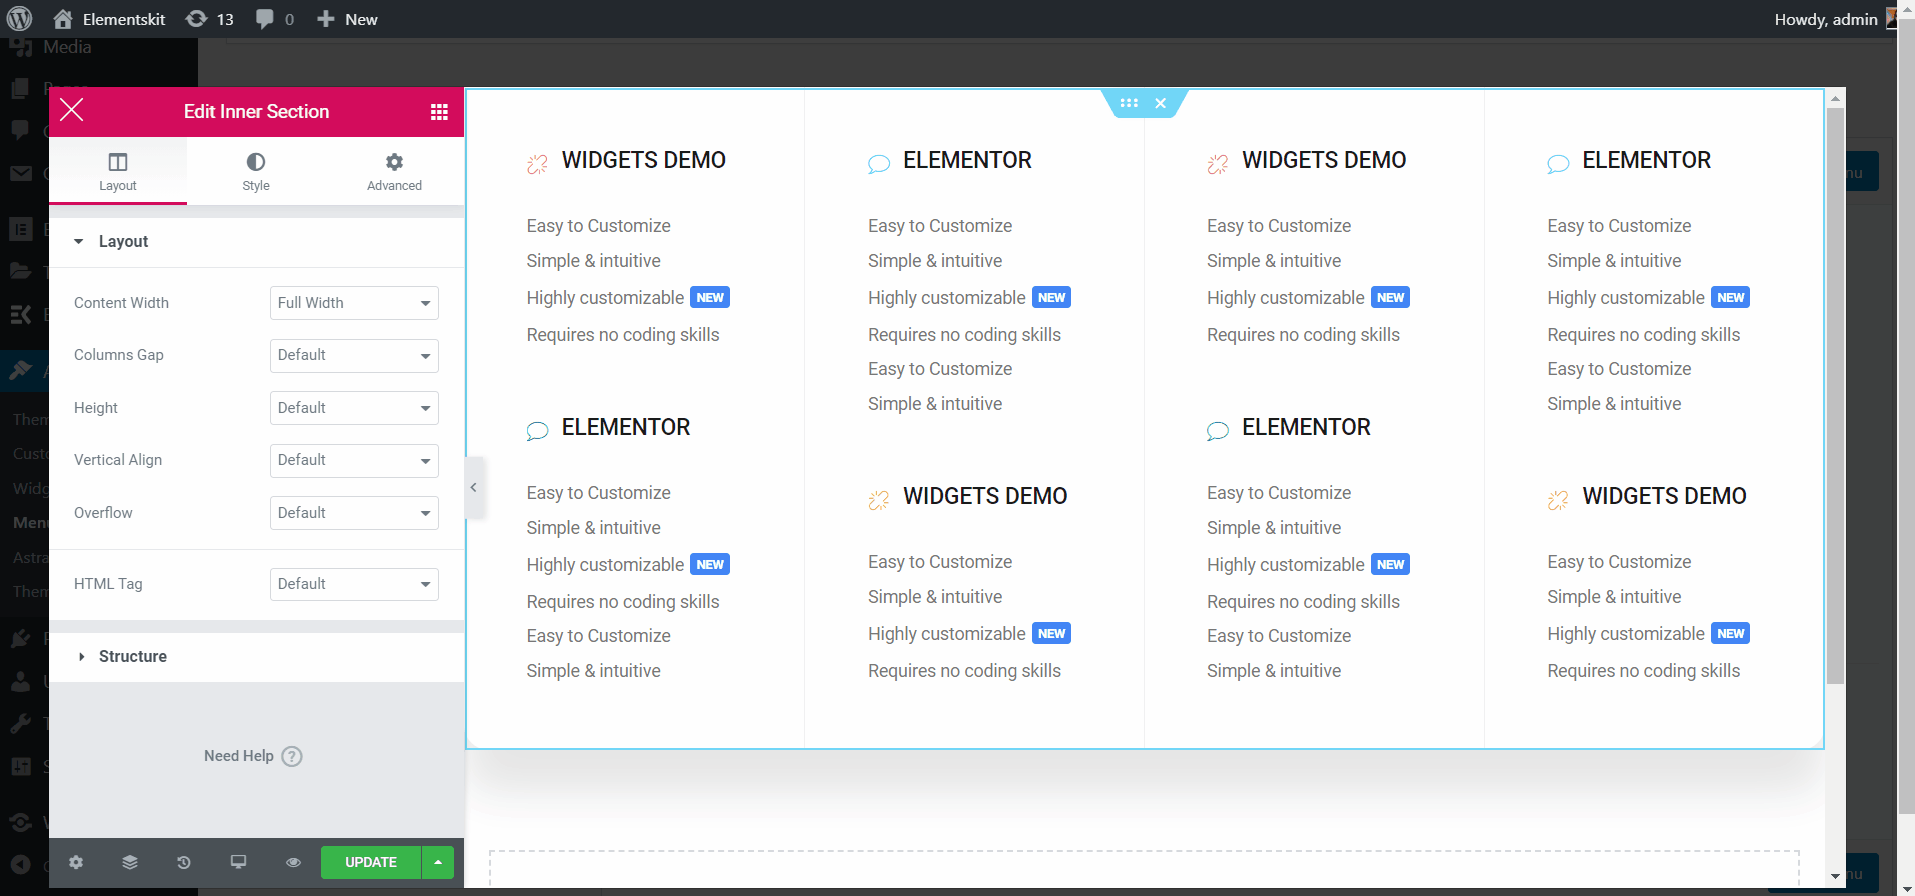
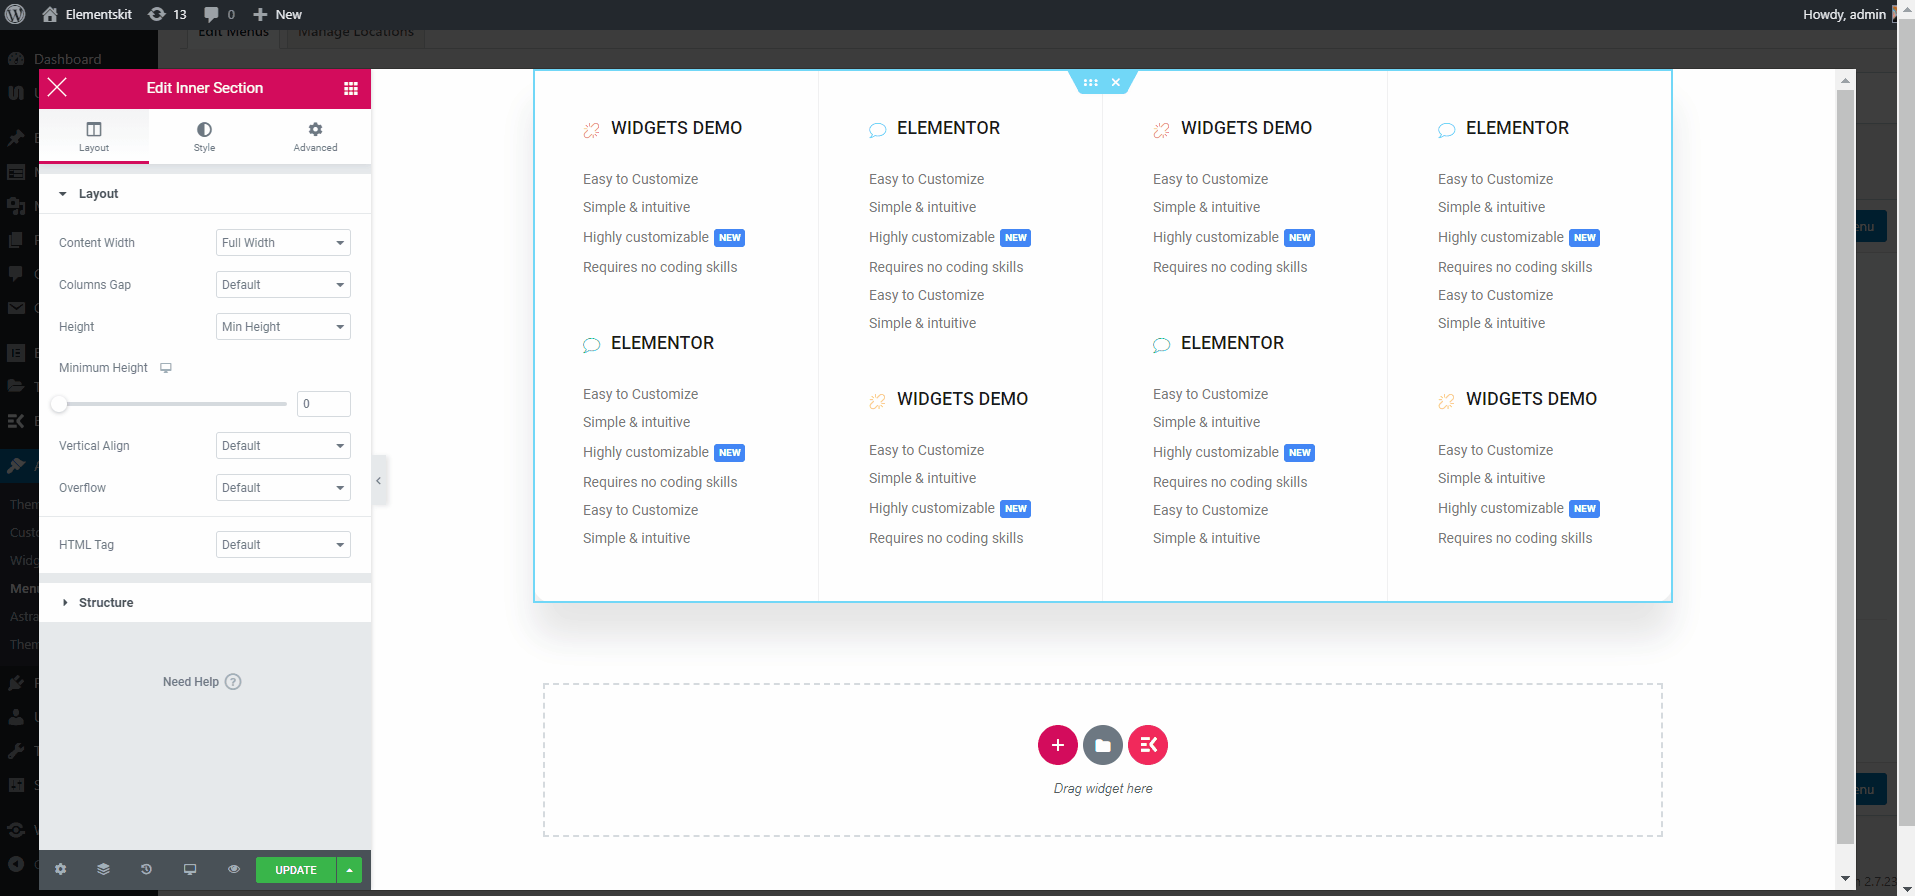
Choose Position #
- Height: Select your Height dragging Left to Right.
- Vertical Align: Select Vertical Align from the drop-down.
- Overflow: Select Overflow Default or Hidden.
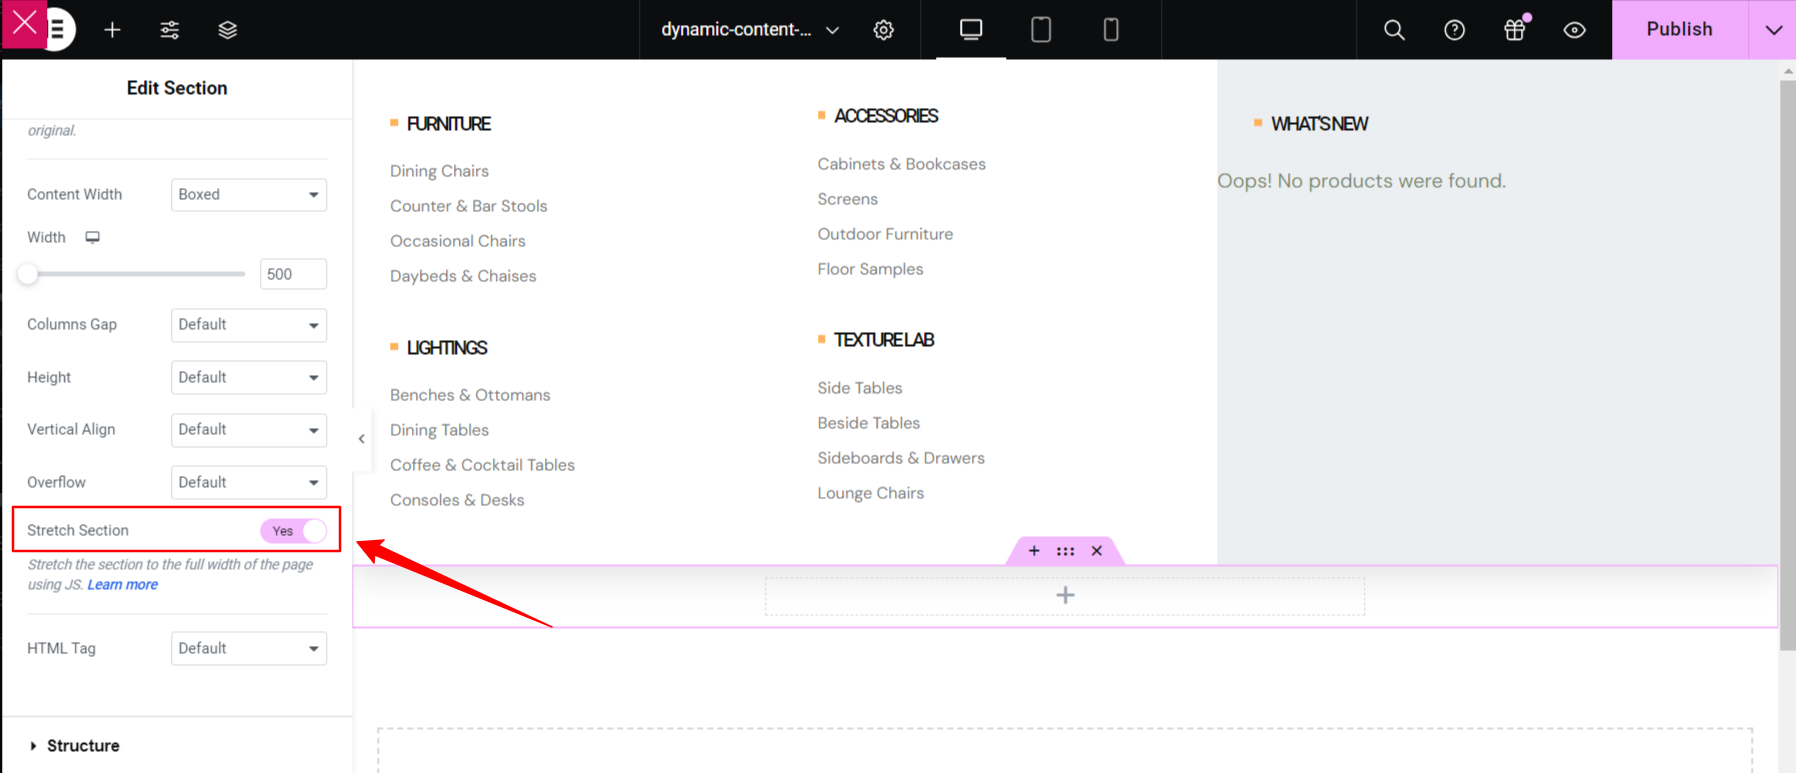
Stretch Section #
Toggle this button to turn the mega menu to full-width, which spans from right to left of the screen’s width.
Select HTML Tag #
- Select your HTML Tag from Drop Down.
If you want to see it in action, watch this video and do it yourself within a few minutes.
Customize Mega Menu Heading Text #
- Select Icon Type.
- Enable to Add Icon.
- Upload Header Icon.
- Add or Edit Title.
- Add Edit Description.
Customize Text #
- Add or Edit Text.
- Add or Edit Sub-Title.
- Enable to Show Label.
- Add or Edit Label.
- Customize Background Color, Typography, Padding, Alignment, Radius.
- Once done click update and close the window.
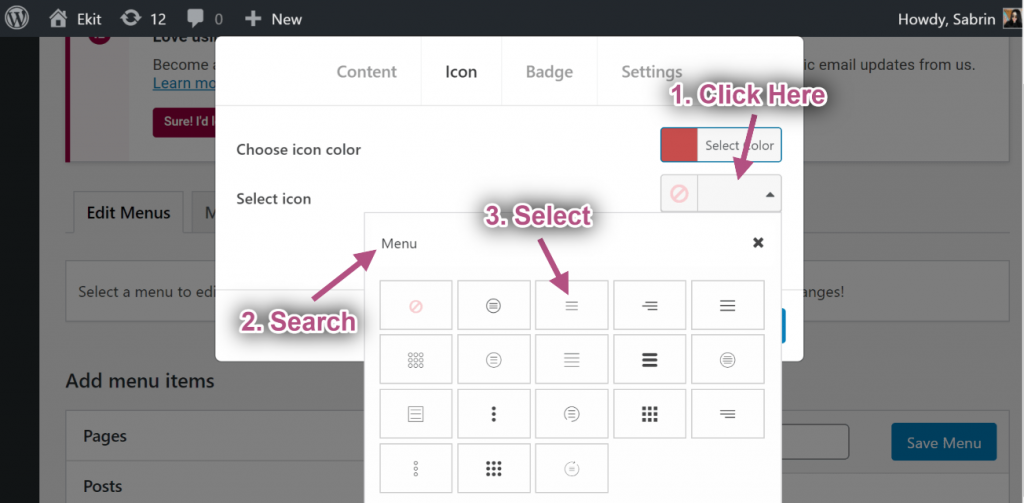
Step #3: Customize Icon #
- Now go to Icon Tab=> Choose any color from the Color Palette.
- Select Icon from the Icon Library.
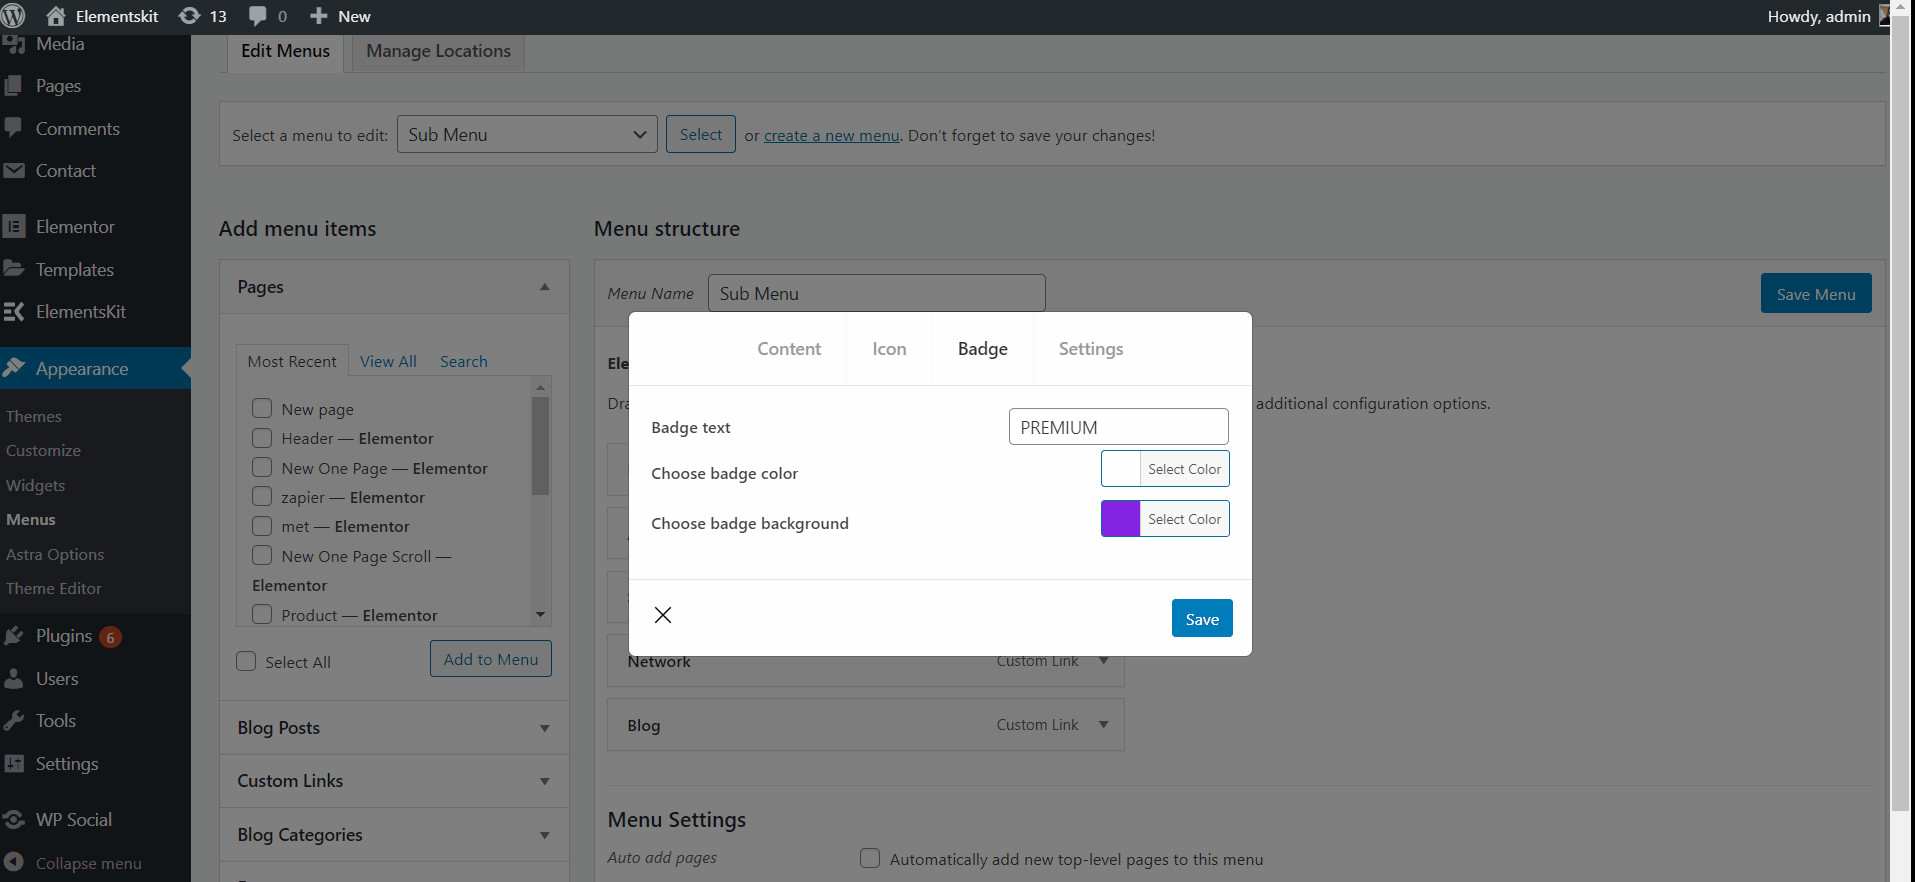
Step #4: Customize Badge #
- Add or Edit Text.
- Choose Badge Color.
- choose Badge Background Color.
- Click Save.
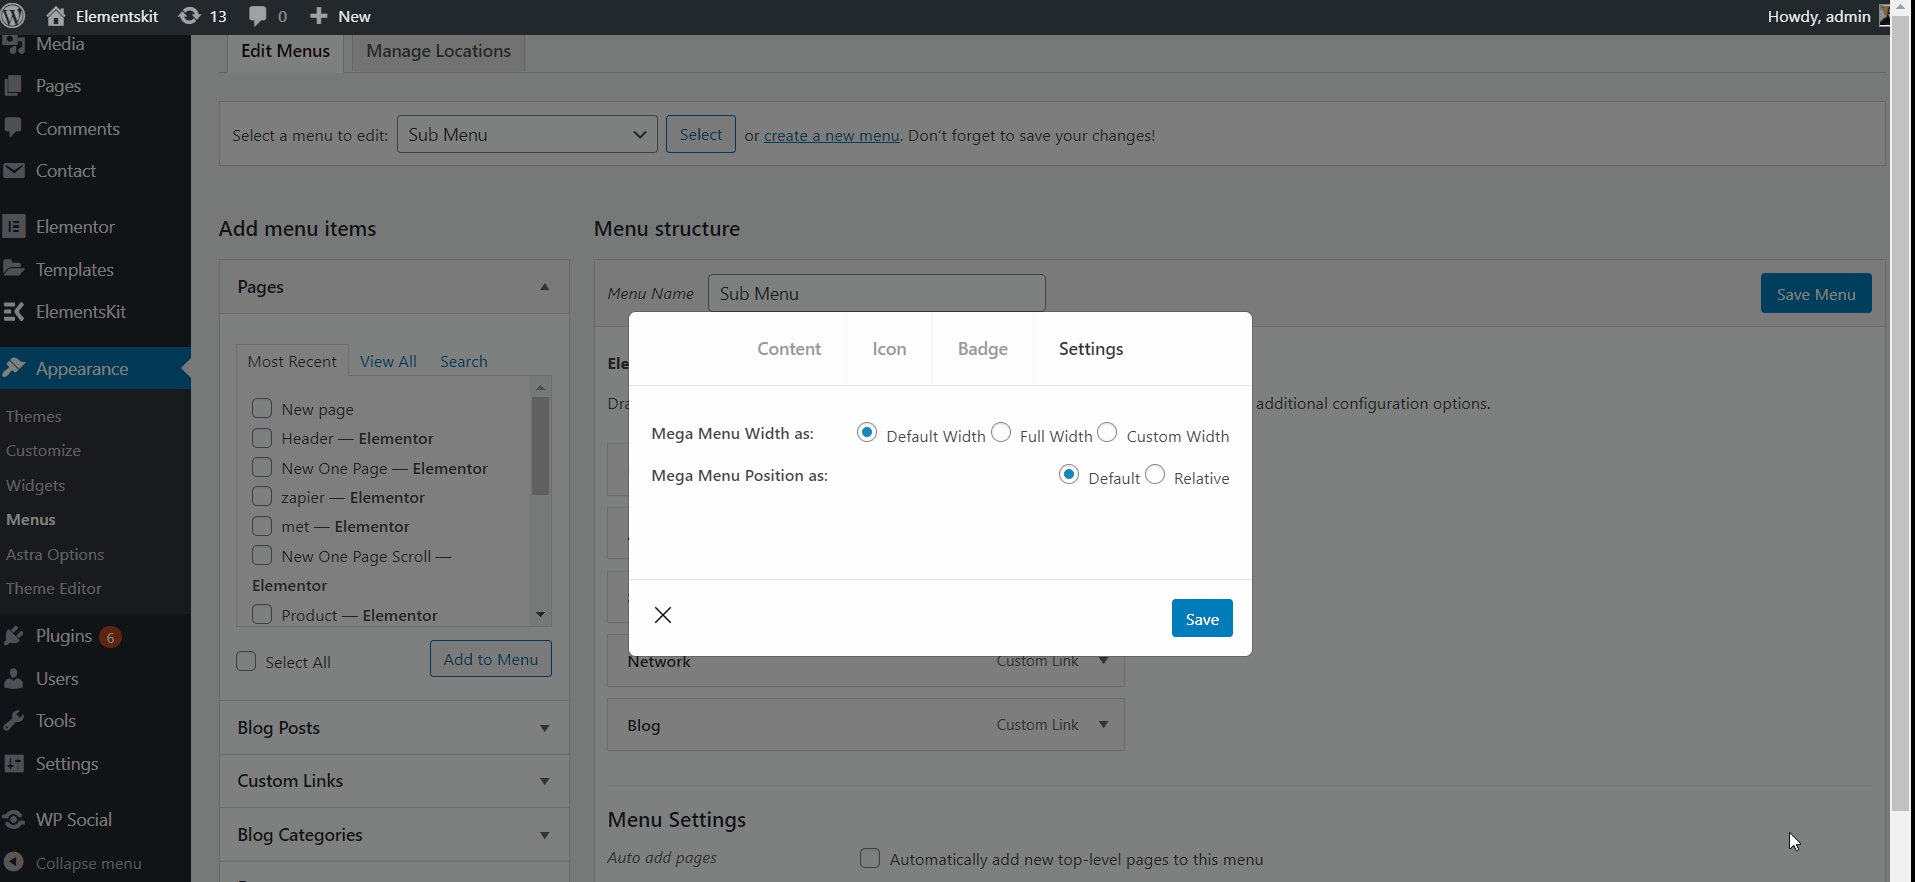
Step #5: Settings #
Default Width #
- Select Mega Menu Width: Default.
- Select Mega Menu Position: Default.
- Save the window.
- Site View: Showing Default Width with Default Position.
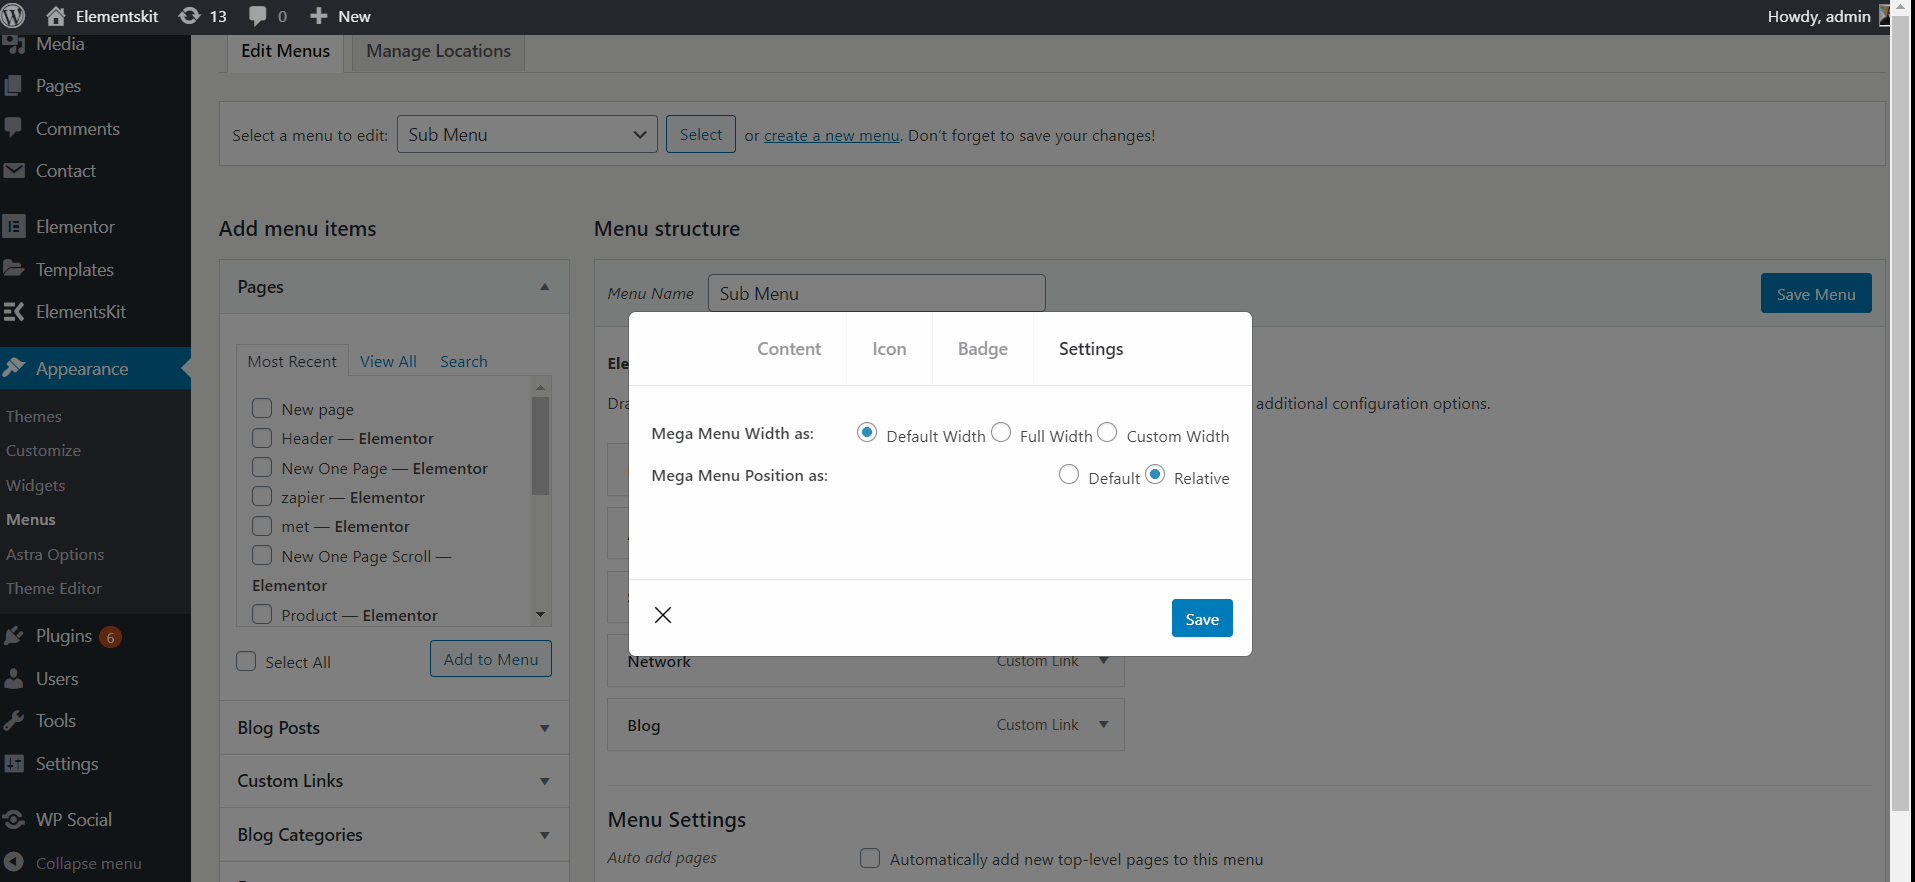
Default Relative #
- Select Mega Menu Width: Default.
- Select Mega Menu Position: Relative.
- Click Save.
- Site View: Showing Default Width with Relative Position.
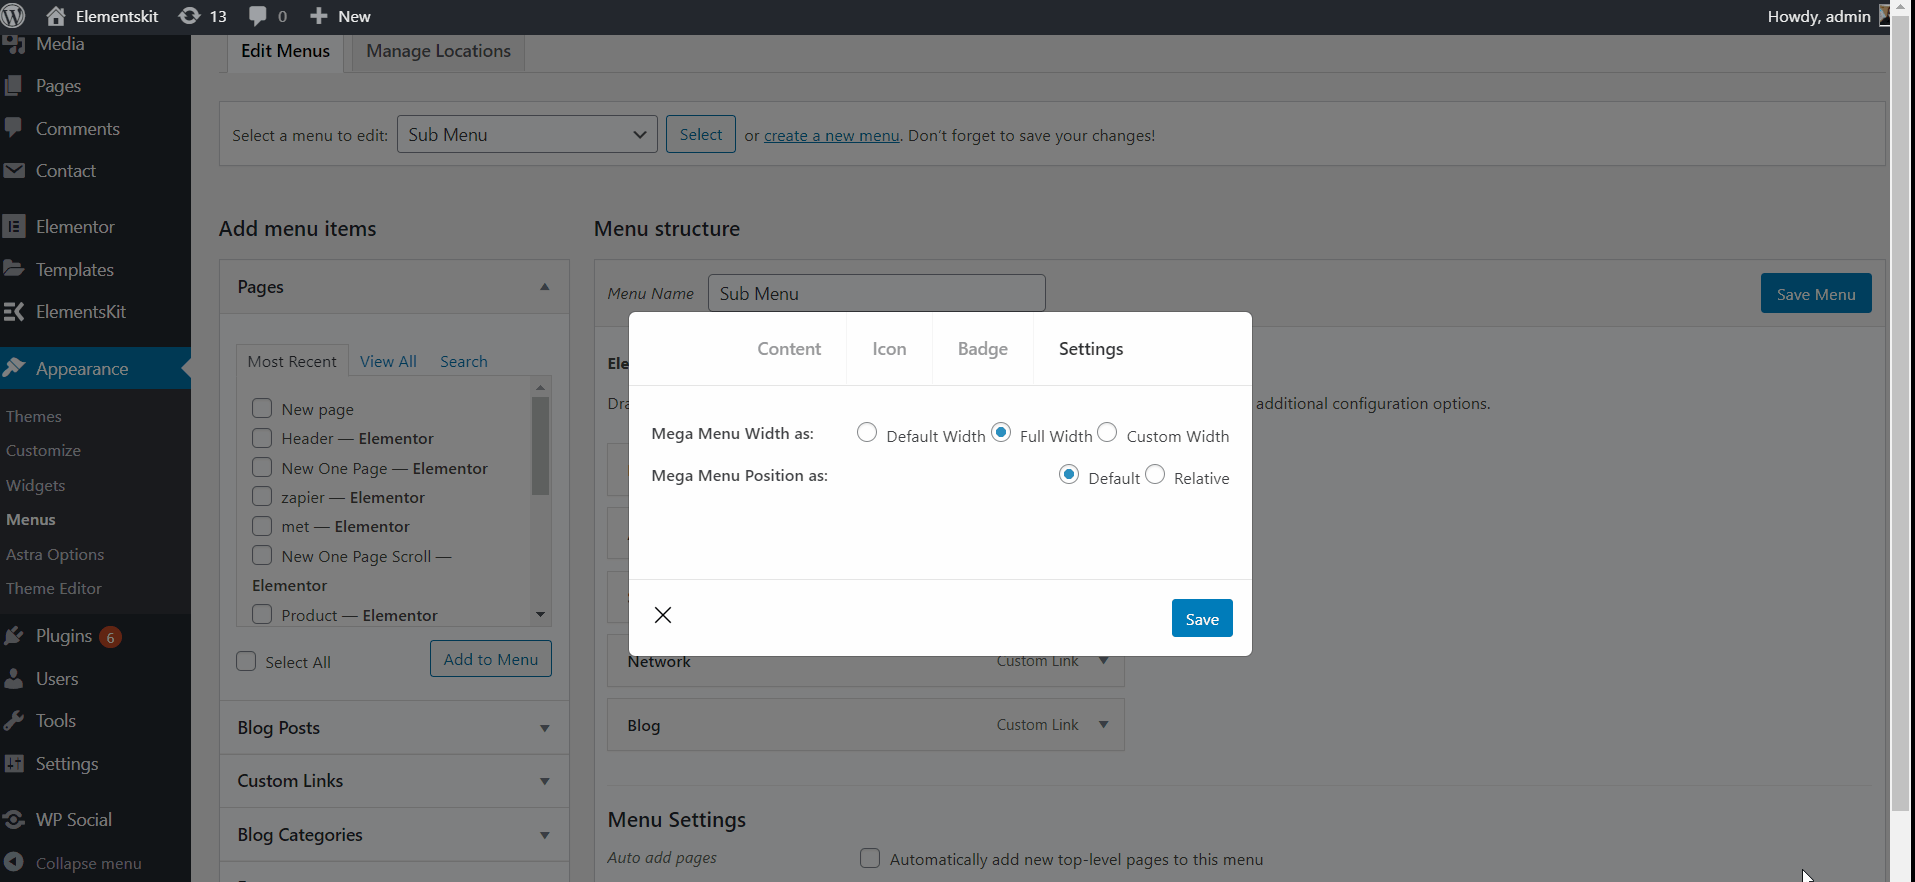
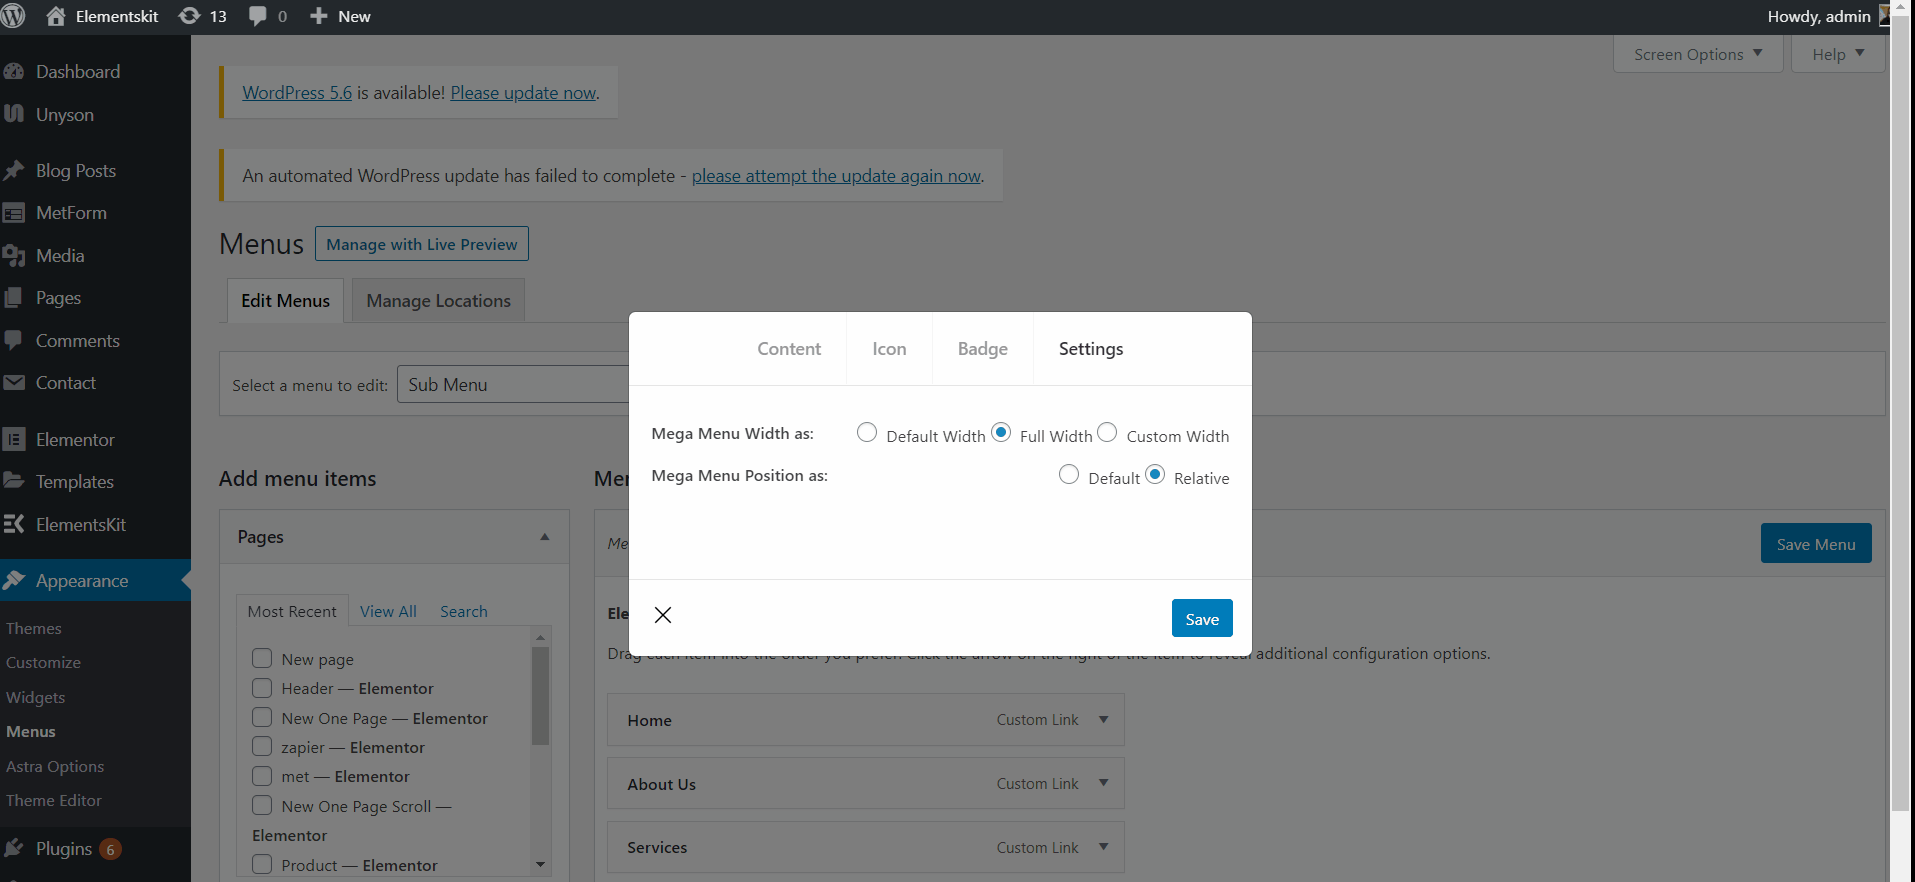
Default Full Width #
- Select Mega Menu Width: Full Width.
- Select Mega Menu Position: Default.
- Click Save.
- Site View: Showing Full Width with Default Position.
Full Width Relative Position #
- Select Mega Menu Width: Full Width.
- Select Mega Menu Position: Relative.
- Click Save.
- Site View: Showing Full Width with Relative Position.
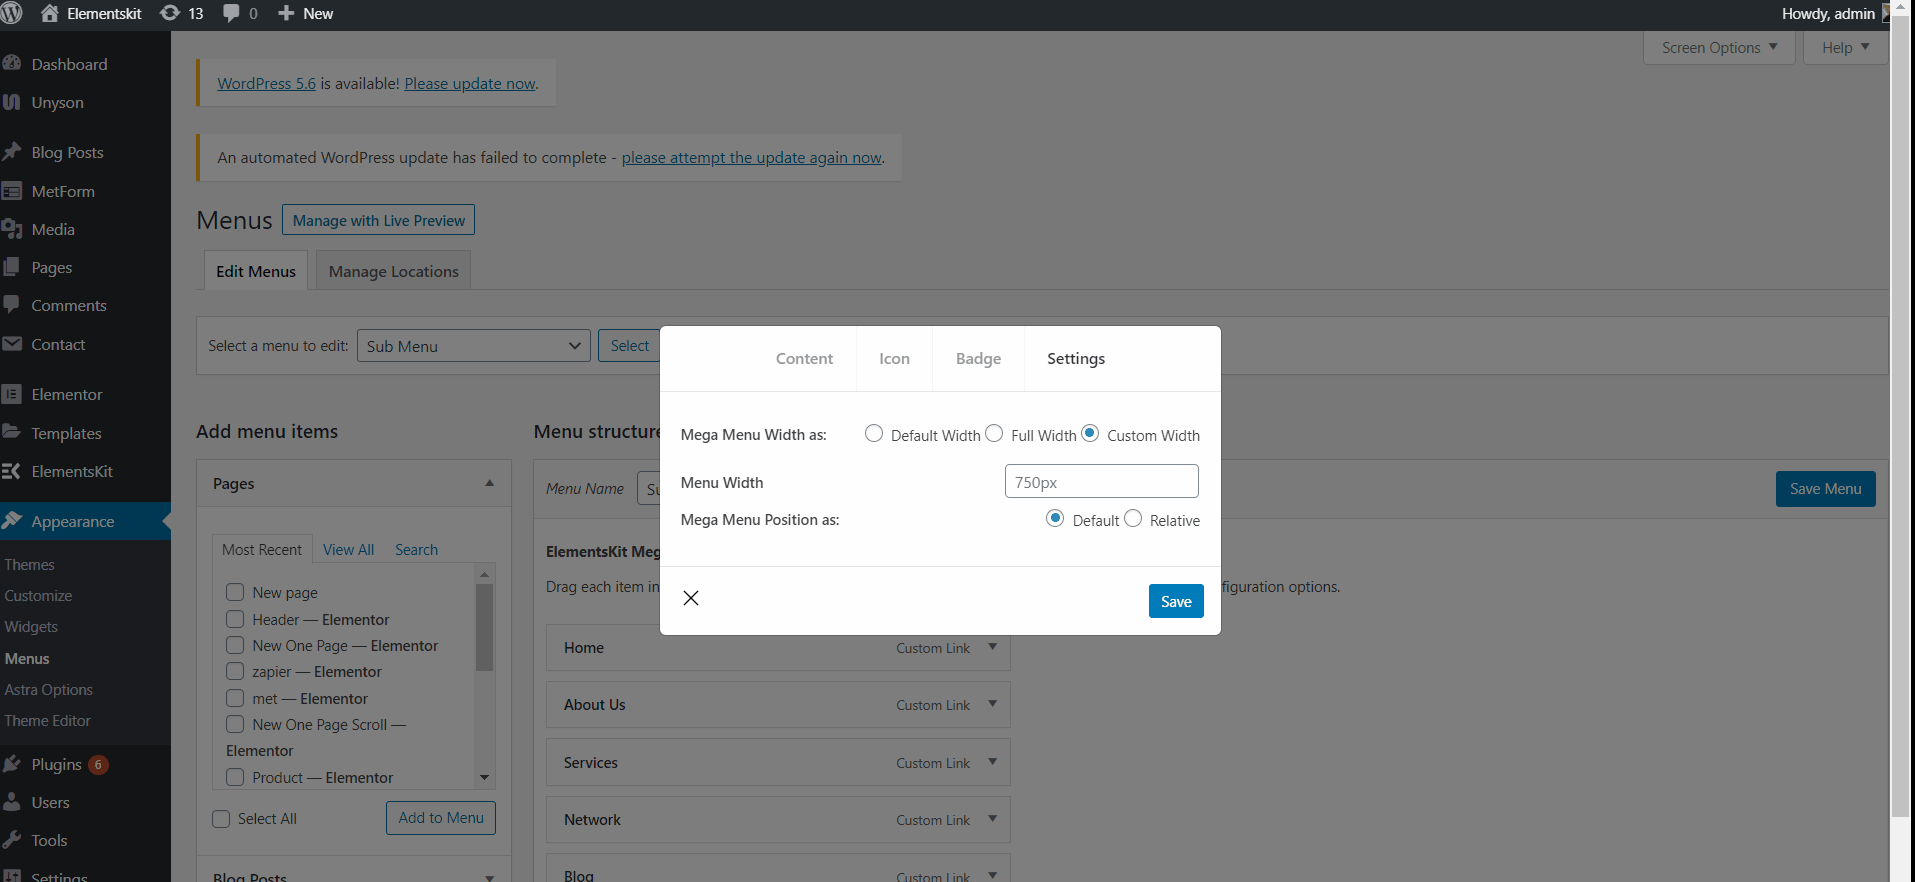
Custom Default Width #
- Select Mega Menu Width: Custom Width.
- Provide any custom width but by default, it is 750px.
- Select Mega Menu Position: Default.
- Click Save.
- Site View: Showing Custom Width with Default Position.
Custom Default Width Relative #
- Select Mega Menu Width: Custom Width.
- Provide any custom width but by default, it is 750px.
- Select Mega Menu Position: Relative.
- Click Save.
- Site View: Showing Custom Width with Relative Position.
Step #6: Create a Header Template #
Here you can use the Elementor Header Template or you can use the ElementsKit Header Template. Let’s see to to add it.
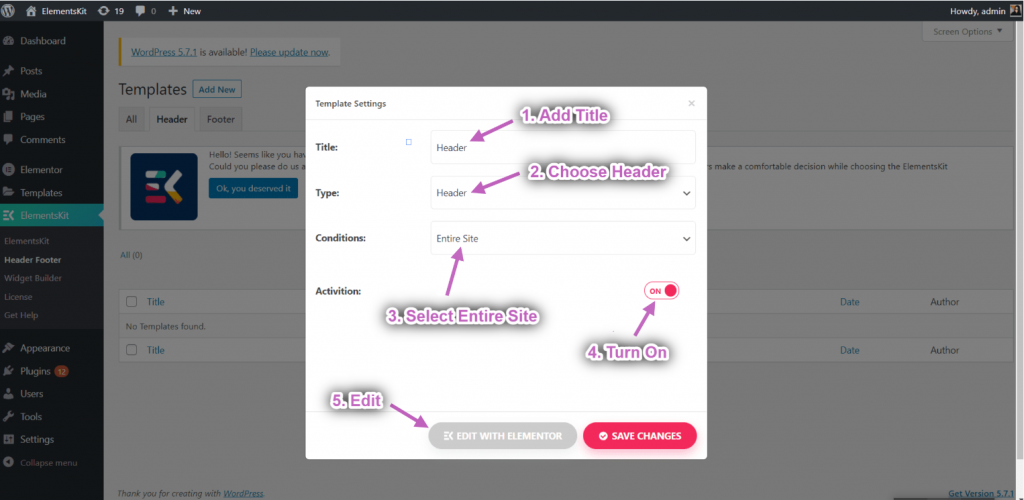
- Navigate to ElementsKit→ Header Footer→ and click Add New.
- A popup box will open with options.
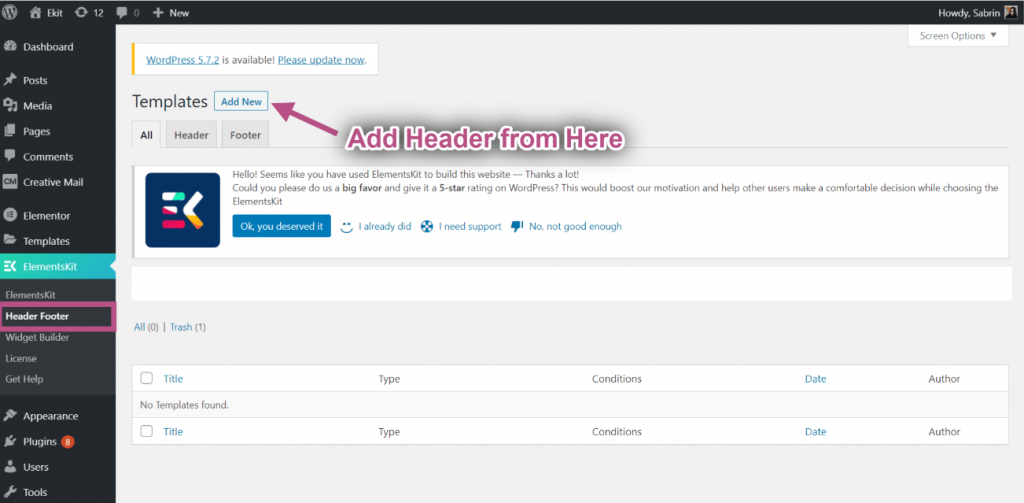
- In the popup box type a Title, select the Type→ Header.
- Select the Conditions→ Entire Site.
- Toggle the Activation option and click on Edit With Elementor.
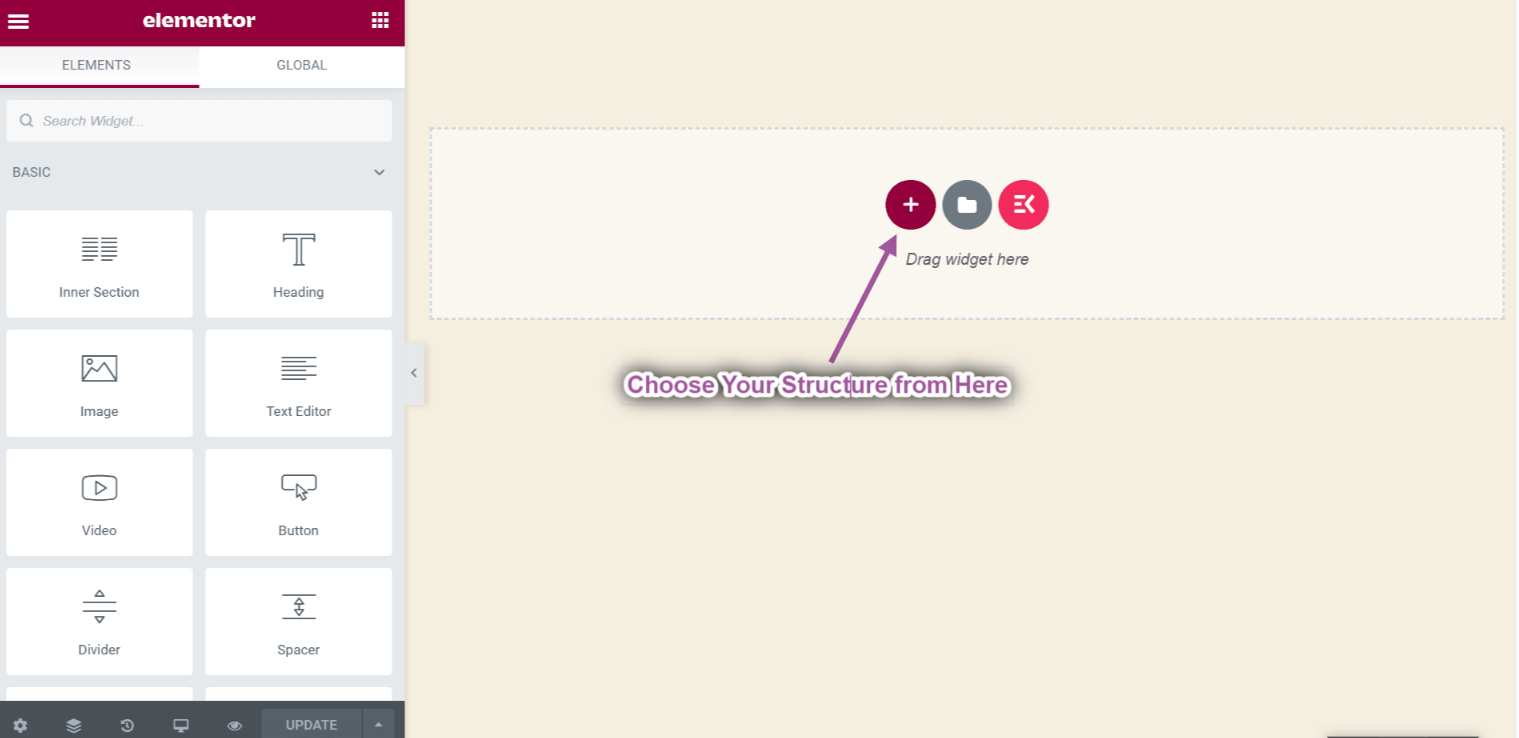
- Select your Structure from the selected area.
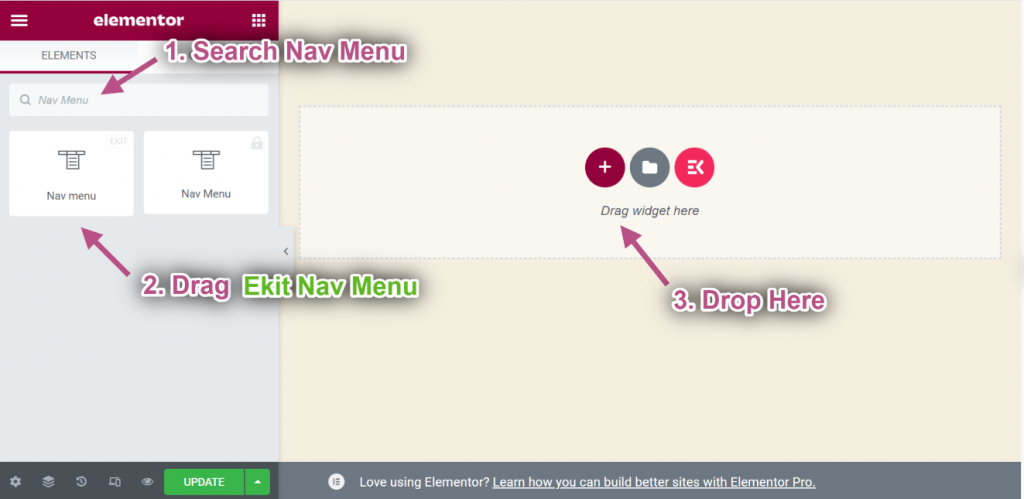
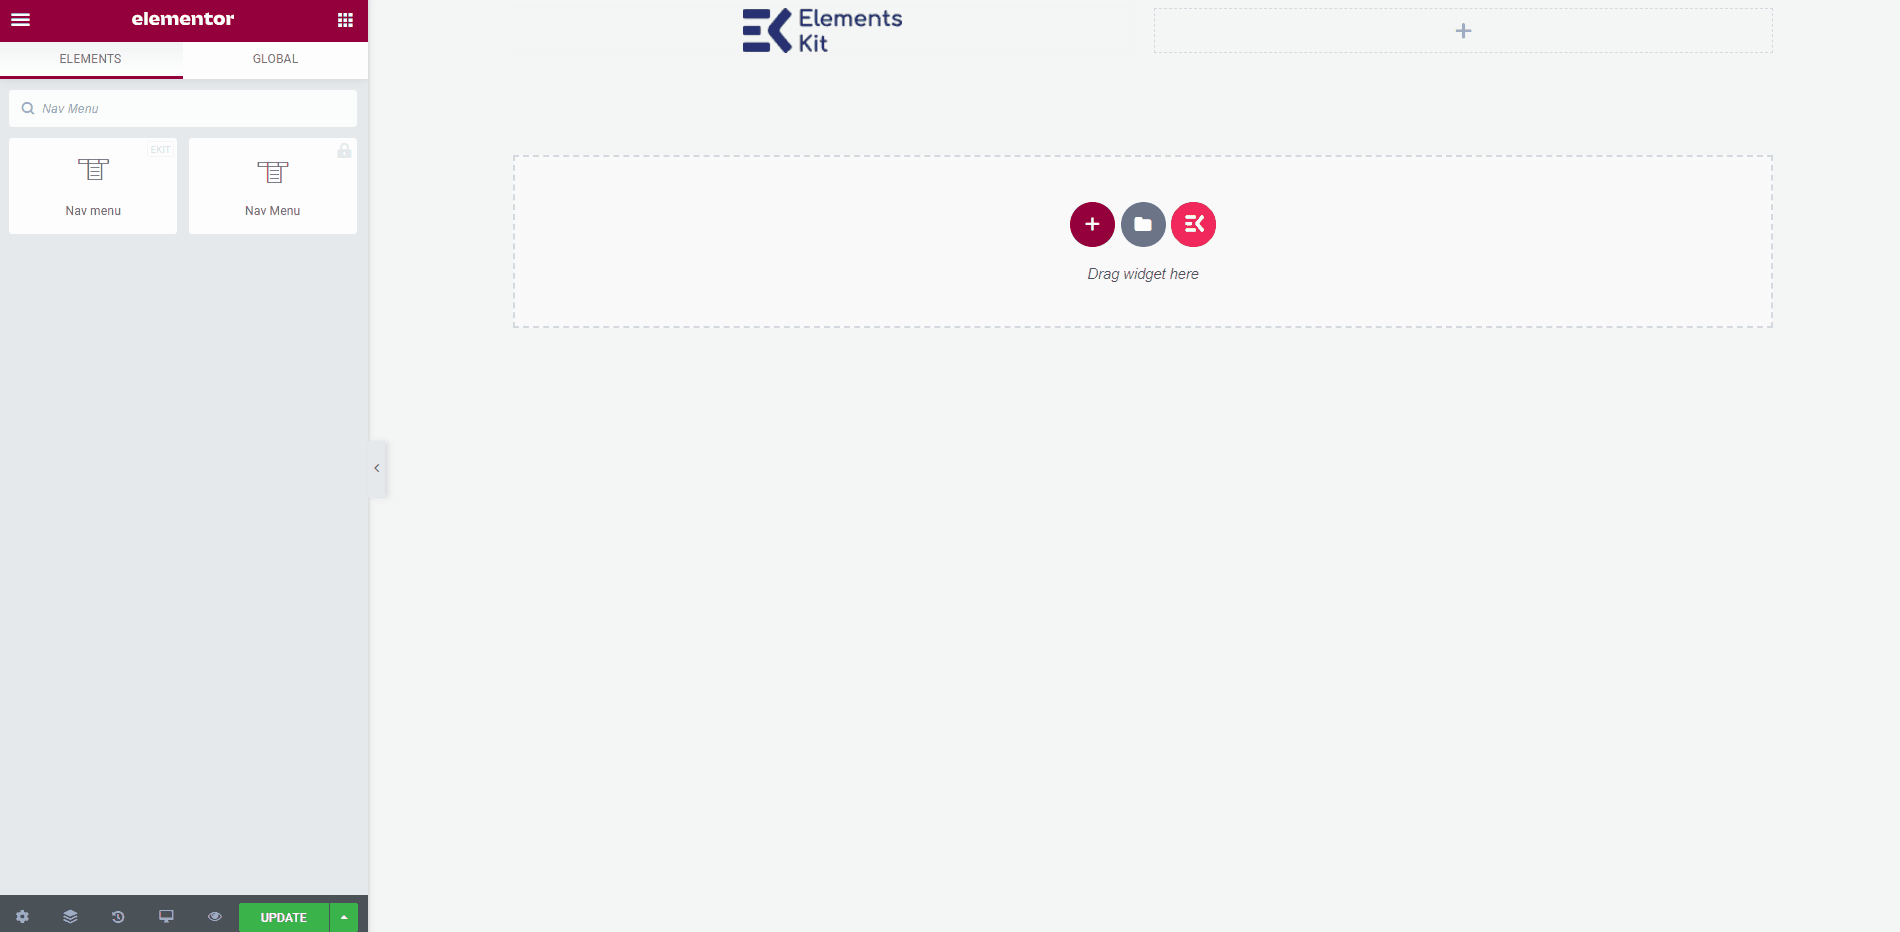
- Now Search Nav Menu=> Drag the Ekit Nav Menu and Drop on the selected area.
** Note: Make sure to drag the ElementsKit Nav menu otherwise your created Megmenu will not appear.
- Now go to Menu Settings=> select your created Header Menu from the drop-down.
- You can add any type of widget from here to customize your header template.
Final Output #
Once done, click the Update button to save the menu.
Now go to your site and you can see your selected Elementor Mega menu is showing accordingly.