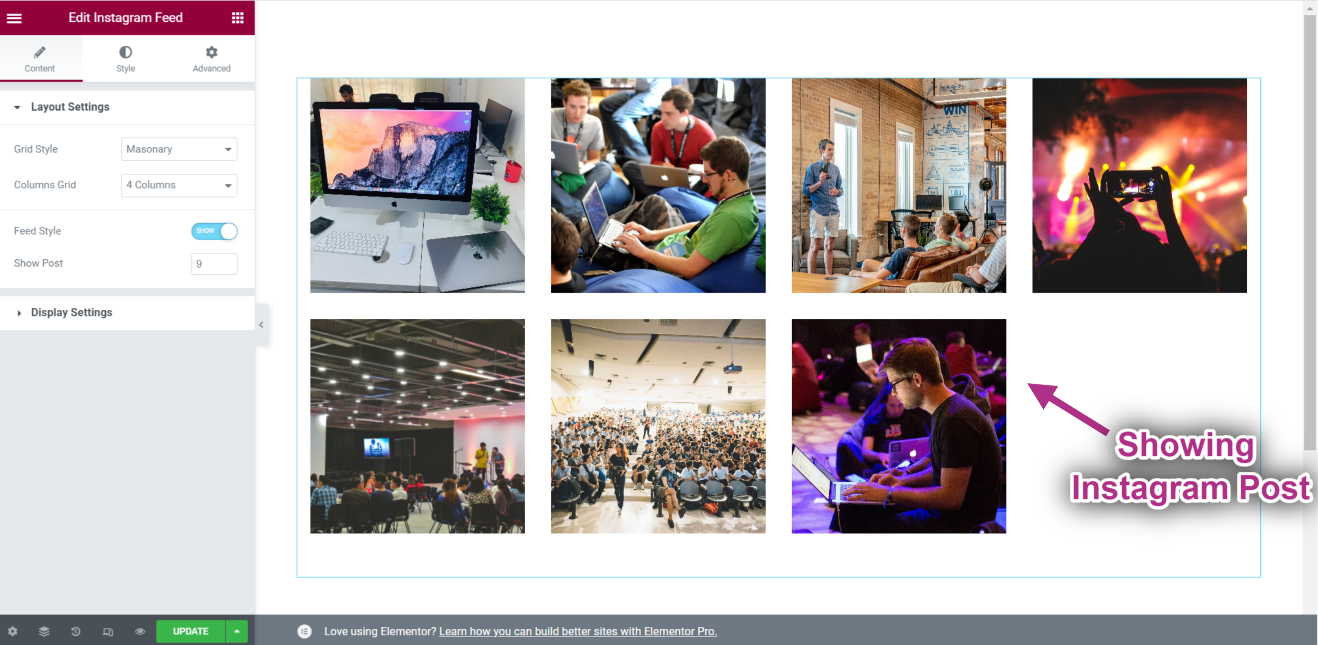
Getting Started #
The Instagram Widget allows you to display your latest Instagram posts on your WordPress sites. Here’s a comprehensive article to explain every method in detail. Follow the step-by-step process to connect to the Instagram Feed.
Generate Instagram User ID and Access Token #
Here is how to generate an Instagram User ID and Access Token.
To display your Instagram feed using the ElementsKit Instagram Feed widget, you need to create a Meta app on Facebook Developers and generate an access token linked to your Instagram account. Follow the step-by-step process below.
Step 1: Access Meta for Developers and Open My Apps #
Log in to your Facebook account and go to Meta for Developers. From the top-right corner of the page, click on My Apps to open your apps dashboard.

Step 2: Create a New App #
Inside the My Apps dashboard, click the Create App button on the top right of the screen. This opens the app creation flow.

A popup will appear titled “There’s a new way to create apps with Meta” – explaining Meta’s updated app creation system. Click the Create app button on the popup to continue with the new flow.

Step 3: Enter App Details #
You’ll now be on the App details step. Enter your App name – this is the name that will show on your My Apps page – and your App contact email – the email Meta will use to reach you about your app.
Once both fields are filled in, click the Next button.

Step 4: Add Use Cases #
On the Use cases step, you need to specify what your app will do. In the “Filter by” section on the left, click on Business messaging.
From the list on the right, select Manage messaging & content on Instagram. This is the use case required to display Instagram feed content. A blue checkmark will appear on the selected use case.
Click the Next button to proceed.

Step 5: Select Business Portfolio #
On the Business step, Meta will ask “Which business portfolio do you want to connect to this app?”
If you don’t have a business portfolio yet, select I don’t want to connect a business portfolio yet, you can always add one later if needed.
Click the Next button.

Step 6: Review Requirements #
On the Requirements step, Meta will show you the publishing requirements you need to complete to get and maintain access to user and business data.
If your app is new and hasn’t been submitted for review yet, you’ll see the message: “No requirements identified. This may change if you add more to this app.”
Click the Next button.

Step 7: Review Overview and Create App #
On the final Overview step, review all the details you’ve entered — App Name, App Email, Use Cases, Business, and Requirements.
If everything looks correct, click the Create app button at the bottom right to finalize creating your app.

Step 8: Customize the Instagram Use Case #
After the app is created, you’ll be taken to the app dashboard. Under App customization and requirements, click on Customize the Manage messaging & content on Instagram use case.

Step 9: Add an Instagram Tester Account #
Before generating the access token, you need to add the Instagram account you want to use as a tester.
From the left sidebar, click App roles → Roles. In the App Roles page, click the Add People button on the top right.

In the popup, from the Additional roles for this app section, select Instagram Tester. Then enter the username of the Instagram account you want to add in the search field at the bottom.
Click the Add button.

Step 10: Accept the Tester Invitation from Instagram #
The invitation you just sent needs to be accepted from the Instagram side.
Log in to the Instagram account you added. Go to your profile Settings, then click on Website Permissions → Apps and Websites. Find the invitation from your Meta app under Tester Invites and click Accept.

Once accepted, return to your Meta app dashboard. The Instagram account will now appear with the Instagram Tester role in your App Roles page.

Step 11: Generate the Access Token #
Now go back to the Instagram use case customization page. Under section 2. Generate access tokens, you’ll see your added Instagram account listed.
Click the Generate token button next to your Instagram account.

A popup will appear stating “Tokens can only be generated for public Instagram accounts.” Make sure your Instagram account is set to a Professional (Business or Creator) account and is public. Click Continue.
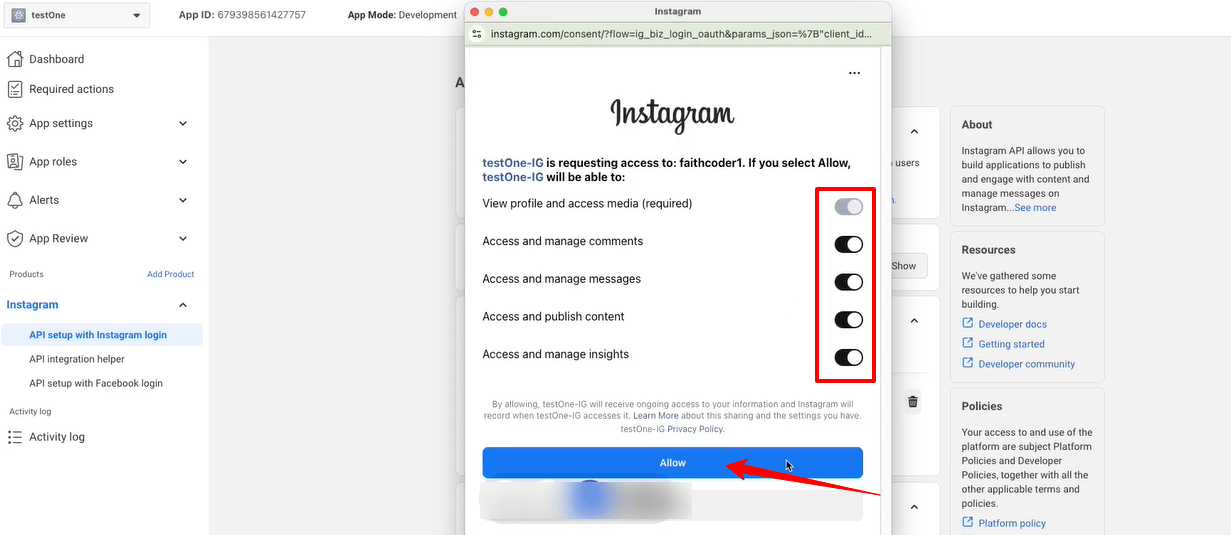
You’ll be prompted to log in to your Instagram account and grant permissions. Click Allow to authorize the app.
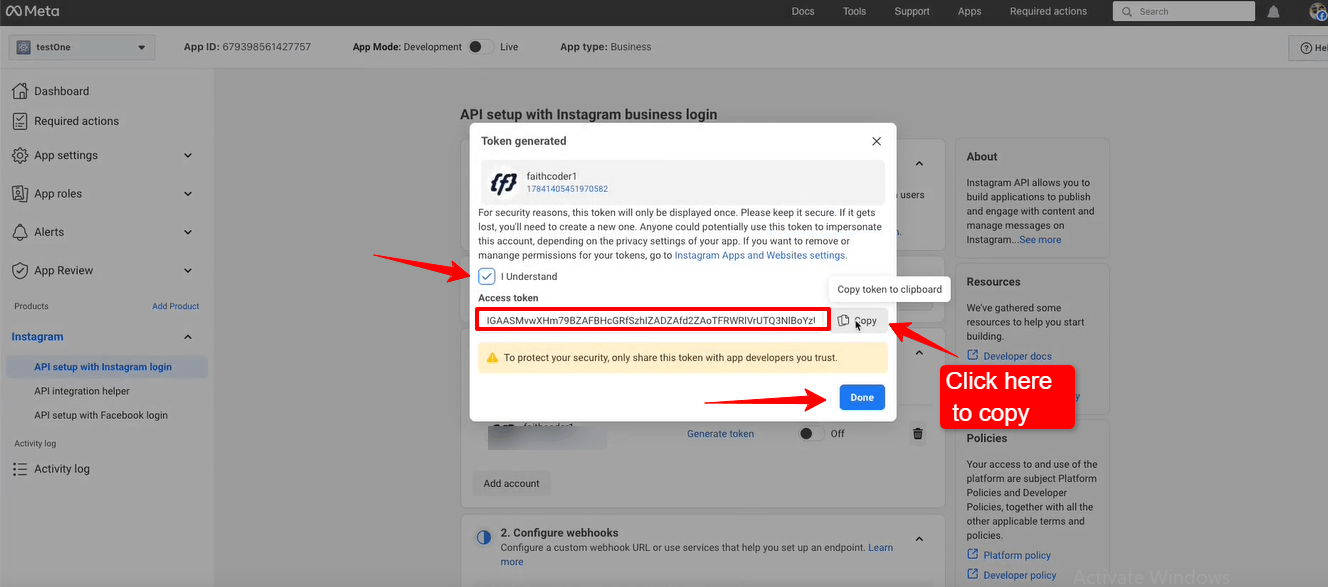
Once approved, your Access Token will be generated. Click Copy to copy the token to your clipboard.
Your Instagram Access Token is now ready. Hit the Done button to clear the popup.
Proceed to the next section: Adding Instagram Access Tokens to ElementsKit, to paste it into the widget and start displaying your Instagram feed on your WordPress site. We’re going to show the process in the next phase.
Adding Instagram Access Tokens to ElementsKit #
You will need a User ID and Access Token to Connect to your Instagram.
- Step=>1: Go to Elementskit=> User data=> Click on the Instagram User Data to Expand-> Click on Get Access Token.
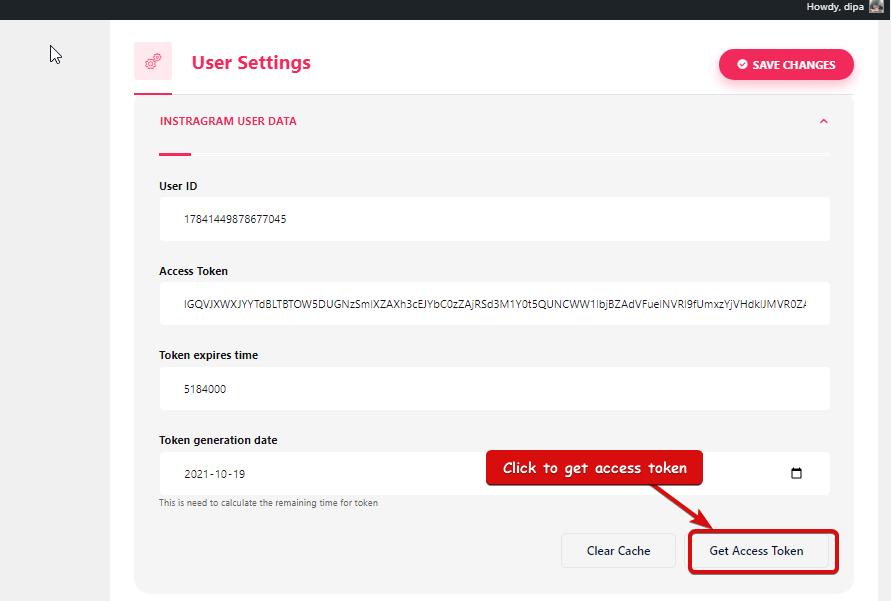
- Step=>2: Enter your Instagram account Credentials and click on Log In. Or, you can log in with your Facebook Account. Once asked for permission click on allow.
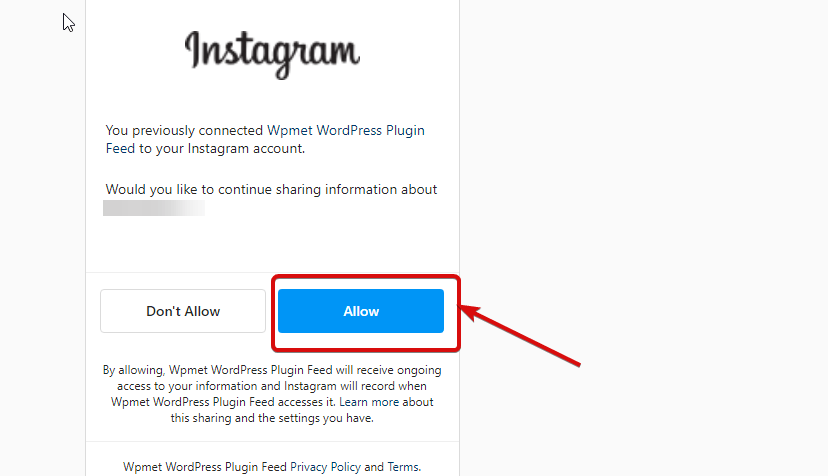
- Step=>3: Here is your Instagram User ID, Long Lived Token, Token expires in and Token generated. Copy them.
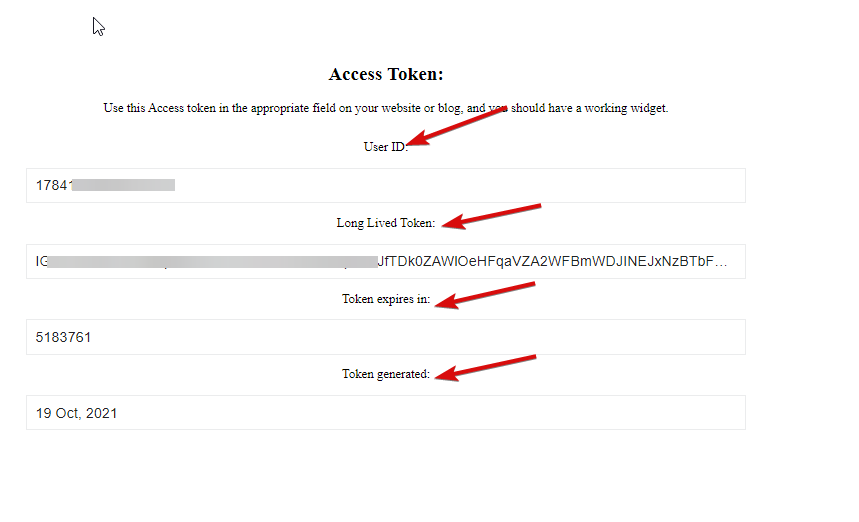
- Step=>4: Then go to Instagram User Data and paste the User ID, Long Lived Token, Token expires in and Token generated values.
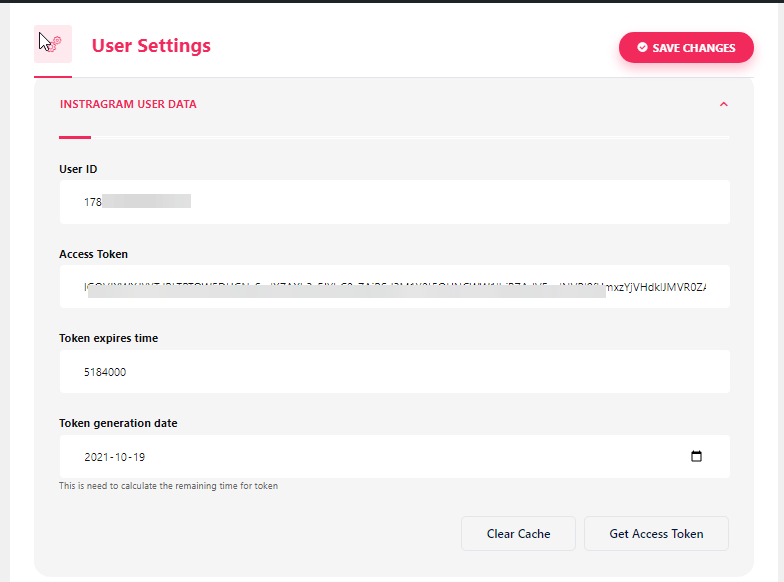
Note: You need to sync the data before the token expires time exceed.
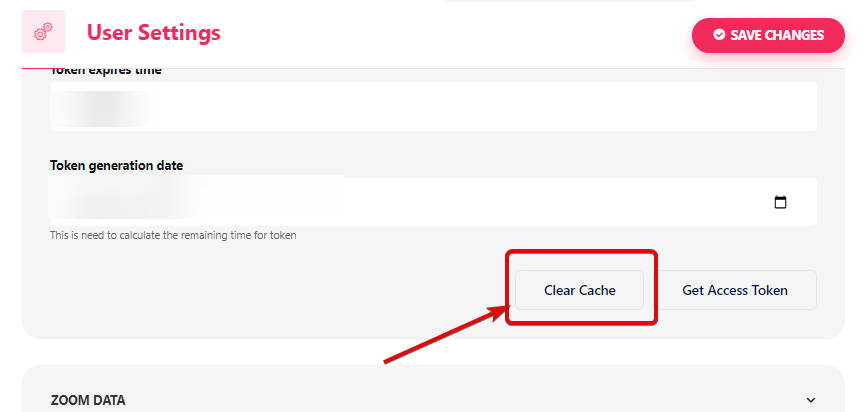
- If you face any issue regarding syncing the data, just click on clear cache.
- Step=>5: Go to Elementor=> Search Instagram Feed=> Just Drag and drop the field.
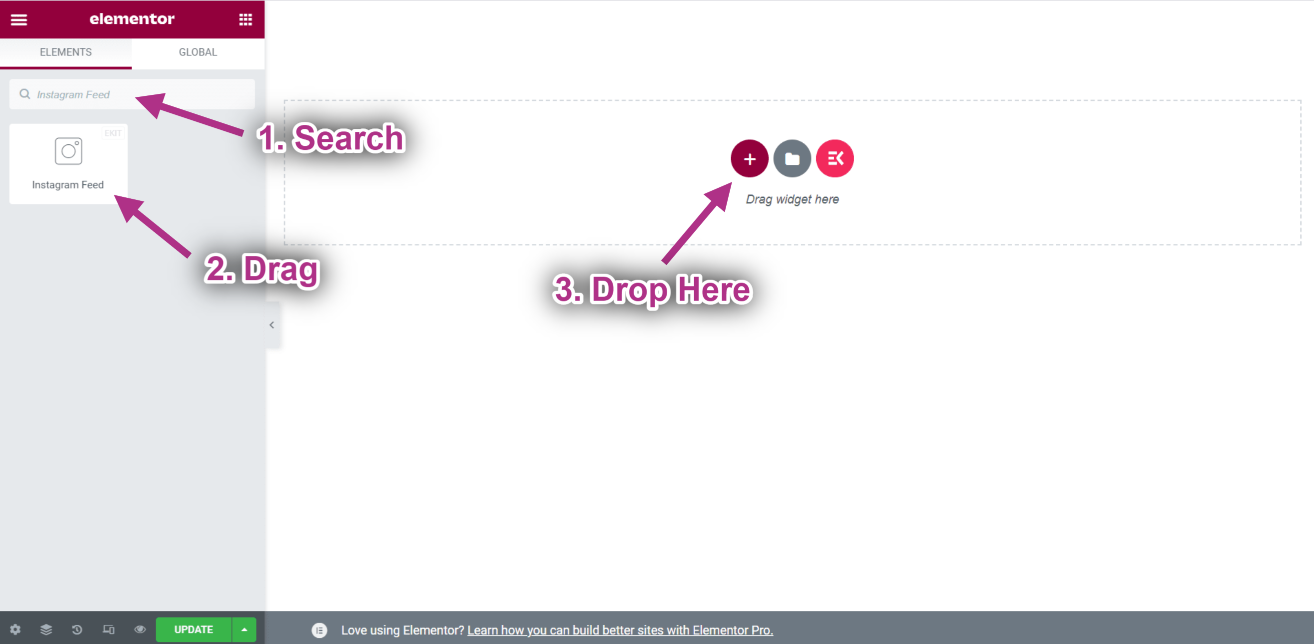
- Now you can see your Instagram post on your Instagram feed widget.