

The advanced slider widget of ElementsKit empowers you to create advanced-level sliders. By advanced level, we mean you can create any design you want to using the Elementor page builder.
Basically, with this slider, you can have the flexibility you get while creating a page in Elementor except now you can use that flexibility to create amazing sliders.
How to add Advanced Slider in Elementor in 6 steps #
Learn how to add advanced Slider in Elementor using ElementsKit Advanced slider in just 6 steps.
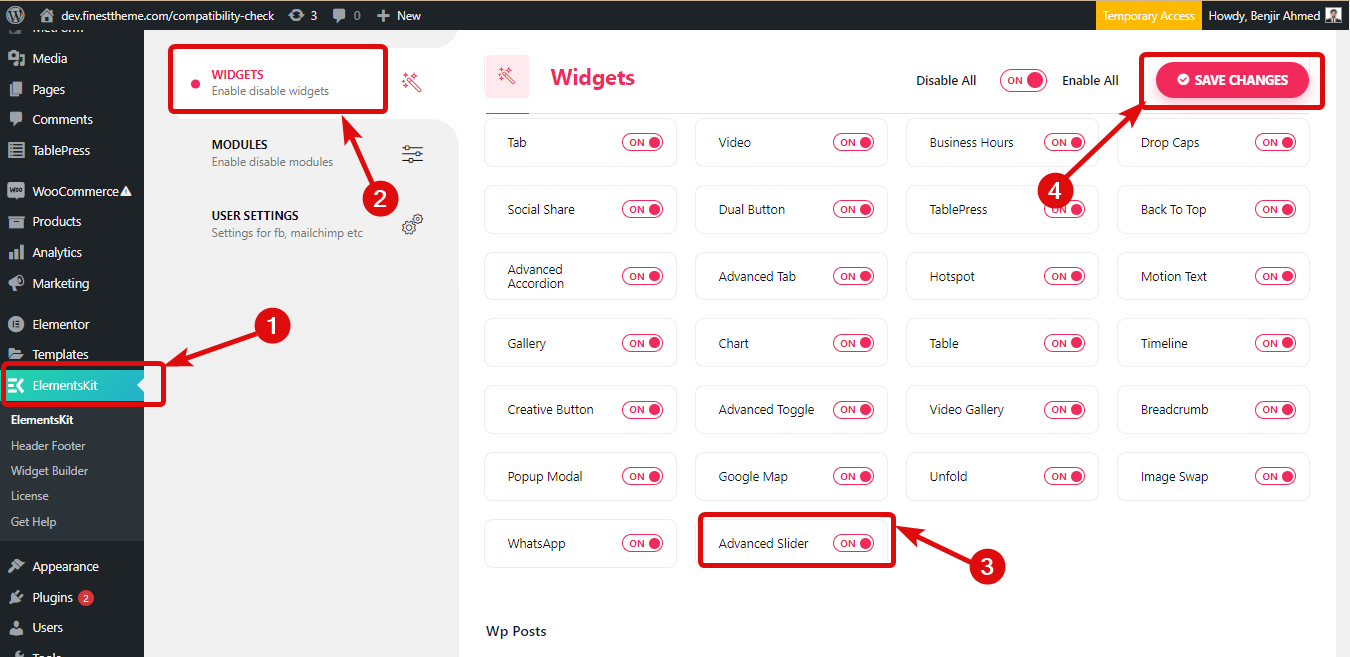
Step 1: Enable the Advanced slider widget of ElementsKit #
Navigate to ElementsKit ⇒ Widgets, turn on the Advanced slider widget and click on Save changes.
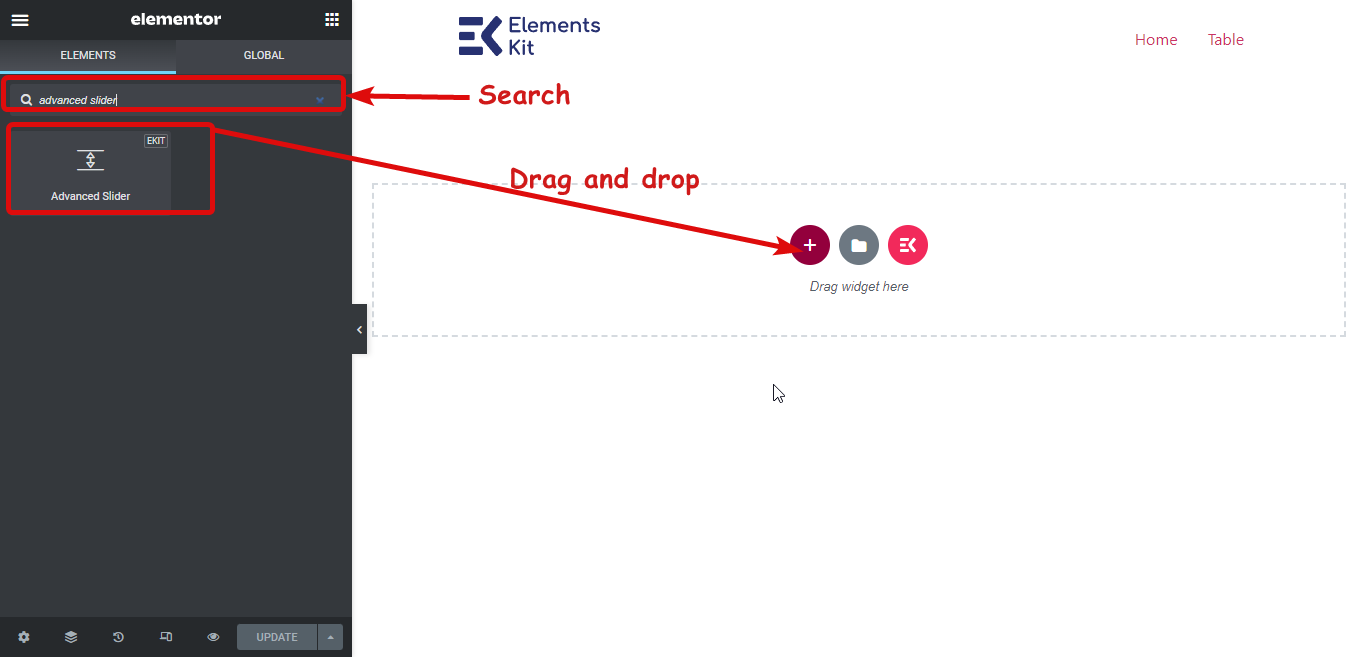
Step 2: Drag and drop the Advanced slider widget #
Go to the page where you want to add an Advanced slider and click on edit with Elementor to edit the page with Elementor page builder. Then search for “Advanced slider”, and drag and drop the widget with the Ekit Icon.
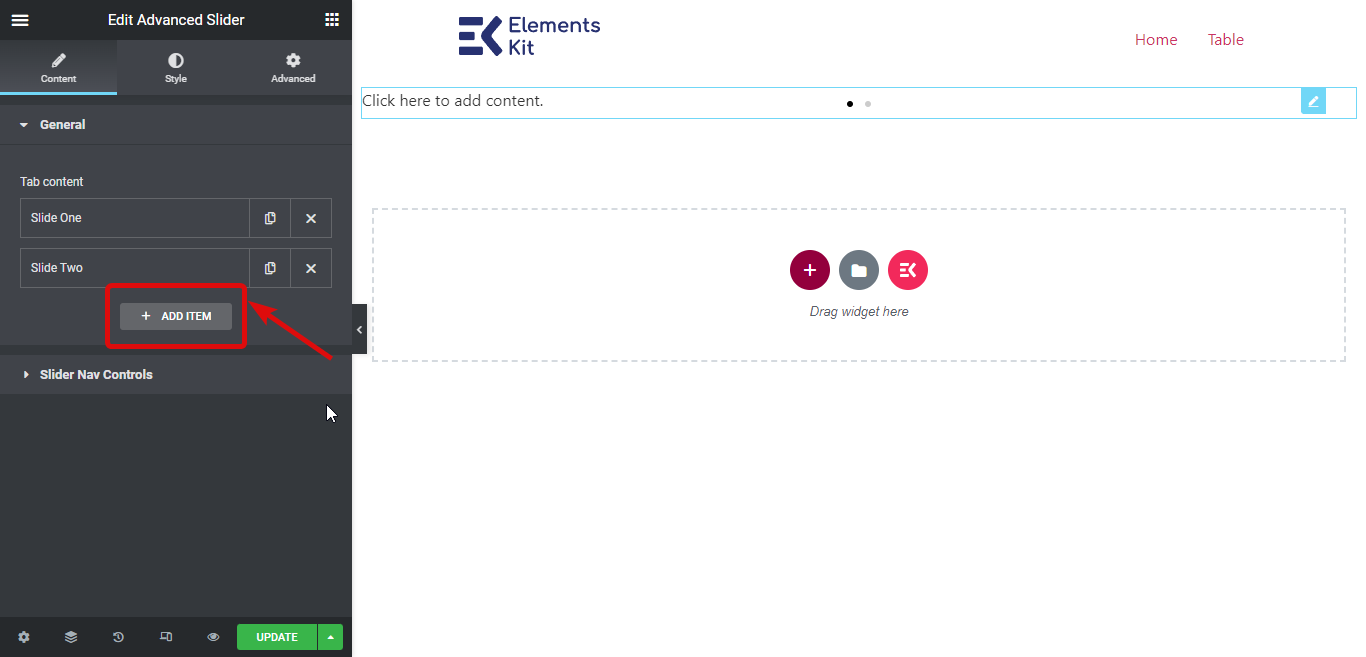
Step 3: Add Slider #
By default you will get two sliders, you can always add new sliders. To add a new slider, just click on the +ADD NEW icon. Once the slider is added you can rename it.
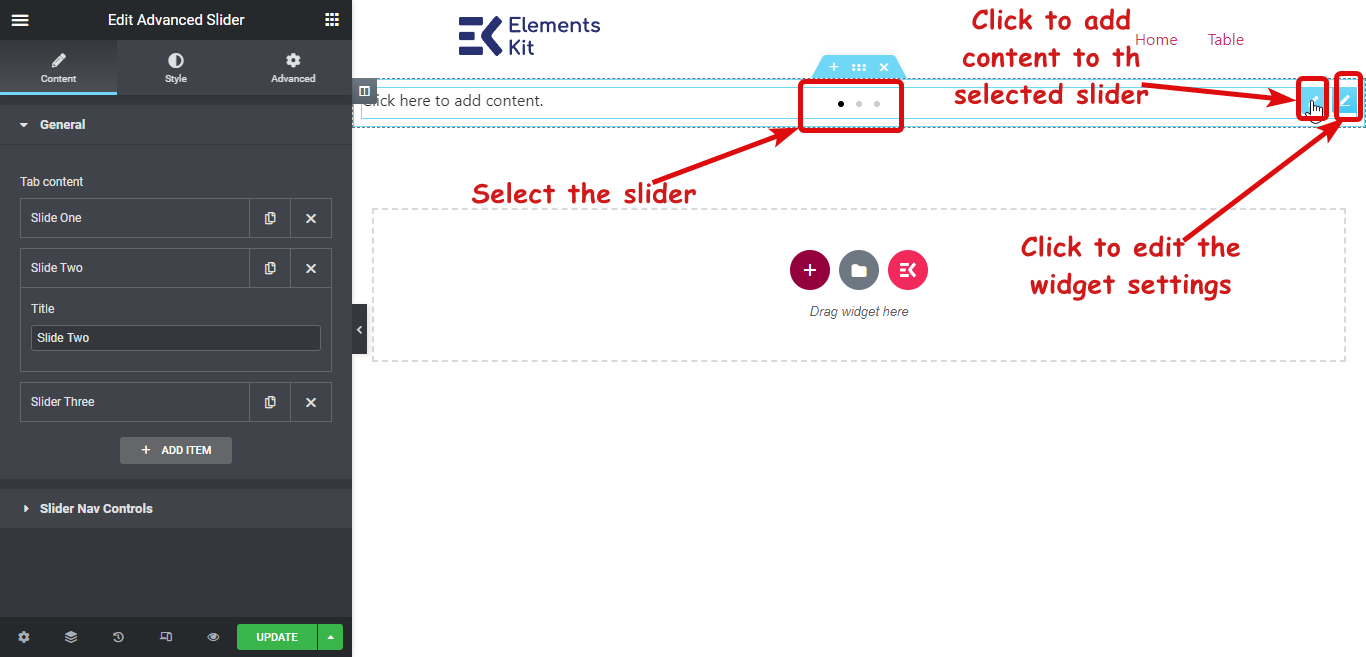
Step 4: Add Contents to Sliders #
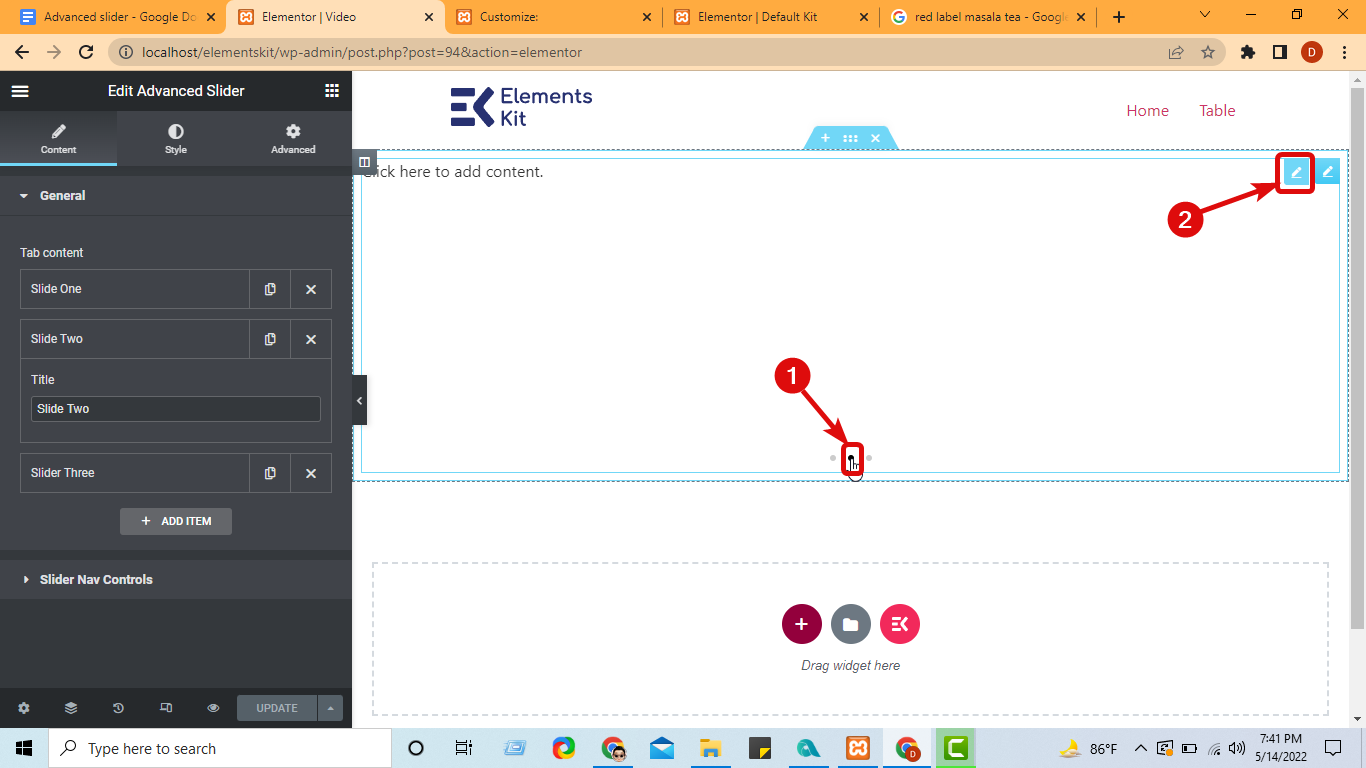
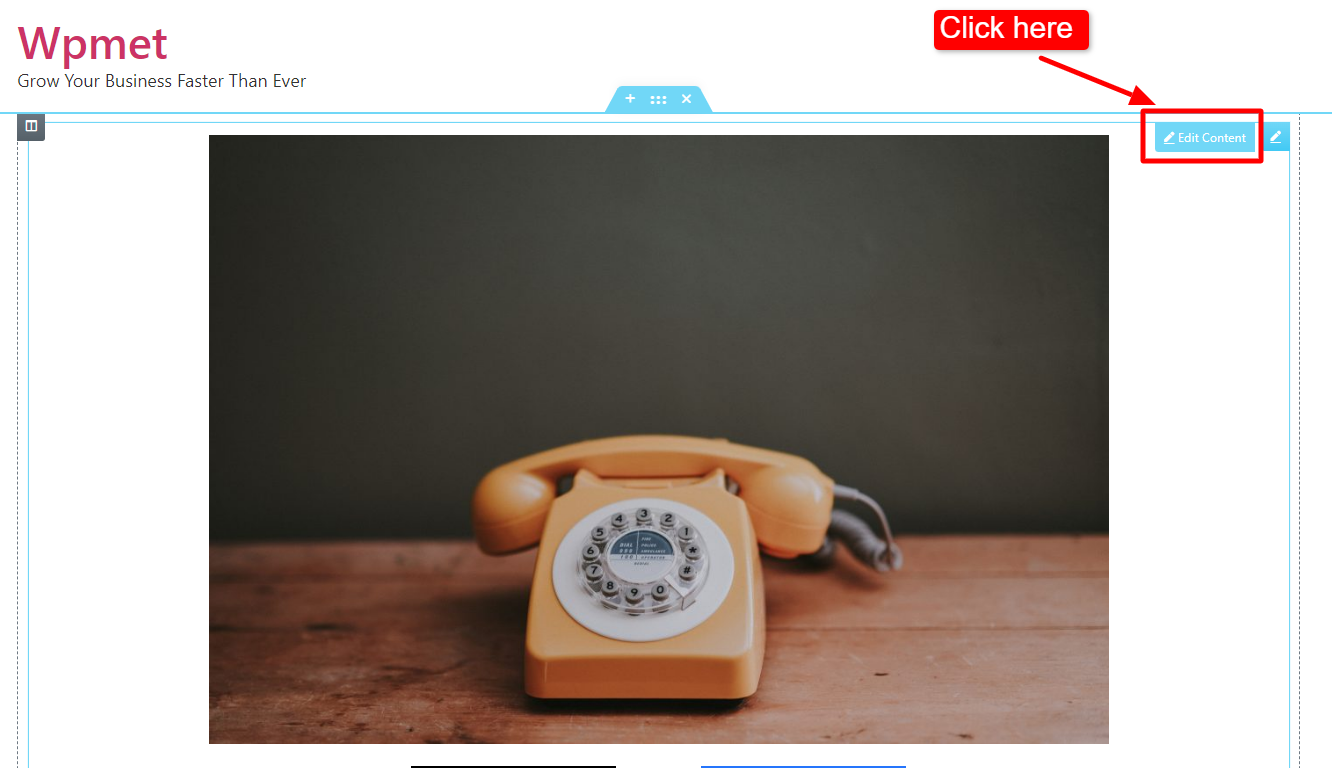
Now it’s time to add content to your slider. For that hover over the widget, here you will find the button navigator which you can choose to select a specific slider. Then click on the first edit icon to edit the slider. In case you want to edit the widget settings then click on the second edit icon.
Once you click on the edit icon to add content, you should see a new window with the same Elementor page builder interface. Here you can select any layout and add content just like you do while building a page. Once you create and customize your slider, click on update to save then click on the X icon on the top right corner to close the window.
Now add contents to all the sliders using the same process. Choose the slider from the navigator, then add the content.
You can also add the ready section by ElementsKit. For that, once the widget window opens, click on the Ekit icon. You will find a new window with all the premade pages, templates, and sections of ElementsKit.
Go to the Section tab, hover on the section you like and to add it to your slider click on insert. Once the section is inserted you can customize it and then click on update to save.
Follow the above-mentioned steps to add content to all your slides.
Step 5: Configure and Style Advanced Slider in Elementor #
You can configure the Advanced Slider widget under the content tab.
5.1 General #
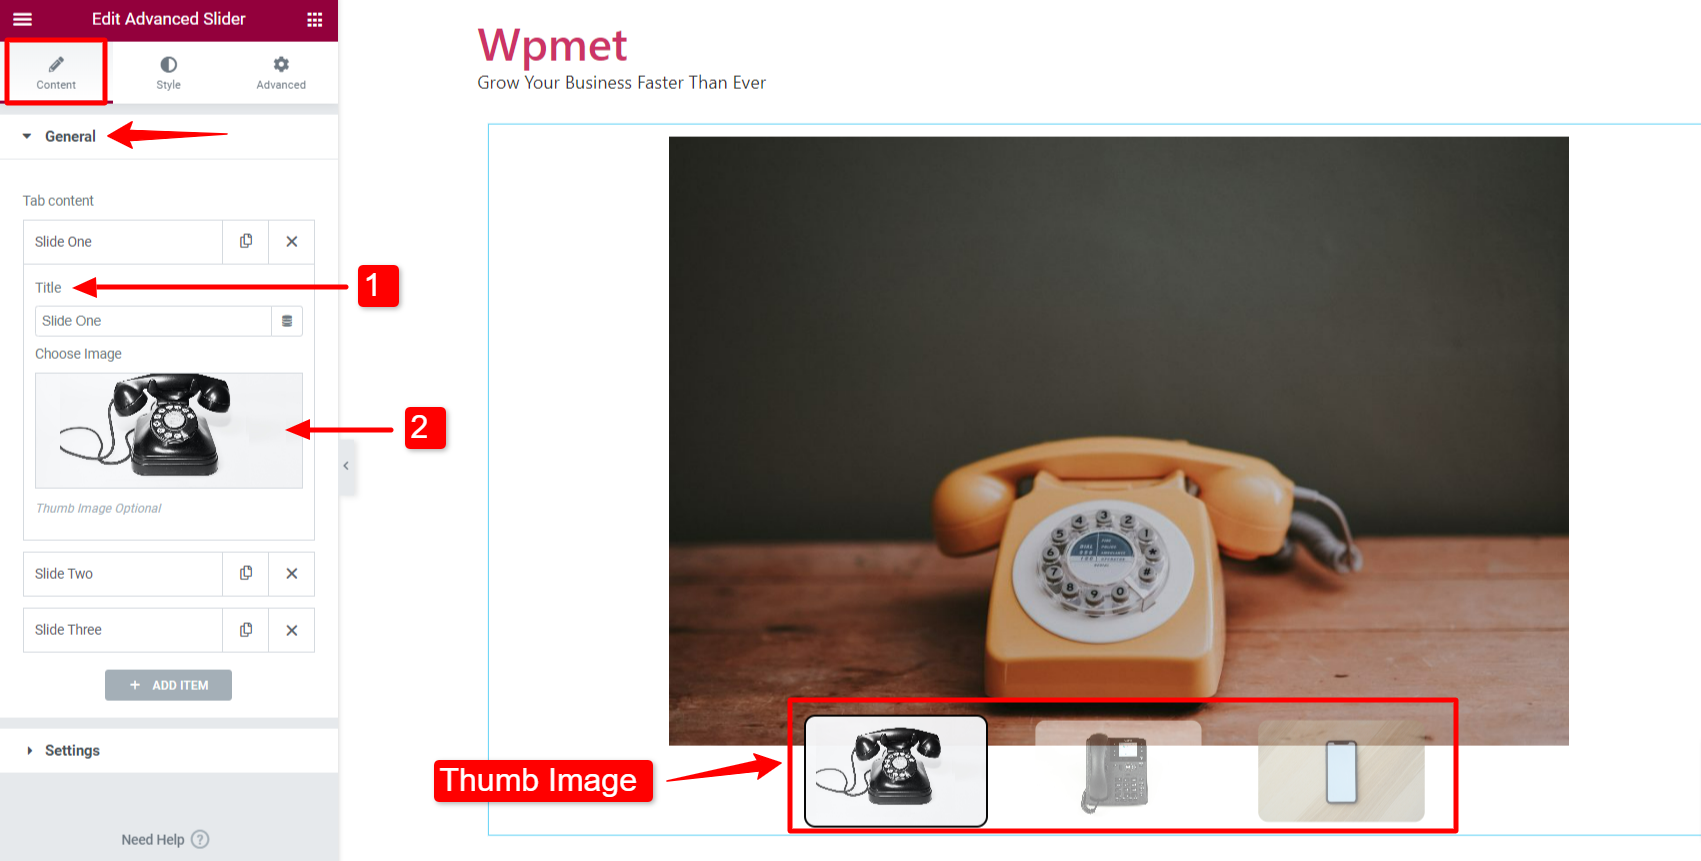
As said earlier, you can add slides in this section. After adding slides,
- You can change the slide name – Title.
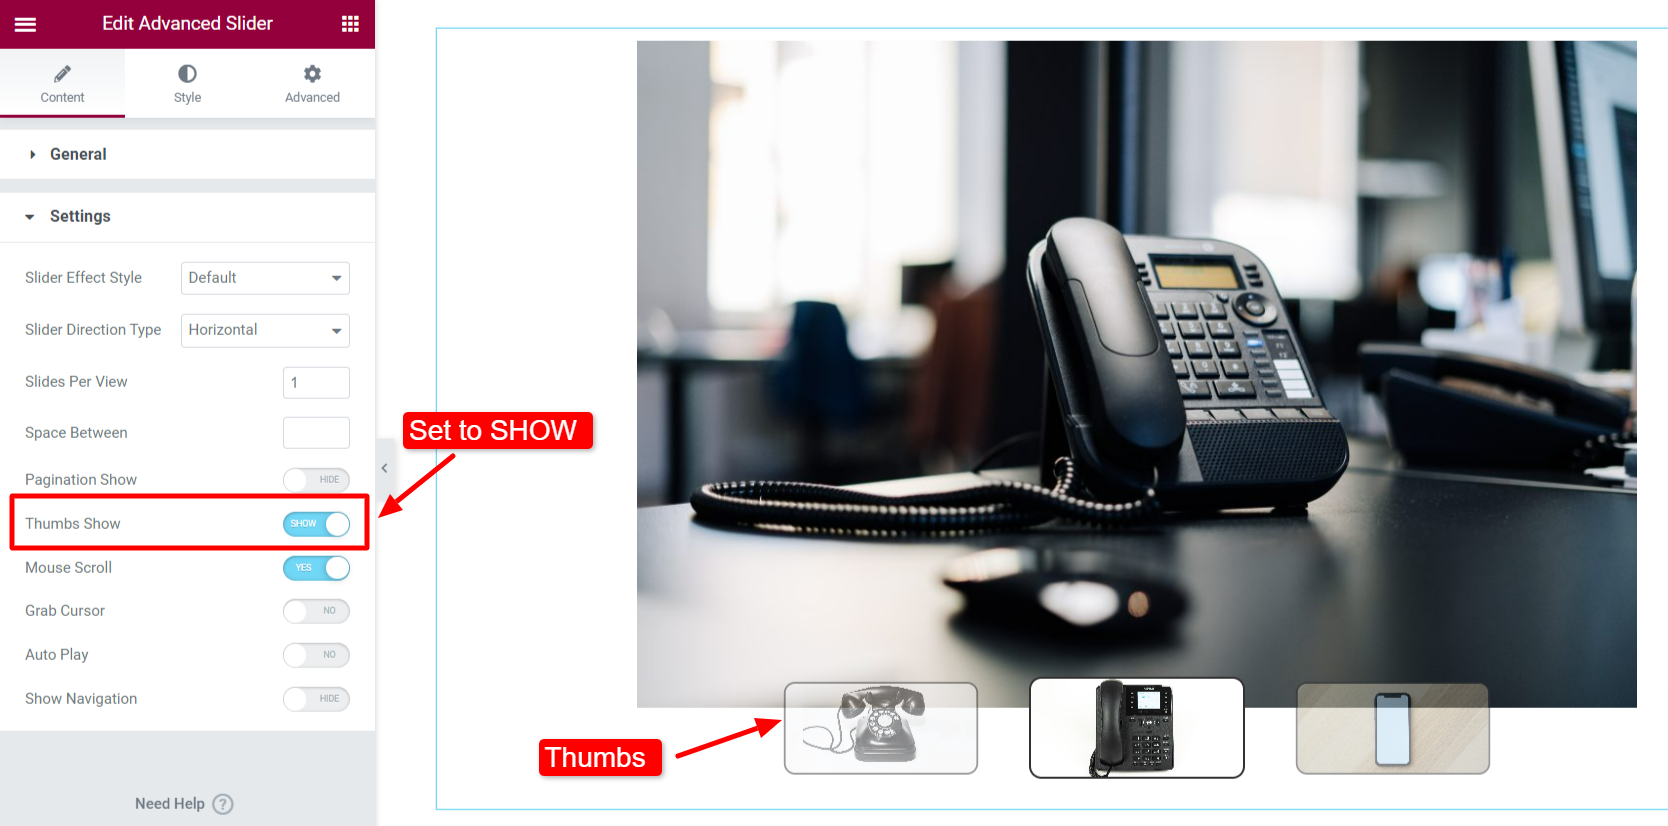
- You can also add a Thumb Image for each slider.
*Note: To make the Thumb Image visible, enable the “Thumbs Show” under the Settings section.
5.2 Settings #
Under the Settings section, several options are available to configure the advanced slider in Elementor.
Slider Effect Style #
The ElementsKit Advanced Slider widget has 5 different Slider Effect Styles available. They are Default, Fade, Cude, Flip, and Coverflow.
Slider Direction Type #
You can create Horizontal or Vertical slides using the widget.
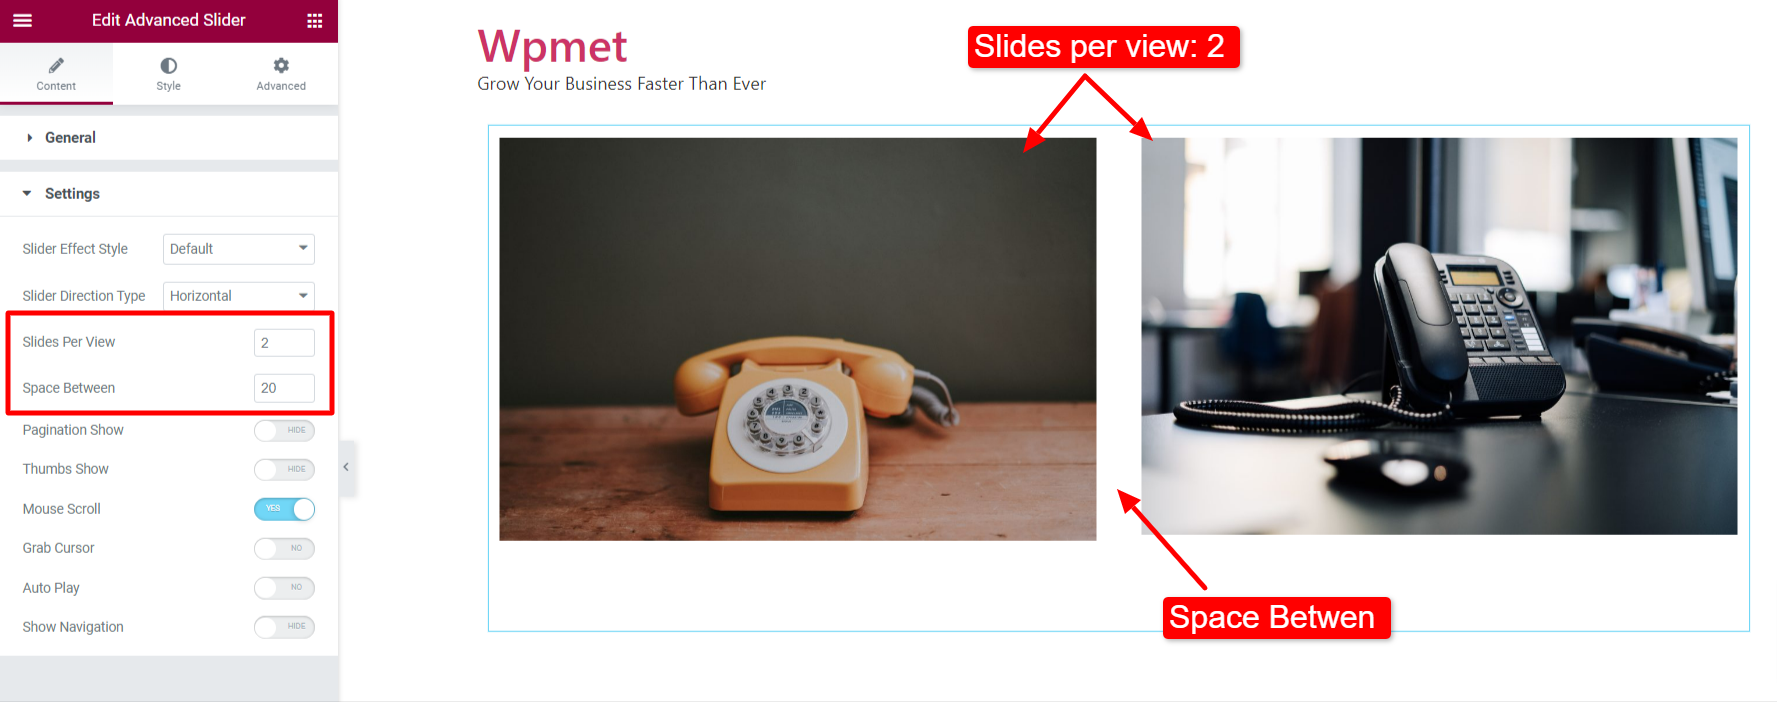
Slides Per View #
You can decide how many slides to show on a single view using the Slides Per View feature. If you set the Slides Per View to two or more, adjust the Space Between the slides.
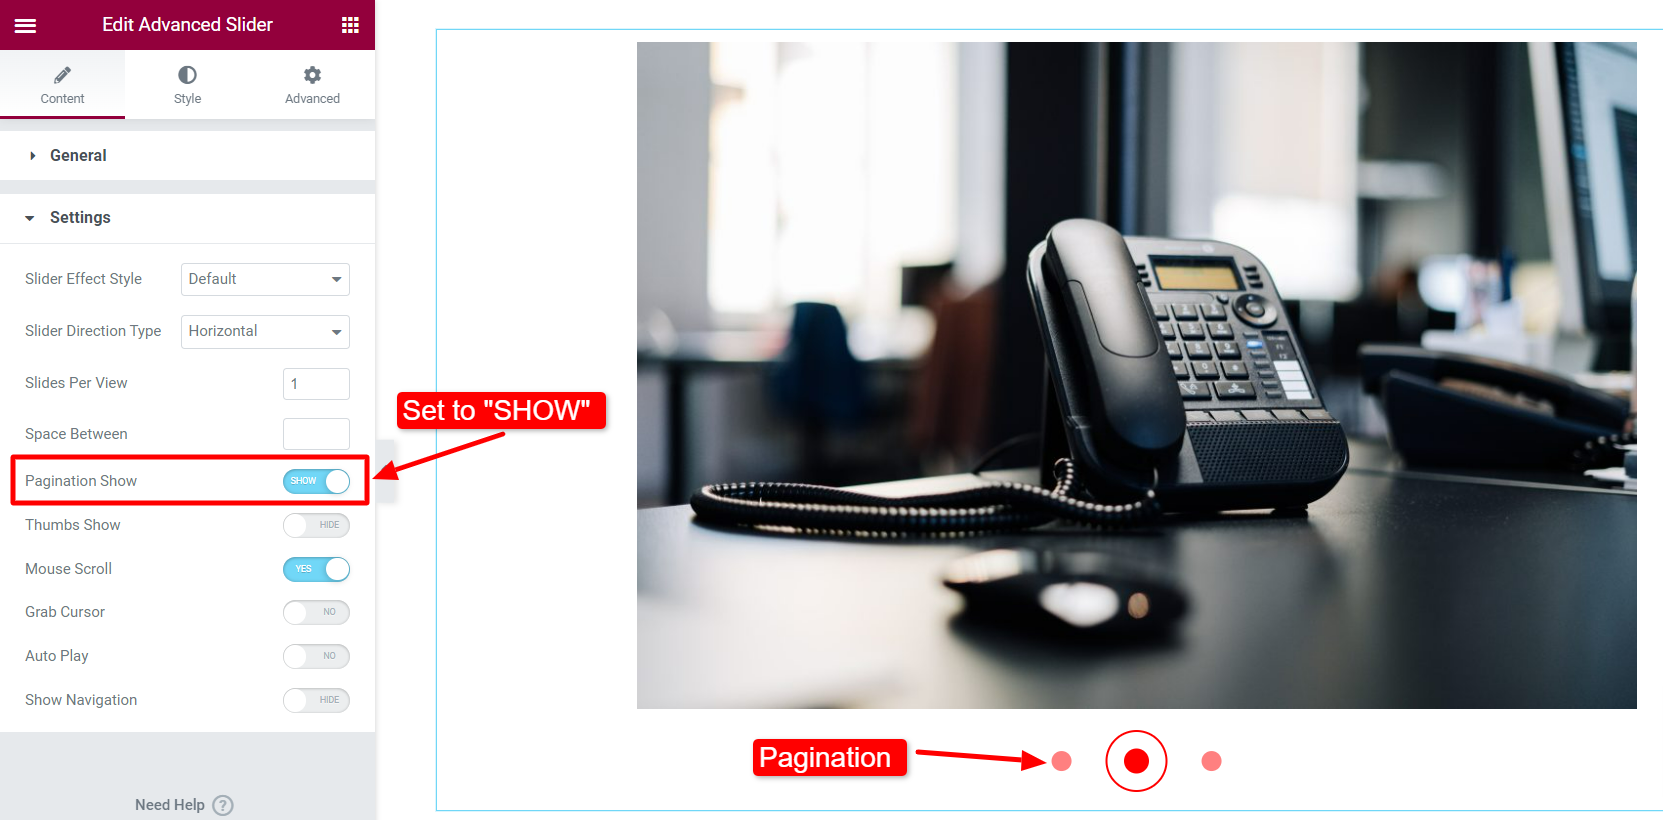
Pagination Show #
Enable the Pagination Show from the Content > Settings section.
Note: Pagination will only be visible when “Thumb Show” is disabled.
Then move to Style > Pagination / Thumbs. When Pagination is enabled, options for pagination will appear here.
- Choose a pagination Dot Color.
- Adjust pagination Dot Size.
- Select a Dot Border Color and adjust the Dot Border size.
- Set the Alignment to the right, left, or center.
- Adjust the Border Radius.
- Set the Pagination Gap.
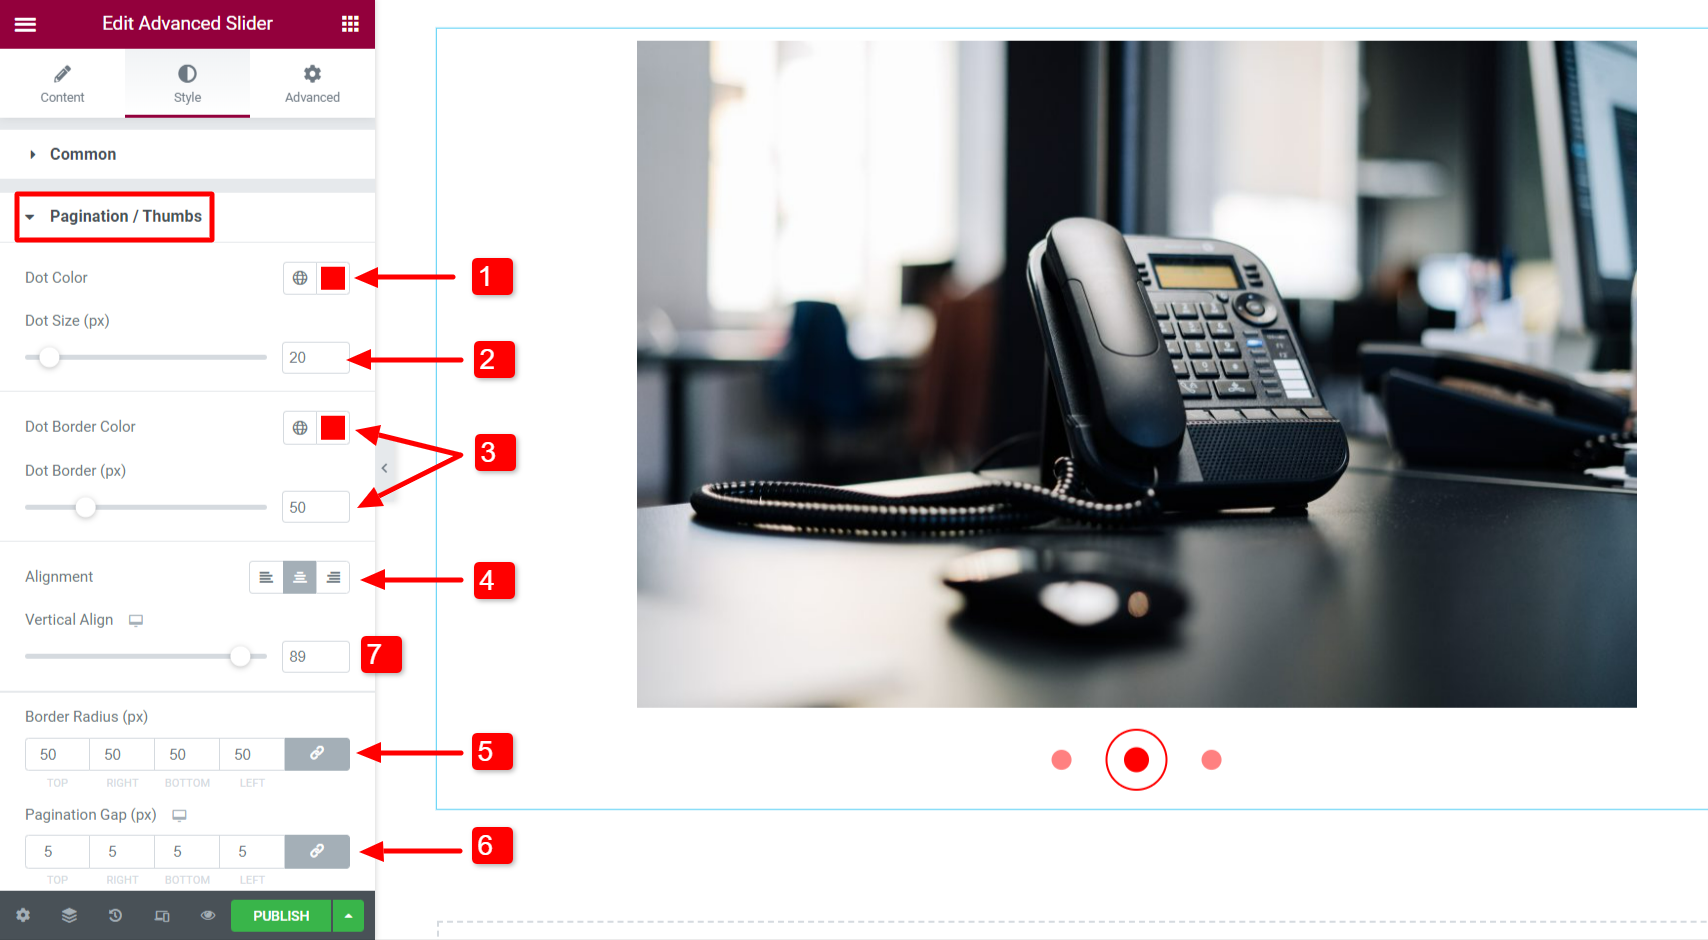
- Adjust the vertical position of pagination dots using the Vertical Alignment option.

Thumbs Show #
Enable the Thumbs Show option from the Content > Settings section.
Note: Pagination won’t be visible when Thumbs Show is enabled.
Then move to Style > Pagination / Thumbs. When Thumbs are enabled, options for thumbs will appear here.
- Set the Alignment to left, right, or center.
- Adjust the thumbs’ vertical position with Vertical Align option.
- Set the Opacity, Border Type, Border Width, Border Color, and Border Radius. You can set different parameters for “Normal” and “Active” thumbs.
- Adjust the Thumbs Height.
- Adjust the gap between the thumbs – Thumbs Gap.
- Adjust the Offset Gap.
Mouse Scroll #
The ElementsKit Advanced Slider in Elementor comes with a Mouse Scroll feature. Users can change the slides using the scroller of the computer mouse. Turn the Mouse Scroll feature to on to enable the feature.
Grab Cursor #
An option that lets the user scroll the slides with their mouse cursor. Enable the Grab Cursor option from the Content > Settings section.
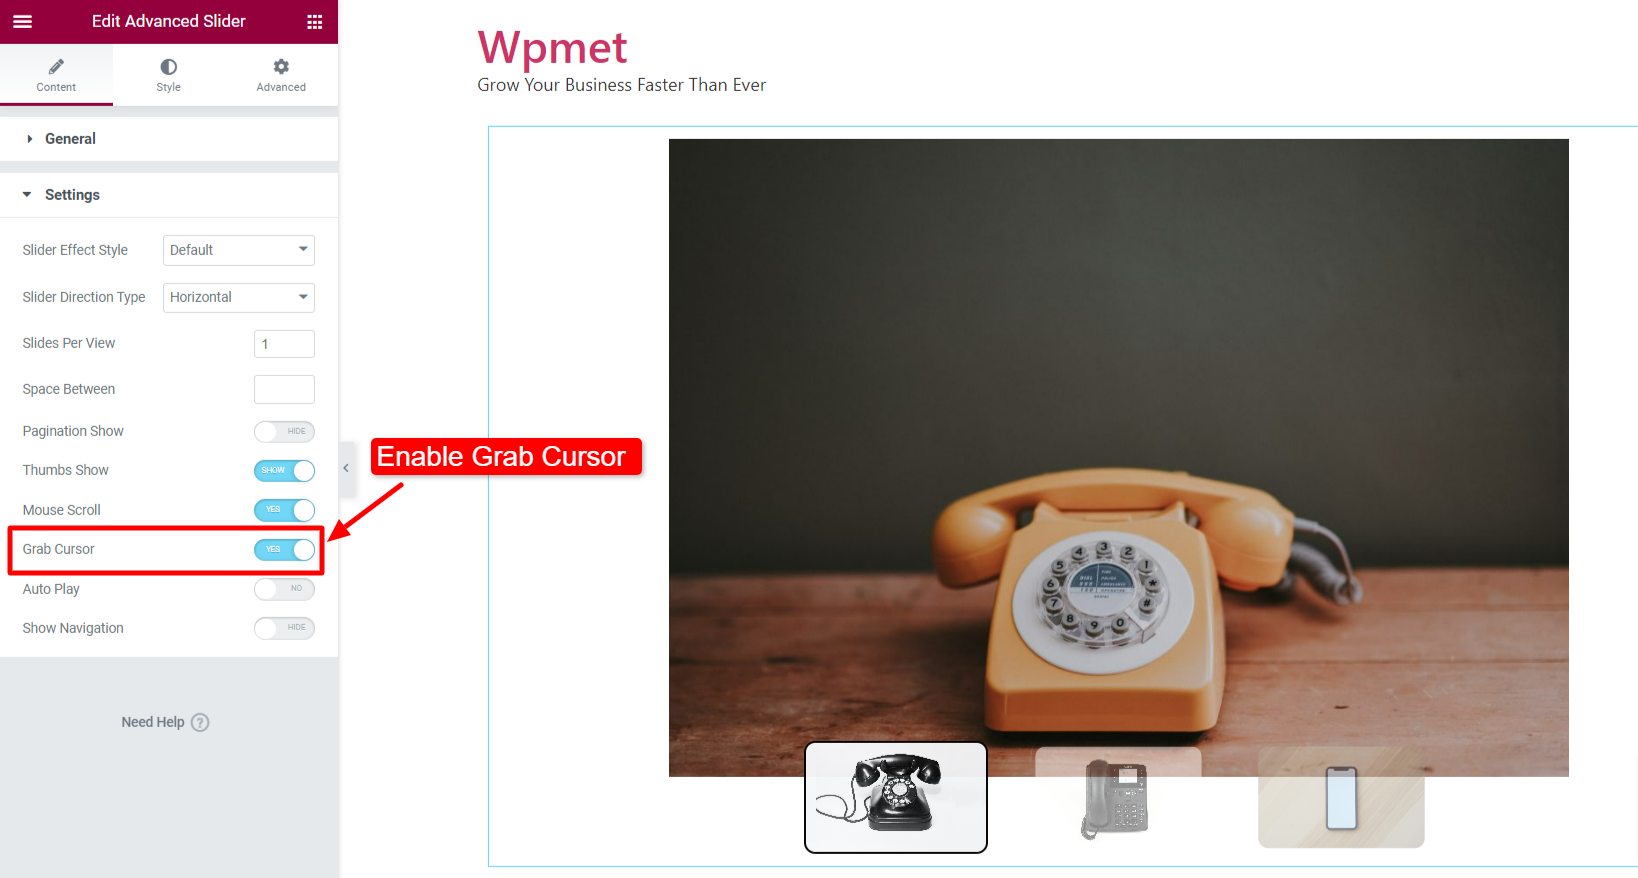
On the front end, you can check the cursor scrolling of the Advanced slider.
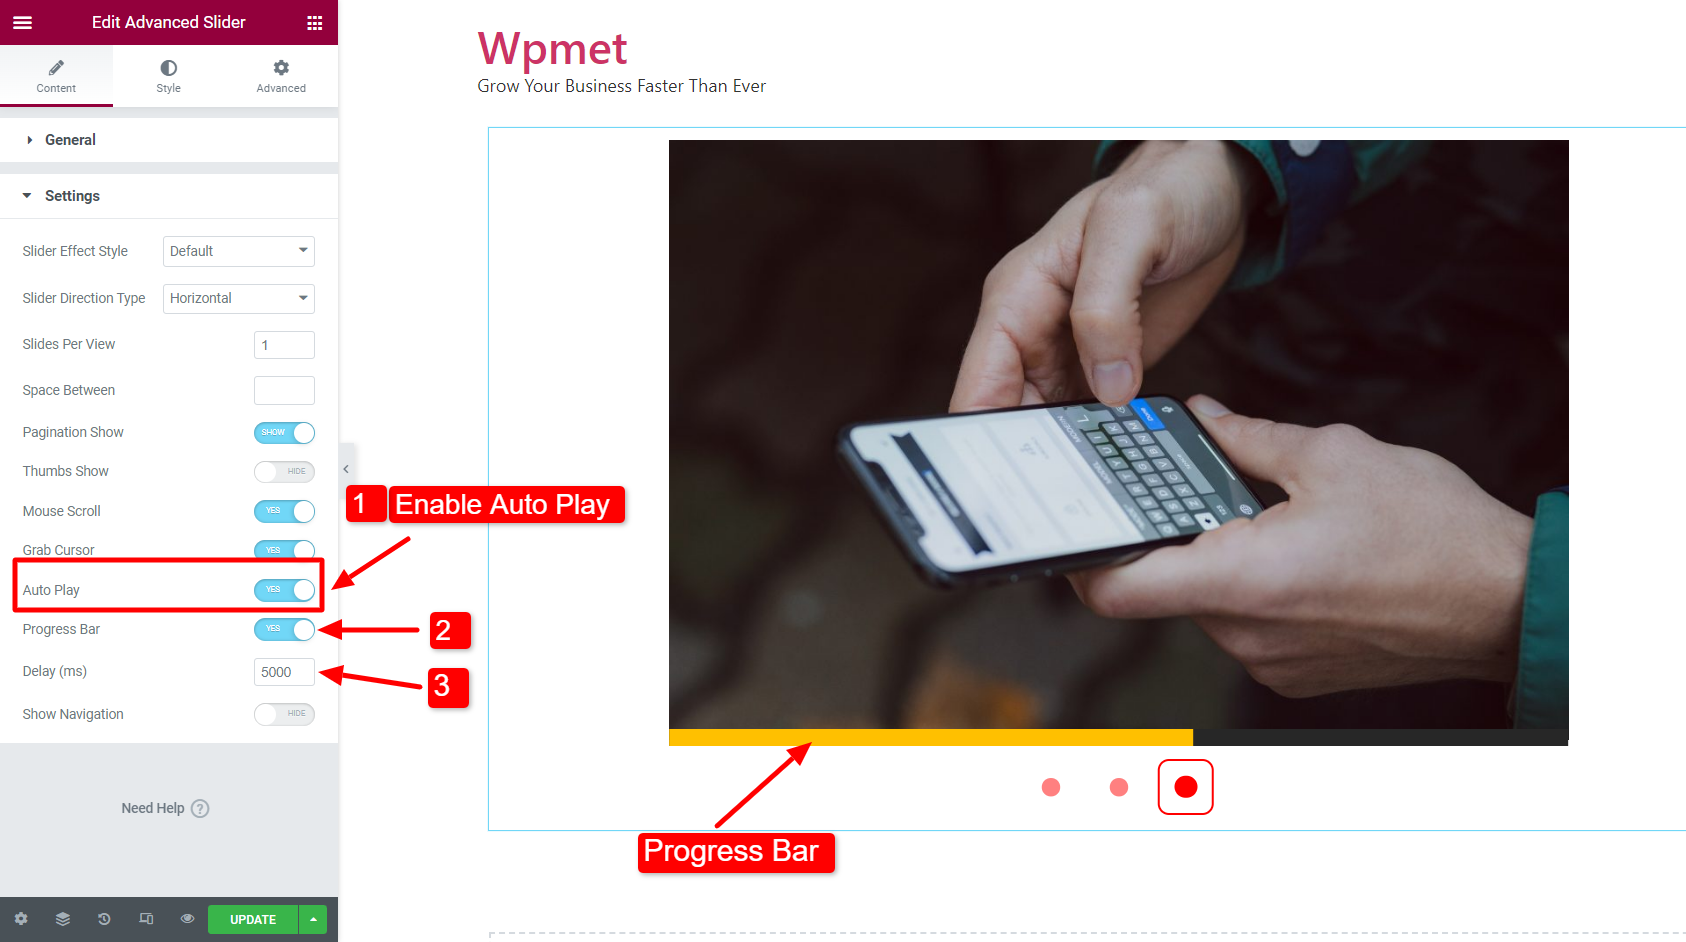
Auto Play #
You can enable autoplay for the advanced slider in Elementor.
- Enable Auto Play under Content > Settings.
- When Auto Play is enabled, set the Delay time in milliseconds (ms).
- You can also enable Progress Bar when autoplay is enabled.
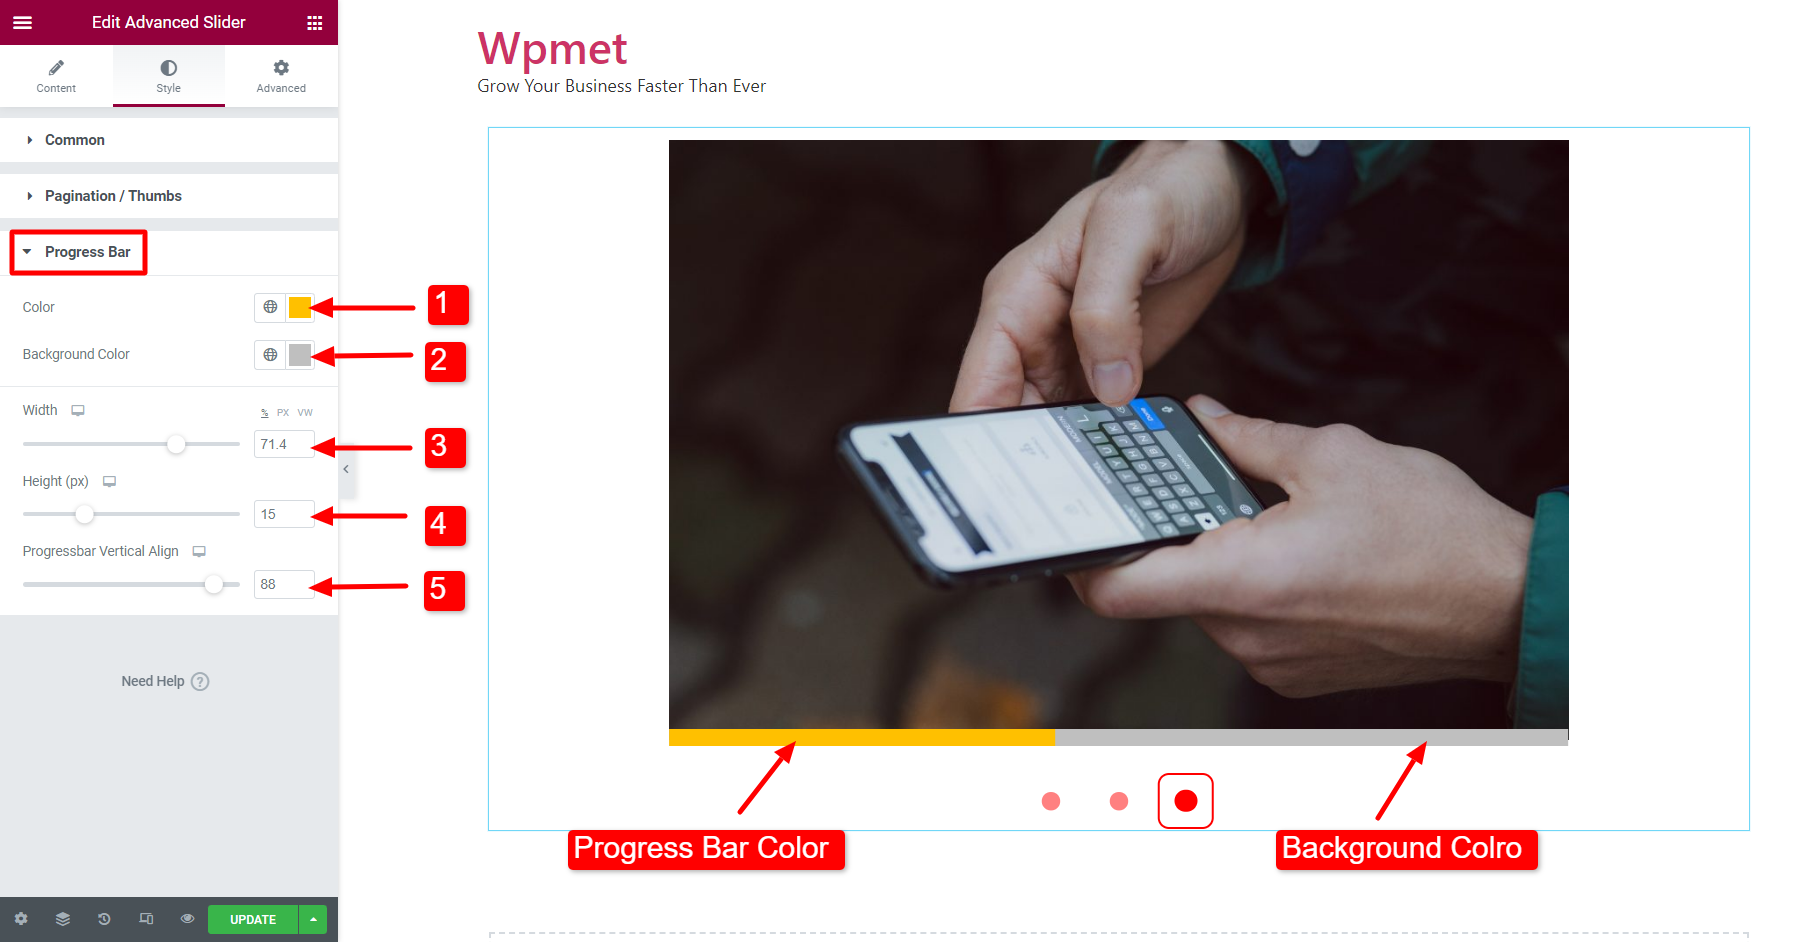
You can also customize the Progress Bar styles. To customize its styles, move to Style > Progress Bar. This option will only appear when “Progress Bar” is enabled from settings.
- Choose a progress bar Color.
- Select a Background Color for the progress bar.
- Adjust the progress bar Width.
- Set the Height of the progress bar.
- Adjust the vertical position with the Progressbar Vertical Align option
**Content Animation with Auto Play**
If you add animations to the slider content, make sure the animation time must be less than the autoplay delay time.
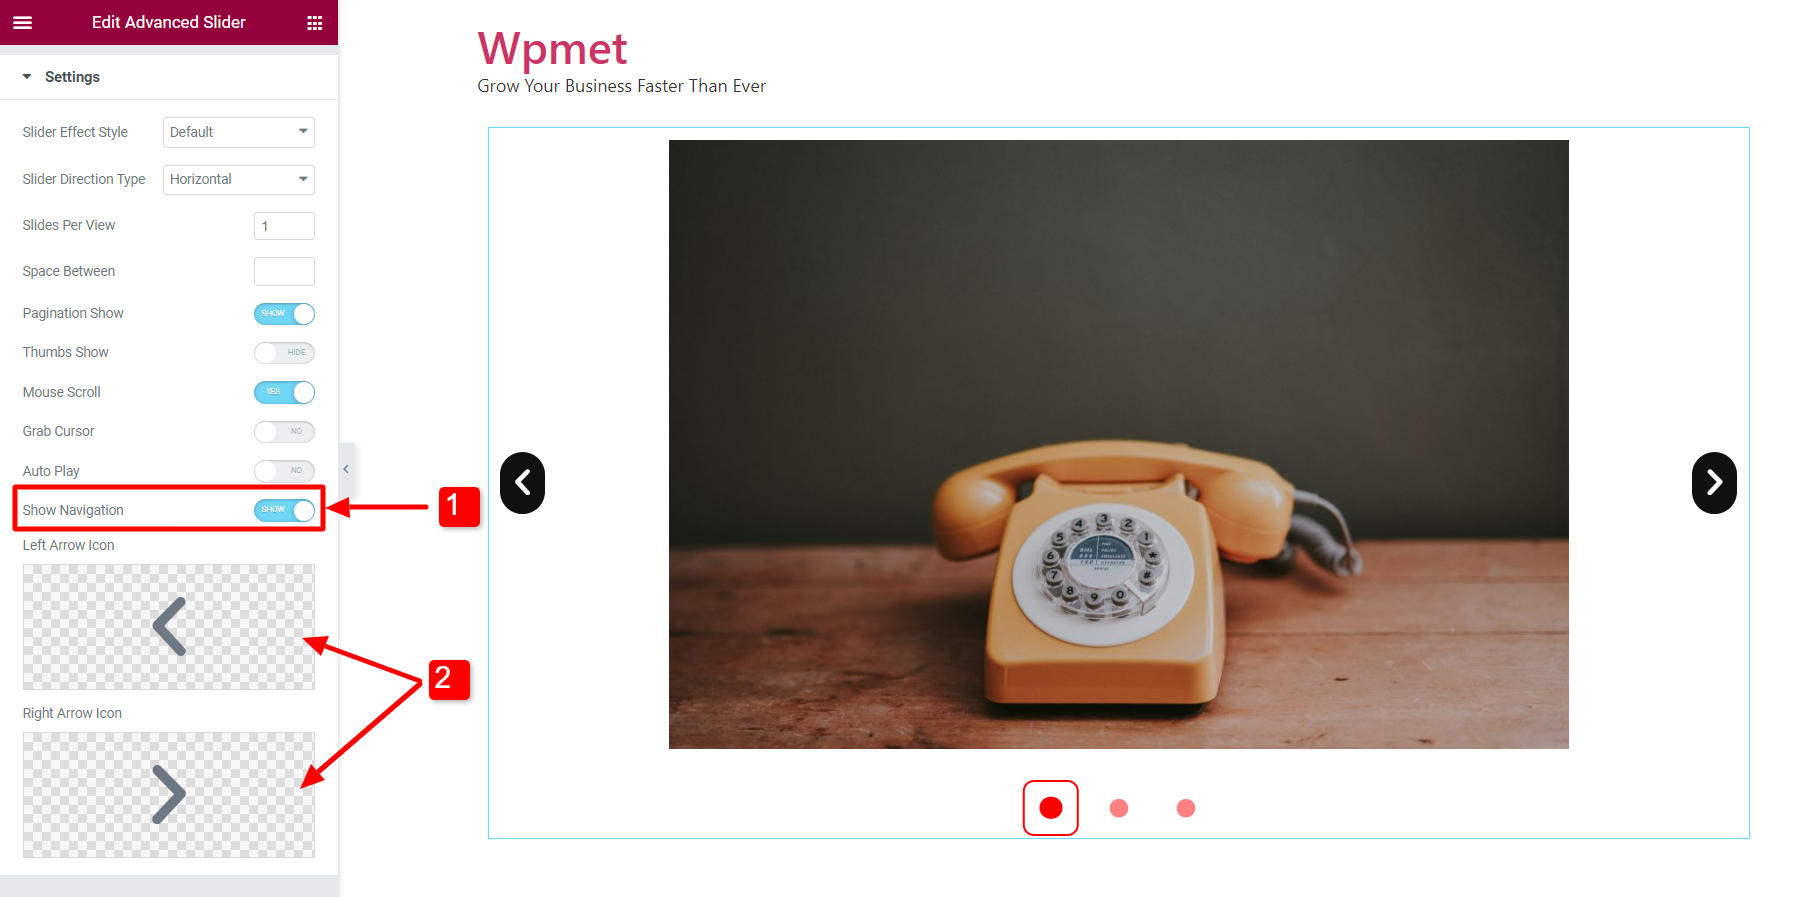
Show Navigation #
You can also show navigation with the Advanced Slider in Elementor.
- Enable the Show Navigation feature under Content > Settings.
- When enabled, set the Left Arrow Icon and Right Arrow Icon.
You can also customize the Navigation styles. To customize its styles, move to Style > Navigation. This option will only appear when “Show Navigation” is enabled from settings.
- Adjust the Width and Height of the navigation arrow box.
- Set the navigation Icon Size.
- Choose the Icon Color, Background Color, and Border Type for the navigation arrows. You can choose different sets of styles for the “Normal” and “Hover” style.
- Set the border radius of the navigation arrows using the Nav Border Radius feature.
- Adjust the vertical position of the arrow using the Arrow Vertical Align option.
Custom Navigation #
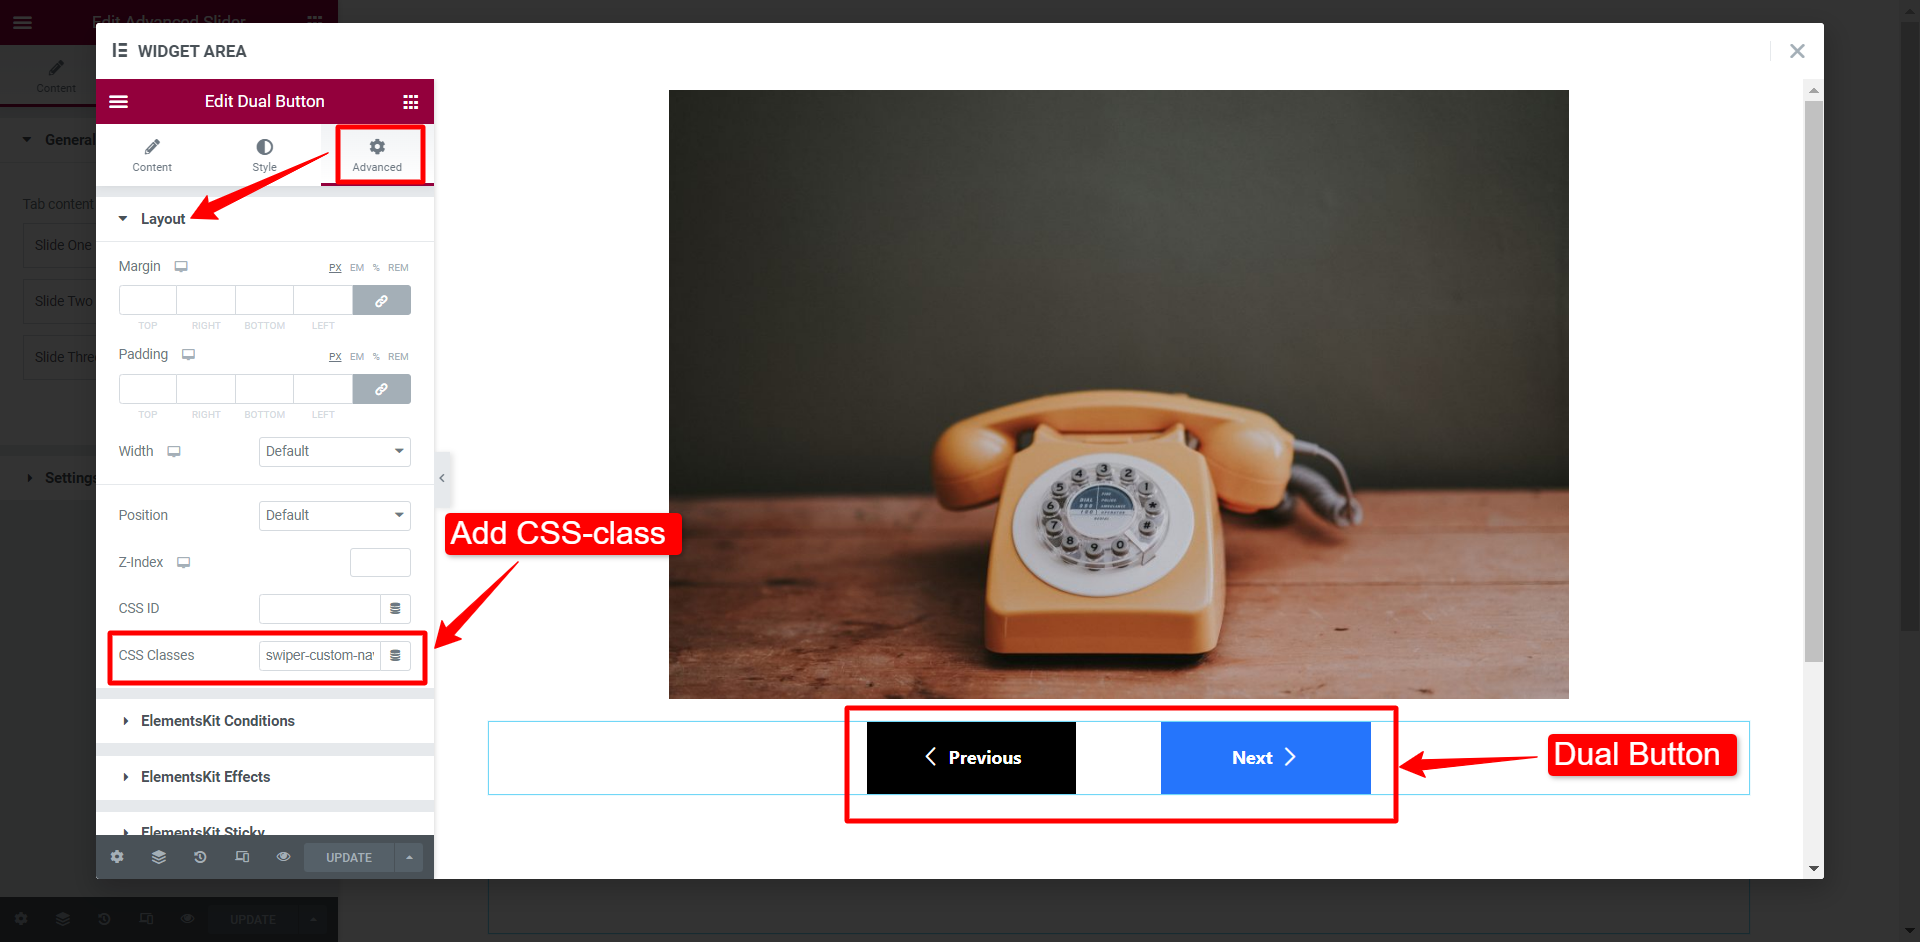
The Advanced Slider widget supports Custom Navigation for ElementsKit Dual Button widget.
You can use the Dual Button as slider navigation. To use the custom navigation feature, you have to use the following CSS class:
swiper-custom-navTo add the custom navigation class
- Click on Edit Content for a slide.
- Drag and drop the ElementsKit Dual Button widget in the slide content design.
- Go to Advanced > Layout section, you will a field for CSS Classes. Add the class “swiper-custom-nav” in the field.
- You can customize the button styles if you want.
- Now click on the update button
Now you can check that custom navigation is working perfectly with the advanced slider.
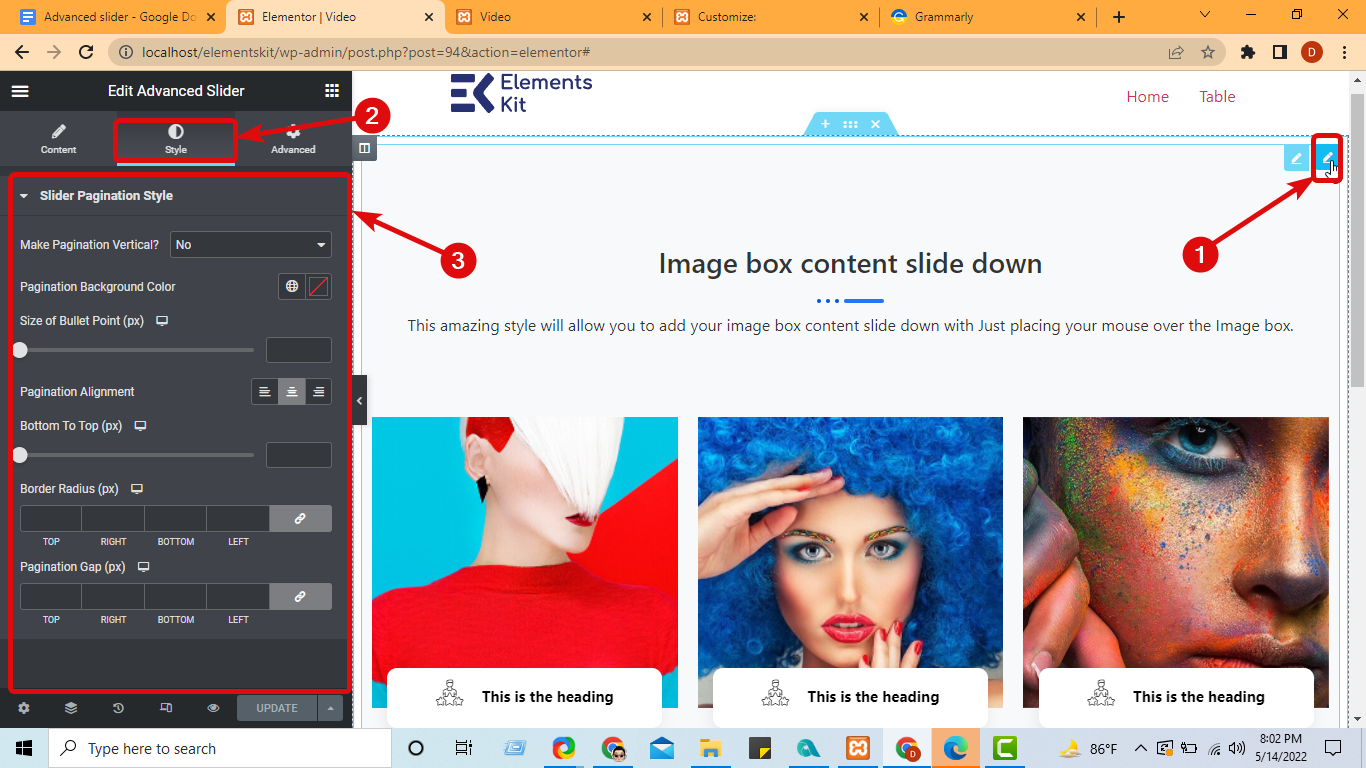
Step 6: Customize the style settings #
To customize the slider pagination style click on the Edit icon to edit the entire widget, then move to the Style Tab. Here you can customize the following options:
- Make Pagination Vertical: Select yes from the dropdown to make the pagination vertical.
- Pagination Background Color: Choose a custom color for the pagination background.
- Size of Bullet Point (px): Choose the size of the pagination bullet.
- Pagination Alignment: You can place the pagination on the left, right, or center.
- Bottom To Top (px): Choose the position of the pagination. This value will be based on the distance from the bottom.
- Border Radius: Customize the border-radius.
- Pagination Gap (px): Select how much gap you want around each bullet of the pagination.
Step 6: Update and See the preview #
Finally, click on Update to save the page and click on the preview button to use an advanced slider in Elementor like the one shown below:
ElementsKit for you 👇


