The purpose of the Price Menu block in WordPress is to display product or service prices in a clear and organized way. With GutenKit Price Menu block you can make beautiful menus in a table format.
Check the documentation and learn to use the GutenKit Price Menu block.
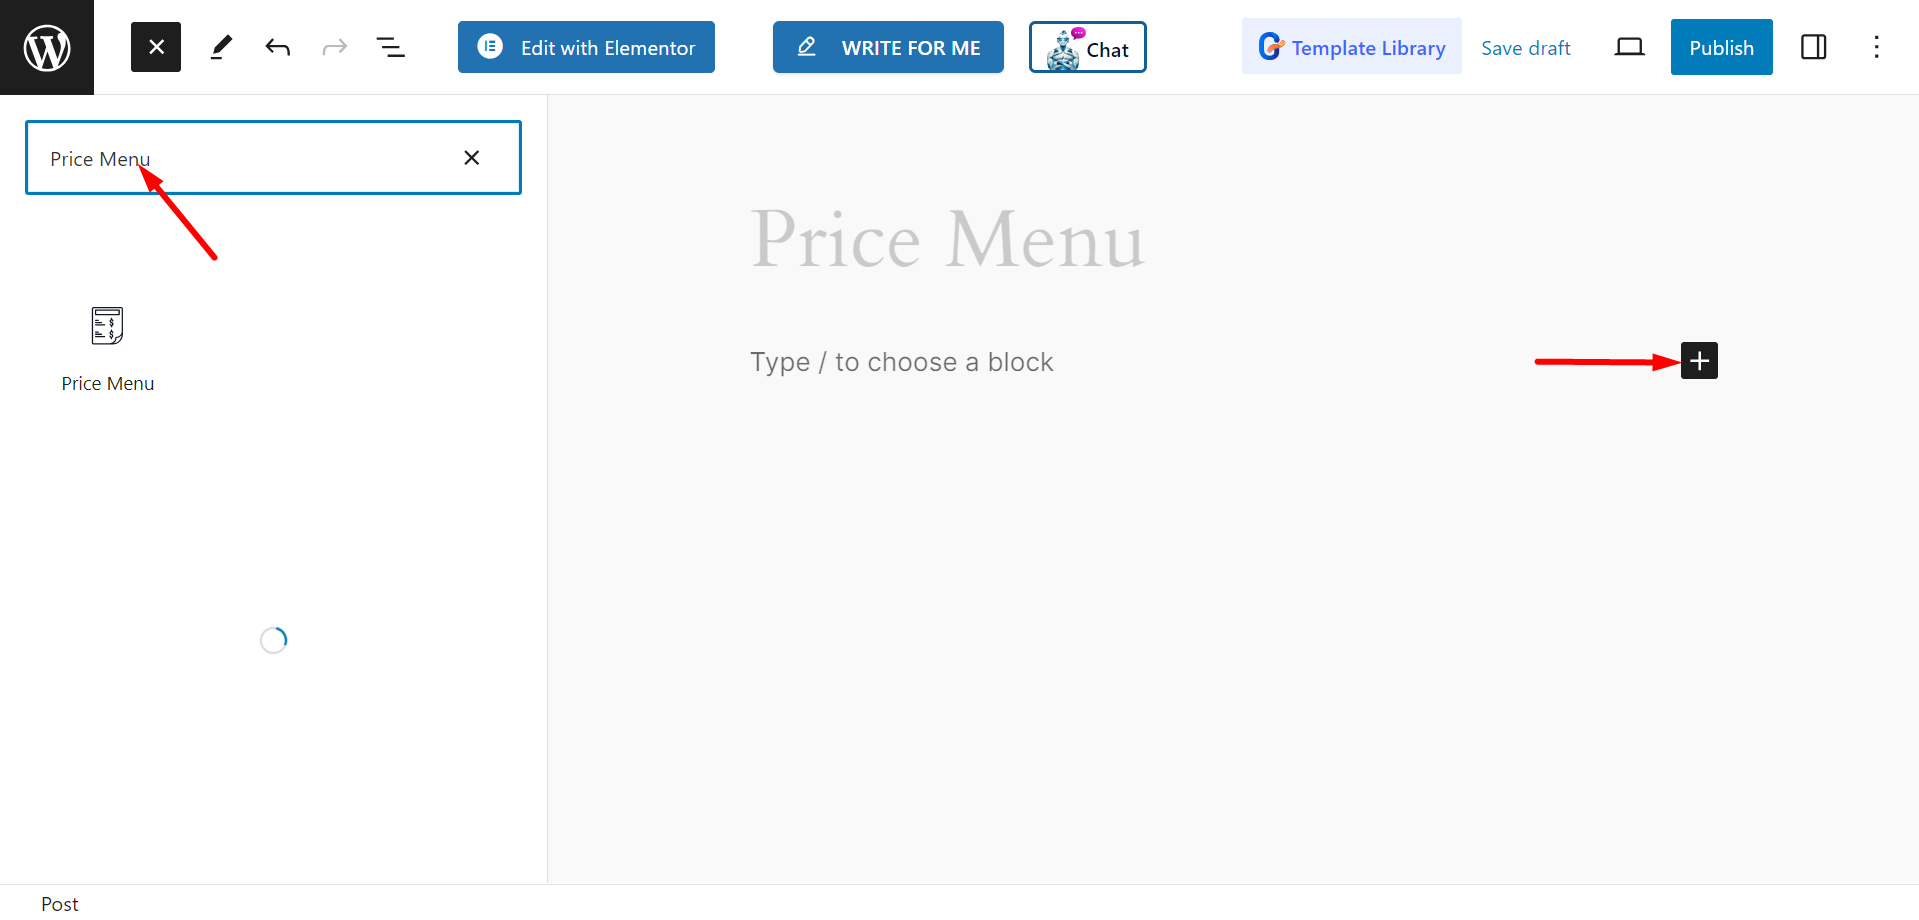
How can you use Price Menu block? #
Access to your WordPress dashboard –
- Find Pages/Posts > Add New Page/Post or start editing an existing page with the block editor.
- Look for the “+” icon at the right side or top of the editor screen. Click it.
- A block menu will appear, search for “Price Menu”.
- When you see it, click it or drag & drop it on the block editor screen.
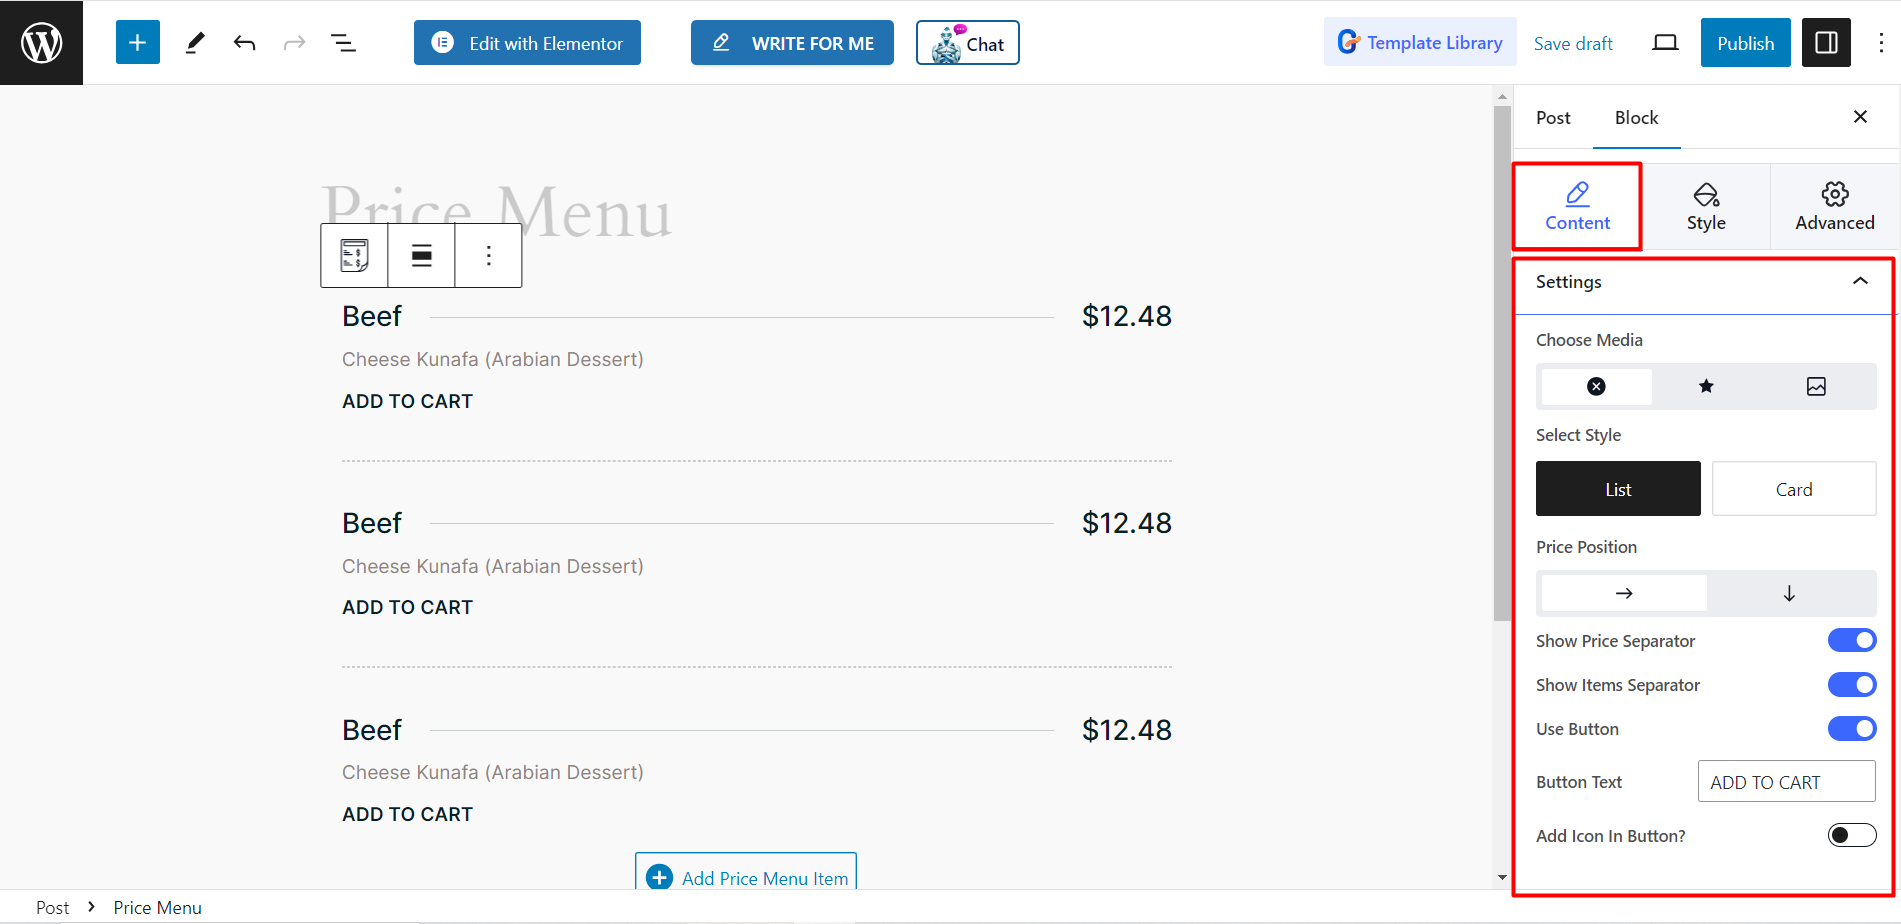
Editing Content Part #
Settings – This option offers the following controls –
- Choose Media: To set the media, you can choose an icon or set a image, or choose to not keep any media.
- Select Style: You can display the price menu as a List or as a Card.
- Price Position: Choose between Right and Bottom to set the price position.
- Show Price Separator: You can show a separator for the price.
- Show Items Separator: Between each items you can show separator by enabling the button.
- Use Button: If you want, you can button to the price menu. After enabling the button, you’ll get these options –
- Button Text: You can write button text in the field.
- Add Icon In Button: This option lets you add a button with your button. If you enable this option, then you can also choose icon from the list and adjust its position.
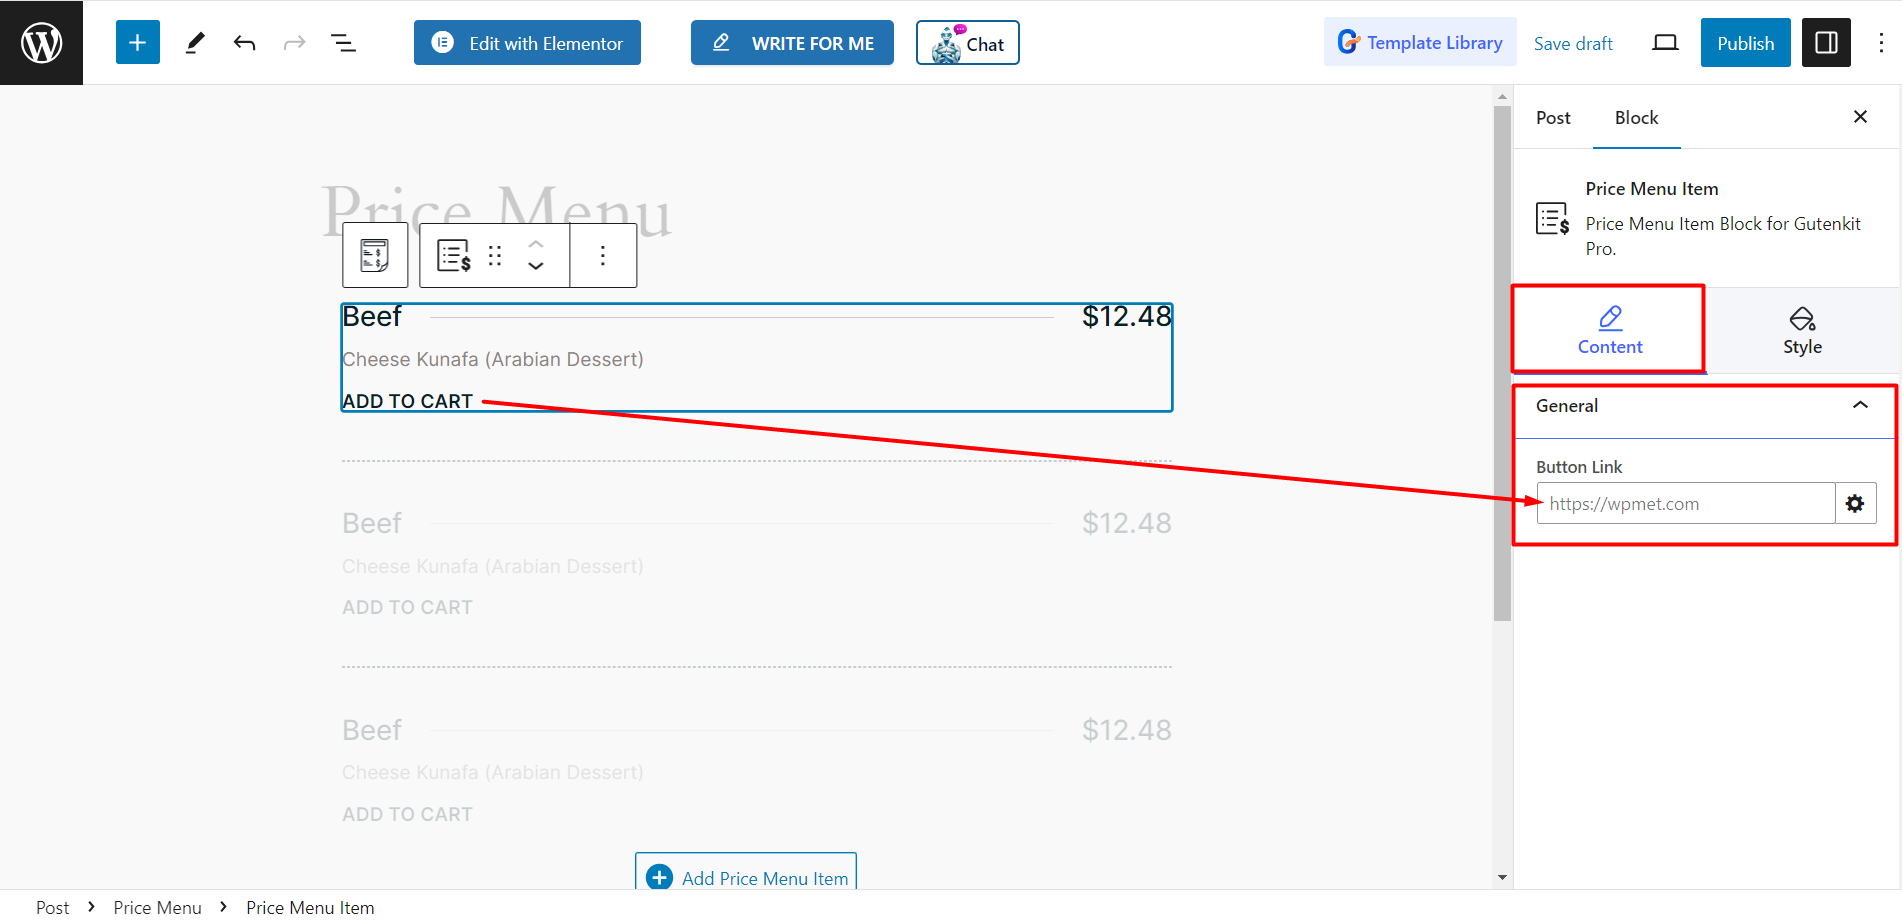
Edit Content of Single Items #
For each item on the price menu, you can customize the content section separately. It will show you a General option. Under this option, you can insert Title Link or if you have enabled Button, then you can insertButton Link.
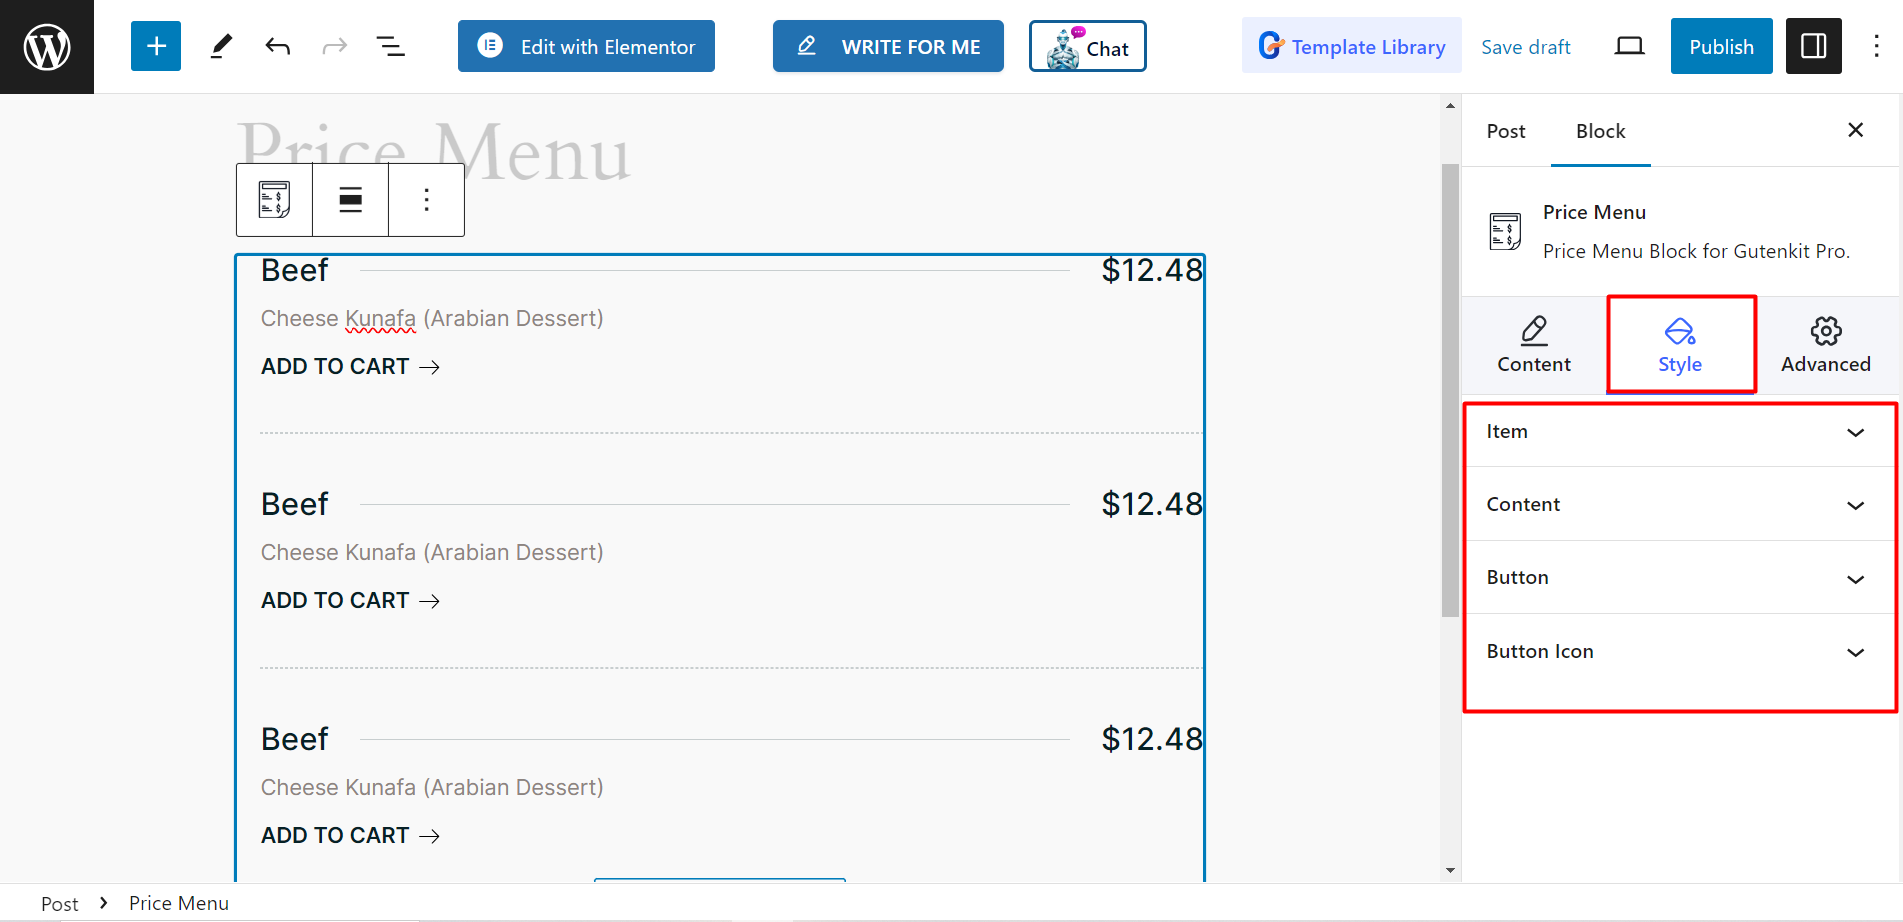
Style #
Depending on the customization options of the content section, you will get all the necessary styling options here.
- Item: To design the items, you can adjust vertical align, space between, separator, padding, border radius, background type, etc.
- Content: Here, you can control the padding, and then set color, typography, margin, etc. for the title, description, and price.
- Button: To style the buttons you can change the typography, border, box shadow, and other related things from here.
- Button Icon: To design the button icons consider changing color, icon size, spacing, etc. from here.
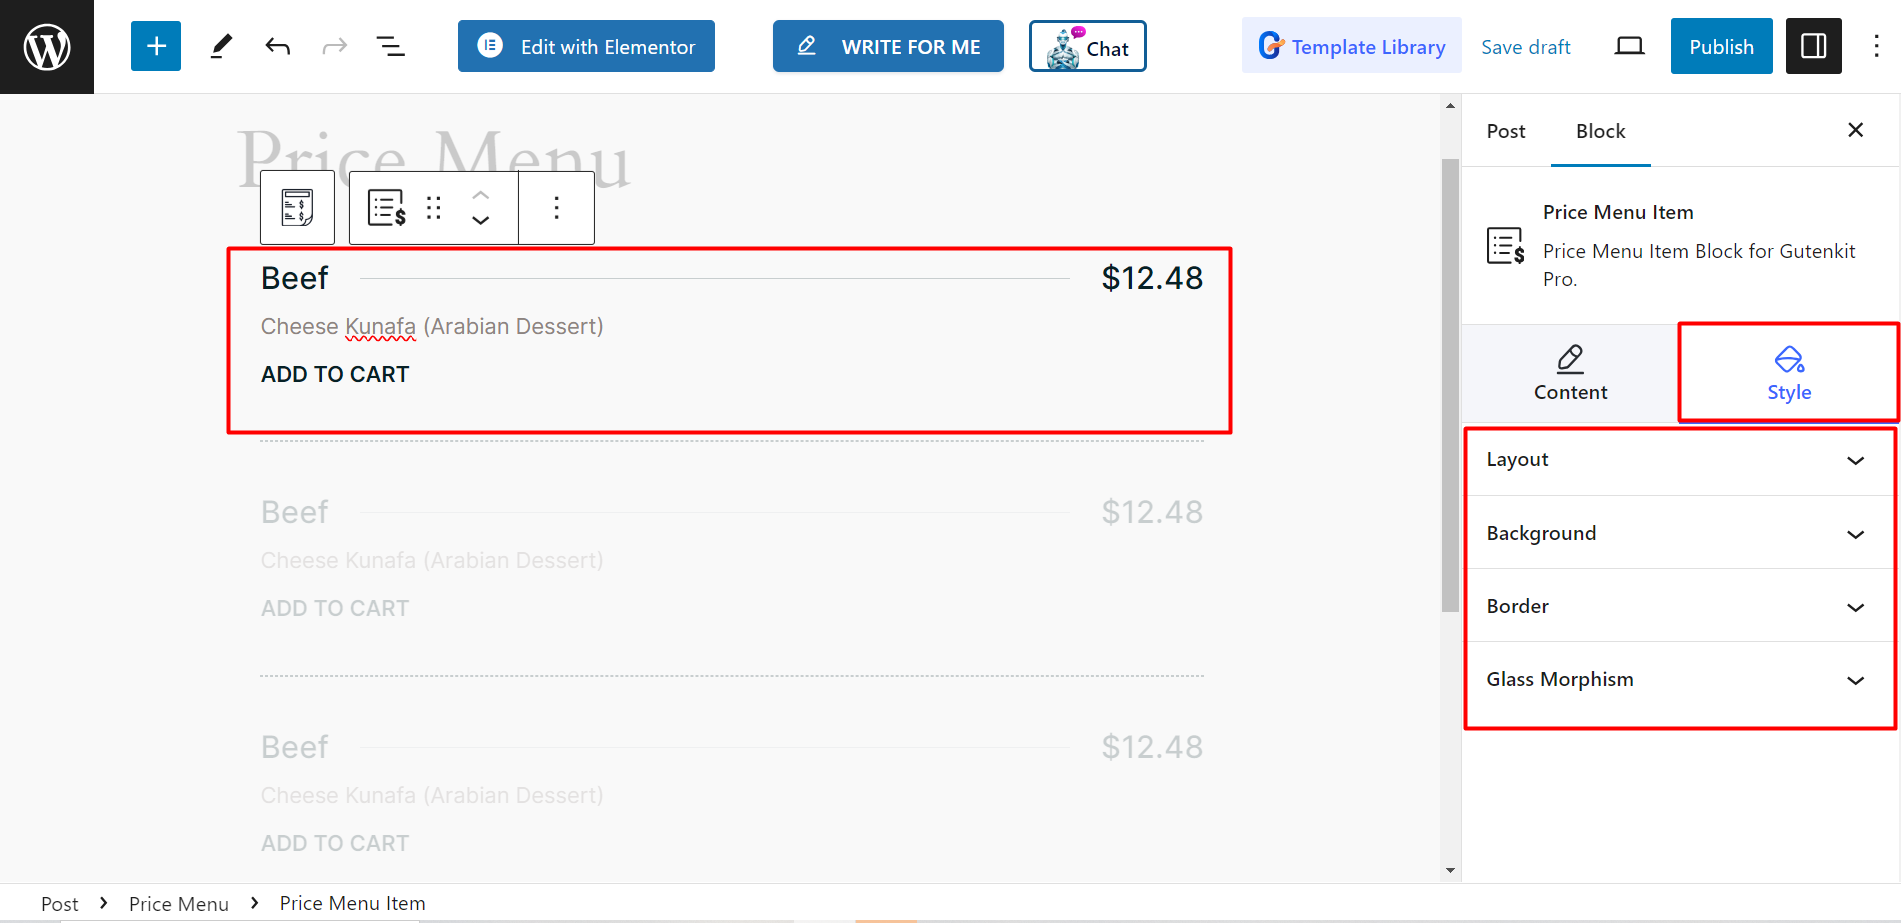
Edit Content of Single Items #
For a single item, you will get the following styling options –
- Layout: To style this part, you have to change the margin, padding, and width.
- Background: You can decorate the background with different colors and images, and keep it at normal or hover state.
- Border: Here, the options are – Border style and color, border radius, and box-shadow.
- Glass Morphism: To give a frosted glass effect to your price menu, you can use this option and create an eye-catching price menu.
Isn’t it a simple process? To enhance clarity and user experience you must try the block today.


