Want to build your customize layouts in Gutenberg Page Builder for designing website sections by adding multiple blocks? Well, you can’t do this with the default functionality. However, the GutenKit Container block is available with various presets of column structure. And, you can add multiple blocks within one column.
Further, it allows you to customize each column individually and control block positioning. This documentation will educate you to use the GutenKit Container block for creating column layouts in the Gutenberg page builder.
How to Use the GutenKit Container Block #
Make sure you have installed the GutenKit plugin. Then, start from the WordPress dashboard, take a new page or post, and start editing.
Step 1: Add Container Block #
Start from the WordPress dashboard and take a new page or post. You will be directed to the WordPress block editor. Then, click the “+” icon in the upper-left corner of your block editor. A block menu will appear with a range of blocks:
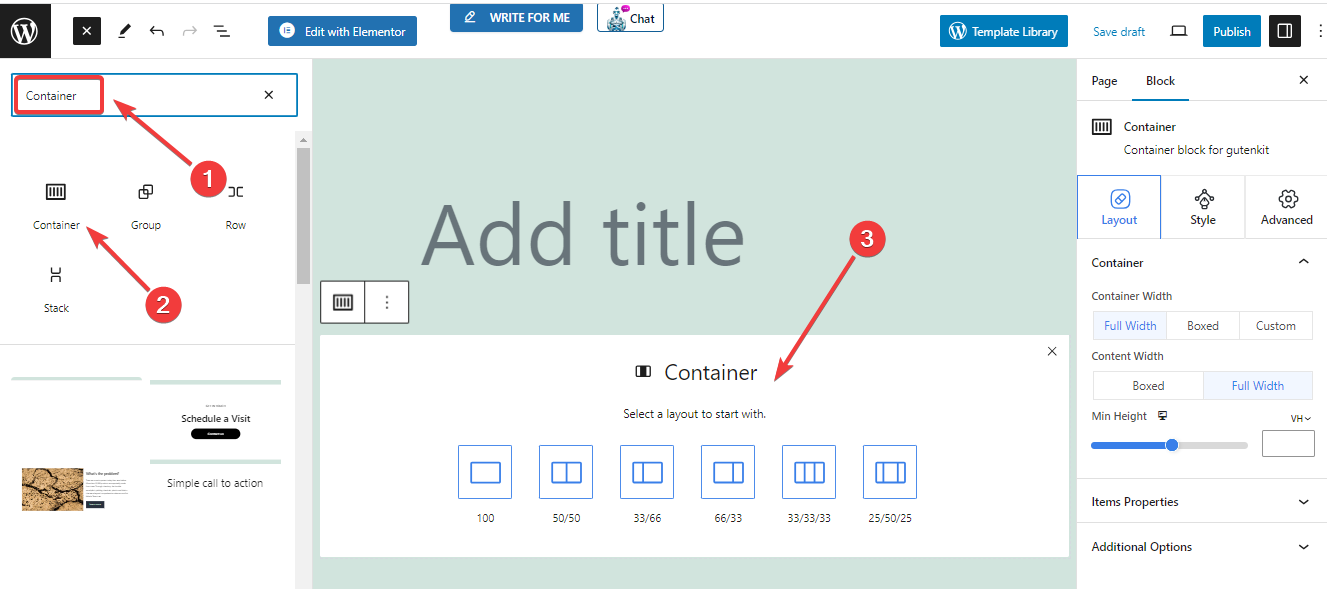
- Use the search box to find the “Container” block.
- Once you find it, just click on it or drag and drop it to the editor screen.
- The Container block is added to your screen.
Step 2: Choose a Column Structure/ Column Width Preset
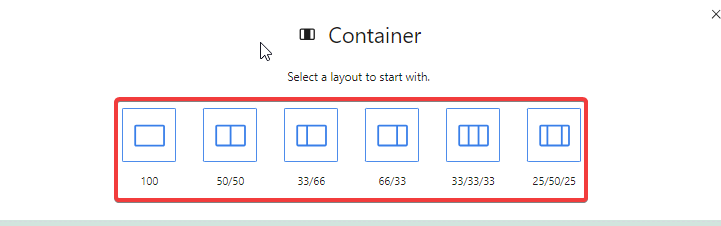
The Container block will show six different column structures/ preset column widths. Choose your preferred one according to your design and content type. For example, we are going for a 50/50 structure.
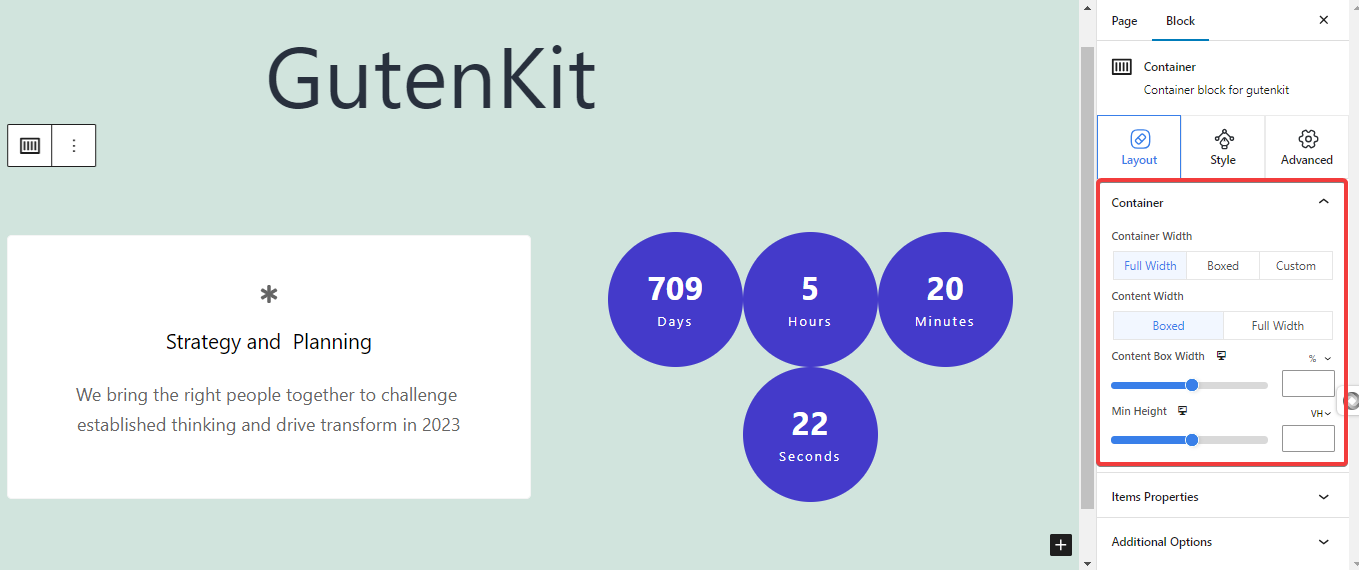
Step 3: Configure The Container #
After selecting your preferred structure for the container, take a look at the block settings in the right sidebar. You will configure the container from the Layout tab.
Note that you can configure and style each column independently. Here are the settings:
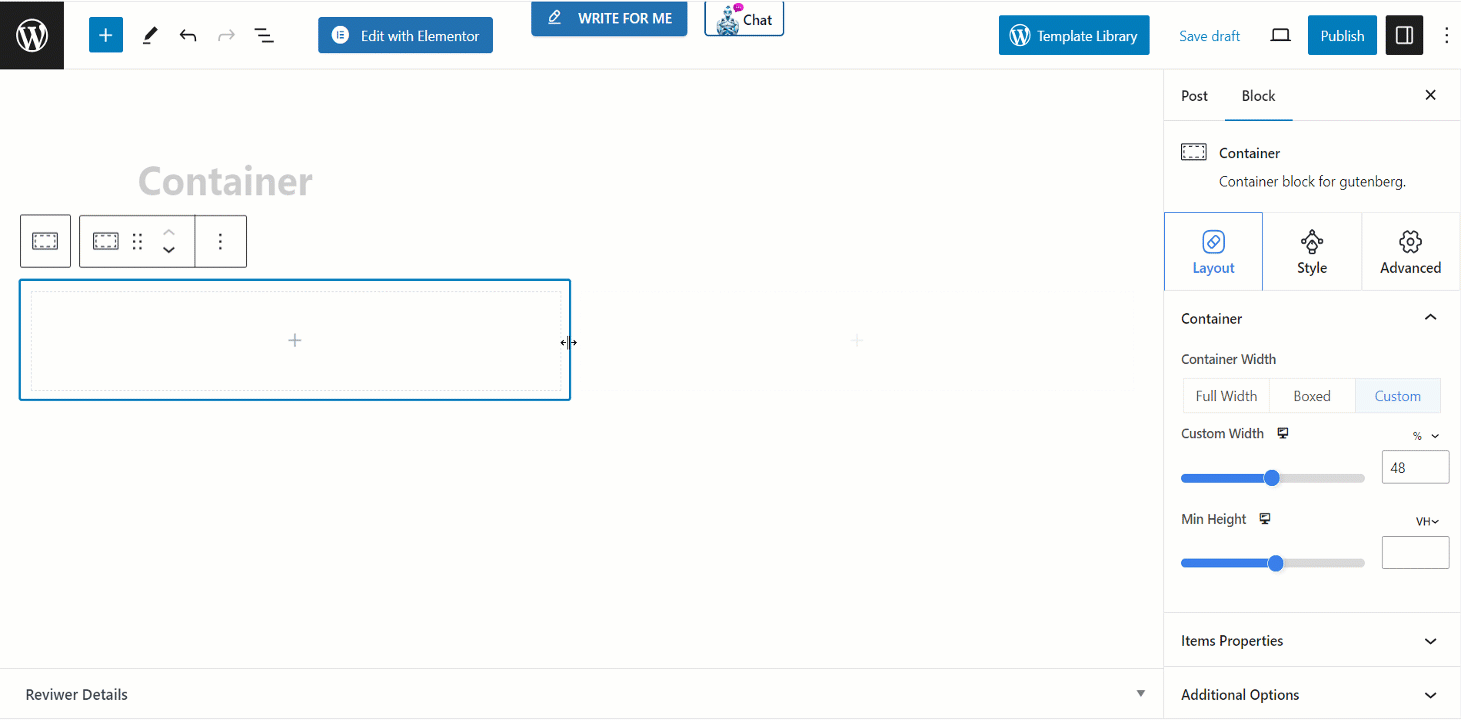
Container #
- Container Width: From here you will control the column width. (Full Width, Boxed, Custom)
- Full Width: Selecting this will reveal the “Content Width” option.
- Content Width: Here, you will choose the width for the content in the column. Pick between the “Boxed & Full Width” options. And, you can define the content box width while choosing the Boxed option.
- Custom: You will set the Custom Width for your column.
- Full Width: Selecting this will reveal the “Content Width” option.
- Min Height: Select the minimum height for the column.
Draggable Container Width #
However, you can control the gap between containers manually like this –
Items Properties #
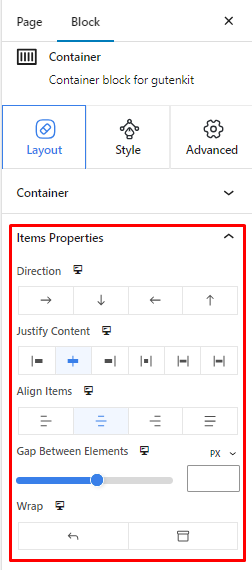
- Direction: From here you can place elements of the column into four different directions.
- Justify Content: Here you can control the space between and around elements in the container column.
- Align Items: Set the alignment of elements vertically.
- Gap Between Elements: Define the gap between elements of the column.
- Wrap: Enabling Wrap will place elements to the lower while there isn’t enough space in the column.
Additional Options #
- Overflow: Show or hide a scroll bar in your column.
- HTML Tag: Set an HTML tag.
Step 4: Style The Container #
From this setting area, you will customize the appearance of the column.
NB: All the following design functionalities also apply to hover effects.
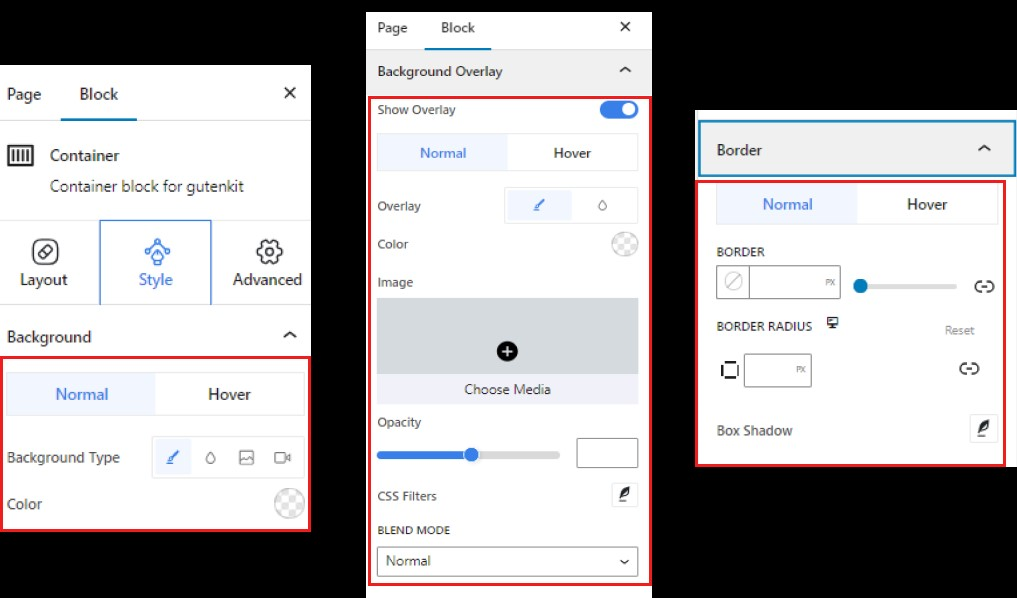
- Background: Choose a background type between solid color, gradient, image, and video.
- Background Overlay: Set an overlay background between solid color, gradient, and image.
- Border: Give a border color and define its width. Also, it gives shadow effects to the border.
That’s it! Now you can easily add and use a container block for making your own layout in the Gutenberg Page Builder.


