The Zoom Widget allows your customers to communicate with their clients through video conferences. It is a quick, easy, and effective way to engage with site visitors. Here’s a comprehensive article to explain every method in detail. Follow the step-by-step process to connect the Zoom.
Watch our video guide:
Or, just follow the step by step process:
Add Zoom Widget #
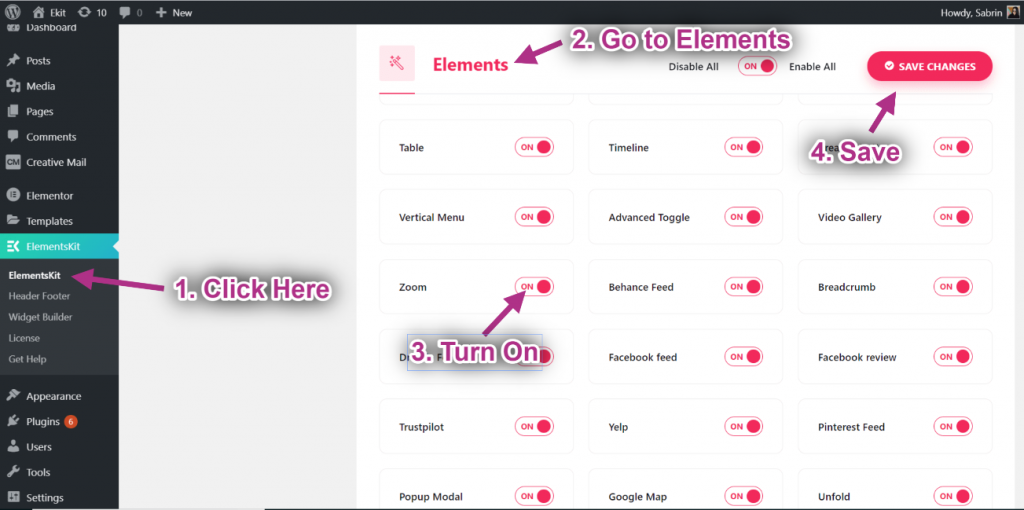
- Go to Elementskit=> User data=> Click on the Zoom to Expand. You will need a User ID and Access Token to Connect Zoom.
Step->1: Generate Zoom Client Id and Secret #
In this step, we will generate the Zoom app Credentials like client ID and secret Key.
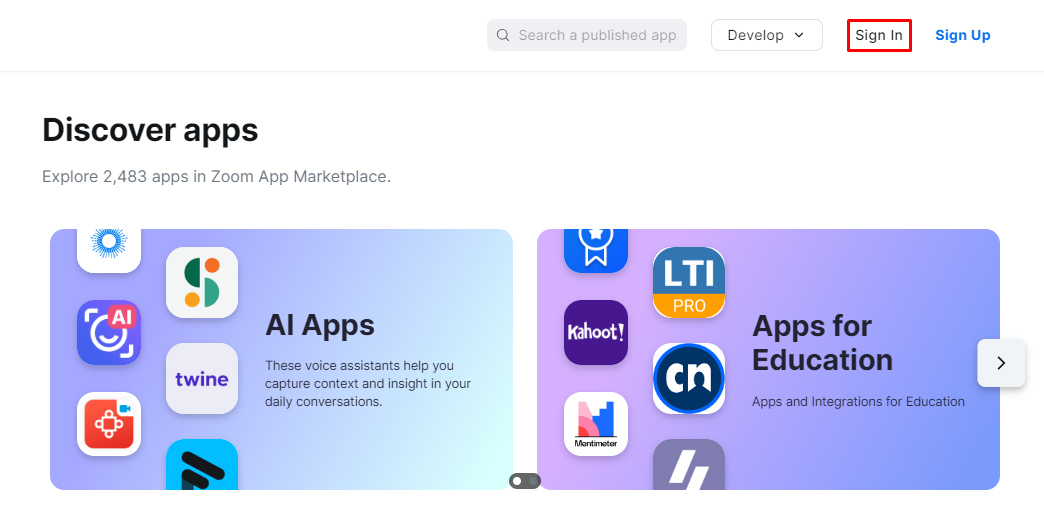
Click here to access the Zoom App Marketplace. Then, sign in with your Zoom ID or create a new account.
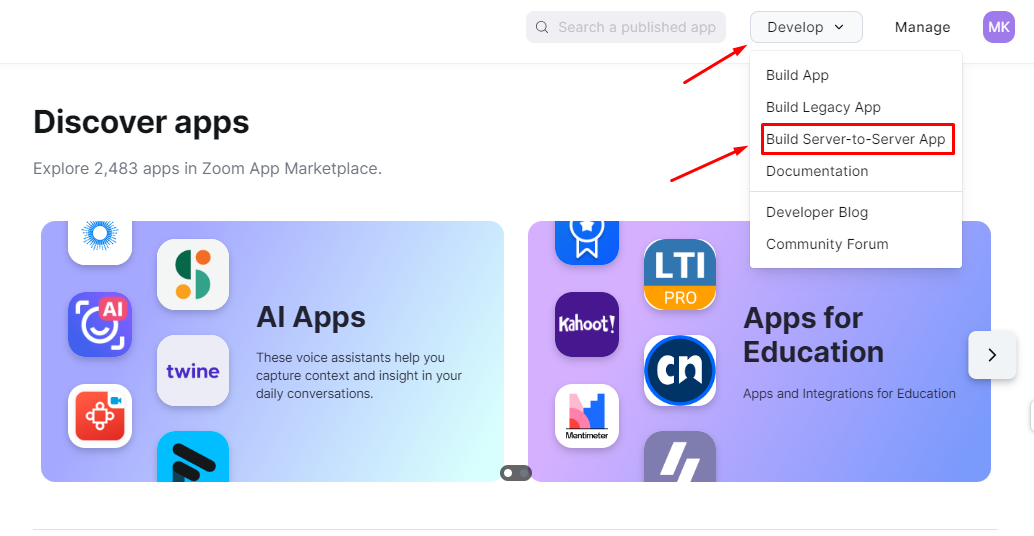
Locate the “Develop” option from the header area and select the “Build-Server-to-Server-App” option from the dropdown.
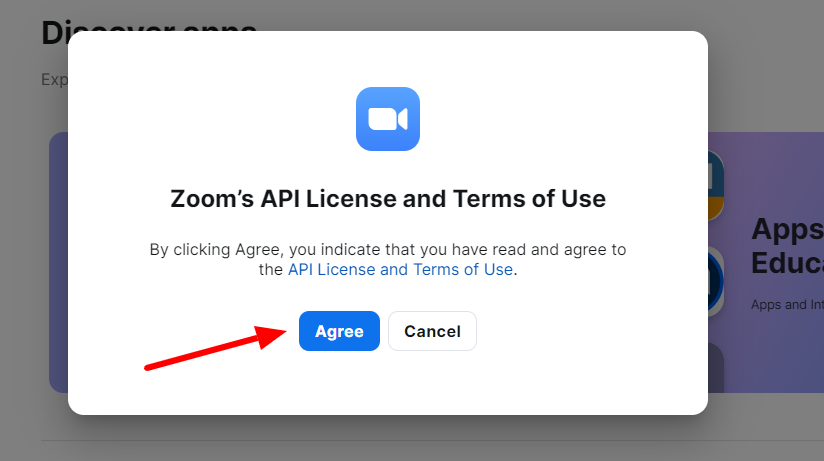
And, you’ll see a popup to agree on Zoom’s API License and Terms of Use.
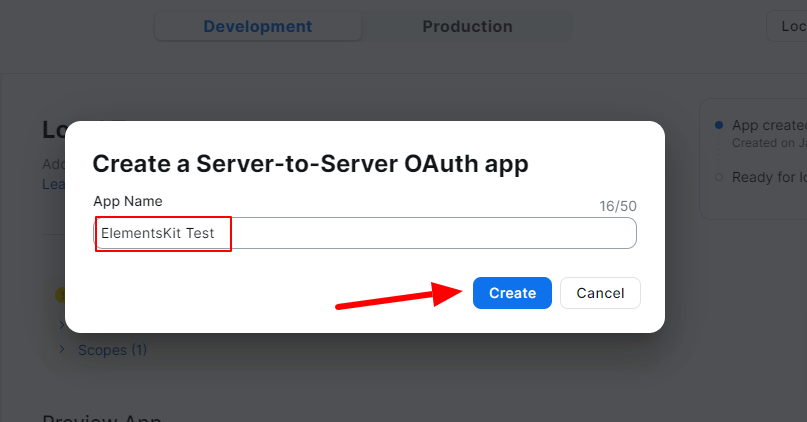
Up next, there will be another pop-up to enter your App Name. Then hit the “Create” button.
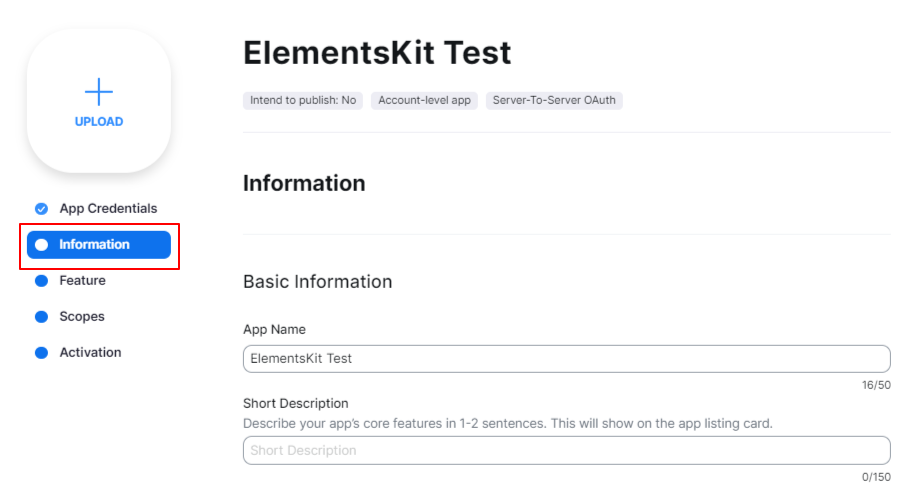
The next screen will show you all the options to configure your App. First, click on the information option. Here you will add a few basic information.
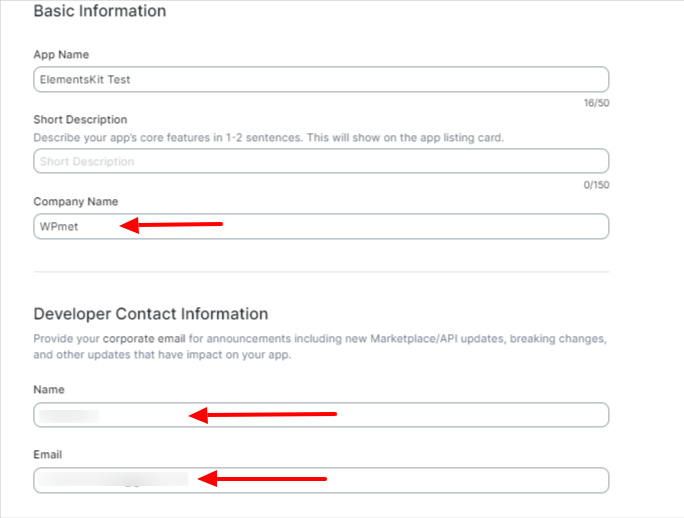
Fill out the Company Name, Developer Name, and Email fields.
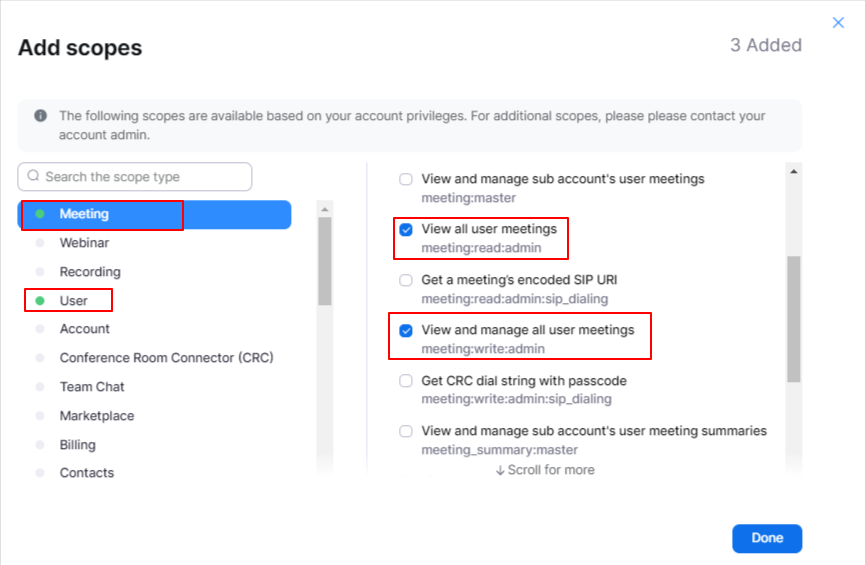
Then, click on the “Scopes” option and hit the “+Add Scopes” button. Doing this will open up a new “Add Scopes” settings popup.
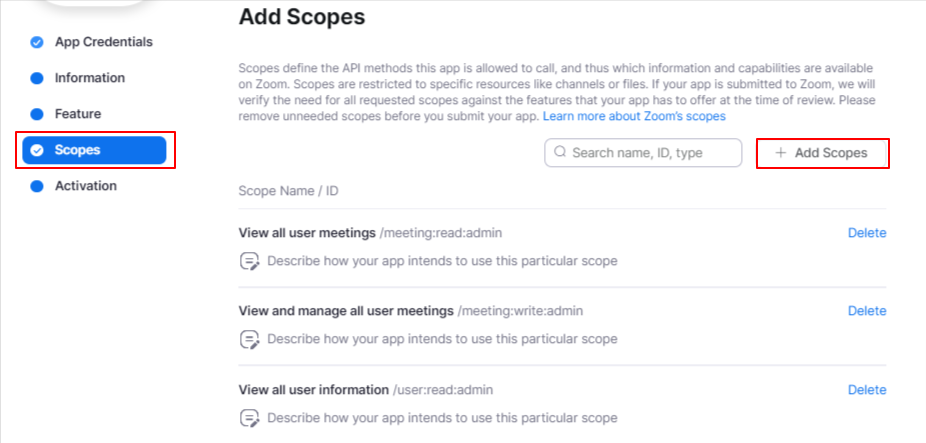
For ElementsKit integration, check the “View all user meetings” and “View and manage all user meetings” options under the “Meeting” scope. Also, select the “View all user information” option under the “User” scope. Then, hit the “Done” button.
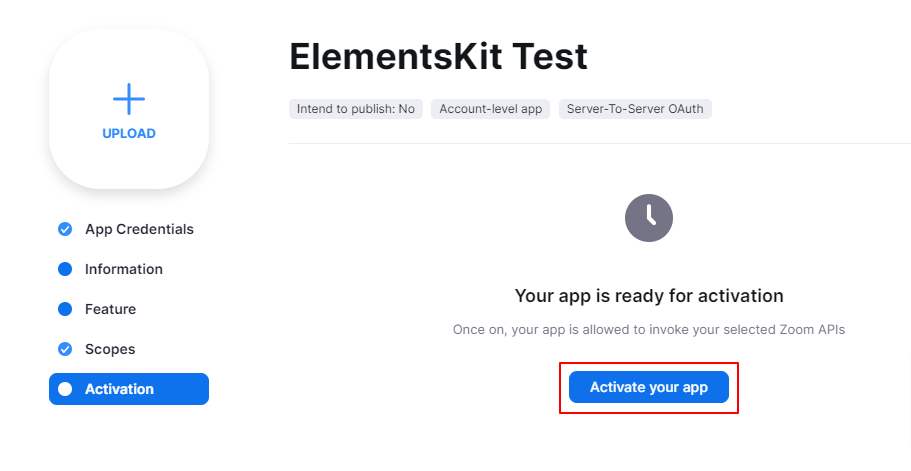
All done, just hit the “Activate your app” button from the Activation option. And, you will successfully activate the app.
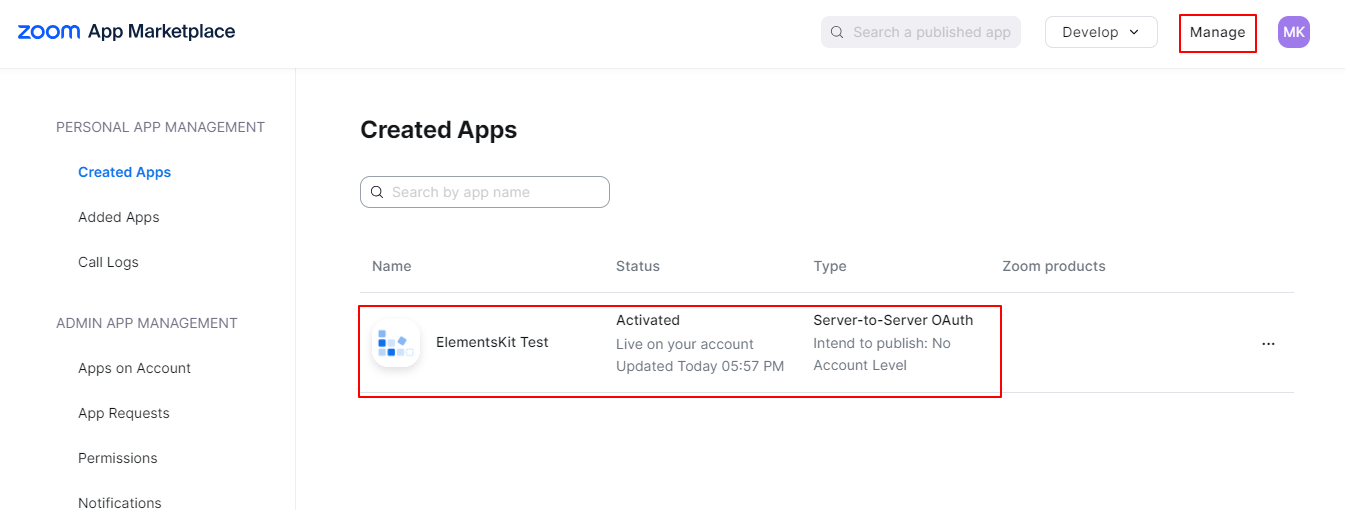
Now, click on the “Manage” option from the Header area.
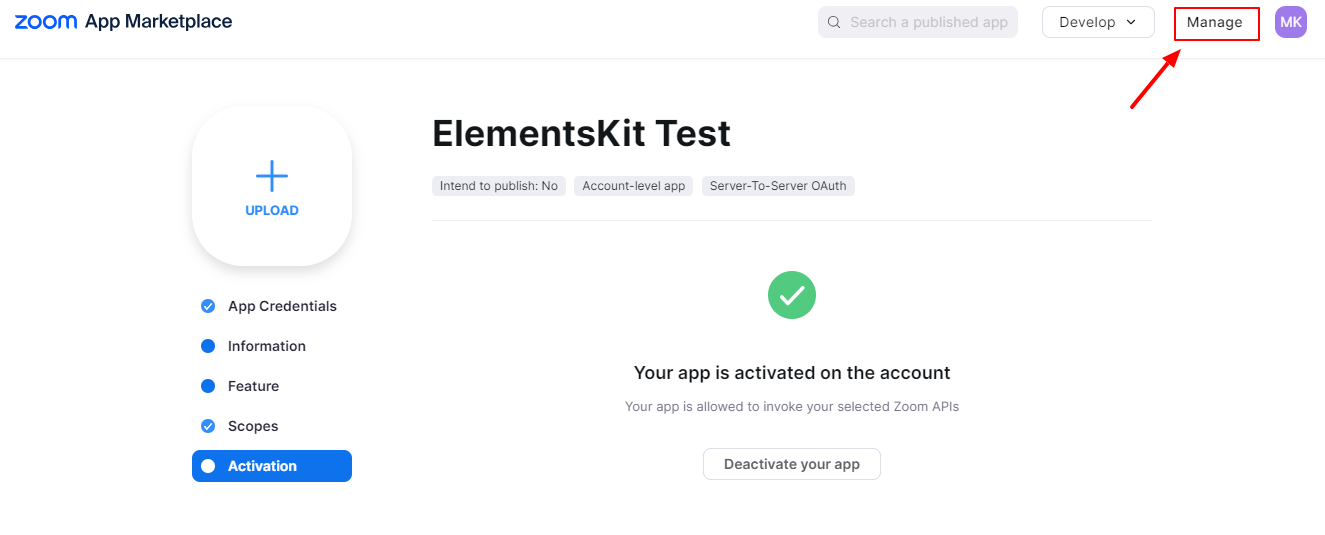
On your device screen, you will show the list of created apps. Click one to get all the credentials.
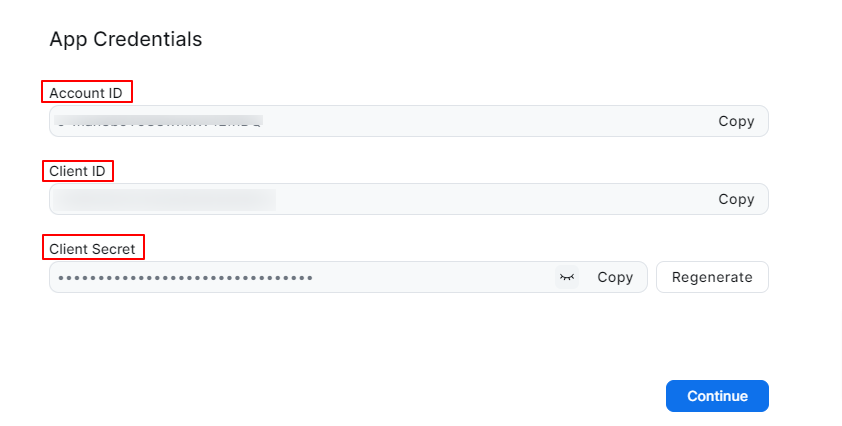
Your app credentials. Copy the Client ID and Secret ID.
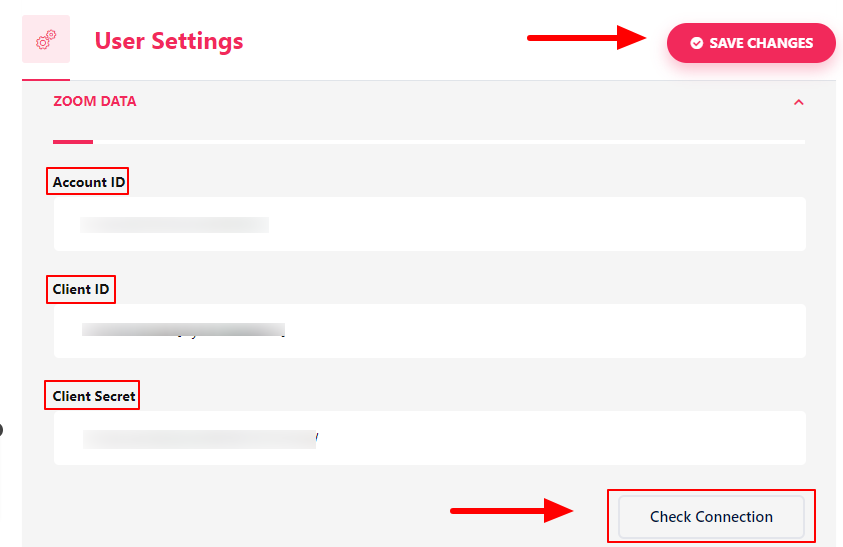
Now, go back to your WordPress dashboard, and follow: ElementsKit > User Settings. Scroll down to get the Zoom Data option. Open it, fill out the fields, and hit the “Save Changes” button.
To examine your connection, click the “Check Connection” button. You will see a notification on at the top of the page.
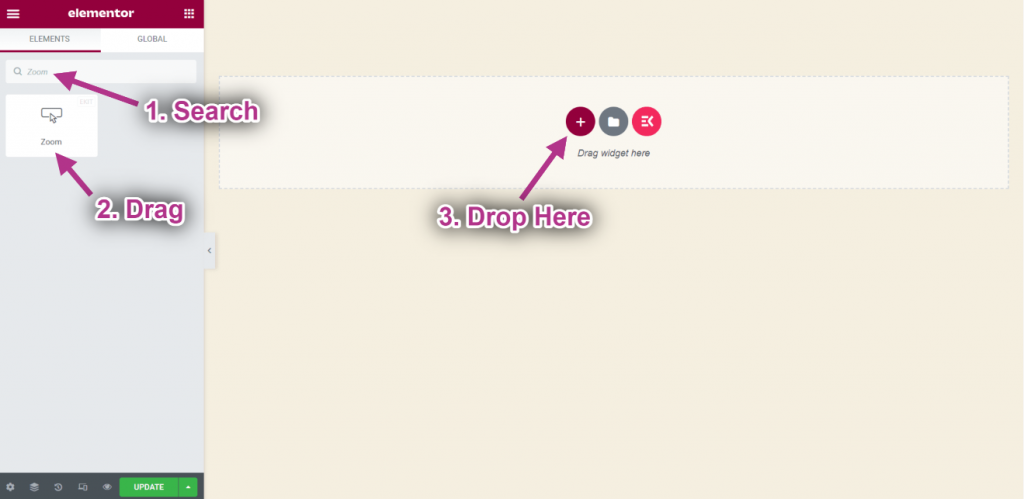
- Go to Elementor=> Search Zoom=> Just Drag and drop the field.
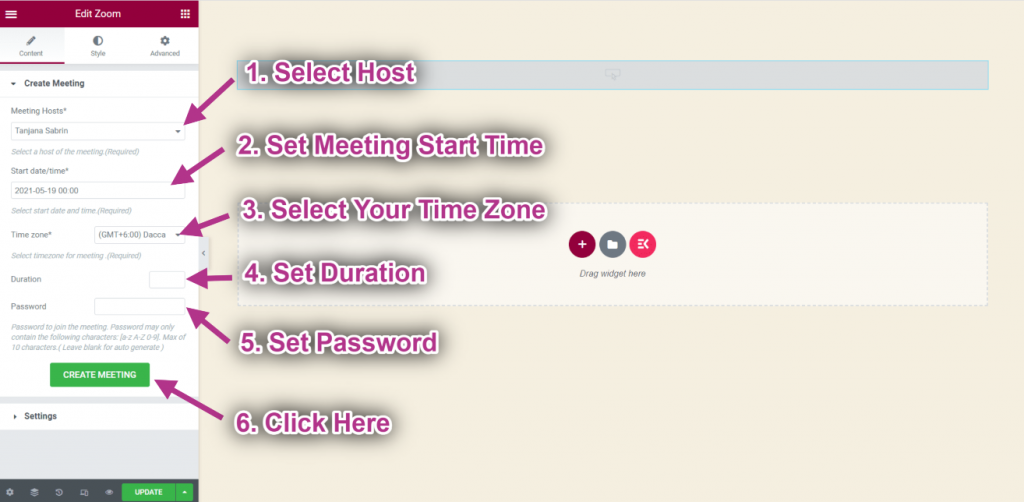
Step-> 2: Customize Zoom Widget #
- Select Host.
- Set Meeting Start Time.
- Select Time Zone.
- Set Duration.
- Set Password.
- Now Click on Create Meeting.
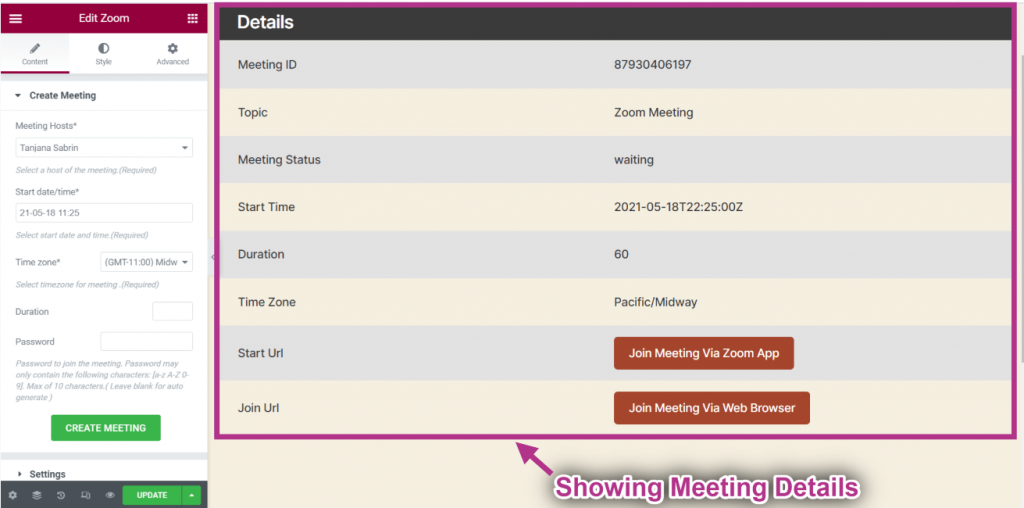
- Now you can see your Meeting Details.
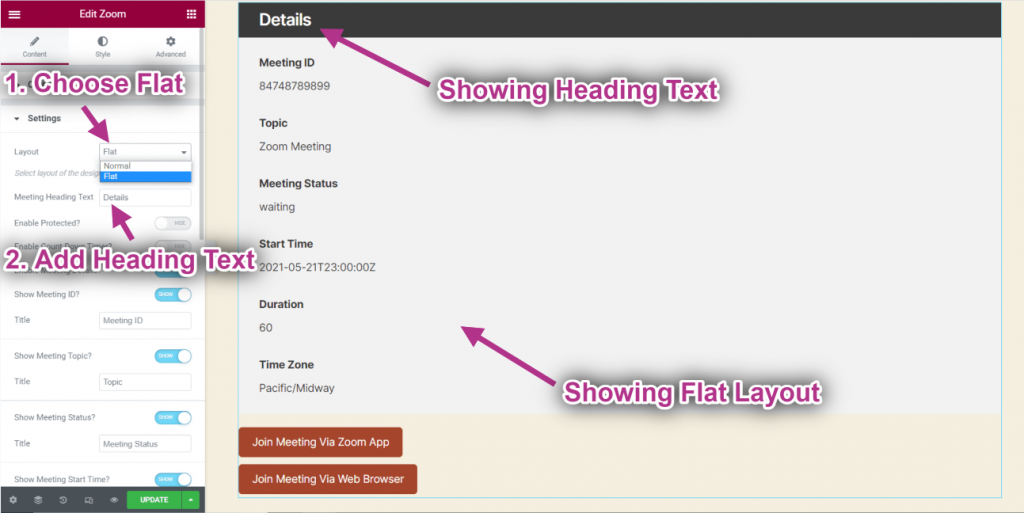
- Choose Layout: Flat. You can select Normal as well.
- Provide Heading Text.
- You can see the Flat Layout with Heading Text.
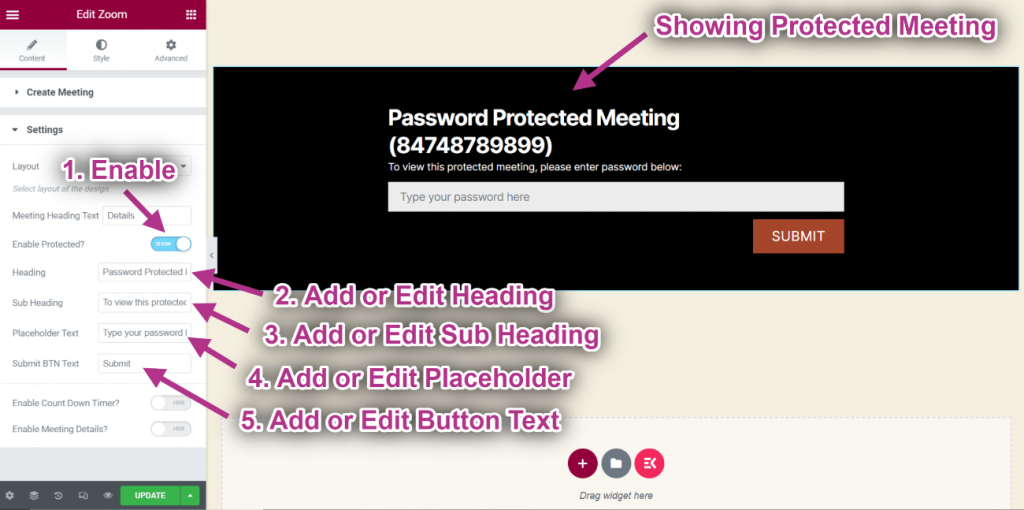
- Enable Protected.
- Add or Edit Heading Text.
- Add or Edit Sub Heading.
- Add or Edit Placeholder.
- Add or Edit Button Text.
- You can see the protected meeting is showing with the following information.
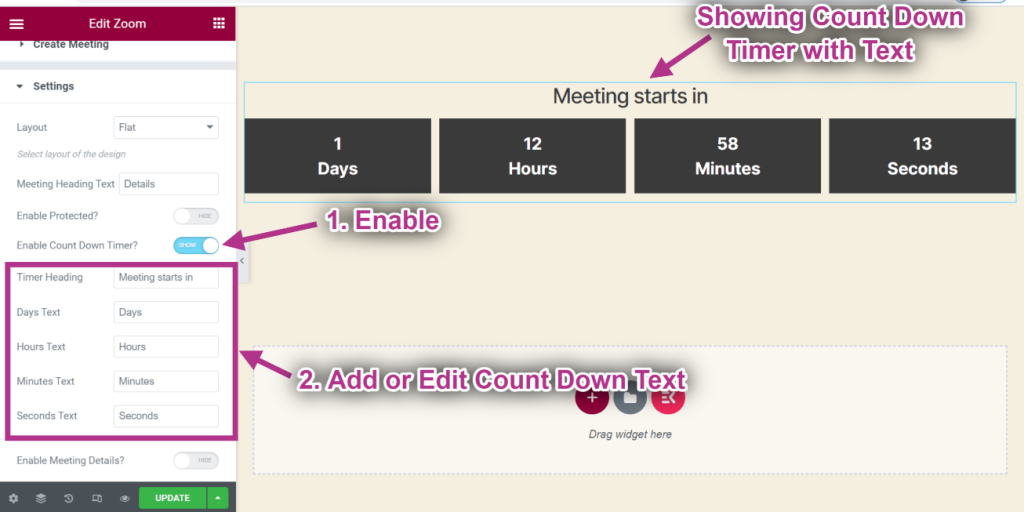
- Enable Count Down Timer.
- Add or Edit Count Down Text.
- You can see the countdown timer with text.
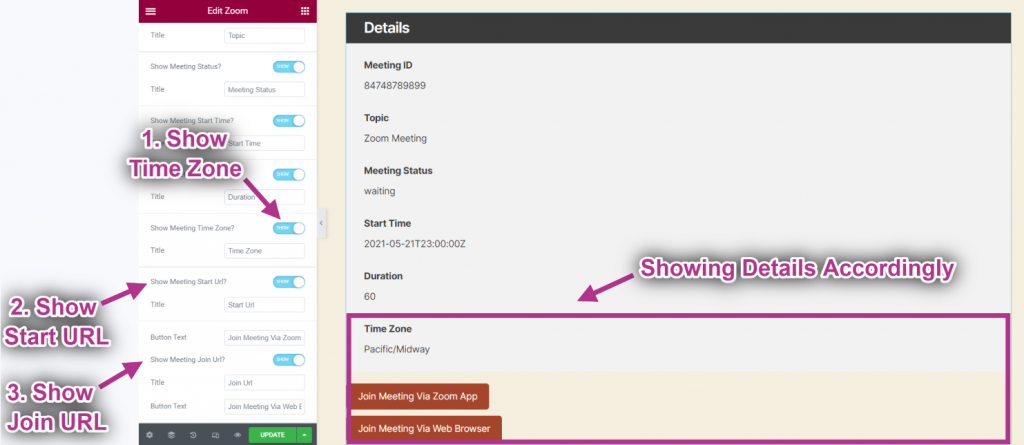
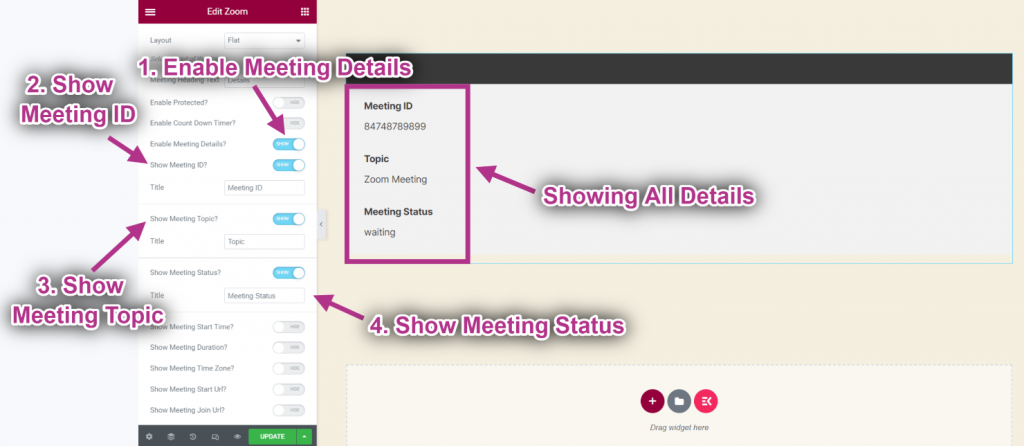
- Enable Meeting Details.
- Show Meeting ID.
- Show Meeting Topic.
- Show Meeting Status.
- Showing All Details.
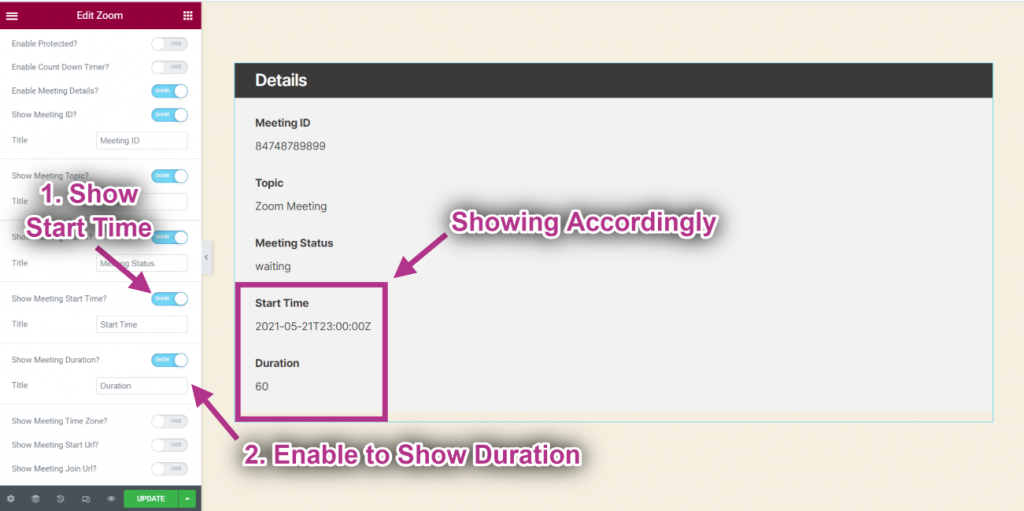
- Show Start Time.
- Enable to Show Duration.
- Showing Start Time and Duration.
- Show Time Zone.
- Show Start URL.
- Show Join URL.
- Showing Details Accordingly.