English
  German
  Spanish
  Italian
  French
  Danish
  Portuguese
  Swedish
  Polish
  Korean
  Japanese
 The Partial Payment module allows you to receive installment payments for WooCommerce stores. You can take partial payment for a product and select another method to receive the rest of the money.
You can also receive money for hotel booking, restaurant booking, etc. with ShopEngine’s built-in Partial Payment module.
How to Integrate Partial Payment in WooCommerce #
Step 1: Enable Partial Payment #
- Go to WordPress Dashboard => ShopEngine => Module.
Enable the Partial Payment Module and do the changes as you need.
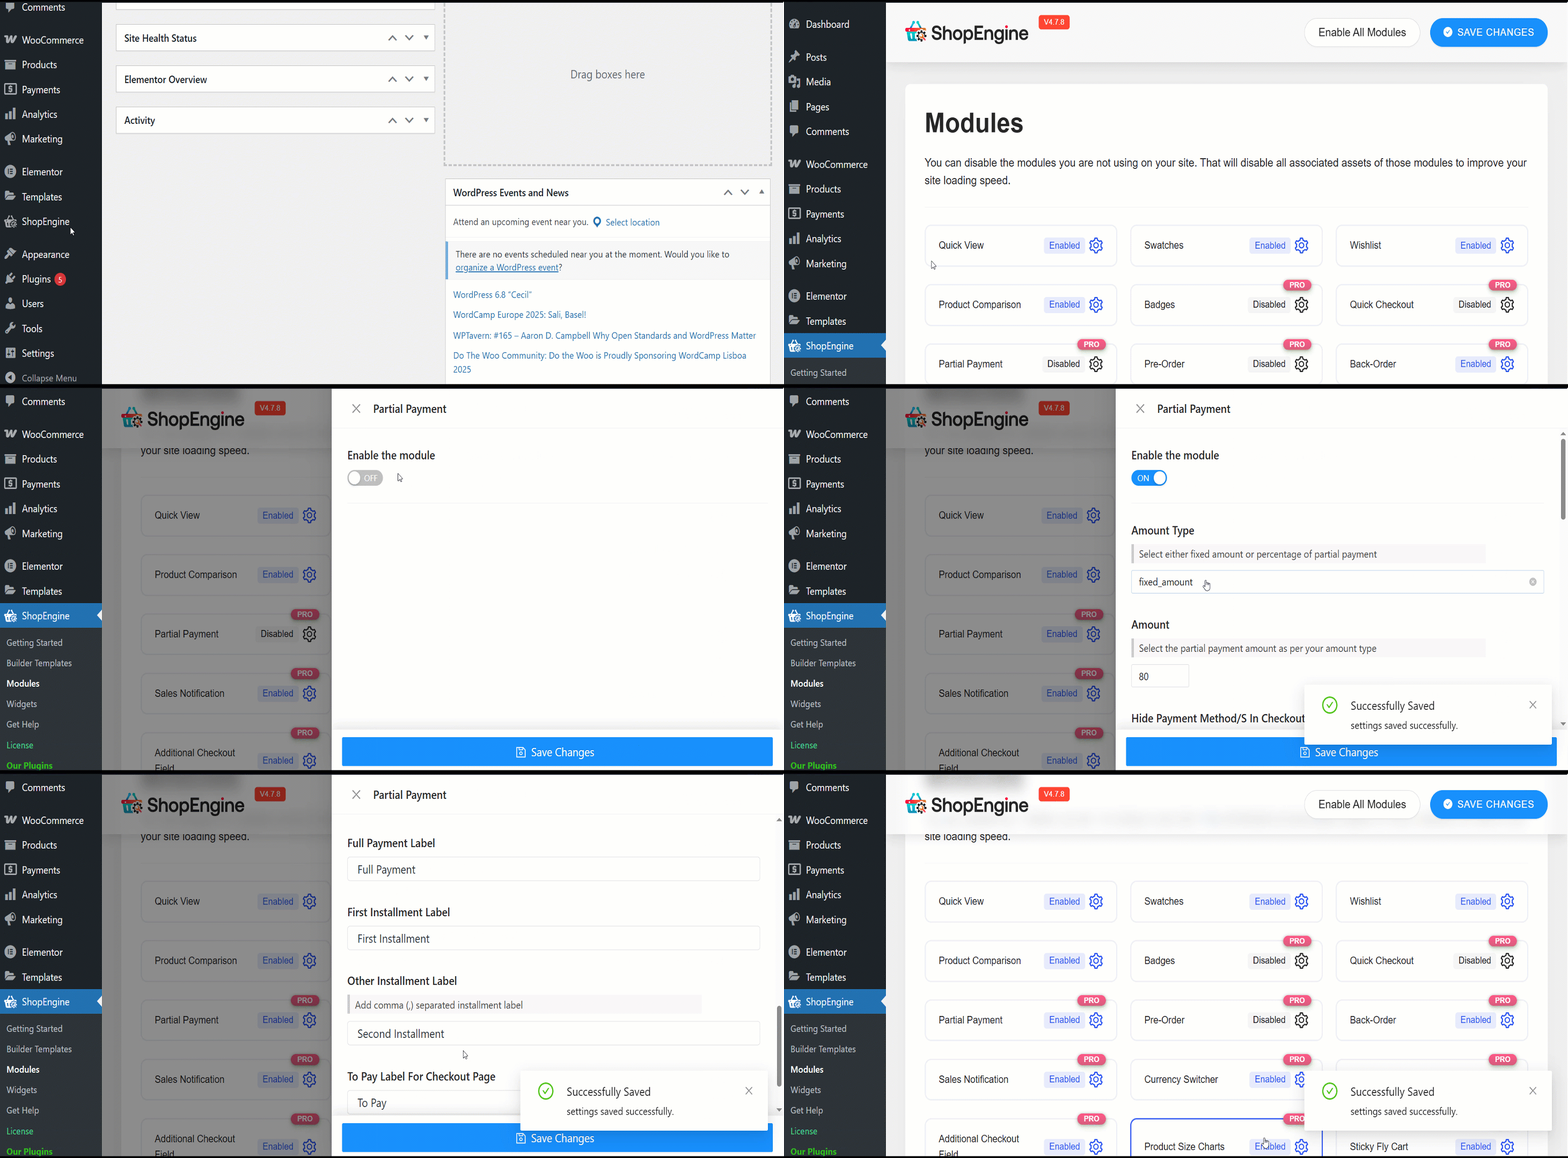
- Amount Type: You can select the type of partial payment – Percentage or Fixed Amount.
- Amount: Enter the amount or percentage of partial payment.
- Hide Payment Method/ S In Checkout: Use this option to hide the payment method selection from the checkout.
- Send Mail After Order Date In Day/S: Set the number of days after purchase to send payment reminder emails to customers.
Next, you can enter customized labels for the following five features:
- Partial Payment Loop Product Label: Display a custom label on product listings showing partial payment availability.
- Partial Payment Single Product Label: Show partial payment info directly on the individual product page.
- Full Payment Label: Clearly indicate the option for paying the full amount upfront.
- First Installment Label: Label the first payment amount in an installment plan.
- Other Installment Label: Define the text for upcoming or recurring installment payments.
- To Pay Label For Checkout Page: Highlight the amount due now at checkout for partial payments.
Step 2: Edit the product page to enable Partial Payment for the product #
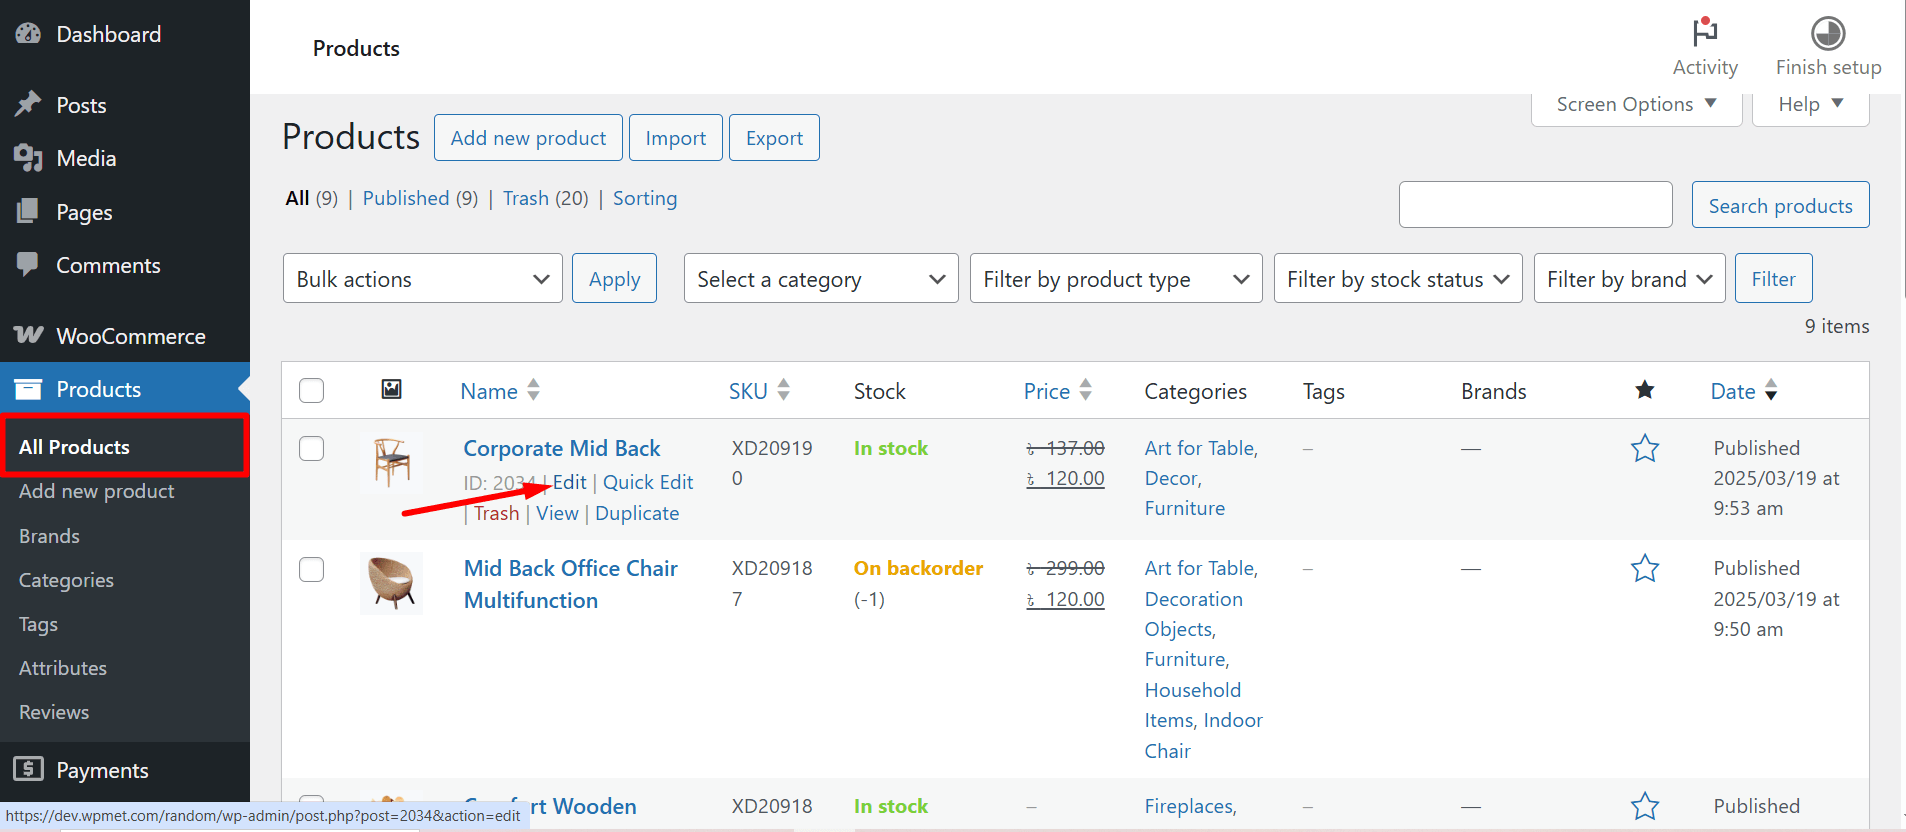
Now go to the product for which you want to enable partial payment.
WooCommerce >> Products >> All Products >> Select the Product >> Edit
After that, from the product page, enable partial payment for this particular product. Choose the type of partial payment.
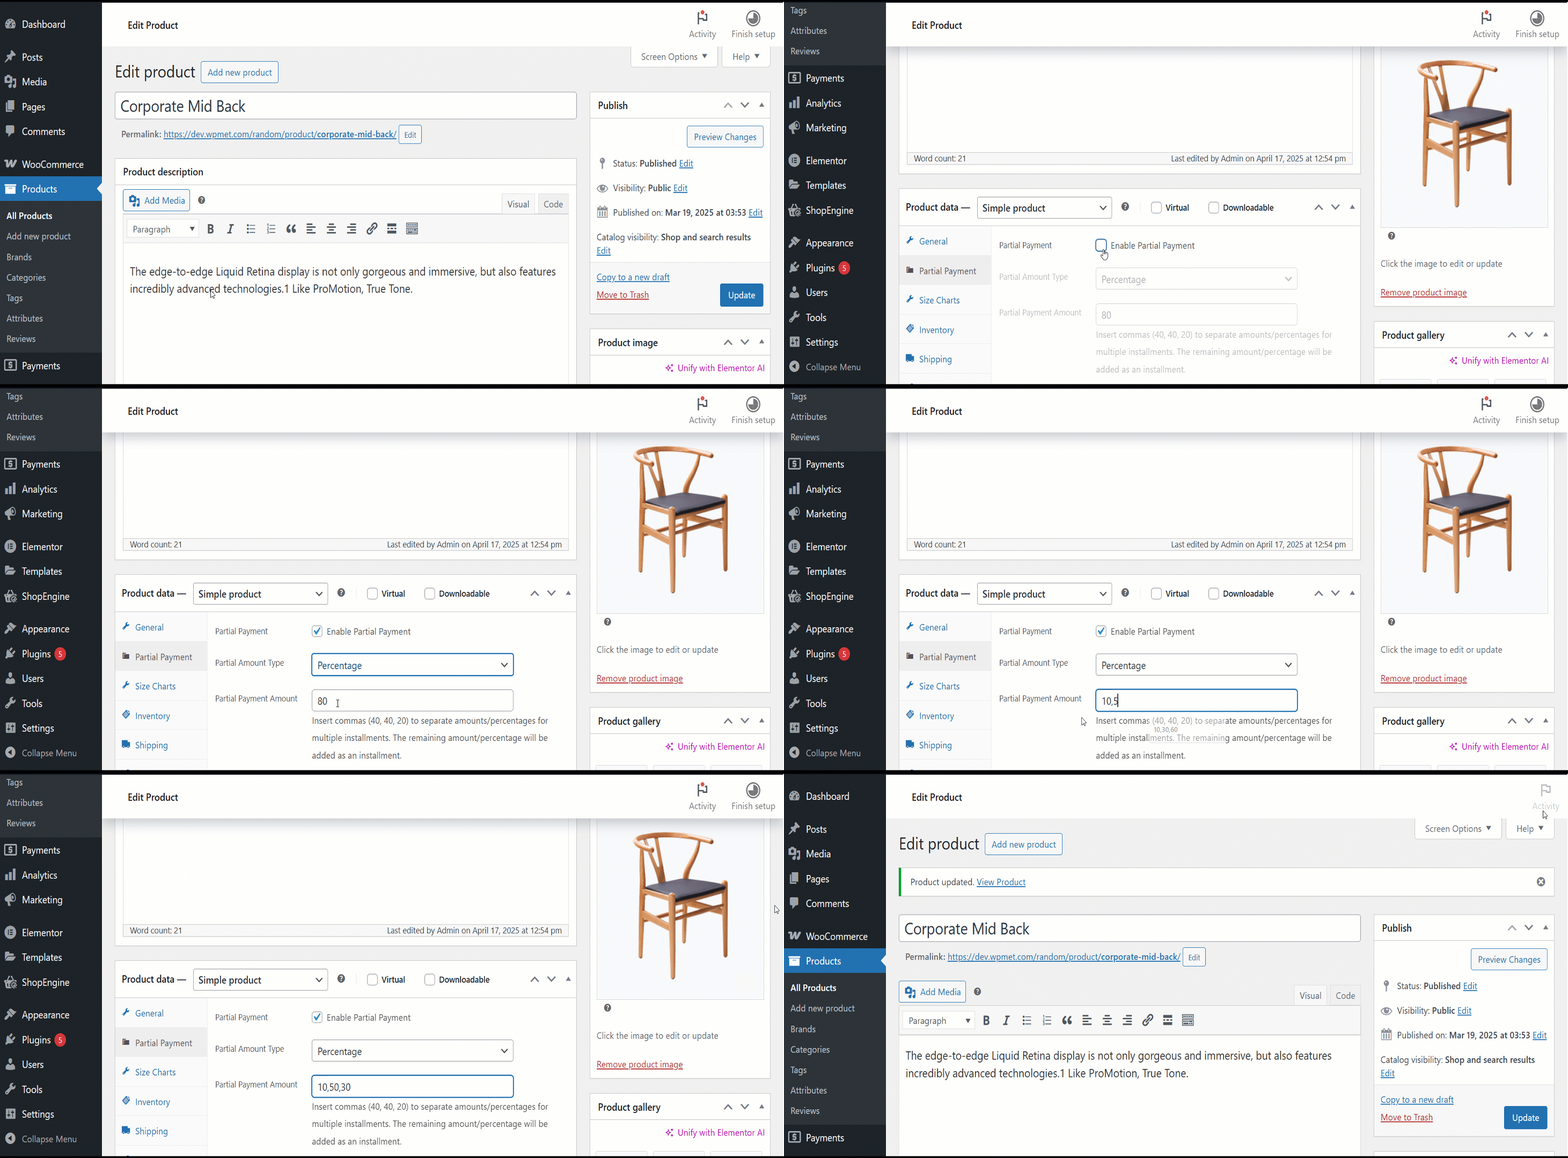
If you are using percentage, select the percent. Update the product. Or, you can also choose a fixed amount.
Step 3: Create a template for due payment #
To create a template for the due payment,
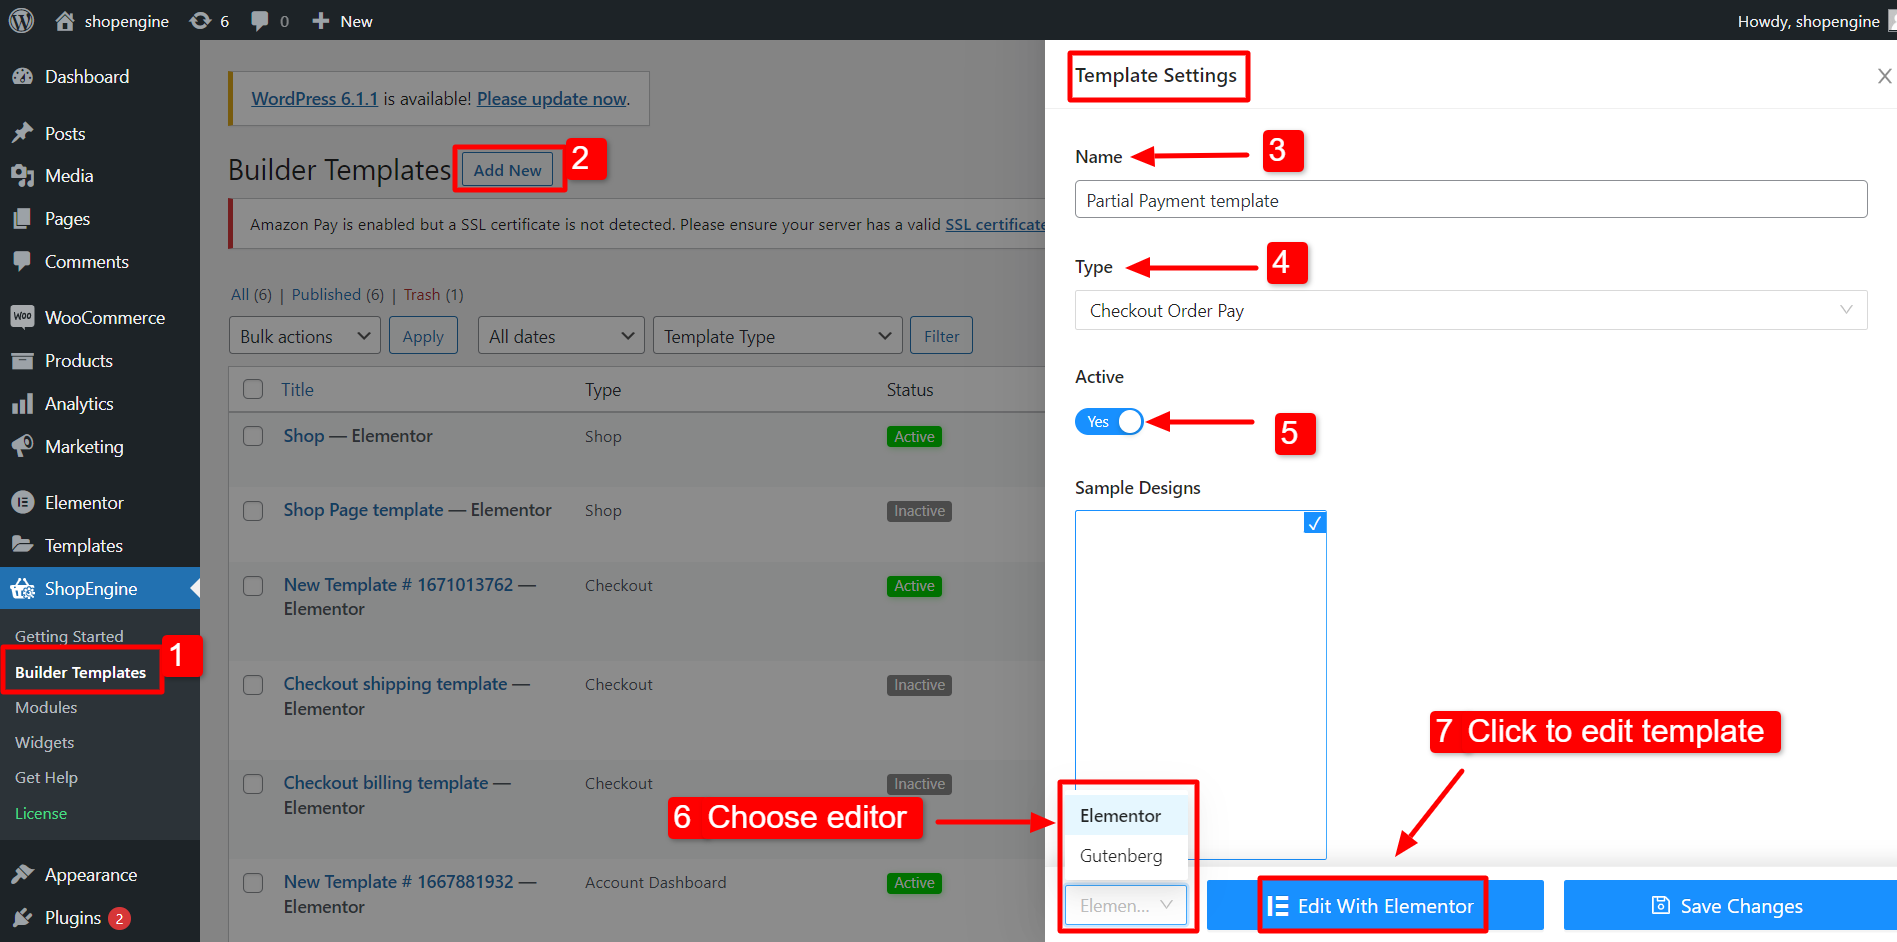
- Navigate to ShopEngine >> Builder Templates from WordPress dashboard.
- Click on the “Add New” button in the top left corner.
- On the Template settings window, enter a template Name.
- Set the template Type to: Checkout Order Pay.
- Activate the template.
- Select the editor (Elementor in this case).
- Click on the Edit with Elementor.
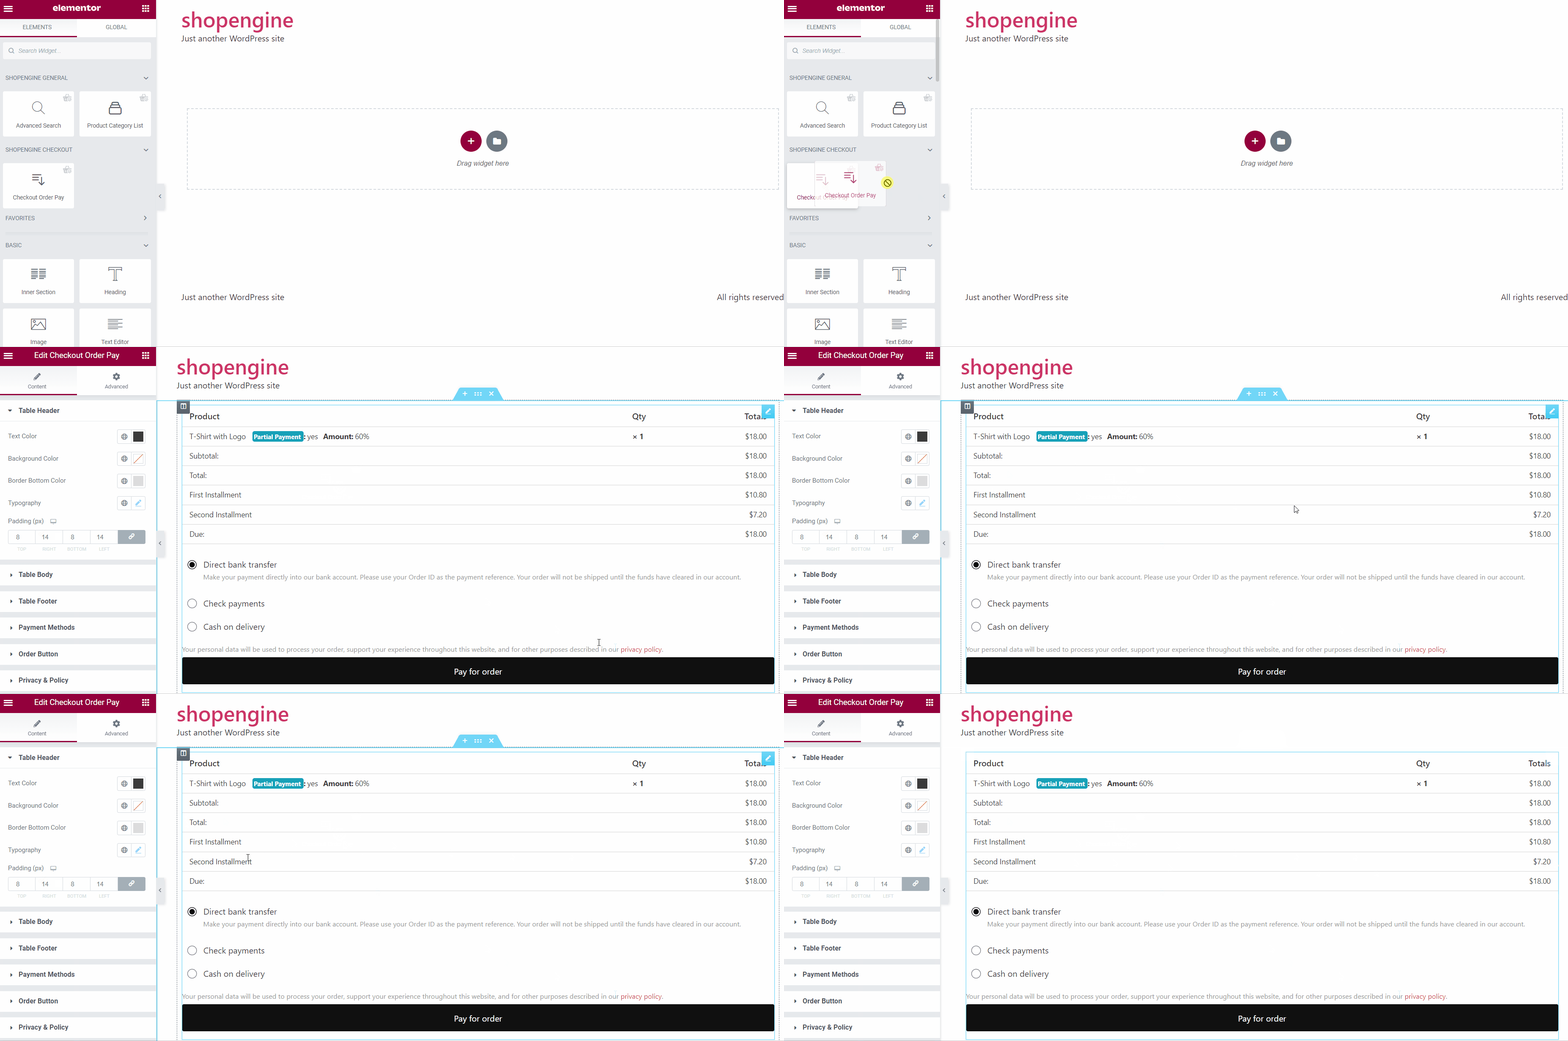
On the Elementor editor, drag and drop the Checkout Order Pay widget into the design area, Now you can see the due payment details of your order.
Step 4: Check how it work #
- Now go to the Product Page. You will see both Partial Payment and Full Payment Options.
- Select Partial Payment and click on the Add to Cart button.
- Now from the top, click on “View Cart” and see if the partial payment is working.
- You can also check the checkout page for the details.
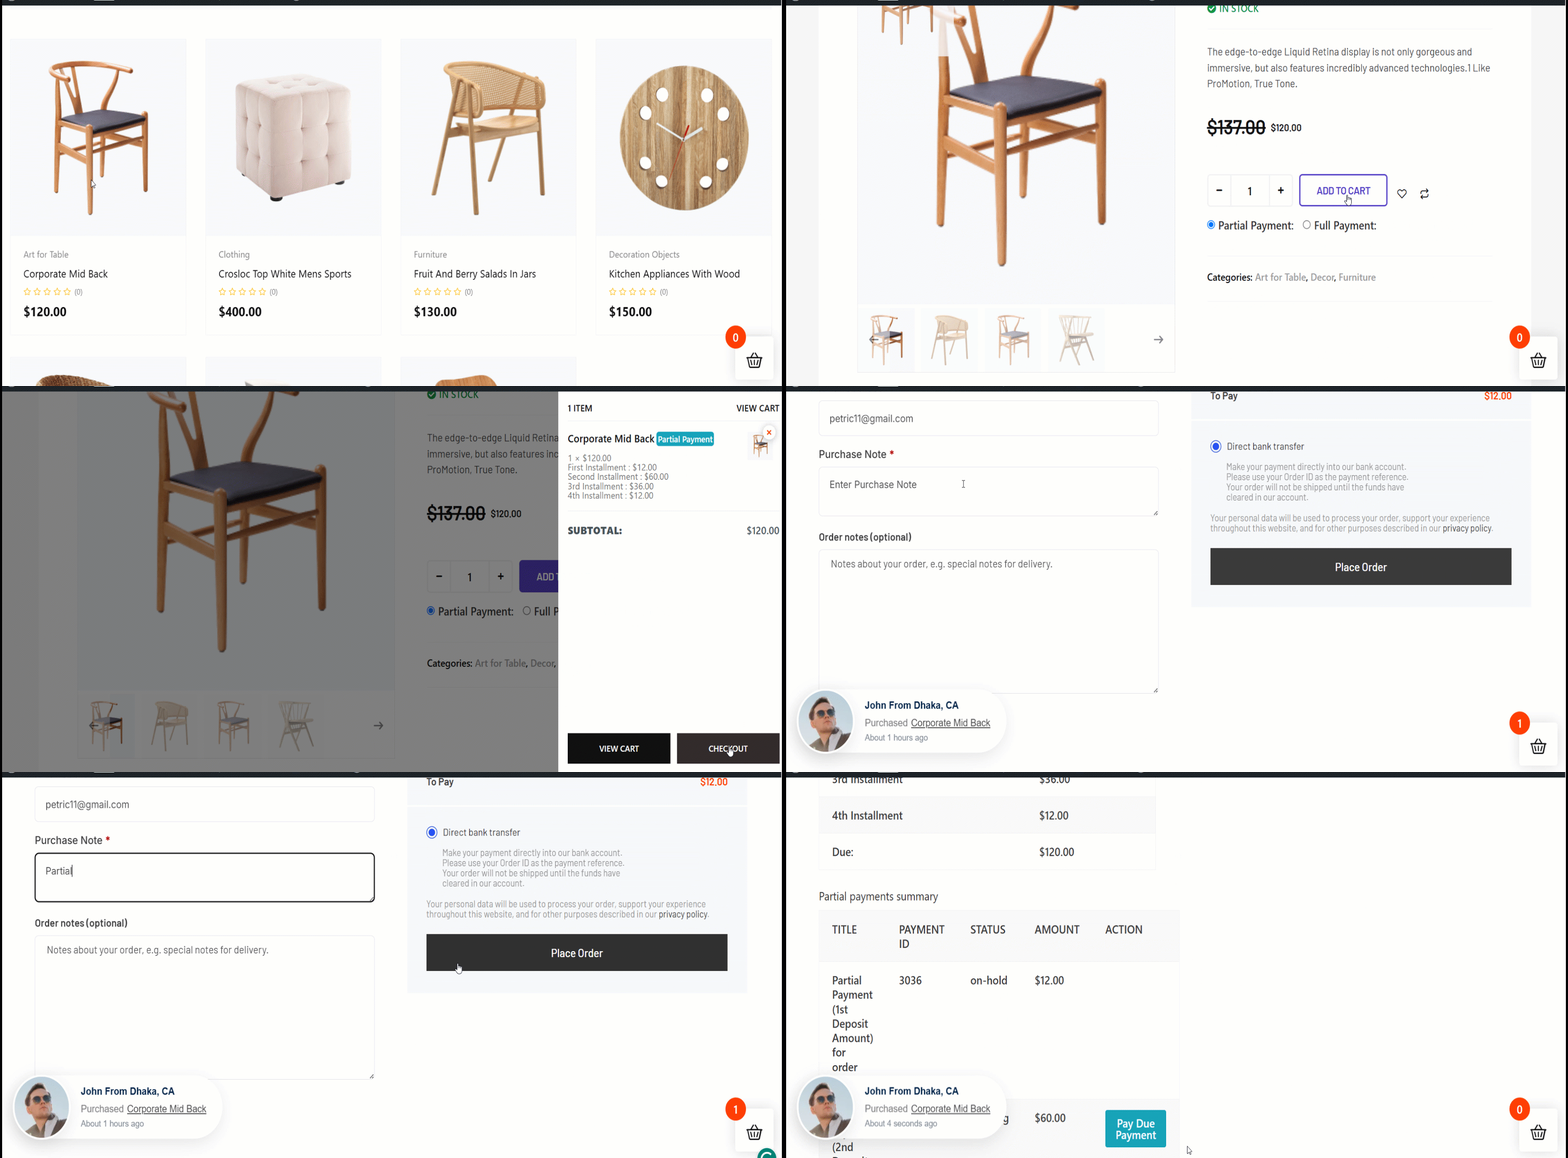
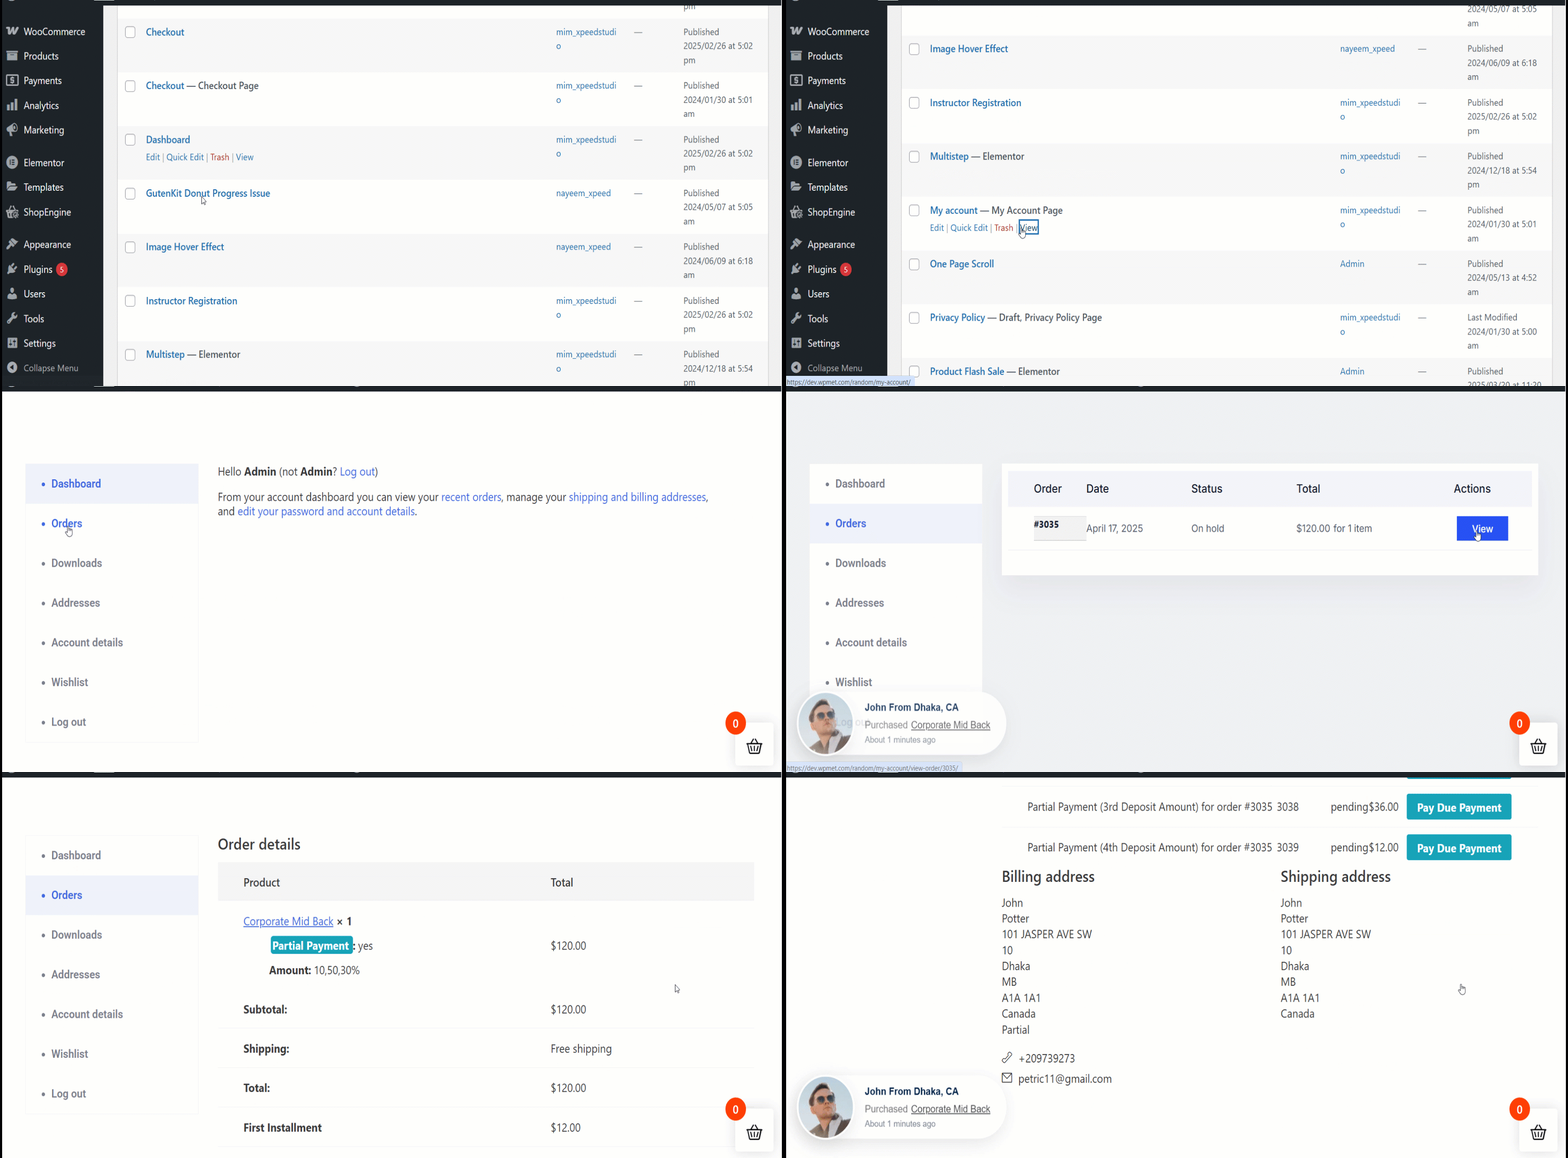
Once the user completes the first payment, he will see the due amount on the my account order details page.
When users navigate to My Account > Orders > View order details, he will see the option to Pay Due Payment. If he selects to pay the due payment, will see the second installment option as follow.
Users can then pay the due amount from this page.